Japanese DIY ideas earn their keep twice over: they look like something off a design shop shelf, and most of them use paper, thread or a bowl you already own. There are twenty one here, and the range is wide. Origami vase covers slide over a plain glass. A kintsugi repair runs a gold seam through a bowl you were about to throw out, and honestly the bowl comes out better than it started. There are paper fans small enough to hang on a tree, washi wrapped eggs, a lolly stick lantern that glows around a tealight, and a bookmark doll in a tiny kimono that costs about four cents in cardstock. Some take twenty minutes. One involves a band saw, so pace yourself. Every project links back to the person who worked it out.
1. DIY Japanese Inspired Origami Vases
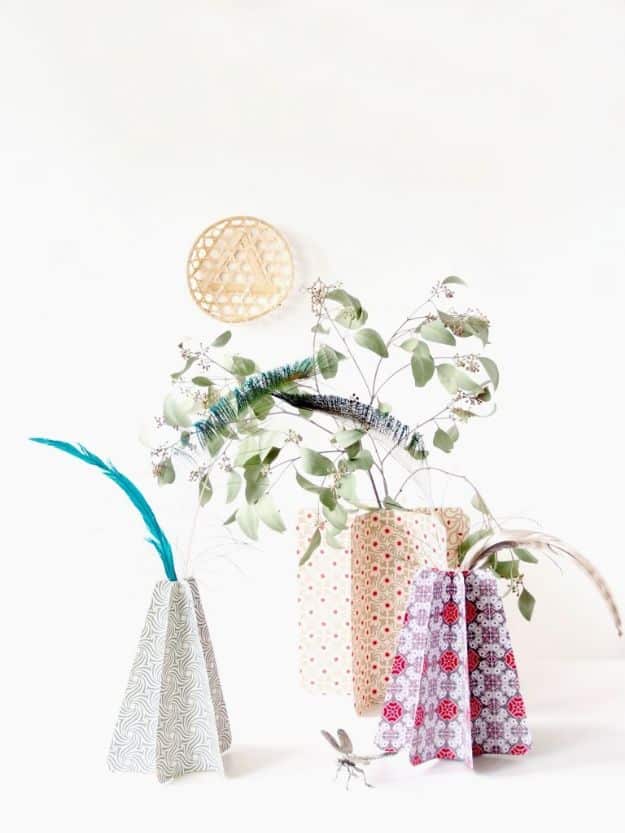
Paper covers that slide over a vase you already own, folded from six sheets of patterned gift paper and held together with a glue stick. monsterscircus folds each sheet in half with the pattern facing in, runs glue down the sides, and leaves about an inch of the right edge free so the pleats can still open. Glue the first sheet to the last and the whole thing becomes a cylinder. Trim every corner on a diagonal for crisp points. A water bottle works just as well as a vase, which is useful when six centerpieces are due on Saturday.
Get the full tutorial at monsterscircus.
2. Cute And Easy Origami Cats
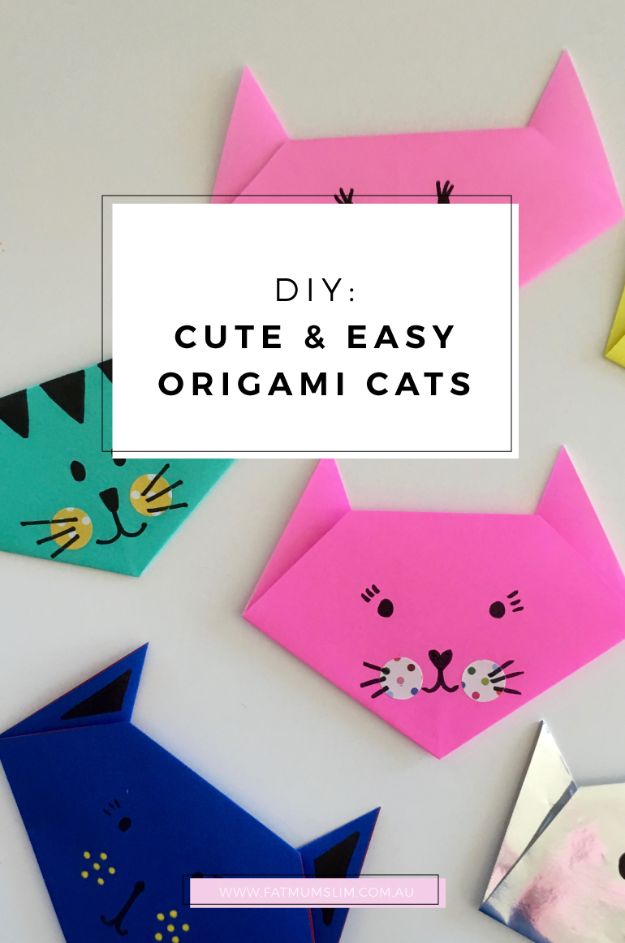
Square origami paper, eight folds, and a cat. Fat Mum Slim starts by folding the square into a triangle, marks the halfway point along the long edge before turning the sides up, and that one mark is what keeps the ears even instead of one perky and one drooping. The faces go on last with markers or stickers, which makes this a good project for a wide age range, because a child too young to fold can absolutely draw whiskers. Bargain shop origami paper is fine here. Make a pile of them in clashing colors and line them along a shelf.
Get the full tutorial at Fat Mum Slim.
3. DIY Japanese Printed Bowls
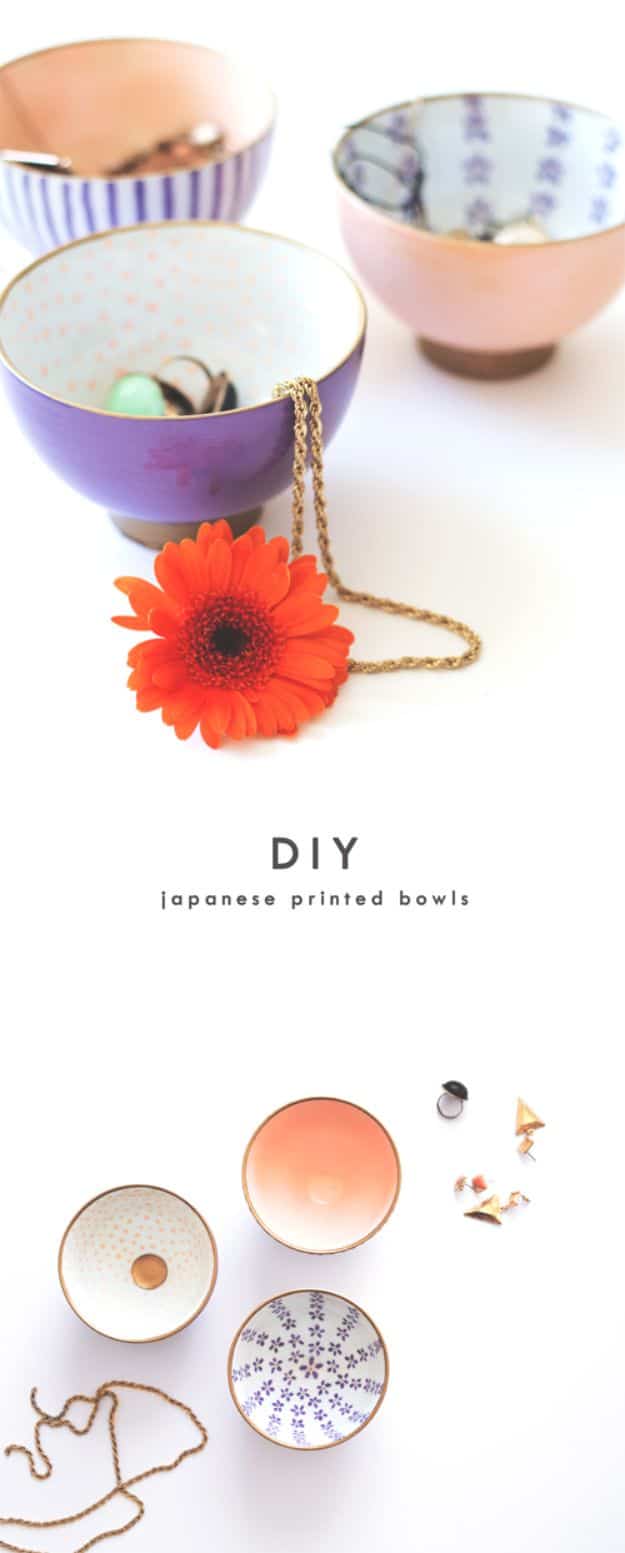
Plain white porcelain bowls painted with ceramic paint and finished with a gold pen, then baked so the pattern stays put. The Lovely Drawer keeps it to two colors per bowl, which is the tip that saves this from looking muddy, and notes that solid areas want two coats. Paint the inside first, let it dry, then do the outside. Gold marker goes around the rim and the foot. Thirty minutes at 150C sets everything, and after that they are dishwasher proof, so they can hold dipping sauces and snacks instead of sitting on a shelf looking decorative.
Get the full tutorial at The Lovely Drawer.
4. Japanese Peonies
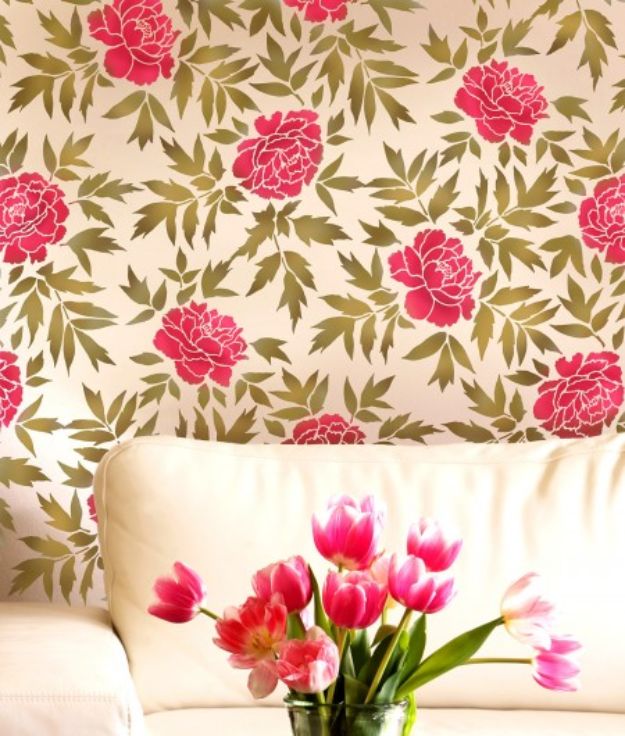
An allover wall stencil of tree peonies, used here in bright pink on gold green foliage, and from two steps back it is genuinely hard to tell from wallpaper. Cutting Edge Stencils designer Janna Makaeva drew the pattern from the hardy perennials in her own garden, which is why the petals sit the way real peony petals sit. The same stencil goes onto a nightstand, an accent pillow or a canvas tote, so one purchase covers a wall and the soft furnishings that have to live with it. No repeat measurements are published, so measure your own wall before ordering.
Get the full tutorial at Cutting Edge Stencils.
5. DIY Japanese Inspired Wind Chime
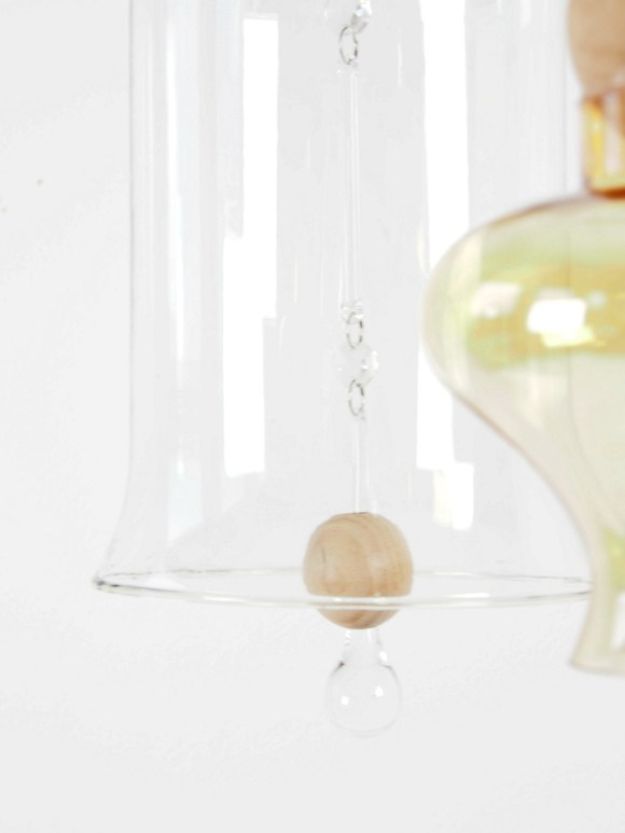
Clear glass bells and a wooden bead strung on a chain, and the sound is the point: glass against wood is a soft clink rather than the metallic clatter most porch chimes make. Hung at staggered heights under a pergola or along a porch rail, a row of them moves at different speeds in the same breeze, which is much prettier than one chime doing all the work. The source page sits behind a bot challenge and could not be read from here, so no materials list, chain length or assembly order is claimed for this one.
Get the full tutorial at Eclectic Trends.
6. Japanese Inspired Wall Design
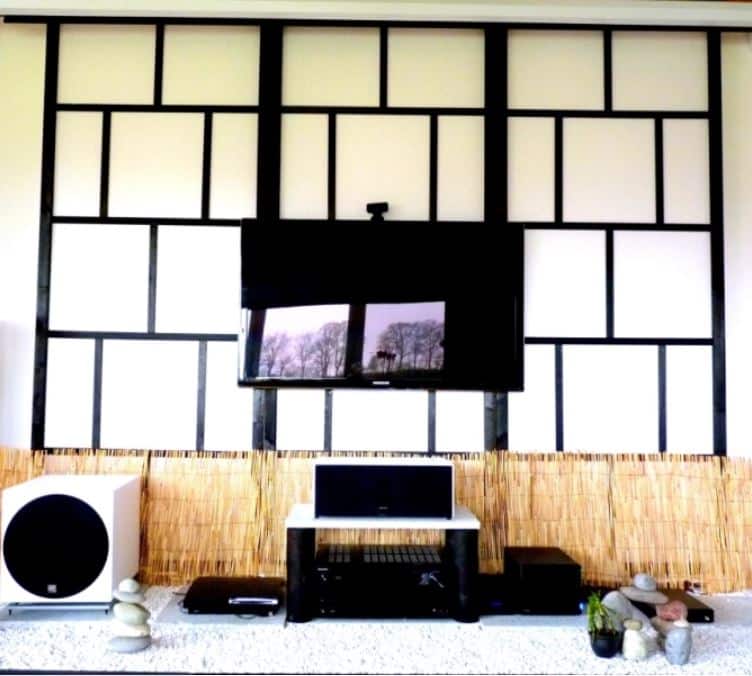
A whole wall of shoji panels, wooden frames filled with translucent Japanese paper, built as a media wall so the screen and the speakers sit inside the grid instead of fighting it. Foxy Folksy glues shoji paper to the frames with nori paste, works one section at a time so the paste does not dry ahead of her, and trims to about a centimeter from the edge with a sharp cutter. Then the good part: mist the paper with water, not soaking, and it tightens like a drum as it dries. Buy the wood pre sanded and do not paint the gluing face.
Get the full tutorial at Foxy Folksy.
7. DIY Wall Sconce
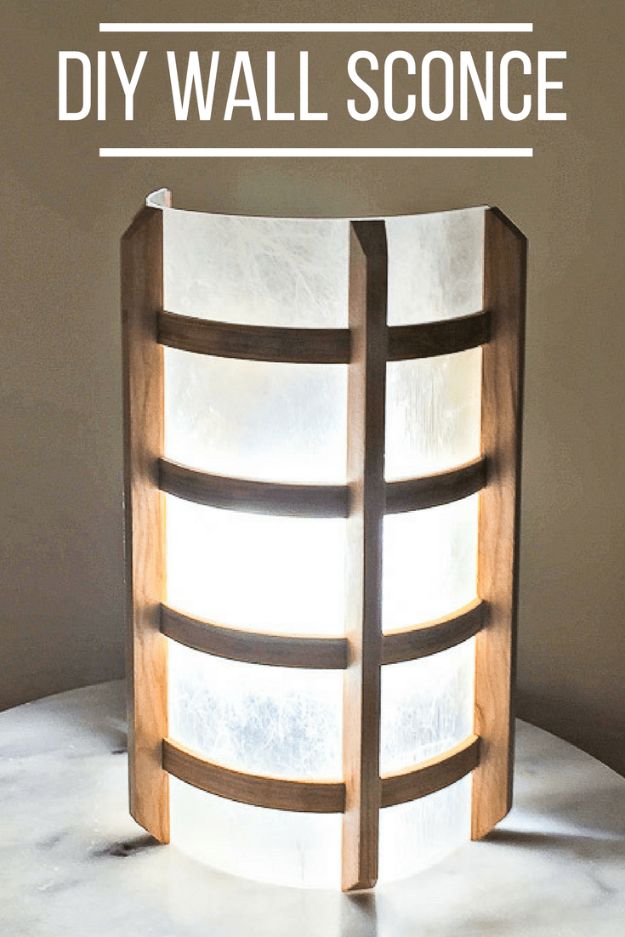
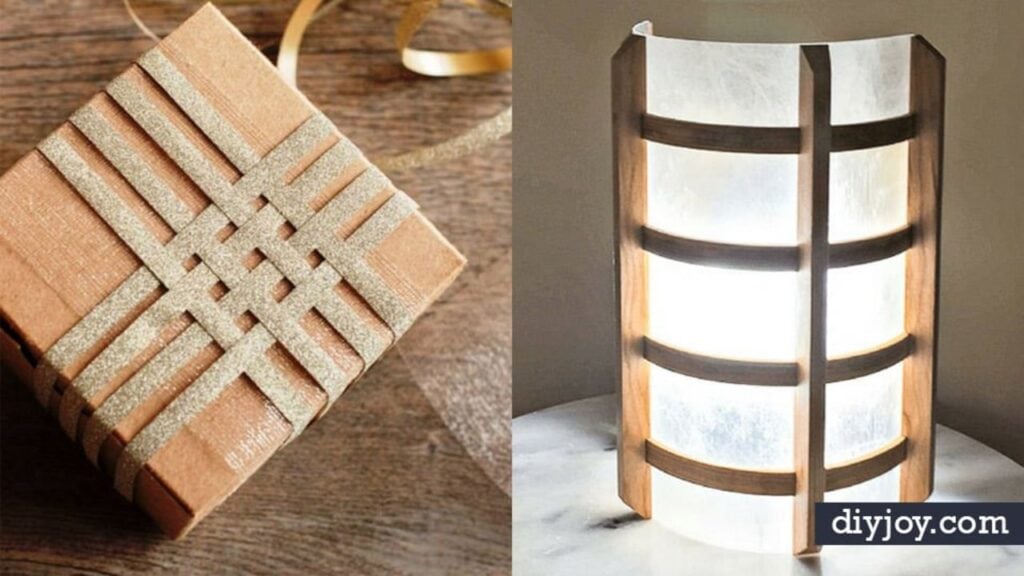
Curved cherry slats over a rice paper style shade, lit from inside, and it looks exactly like the designer lantern sconces that cost a few hundred dollars each. Be warned that this one is a real woodworking project. The Handyman’s Daughter soaks thin cherry in water in the oven just below boiling for about twenty minutes, then clamps it into a homemade bending jig overnight, and the shade is clear plastic sheet covered with adhesive window film that mimics rice paper. Table saw, band saw and sharp chisels required. Build a prototype first, which is her advice and worth taking.
Get the full tutorial at The Handyman's Daughter.
8. How to Make Origami Daffodils
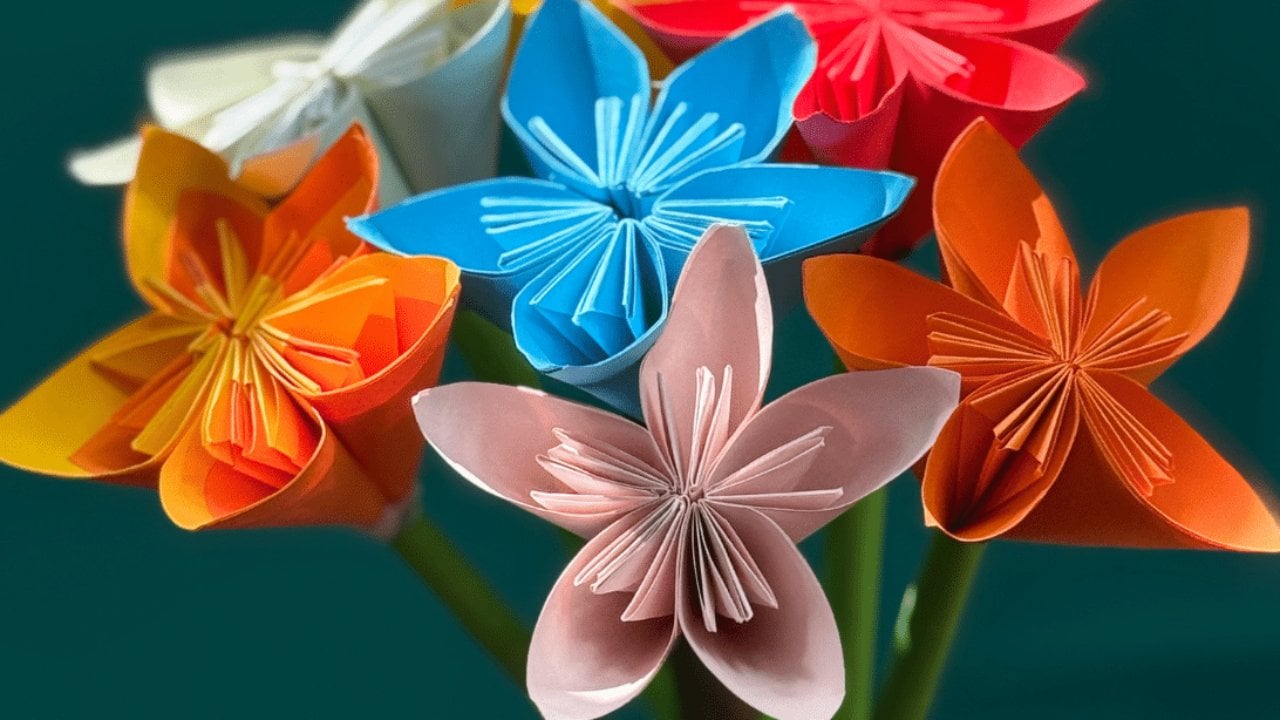
Five folded petals glued into a daffodil, and the flower looks far more complicated than the ten steps behind it. Cut five paper squares, fold each one diagonally, bring both corners up to centre, then open and refold until the piece sits in a tulip shape, tuck the points in and glue the edge. Glue the five petals together and the flower is done. Colored copy paper is all it takes, so a full bouquet costs pocket change and never needs water. Bright yellow is the obvious choice, but a pale pink one is quietly lovely on a desk.
Get the full tutorial at DIY Joy.
9. Ikebana Inspired Foraged Centerpiece
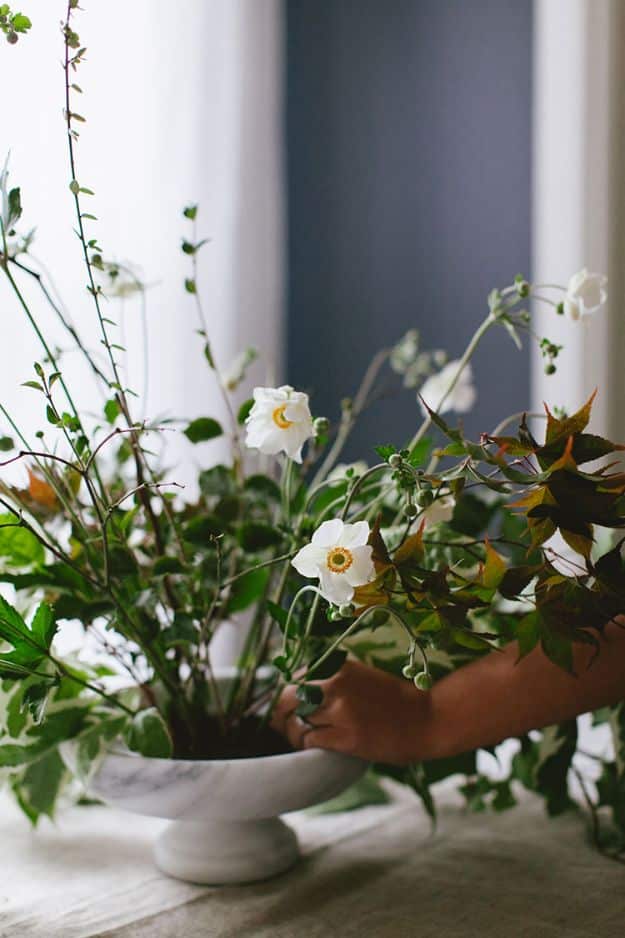
Foraged branches and white Japanese anemones in a shallow footed bowl, arranged the ikebana way, which means shape and negative space rather than a dome of blooms. Jojotastic’s florist secures a three inch floral frog to the middle of the dish with floral putty before a single stem goes in, so the weight of the branches cannot topple it. The rest is variegated weigela, English ivy and clippings from the yard, deliberately taller on one side and balanced by length on the other. It costs whatever the hedge is doing this week.
Get the full tutorial at Jojotastic.
10. Cherry Blossoms Party Backdrop
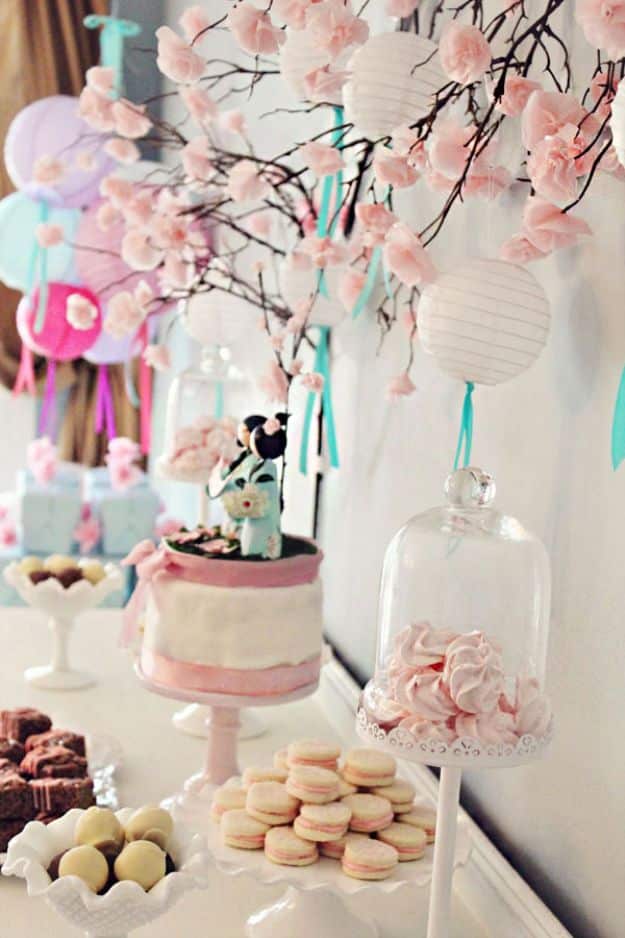
Bare branches crowded with pale pink tissue blossoms, paper lanterns on ribbon, and a dessert table underneath. The blossoms themselves are the craft and they are almost embarrassingly simple: cut squares of tissue, stack a few, gather them at the centre and hot glue the gathered end onto a branch. Repeat until the branch looks full, which takes longer than you think and is very good television watching work. Buy the branches or cut them, either works. Crowd them rather than spacing them evenly, because real blossom grows in clusters.
Get the full tutorial at Icing Designs.
11. Japanese Inspired Coasters
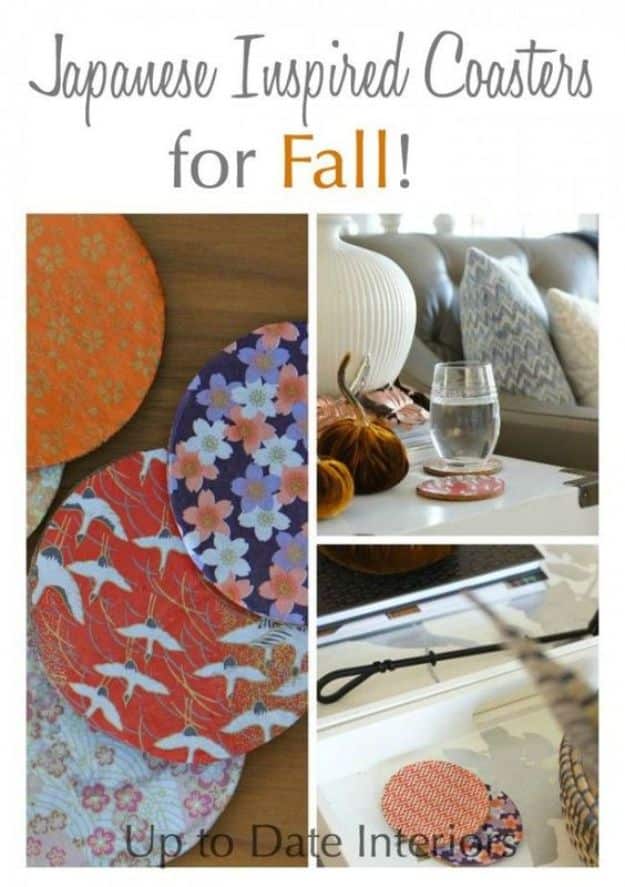
Cork coasters faced with washi or origami paper and sealed with decoupage medium, three steps and a paintbrush. Up to Date Interiors traces each coaster onto the back of the paper and cuts with a craft knife, brushes a thin coat of medium onto the cork, lays the paper on and brushes a second coat over the top. Decoupage dries smooth, so small wrinkles settle themselves. Cork curls slightly as it dries, so press the finished set between books for a couple of days. They are not dishwasher safe, which matters less than you would think.
Get the full tutorial at Up to Date Interiors.
12. Kintsugi DIY
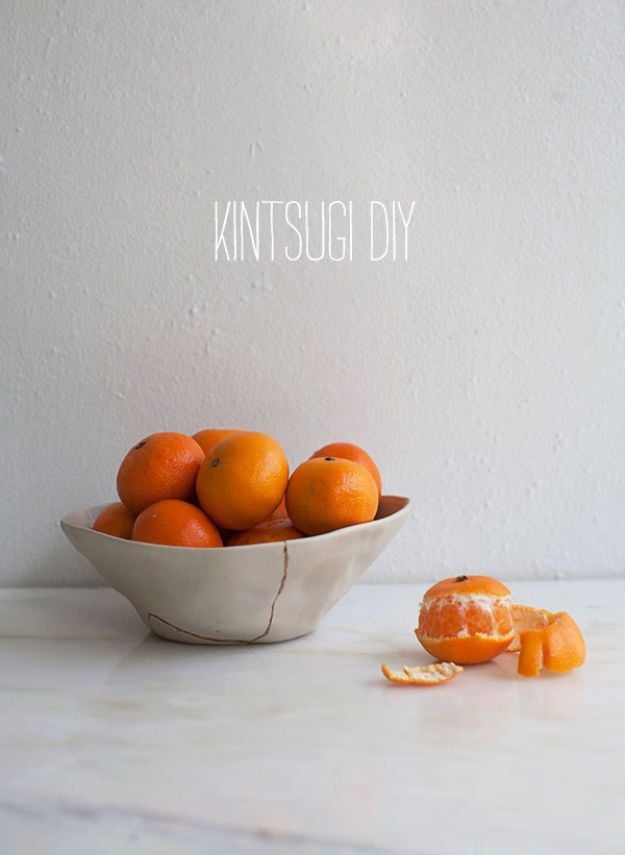
A broken bowl put back together with a gold seam running through it, and the repaired bowl genuinely looks better than the whole one did. A Cozy Kitchen is upfront that this is a shortcut version, liquid gilding and E6000 rather than lacquer and real gold dust. Paint the gold along both broken edges first, let it set about ten minutes, then apply a very small amount of glue, because too much makes the gilding go clumpy. Hold the pieces for a minute and leave it alone for two hours. Food safety is not addressed, so treat the result as decorative.
Get the full tutorial at A Cozy Kitchen.
13. How to Make An Origami Heart Bookmark

One square of paper, a flat surface and a few minutes, and the corner of your book now has a heart on it. The bookmark slips over the page corner so it cannot fall out the way a flat card does, which is the practical reason this one earns its place. Any paper works, so a single pad of origami squares makes a stack of them, and patterned paper looks as good as plain. They are a nice small thing to hand out to a book club, a teacher, or the friend who loses her page constantly.
Get the full tutorial at DIY Joy.
14. Japanese-inspired Washcloth
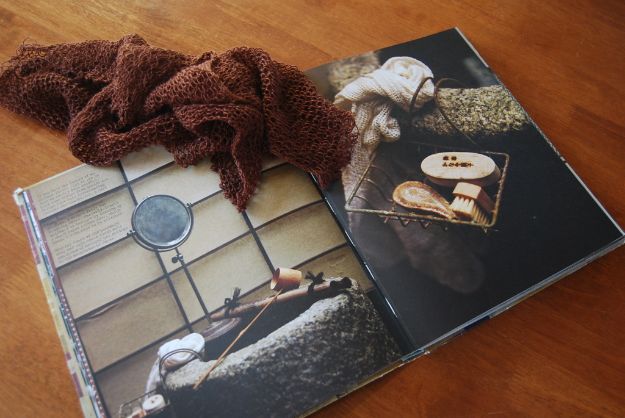
A loosely knit or crocheted washcloth in warm brown, photographed draped across an open book of Japanese bath rituals, which tells you exactly what mood the project is going for. A washcloth is the most forgiving thing a beginner can put on needles, and an open, airy stitch lathers better and dries faster than a dense one, which is really the whole argument for making your own. The source page sits behind a Cloudflare challenge and could not be read from here, so no yarn, hook size, stitch or measurement is claimed for this one.
Get the full tutorial at Tortoise and Lady Grey.
15. How to Make Japanese Lanterns Quilt
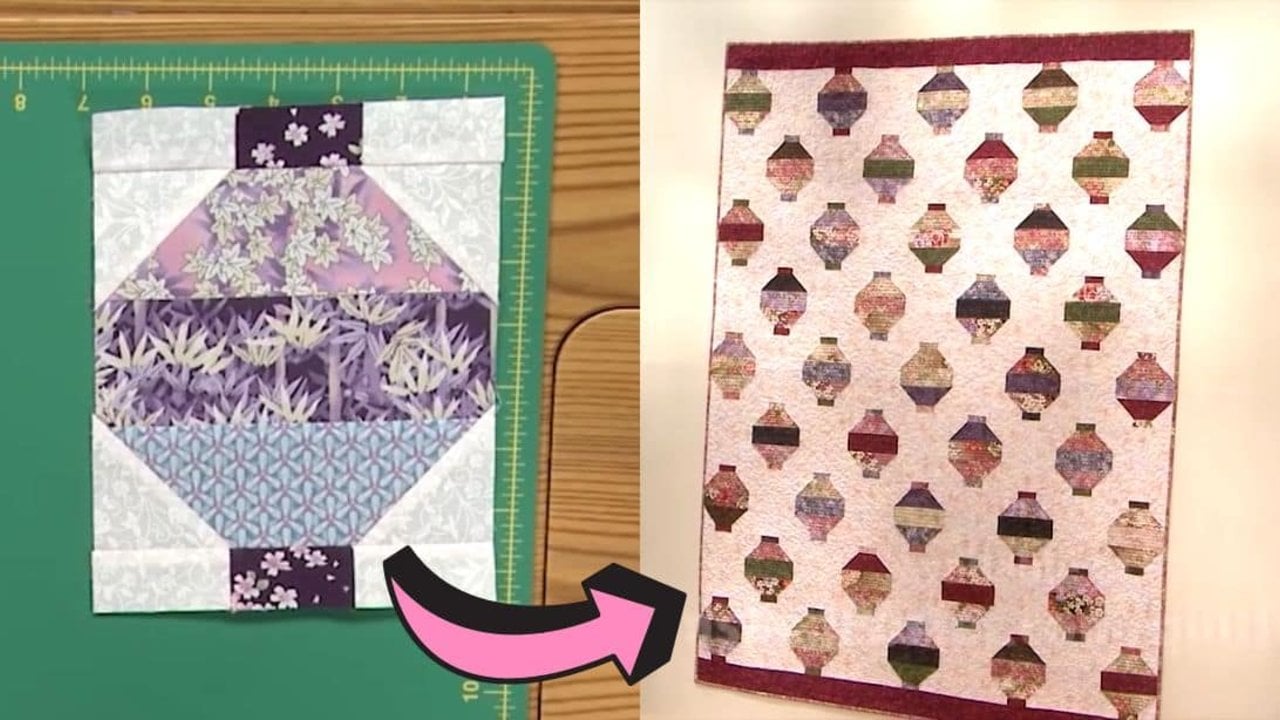
A quilt block that reads as a row of paper lanterns strung across the cloth, pieced from two and a half inch precut strips against a plain background. Each lantern is a strip rectangle with the corners folded off by the stitch and flip method, then capped top and bottom with narrow pieced bars. It is a beginner block, and a single one takes minutes rather than an evening. The trick is alternating your fabrics rather than repeating them, so the finished wall hanging looks like real lanterns catching different light rather than a printed panel.
Get the full tutorial at DIY Joy.
16. DIY Japanese Paper Fan Ornaments
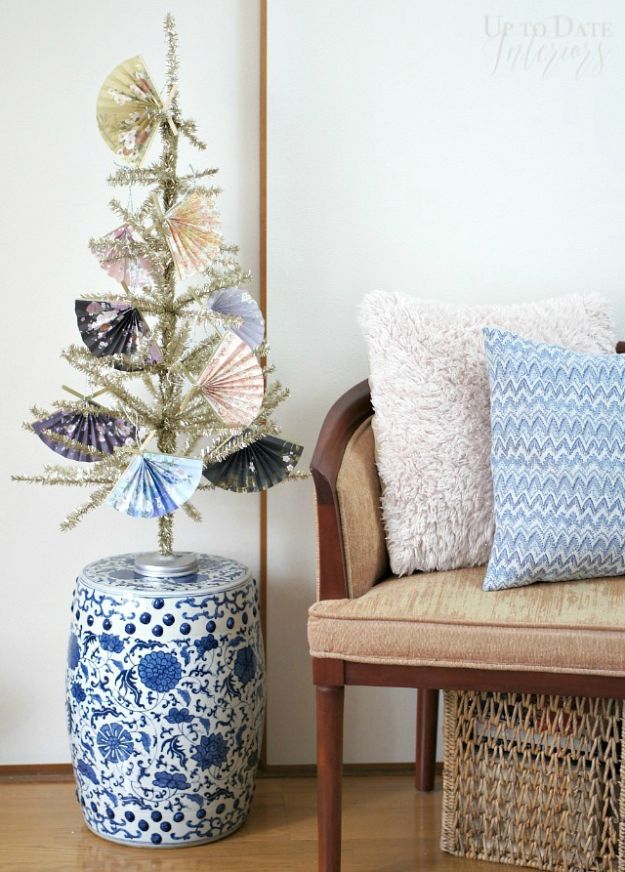
Small accordion fans in origami and washi paper, mounted on coffee stirrers and hung as ornaments. Up to Date Interiors trims six inch origami squares down to six by four, folds each piece into quarter inch accordion pleats, then glues two pleated pieces together at the centre so the fan has depth. A wooden stick glues to the back as a handle and a ribbon around the centre holds the pleats while letting the fan open. Sharp, precise folds are what separate a crisp fan from a floppy one, so take the extra minute.
Get the full tutorial at Up to Date Interiors.
17. DIY Japanese Washi Ribbon Eggs
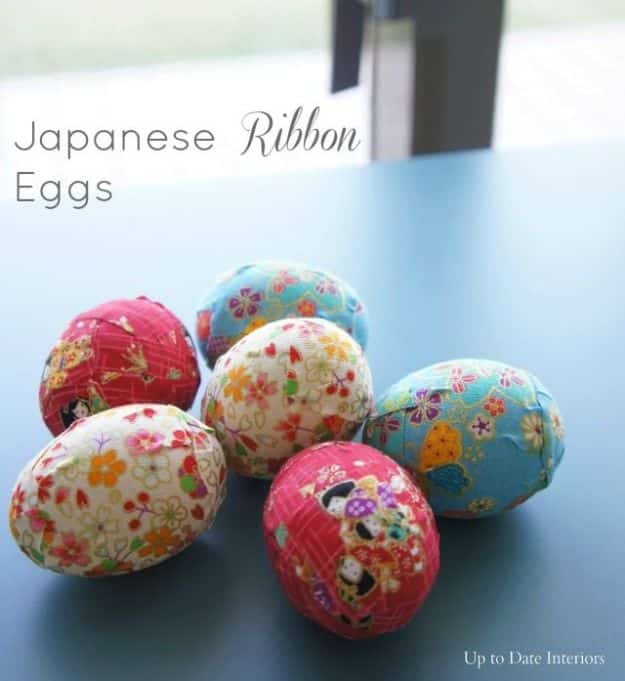
Eggs wrapped edge to edge in Japanese ribbon tape, patterned in pink, red and pale blue florals, and no glue anywhere. Up to Date Interiors used blown out eggs and says plastic ones work the same way. The technique that makes it look neat is small: snip into the edge of the tape roughly every quarter inch as you wrap, so the strip lies flat against the curve instead of puckering, and cap the tips with cut circles. Wide tape wraps around the middle, thin tape spirals the whole egg. Three rolls came to under three dollars.
Get the full tutorial at Up to Date Interiors.
18. Japanese Lantern From Lolly Stick Slats
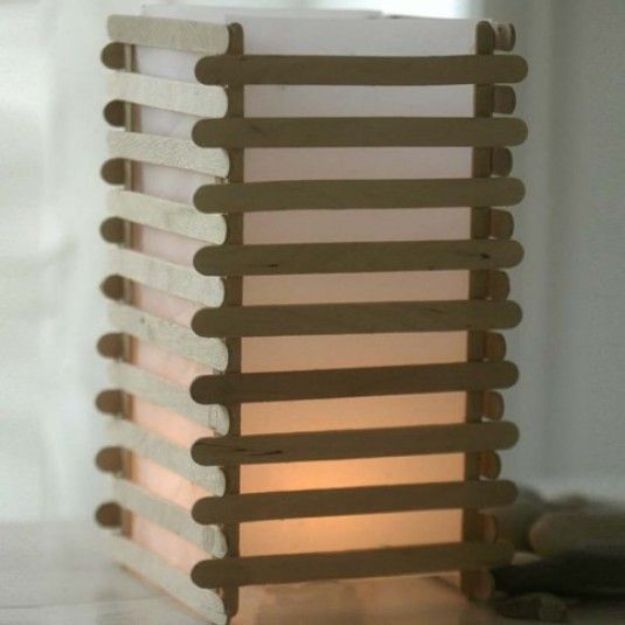
Lolly sticks glued into four slatted sides around translucent paper, with a tealight inside, and the light coming through the gaps is genuinely lovely. CC Craft sets two long sticks parallel about eight centimeters apart as a frame, then glues standard sticks across them with a gap between each. Two sides get nine sticks and two get ten, and the ten stick sides start one stick width lower so the corners line up when the box goes together. Transparent paper lines the inside. Use a battery tealight, because paper and a live flame are a poor combination.
Get the full tutorial at CC Craft.
19. Japanese Bookmark Doll
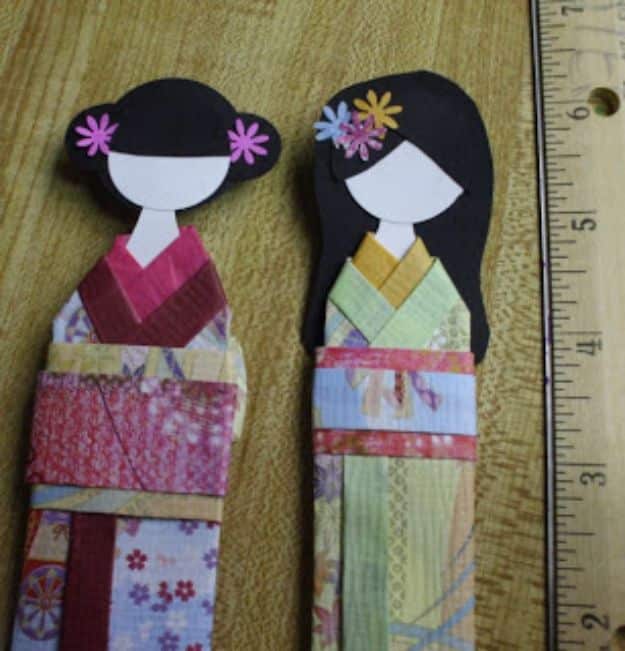
Paper dolls in tiny patchwork kimono, slim enough to sit between the pages of a book. Ballpoint Bliss cuts a white cardstock strip about four inches long and half an inch wide, shapes a neck and shoulders into it, then wraps scraps of origami paper for the undergarment and kimono. Two things matter. Wrap the right side over the left, because the other way is how the dead are dressed. And skip the sleeves, or as she puts it, the doll ends up looking like Batman. A one inch circle punch makes the head.
Get the full tutorial at Ballpoint Bliss.
20. Elegant Japanese-Inspired Pallet Coffee Table
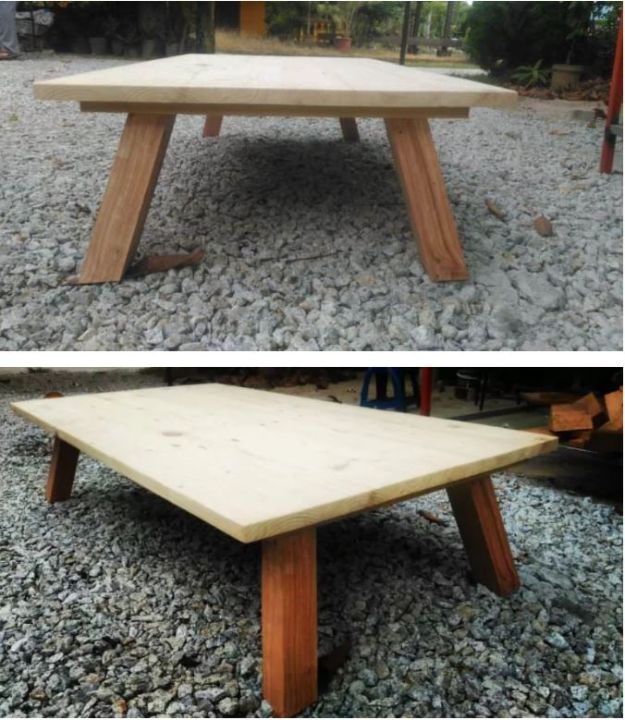
A low table with a wide plank top and angled legs, built from a single dismantled pallet in pine and spruce. The build runs to a subframe, angled legs, a lot of sanding, then deck boards carefully edge joined and glued into one top and fixed to the frame from underneath. Four hours, about ten dollars, and a medium difficulty rating. The original finish is a water based transparent paint sealed with wax for a soft two tone effect. Sand more than you think you need to, which is the difference between a pallet table and a table.
Get the full tutorial at 1001 Pallets.