Somewhere on your phone are hundreds of photos nobody ever gets to see, and these 24 creative handmade photo crafts are here to fix that. A handmade photo craft takes a printed picture and turns it into something you can hold, hang or give away, usually with Mod Podge, a little glue and a frame or block of wood. Some are quick wins, like mason jar lid magnets and glowing photo luminaries. Others take an afternoon, like a photo quilt for a college bound kid or a resin coaster that catches the light. A few DIY JOY favorites with step by step videos are in the mix too. The best tip for almost every project here? Print on matte paper or with a laser printer, because shiny prints and inkjet ink are what smear under glue.
1. DIY Photo Quilt
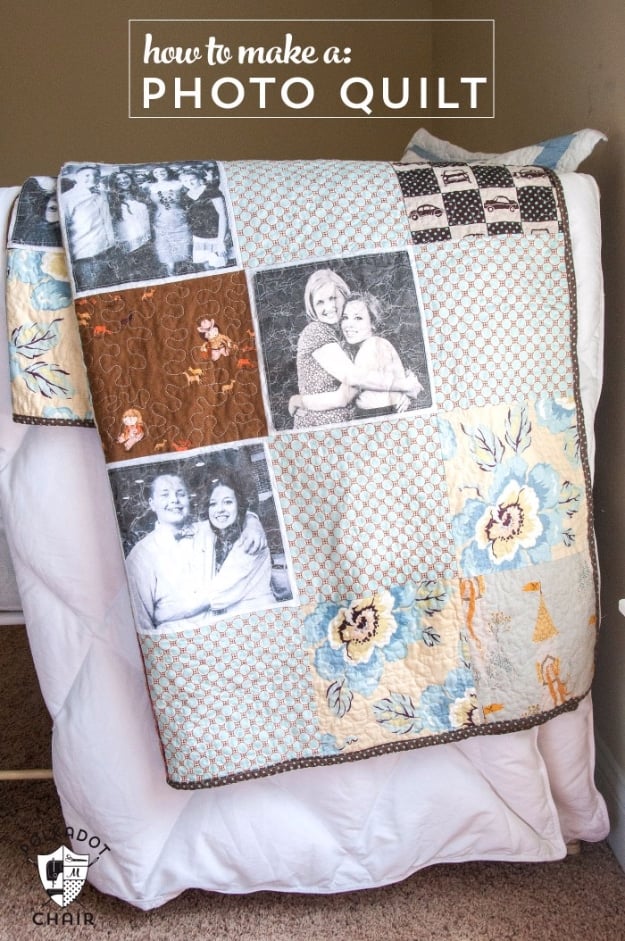
A DIY photo quilt is a heartfelt send off for a graduate heading to college, filled with family faces to cure homesickness. This one keeps the pattern simple: eight rows of six 9 inch squares, with photo blocks mixed in among the prints. Print black and white photos at 8 by 8 inches on printable fusible fabric, trim them and iron them onto white fabric, then trim that to 9 by 9. Heat set the ink as the package directs, and prewash the photo blocks before sewing so any bleeding happens early.
Get the full tutorial at The Polka Dot Chair.
2. Upcycled Mason Jar Photo Lid Magnets
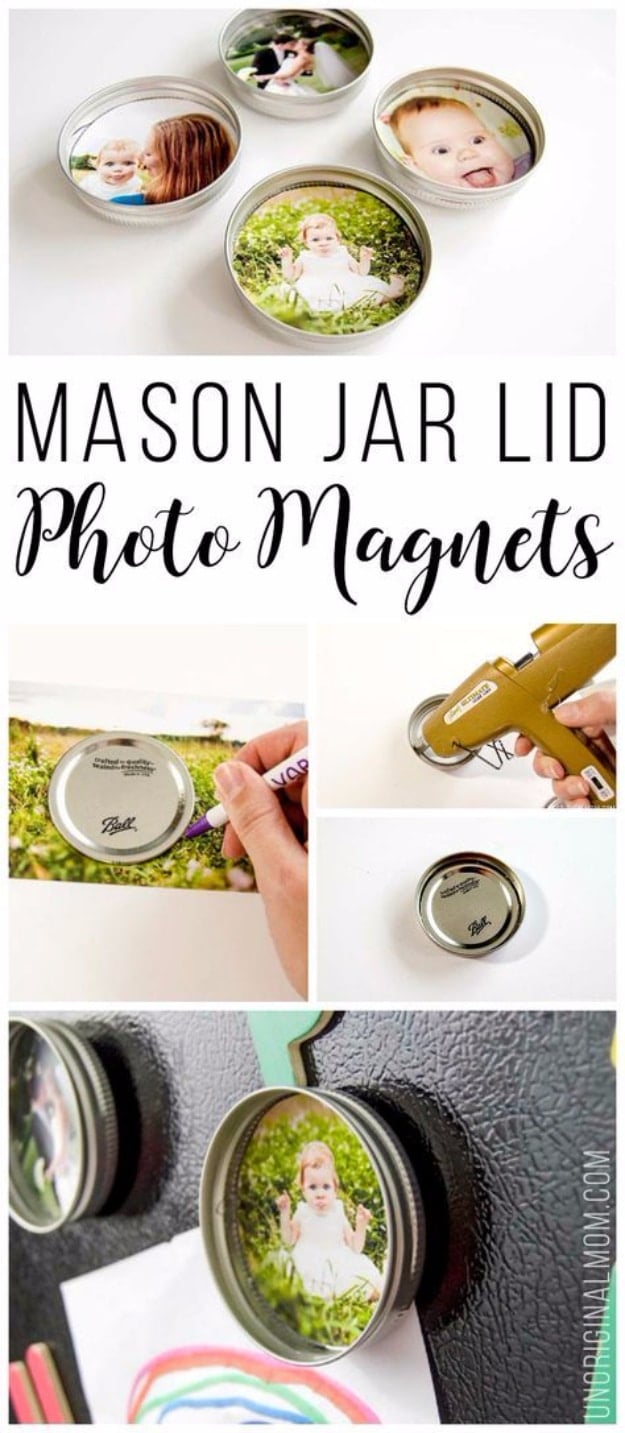
Upcycled mason jar photo lid magnets turn leftover canning lids into tiny framed photos for the fridge. Use the flat lid insert as a template to trace a circle on a photo, then cut it out. Hot glue the insert inside the ring, being careful because the metal gets hot, then glue the photo onto the insert. A circle of thick cardboard behind the photo makes it pop forward, while leaving it flat looks more like a frame. Glue a magnet to the back. Any jar lids work, not just mason jars.
Get the full tutorial at unOriginal Mom.
3. Make Your Own Photo Candle
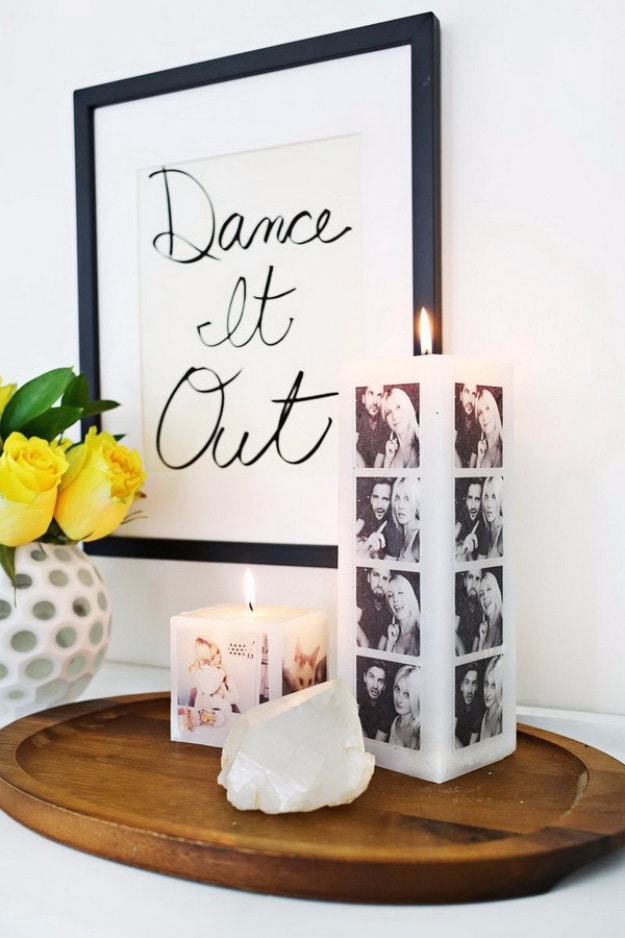
A photo candle transfers a printed picture right onto the wax, and it takes about half an hour. Print the photo on white tissue paper taped to card stock so it feeds through an inkjet, printing on the less shiny side. Wrap the tissue around a white pillar candle, hold a sheet of wax paper tight over it and warm it with an embossing heat tool until the image melts into the wax. Denser candles give a crisper image. Many people keep these as decor rather than burning them down to the photo.
Get the full tutorial at A Beautiful Mess.
4. Picture Frame Luminaries
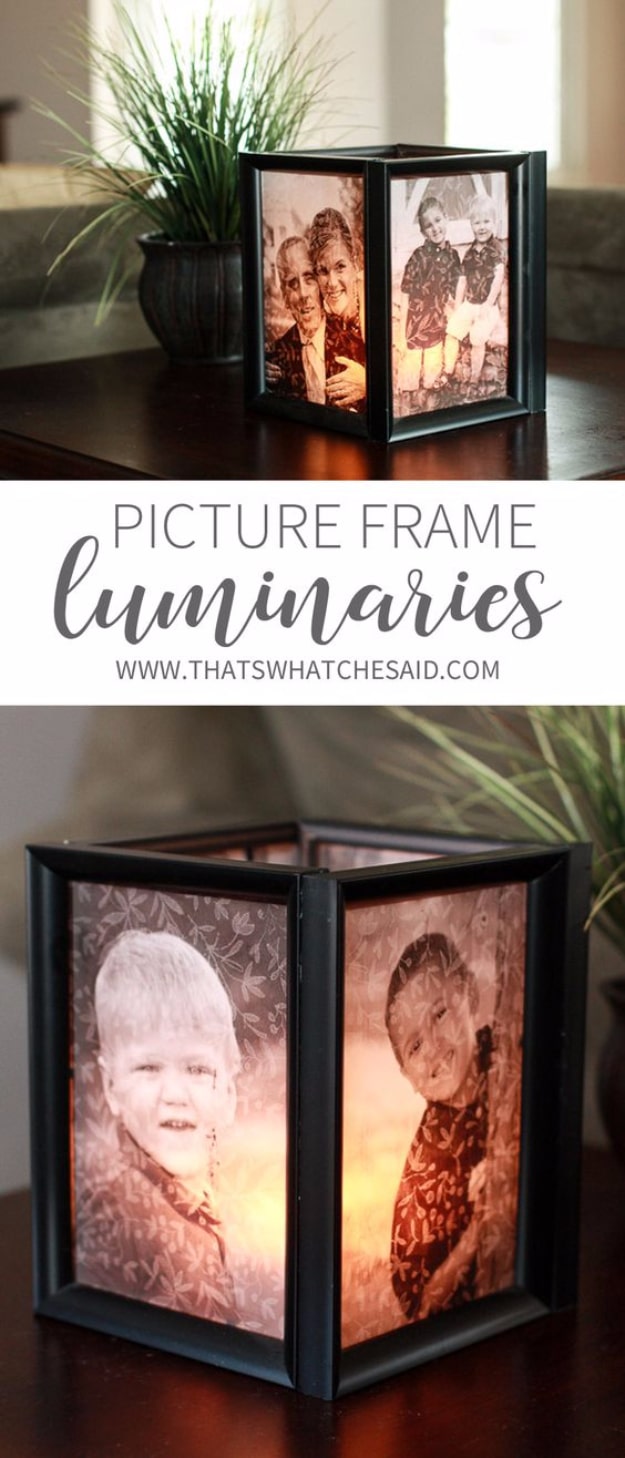
Picture frame luminaries are made from four 5 by 7 frames, often from the dollar store. Choose frames with flat, square edges and pegs on the frame itself, since the backings are not used. Print photos straight onto vellum and trim them. Set each frame face down with the vellum photo face down and the glass on top. Glue the four frames into a cube with a thin line of glue on the inner side of each joint. Set the cube over a square mirror to bounce the light and use an LED candle inside.
Get the full tutorial at That's What Che Said.
5. DIY Photo Wall Hanging
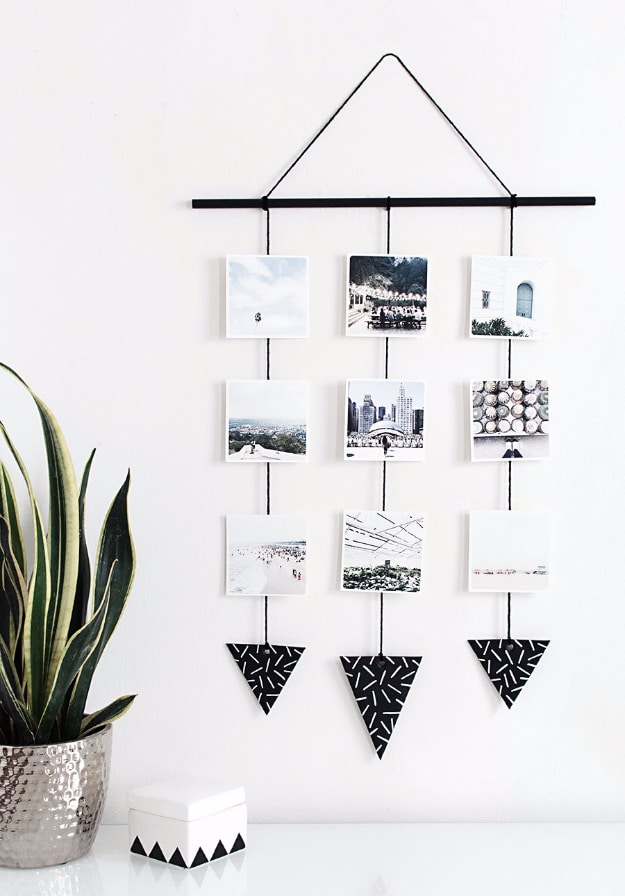
A DIY photo wall hanging puts square prints on display without a single frame. Paint a round wood dowel black, then tie yarn to both ends for hanging and secure every knot with a dab of super glue. Knot three long strands of yarn across the dowel. For weight and a little flair, cut triangles from black polymer clay using a card stock template, poke a hole in each with a straw, bake and decorate with a white paint pen. Washi tape holds the 4 by 4 prints, so they swap out easily.
Get the full tutorial at Homey Oh My.
6. DIY Photo Puzzles
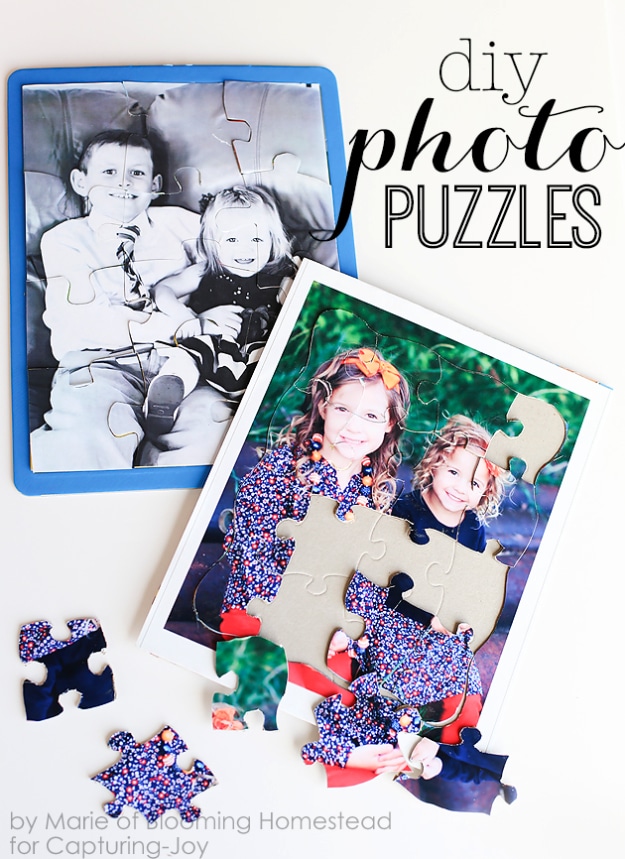
DIY photo puzzles start with an inexpensive 12 to 16 piece puzzle, often from the dollar store, and a photo printed to the same size. Lay the photo face down, set the puzzle on top and pull away the backing so only the pieces remain. Trace the border, then trace every piece. Cut them out slowly with scissors or a craft knife. Spray the puzzle pieces with an acid free adhesive that won’t warp the photo and press each photo piece onto its match. The tracing and cutting take precision, so this one is for grownups.
Get the full tutorial at Capturing Joy.
7. How To Make A Barn Door Picture Holder
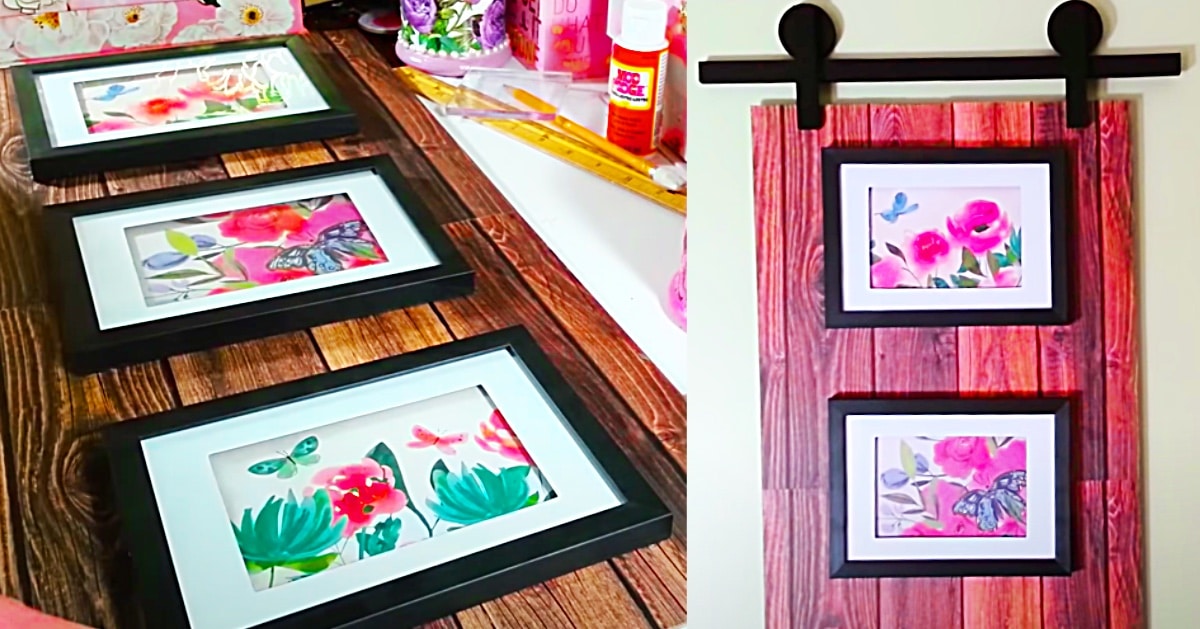
A barn door picture holder is a farmhouse style display made from craft store and dollar store parts. Glue faux wood pattern card stock onto a backing board with decoupage glue to make the door. Wood blocks from a tumbling tower game and popsicle sticks build the rail and hardware details, all joined with wood glue and hot glue. Then hot glue three small picture frames onto the faux wood surface. Fill the frames with family photos, art prints or kids’ school pictures, and swap them out with the seasons.
Get the full tutorial at DIY JOY.
8. DIY Photo Wood Transfer
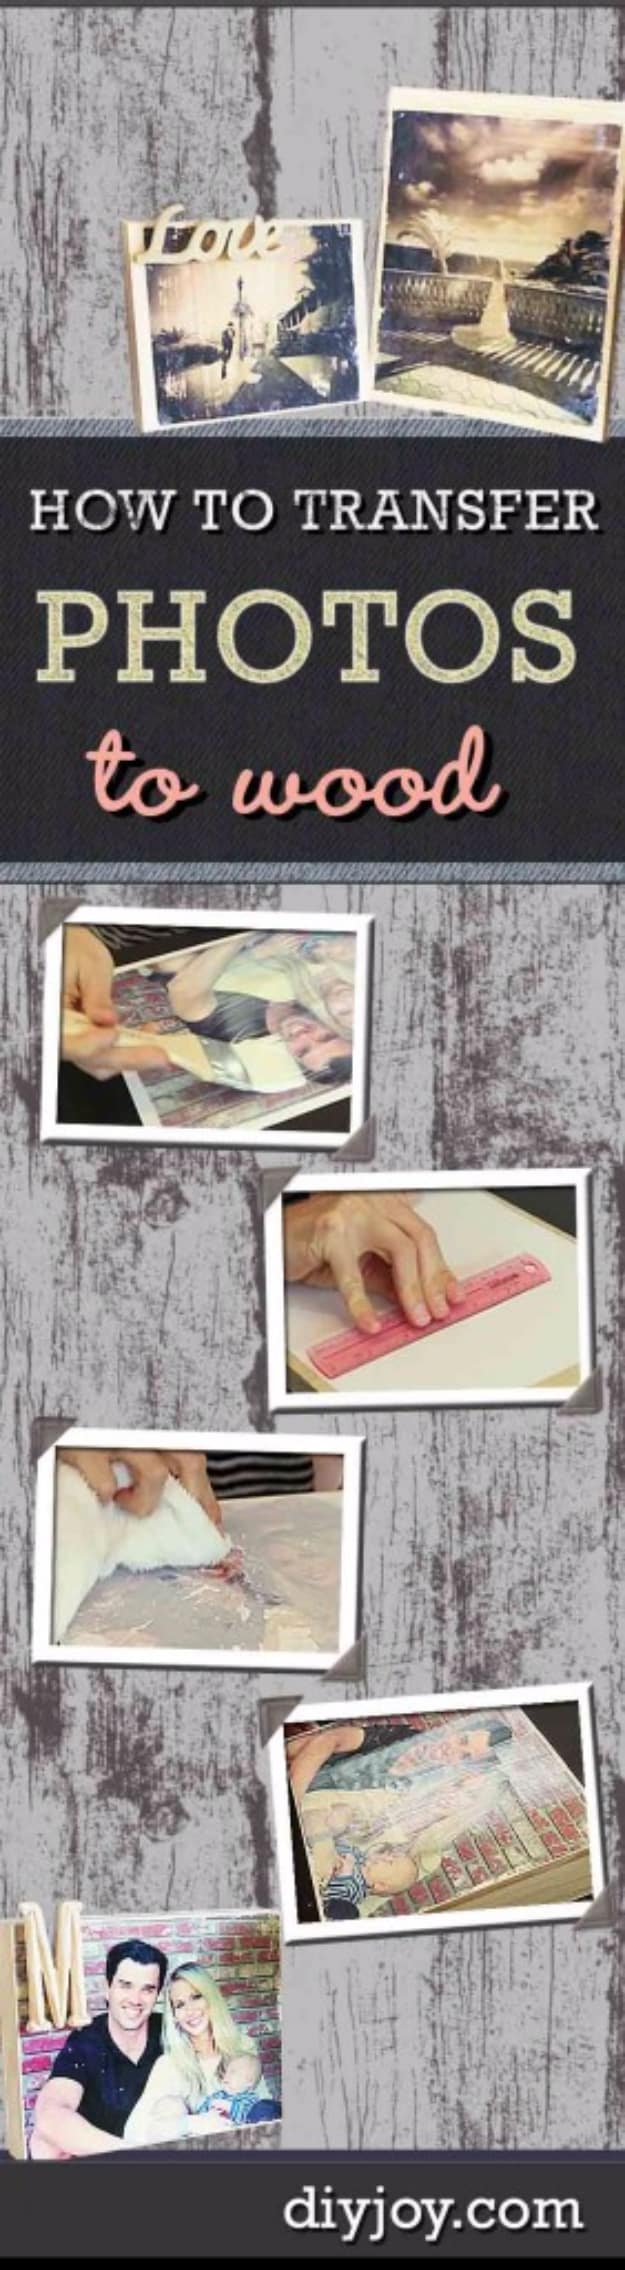
A DIY photo transfer to wood is a rustic alternative to an everyday picture frame. Mod Podge moves the image of an old family photo onto a plank, and most of the materials can be repurposed from around the house. The process runs in five easy steps and leaves a weathered look that suits farmhouse and cabin style. Display the finished piece on a mantel, or attach a wire to the back and hang it as wall art. It makes a thoughtful DIY gift for men and women alike.
Get the full tutorial at DIY JOY.
9. Handmade Photo Blocks
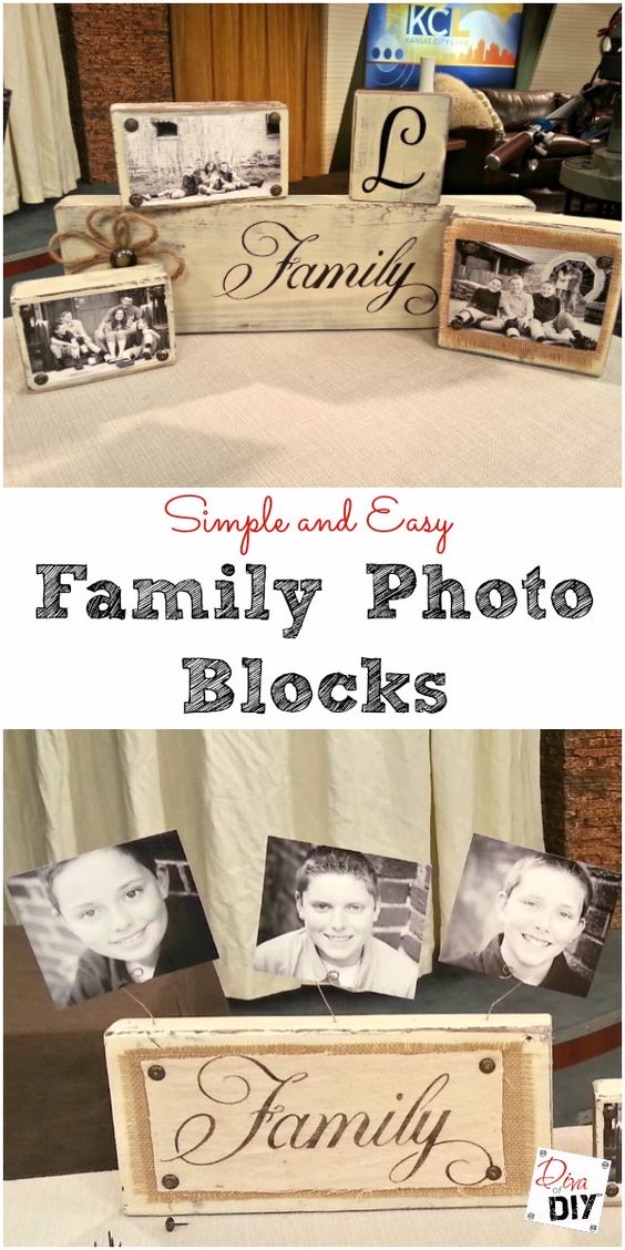
Handmade photo blocks hold pictures, recipe cards or Christmas cards on little wire stems. Cut 2×4 or 2×6 boards into 12 inch blocks and sand the edges. Paint the edges your accent color, rub them with a candle so the next coat won’t stick, then spray paint the whole block and sand back the edges to reveal the first color. Drill small holes in the top for stretched ornament hooks glued in with E6000. Tack on burlap with a stenciled “Family” panel, and slide photos into the hooks.
Get the full tutorial at Diva of DIY.
10. DIY Popsicle Stick Photo Bracelet
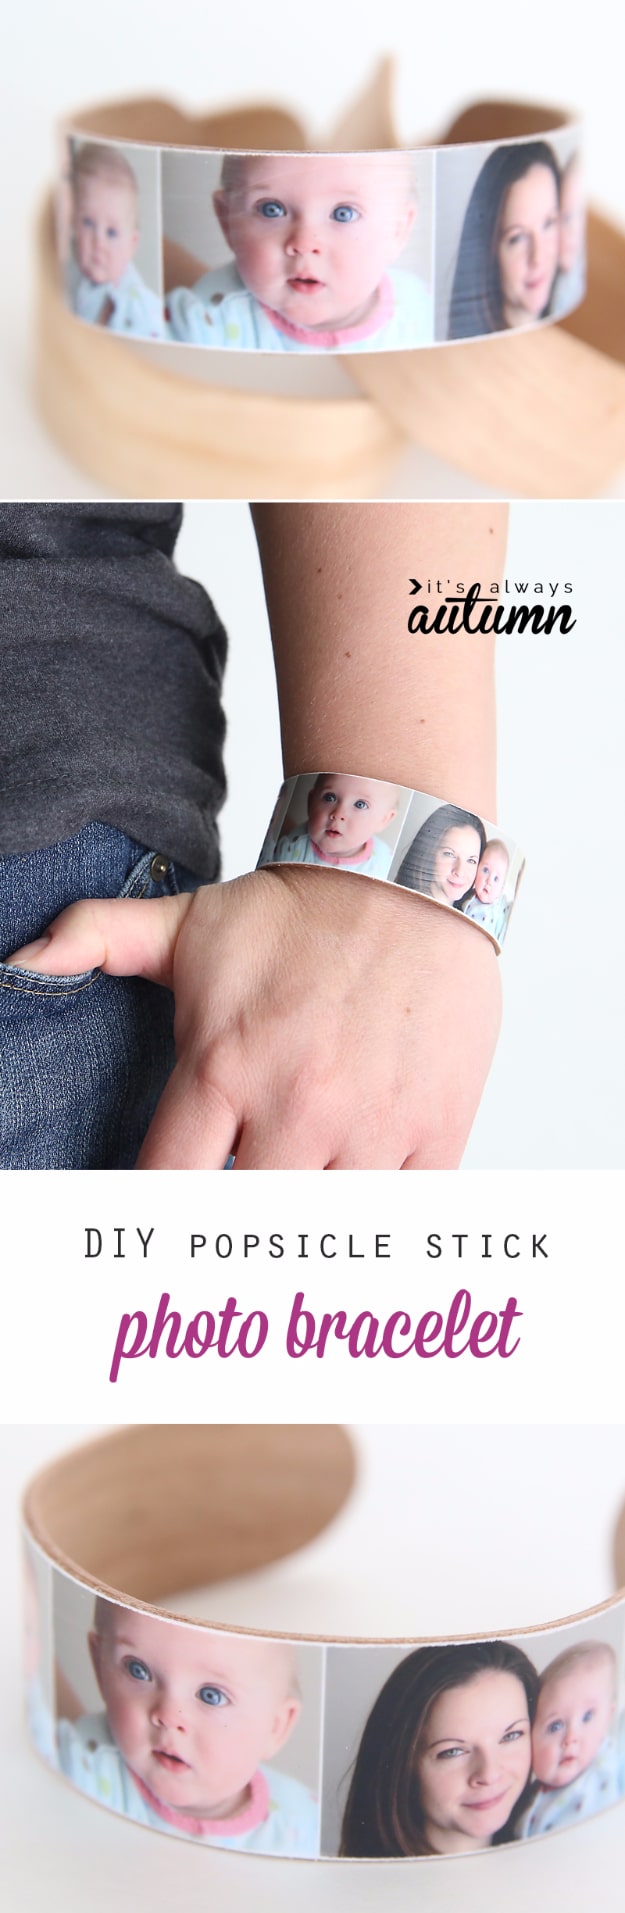
A DIY popsicle stick photo bracelet bends a jumbo craft stick into a cuff. Boil 1 by 7.5 inch sticks for 30 minutes, soak them in the hot water over an hour, then gently coax each one inside a pint jar or glass and dry it in a 250 degree oven for about half an hour. Boil extras, since some will snap. Trim a photo strip to 1 by 7 inches, attach it with matte Mod Podge, let it dry and sand the edges. A final coat of Mod Podge seals it.
Get the full tutorial at It's Always Autumn.
11. Glowing Photo Luminaries
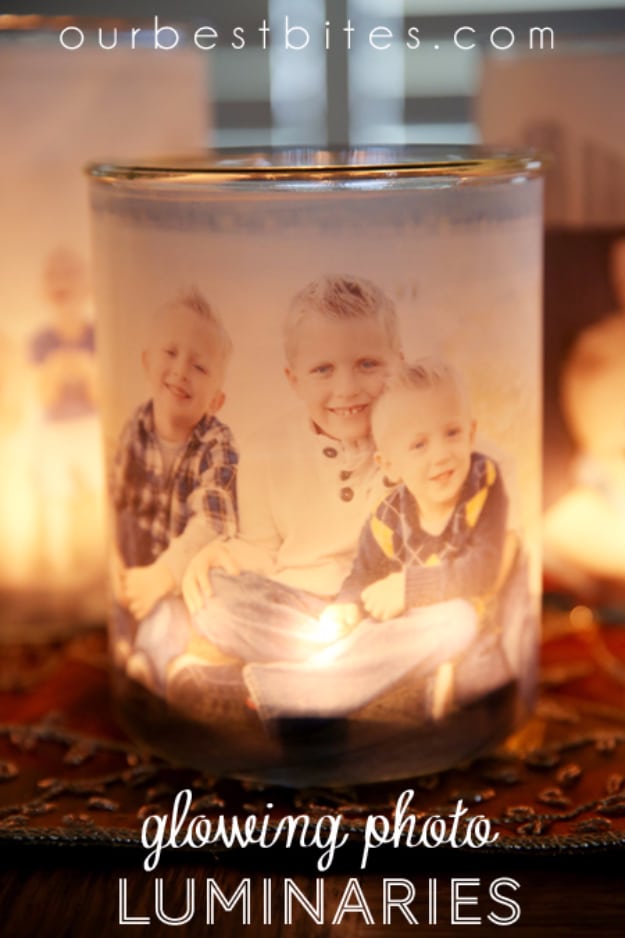
Glowing photo luminaries take minutes and nothing has to be permanent. Print favorite photos onto vellum with an inkjet printer, choosing horizontal shots since they need width to wrap around. Gather smooth, cylindrical glass jars, vases or hurricanes; squares work, but irregular shapes don’t. Trim each photo to the height of the glass, add a strip of double sided tape and wrap the photo around, meeting in the middle of the tape on larger jars. Washi tape adds a trim. Almost empty scented candles in jars work perfectly inside.
Get the full tutorial at Our Best Bites.
12. Photo Frame Magnets
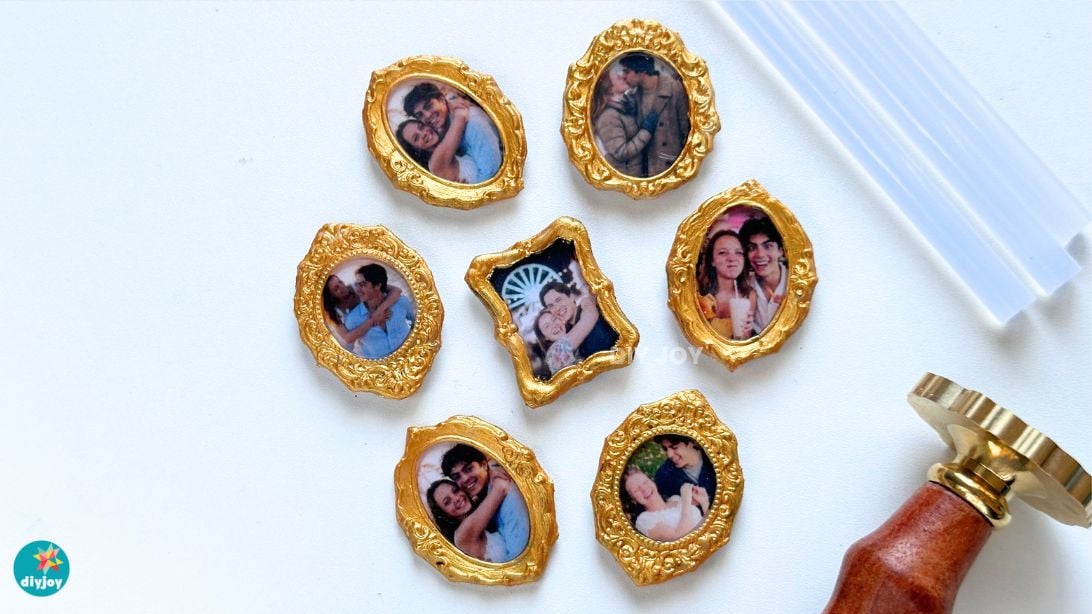
These mini photo frame magnets look like tiny gilded antiques, but they are made with hot glue and a wax seal stamp. Print photos about 0.85 by 1 inch. Chill the metal stamp on an ice pack and wipe it dry so the glue won’t stick. Squeeze a generous puddle of crystal clear hot glue over a photo, press the cold stamp in and wait 10 to 15 seconds before lifting. Trim the excess glue, paint the frame gold and stick a magnet to the back. A 15 watt glue gun helps prevent bubbles.
Get the full tutorial at DIY JOY.
13. LEGO Picture Puzzles
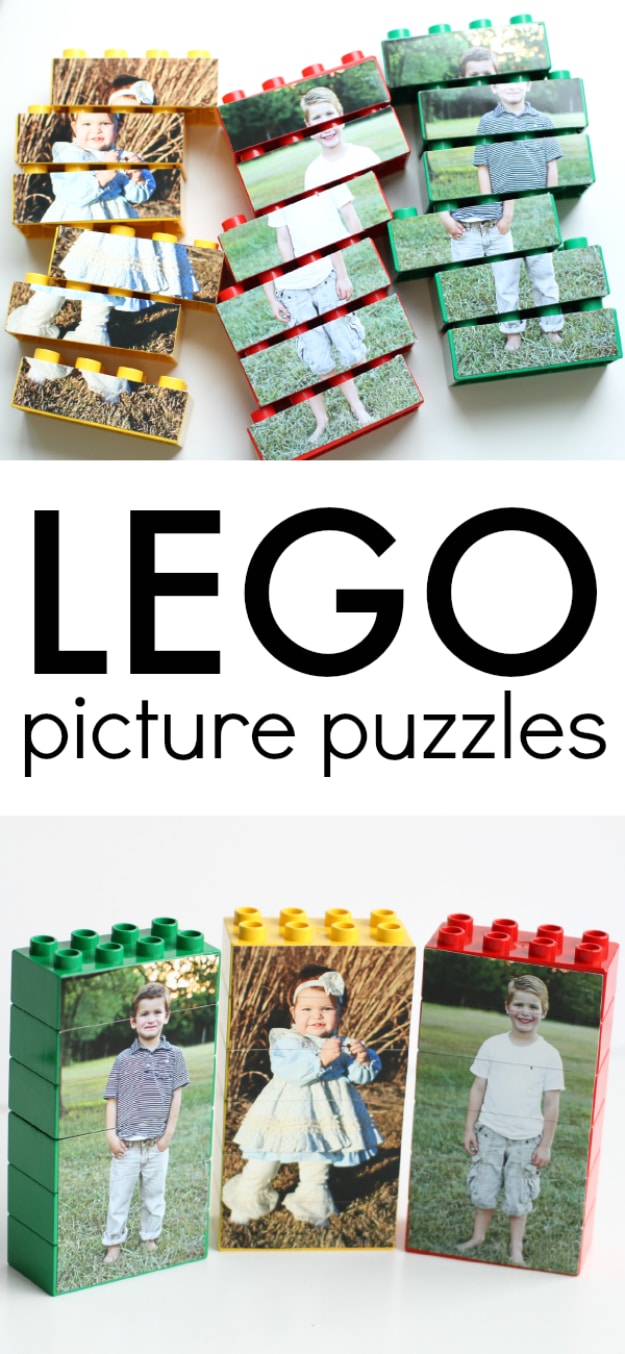
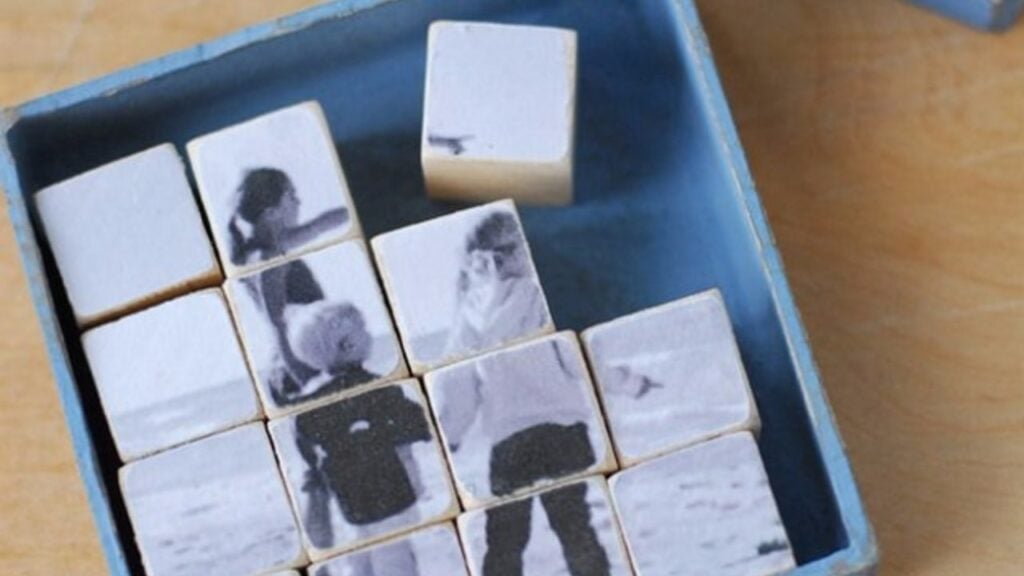
LEGO picture puzzles turn a stack of Duplo blocks into a mix and match photo game. Photograph each person in the same spot from the same distance, keeping them centered. Stack six Duplo blocks, trim a 4 by 6 print to fit the front of the stack and stick it on with a piece of double sided tape on each block. A grownup then slices through each crease between the blocks with an X-Acto knife, which goes right out of reach afterward. Kids love scrambling heads, shirts and shoes into silly combinations.
Get the full tutorial at I Can Teach My Child!.
14. Burlap Photo Wreath
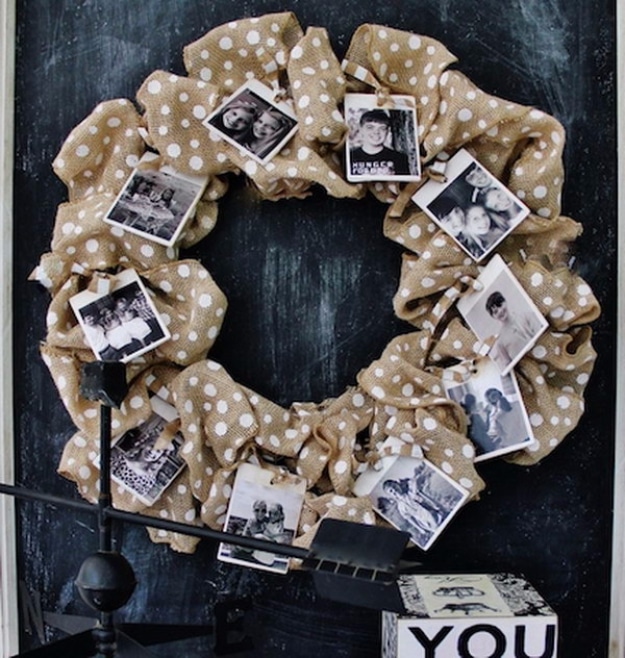
A burlap photo wreath pairs ruffled burlap with photos mounted on little wood tags. Weave wide burlap ribbon through a 16 inch wire wreath form, forming loops and pushing each pouf tight against the last; one roll covers about half the wreath. For the photos, paint small wood rectangles white, drill a hole at the top and lightly sand the edges. Seal inkjet prints with clear acrylic spray first so they won’t smudge, then Mod Podge them to the wood and let dry overnight. Tie them on with narrow burlap ribbon.
Get the full tutorial at Thistlewood Farm.
15. Photo Vases From PVC Pipe
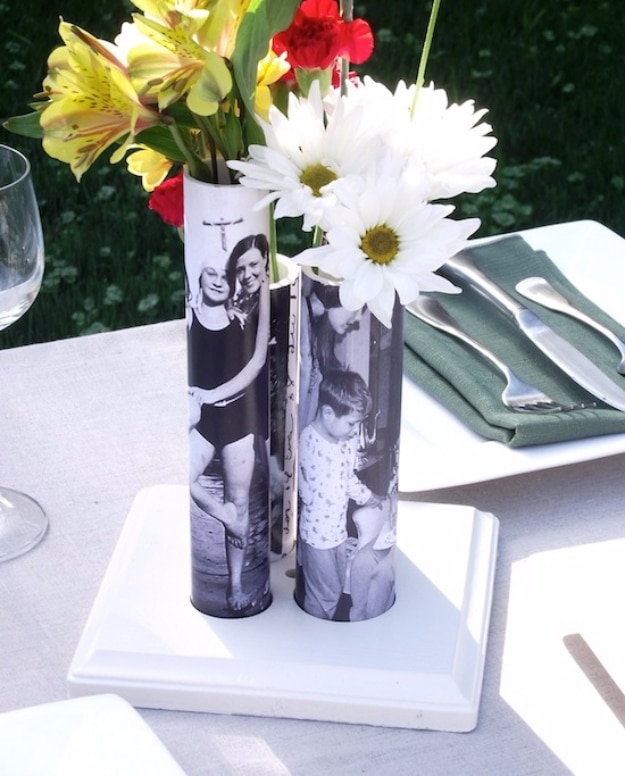
Photo vases from PVC pipe make a nostalgic centerpiece for about $12. Cut pipe of different widths into 8 to 11 inch lengths and cement caps to the bottoms so they hold water. Resize each photo to wrap its pipe and print on plain paper with a laser printer. Soak the prints, press out the extra water and decoupage them onto the pipes with Mod Podge, using the Outdoor formula for a patio table. Glue the vases to a painted wood plaque with E6000. Test on a scrap of pipe first.
Get the full tutorial at Mod Podge Rocks.
16. Photo Resin Coaster
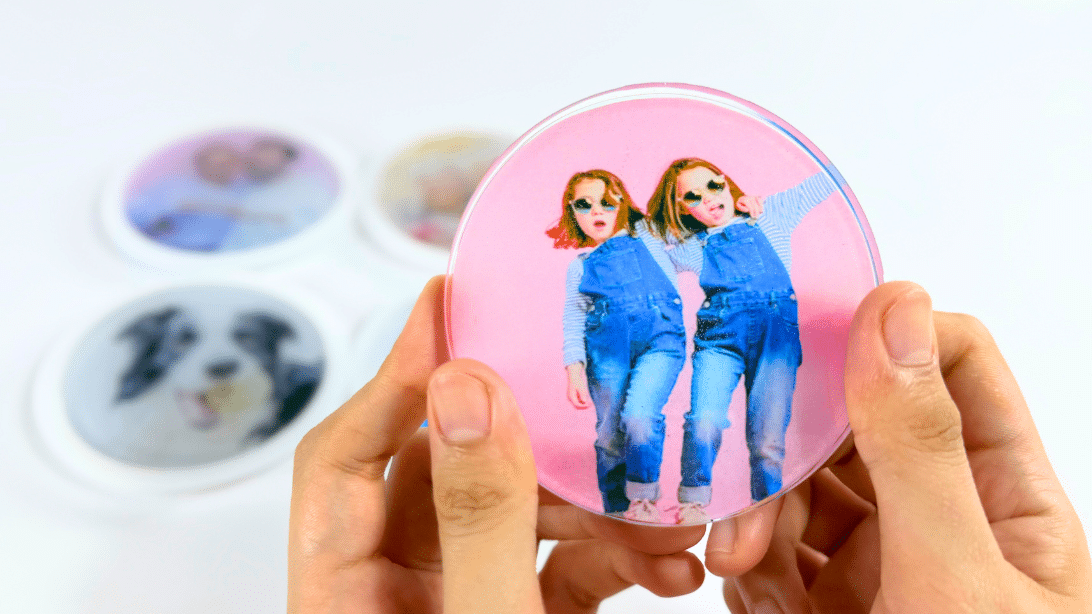
A photo resin coaster seals a favorite picture in glossy, clear resin, and it works on a first try. Mix about 36 grams of epoxy resin with 12 grams of hardener for a 3 to 1 ratio, stirring slowly for 5 to 10 minutes so bubbles stay away. Wearing nitrile gloves, pour a thin layer into a round silicone mold. Trace a round object on the photo, cut it out and center it on the resin. Pour in the rest and let it cure about 24 hours before unmolding.
Get the full tutorial at DIY JOY.
17. DIY Rustic Photo Mobile
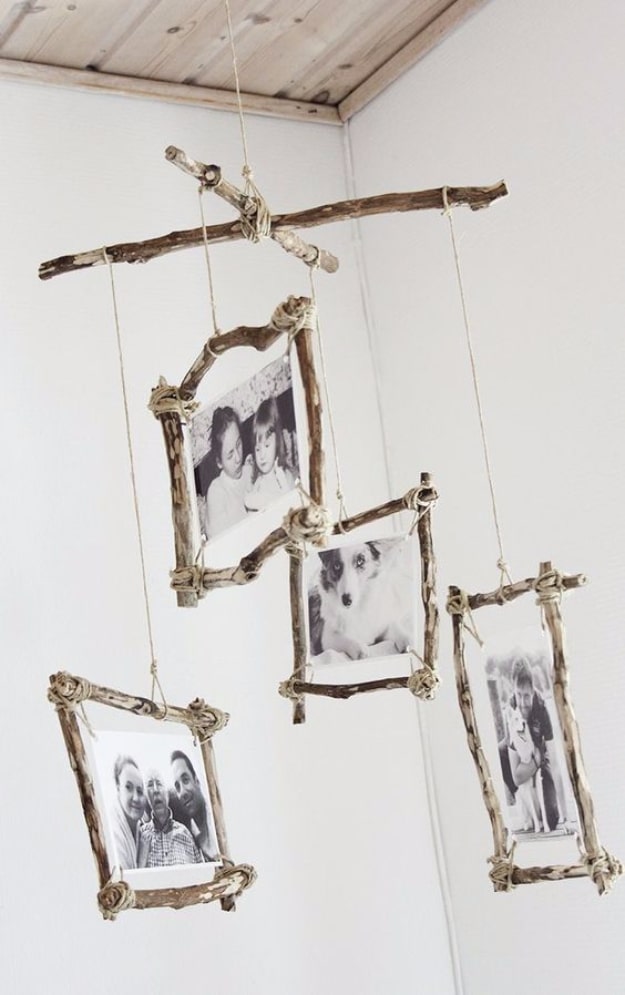
A DIY rustic photo mobile frames double sided photos in branches. Collect twigs about three quarters of an inch thick and cut them with pruning shears so each frame overlaps at the corners around a 6 by 4 print. Strip the bark with a sharp knife for a cleaner look, then bind every corner tightly with twine. Tape pairs of photos back to back with double sided tape, punch the corners and tie them into the frames. Hang the frames from two crossed branches at different lengths, sliding the knots to balance it.
Get the full tutorial at Simple as That.
18. Photo Mini Magnets
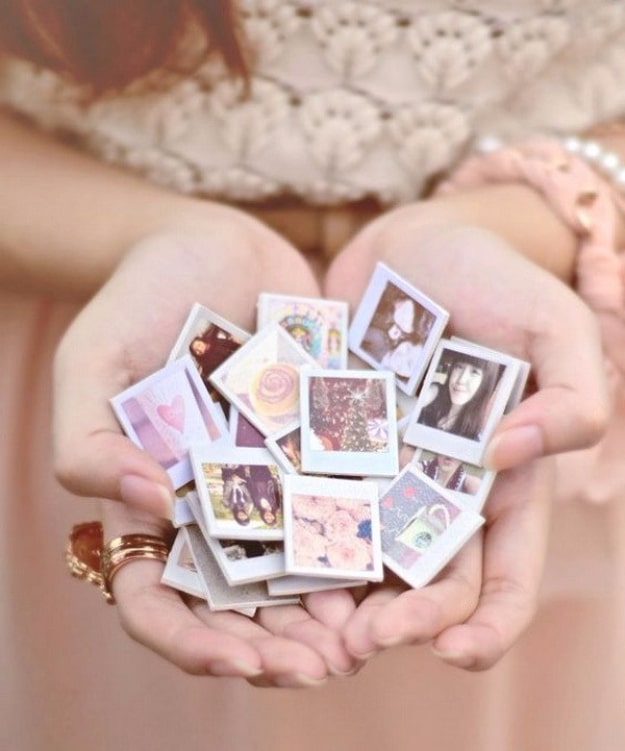
Photo mini magnets look like tiny instant camera prints and cost almost nothing. Print small photos with a white instant photo style border; the source shares a free template for the border. Glue the prints onto mounting board from an art store, then cut them out with a craft blade, sliding it again and again through the thick board. Paint the cut sides white for a clean finish, and glue a magnet to each back. They make a sweet Mother’s Day gift, especially with memories the two of you share.
Get the full tutorial at SUNDAESINS.
19. DIY 3D Photo Shapes
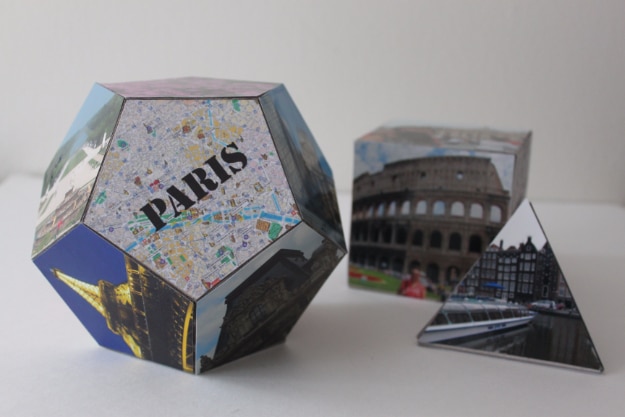
DIY 3D photo shapes fold travel photos into a cube, a pyramid shaped tetrahedron and a twelve sided dodecahedron. Print and cut a triangle, a square and a pentagon on plain paper to use as templates. Trace the shape nets onto chipboard and cut them out along the outer edges. Score the inner lines with a blade without cutting through, fold them inward and glue the edges. Then cut photos to match each template and Mod Podge them onto the faces. Mix in maps and postcards for a souvenir look.
Get the full tutorial at Why Don't You Make Me?.
20. DIY Photo Transfer on Glass Using Packing Tape
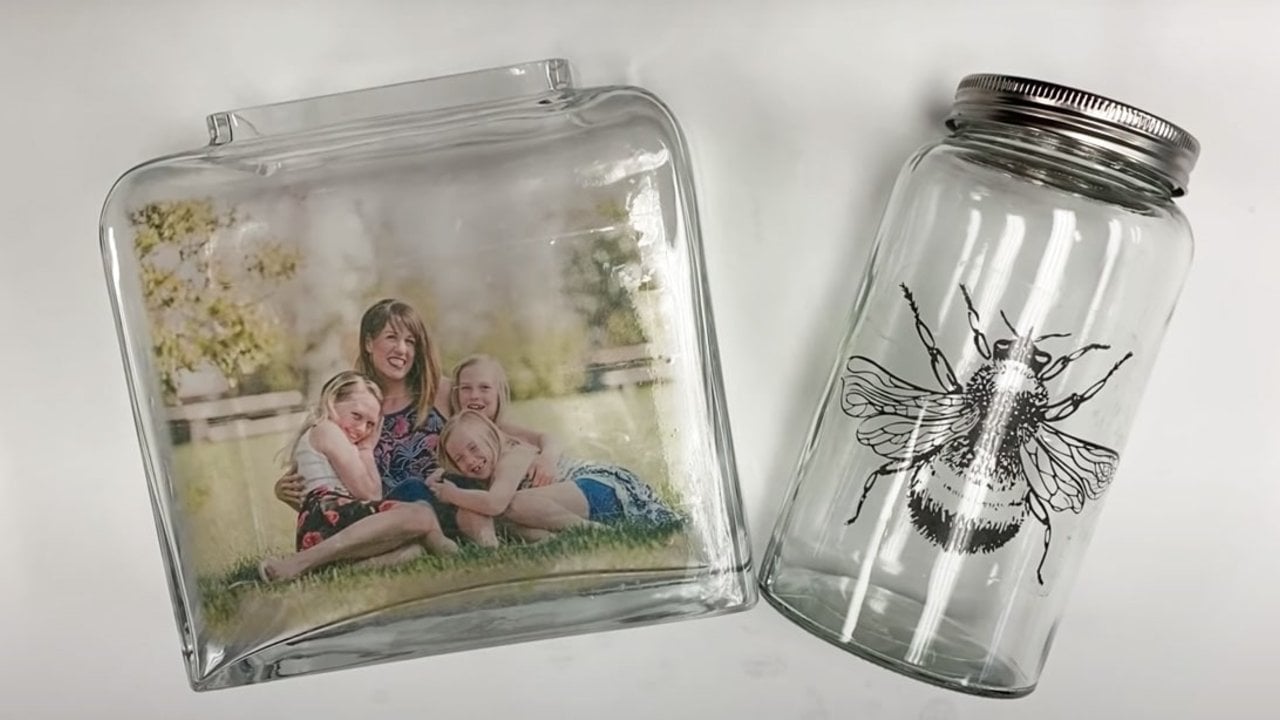
A photo transfer on glass with packing tape needs no special medium at all. Lay strips of clear packing tape sticky side up, overlapping slightly, and press a reversed laser printed photo face down onto them without wrinkles. Trim the edges and rub hard across the paper with a scraper in every direction. Soak it in warm water for 2 to 3 minutes, then rub off all the paper so only the clear, inked tape remains. Let it dry completely, press it onto a glass block and burnish away any wrinkles.
Get the full tutorial at DIY JOY.
21. Photo Bookmarks
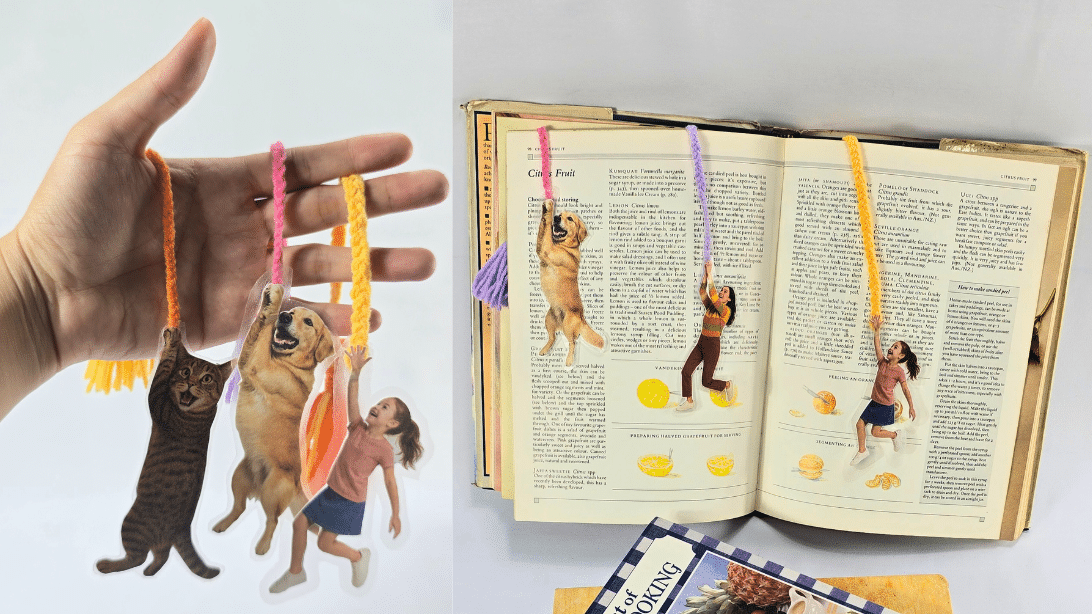
Photo bookmarks turn a cut out photo into a reader climbing up the page. Print a photo of someone, a pet or a favorite character, then cut it out close to the edges; a craft knife handles tight corners better than scissors. Glue the cutout to card stock but leave the hands unglued, then trim it neatly. Slip a tassel’s loop between the layers at the hands. Cover the front and back with contact paper, smoothing out bubbles, and trim the plastic to about 1/8 inch around the edge.
Get the full tutorial at DIY JOY.
22. DIY Instax Photo Calendar
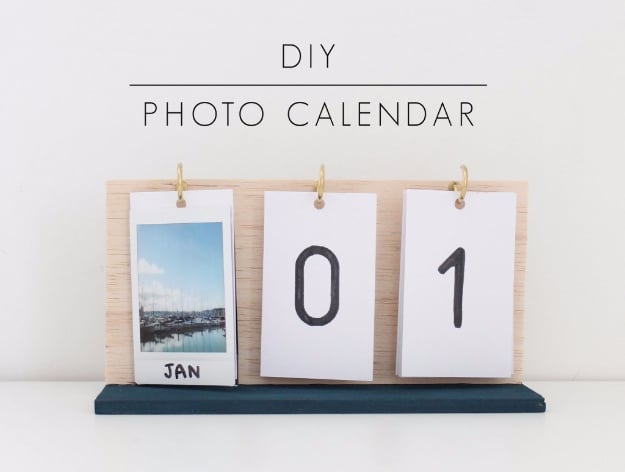
A DIY Instax photo calendar flips a fresh snapshot into view every month. The idea uses instant camera prints for a little vintage charm, but regular printed photos work just as well for anyone without an instant camera. The supplies are basic and budget friendly: card stock for the month and date cards, a binder ring to hold them and a stack of favorite photos. Family and friends, landscapes or even favorite quotes and affirmations all work. It is a great home for photos stuck on a phone.
Get the full tutorial at Indie Crafts.
23. 10 Minute Photo Ornaments
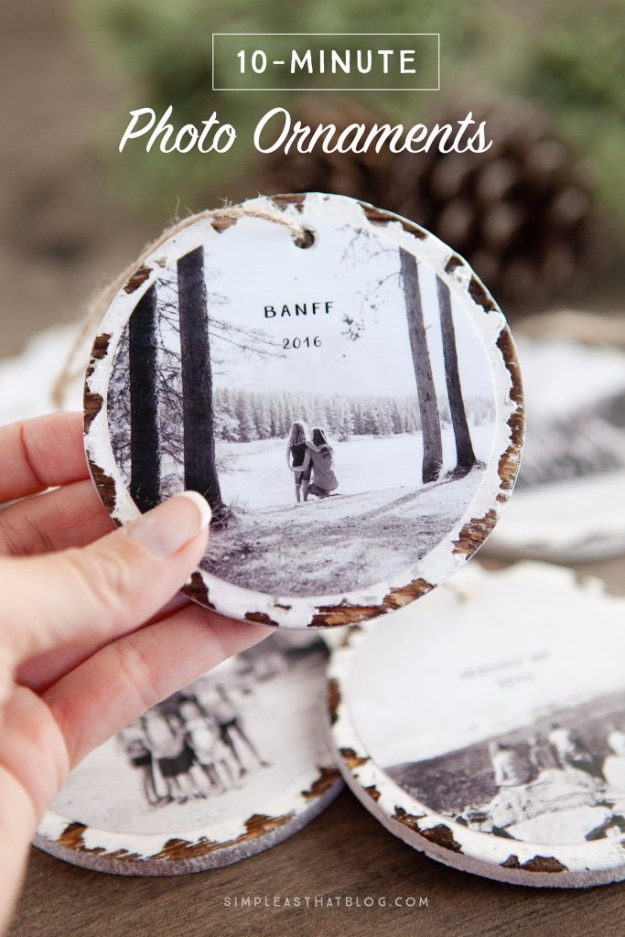
10 minute photo ornaments put family memories right on the Christmas tree. Crop photos into circles in a photo editor and add a little text with the place and year if you like. Paste each circle onto a 4 by 6 canvas so any photo lab prints it at standard size. Cut the circles out, punch a hole in line with the ornament’s hole and brush Mod Podge over a distressed wood disc ornament and the back of the photo. Press it on, add a smooth final coat and tie on twine.
Get the full tutorial at Simple as That.
24. Glass Photo Jewelry
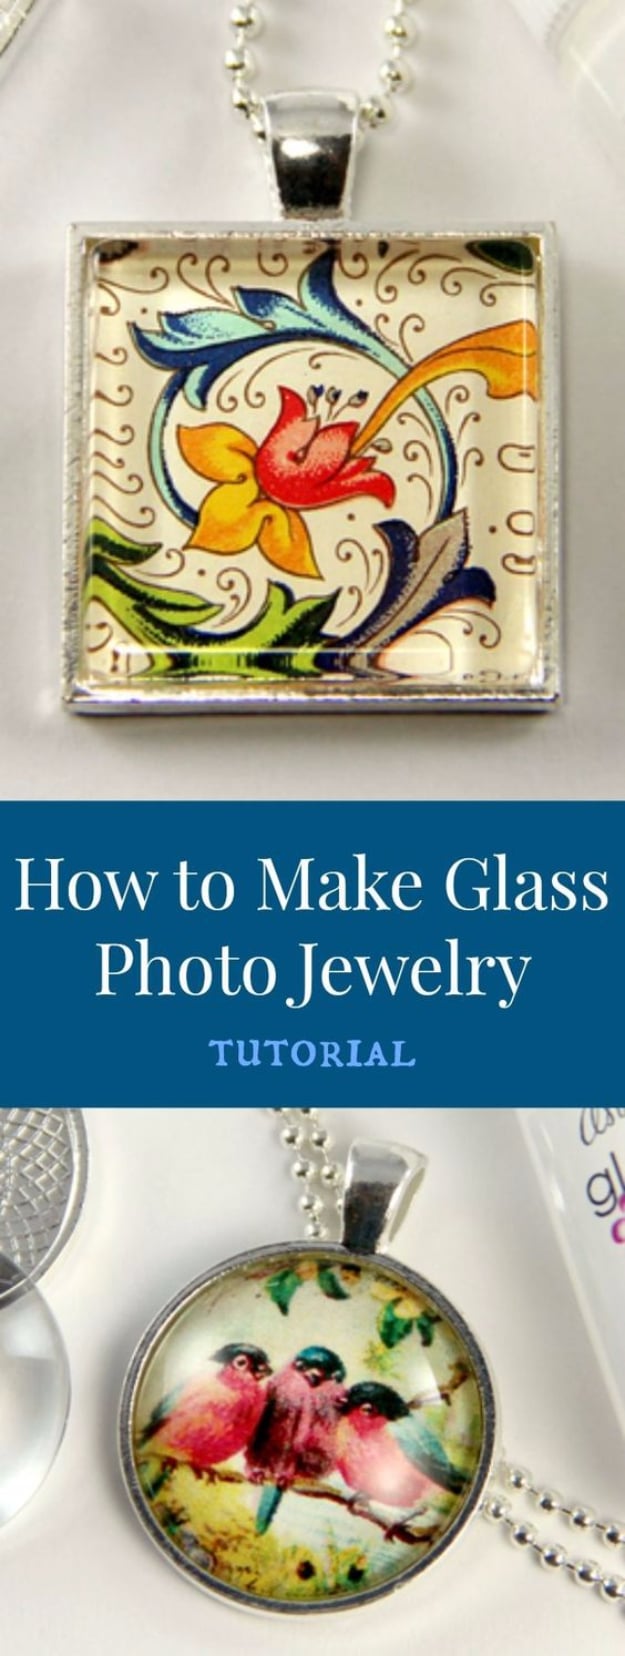
Glass photo jewelry seals a tiny photo or a scrap of patterned paper under a clear glass cabochon. Wipe the glass with a lint free cloth, keeping lotion off your hands. Brush a thin coat of sealer on the glass, press it face down onto the paper and push out bubbles with firm, even thumb pressure. Turn it over on a cutting mat and trim away the excess paper with a fresh #11 X-Acto blade. A thin coat of sealer on the back sets it into a pendant tray. Laser prints won’t smear.
Get the full tutorial at anniehowesjewelrykits.com.