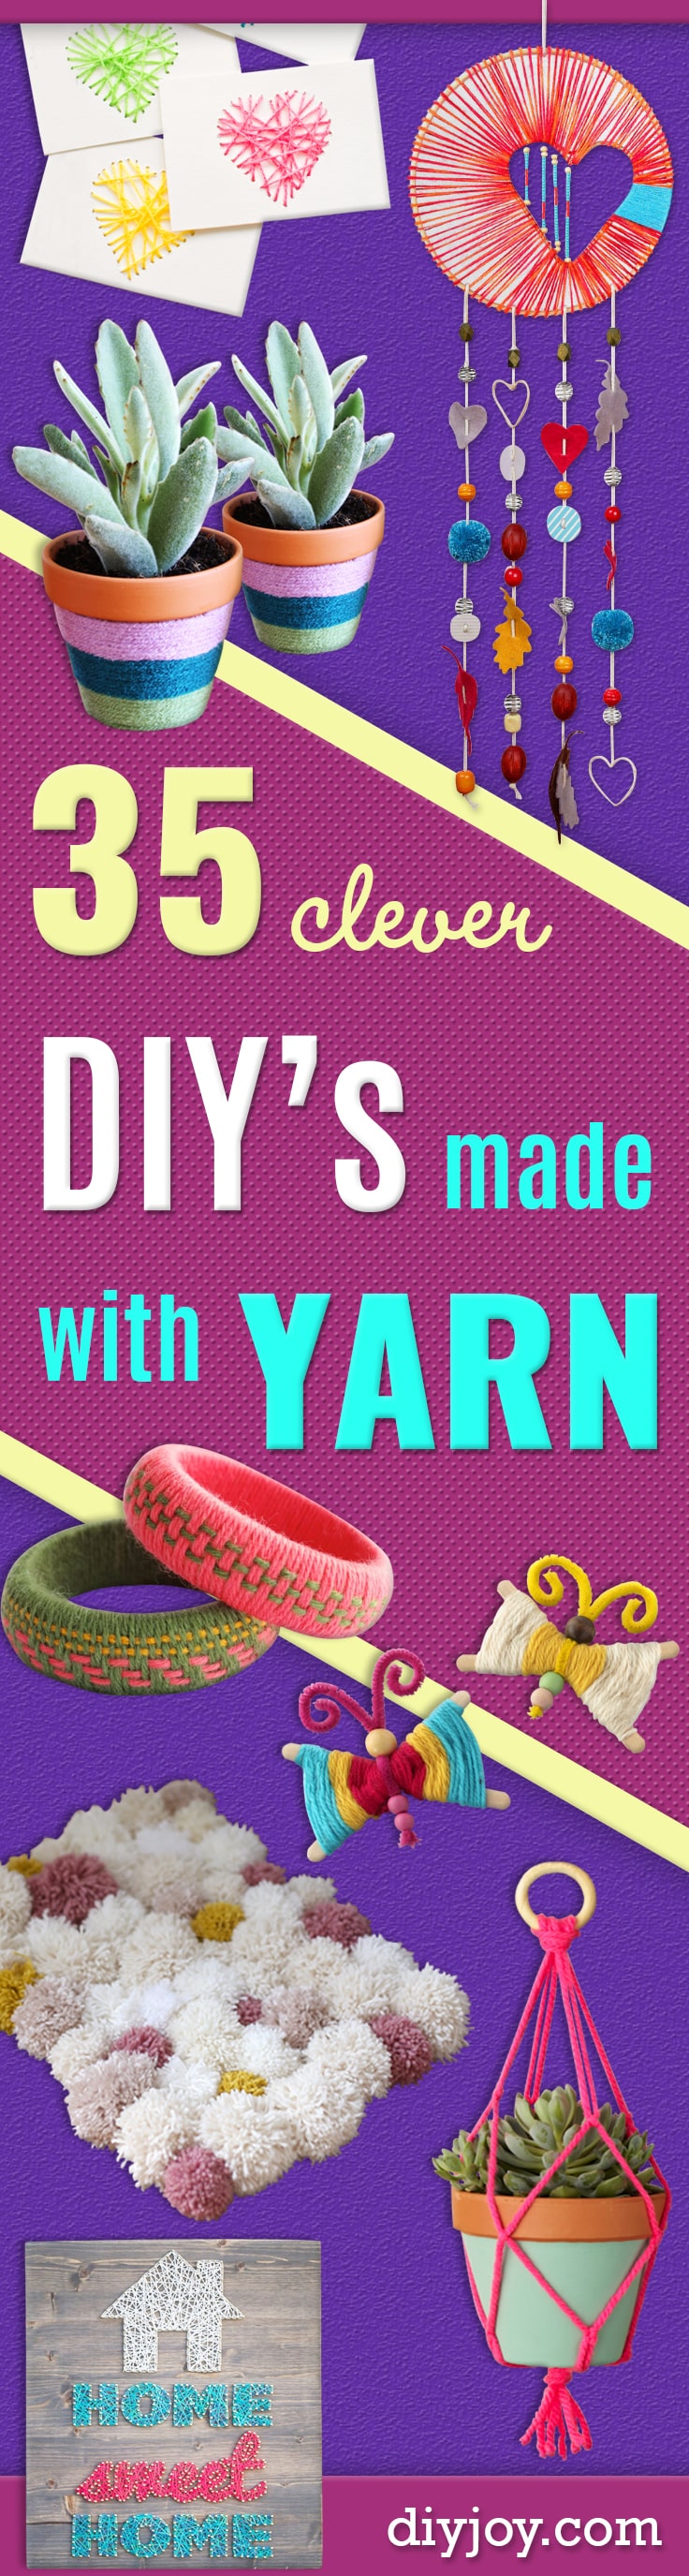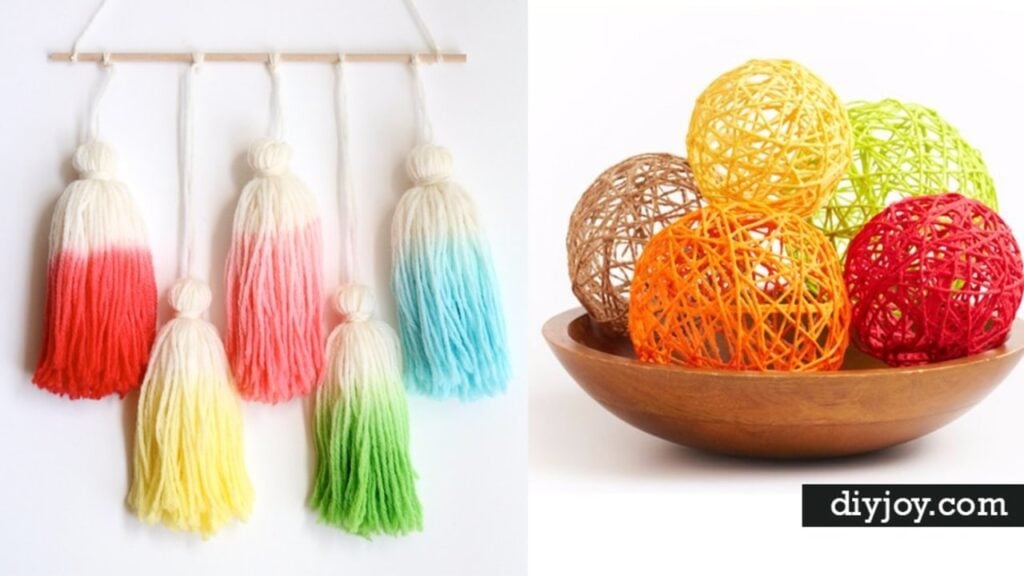
Every crafter has a basket of half-used skeins, and this is the list that finally empties it. These 32 easy DIY yarn crafts need no knitting needles or crochet patterns: most use wrapping, knotting, gluing or a simple pom pom made around your fingers or a fork. There are big statement pieces, like a pom pom rug, an ombre lampshade and a wedding-ready yarn backdrop, and small quick ones, like a pom pom bookmark, yarn wrapped pine cones and a woven mug cozy. A whole batch of DIY JOY originals with step by step videos is mixed in too, from fluffy yarn chicks to a tiny yarn dog. Here’s the best trick for pom poms: wrap more times than seems right, because a full bundle trims into a round, fluffy ball and a thin one never does. Find even more ideas on the yarn crafts hub.
1. Macrame Yarn Garland DIY
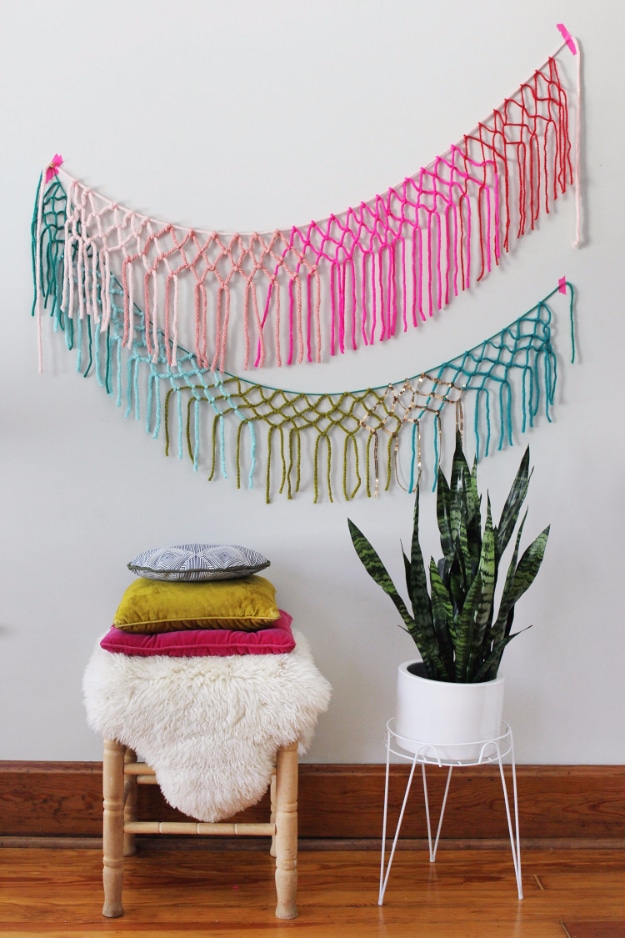
A macrame yarn garland adds a lot of color to a blank wall in about an hour, and it uses chunky yarn instead of rope. Cut one base strand about 8 feet long and pin it to the wall, then cut 30 to 35 pieces between 2 and 3 feet long. Tie each piece over the base about every 2 inches. Start the second row by skipping the first strand and knotting neighboring pairs together, which creates the classic macrame diamonds. Trim the fringe even at the end. It’s a great party backdrop too.
Get the full tutorial at A Beautiful Mess.
2. Yarn Wrapped Flower Pots

Yarn wrapped flower pots dress up plain terra cotta in a few minutes, and cheap yarn is perfect for them. Spread glue over the pot with a sponge brush, skipping the rim. Glue the first half inch of yarn just under the edge, then wrap the first full row right against it so the loose end is hidden. Hold the first few rows in place by hand, and after that they stay on their own. To change colors, cut the yarn at the back of the pot and start the new shade there.
Get the full tutorial at Celebrations at Home.
3. Yarn Ombre Lampshade Tutorial

A yarn ombre lampshade is an easy, high impact makeover for a thrifted lamp. Put a dab of hot glue about 2 inches above the bottom of the shade and wrap round and round, nudging each row down with your fingertips. To blend into the next shade, wrap the first color loosely with big gaps, glue on the second color and wrap it in between. Tuck the first yarn inside the shade so it doesn’t tangle. Keep fading lighter toward the top, and finish with a few stripes of the darkest color.
Get the full tutorial at Vintage Revivals.
4. How to Make Pom Pom Hearts
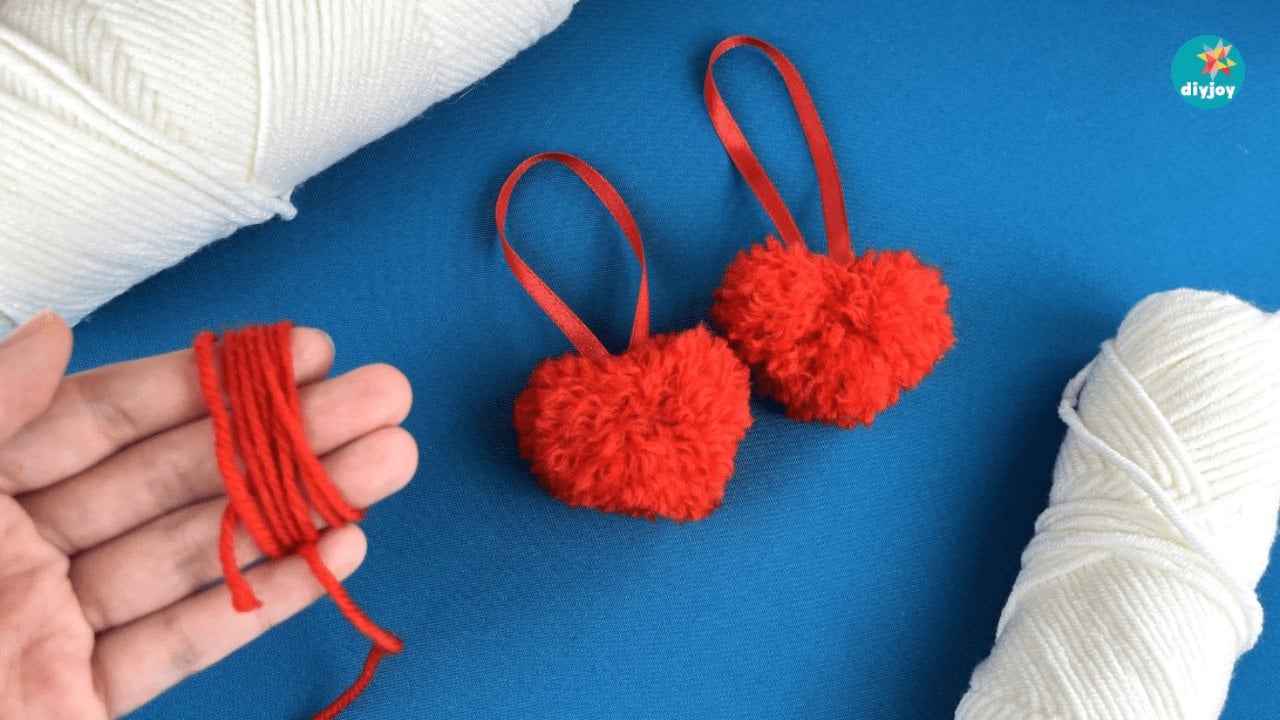
Pom pom hearts take about 3 minutes each and are a great way to use up leftover yarn. Wrap yarn around three fingers 70 times, slide the bundle off and tie a short piece of yarn tightly around the middle. Cut through the loops on both sides to make a basic pom pom. Lay a paper heart template on top and trim around it with sharp scissors, then comb the strands so they puff up. Glue on a ribbon loop or a keychain ring, or use them as hair clips, pins or gift toppers.
Get the full tutorial at DIY JOY.
5. How to Make Pom Pom Flowers Using a Fork
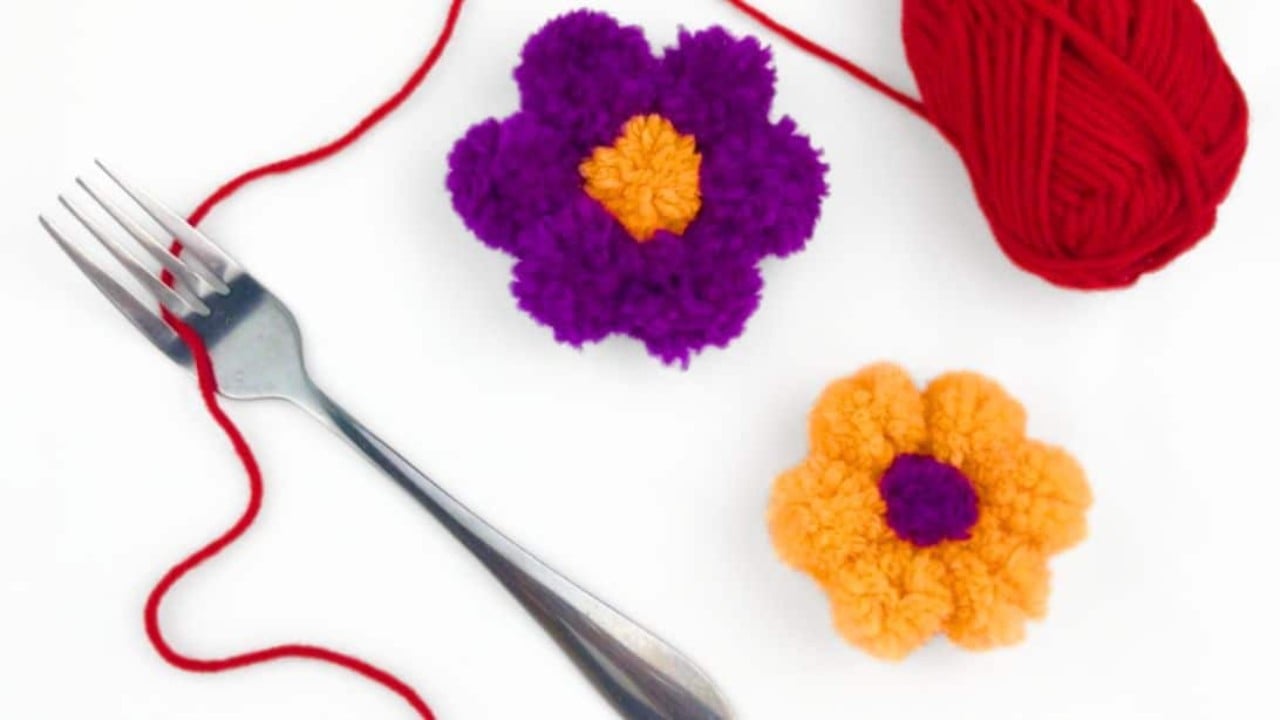
Pom pom flowers made with a fork need no special tools, just yarn in two colors, a paper clip and tape. Wrap yarn around the fork tines 30 times, tie a short piece through the middle tines, then slide the bundle off and cut the loops. Fluff it with the fork and trim it round. Make one pom pom for the center and six for the petals. Straighten a paper clip and tape yarn to it for a quick needle, thread the petals together, tie them off and add the center pom pom.
Get the full tutorial at DIY JOY.
6. How to Make Flowers Using Yarn
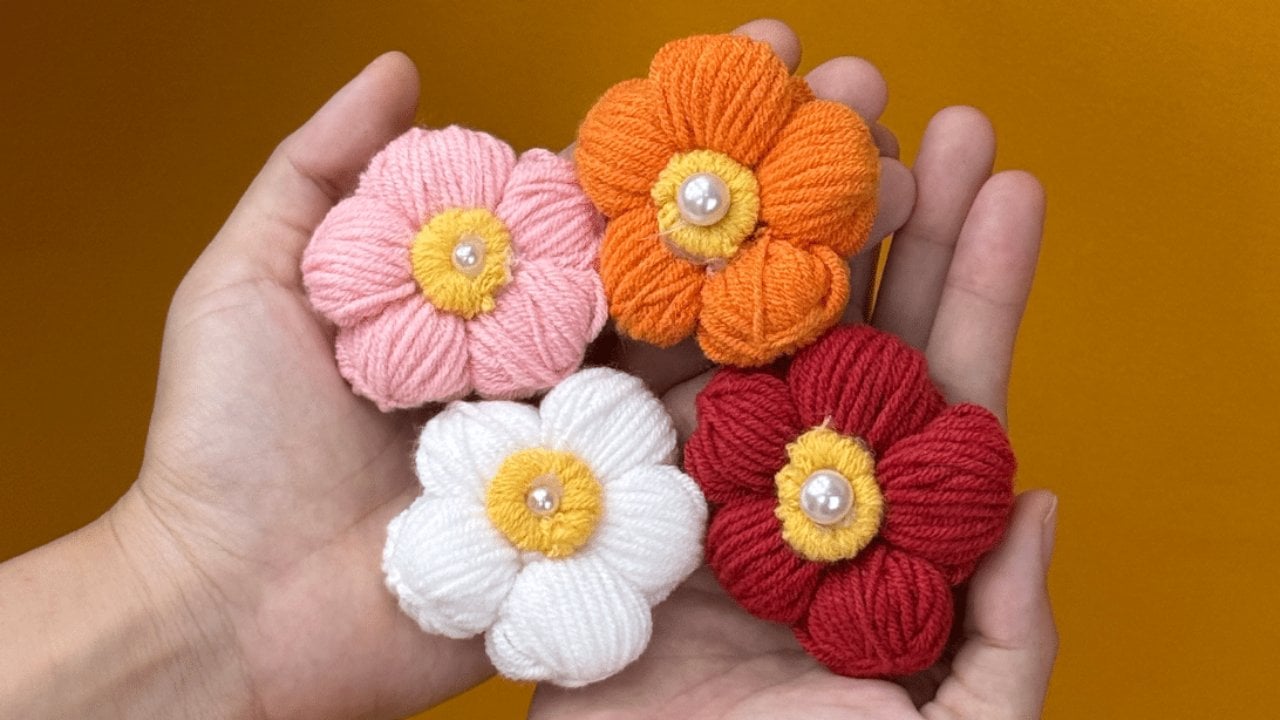
DIY yarn flowers made around a fork come together in about 15 minutes, and they never wilt. Wrap yarn around the fork 30 times, then sew through each side of the loops with a needle to lock them into a petal. Slide it off and repeat for five petals, then stitch them together into a flower. For the center, wrap yarn around a straw, tie it tight and slide it off. Glue a pearl in the middle, wrap a stick in green yarn for the stem and attach it with hot glue.
Get the full tutorial at DIY JOY.
7. Easy DIY Pom Pom Wreath
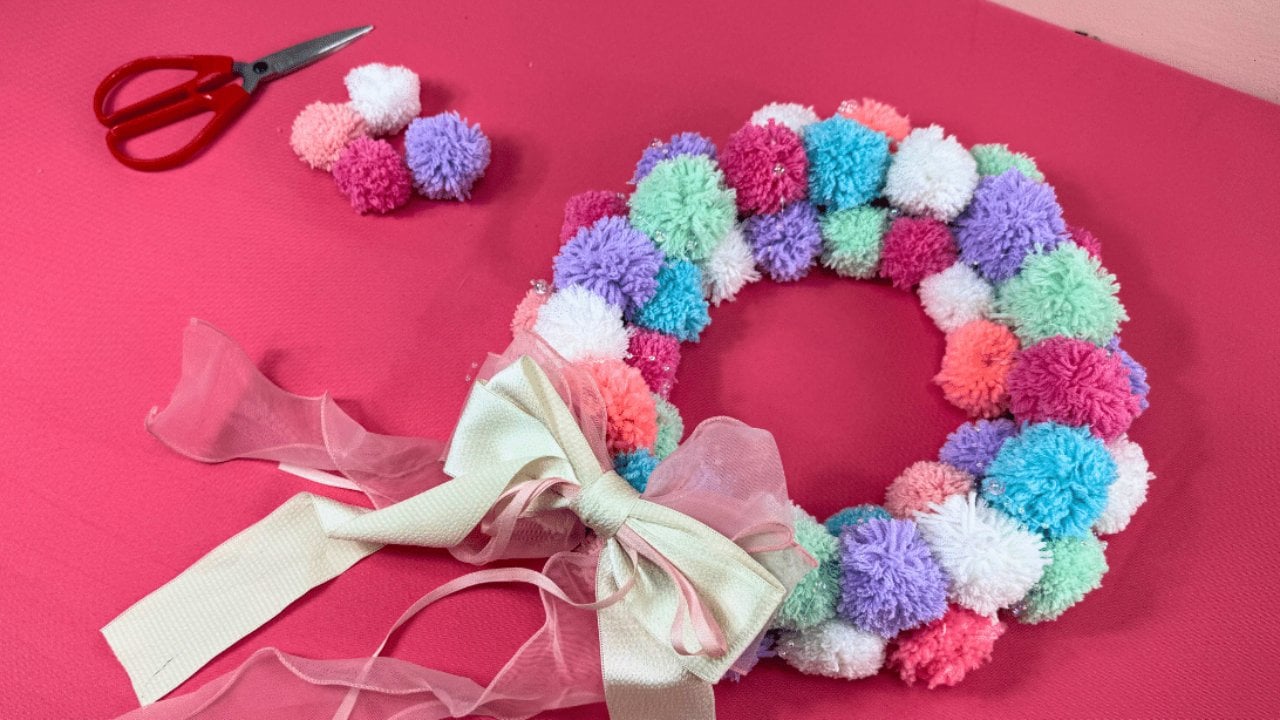
A yarn pom pom wreath is an affordable way to bring a pop of color to the front door. Wrap yarn around a large cardboard rectangle 80 times, tie it tight in the middle, slide it off and cut the loops. Knot it a few times so it won’t unravel, then trim it into a ball. Make about 16 large pom poms in mixed colors and around 18 smaller ones. Hot glue the large ones around the wreath form, then fill the inside and outside edges with the small ones. A beaded wire and a ribbon finish it.
Get the full tutorial at DIY JOY.
8. Yarn God's Eye Tutorial

Yarn god’s eyes are a classic camp craft that look surprisingly modern on a wall. Lay two dowels side by side, tie them together at the middle with a double knot, then twist them into a cross. Wrap the yarn over each dowel, around the back and over the top before moving to the next one, and the diamond pattern builds itself. Switch to wrapping under the dowels for a different texture, and change colors or yarn weights as you go. Finish the ends with tassels and group a few as a wall hanging.
Get the full tutorial at Craftaholics Anonymous.
9. Creative Yarn Chandelier

Yarn chandeliers made over balloons are budget friendly and work for birthdays, baby showers and beyond. Hang inflated balloons from a dowel between two chairs, with plastic underneath, and coat each one in petroleum jelly so the yarn won’t stick. Mix school glue with about half a cup of cornstarch and a quarter cup of water into a paste. Dip the yarn, squeeze out the extra and wrap the balloon vertically, then horizontally. Let them dry a full 24 hours before popping the balloons and tapping off any glue crystals.
Get the full tutorial at Hostess with the Mostess.
10. DIY Easy Yarn Backdrop

A DIY yarn backdrop looks like macrame but needs only rings, yarn and a dowel. Knot macrame rings into a row and wrap each one with yarn. Cut lengths twice as long as the finished backdrop and tie them onto the rings with slip knots, mixing shades for color blocks. Tie the rings to a dowel and add a 2 foot hanging loop. Gather each section at the middle of its ring with a short tie, then split and rejoin neighboring bundles to make a lattice. Trim the bottom straight for a clean finish.
Get the full tutorial at Ruffled.
11. Home Sweet Home Yarn String Art

Home sweet home string art is easier than it looks and makes a sweet housewarming gift. Print the words and a little house shape, tape the pattern to a stained wood board and hammer small nails along every outline. Tear the paper away, then tie string to one nail and wrap it back and forth across the shape until it fills in, holding the string down with a thumb at each nail. Start with a simple letter for practice if string art is new. A picture hanger on the back makes it ready for the wall.
Get the full tutorial at Infarrantly Creative.
12. DIY Lantern Chandeliers

DIY string chandeliers made from balloons, glue and twine can light a wedding and then come home as a mid century lampshade. Blow up a balloon a little under full size so it stays round, and mark a circle around the knot big enough for a light fitting. Coat the balloon in petroleum jelly. Mix glue, cornstarch and warm water until smooth, run the twine through it and wrap the balloon, leaving the marked circle open. Let it dry hanging, then pop and pull out the balloon. Lay a tarp down first, since it gets messy.
Get the full tutorial at Merry Brides.
13. How to Make a Yarn Dog
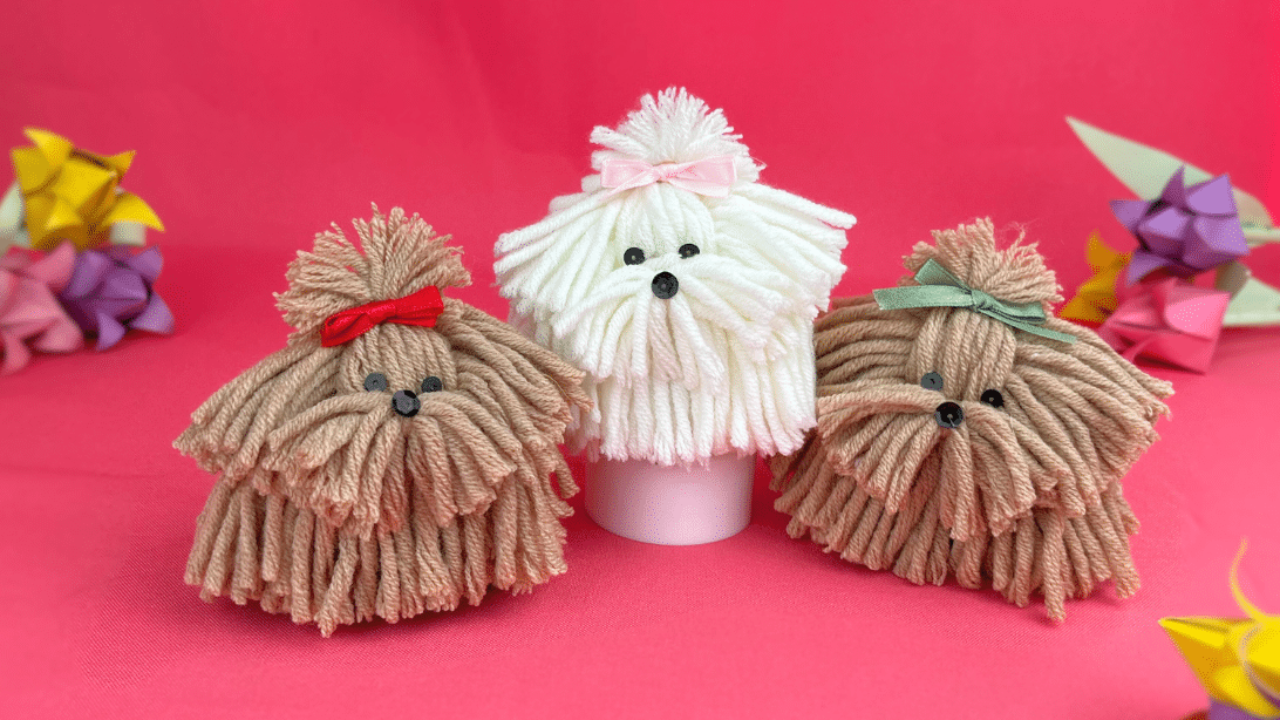
A yarn dog is the cutest way to use up leftover yarn, and the body is built on a wine cork. Wrap yarn around three fingers 10 times, tie the middle, cut one side and trim to make a small tuft. Make nine of these for the body. Then wrap four fingers 95 times, tie and cut it the same way for the head and fluffy fur. Hot glue eight tufts along the top of the cork, build up the head with more glue and yarn, and finish with bead eyes, a nose and a ribbon collar.
Get the full tutorial at DIY JOY.
14. How to Make a DIY Yarn Dog Keychain
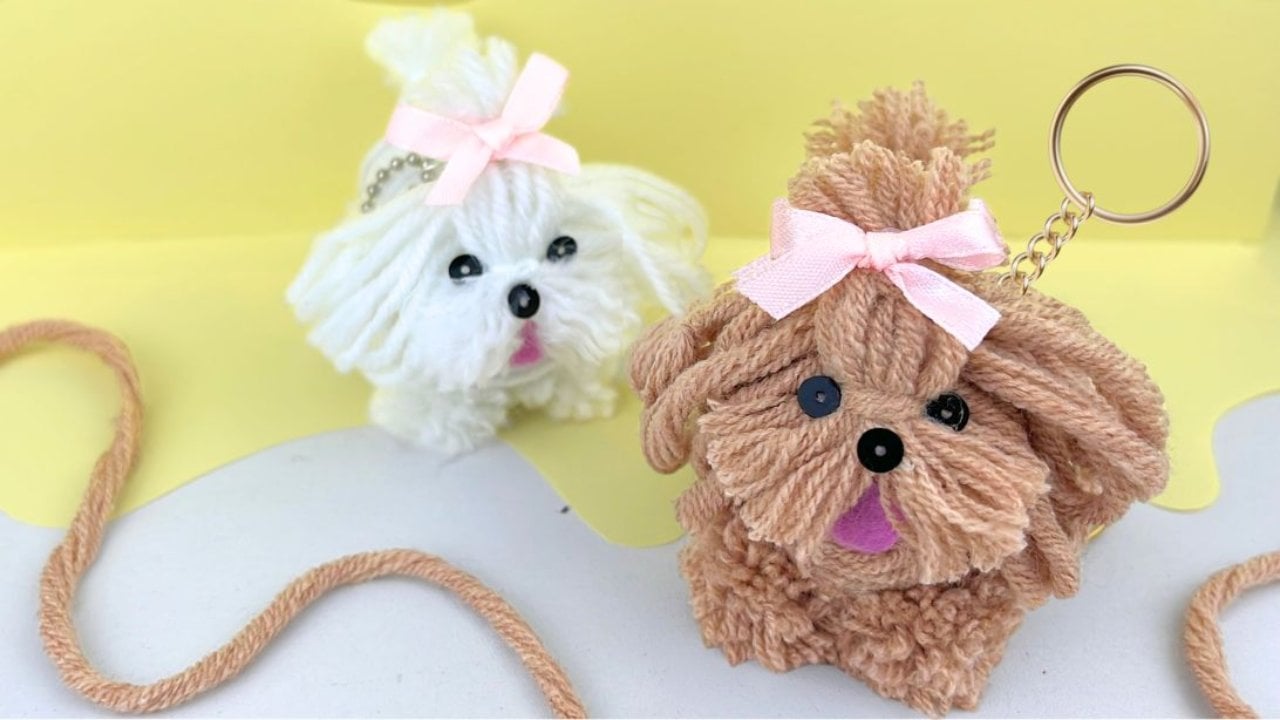
A yarn dog keychain is a tiny bag charm that can match the real family dog. Shape an oval of air-dry clay about 1 7/8 inches long and 7/8 inch wide, push an eye pin into the middle and let it dry completely. Wrap the clay body in yarn from end to end until it’s covered. Make small pom poms for the head and ears, trim them into shape and glue everything together. Add tiny eyes and a nose, then clip on a keyring. It works as a bag charm, a keychain or desk decor.
Get the full tutorial at DIY JOY.
15. Yarn Ball Bookmark

A yarn ball pom pom bookmark is an easy anytime gift for a book lover, and it needs only yarn and sharp scissors. Cut an 8 to 10 inch piece and a 15 inch piece of yarn and set them aside. Wrap the yarn around your fingers 90 times, snug but not tight, then slide the bundle off onto the shorter piece and knot it tightly around the middle. Tie the long piece on as the tail that sits in the book, then cut the loops and trim the pom pom into a round, fluffy ball.
Get the full tutorial at Design Mom.
16. DIY Arm Knitting

Arm knitting makes a chunky, rich looking blanket with no needles at all, because your forearms do the work. Cast the stitches onto one arm, then pull each new loop through and pass the stitches back and forth from arm to arm to build every row. Super bulky yarn, or a few strands held together, gives the plush, oversized loops that make these blankets so cozy, and a throw grows fast enough to finish in an afternoon. Some crafters even knit on their legs instead. Make one for the couch or wrap it up as a holiday gift.
Get the full tutorial at DIY JOY.
17. Easy DIY Yarn Chicks
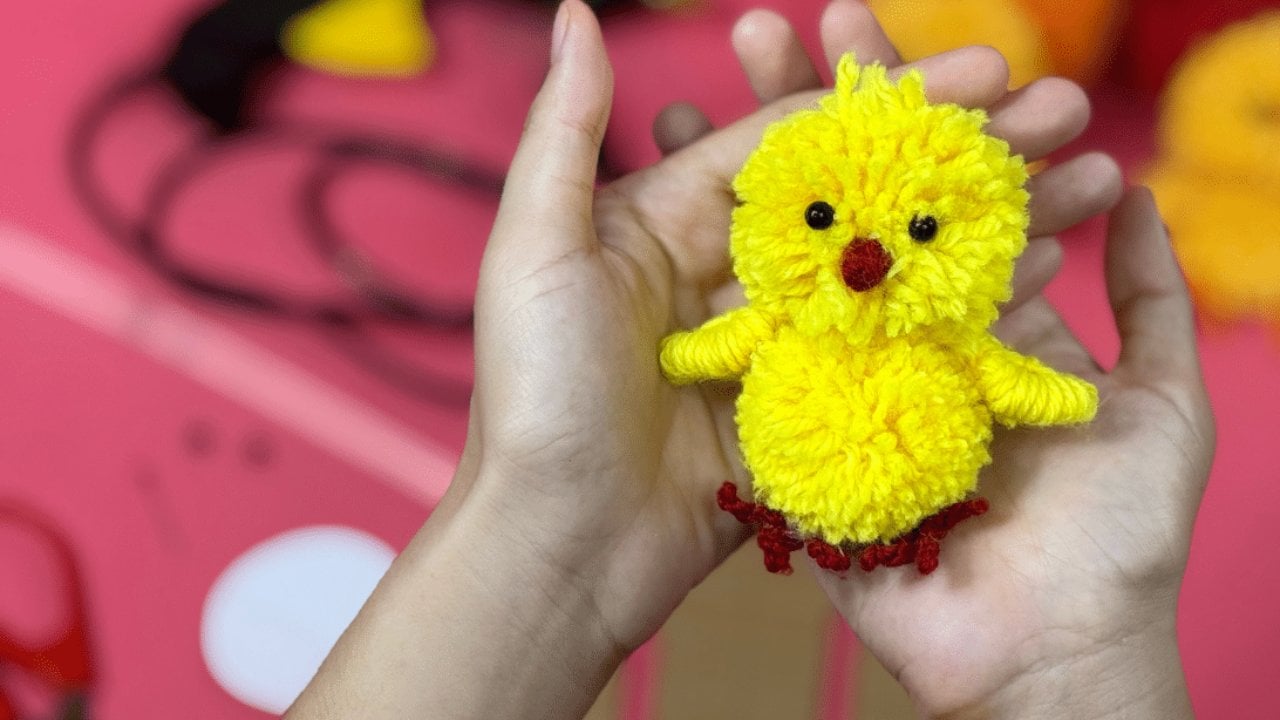
DIY yarn chicks are budget friendly and need only yarn, beads and hot glue. Wrap yarn around a large cardboard rectangle 150 times, counting carefully, then tie the loops tightly in the middle and slip them off. Cut through the loops and trim the bundle into a round ball using a paper circle as a guide. Make a smaller pom pom the same way for the head. Glue the two together, then add bead eyes, a tiny beak and little feet. Leftover yellow yarn works perfectly.
Get the full tutorial at DIY JOY.
18. Warm Fuzzies Centerpiece

A warm fuzzies centerpiece fills an apothecary jar with yarn wrapped foam balls for instant winter coziness. Brush a thin coat of tacky glue over half of a foam ball, then start winding yarn in small circles from the top and keep wrapping horizontally. Let that half dry, then glue and wrap the second half, holding the finished side. Tuck the tail in when you reach the end. Acrylic yarn in a thicker strand wraps more easily than alpaca. A dozen balls in two sizes took about two hours.
Get the full tutorial at The Hyper House.
19. Easy DIY Yarn Birds
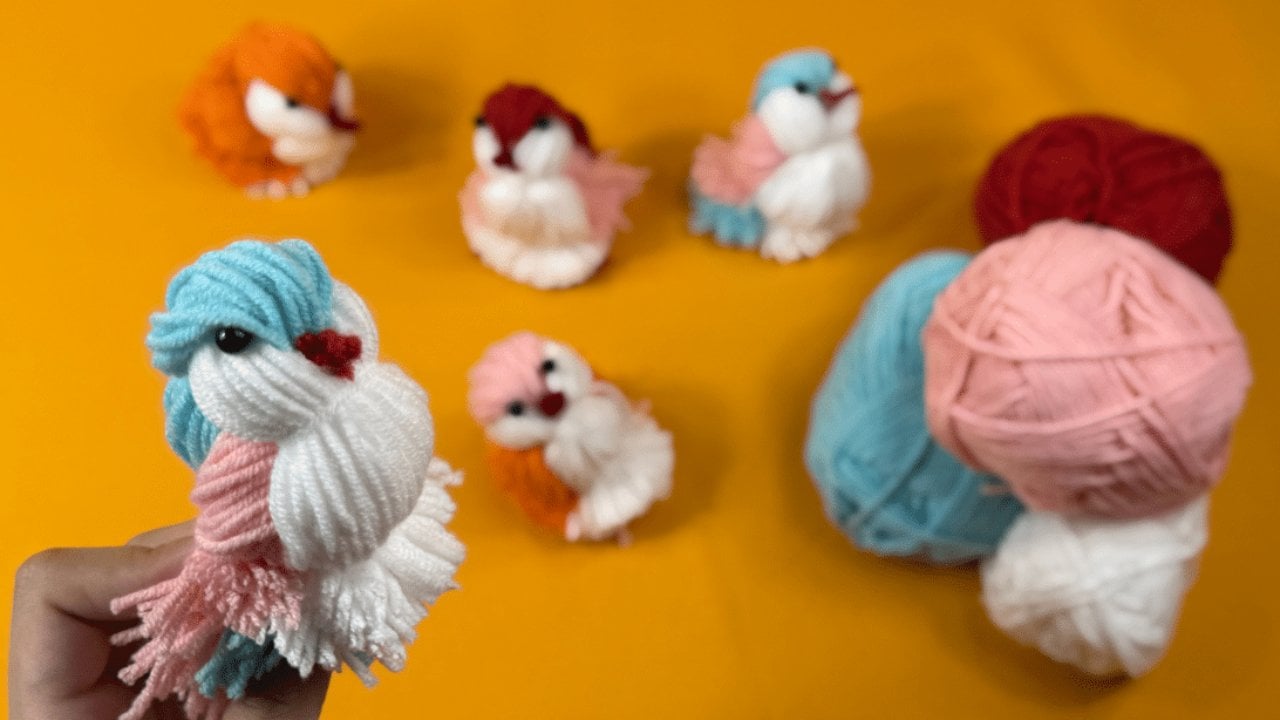
Easy DIY yarn birds take about 5 minutes each and need just yarn, beads and a cardboard template. Wrap white yarn around the length of the template 50 times and cut one end, then do the same with blue. Turn the template, wrap the width 50 times and tie that bundle around the middle. Wrap the blue around the white, tie each side to shape the head, then add a pink band for the wings. Trim the tail and glue on bead eyes. Hang them on a tree or add them to a spring wreath.
Get the full tutorial at DIY JOY.
20. DIY Pom Pom Rug

A DIY pom pom rug is a soft spot to stand on next to a crib or bed, and it’s all yarn, scissors and time. Wrap wool yarn around two fingers until the bundle is nice and thick, tie it tightly in the middle, then cut the loops and trim it round. Make a big batch in a neutral palette with a few pops of pink and yellow. Tie each pom pom through the holes of a non-slip rug mat from the hardware store, cut to size, and pack them close together so no mat shows.
Get the full tutorial at Say Yes.
21. Yarn Wrapped Recycled Bottles

Yarn wrapped recycled bottles turn empty glass into colorful vases, and the only supplies are yarn, decoupage glue and scissors. Brush glue onto a small section near the bottle’s neck and start wrapping there, working from the narrow top down toward the wider base. Add glue as you go and pack each row tight against the last. Switch colors whenever you like for stripes, or leave bands of bare glass showing. It gets a little sticky, but it’s worth it. Fill them with ranunculus or a few garden stems.
Get the full tutorial at Craft & Creativity.
22. Handmade Yarn Feather Tutorial

Handmade yarn feathers look delicate, but they’re made from floss, wire and liquid starch. Cut cloth-covered stem wire to length, glue one end and wind embroidery floss tightly down the wire and back again to make the spine. Cut lots of 3 inch pieces of floss and single-knot them along the spine, then brush them with liquid starch and comb them into a feather shape. Once dry, trim the edges into a curve. Baker’s twine, yarn or jute all work, and the feathers look gorgeous tucked into a wreath.
Get the full tutorial at Infarrantly Creative.
23. DIY Easy Yarn Chandelier
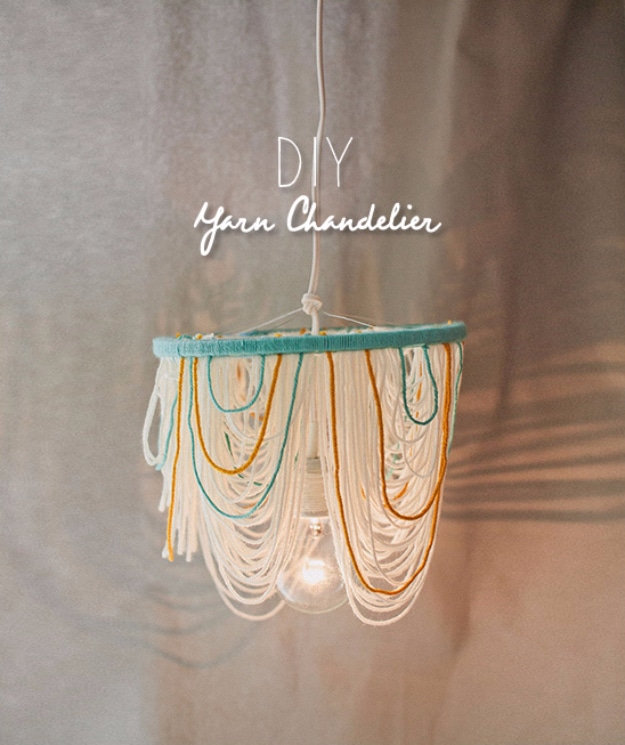
An easy yarn chandelier uses a 12 inch sewing hoop and a lamp cord to make a soft, cozy pendant. Loop lengths of cream yarn around the inner hoop until it’s full, then mix in a few pieces of color, like mustard and teal. Secure a center wire across the hoop for the lamp attachment and press the outer hoop over the inner one to lock the yarn in place. Wrap the light socket in yarn and knot the cord to the center wire. A vintage Edison bulb gives it a warm, nostalgic glow.
Get the full tutorial at Wedding Chicks.
24. Easy DIY Woven Yarn Mug Cozy
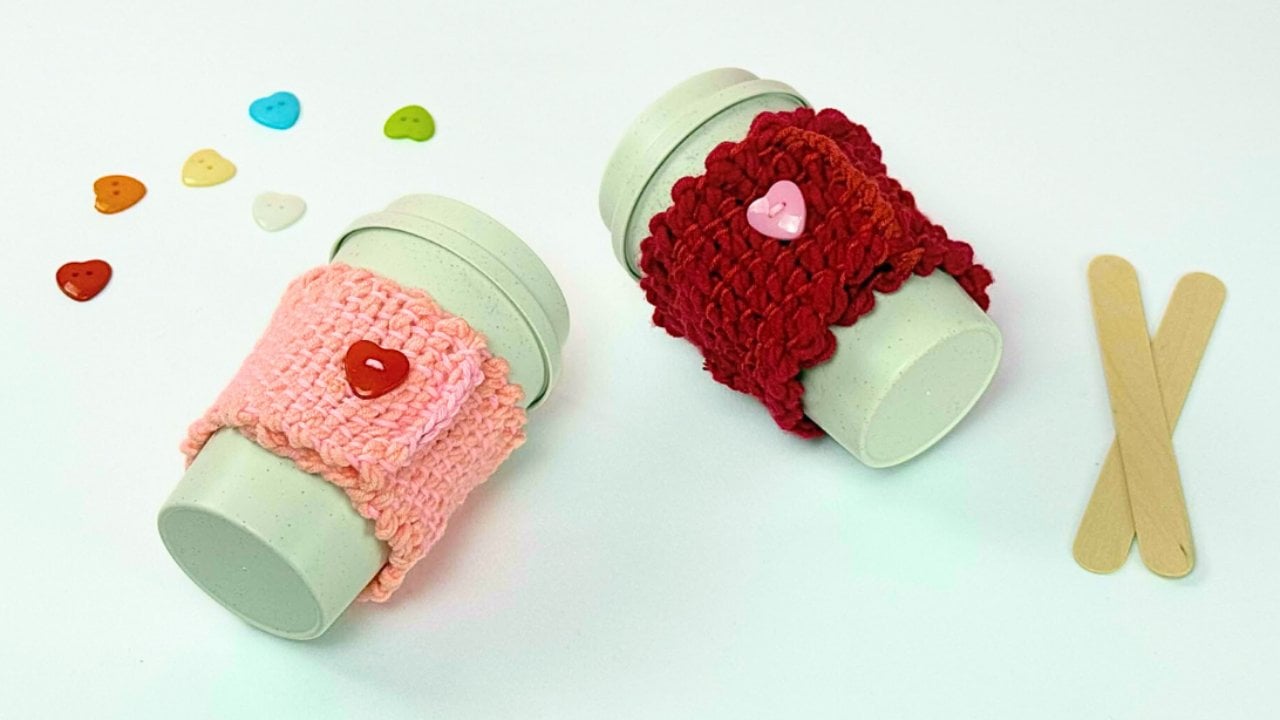
A woven yarn mug cozy is a crochet-free gift that’s woven on a scrap of cardboard. Measure around the mug and cut cardboard to that length and the width you want, then notch both ends about 1 cm deep and 1 cm apart. Knot yarn at the first slit and stretch it back and forth through the notches for the vertical strands. Weave a second yarn over and under those strands, row after row, pushing each row snug. Twisting the yarn first adds extra texture. Slide it off and button it around a mug.
Get the full tutorial at DIY JOY.
25. Woven Craft Stick Butterflies

Woven craft stick butterflies use a god’s eye style weave to make the wings, and they’re a fun spring or summer craft for kids 7 and up. Cross two craft sticks into an uneven X and wrap yarn around the center until they hold. Wind the yarn around one half of the frame first, then switch to a figure 8 when you reach the gap between the sticks. Change colors by tucking the old end into the winding. Add two small beads and a larger head bead plus pipe cleaner antennae.
Get the full tutorial at The Craft Train.
26. Yarn Wrapped Ombre Monogrammed Letter

A yarn wrapped ombre monogrammed letter makes a pretty party decoration, nursery accent or baby shower gift. Pick a wooden letter and three shades of one color, like light, medium and dark pink. Glue about 3 inches at a time on the back, top and bottom of the letter and wrap the yarn snugly, adding glue as you move up. Leave the yarn ends long until everything is dry, then trim. Plan the color changes before starting so the fade stays even. Finish with a few sticky-back flower embellishments.
Get the full tutorial at Catch My Party.
27. Simple Heart String Art

Heart string art is a great first string art project, and pre-drilling the nail holes is the secret that makes it easy. Trace a simple heart template onto a scrap board and mark nails every half inch around the edge of the board and the heart. Drill small pilot holes, then tap in flat-top wire nails so they stand straight. Tie yarn or baker’s twine to one nail and wrap back and forth between the heart and the border, switching colors for a rainbow. Hot glue the knots so they stay put.
Get the full tutorial at Sugar Bee Crafts.
28. Easy Finger Crochet Yarn Bow Tutorial
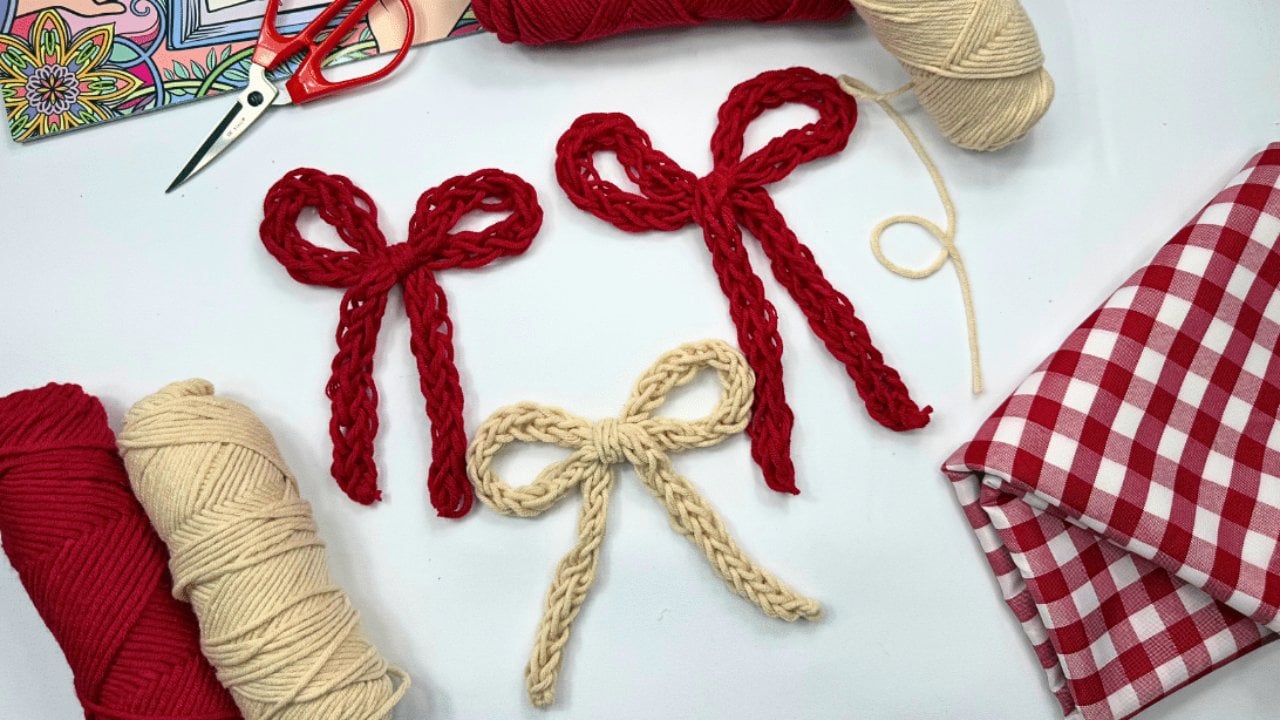
A finger crochet yarn bow needs no crochet hook at all, so it’s a great first project for anyone curious about crochet. Wrap the yarn around your thumb three times, then weave it across your fingers, in front of the index finger, behind the middle, in front of the ring finger and behind the pinky. Work back across to build the second row, then lift the lower loops over the top ones to form stitches. Keep going until the band is long enough, pinch the middle and tie it into a bow.
Get the full tutorial at DIY JOY.
29. Yarn Pine Cones Centerpiece

Yarn wrapped pine cones are about the simplest holiday decor there is, and they need no glue. Grab leftover yarn and a bag of pine cones, tie the yarn near the base and wind it around the cone, pulling it deep into the crevices as you go. The tight scales near the bottom grip the yarn and hold it in place on their own. Mix colors, like teal, purple and green, and stop partway up for a two tone look. Pile them in a pretty bowl or tie one onto a gift as a topper.
Get the full tutorial at Family Chic.
30. 3 Easy DIY String Art Ideas
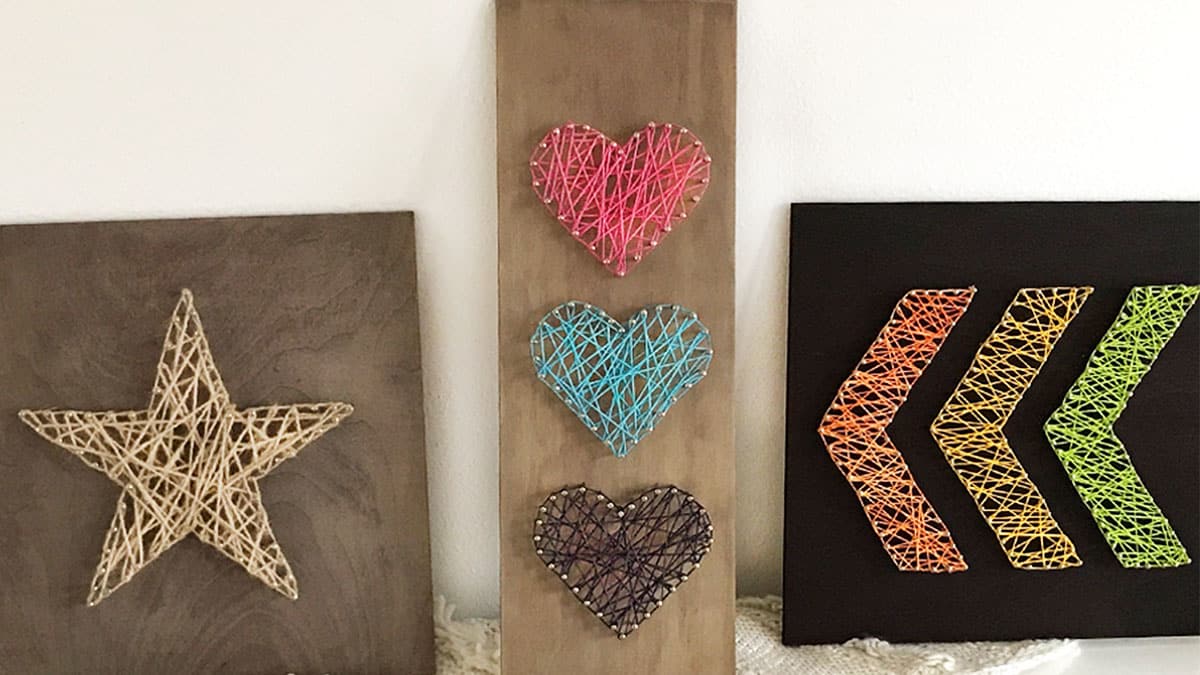
DIY string art looks impressive but needs no artistic skill, just a few basic techniques. Print a simple graphic, like a heart or a star, and lay it on a wood plank. Hammer small wire or linoleum nails along the outline, spacing them evenly, then tear the paper away. Tie twine, cord or embroidery thread to one nail and wrap it around the shape, crisscrossing to fill the inside or tracing the edge. A twine wrapped star looks rustic, and a set of hearts in bright thread feels playful.
Get the full tutorial at DIY JOY.
31. DIY Pom Pom Bunny
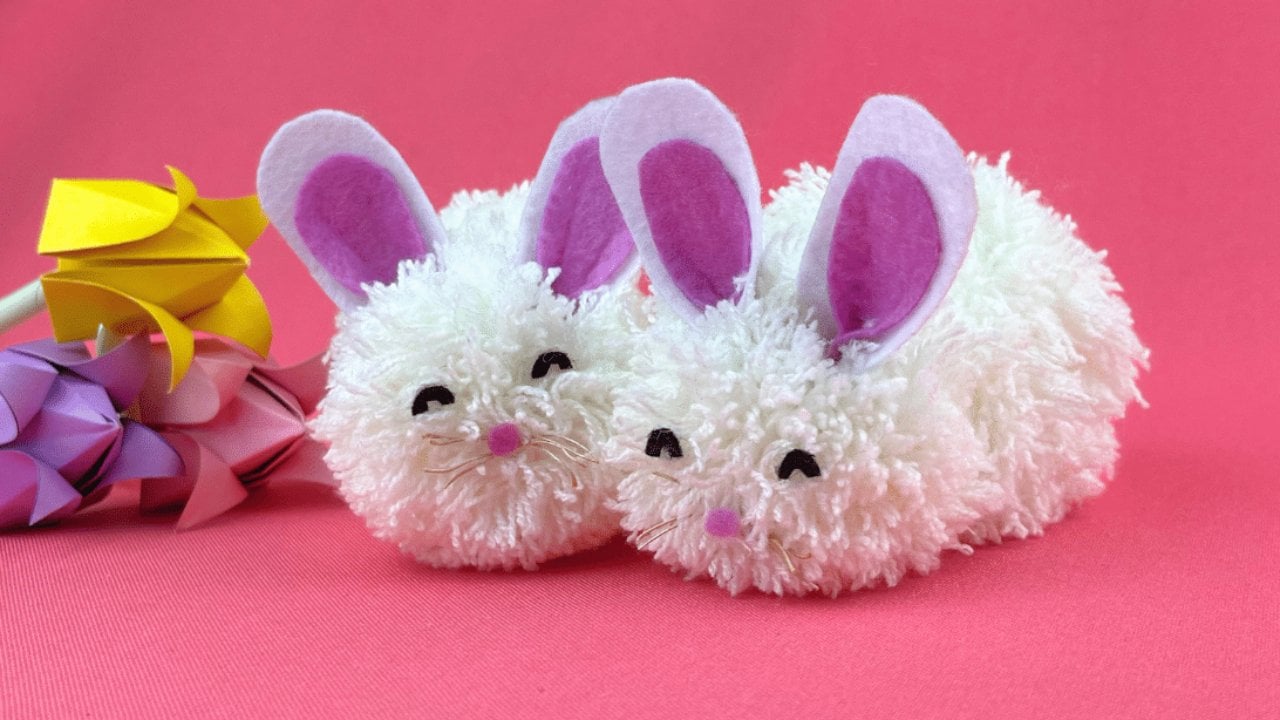
A DIY pom pom bunny is a fun Easter craft to make with kids. Stack two large cardboard circles, wrap yarn around them many times, cut through the loops and tie a double knot between the cardboard. Slide it off, trim and comb it fluffy for the body. Repeat with smaller circles for the head. For the tail, wrap yarn around two fingers 40 times, tie, cut and trim. Glue the three pom poms together, then add felt ears, eyes and a nose. Beads work for the eyes too.
Get the full tutorial at DIY JOY.
32. DIY Yarn Christmas Tree
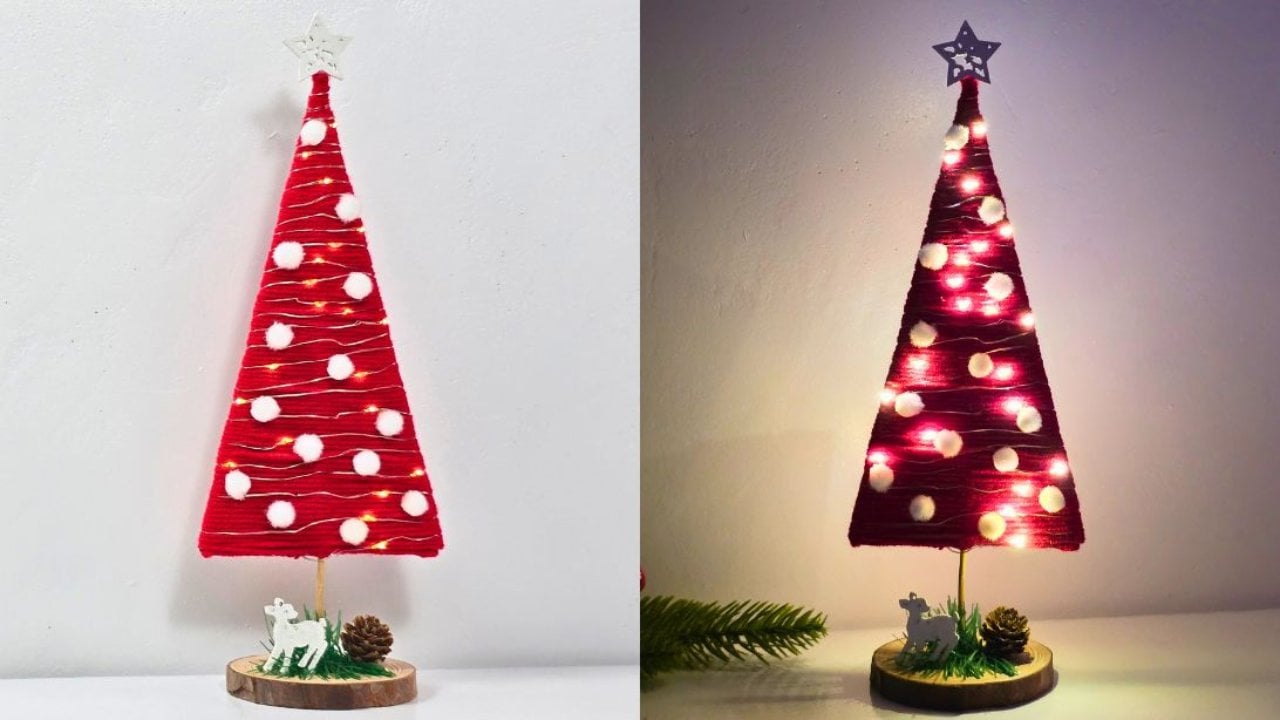
A DIY yarn Christmas tree comes together in about 10 minutes and uses mostly craft drawer supplies. Cut a triangle from cardboard and hot glue a skewer down the center for the trunk. Put a dab of glue at the top and wrap chunky red chenille yarn around the triangle, working down to the bottom and gluing the end, including underneath, so no cardboard shows. Stand the tree in a wood slice, then decorate it with tiny pom pom balls, a strand of battery fairy lights and a few small embellishments.
Get the full tutorial at DIY JOY.