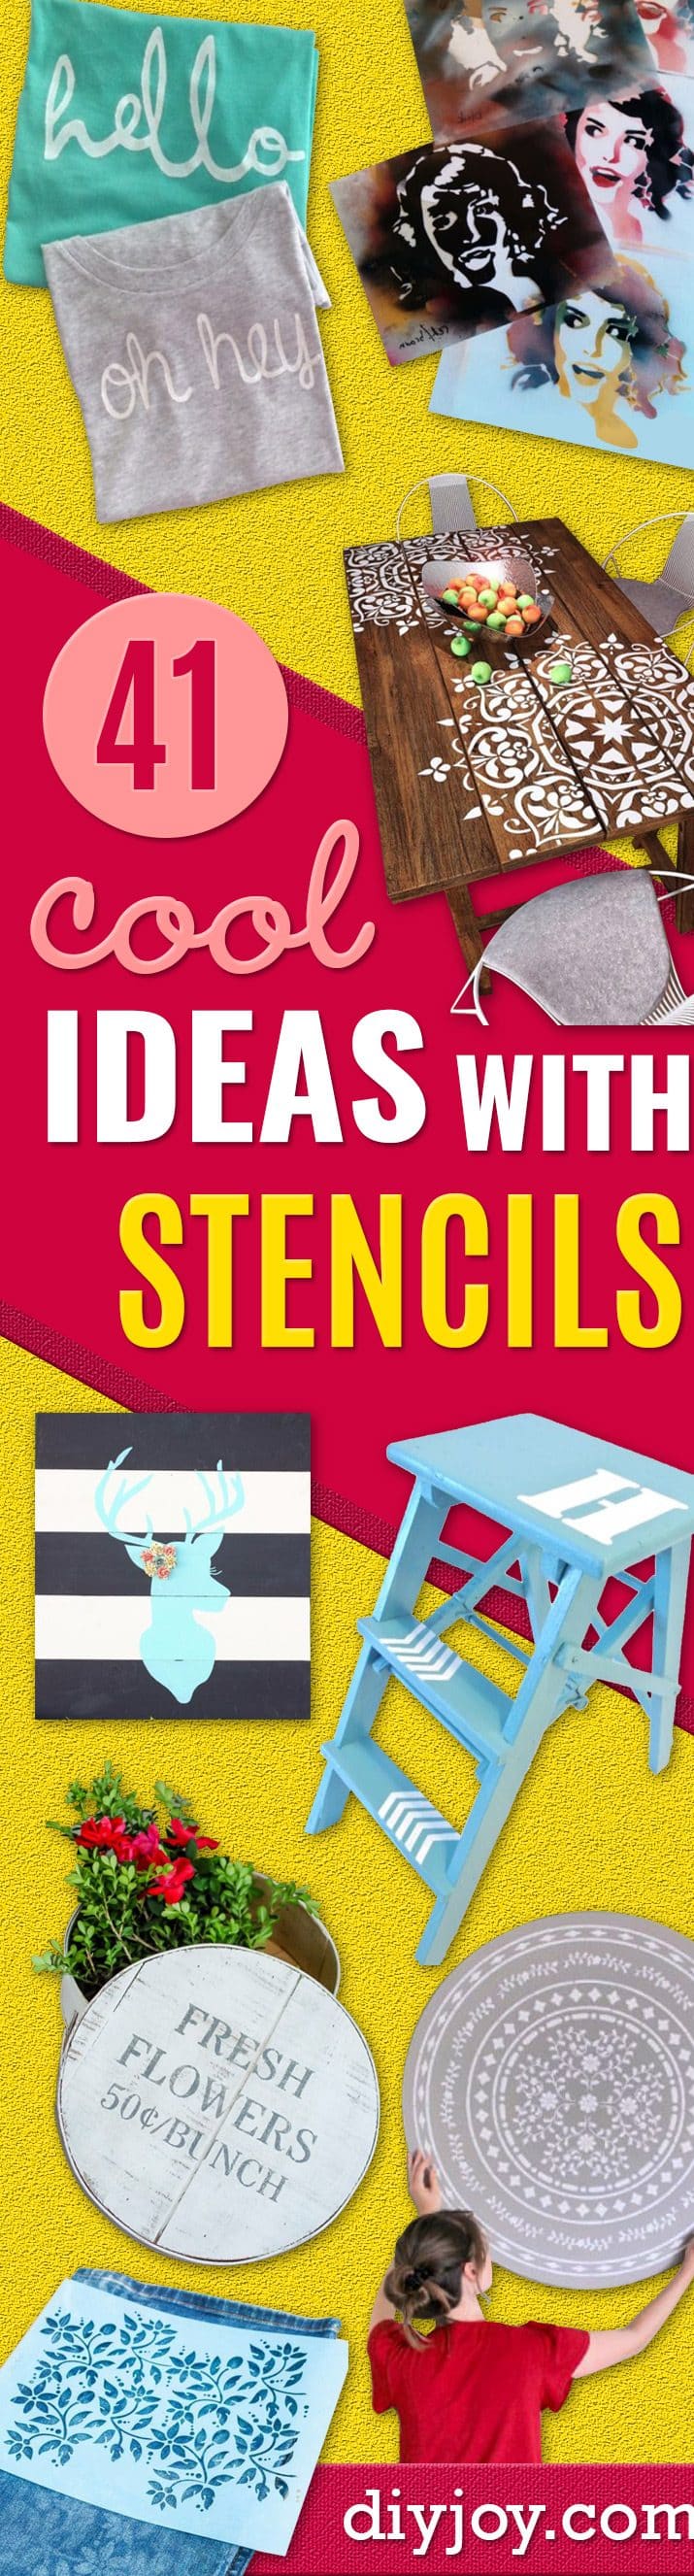
A stencil is the cheapest way to put a pattern on something, and it is also the fastest way to ruin a wall if you load the brush the way you would for painting. Nearly every tutorial on this page says the same thing in different words: use almost no paint, offload most of it onto a paper towel, and tap rather than stroke. Get that one habit and these DIY stencil ideas open up a lot of surfaces. There is a freezer paper shirt you can cut with an X-Acto knife, a mandala the size of an outdoor rug painted straight onto deck boards, a round table that ends up looking like bone inlay, a gold bee wall, bleached jeans, stenciled placemats and a ceiling. Here are 27 of them, each linked to its full tutorial.
Table of Contents
- 1. Farmhouse Touch on Your Stencils
- 2. DIY Freezer Paper Stencil Shirt
- 3. Stenciled Ladder Makeover
- 4. DIY Stencil Wall
- 5. Monogrammed Tote
- 6. DIY Stenciled Jeans
- 7. Stenciled Cork Board Table
- 8. DIY Ikea Stool Stenciled Slipcover
- 9. Stencil a Deck Using a Mandala Pattern
- 10. DIY Fabric Paint Stenciled Placemats
- 11. Moroccan Dreams Wall Art
- 12. Ceiling Stencil and Border Tutorial
- 13. Stenciled Wall Paper Fan Decor
- 14. Allover Wall Stenciling
- 15. Vintage Industrial Bar Stools
- 16. Stencil Canvas With Twinkle Lights
- 17. Kitchen Pantry Stencil
- 18. BEE-utiful Stencilled Wall
- 19. Stencil a Metallic Foil Wall Finish
- 20. Tribal Feather Wall Art
- 21. Bullet Journal Stencils
- 22. Stencil Film With a Silhouette
- 23. Stencil a Round Indian Inlay Table
- 24. Stenciled and Embroidered Pillow
- 25. Stencil an Accent Wall
- 26. DIY Stenciled Wrapping Paper With Martha Stewart Crafts
- 27. Watercolor Stencils and Doilies
1. Farmhouse Touch on Your Stencils
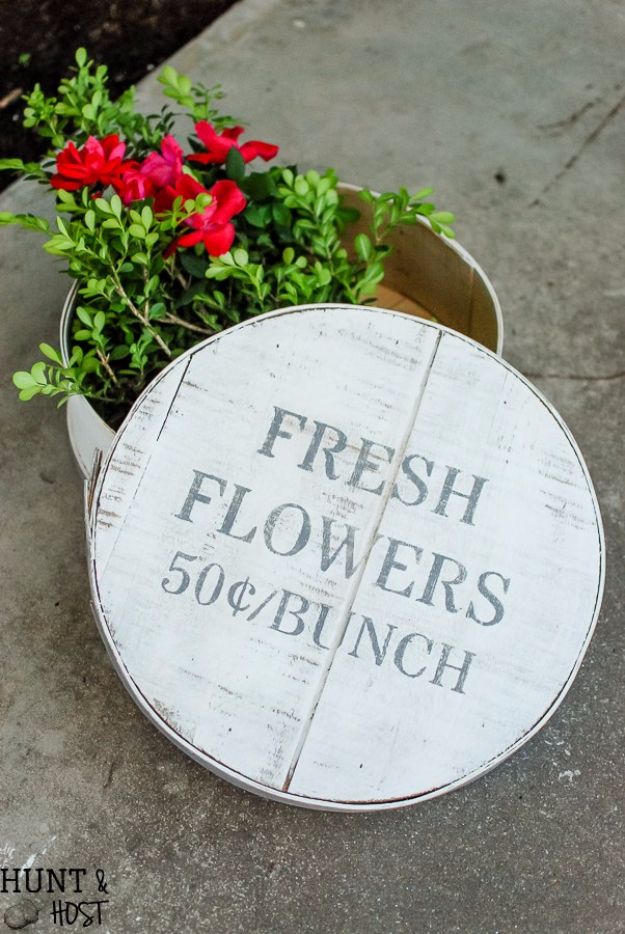
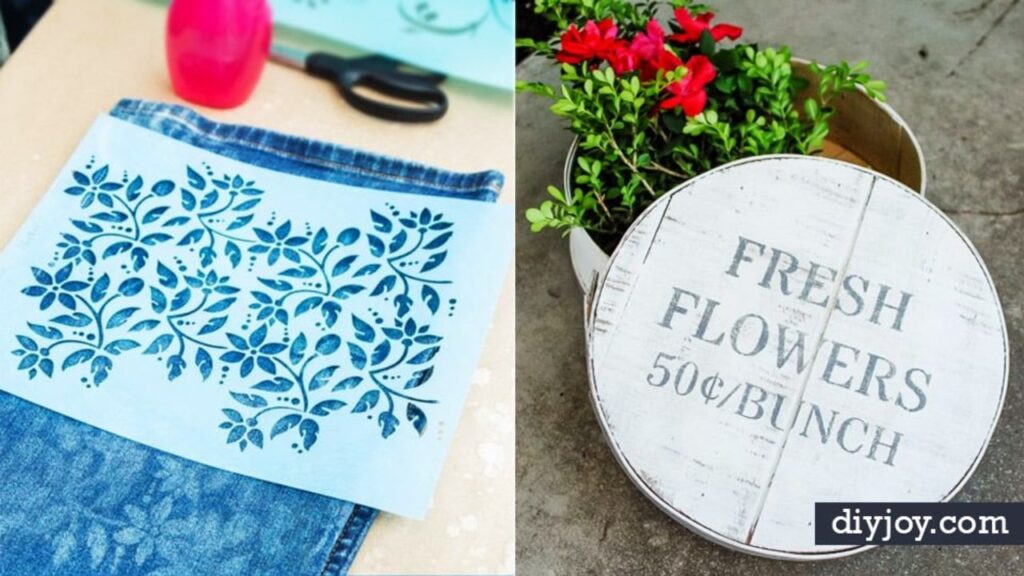
A vintage cheese box painted with farmhouse lettering, and the stenciling advice on this one is worth more than the project. Sand, base coat, center the stencil and tape it down, then load a round stencil brush by tapping it straight up and down and offloading most of the paint before it touches the surface. Blot vertically, never swipe sideways, and build the color in extra coats rather than one heavy one. Paint the connecting lines in by hand with a small stiff brush so it reads as lettering. Wash the stencil in warm soapy water straight away and finish with wax.
Get the full tutorial at Kim Pepper Blog.
2. DIY Freezer Paper Stencil Shirt
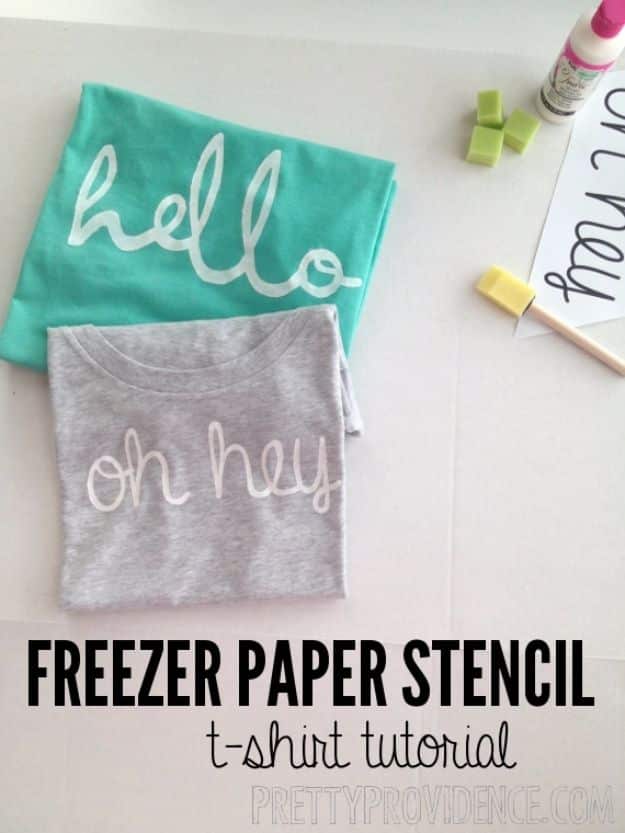
Freezer paper has a wax coating on one side, and that coating is the whole trick: ironed wax side down it sticks to fabric firmly enough to paint against, then peels off clean. Trace your design onto the matte side, cut it out, and slide cardboard plus a second sheet of freezer paper waxy side up inside the shirt so nothing bleeds to the back. Iron the stencil down and press the edges hard. Two coats of fabric paint with twenty minutes between them, then leave it overnight before peeling. Cotton holds the paint best.
Get the full tutorial at Pretty Providence.
3. Stenciled Ladder Makeover
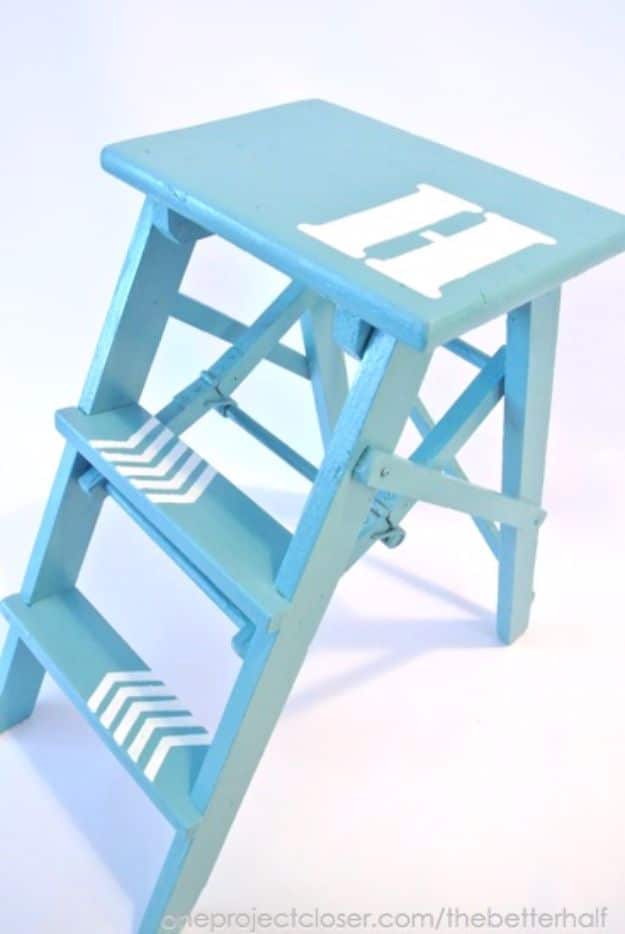
A seven dollar wooden step stool, painted turquoise and stenciled with a large letter on the seat and chevron arrows running up the steps. Clean it and strip whatever finish is failing, base coat it in leftover satin wall paint, then stencil with a multi-surface craft paint using a pouncer rather than a brush. A pouncer is worth the two dollars on a piece like this because the flat end presses paint straight down into the surface instead of dragging it sideways under the stencil. Seal it with polycrylic, and check that it still folds before the paint fully cures.
Get the full tutorial at One Project Closer.
4. DIY Stencil Wall
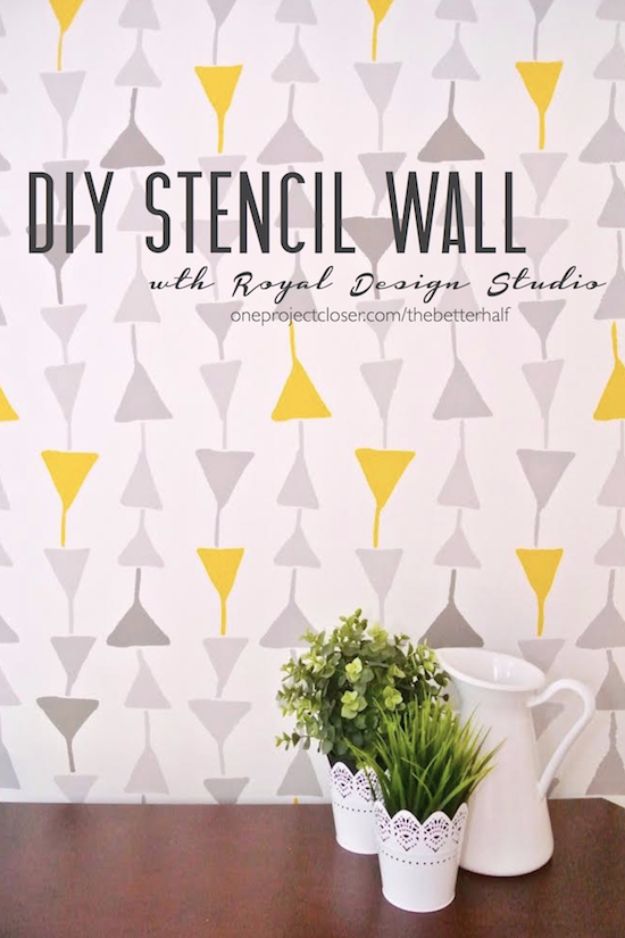
Builder beige walls covered in a triangle pattern in yellow and gray, using a small sponge roller for each color. Start at the top center of the wall and use the ceiling line as your straightedge, then work downward in both directions, which stops the pattern drifting off level across a long wall. The scheduling advice is the real tip: plan the whole wall in one day, roughly four hours, because stopping overnight means washing every roller and matching your paint load again the next morning.
Get the full tutorial at One Project Closer.
5. Monogrammed Tote
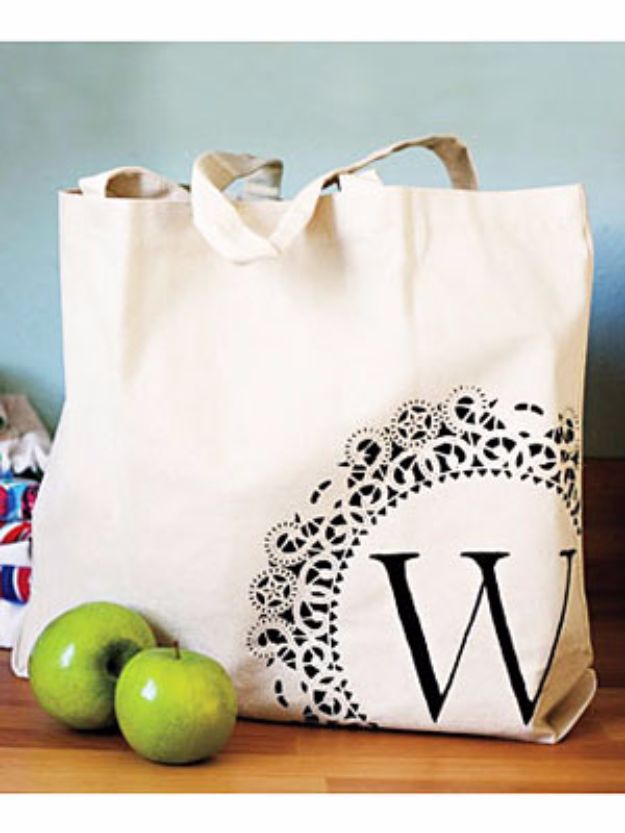
Two stencils in one bag. A paper doily, sprayed with adhesive and pressed onto the corner of a canvas tote with a quarter of it hanging off the edge, gets brushed around its outer edge only, then peeled while the paint is still wet. The letter is a freezer paper stencil: print a letter at around 550 point, trace it onto freezer paper, cut it out with an X-Acto knife and iron it matte side up onto the bag without sliding the iron around. Fill it in, peel, and press the whole design with a hot iron for twenty to thirty seconds so it survives a wash.
Get the full tutorial at Woman's Day, project by Ashley Campbell.
6. DIY Stenciled Jeans
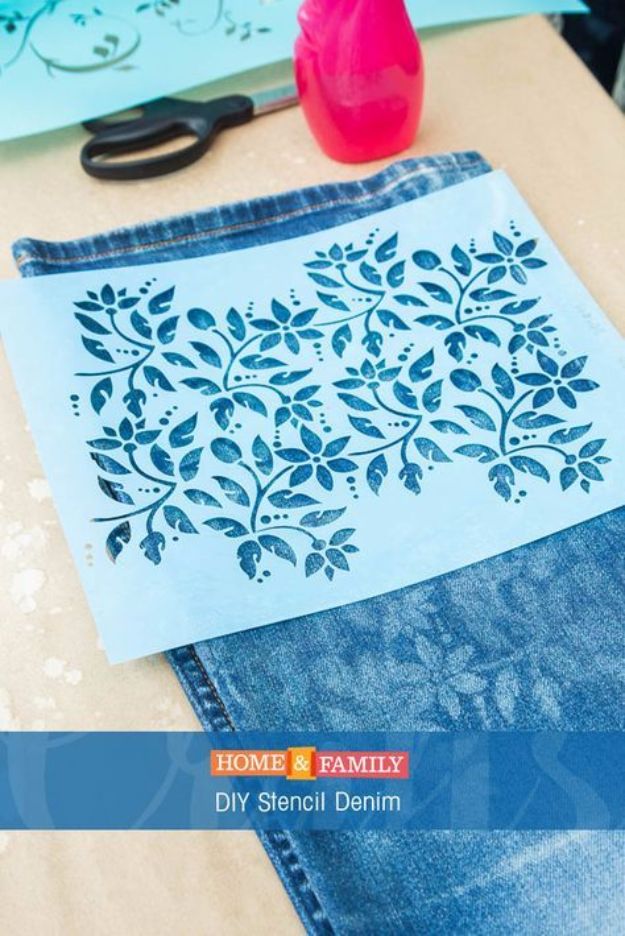
A floral stencil worked over worn denim with bleach instead of paint, so the pattern comes out of the fabric rather than sitting on top of it. Push a plastic bag or a piece of scrap fabric down inside the leg first, or the bleach soaks through and takes the color out of the back too. Lay the stencils flat on the denim and cover every exposed part of the jeans with old towels. Fill a spray bottle with half bleach and half water, spray the surface, lift the stencils off, and put the jeans straight in the wash once the color is where you want it.
Get the full tutorial at Hallmark Channel Home and Family, project by Orly Shani.
7. Stenciled Cork Board Table
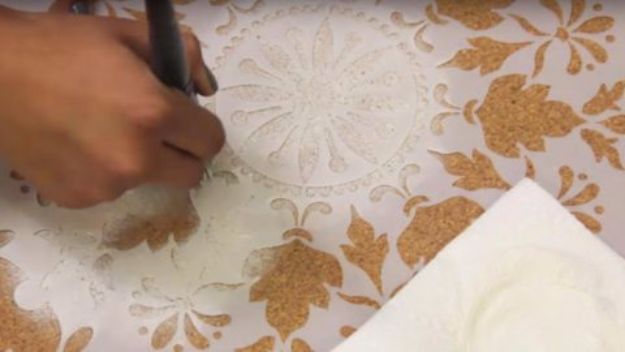
This one is ours. A sheet of cork board, stenciled with a gold damask medallion and set into a table top, so the surface takes a pushpin and still looks like furniture. Work from the center of the sheet outward, because a medallion that lands off center on a round top is not fixable. Cork drinks paint, so the stencil rule on this page matters twice as much here: almost no paint on the brush, tapped straight down, built up in two light passes rather than one heavy one.
Get the full tutorial at DIY JOY.
8. DIY Ikea Stool Stenciled Slipcover
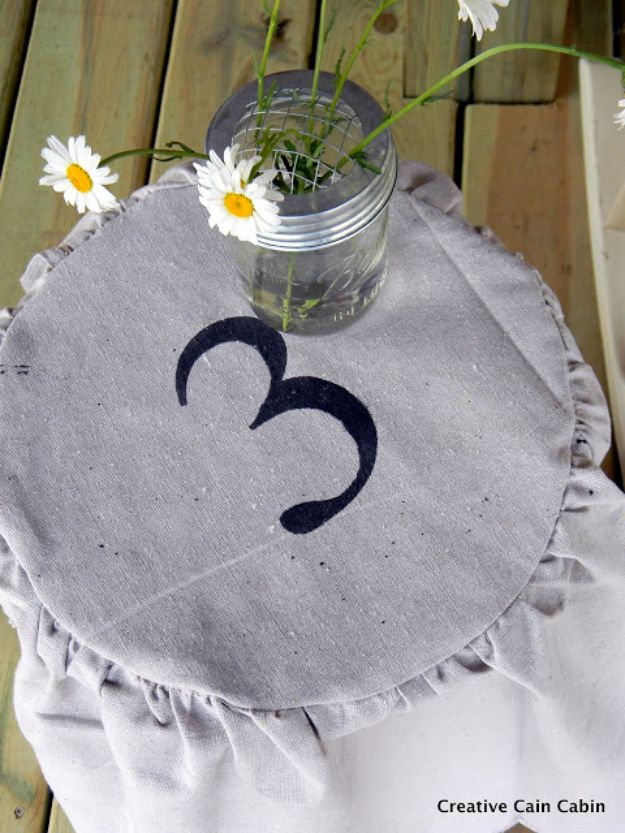
A five dollar IKEA stool given a drop cloth slipcover with a stenciled number on the seat. Trace a pan the same size as the stool top for the circle, then cut the skirt at twice the length you need so it gathers. The setting that does the work is the sewing machine: tension at plus three and stitch length at 4.5 produce the gathers without you pulling a thread by hand. Pin the skirt to the circle and test fit on the stool before the final seam. Stencil the number last with fabric spray paint, masking everything else with garbage bags.
Get the full tutorial at Creative Cain Cabin.
9. Stencil a Deck Using a Mandala Pattern
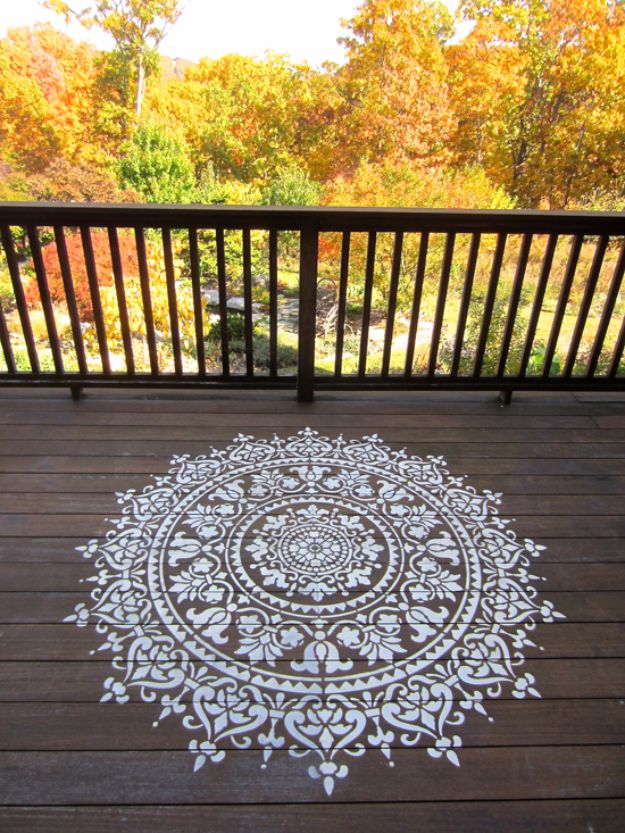
A seventy four inch mandala painted onto deck boards, which is an outdoor rug that never blows away or grows mildew underneath. The stencil is a quarter medallion, so you paint one quarter, rotate it and repeat four times, and a thumbtack pushed through the center point is what lets it pivot without shifting. Clean the deck thoroughly first, because grit under the stencil both lifts it off the boards and takes the paint off with it later. Roll off excess paint onto a paper towel before every pass, since too much paint bleeds under the edge.
Get the full tutorial at Cutting Edge Stencils.
10. DIY Fabric Paint Stenciled Placemats
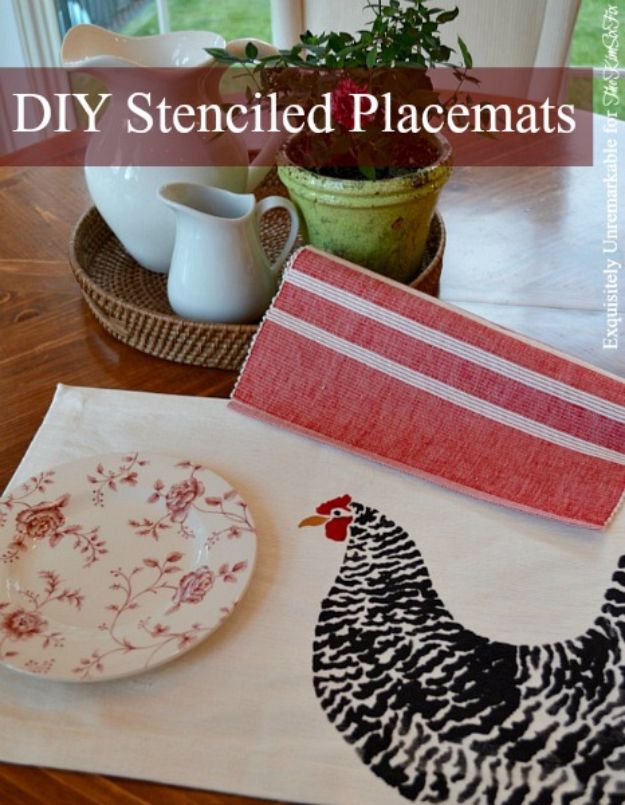
Plain cotton placemats stenciled with a hen and a stripe, and the whole thing takes under half an hour. Iron the placemats flat first, because fabric paint finds every crease. Tape and pin the stencil down, then dab paint on with a brush for the fine parts and a small foam roller for the open areas, always dabbing rather than brushing, which is what keeps paint from creeping under the edge. Heat set the finished mats with a hot iron once they are dry, following the paint brand’s own instructions, or the design comes off in the wash.
Get the full tutorial at The Kim Six Fix.
11. Moroccan Dreams Wall Art

Quarter inch MDF trellis shapes, stenciled and hung as a removable wall panel, which is the version of this for anyone who rents. The damask pattern is not painted flat, it is embossed: spread wood icing through the stencil with a taping knife, level it with a trowel, let it dry and sand it smooth so the pattern stands up off the surface. Base coat the shapes in teal or lilac, dry brush other colors over the top with a chip brush, tone everything with a diluted brown stain, then stencil gold over the raised damask to catch the light.
Get the full tutorial at Royal Design Studio.
12. Ceiling Stencil and Border Tutorial

Stenciling overhead is a different job from stenciling a wall, and the difference is gravity. You must use a repositionable spray adhesive, not tape, or the stencil peels away from the ceiling the moment you let go, and it has to be repositionable rather than permanent. Paint a scrap of foam core your ceiling color and practice the whole sequence on it before you climb a ladder. Use stencil cremes rather than thin acrylics, offload nearly all the paint onto a towel and work in small circles. This took five to six hours of actual brush time over two days.
Get the full tutorial at Celebrate Creativity.
13. Stenciled Wall Paper Fan Decor
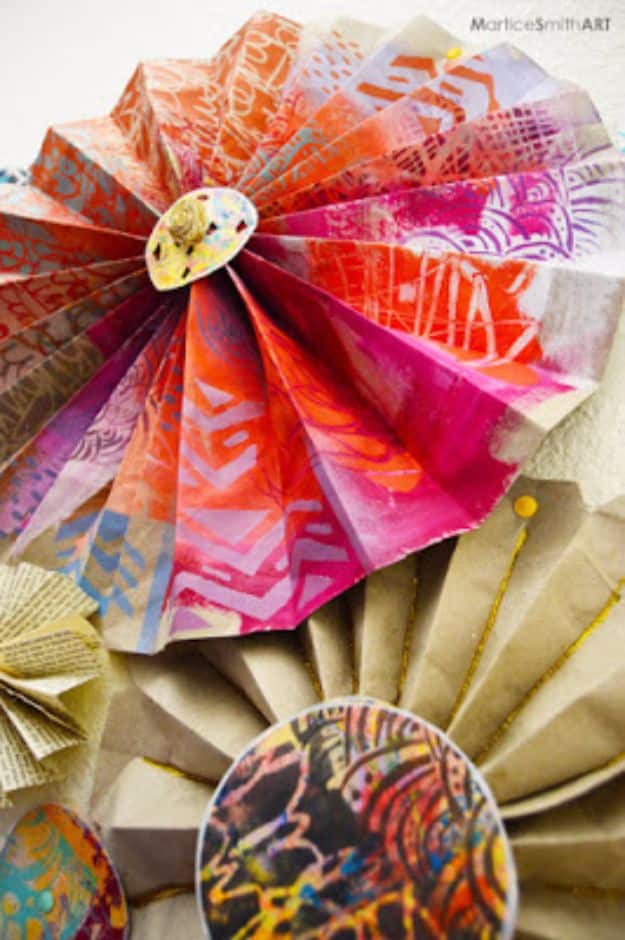
Kraft paper rolls, stenciled in bright acrylics and folded accordion style into fans, then layered on a wall as a backdrop. Roll the paint on with a sponge roller using a gelli plate as your palette, and stencil the paper before any folding happens, since a pleated sheet cannot be stenciled evenly. Hot glue the ends of each fan together, then trace container lids onto leftover stenciled paper for the round medallions in the centers. Roll spiral cut book pages into the little flowers. Thumbtacks hold the whole arrangement up, so it comes down without damage.
Get the full tutorial at StencilGirl Talk, project by Martice Smith.
14. Allover Wall Stenciling
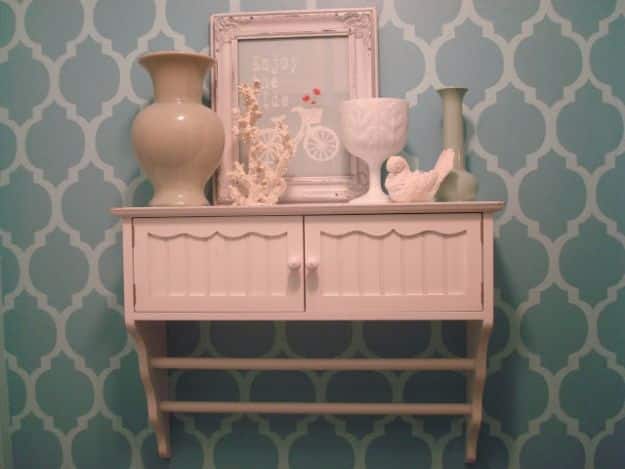
The honest version of an allover wall stencil, written as a list of things that went wrong. Let the base coat dry a full twenty four hours before you stencil over it, or the stencil and the wall dry together and the paint peels when you lift it. Use low tack spray adhesive and leave it on until the whole panel is finished. Use very little pressure and several thin coats instead of one loaded pass. Pull the stencil straight off right after the last coat while the paint is fresh, and start in the least visible corner.
Get the full tutorial at Like Mother Like Daughter.
15. Vintage Industrial Bar Stools
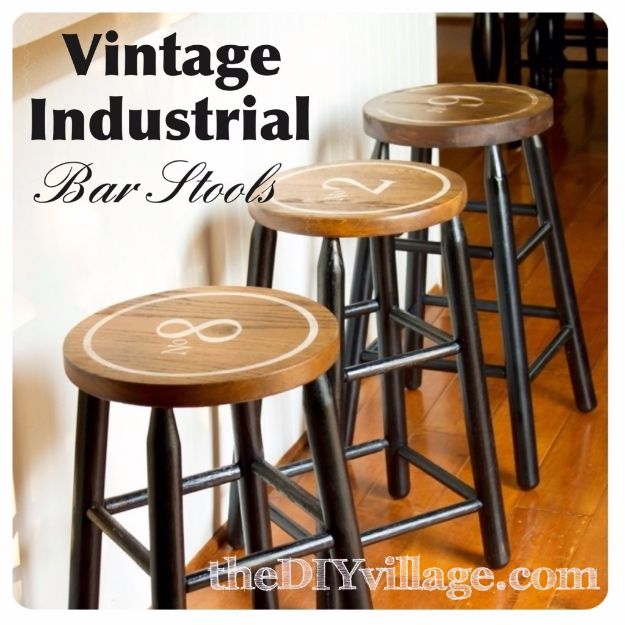
Three oak bar stools taken back to raw wood and finished to look like salvage, with a custom design stenciled into each seat. The numbering idea is the part worth stealing, though these carry a friend’s anniversary date rather than one, two, three. Sand the seats down, mask and spray the bases, cut the design as a vinyl stencil and lay it on with transfer tape, then paint inside it. The finish is what sells it: brush Minwax gel stain in walnut over the top, wait three minutes, wipe it off, and build up several coats of polycrylic so the design does not rub away.
Get the full tutorial at The DIY Village.
16. Stencil Canvas With Twinkle Lights
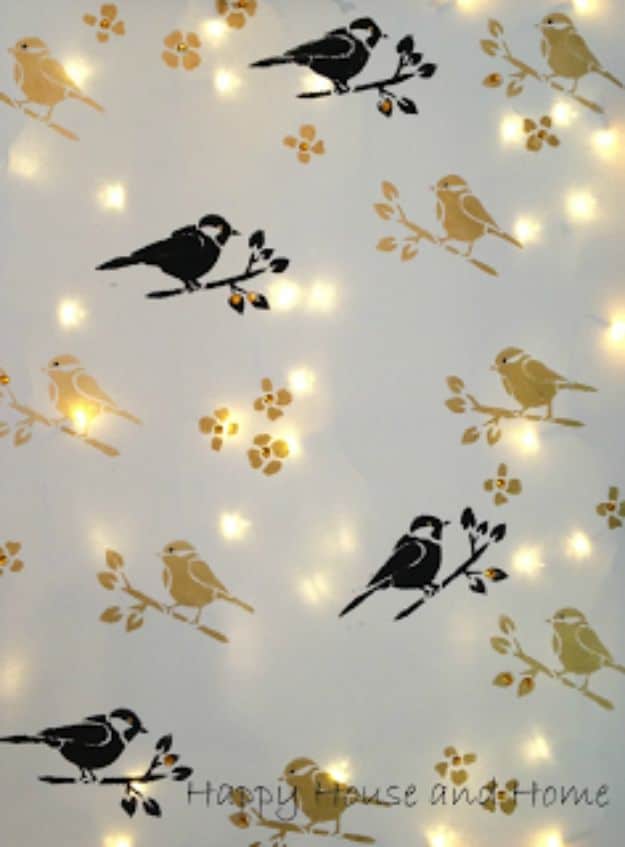
A canvas stenciled with birds and branches, with a strand of twinkle lights threaded behind it so points of light sit among the pattern. Run the lights back and forth across the back and tuck them under the wooden stretcher frame, which holds them without any glue and lets you nudge individual bulbs afterward. Push each bulb through from behind at a spot that suits the design rather than at a regular interval. For details the stencil does not include, like an eye on a bird, a toothpick dipped in paint is the right sized tool.
Get the full tutorial at Happy House and Home.
17. Kitchen Pantry Stencil
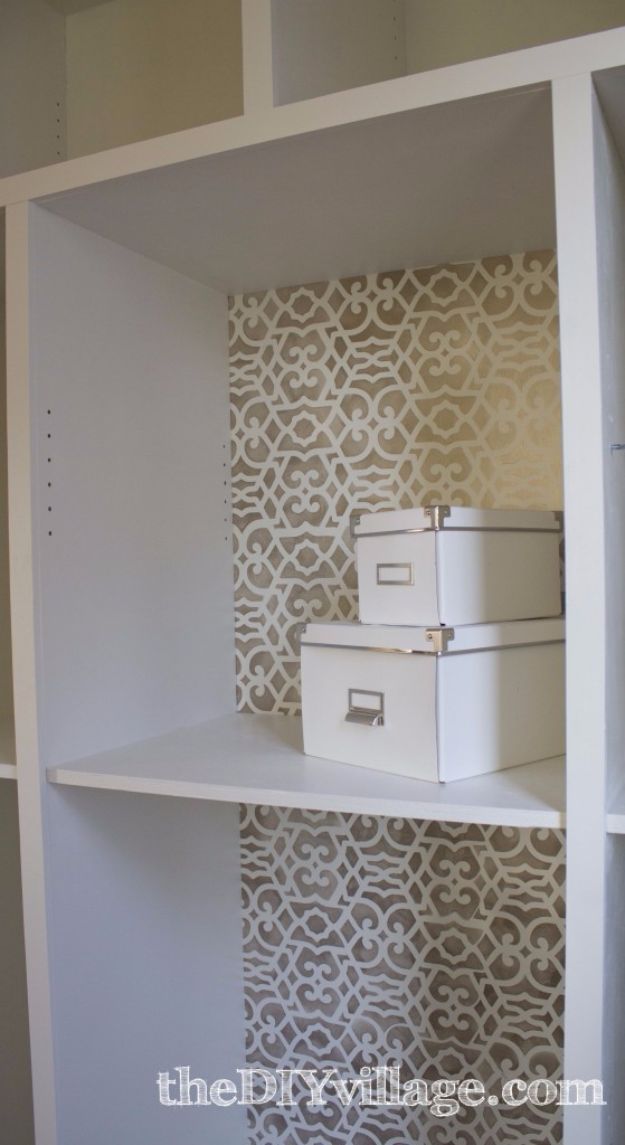
Built in pantry cabinets whose back panels are stenciled in a soft tone on tone pattern, which is the cheapest upgrade available to a cupboard you open twenty times a day. Stencil the back panels while they are flat on a workbench and fit them afterward, rather than working inside a finished cabinet. The color choice is the lesson: a first attempt in ordinary paint came out loud enough to be called a Hawaiian shirt, so the panels were repainted white and redone in a stencil creme a shade or two off the base, worked in with a wide stencil brush. Tone on tone is what makes it read as texture.
Get the full tutorial at The DIY Village.
18. BEE-utiful Stencilled Wall
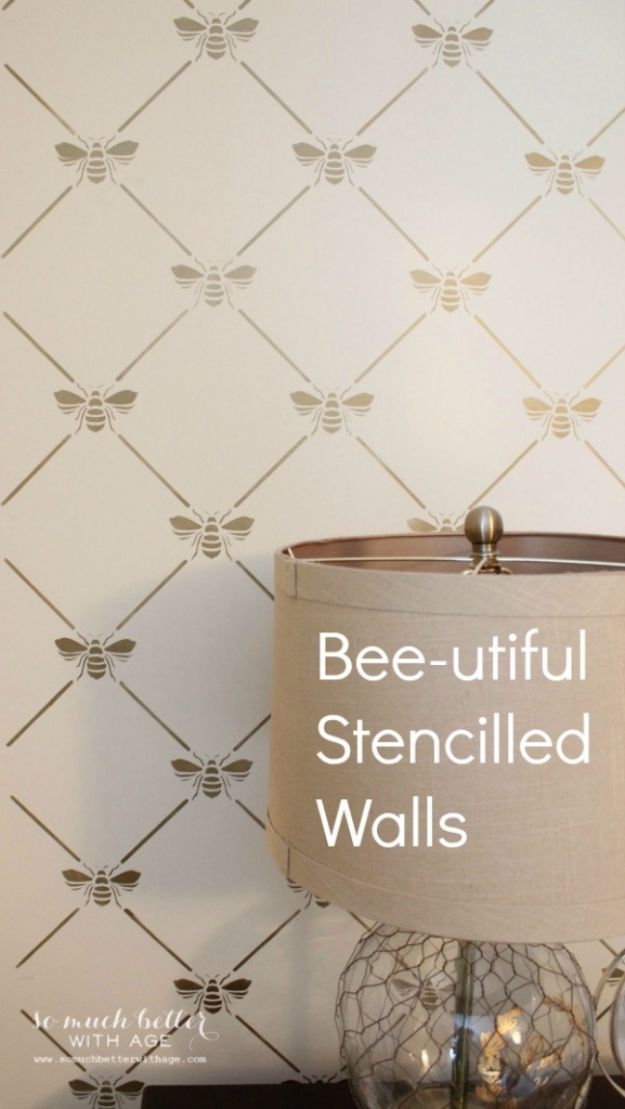
A master bedroom wall behind the bed, stenciled in a gold trellis with a small bee at every intersection, chosen over wallpaper because nobody wants to take wallpaper down later. The stencil is large scale, which is what keeps the whole wall to about two and a half hours on a first attempt. Start in the middle and work outward so the pattern stays even, and tape as you go. Use the stencil creme the stencil maker sells rather than craft or latex paint, because the dry brush method needs very little paint and the shimmer comes from the creme. Wipe the back of the stencil halfway through or it starts to bleed.
Get the full tutorial at So Much Better With Age.
19. Stencil a Metallic Foil Wall Finish
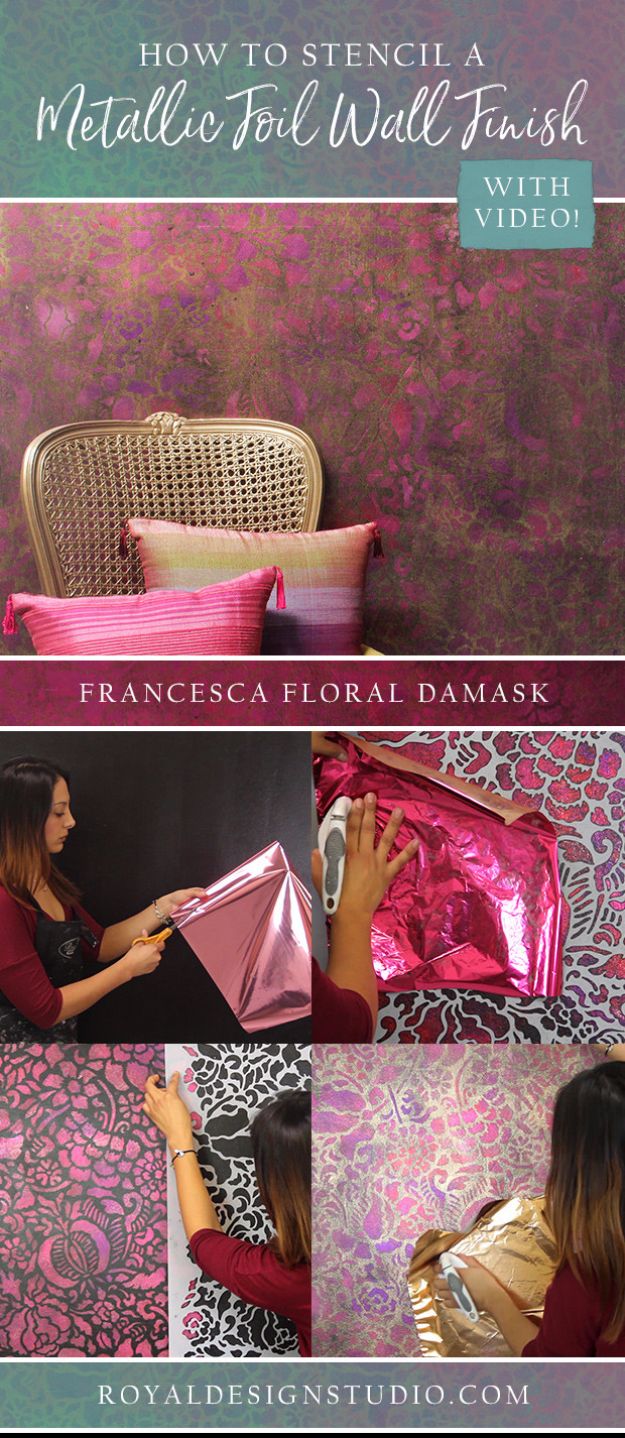
Real metallic foil, laid into a stenciled pattern, and the whole thing depends on one surface condition: the wall must be eggshell, not flat. Flat paint is porous enough to drink the stencil size and you lose your working window. Roll the size on through the stencil, then wait until it goes tacky, which you test by pressing a knuckle to it and listening for a small pop. Press crumbled foil into the tacky pattern with a pouncing motion, fill the gaps with a rag or a scrub brush, then seal it with two coats of clear topcoat.
Get the full tutorial at Royal Design Studio.
20. Tribal Feather Wall Art
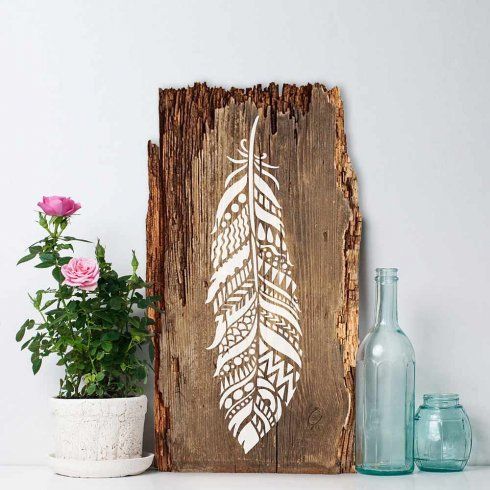
A single ornate feather stenciled in white onto a slab of bark edged reclaimed wood, leaned against a wall rather than hung. It is a one overlay stencil, which means the whole design paints in a single pass with no lining up of layers, and it comes in sizes from a four inch feather up to a forty four inch one. Rough reclaimed wood is the hardest surface for a stencil, so use a dense foam roller with medium pressure and accept a little seepage. On a piece like this the imperfections read as handmade, not as mistakes.
Get the full tutorial at Cutting Edge Stencils.
21. Bullet Journal Stencils

Make the stencil instead of buying it, out of a plastic coated school folder. Peel the flaps off to get one flat sheet, cut rectangles to match your journal page, then lay out stickers and tags in the shapes you actually use, ovals, banners, boxes, and tape them down as your cutting guides. Fill every empty space with more shapes drawn in, because a stencil with gaps in it is wasted card. Cut each shape out with an X-Acto knife. Skip perfect circles or trace a bottle lid, since freehand circles are where this goes wrong.
Get the full tutorial at So Not Together.
22. Stencil Film With a Silhouette
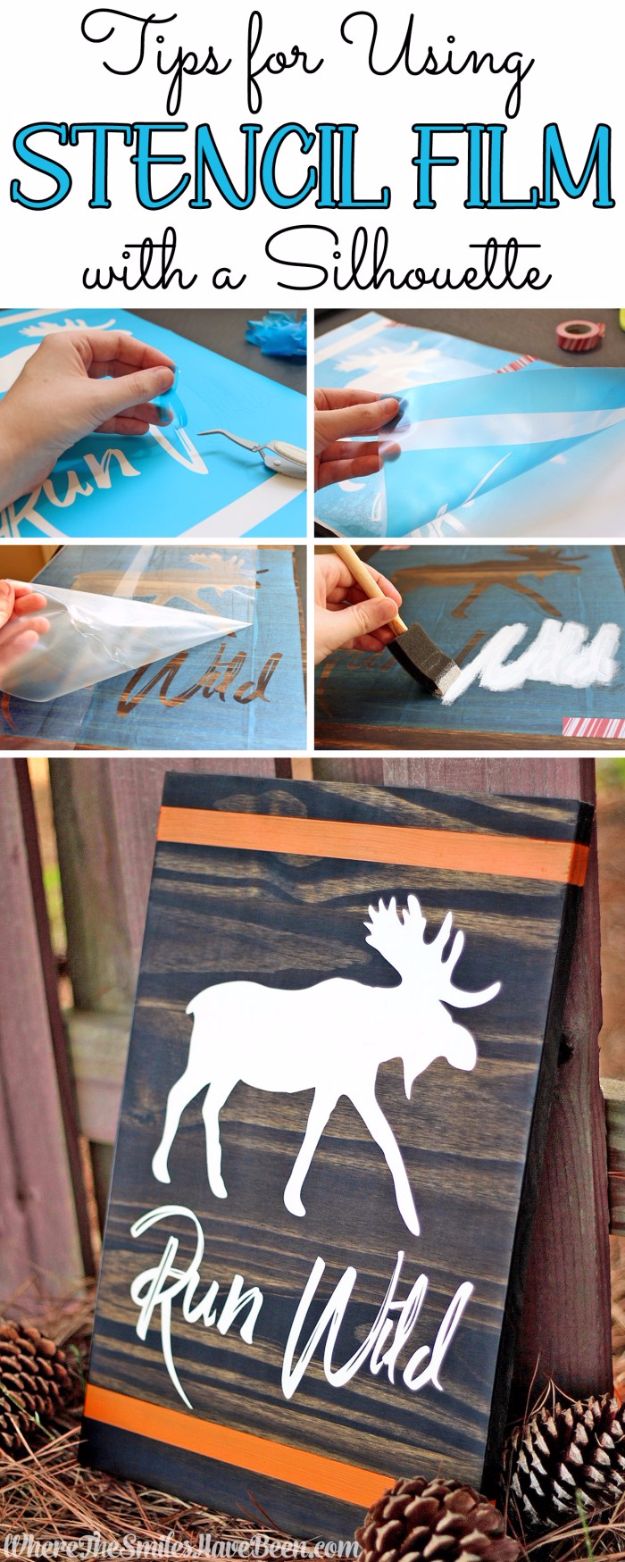
Stencil film is the middle ground between a paper stencil you throw away and vinyl you stick down for good, and it cuts on a Silhouette like anything else. The film in the tutorial is Oramask 813, and the reasons given for it are practical: it cuts tiny intricate pieces cleanly, it weeds easily because it is not as sticky as vinyl, and it is translucent, so you can see whether the seal around every edge is good before you paint. It is sticky enough to seal and not so sticky that it lifts what is underneath when you peel it. The example is a woodland nursery sign, one of a set of four.
Get the full tutorial at Where The Smiles Have Been.
23. Stencil a Round Indian Inlay Table
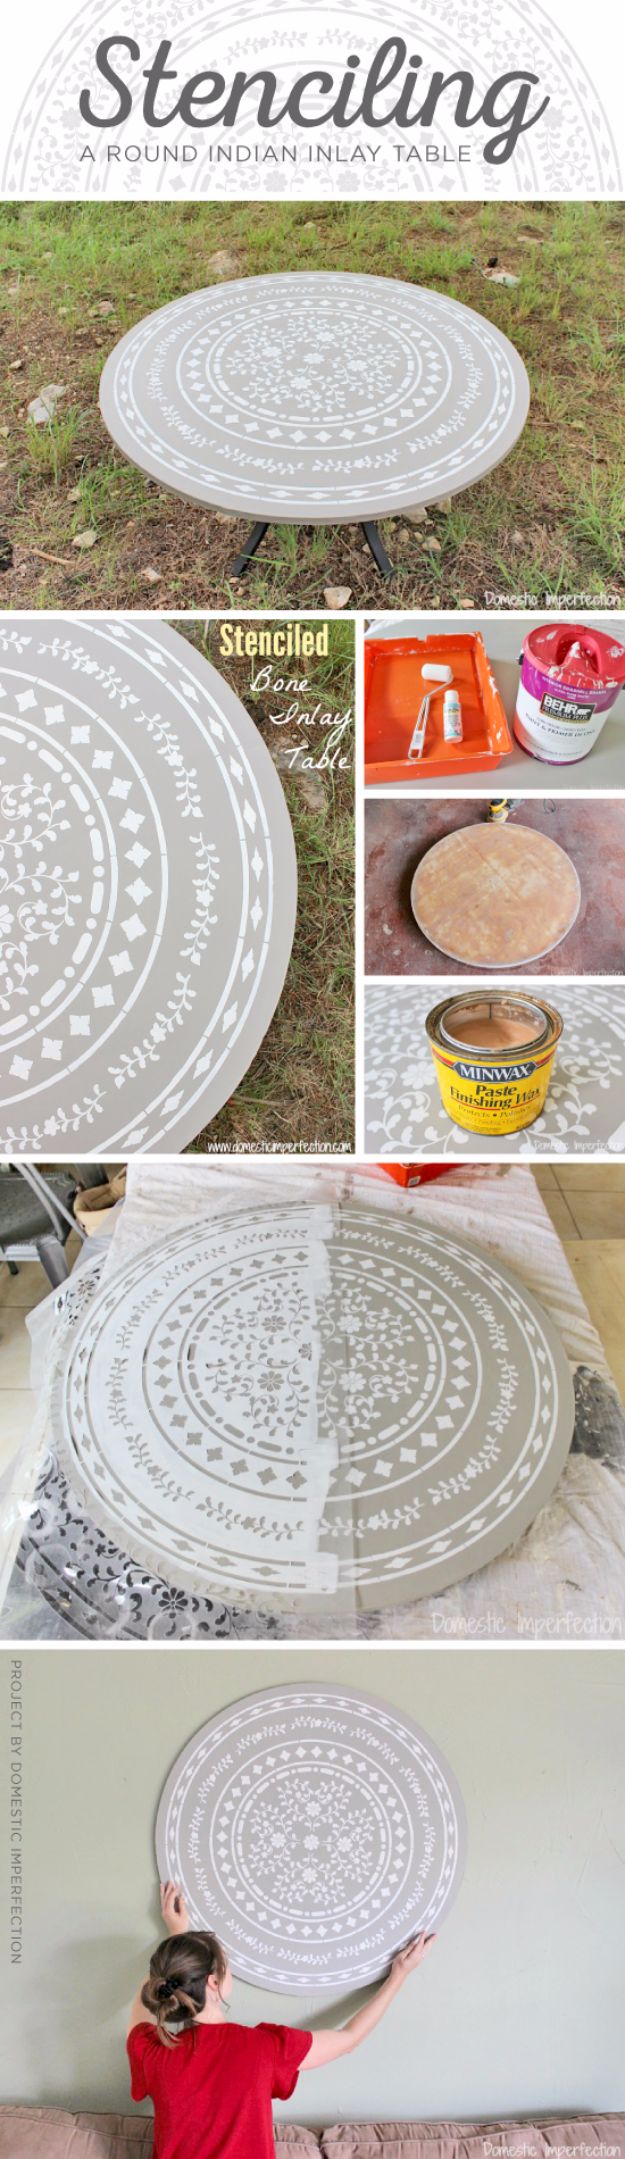
A plain round tabletop painted gray, then stenciled in white with an Indian inlay medallion so it passes for bone inlay furniture at a fraction of the price. The stencil covers half the table: paint one half, then flip the stencil over and paint the other, which is how a half sheet produces a symmetrical full circle. Tape it down for both passes and roll the paint on with a dense foam roller. Wax the finished top, because an unprotected painted tabletop will wear through at the edges within a year of real use.
Get the full tutorial at Cutting Edge Stencils.
24. Stenciled and Embroidered Pillow
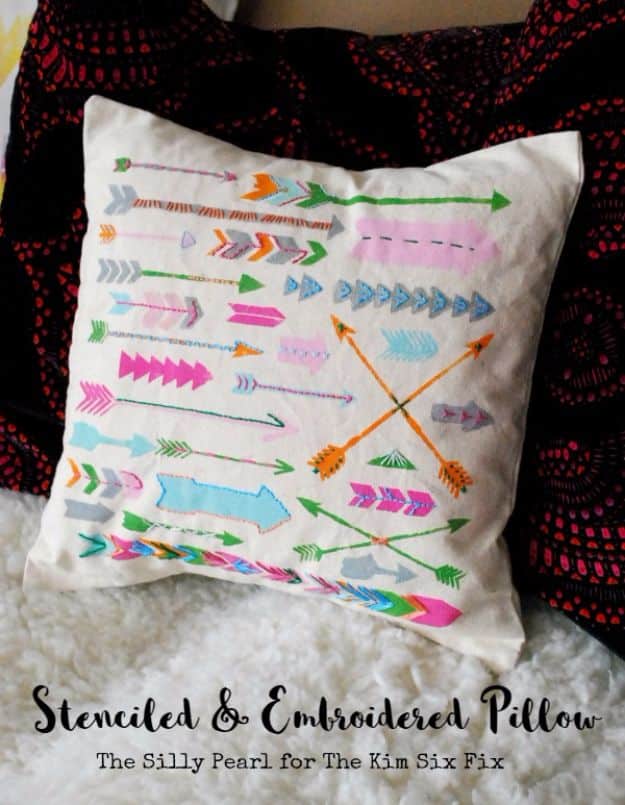
Two crafts on one pillow, and the second one is what makes it look expensive. Stencil arrows in six colors, scattered at random angles, onto a fourteen inch canvas pillow cover using acrylic paint mixed with fabric medium so it stays soft. Let it dry completely, then put the painted front into an embroidery hoop and stitch over some of the arrows with six strands of floss in contrasting colors. Do not embroider all of them. Picking out maybe a third of the shapes is what gives the surface depth, and stitching every one flattens it back out.
Get the full tutorial at The Kim Six Fix, project by The Silly Pearl.
25. Stencil an Accent Wall
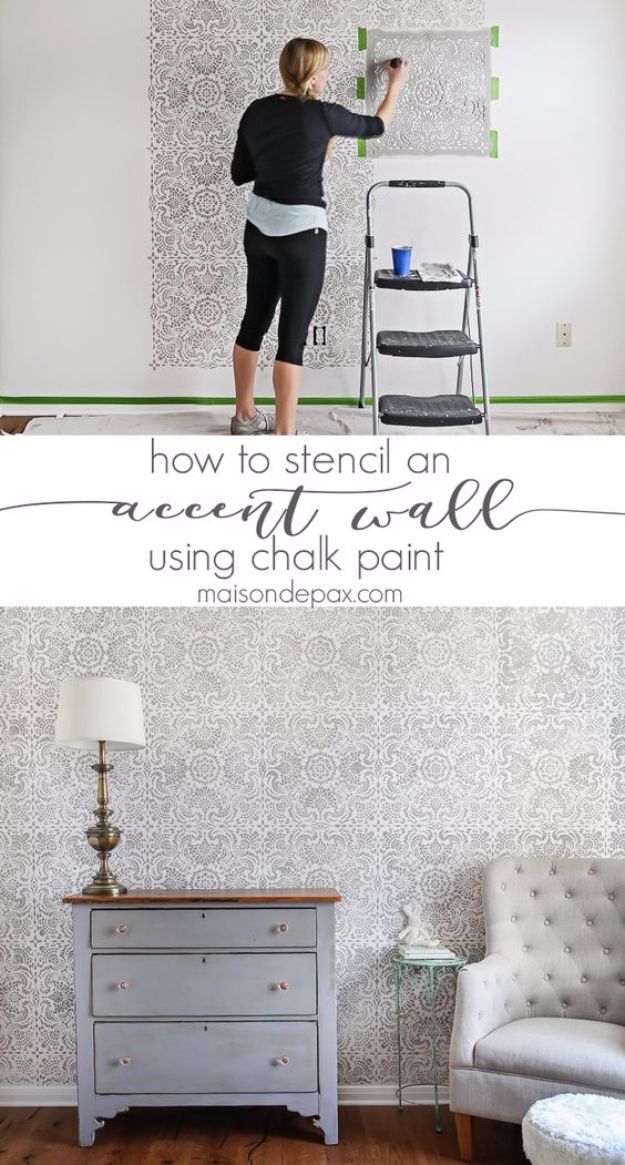
A lace tile pattern stenciled over a whole wall in chalk paint, about five hours including setup and cleanup. Draw a vertical line down the center of the wall with a level and start there, not at a corner, since corners are rarely plumb and a pattern started against one drifts. Load the brush, offload most of the paint onto a paper towel, and work it in with circular motions. Lift a corner of the stencil now and then to check for bleed, replace the tape often, and wipe the back of the stencil between placements.
Get the full tutorial at Maison de Pax.
26. DIY Stenciled Wrapping Paper With Martha Stewart Crafts
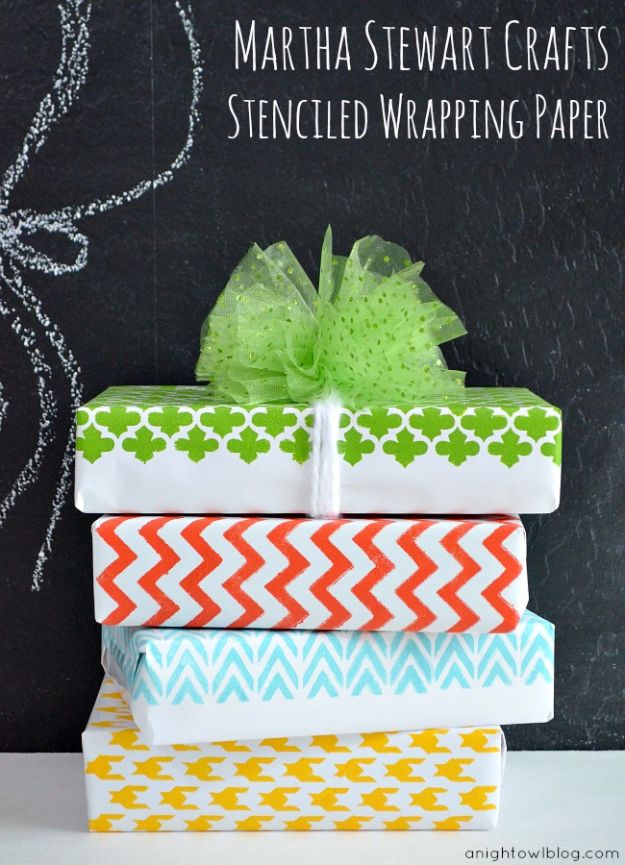
A plain white roll of paper, stenciled into custom wrapping paper, which is the answer to a closet holding twenty rolls you use once a year. Cut the sheet to the size of your gift first, then tape both the paper and the stencil down to your work surface before any paint goes on, because paper slides in a way fabric and walls do not. Fill the stencil with a foam pouncer, then wait for the paint to dry before moving the stencil along, or you will drag wet paint across the sheet. Kraft paper takes it beautifully too.
Get the full tutorial at A Night Owl.
27. Watercolor Stencils and Doilies
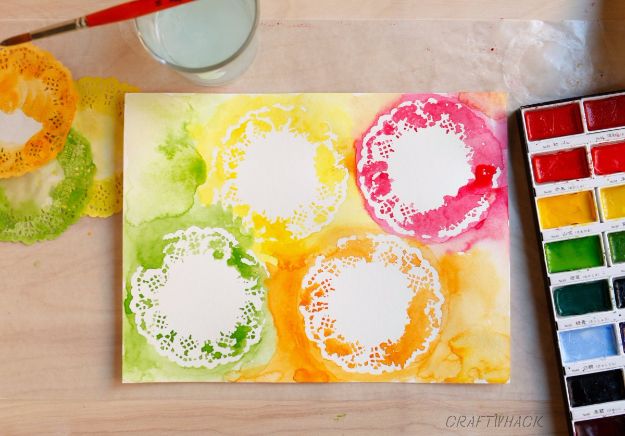
Paper doilies used as stencils with watercolor instead of paint, which behaves completely differently and is the whole appeal. Lay the doilies on the paper, wash color over and around them, and let the water pool and bleed at the edges rather than fighting it, because the soft halo is what a watercolor stencil gives you that an acrylic one cannot. The photo shows four doily circles in yellow, green, pink and orange on one sheet. This is the easiest project on this page and the best one to hand a kid on a rainy afternoon.
Get the full tutorial at Craftwhack.