

Got a bag of concrete in the garage and no idea what to make with it? These 75 DIY concrete projects will keep you busy all year! A few dollars of cement and a mold you already own, like a yogurt tub, a party cup or an old cake pan, turn into planters, candle holders, bowls and bookends that look like they came from a pricey boutique. You’ll find quick 15 minute pours, weekend builds like a concrete desk or fire pit, garden stepping stones and orbs plus fun seasonal pumpkins and ornaments. 🌿 Perfect for gifts, patio decor and first time concrete crafters! One tip before you start: wear a mask and gloves while you mix, because the dust is fine and dries your skin fast.
1. Concrete and Gold DIY Plant Pots

Want plant pots that look like they came from a fancy boutique? These are poured into big yogurt tubs with plastic cups pressed in the middle to make the planting well. Mark the cup first so you push it to the right depth, weigh it down, then let it set overnight. A heavy grit sanding disc smooths the rims, and gold leaf goes on last in triangles or dabbed-on polka dots. Bubbles and gaps in the gilding are part of the charm, so don’t stress about perfect!
Get the full tutorial at DIY in PDX.
2. Tiered Concrete Planter with Copper Pipe

This tiered concrete planter looks way more complicated than it is. Shoe boxes, candy boxes and cups that nest inside each other become the molds, and a 6 inch piece of half inch copper pipe joins the two tiers. Fill the pipe with concrete too so it’s strong, prop up the top tier while it dries and weigh down the inner boxes. Give it 48 to 72 hours before you peel off the cardboard. A coat of metallic copper paint ties it all together.
Get the full tutorial at Anika's DIY Life.
3. Geometric Concrete Polyhedron Container
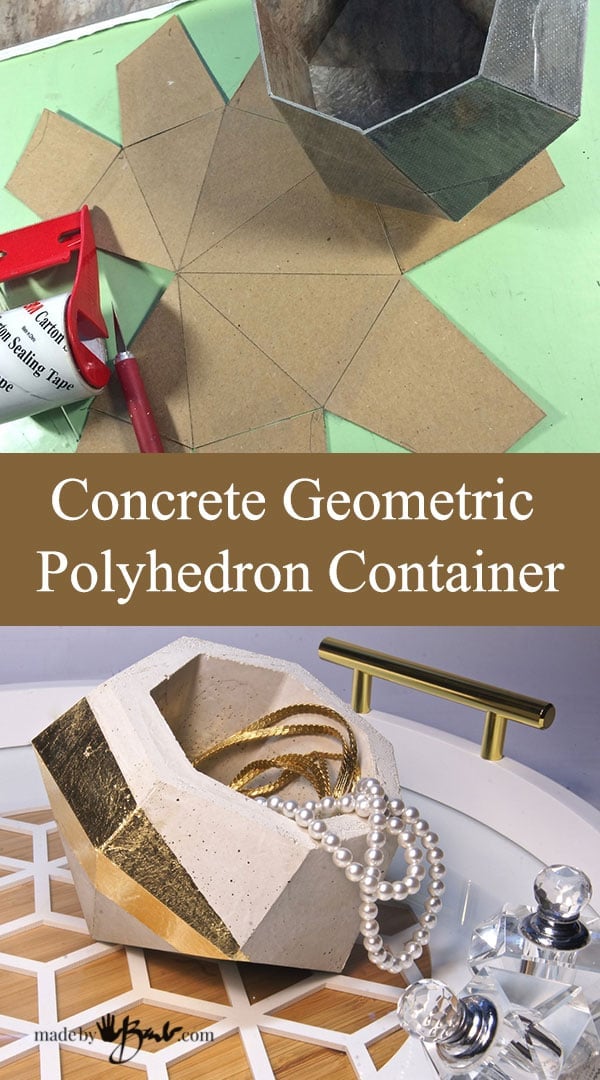
Love that faceted, gem-like look? This geometric container is cast in a mold made from peel and stick vinyl floor tiles, and there’s a free printable pattern right on the page. Trace the pattern on the back of the tiles, score the fold lines, tape it into shape and nest a smaller inner mold inside. Mix rapid set concrete to watery pudding thickness, pour and unmold after about an hour. Sand the edges and add gold leaf to a few facets!
Get the full tutorial at Made By Barb.
4. DIY Concrete Vessels

Got a plain glass vase or an ordinary pot? Wrap it in concrete! For these vessels you pour mixed concrete into a plastic container, then press your vase or planter down into the middle so the concrete sets up around it. Once it’s dry, cut the plastic away and you’ve got a heavy, modern vessel with a clean glass or ceramic insert. It’s a quick way to make a big leafy plant look like a designer piece.
Get the full tutorial at Monsters Circus.
5. DIY Concrete Planters

Here’s a fun trick for small concrete planters: use recycled paper and plastic containers as molds, because they’re easy to peel or break away when the concrete dries. The maker found the best mix ratio was 4 cups of mortar or cement mix to 1 and a quarter cups of water, and she skipped regular concrete because the gravel won’t dissolve. Shape round, square or faceted pots, then dip some in gold paint. The tutorial is written in Spanish.
Get the full tutorial at Avanti Morocha.
6. Ridged Cement Planter Bowls
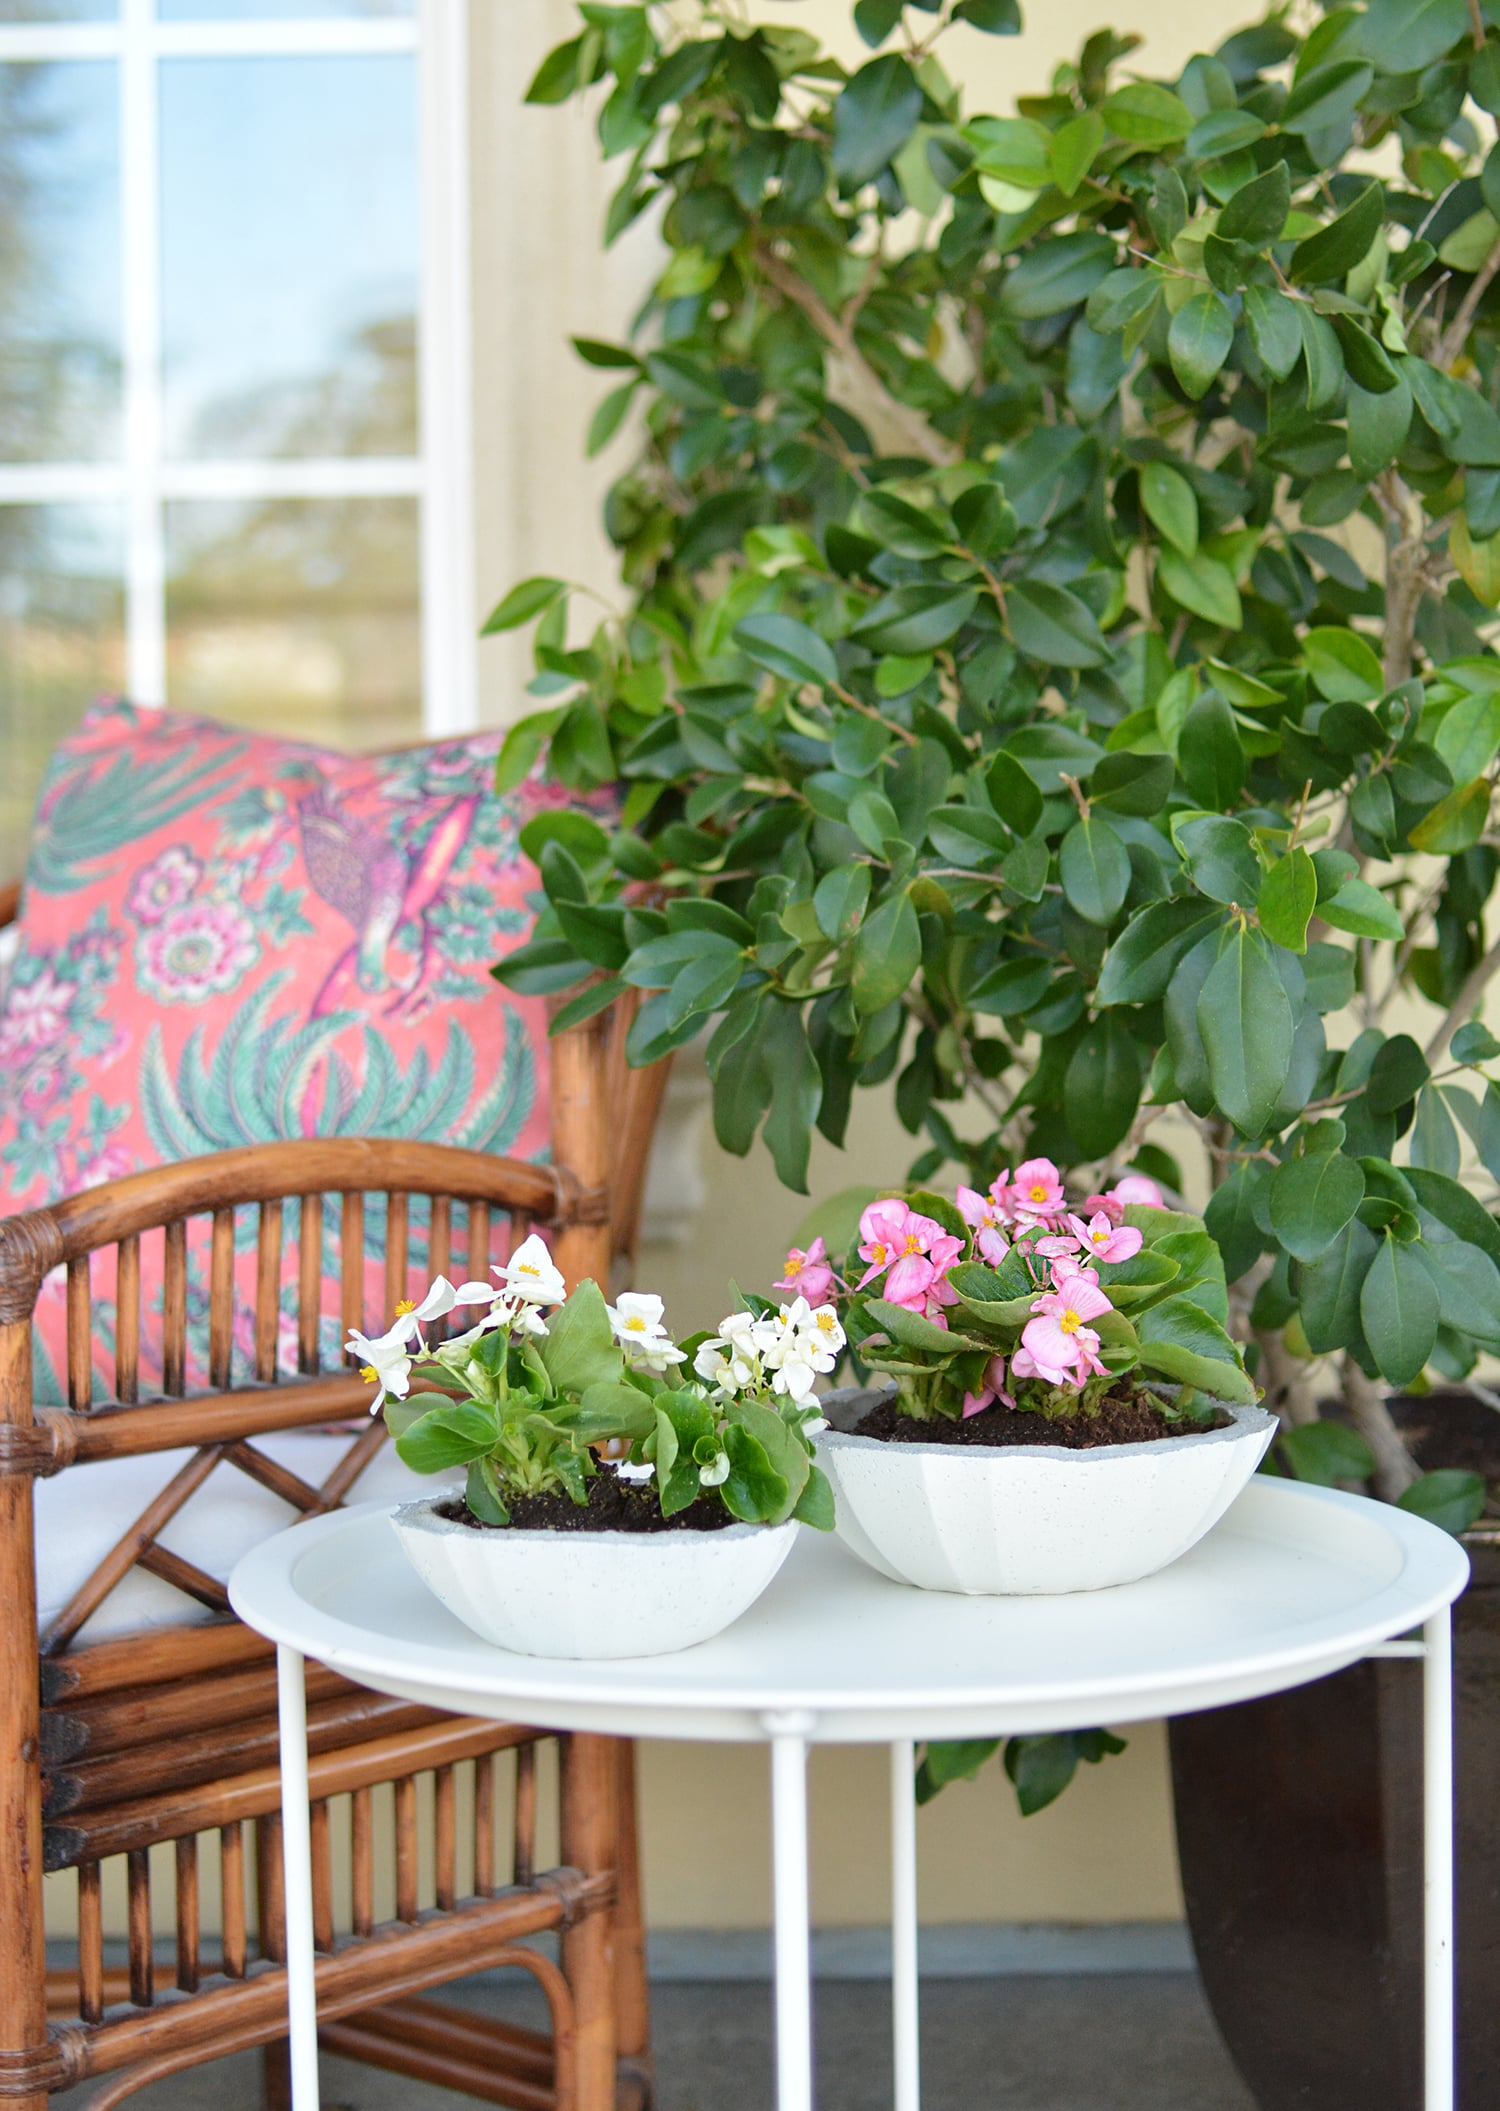
Nesting acrylic bowls with a textured pattern on the inside make these cement planter bowls look so pretty! Oil the bowls, fill one halfway with quick setting cement, then press the next smaller bowl down into it. Pebbles weigh it down. After about 45 minutes, pull out the inner bowl and poke a drainage hole with a chopstick while the cement is still soft. Let it harden 8 to 10 hours, pop it out and spray paint if you like.
Get the full tutorial at Centsational Style.
7. Cement Planters Using Plastic Cups
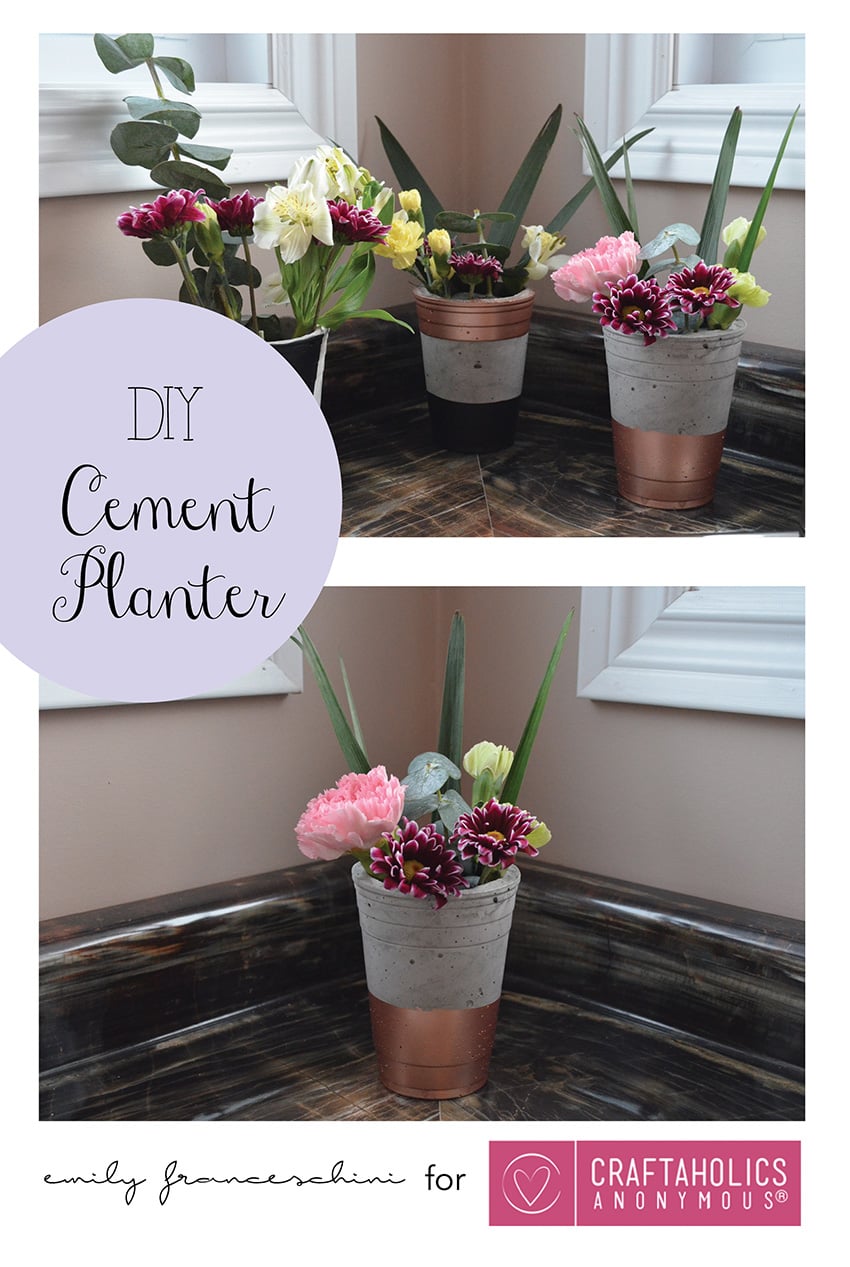
Red party cups make the perfect mold for a first cement project! Grease the inside of a big cup and the outside of a smaller 5 or 6 ounce cup, fill the big one halfway with cement mixed to a peanut butter thickness, then push the small cup in so there’s half an inch all around. Once it’s dry, peel away the cups and sand the edges. Paint a copper stripe or a black dipped base for a pretty finish.
Get the full tutorial at Craftaholics Anonymous.
8. Concrete Planters from Recycled Containers
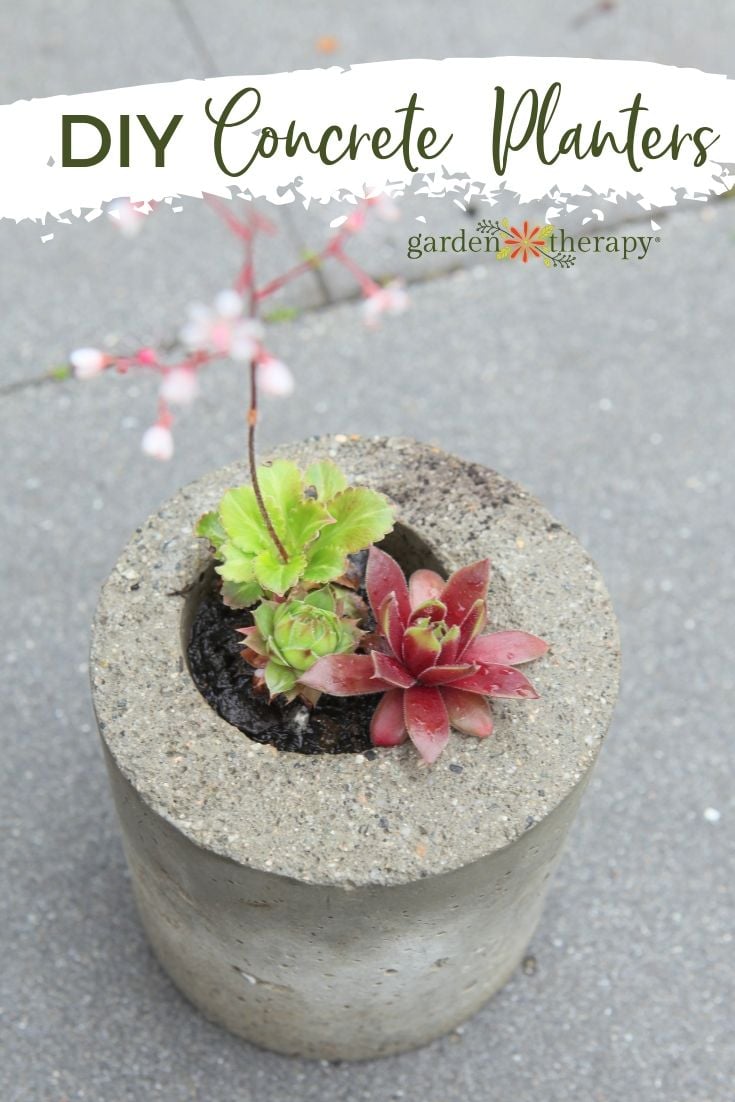
Raid your recycling bin for this one! Plastic tubs and yogurt containers become molds for chunky concrete planters, as long as they’re sturdy enough to hold their shape. Use a smooth topping or repair concrete with no gravel, and grease every container really well so the concrete releases. Press a smaller container inside, weigh it with rocks and let it cure. A concrete drill bit adds the drainage hole. Hens and chicks look perfect in these!
Get the full tutorial at Garden Therapy.
9. Concrete Mason Jar Planter
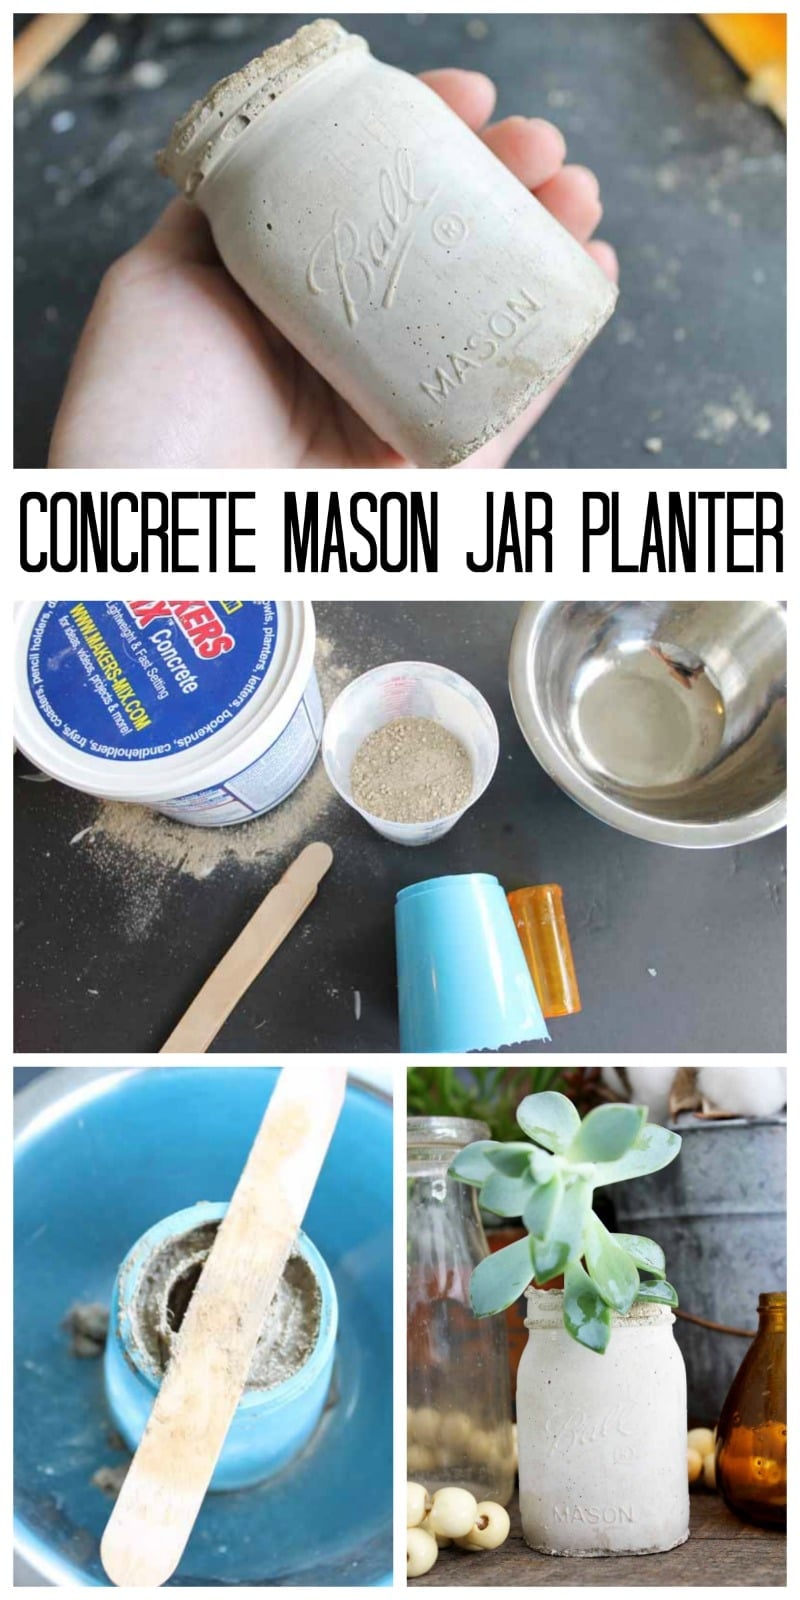
How cute is a concrete planter shaped like a mason jar? The maker cast her own mason jar mold, then hot glued an empty pill bottle in the center to leave the planting hole. Seal the bottom of the mold, coat it with vegetable oil, then mix and pour the craft concrete. Once it sets, the jar pops out with all the embossed lettering intact. Plant a little succulent and it’s an easy gift for any farmhouse fan!
Get the full tutorial at The Country Chic Cottage.
10. Concrete Vessel Planters
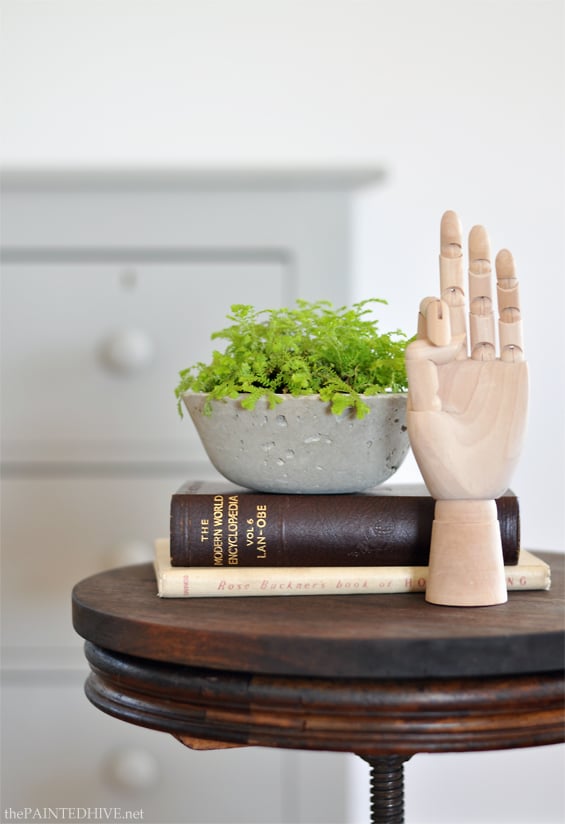
This tutorial is a great read if you want to really understand concrete before you start. The maker explains cement, water and optional aggregates like perlite, gravel or peat moss, then casts small vessel planters between a ceramic bowl and a little plastic ramekin. Oil both molds, keep the walls about half an inch thick so they’re not fragile, then release with a few gentle bangs. She’s reused the same bowl about twelve times!
Get the full tutorial at The Painted Hive.
11. Gold and Concrete Succulent Planters
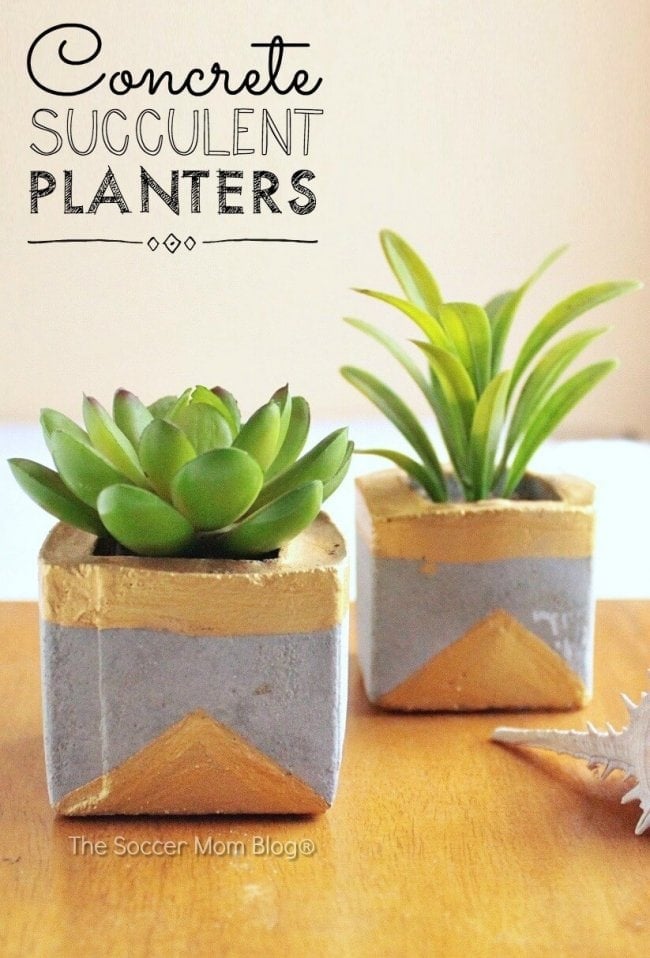
Small cardboard cartons like milk and medicine boxes are the molds for these chic little planters. Tape the outside of the bigger box so it won’t leak, fill it a third of the way with a 50/50 cement and sand mix, then press the smaller box into the middle with a half inch gap underneath. Let it dry a full day, twist out the inner box and peel away the outer one. Gold acrylic paint triangles add the glam!
Get the full tutorial at The Soccer Mom Blog.
12. White Cement River Planter
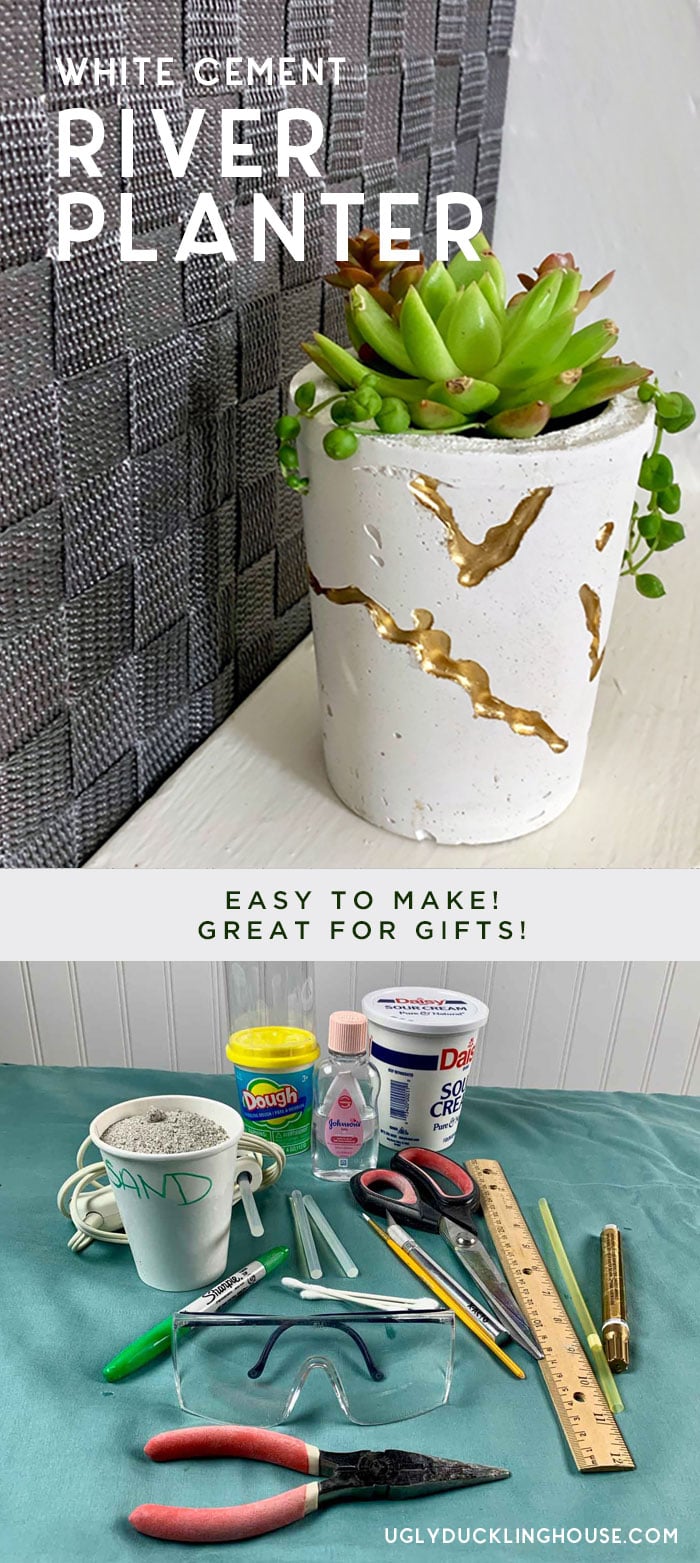
This white cement planter has gold rivers running through it, and the maker tried 11 times to perfect the recipe so you don’t have to! Rapid set Cement All gets white titanium dioxide pigment, a sour cream container is the outer mold and a thin acetate insert makes the planting well. Straws and hot glue form the river channels. Once it’s demolded, a gold leaf paint pen and a tiny brush fill every groove.
Get the full tutorial at Ugly Duckling House.
13. Easy DIY Concrete Pots for Succulents
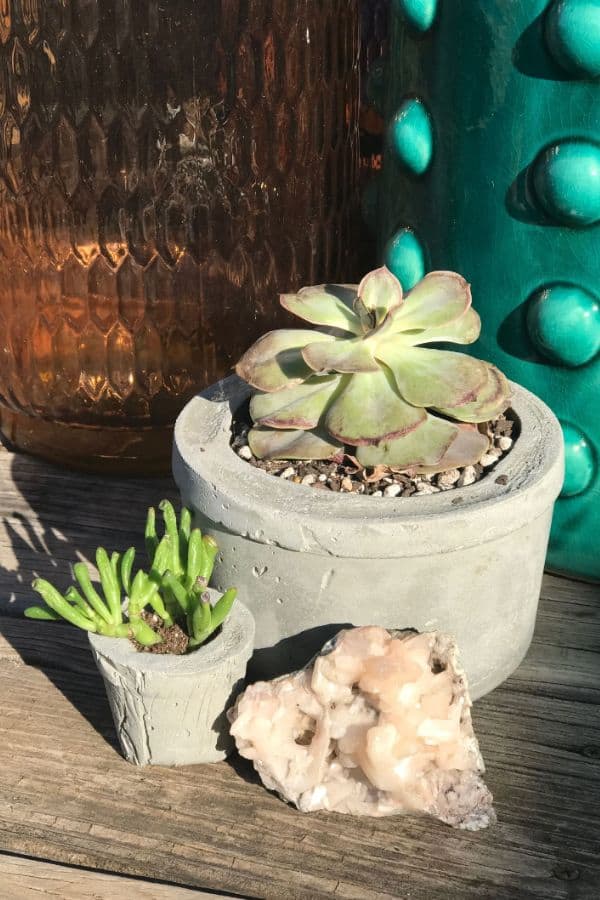
Recycling bin containers make these easy concrete pots, and you’ll want to make a dozen once you start! Grease the molds really well or you’ll be cutting them off. Quikrete recommends a 5 to 1 mix, but the makers found a runnier mix worked better for small pots and a thicker one for big ones. Tap out the air bubbles, let them cure, then pop them out. Wear a mask, goggles and gloves while you mix!
Get the full tutorial at Wildflowers and Wanderlust.
14. Easy Cement Orb Planters
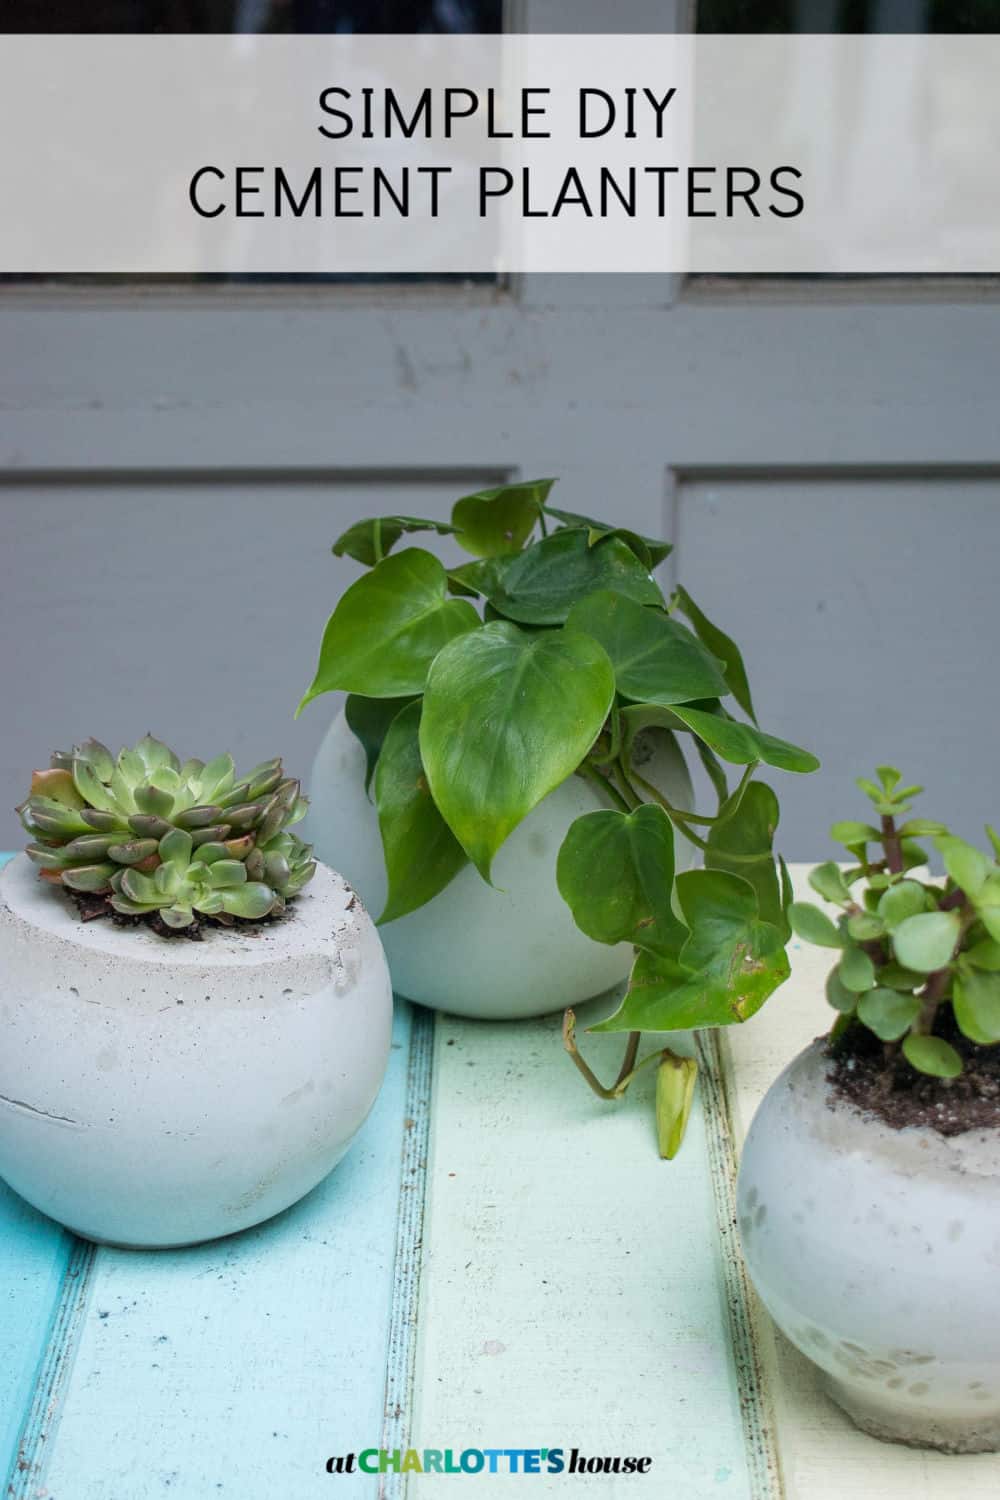
Thrifted round glass vases are the molds for these cement orb planters, so grab a few for a dollar each. Wrap a 5 inch piece of PVC pipe with tape, mix Cement All 4 parts to 1 part water, pour it into the vase and press the pipe in to make the planting hole. Hold it down while it sets. Then wrap the vase in a heavy paper bag, put on goggles and gloves and tap the glass away with a hammer!
Get the full tutorial at At Charlotte's House.
15. Copper Succulents in DIY Concrete Planters
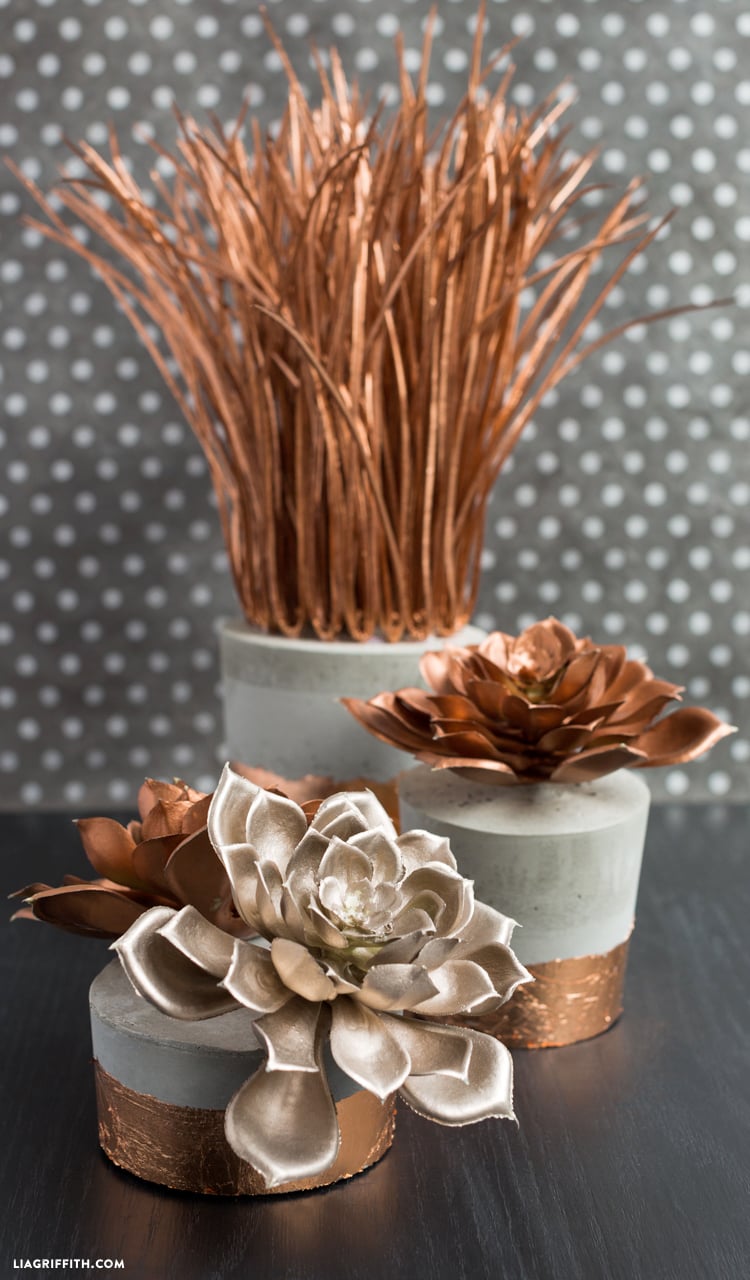
This is one of the easiest concrete projects ever! Mix concrete right in a paper coffee cup or soup container with a plastic knife, let it thicken until it’s a little goopy, then stick metallic faux succulents straight into it. Hold them for about 15 minutes, leave them overnight, then rip the paper cup off at the seam. Mod Podge copper foil around the bottom. It’s a fun craft night idea with friends!
Get the full tutorial at Lia Griffith.
16. How to Make a Concrete Vintage Camper Planter
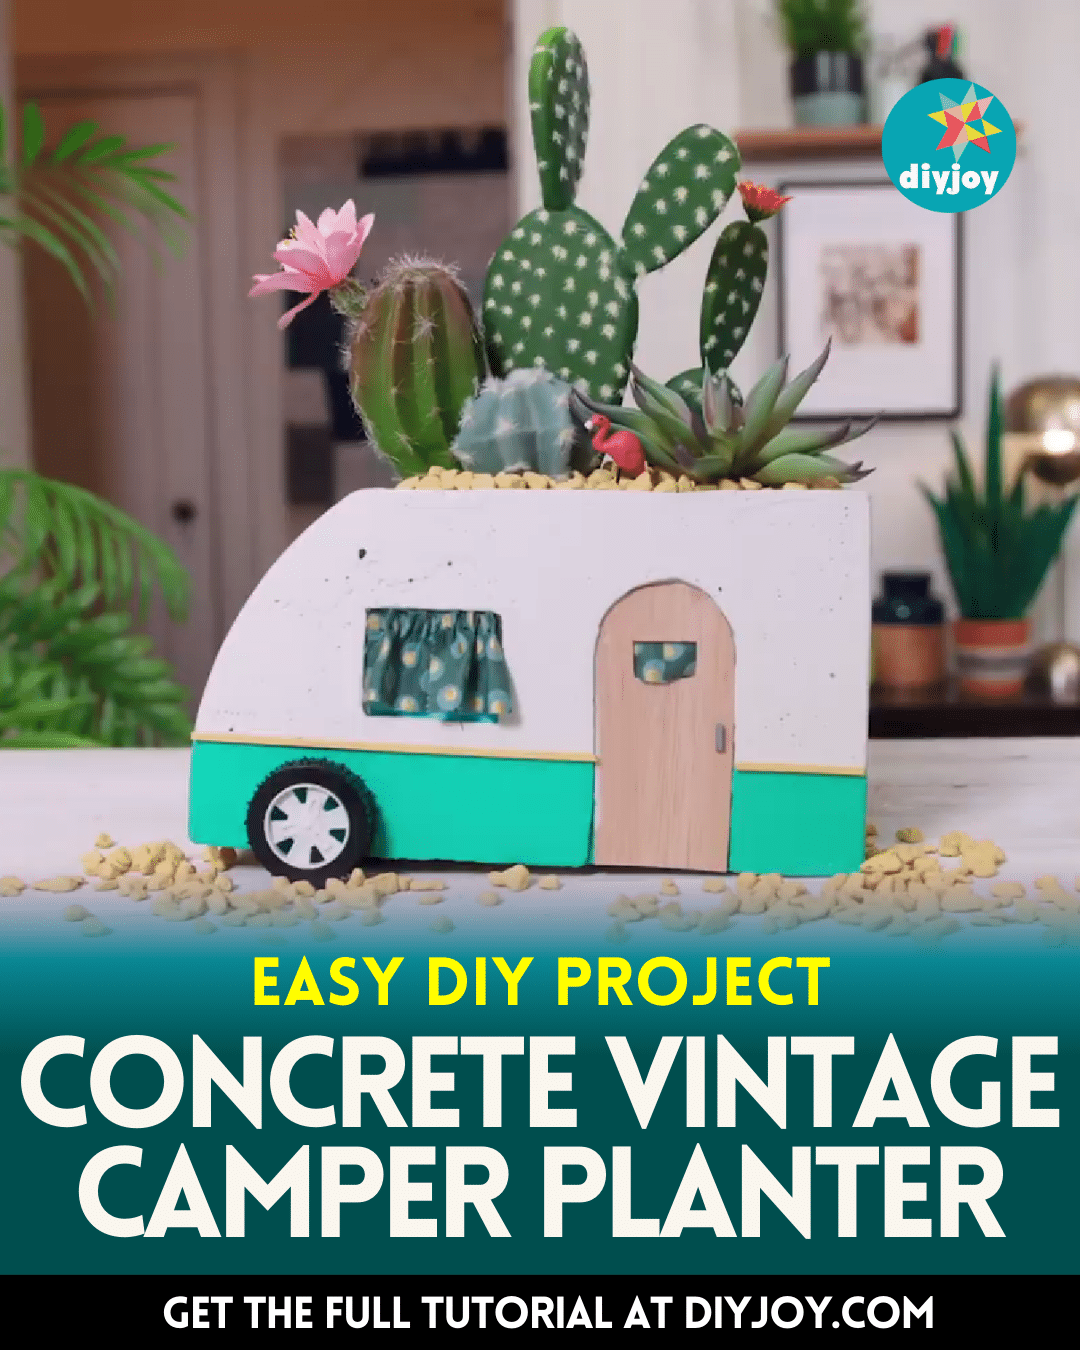
The mold is built, not bought: the camper shape is drawn and cut from insulation board, a round object traces the curved back, and scored cardboard forms the flexible parts, all taped up and glued into a box. Mineral oil sprayed inside is the release. Rapid set concrete fills it halfway before a plastic tub is pressed into the center to leave the planting cavity. Once cured it gets sanded with 60 then 220 grit, taped and painted in acrylic, with balsa wood and small wheels added for the details.
Get the full tutorial at DIY JOY.
17. Concrete Votives and Advent Candle Holder
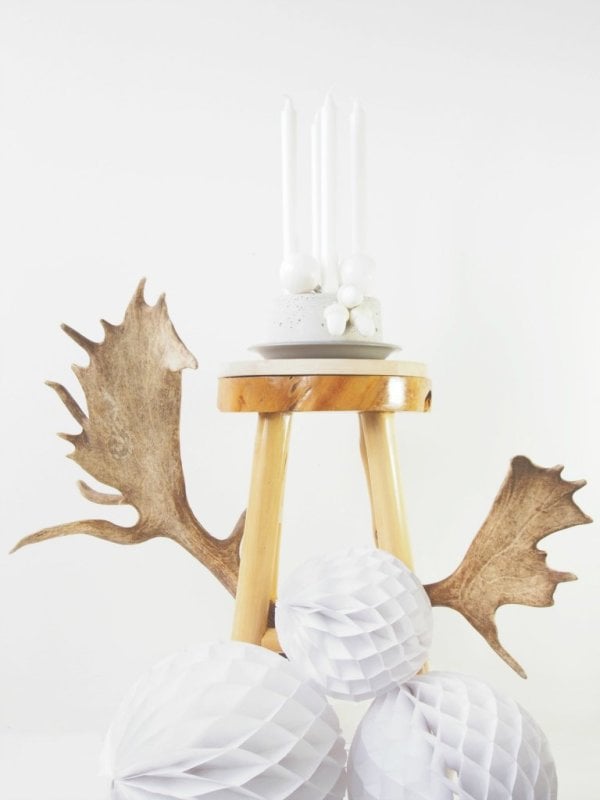
An empty soda can with the top cut off is the mold for these little concrete votives! Mix 1 part concrete to 4 or 5 parts sand with just a little water, pour it into the can and tap a paint stirrer up and down to release the air bubbles. The same mix makes a round advent candle holder for tapers. Once they’re cured, add a touch of shine with gold leaf or metallic spray paint around the base.
Get the full tutorial at Monsters Circus.
18. DIY Gradient Candle Holders
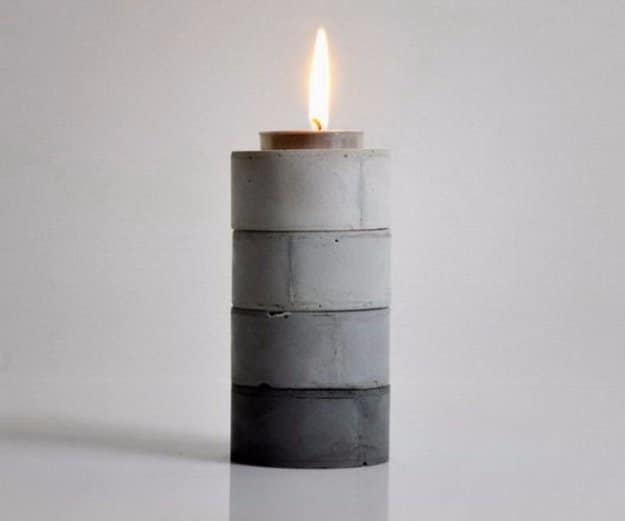
A stacked column of four cast concrete rings, palest at the top and nearly black at the bottom, with a tealight sitting in the top one. The gradient is pigment added in decreasing amounts across four separate pours rather than anything painted on afterward, which is why the color runs right through the edges of each ring instead of stopping at a painted surface. Cast them as separate pieces and you can restack them in any order, or split the set across a table.
Get the full tutorial at HOBBY:DESIGN on Naver.
19. Concrete Arch Candle Holder
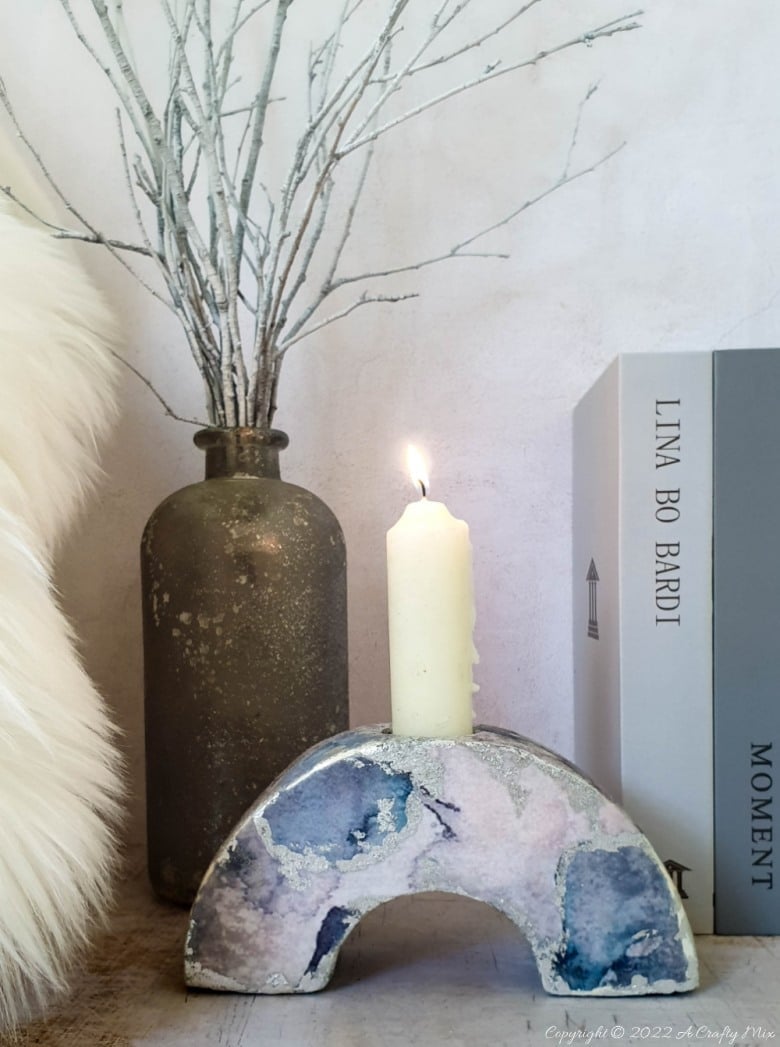
A sturdy cardboard box becomes the mold for this pretty arched candle holder. Trace a pot lid to cut a semicircle, cut a smaller arch out of it, then wrap a long cardboard strip around the edge. Cover everything in aluminum tape so the concrete peels right off with no release spray, and hot glue a tealight in place to make the candle well. After it sets, paint it and decoupage rice paper prints for a blue and silver finish.
Get the full tutorial at A Crafty Mix.
20. Concrete Candle Holders Using Plastic Bottles
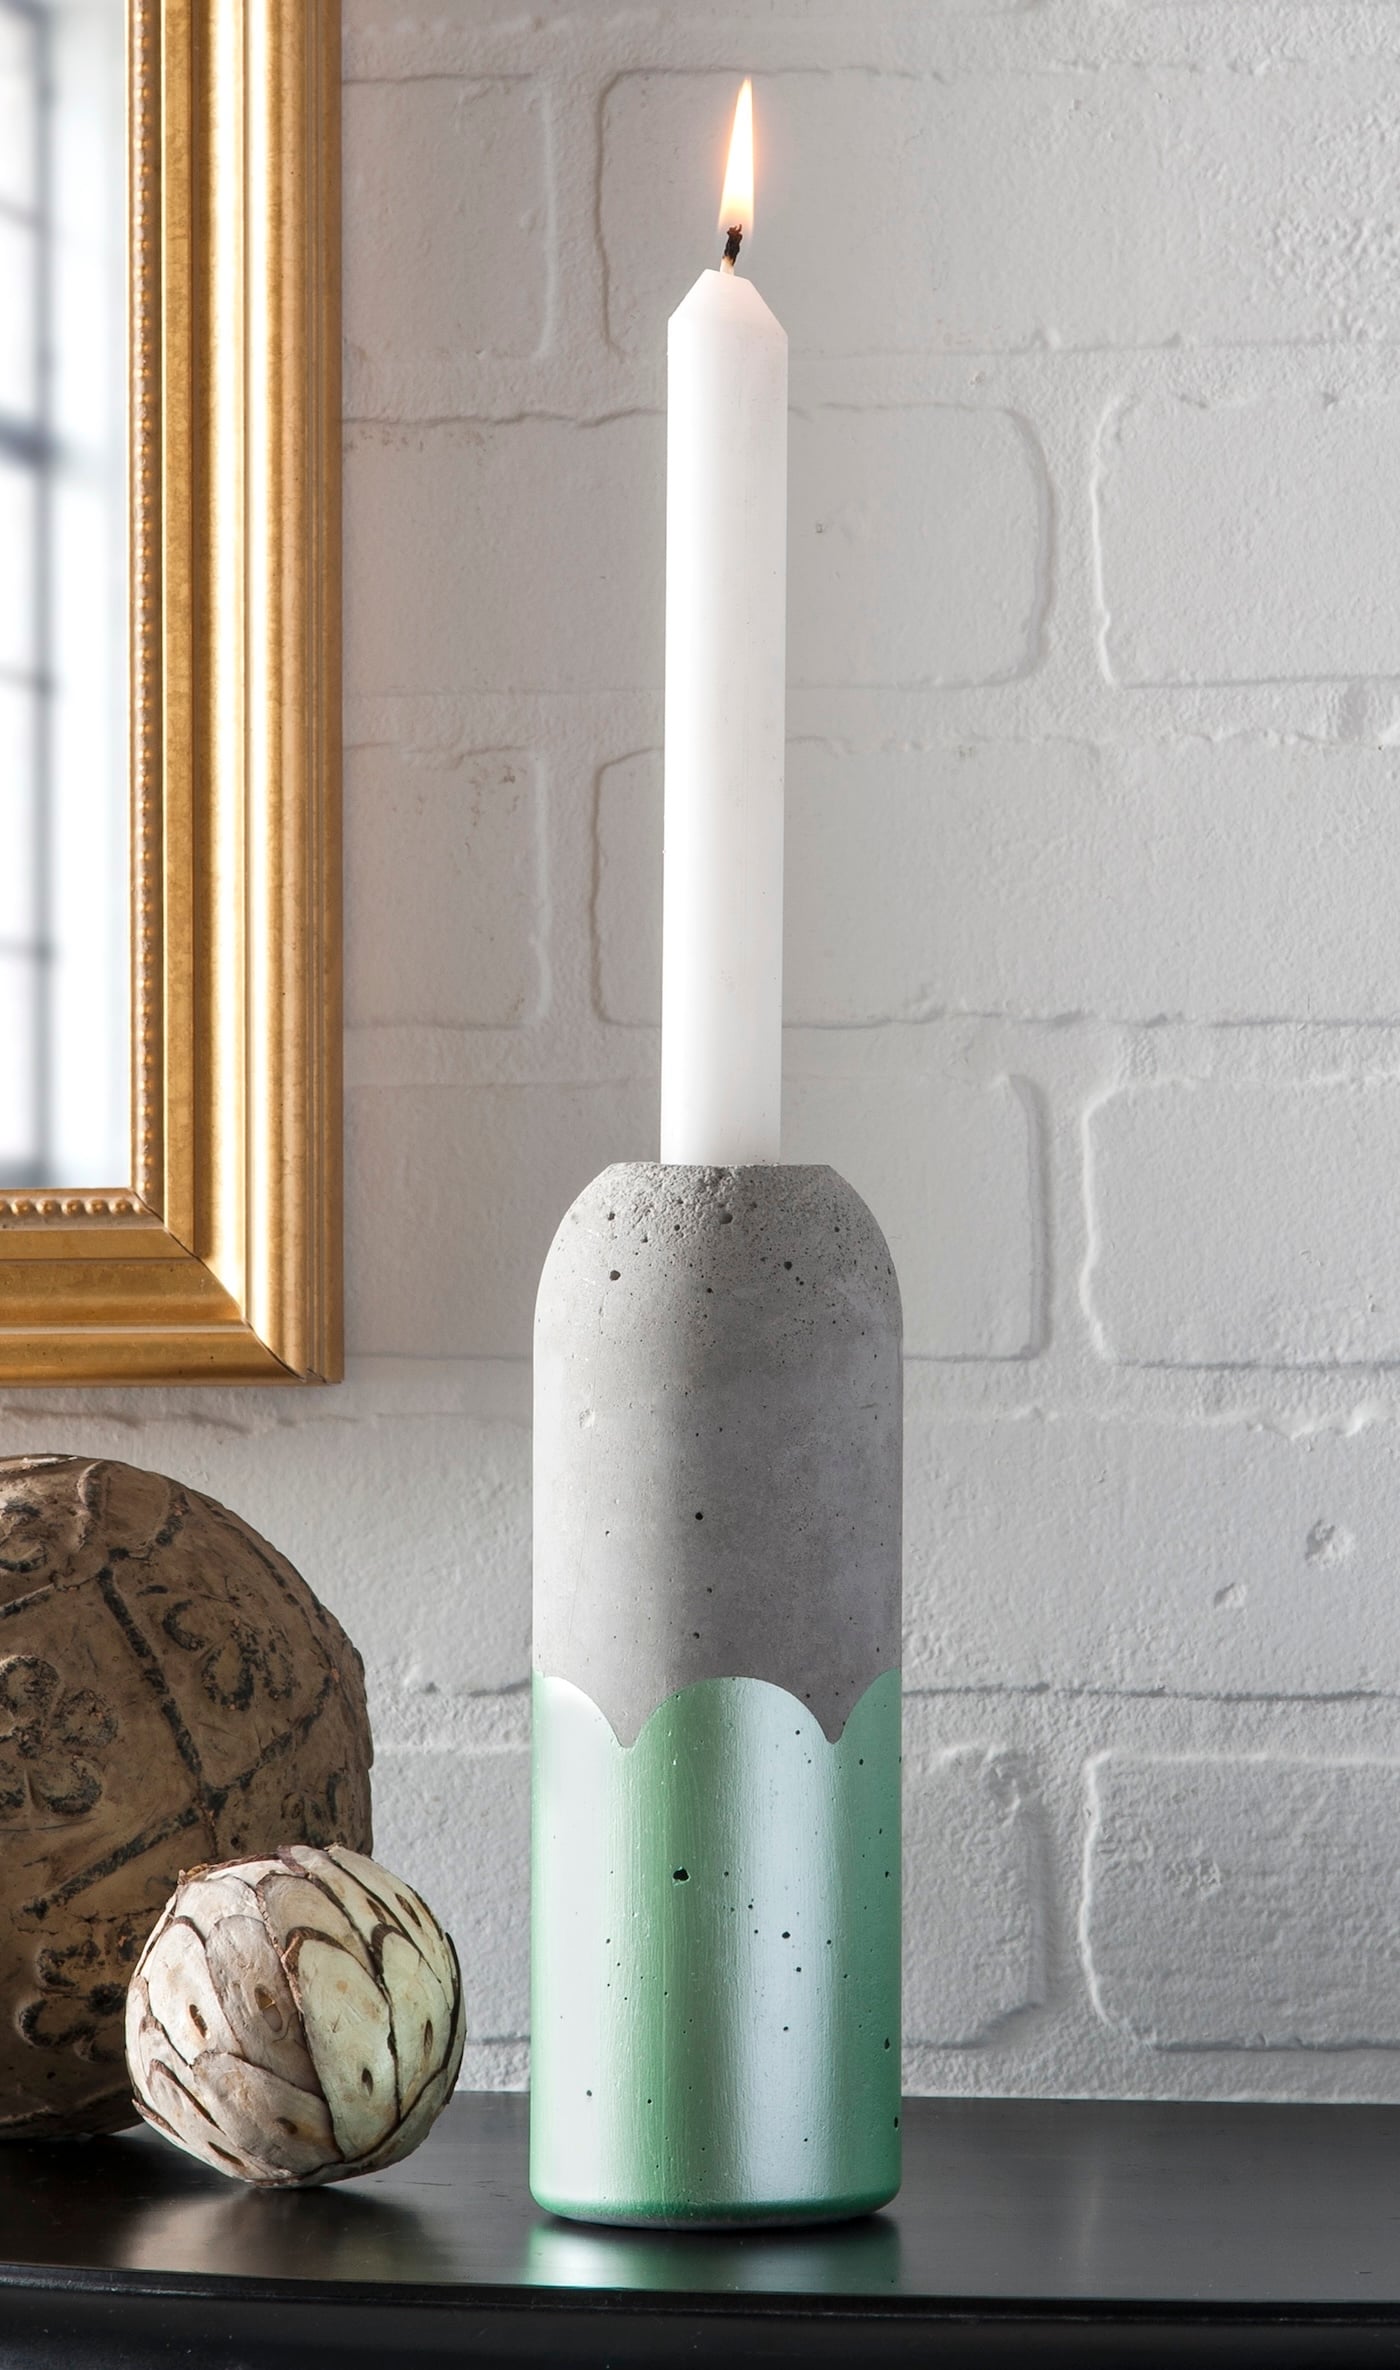
Recycled plastic bottles become the molds for these modern taper candle holders! Sift the bigger stones out of your Quikrete, mix it, then pour it into the bottles, leaving a little room at the top. Spray the end of each candle with cooking spray, push it into the wet concrete and let it sit overnight. Pull the candles out, saw off the bottle tops and slice the plastic away with a razor blade. The bottle ridges show right in the concrete!
Get the full tutorial at DIY Candy.
21. Ombre Cement Candle Holders
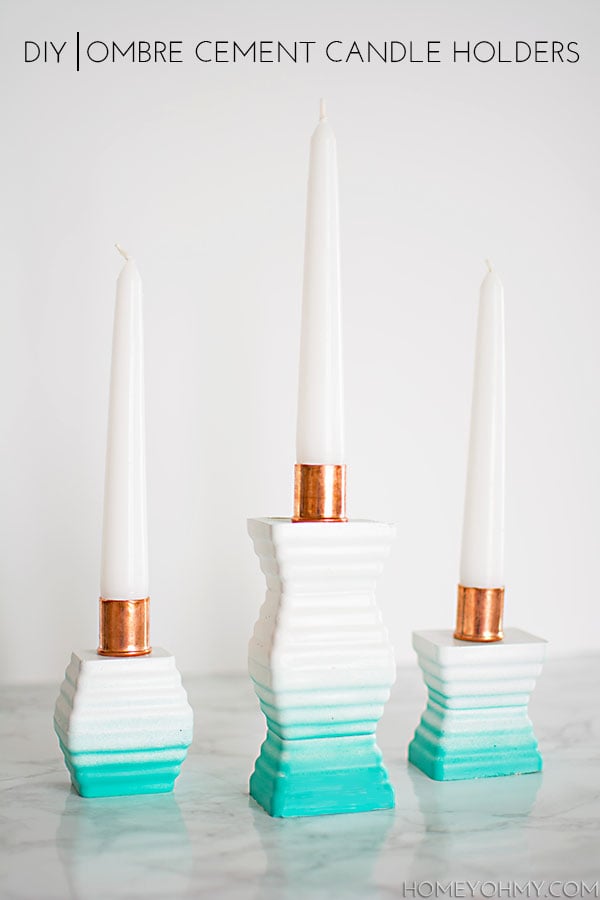
These started as a failed popsicle project and turned into something so pretty! The maker filled a layered ice cube tray with Cement All mixed a little thinner than the package says, so it filled every ridge. The stepped pieces got glued together with E6000 into different heights, then sprayed white in three light coats. Aim turquoise spray paint mostly at the bottom layers for a soft ombre fade, and add copper candle cups on top.
Get the full tutorial at Homey Oh My.
22. Eggshell Concrete Taper Candle Holders
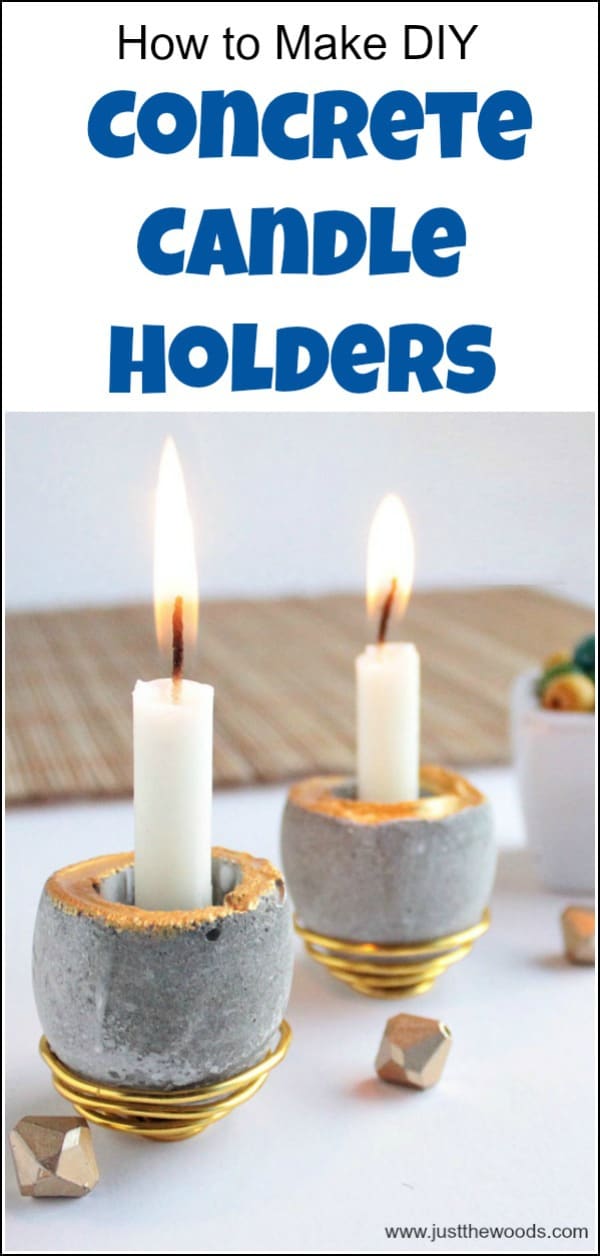
You don’t need a fancy mold for these, just an empty eggshell! Mix cement and sand 50/50, add water until it’s thick but workable, then fill the shell set in a cardstock collar. Push in a taper candle while it’s wet. Once it cures, crack away the eggshell. A coil of 16 gauge craft wire shaped with pliers makes the base, and a brush of liquid gold paint around the rim gives them a glam finish.
Get the full tutorial at Just the Woods.
23. Concrete Bowl Centerpiece
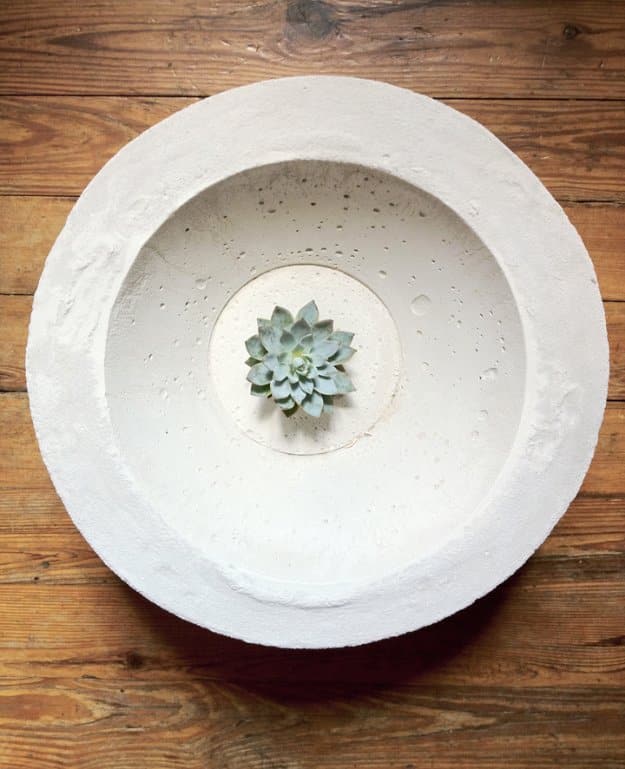
The mold here is two things from the housewares aisle: a flexible rubbery bucket for the outside and a plastic bowl pressed into the middle. Both get wiped with canola oil on a paper towel first, which is what lets the finished bowl release later. A 60 pound bag of cement mixed in a wheelbarrow fills the bucket several inches deep, then the oiled bowl goes in the center and the weight of the mix pressed into it forms the well. Dry it on a level surface. The maker is upfront that the result is heavy.
Get the full tutorial at A Daily Something.
24. Concrete Jewelry Bowls

Two clear acrylic half spheres, one 10 cm and one 8 cm, make these sweet little concrete bowls. Oil the inside of the big one and the outside of the small one, fill the big one about two thirds with creative concrete and press the small one in, weighing it down with stones. Let it dry overnight, lift out the inner mold and tap the bowl out. Press textured paper inside first for a stamped pattern, then gild the inside!
Get the full tutorial at Deschdanja.
25. Concrete Bowl with Embedded Amethyst
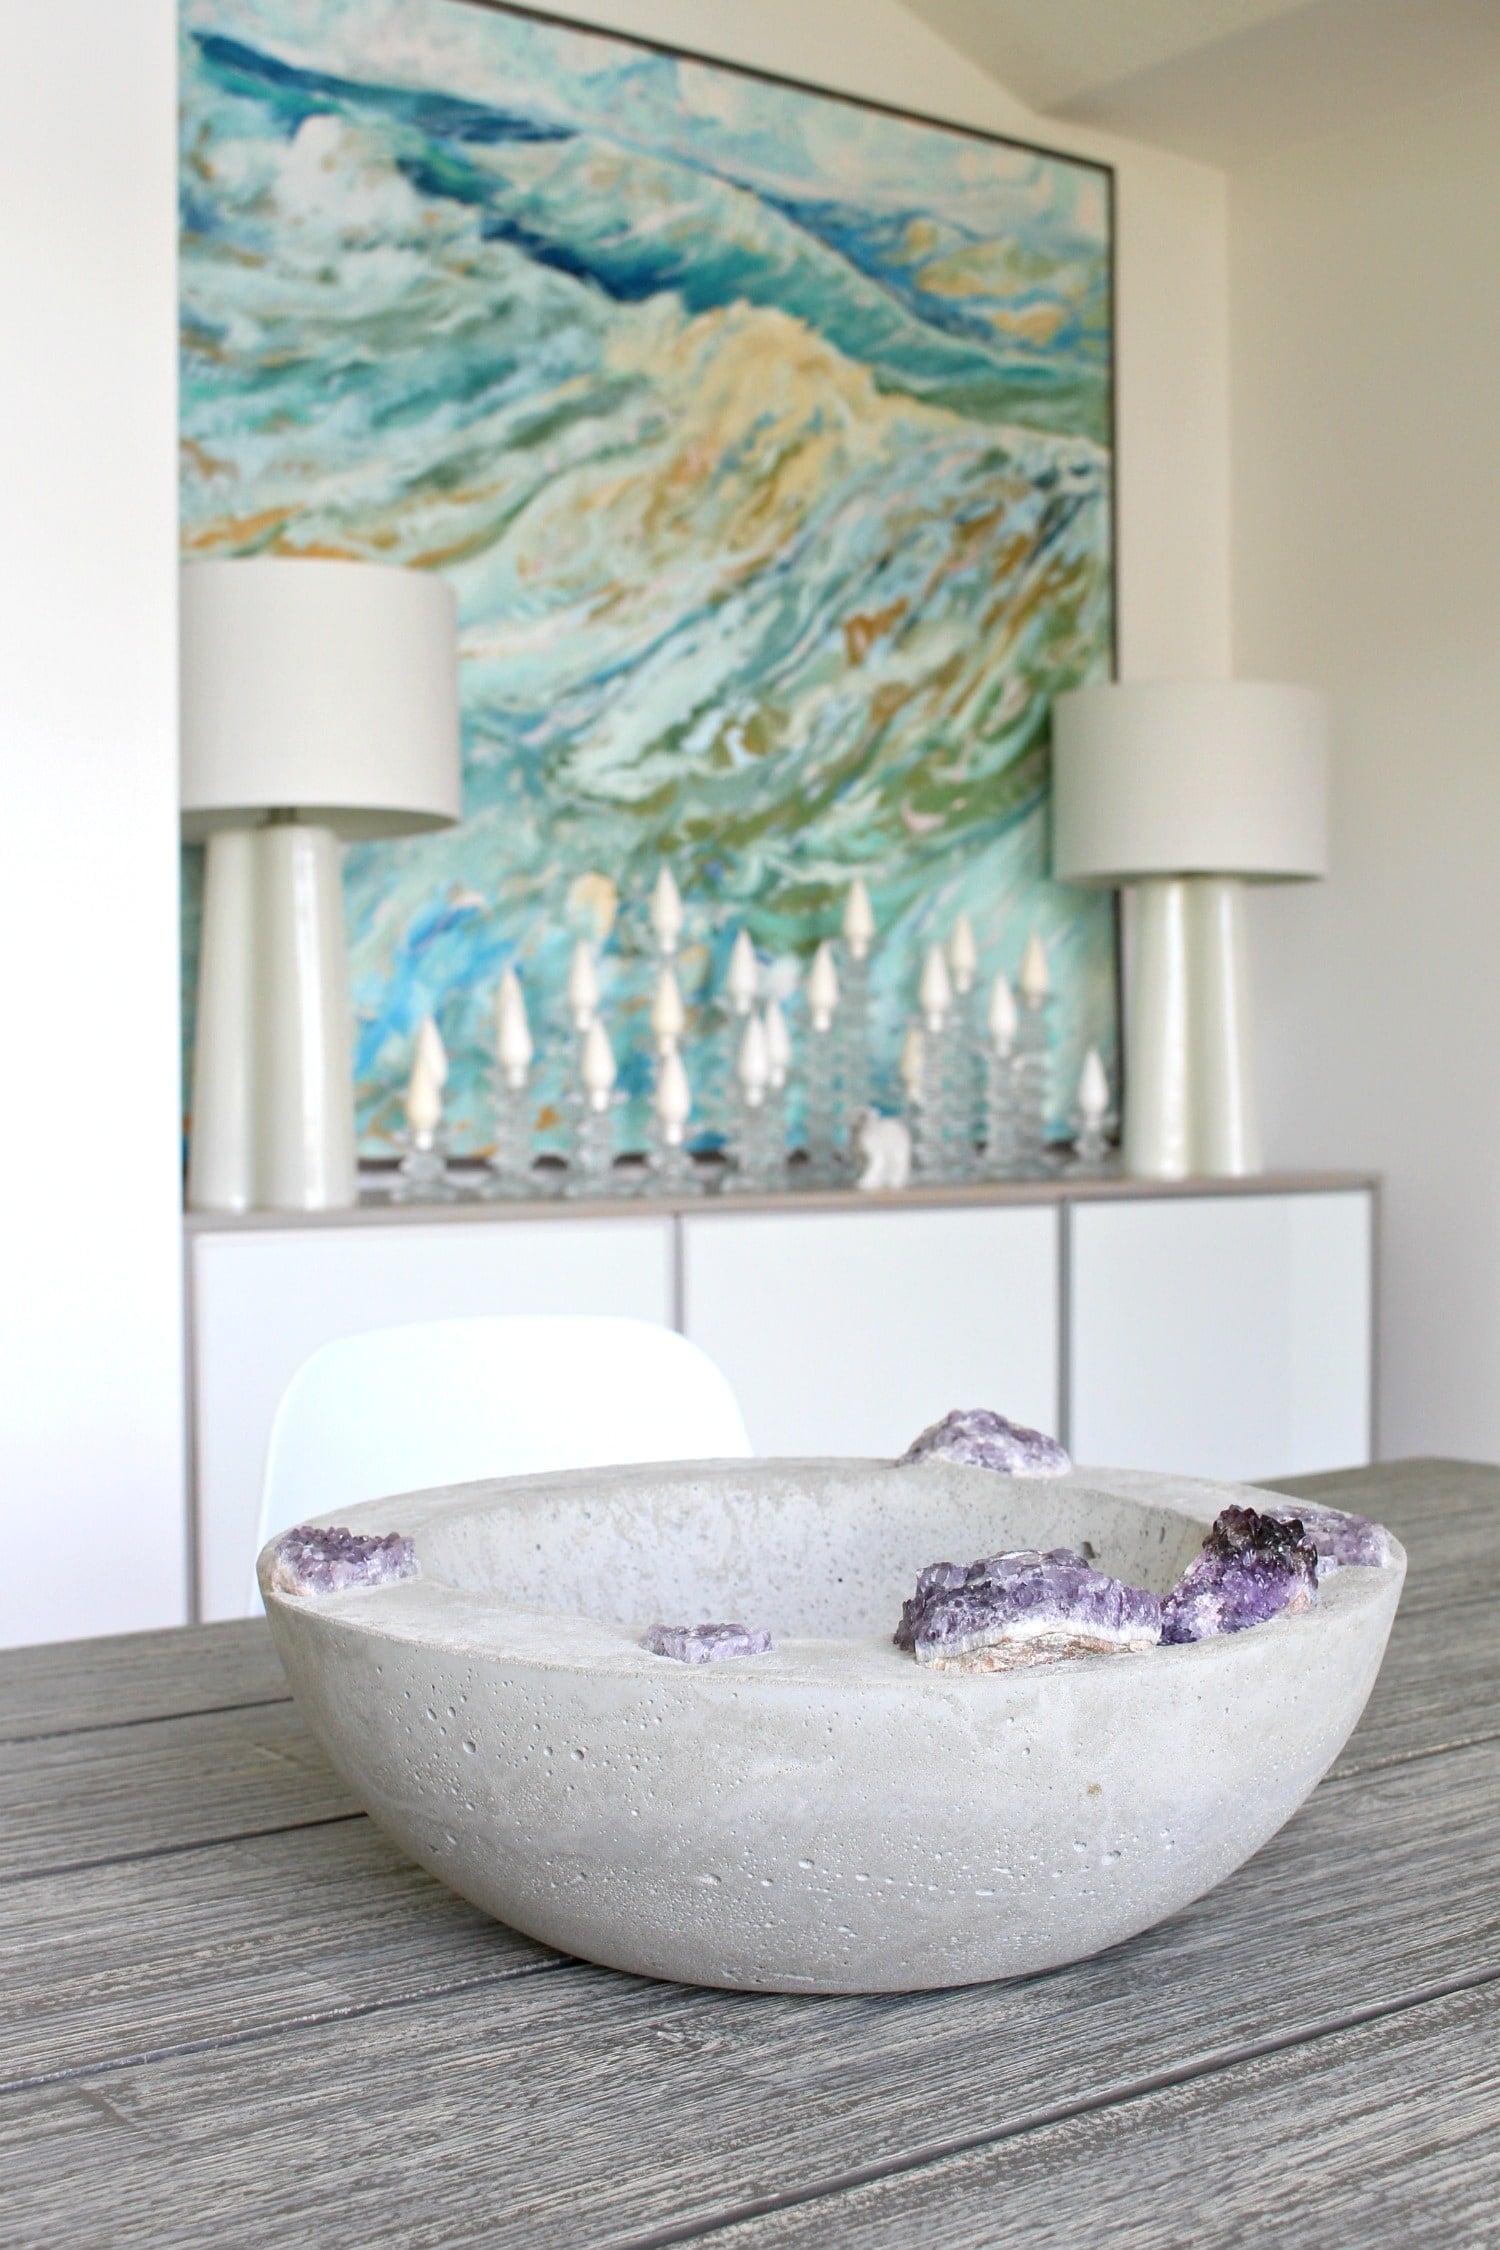
Two dollar store bowls are the mold for this big concrete bowl, and the amethyst chunks make it so special! Spray both bowls with cooking oil, fill the larger one with about 17 pounds of mixed concrete, then press the smaller bowl in and fill it with rocks to weigh it down. Push the amethyst or beach stones into the rim while the concrete is still workable, and tidy the edge with a small putty knife. Add felt feet so it won’t scratch.
Get the full tutorial at Dans le Lakehouse.
26. Concrete Bowl and Lid
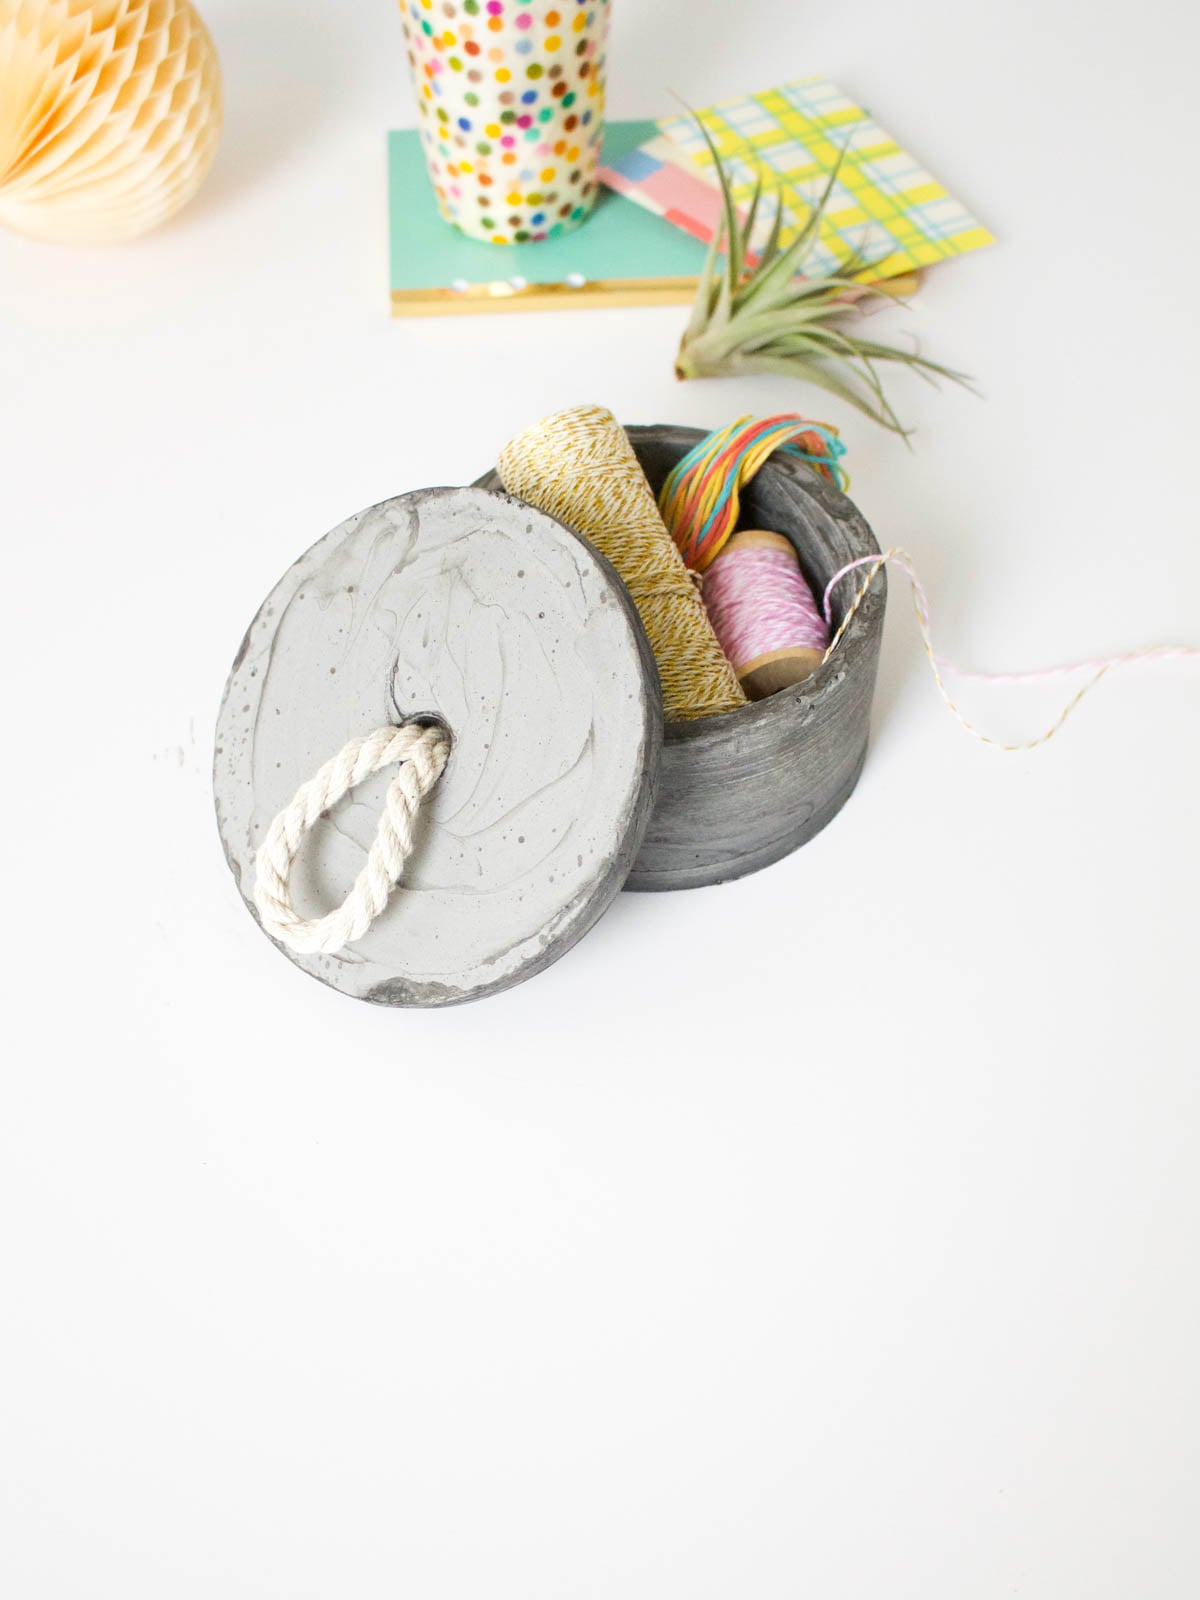
Two cardboard boxes, one with a lid, make this cute concrete box with a rope pull! Rub Vaseline inside the medium box, inside its lid and on the outside of the small box. Set a bottle cap in the center of the lid where you want the pull. Pour about half an inch of concrete in the box and the rest into the lid, then press the smaller box in. Tap out the bubbles and let it set. A knotted rope makes the handle.
Get the full tutorial at Fish and Bull.
27. Concrete and Cylinder Vase
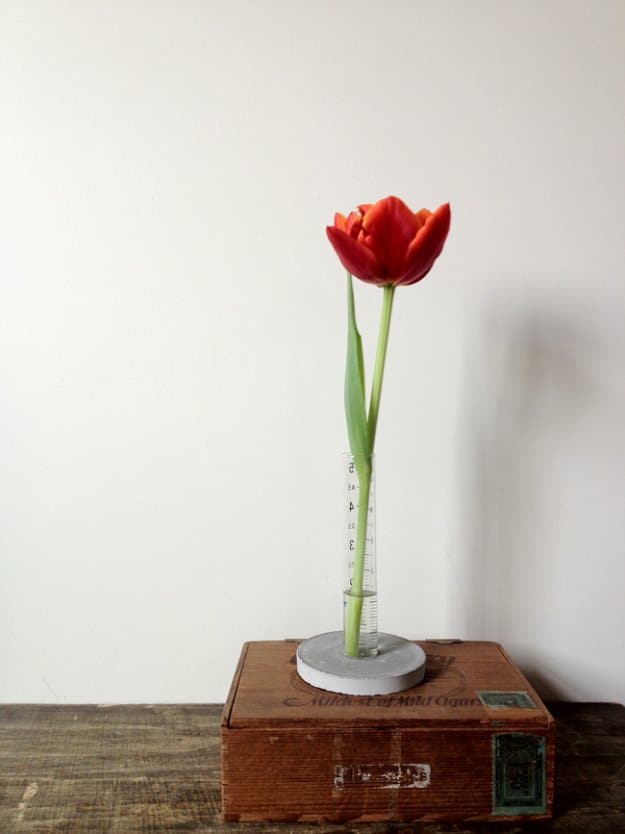
A glass test tube standing in a cast concrete base, holding one red tulip, which is the entire piece. The maker’s favorite product is named outright, Rockite, a smooth fast drying cement, and the base uses the exact same process as her coasters: mix it, pour it into a mold, set the cylinder in place before it goes off. She used a cardboard soup container as the mold. One stem in a narrow tube is a deliberately small idea and it is the reason this works on a side table where a real vase would crowd everything.
Get the full tutorial at A Daily Something.
28. DIY Concrete Tumblers

Did you know concrete sticks to glass? That’s the whole trick behind these minimalist tumblers. Mix fast setting concrete, pour a little into a plastic drinking cup, then press a regular drinking glass down into it. Let it set for about 8 to 15 minutes, cut the plastic cup away and trim the edge with a hobby knife. You can leave the concrete raw or paint it gold. Just remember to hand wash them!
Get the full tutorial at Monsters Circus.
29. Concrete Tray with Dock Cleat Handles
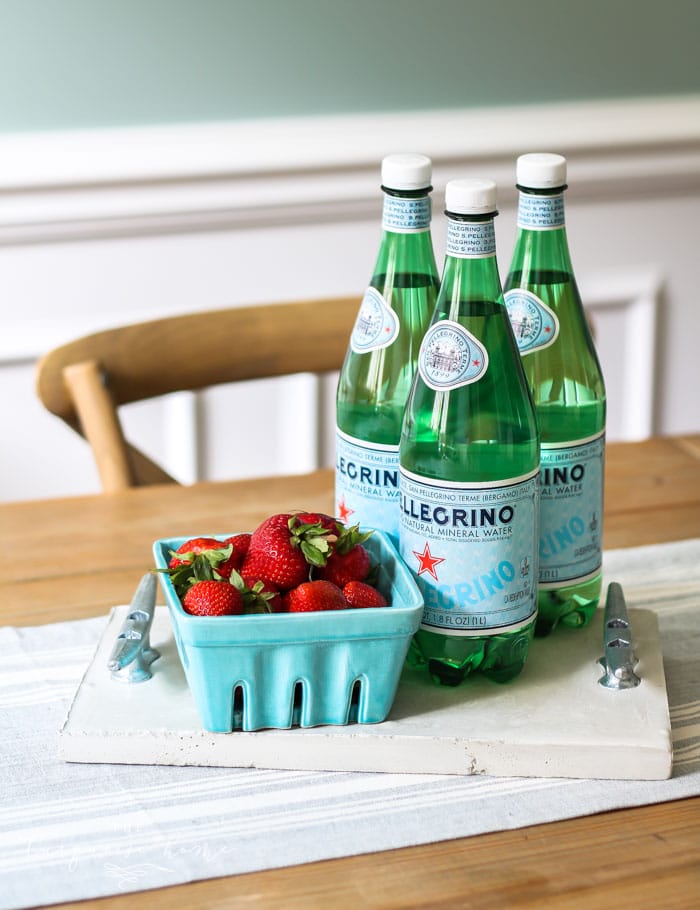
This coastal concrete tray was the maker’s first concrete project, and she was surprised how easy it was! Cut two long and two short 1 by 4 boards and screw them into a box on a plywood base. Screw the small screws into the dock cleats so they’ll set in the concrete, or the handles will pop off. Mix multipurpose concrete exactly as the bag says and pour it quickly. Sand the edges once it’s cured.
Get the full tutorial at The Turquoise Home.
30. Confetti Glitter and White Concrete Coasters
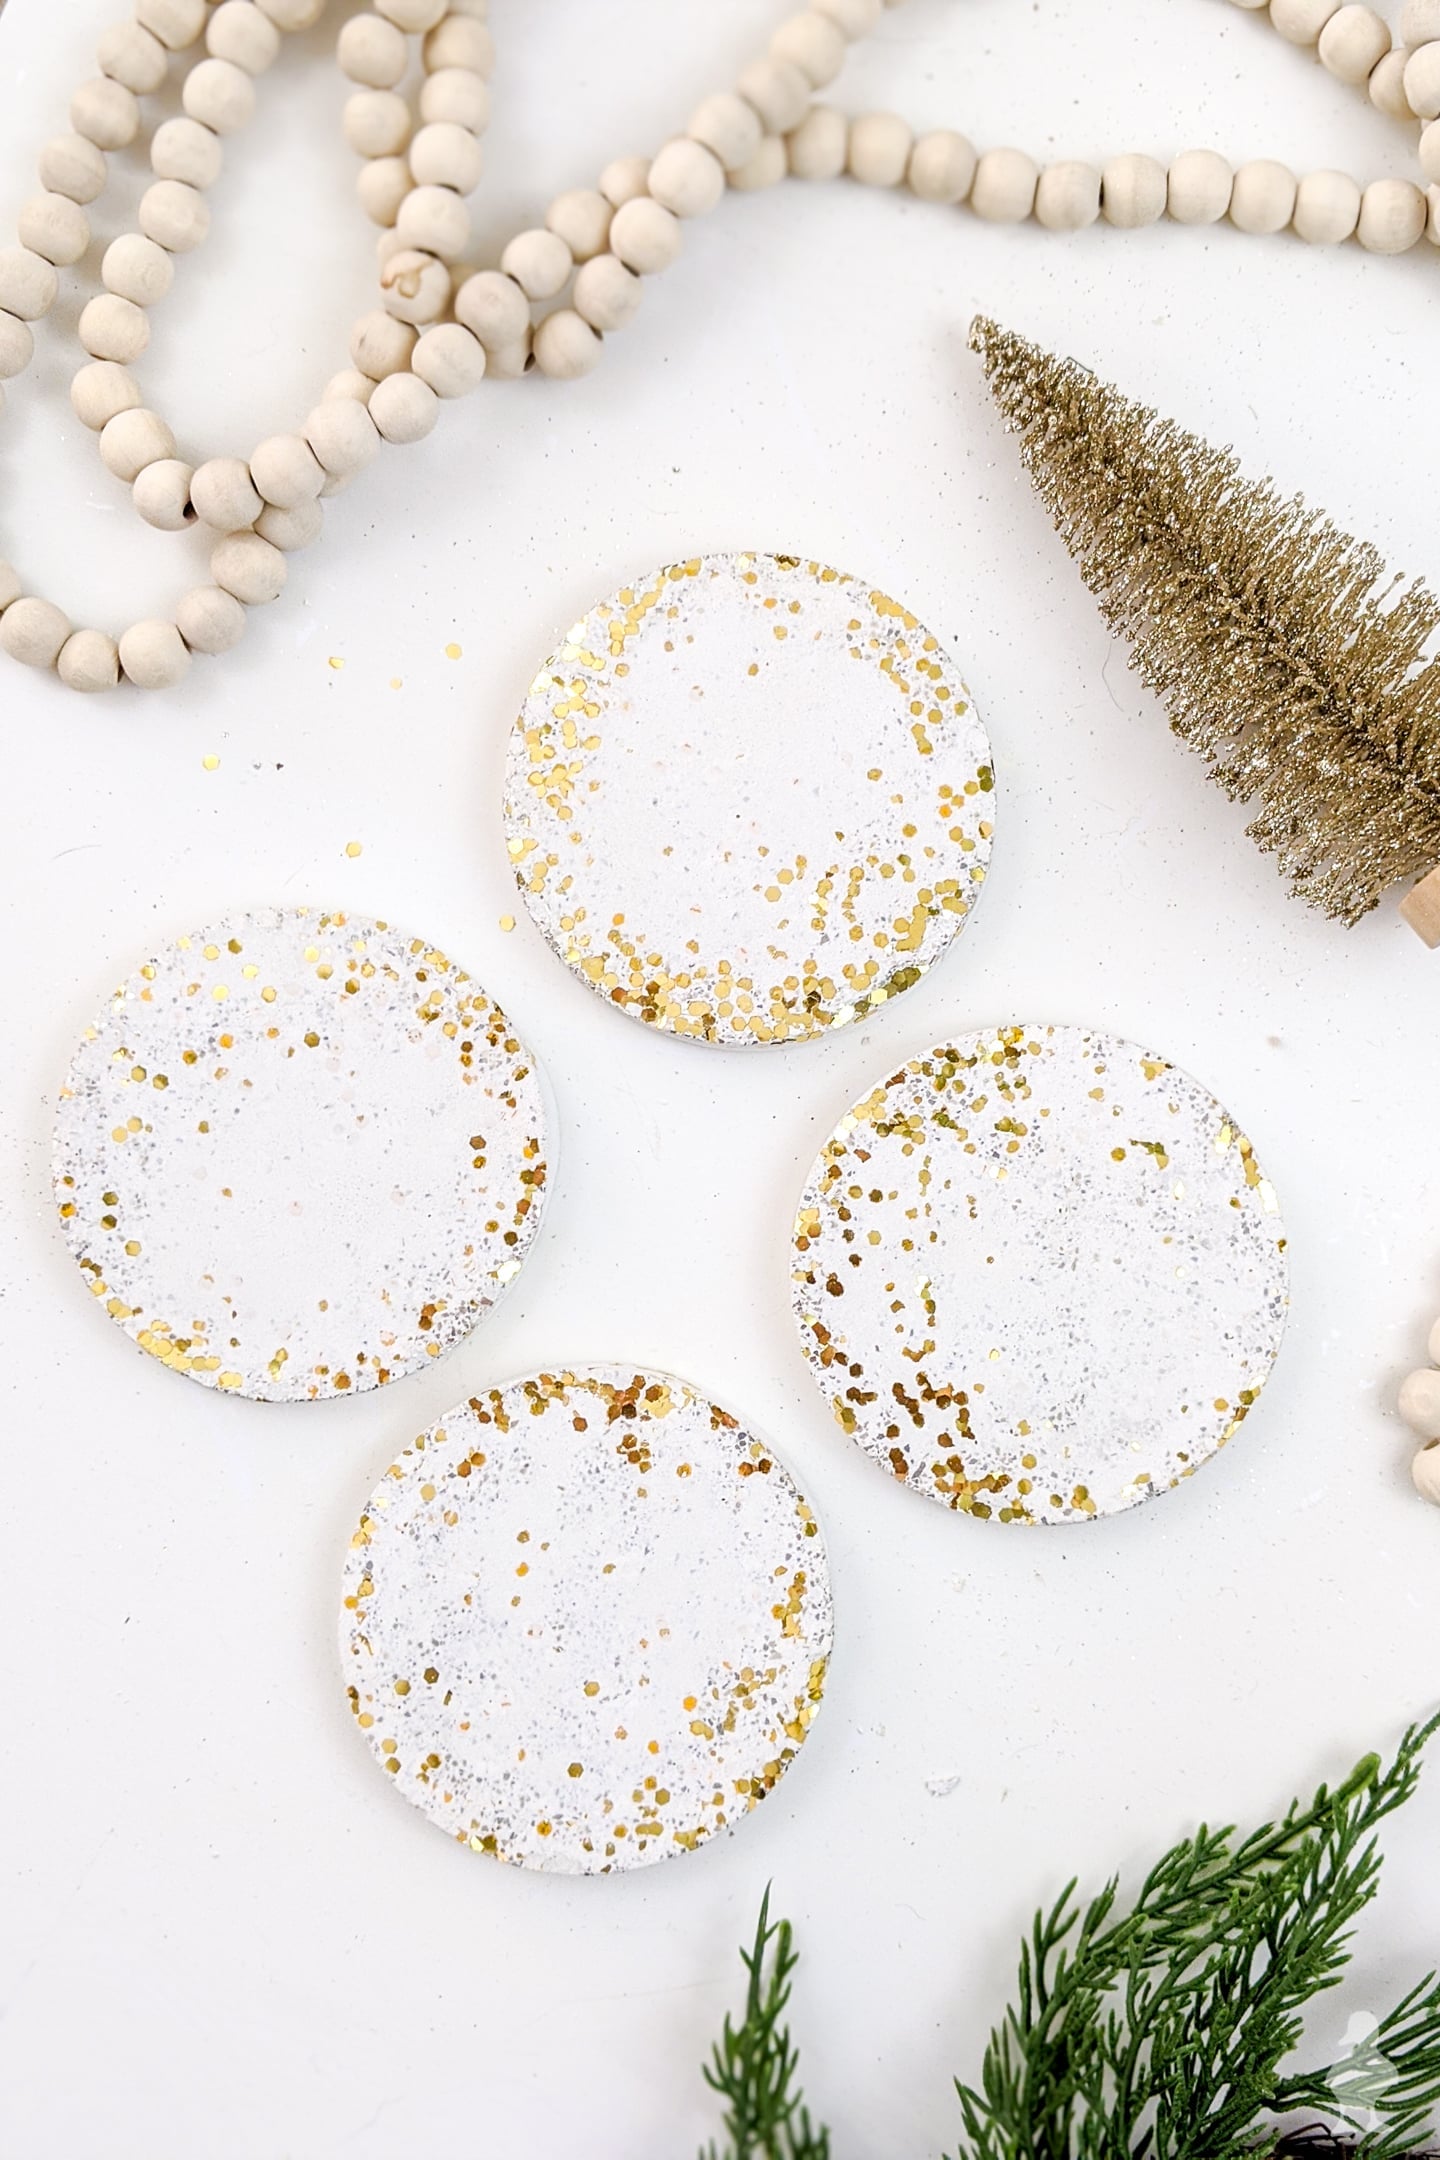
Glitter lovers, this one’s for you! Pour glitter or chunky gold confetti into one side of each silicone coaster mold, then mix white cement to the thickness of pancake batter and pour it over the top. Add the water a little at a time, because it gets soupy fast. Tap out all the air bubbles, let them cure, then pop them out and sand the edges with an orbital sander. They make such a sparkly hostess gift!
Get the full tutorial at Ugly Duckling House.
31. DIY Painted Concrete Place Card Holders

Toilet paper rolls are the molds for these modern place card holders! Cut each roll into 2 inch pieces with an X-acto knife, brush oil inside, then tape the bottom closed. Mix quick setting concrete inside a trash bag stretched over your bowl, so cleanup is super easy. Spoon it into the rolls, push in a piece of 16 gauge wire, let them set and peel off the cardboard. Glue alligator clips on top and paint the bottoms gold!
Get the full tutorial at Hey There Home.
32. DIY Concrete Letter Bookends

Cardboard craft store letters make the molds for these chunky initial bookends. Cut the back off each letter, pull out the cardboard inside and spray the mold with WD40 so the concrete releases. The makers mixed their own concrete for a smoother finish: 60 percent fine play sand to 40 percent cement, plus a little plasticiser and PVA. Keep it stiff so the cardboard doesn’t warp, fill halfway, tap out the bubbles, then fill to the top.
Get the full tutorial at Little House on the Corner.
33. Concrete Monogram Bookends
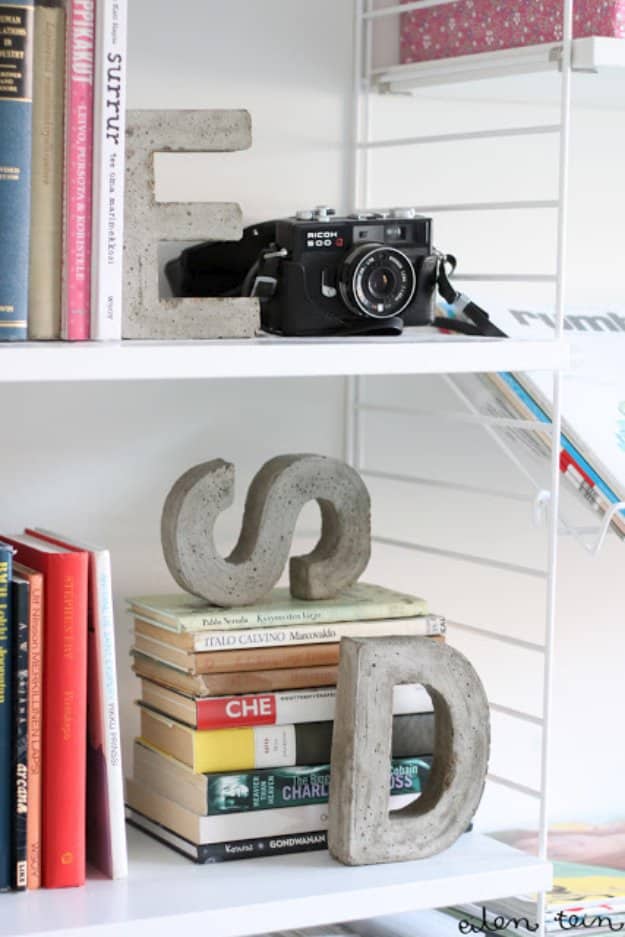
Cardboard craft letters are the mold, and the maker is specific: hers are about fifteen centimeters tall and three centimeters thick, and she prefers that proportion to the narrower taller ones sold elsewhere. Slit the back off with a craft knife, pull out the internal cardboard structure, tidy the edges with scissors, then reinforce every corner with duct tape because that is where a paper mold blows out. Vaseline greases the inside. She is also honest that she would not recommend these as a first concrete project.
Get the full tutorial at Eilen Tein.
34. Scallop Shell Concrete Bookends
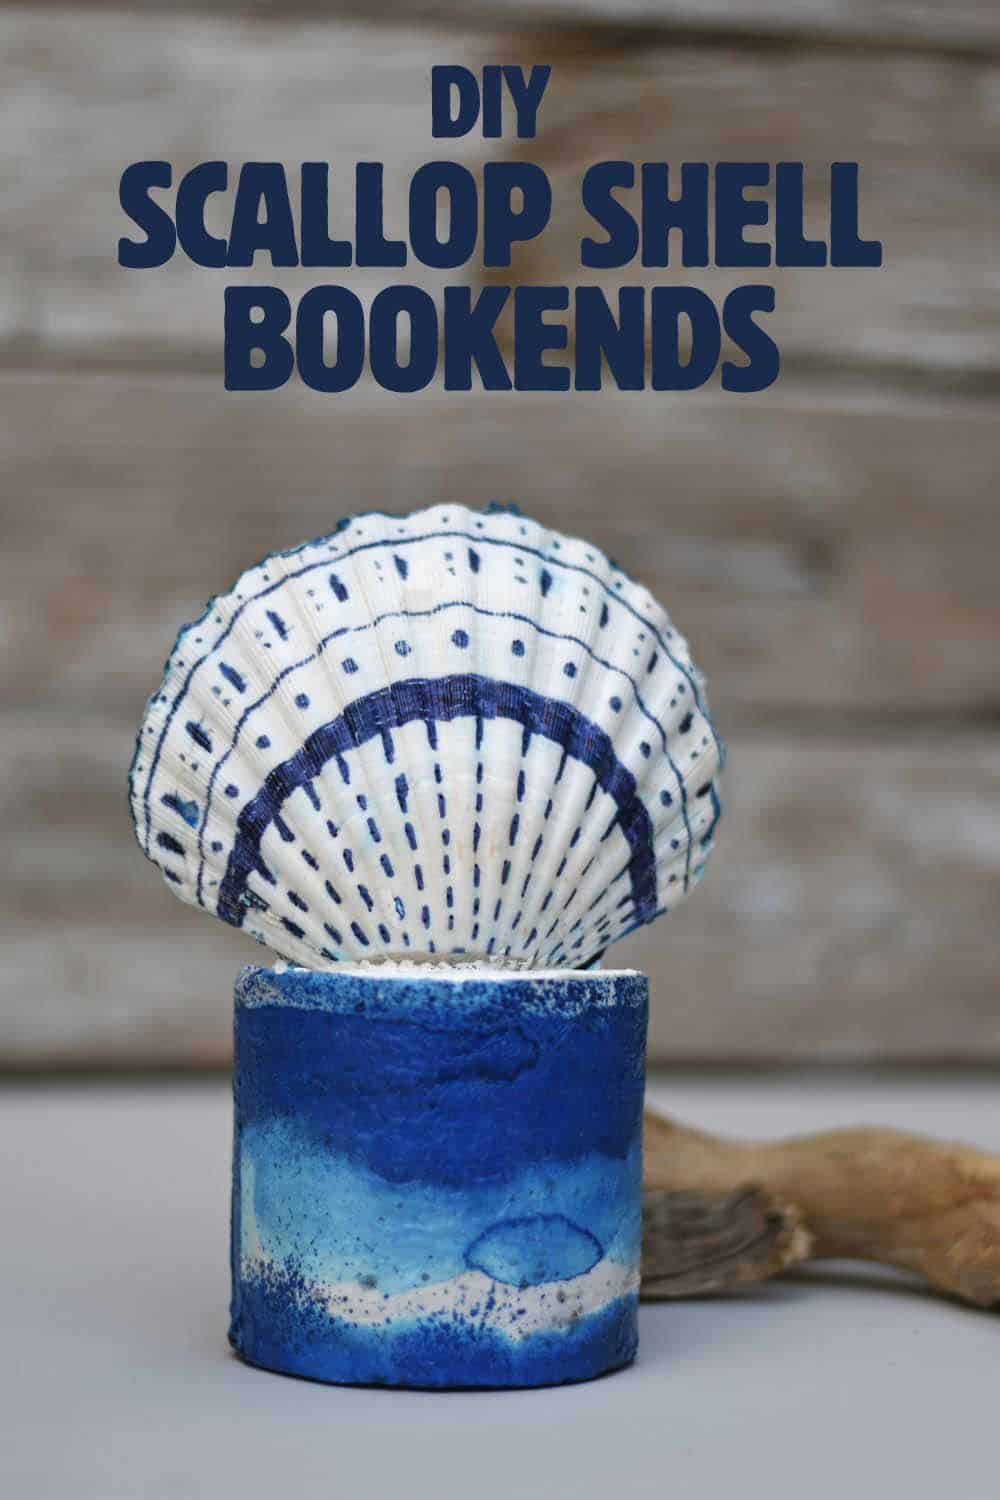
Coastal decor lovers, you’ll adore these! Two big scallop shells get blue Sharpie lines traced along their ridges and blue and white paper napkins decoupaged inside with Mod Podge. The bookend bases are craft concrete cast in round molds about the size of a mini Pringles can, greased with Vaseline. Set each shell into the wet concrete so it stands up, then paint the base white and blue. They’re heavy enough to be little doorstops too!
Get the full tutorial at Pillar Box Blue.
35. DIY Concrete Pencil Holder
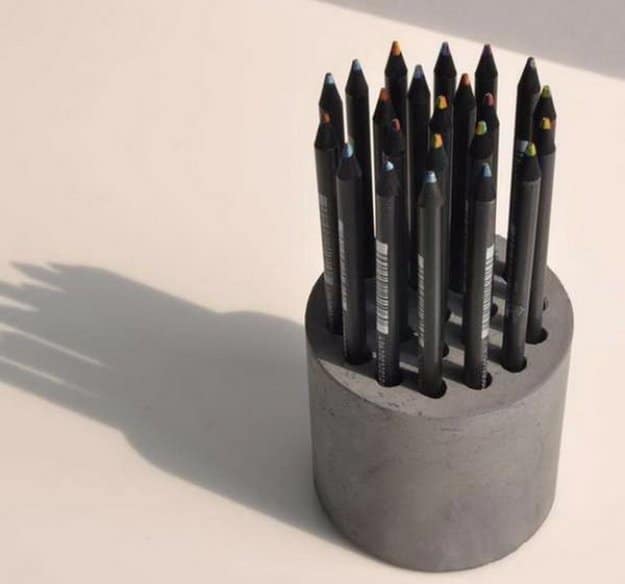
A squat cast cylinder packed with black barrelled pencils, which is a better looking combination than it sounds because the matte gray and the matte black cancel each other out and the only color left in the picture is the tiny painted tips. Cast in a round container with a smaller one held in the middle to make the well. Fill the inner container with something heavy before the mix goes in, or it floats up and you end up with a shallow dish rather than a pot.
Get the full tutorial at HOBBY:DESIGN on Naver.
36. DIY Concrete Paper Weights
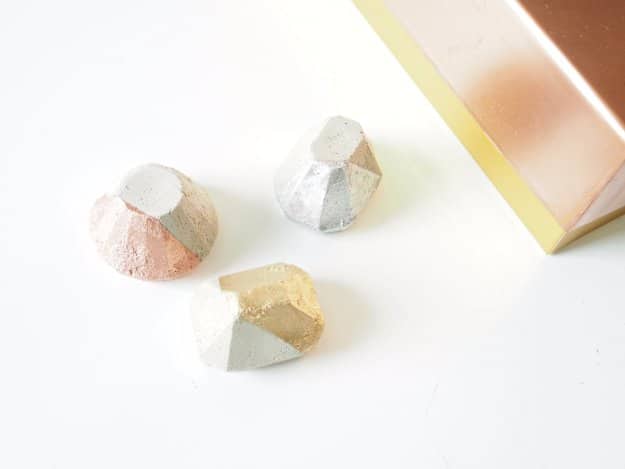
Cast in an ice cube tray or a silicone soap mold, which is why they come out as small faceted blocks. The maker uses a rapid setting cement that is ready in roughly fifteen minutes depending on the size of the piece, and warns that the mix gets genuinely hot while it cures, which is normal and is the reason it sets so fast. Smooth the top with a wet stirrer before it goes off. From there they are either left raw, spray painted, or stamped with acrylic paint and a rubber eraser cut into a shape.
Get the full tutorial at Monsters Circus.
37. Cement Gem Push Pins
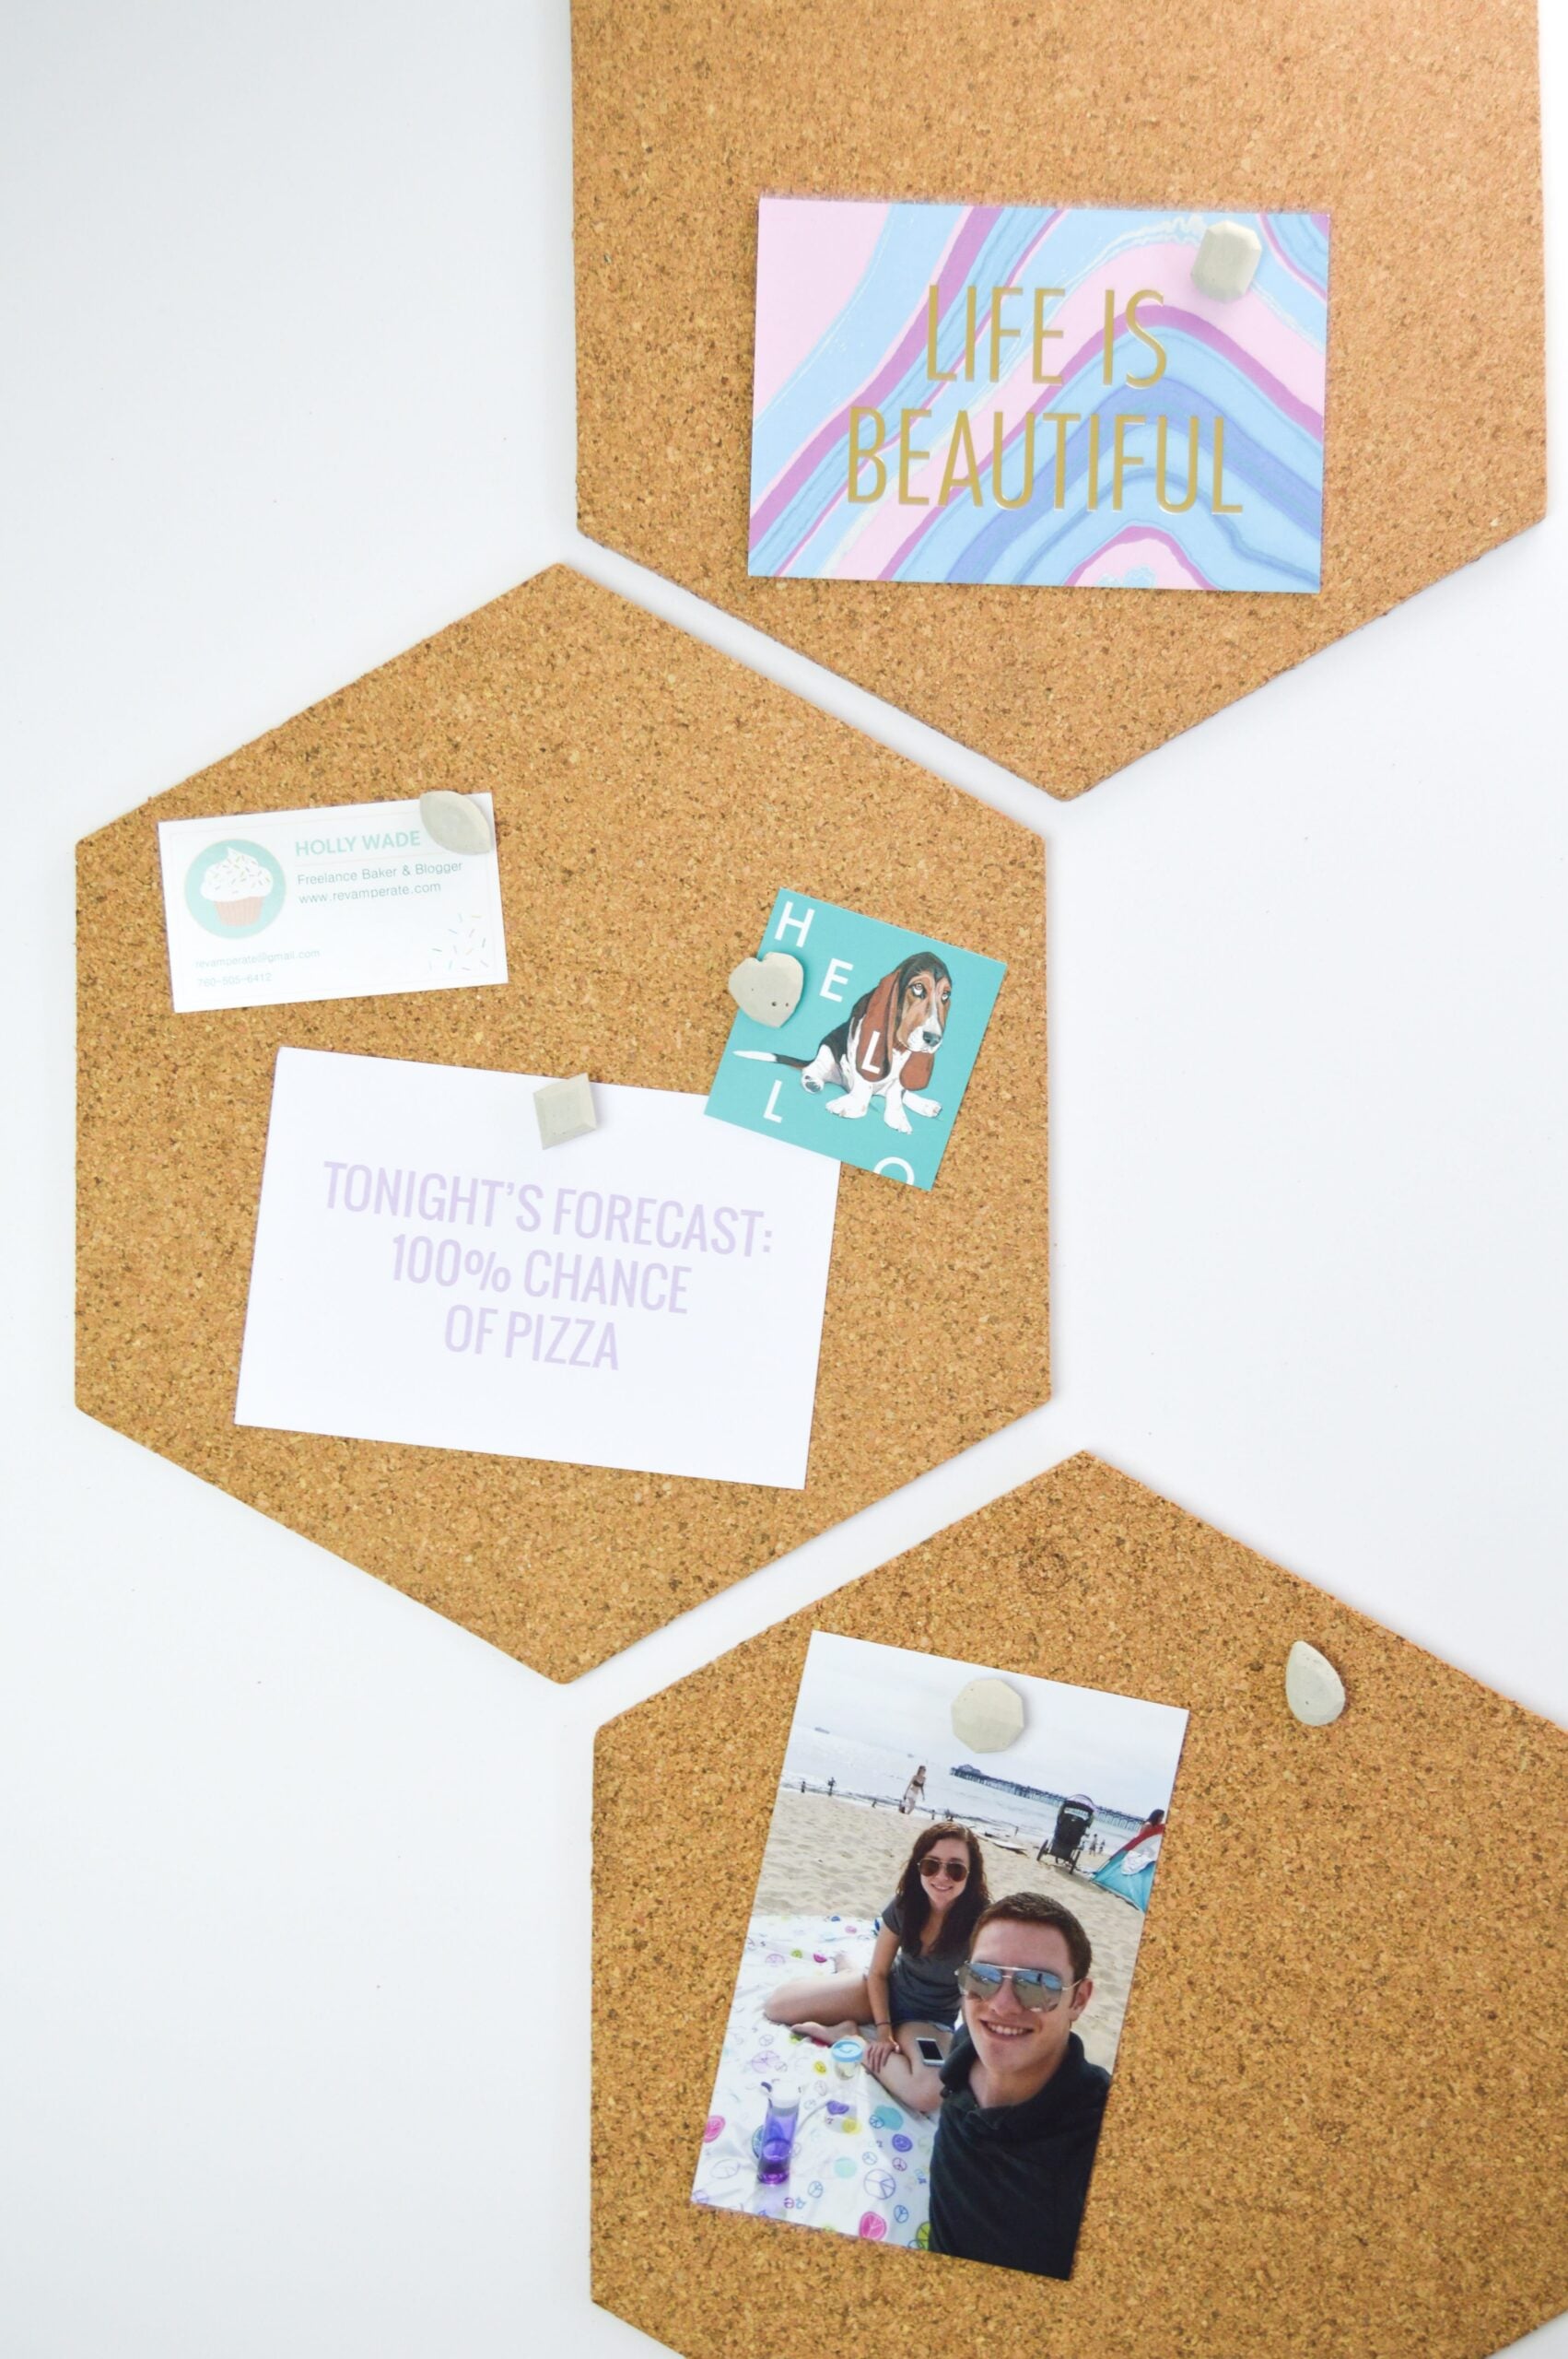
Got a gem shaped candy mold? It makes the cutest cement push pins! Mix powdered cement in a disposable cup with a popsicle stick, spread it over the gem cavities and level the top. Gently press a flat topped tack into the middle of each gem, then wipe off the extra with a wet paper towel. The tack sets right into the cement, so there’s no glue needed. Sand the edges once they pop out. It only takes 15 minutes plus drying time.
Get the full tutorial at Club Crafted.
38. DIY Concrete Letter Magnets

These concrete letter magnets make such a fun handmade gift! The makers used a silicone letter mold and their own smooth mix of cement, play sand, plasticiser and PVA, which shrinks less because it needs less water. Fill each letter, tap out the bubbles and let them cure before you pop them out. Glue a strong magnet on the back of each one, and spell out names, little words or reminders on the fridge.
Get the full tutorial at Little House on the Corner.
39. Concrete iPhone Charger Dock
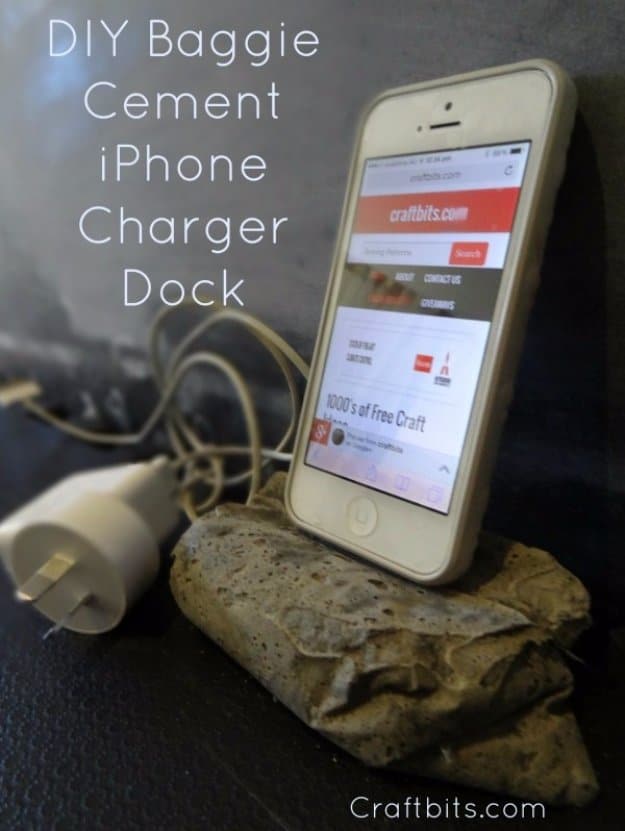
The mold is a plastic lunch baggie, which is why the finished dock looks like a folded rock. Roughly five hundred grams of cement goes into the bag, then you wait fifteen to twenty minutes until it firms up to the consistency of play dough and shape it by hand from the outside, pushing a lip into it for the phone to lean on and flattening the base. Work the creases out of the bag as you go, because a crease becomes a catch and the plastic will not peel away cleanly at the end.
Get the full tutorial at CraftBits.
40. Color Blocked Concrete Clock
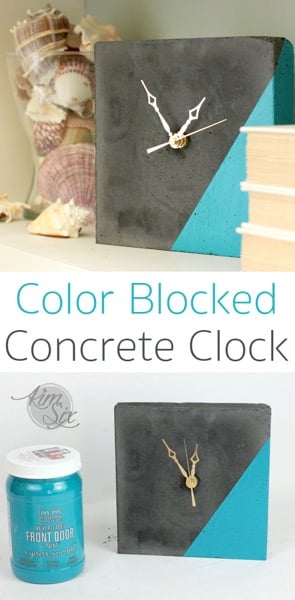
A two dollar clearance clock movement started this modern desk clock! The mold is laminated shelf board, at least twice as wide as your longest clock hand, because the smooth coating gives a slick face and releases easily. The maker tinted her concrete black with powdered cement color, then painted one corner in a bold teal for that dipped look. Drill through for the movement, attach the hands and it’s ready for a shelf or desk.
Get the full tutorial at The Kim Six Fix.
41. DIY Concrete Drawer Pulls and Cabinet Knobs

Small cardboard boxes are the molds for these chunky concrete knobs and hooks. Cut the boxes in half, fold the bottom flaps to the outside so they don’t leave marks, and reinforce the mold with tape so it holds its shape when it gets wet. Spoon the concrete in, jiggle it to release the air bubbles, then push a screw into each one, taped so it stays straight. In a day or two, peel off the cardboard. The tutorial is in Finnish.
Get the full tutorial at Projektila.
42. Big Concrete Button Hooks
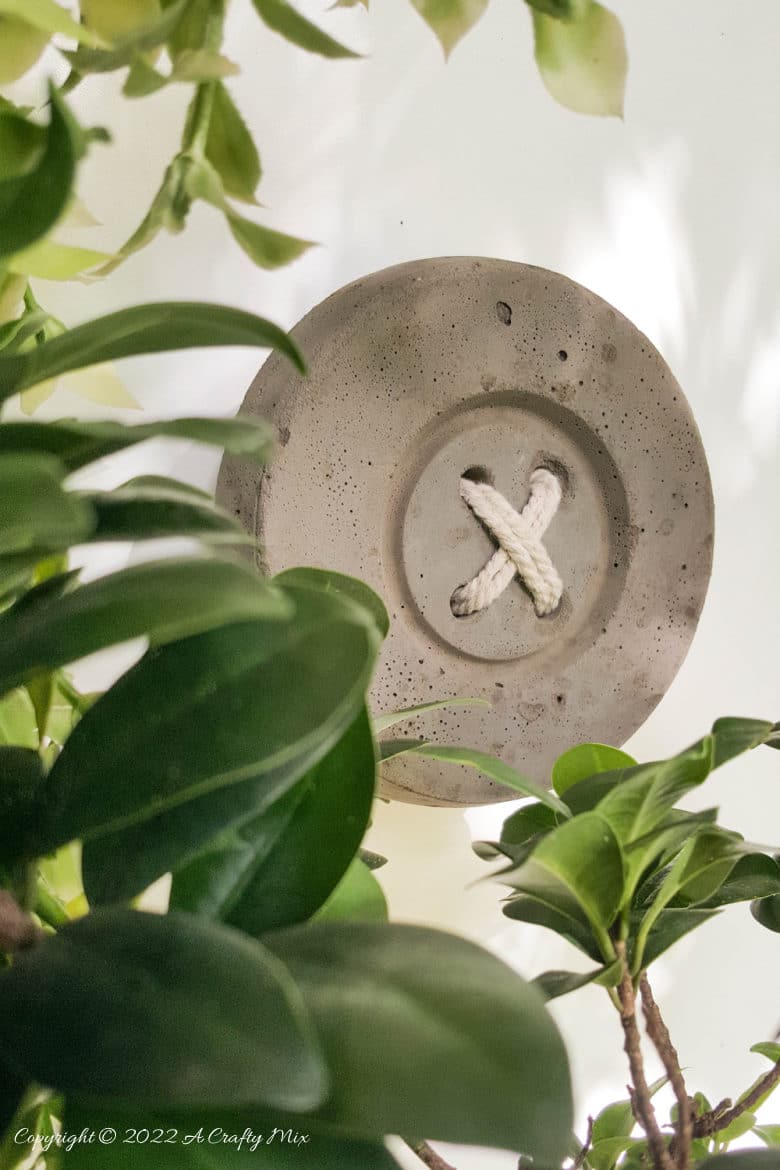
Aren’t these just sew cool? A deep round plastic drip tray with a ridge inside is the mold for each big button. Tape four pens or skewers to a scrap of wood so they stick out about a centimeter, spray everything with WD40 or cooking spray and center it in the tray. Pour quick setting concrete to the brim, tap out the bubbles and let it set before wiggling the pens out. Hang them on a wall screw as hooks!
Get the full tutorial at A Crafty Mix.
43. Concrete and Driftwood Sailboat
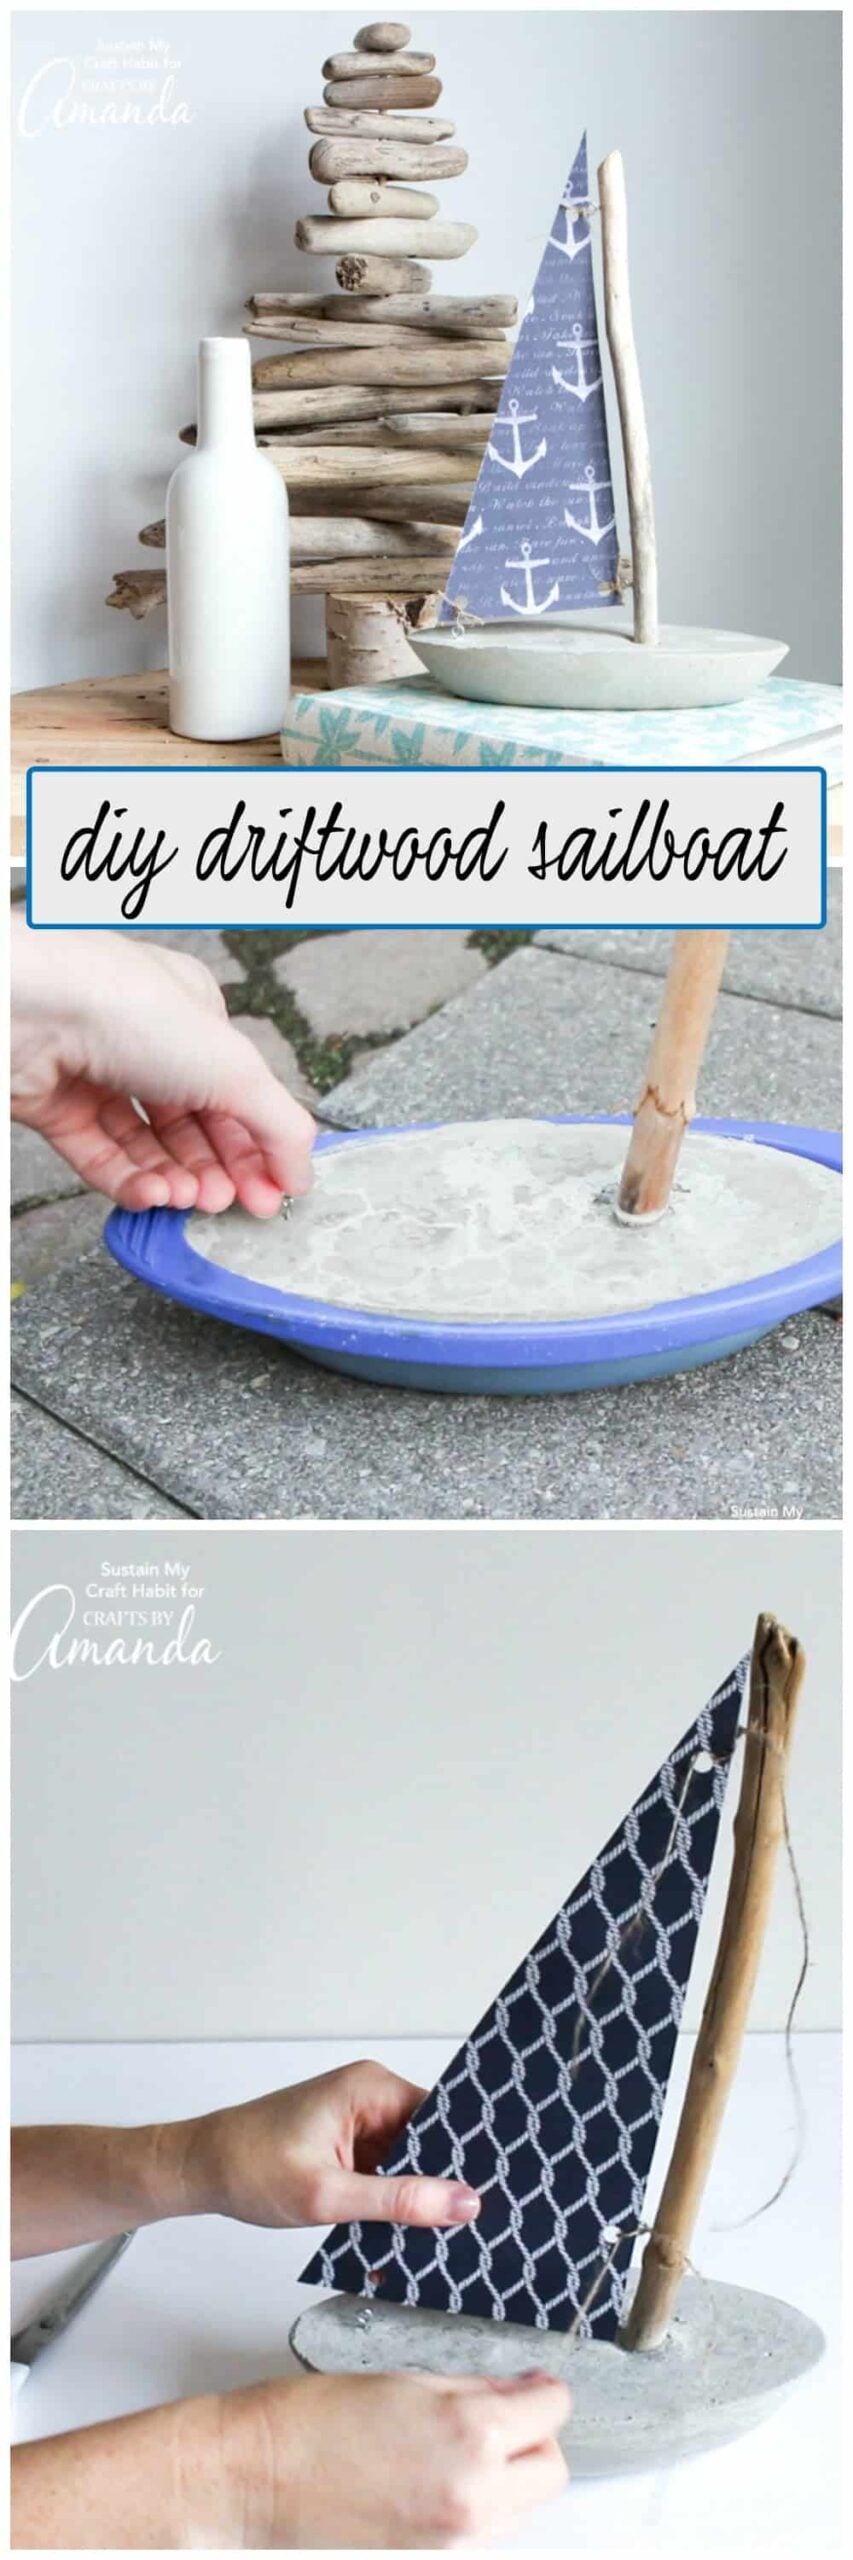
A boat shaped beach toy is the mold for this sweet nautical decor piece! Coat it generously with vegetable oil, then mix two cups of sand with two cups of Portland cement and water and fill the mold. Once it’s cured, sand the edges and drill a hole for a 12 inch piece of straight driftwood. The sail is cut from nautical scrapbook paper, hole punched and tied on with natural twine and small eyelets. Just don’t try floating it!
Get the full tutorial at Crafts by Amanda.
44. Concrete Chessboard

Square mosaic tiles cast right into concrete make this stunning chessboard. Glue 1 7/8 inch tiles face down on a sheet of galvanized steel or melamine with spray adhesive, add a half inch border, then stick foam strips around the edge with carpet tape. Line the walls with clear packing tape for a smooth finish and seal the gaps with caulk. Sprinkle in decorative aggregate, cast it, then polish to show the tiles and stones.
Get the full tutorial at ShapeCrete.
45. Concrete DIY Ring Cones

These concrete ring cones took a lot of experimenting, and the answer turned out to be contact paper! Print the free cone template, trace it on glossy contact paper, then roll it into a cone and tape the seam carefully so it’s smooth. Set it point down through a hole cut in a paper plate. Fill it with Quikrete Quick Setting Cement 1240, which is extra smooth because it’s made for repairs. Once it’s set, peel away the paper.
Get the full tutorial at DIY in PDX.
46. Concrete and Gold Gem Jewelry

These pretty gems came from leftover cement on another project! Mix quick setting cement in a disposable cup, fill a gem shaped mold and let it set. Then brush on gold leaf adhesive, lay on the gold leaf and seal it, so every gem has its own shiny pattern. E6000 glue attaches earring blanks or pin backs. You could even add a push pin or magnet to the back and use them as decor around the house.
Get the full tutorial at DIY in PDX.
47. Colour Block Concrete Bracelet
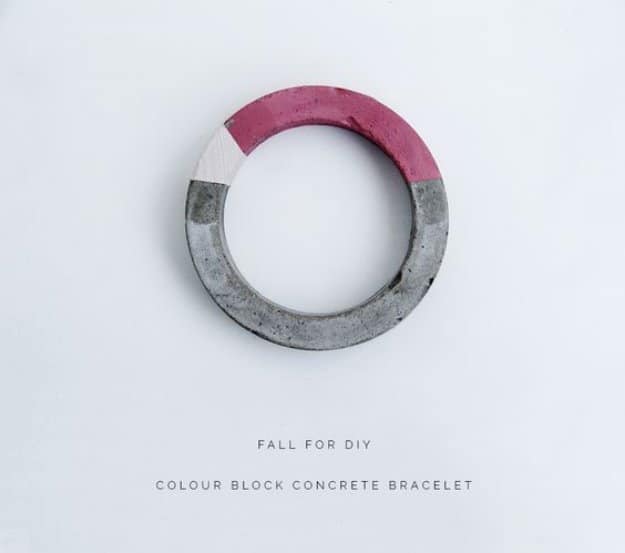
A chunky cast ring of concrete with one third left raw, one third white and one third dusty pink. The detail that makes it wearable is invisible in the photograph: a length of wire is measured, wrapped on itself and laid into the middle of the silicone mold between two half fills of concrete. That wire core is what gives a thin band of cured cement the strength to survive being worn rather than snapping the first time it meets a door frame. It needs about 48 hours before you demold.
Get the full tutorial at Fall For DIY.
48. Gold Dipped Concrete Earrings
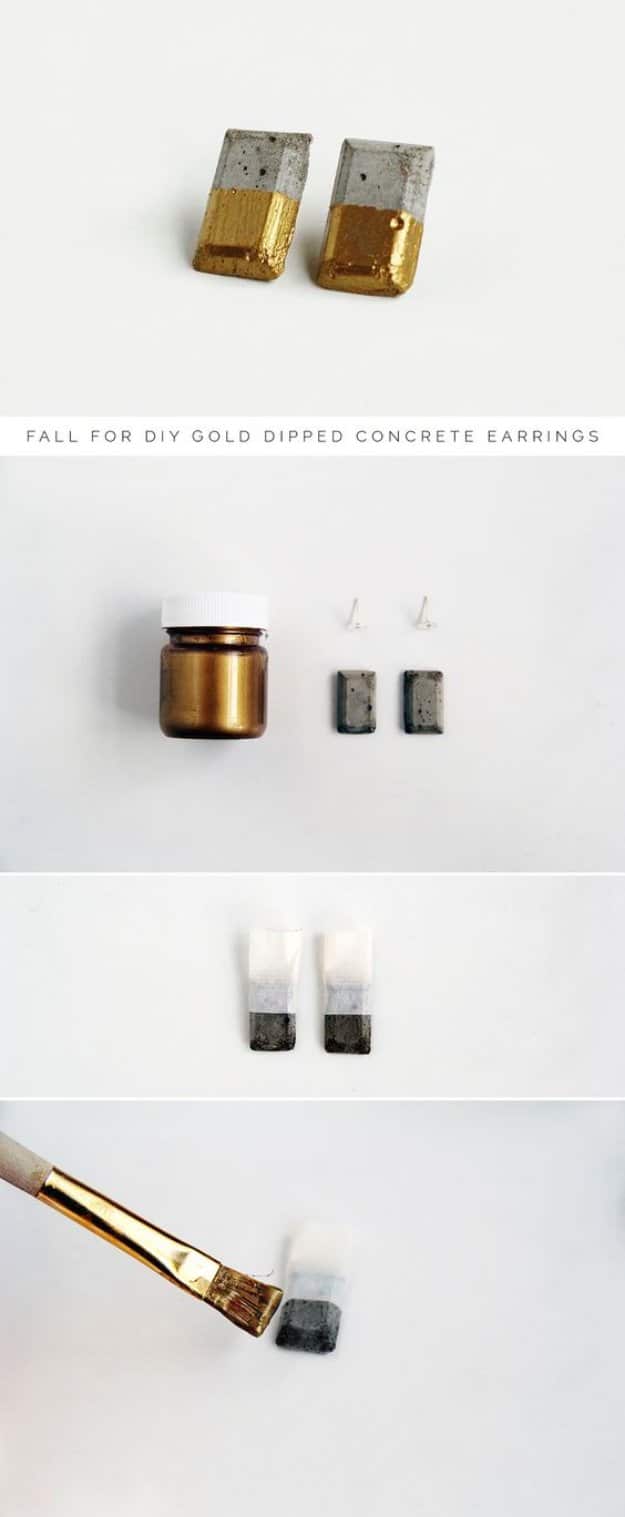
Small faceted concrete gemstones with the lower half gilded. The maker’s own amendment to the tutorial she followed is the useful bit: mix the concrete much thicker than the instructions say, because a stiff mix gives the little gemstone shapes a far stronger finish. Tape off half of each stone all the way around and press the tape edge down hard so no air sits under it, then paint three coats of liquid gold gilding, letting each dry. Earring posts can be set into the wet concrete instead of glued on later.
Get the full tutorial at Fall For DIY.
49. DIY Round Concrete Hanging Planter
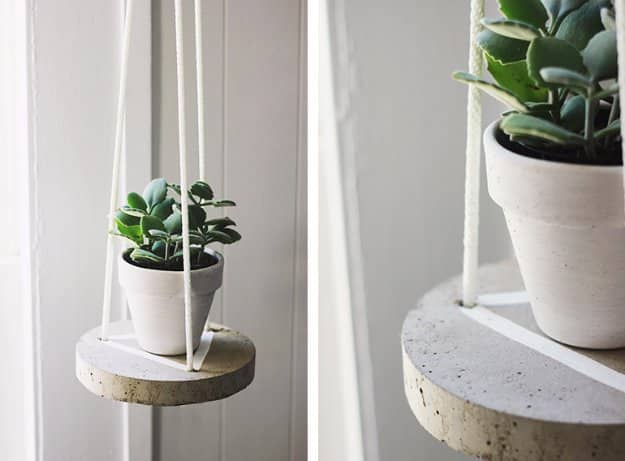
A flat concrete disc hung on three ropes, with a potted plant standing on it, and the clever part happens before any cement is mixed. Three lengths of dowel get superglued to the bottom of a slightly flexible round container, evenly spaced from each other and from the edge, so the cured disc comes out already drilled. The mold is sprayed with cooking spray, filled, then tapped on the floor until the bubbles stop rising and the top goes smooth. Eleven feet of three eighths inch nylon rope hangs it.
Get the full tutorial at The Merrythought.
50. Pottery Barn Inspired Concrete Top Coffee Table

The inspiration was a $1250 catalog coffee table, and the maker built her own version for the backyard and saved over $1000! The base uses 4x4s and 2x4s with legs cut at 15 degree angles and joined with pocket holes. Countersunk screws get covered with little slices of 1×2 so they look like mortise and tenon joints. A turnbuckle and threaded rod add that industrial touch, and a thick concrete slab tops it all off.
Get the full tutorial at The Kim Six Fix.
51. IKEA Hack Concrete Coffee Table

Got a basic IKEA Lack coffee table? Turn it into a chic industrial piece with a skim coat of concrete! The makers used Henry’s Feather Finish, an easy to mix underlayment patch that dries in about 15 minutes. Assemble the table, skip the bottom shelf if you like, then trowel on a few thin coats with a putty knife. Sand and buff between coats with a power sander, then finish with several coats of concrete sealant.
Get the full tutorial at Alice and Lois.
52. Make a Concrete Table Top
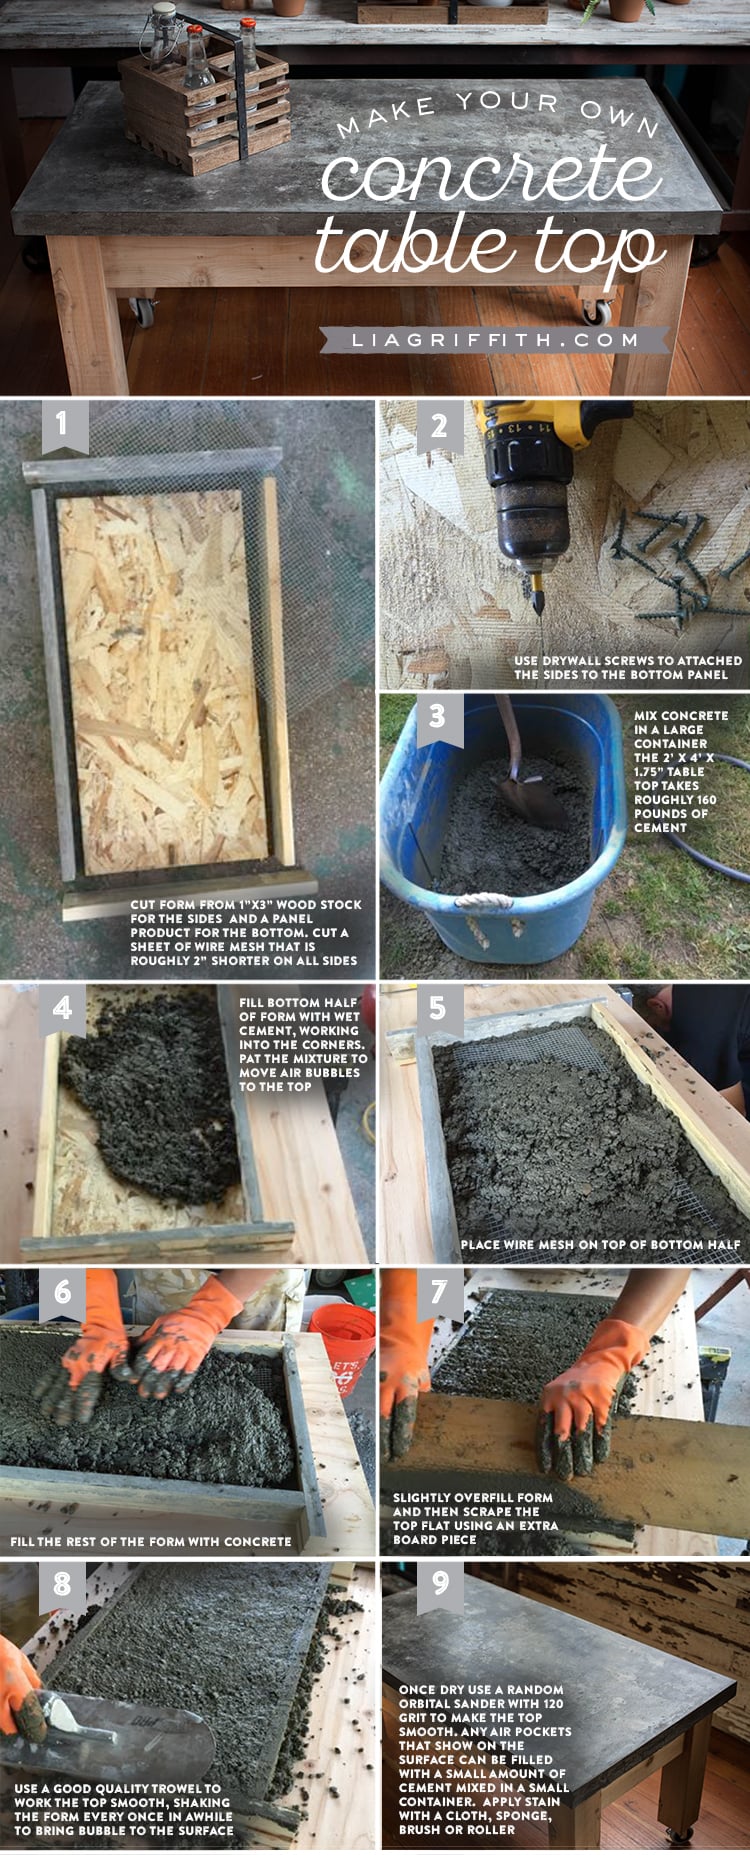
This started as a decor project and ended up feeling like home improvement! For a 2 by 4 foot top, build a form from 1 by 3 wood molding screwed to an OSB or plywood bottom. Cut wire mesh about 2 inches smaller on every side. Mix roughly 160 pounds of Quikrete, fill the form halfway, pat out the bubbles, lay in the mesh and fill the rest. Sand with 120 grit, stain it gray and seal it if it lives outside.
Get the full tutorial at Lia Griffith.
53. DIY Concrete Desk
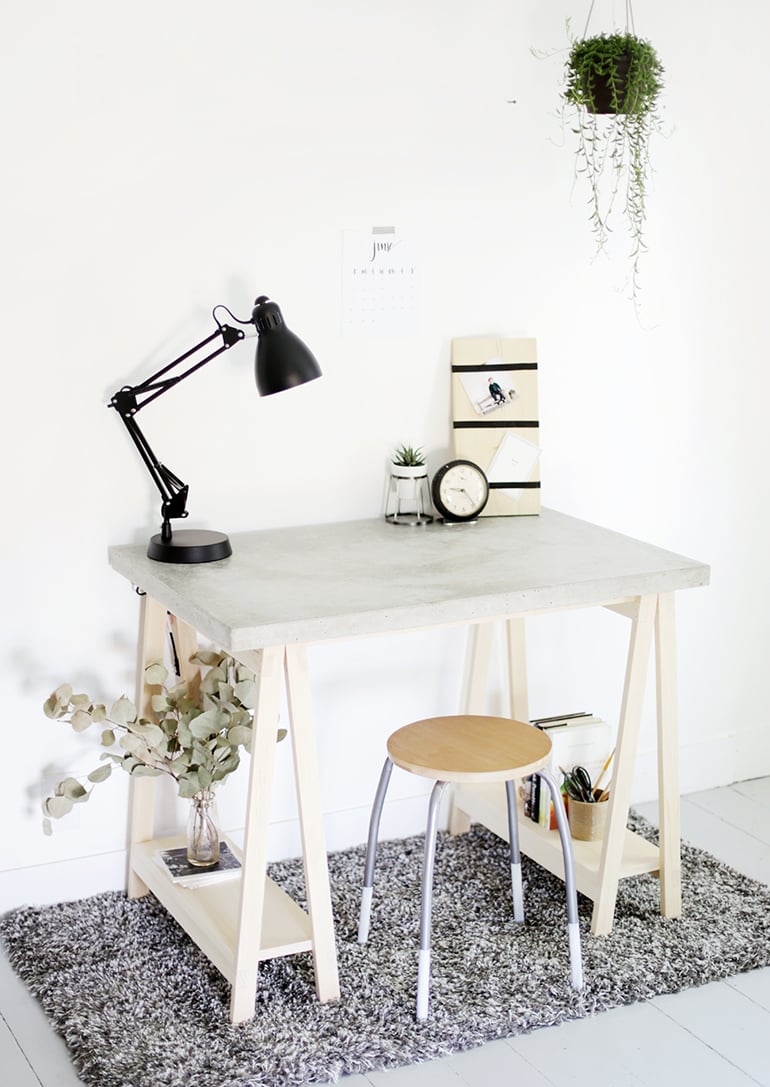
A concrete desktop on wood sawhorse legs makes such a modern workspace! The form is melamine board screwed together, with side pieces cut to the board’s thickness plus the 1 and a half inch counter depth. Tape the inside edges, run a bead of silicone caulk along the corners and smooth it with your finger for a rounded edge. Add wire mesh, pour the concrete and trowel it. The sawhorse legs get little shelves for extra storage.
Get the full tutorial at The Merrythought.
54. Easy DIY Concrete Vanity and Sink
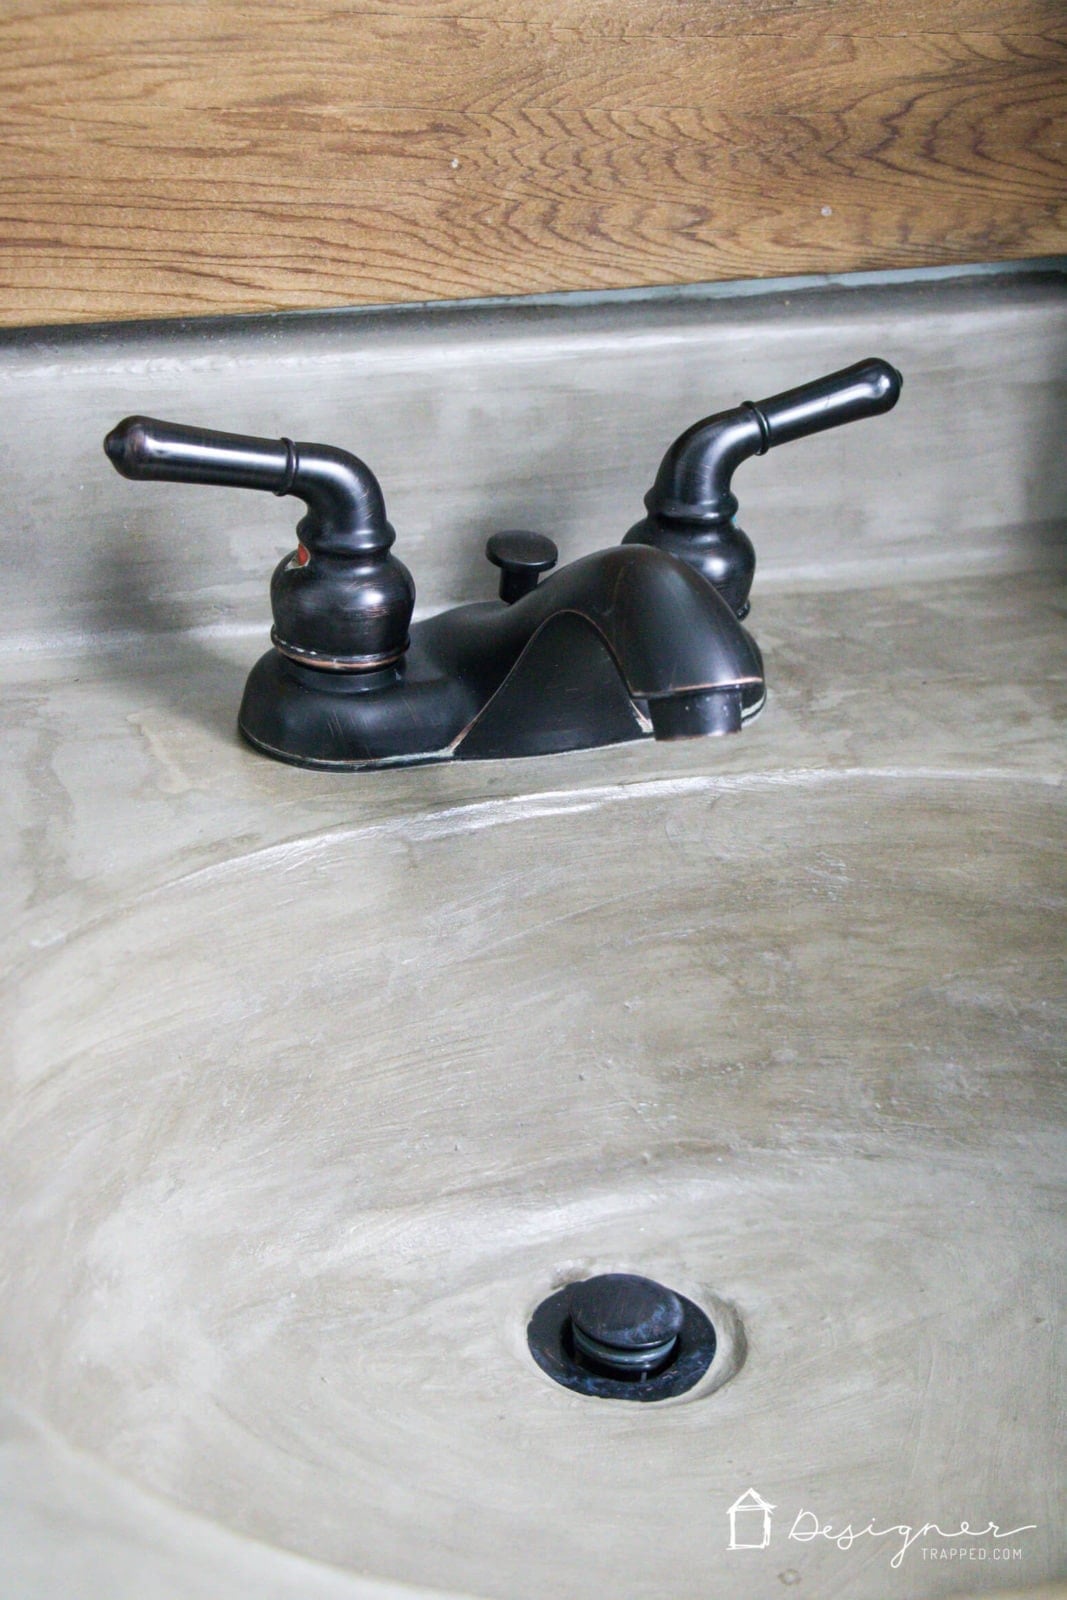
Hate your dated cultured marble vanity? You can skim it with concrete instead of replacing it! This overlay uses Ardex or Henry’s Feather Finish over the existing top and sink, so there are no forms and no heavy lifting. Remove the faucet, trowel on thin coats with a drywall knife, sand between coats with 150 and 220 grit and seal it with acrylic concrete sealer. The whole thing took about 2 and a half hours and under $50!
Get the full tutorial at Kaleidoscope Living.
55. DIY Concrete Fireplace for Less Than $100

Pros quoted $2,000 to $3,000 for this fireplace makeover, so the maker did it herself for under $100! After removing the insert and the old stone facade, she screwed cement board over the brick and taped the seams with mesh tape. Then about two bags of Ardex Feather Finish went on with a 12 inch drywall knife for a smooth, modern look. Please read her safety notes first and get a pro to check your fireplace!
Get the full tutorial at Kaleidoscope Living.
56. DIY Concrete Fire Pit
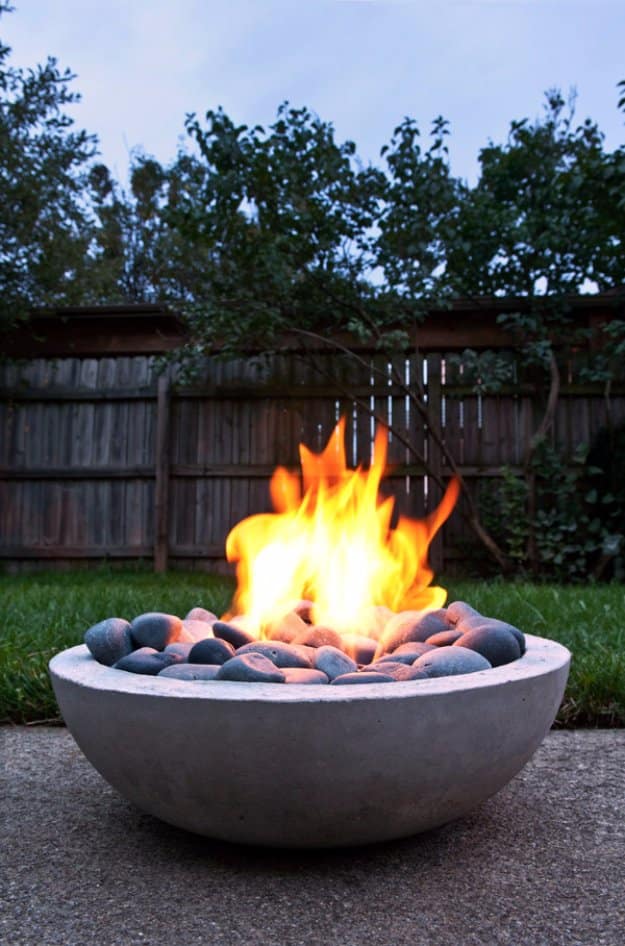
Two mixing bowls are the mold: an eighteen inch one for the outside and a fifteen inch one pressed inside it, oiled with cooking spray or vegetable oil and a brush. It burns gel fuel, which is what makes it a thirty minute after dinner fire rather than a project involving gas lines, and it is portable enough to move off the patio. The maker puts the whole build at a few hours and well under fifty dollars in materials, and is firm about the safety gear: dust mask, goggles and gloves.
Get the full tutorial at ManMade DIY.
57. DIY Concrete Garden Balls
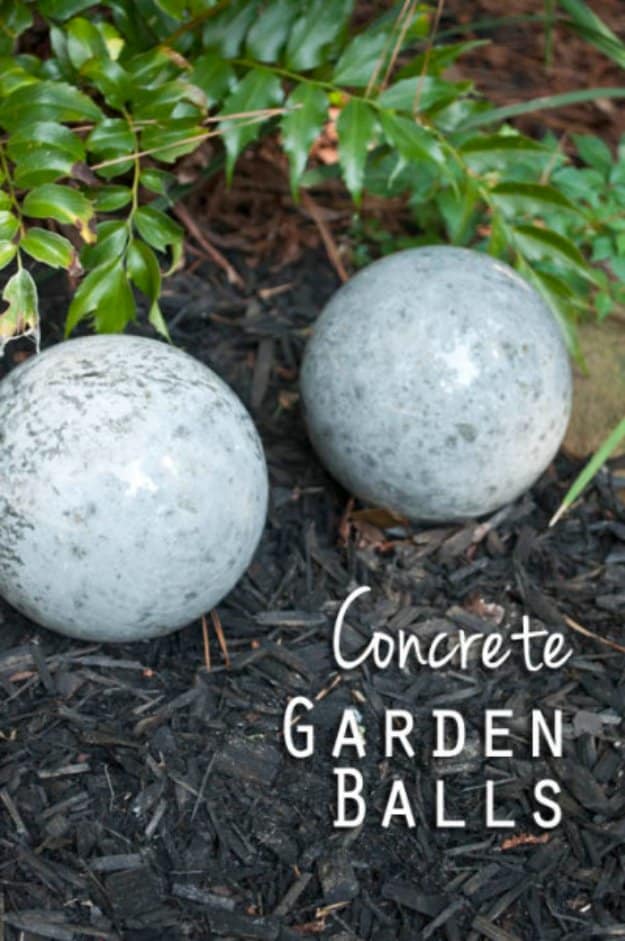
The mold is a glass globe light cover, the kind that comes off a ceiling fan and sits in a cupboard for years, and you break it off with a hammer at the end. The maker uses three quarters portland cement to one quarter peat moss to get a deliberately rustic surface, mixed thick but still pourable, oiled inside the globe with coconut oil first. Cure three or four days before you touch the glass, longer in humid weather, and wear eye protection when you crack it. Thrift stores and Habitat ReStores are full of globes.
Get the full tutorial at Clumsy Crafter.
58. DIY Concrete Garden Spheres
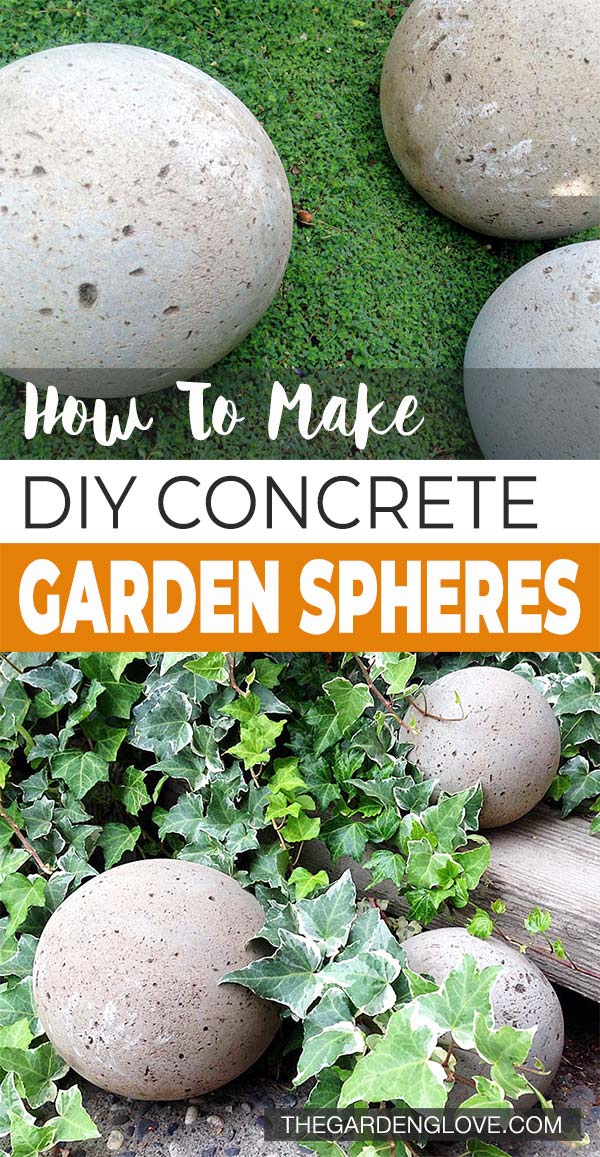
Three garden spheres for under $15? Yes please! Thrifted glass lamp globes are the molds, and the makers tested four recipes so you can pick your look: hypertufa, cement with peat moss, cement with potting soil or straight Portland cement. They liked 1 part cement to 1 part peat moss best. Spray the globe with cooking spray, pack it full, let it cure, then wear eye protection and tap the glass away with a hammer. File and wire brush the seams.
Get the full tutorial at The Garden Glove.
59. Concrete Garden Orbs

These lacy garden orbs are hollow, light and weather resistant! Inflate a beach ball or balloon as the form. Mix Portland cement and water to a creamy slurry, then dunk strips of fleece, chenille or multi strand yarn into it and squeeze out the extra. Wrap the strips around the ball in a crisscross pattern. Mist the orbs with water while they cure, then deflate the ball and chip away any cement in the gaps. Wear gloves and a dust mask!
Get the full tutorial at Made By Barb.
60. Concrete Fountain Orb
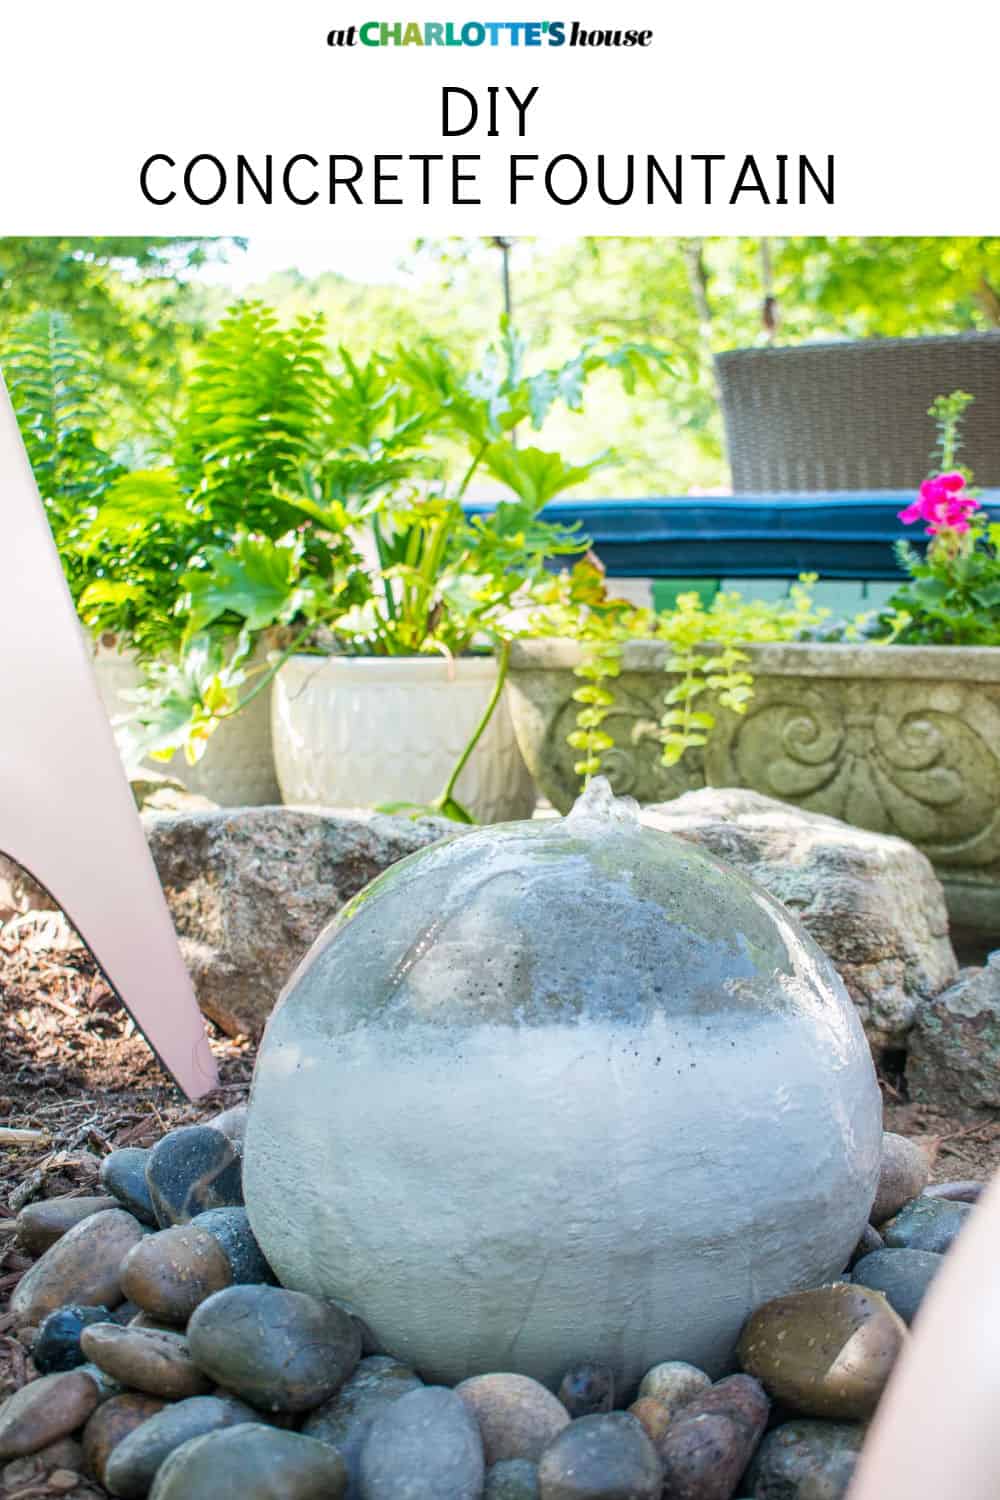
Yes, you can make a real working concrete fountain for under $100! A round concrete mold sits in a simple 2×4 stand so it stays steady. PVC pipe runs through the middle so plastic tubing can carry water up from a fountain pump, and rebar and hardware cloth add strength. Fill it with Quikrete, let it cure and patch any rough spots. Set it over a bucket hidden under decorative rocks, and the water bubbles over the top!
Get the full tutorial at At Charlotte's House.
61. DIY Concrete Leaf Garden Bowl
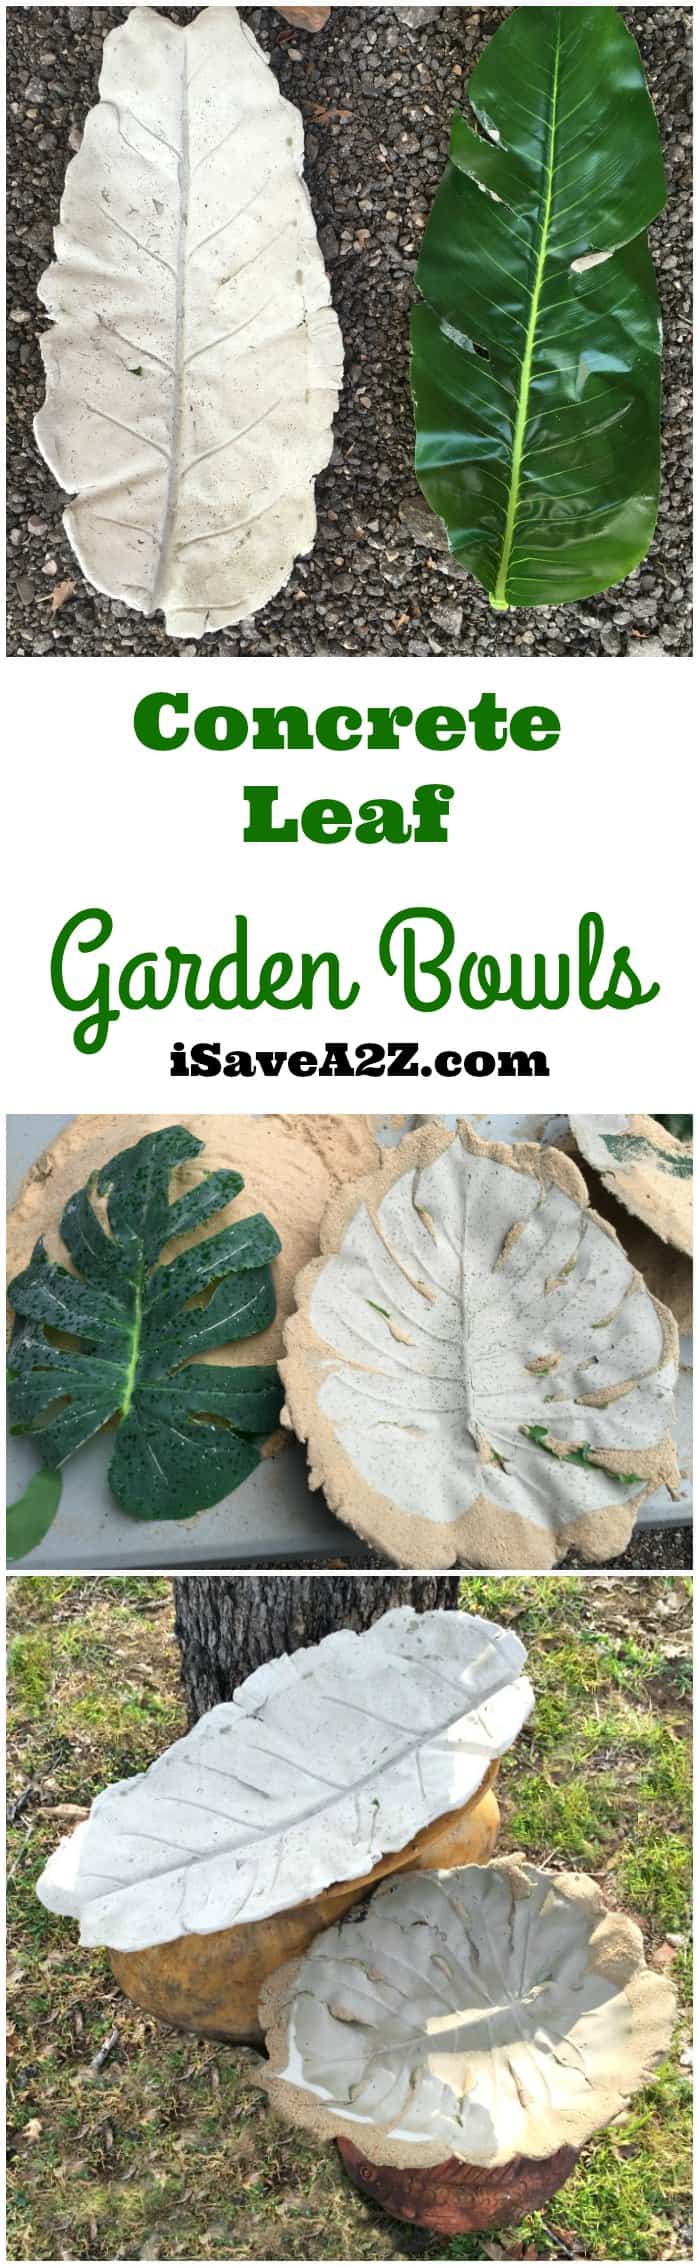
Real leaves work for this, but they’re a pain to peel off, so the maker grabbed big plastic leaves from the craft store floral aisle on sale! She used Cement All Rapid Set because it has no rocks, picks up every vein and sets in about 15 minutes. A 4 to 1 mix of cement to water was perfect. Spread it over the leaf, build up the edges into a bowl shape and let it cure. They make lovely bird baths too!
Get the full tutorial at iSaveA2Z.
62. DIY Embossed Stepping Stones
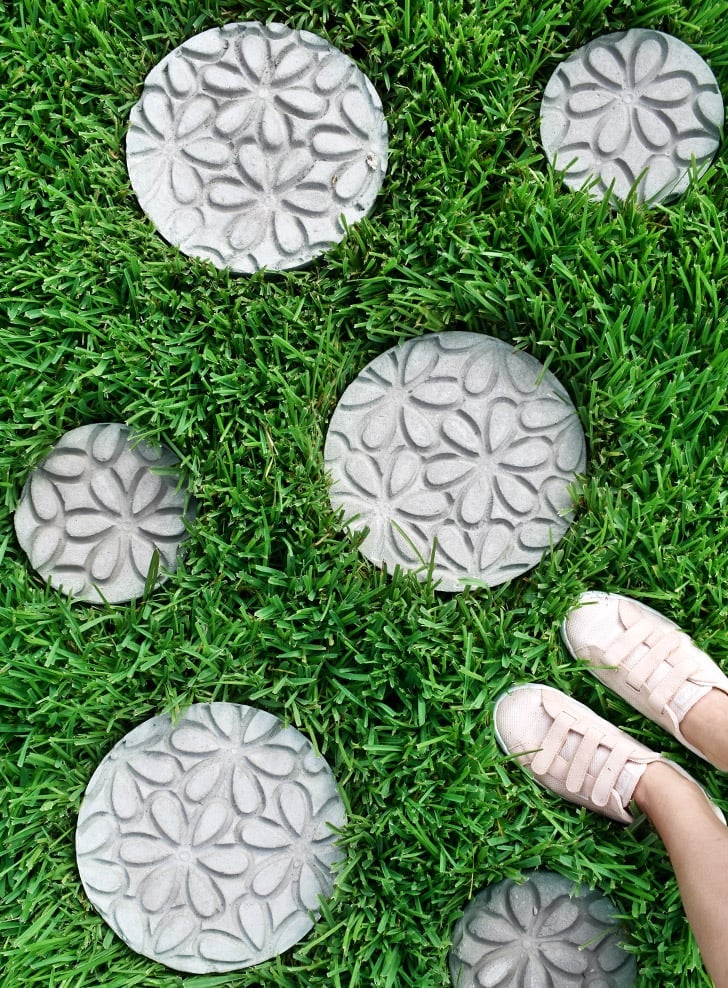
A rubber doormat is the secret to these pretty embossed stepping stones! Cut stamps from the mat with a utility knife and cut resistant gloves, and you can reuse them over and over. Spray a reusable plastic stepping stone mold with cooking spray, lay the stamp in, then fill it with sand or topping mix. Once it cures, the floral pattern is pressed right into the stone. Shop around for the mat, some are $7 and some are $40.
Get the full tutorial at Dream a Little Bigger.
63. Hopscotch Stepping Stones
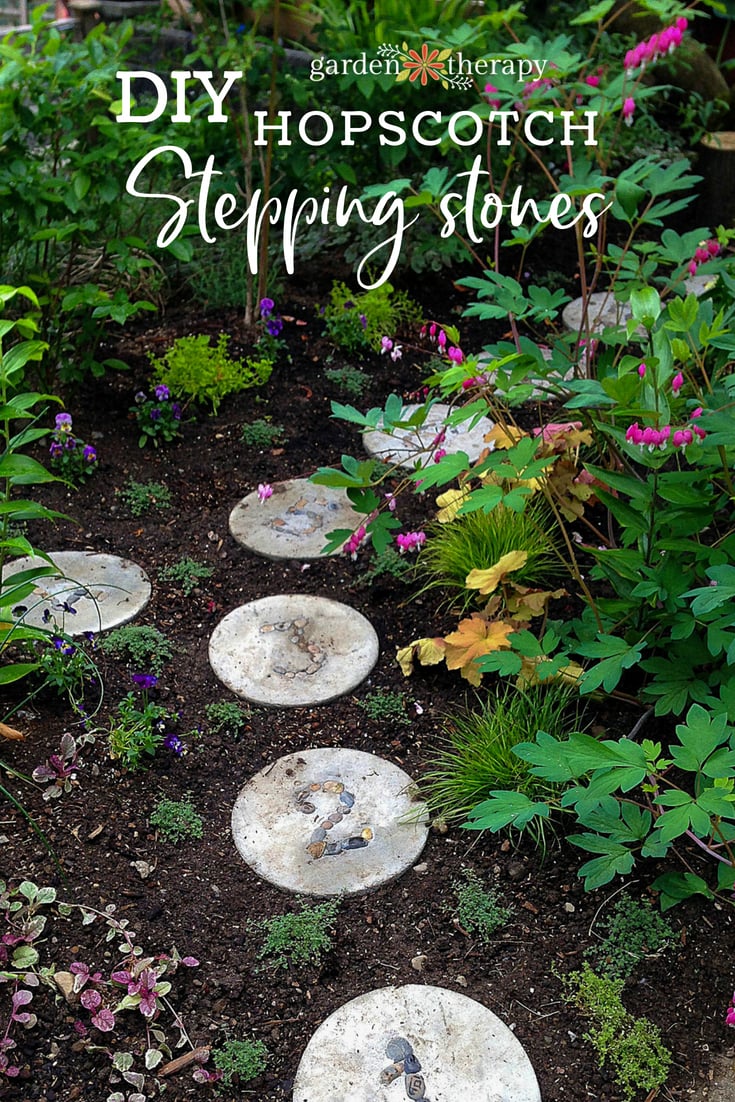
These playful hopscotch stepping stones are a great first concrete project, and you can make all ten in one afternoon! Cut a 12 inch concrete building tube into rings with a saw to use as forms, then fill them with standard concrete mix from a wheelbarrow. Press small pebbles into the wet surface to spell out the numbers 1 to 9, plus a dragonfly on the last stone. Choose a sunny day and give them 24 hours to harden.
Get the full tutorial at Garden Therapy.
64. DIY Stepping Stones with Glass Gems
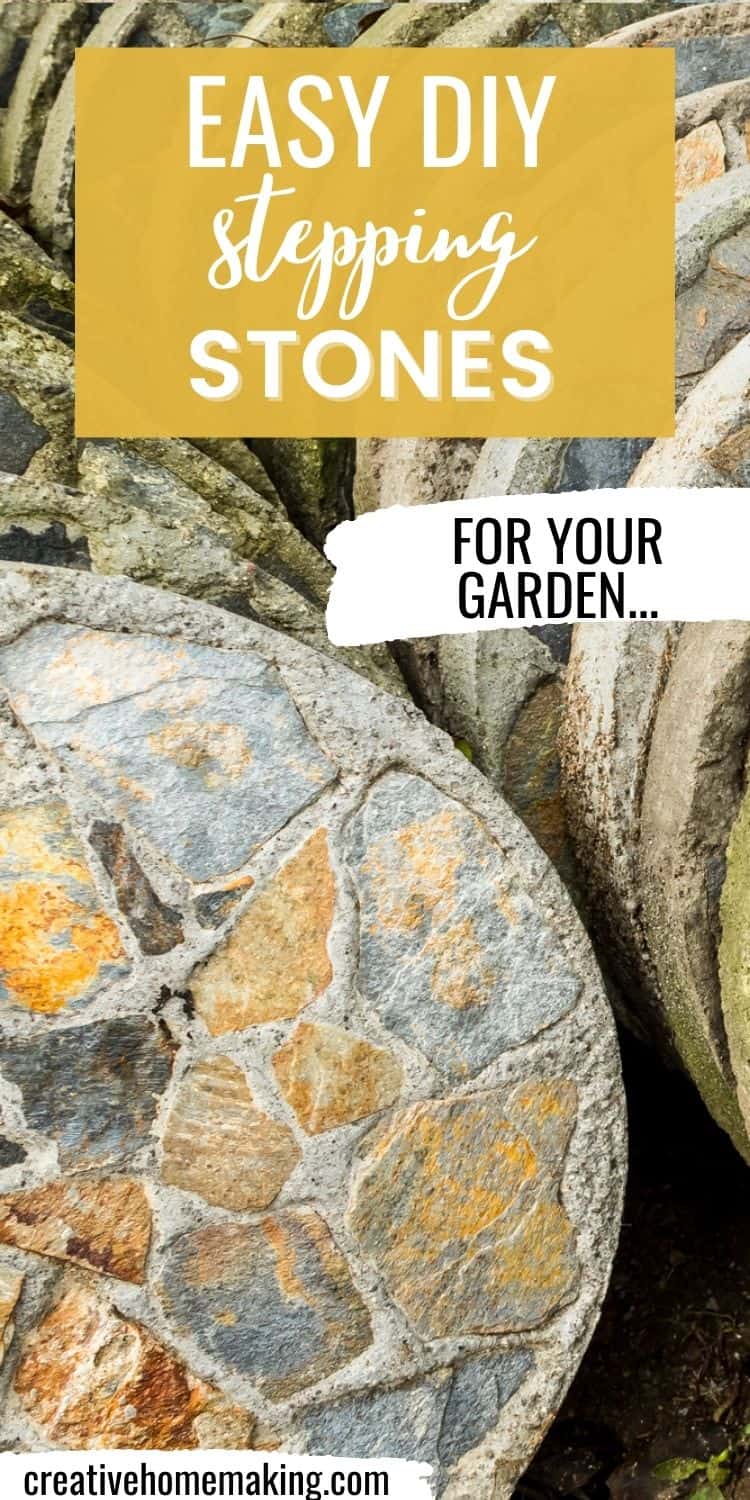
Plastic plant saucers from the dollar store make perfect stepping stone molds! Spray the insides with cooking spray, mix quick setting concrete in a 5 gallon bucket with a small shovel and fill the saucers. Then press colorful glass stones into the top while it’s still wet. You can go simple or make a whole design. They’re so easy that they make a fun gift for Mother’s Day, and everyone can help decorate one.
Get the full tutorial at Creative Homemaking.
65. DIY Mosaic Stepping Stone for a Gnome Garden
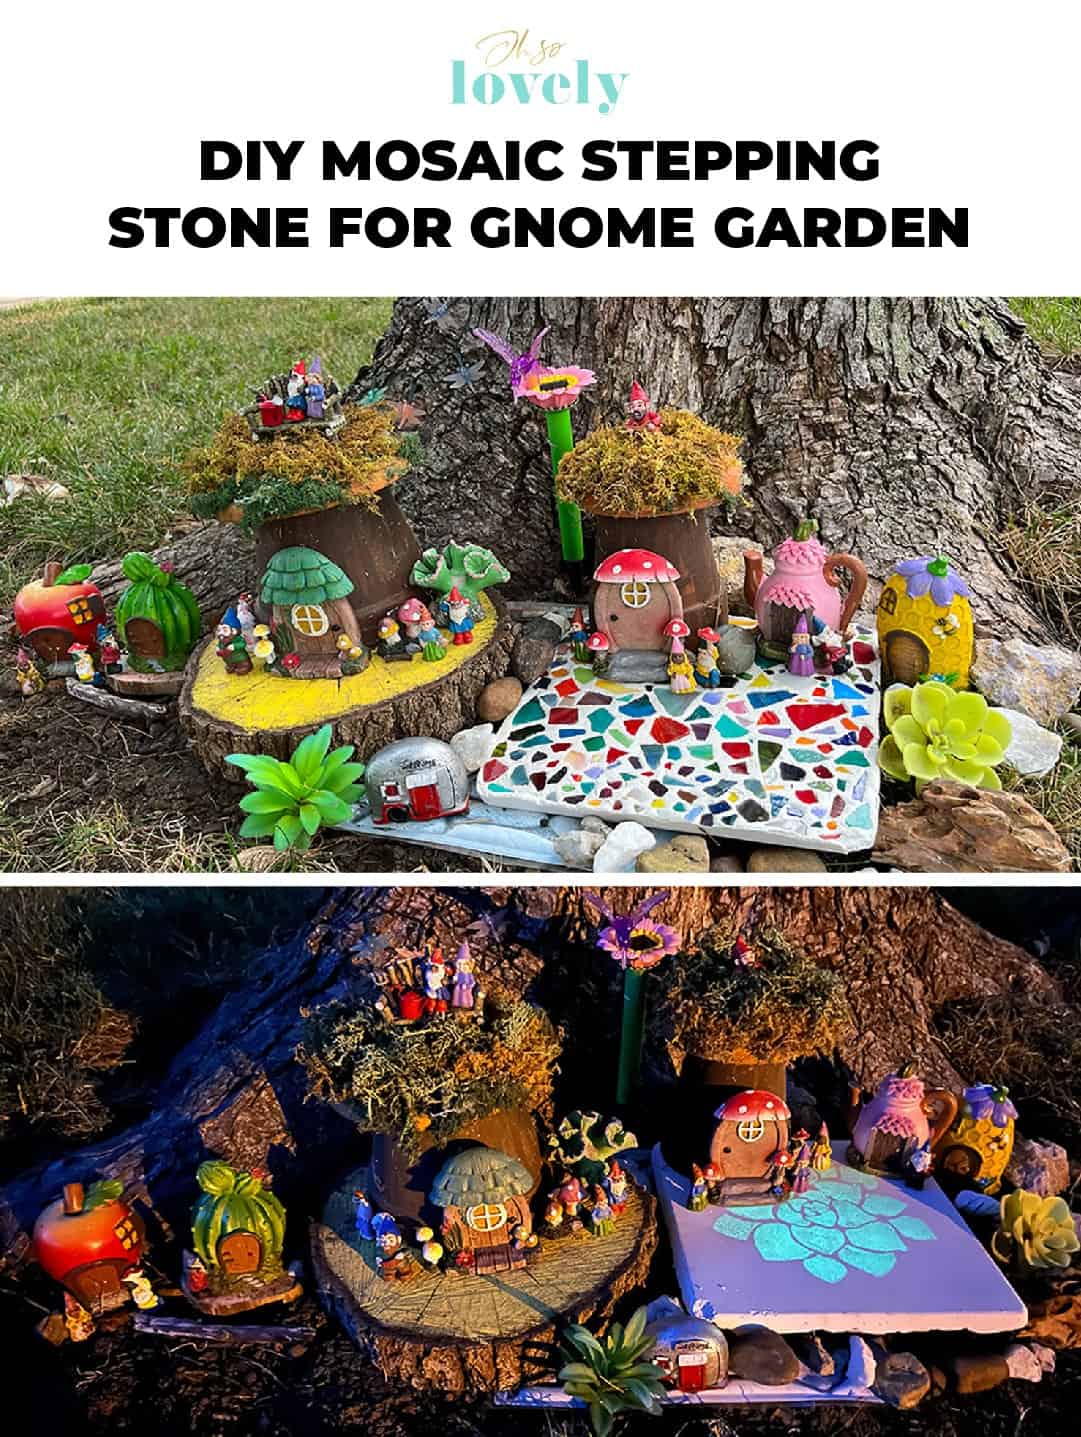
A $2 clearance mosaic kit turned into a colorful base for a little gnome village! Mix the powder with 450 ml of water until it’s smooth like pancake batter, about 5 minutes, then pour it into the plastic form and tilt it to fill the corners. After an hour, piece in the mosaic tiles like a puzzle. Let it set for 36 hours. A stencil and glow in the dark paint make a flower that lights up at night!
Get the full tutorial at Oh So Lovely Blog.
66. DIY Garden Stones with Broken China
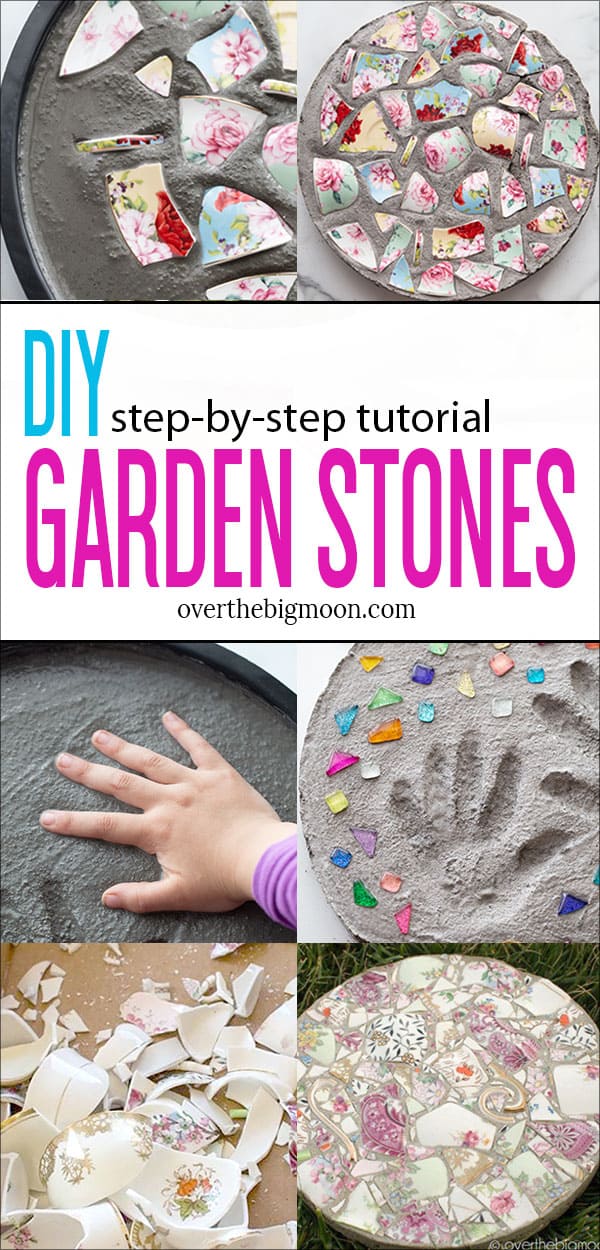
These garden stones were born from a sad day when a box of grandma’s china got dropped. Spray a stepping stone mold with cooking spray, fill it with mortar mix, leaving a quarter inch at the top, and tap out the bubbles. Fold the china in a thick towel and break it with a hammer, then press the pieces, marbles or mosaic tiles into the wet surface. Keep these as decor rather than for walking, since the pieces aren’t flat.
Get the full tutorial at Over The Big Moon.
67. Decorative Garden Stones from Copper Molds
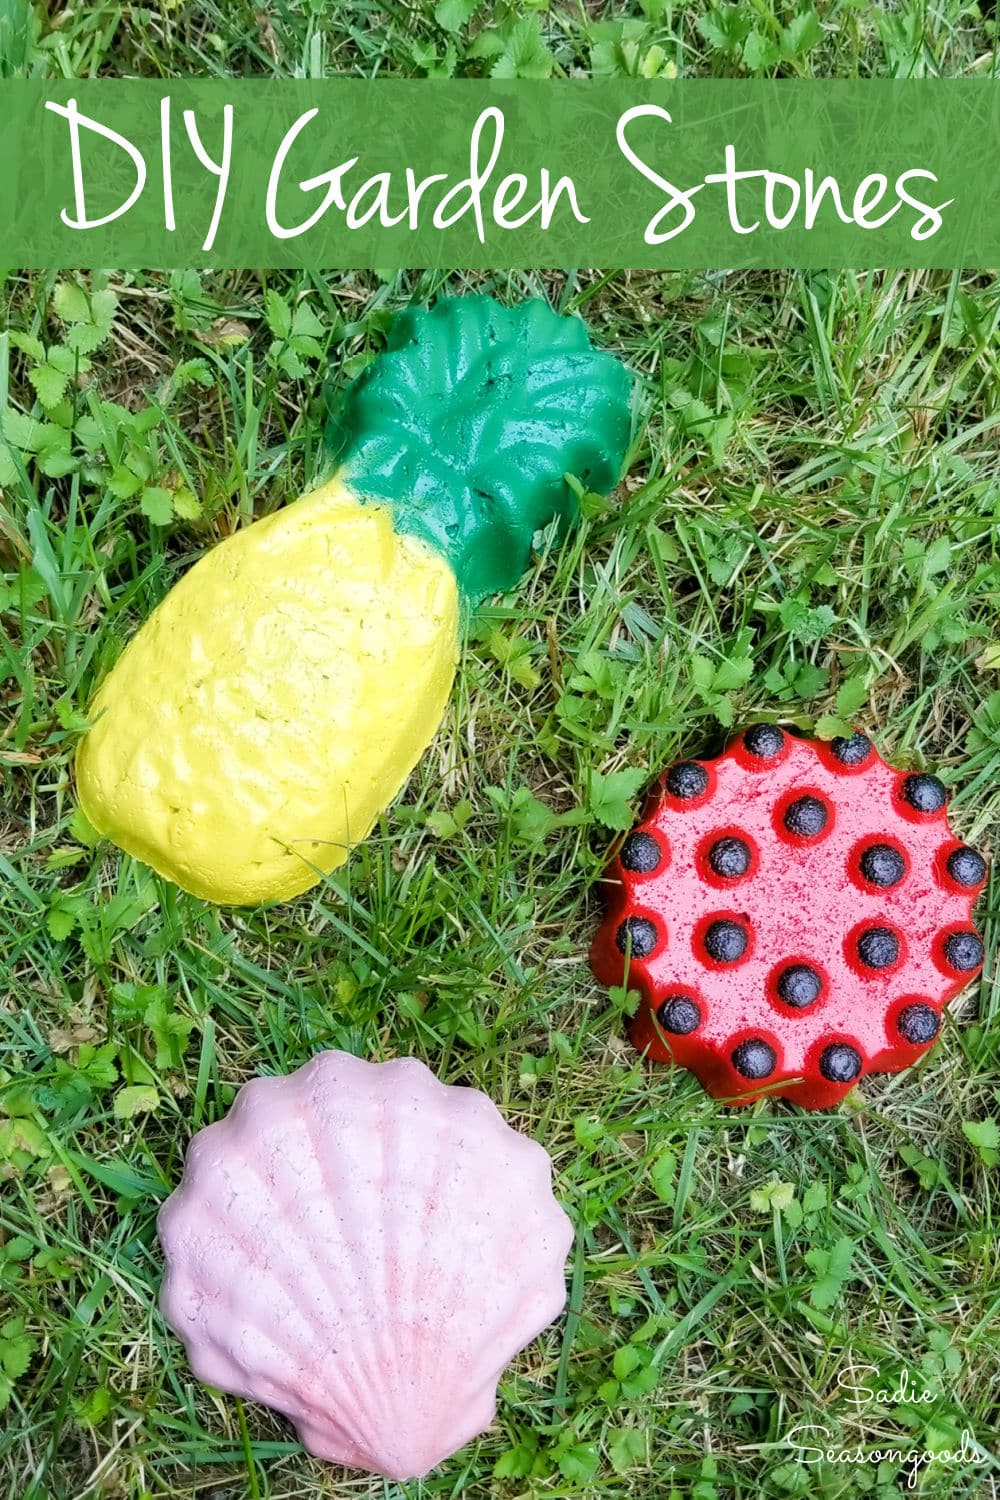
Those copper jelly molds that fill every thrift store shelf make adorable garden stones! Spray them generously with nonstick spray, bottom and sides, then mix a stepping stone kit, which is smoother than Quikrete. One 8 pound box made three stones. Let them sit overnight before unmolding and another night before decorating. Brush off the dust, then spray paint them in bright colors. A pineapple, a shell and a dotted round are so cheerful!
Get the full tutorial at Sadie Seasongoods.
68. Mosaic Stepping Stone with a Key Hider
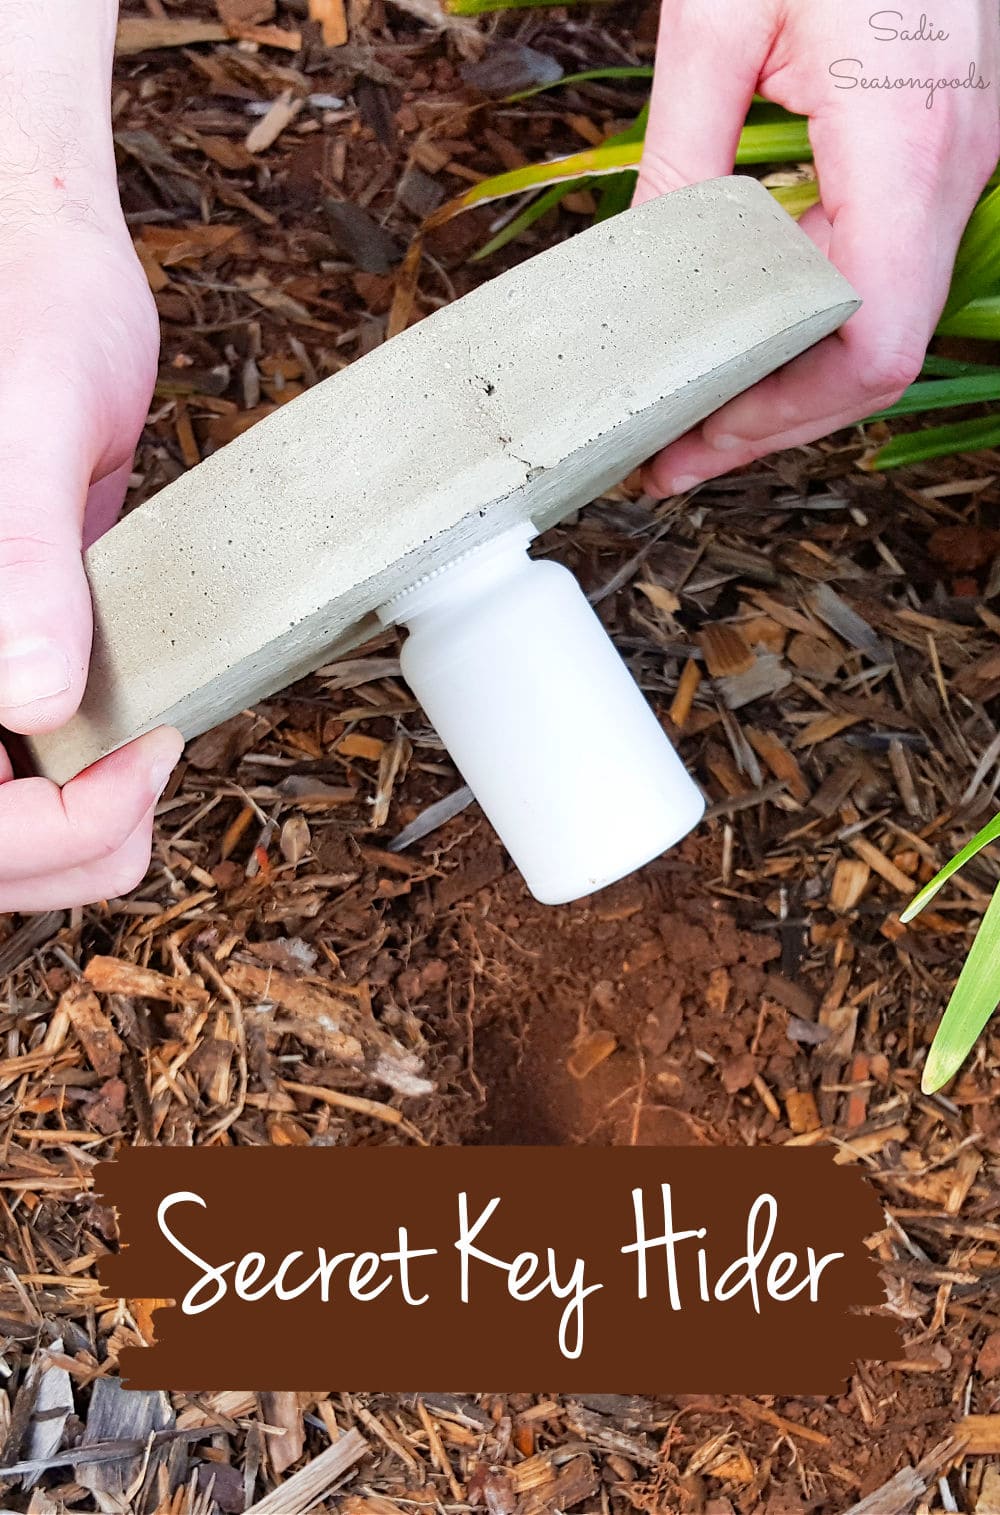
Never get locked out again! A thrifted cake pan is the mold, and a push down child safe pill bottle big enough for a house key becomes the hidden compartment underneath. Lay out your mosaic tiles and glass gems on a sticky clear laminating sheet so the design stays put. Spray the pan really well with nonstick spray, set the design face down in the bottom, then pour in the concrete and set the pill bottle into it.
Get the full tutorial at Sadie Seasongoods.
69. Easy-to-Build DIY Concrete Bench Planter

Cinder blocks and two by six boards, no casting and no mold, which makes this the one project on the list you can finish in an afternoon and sit on the same day. Blocks are stacked at each end on a leveled line with the boards laid across, and more blocks on top of each end hold the timber down. Metal flashing glued over the top edges of the block closes the bottom of each planting hole, expanded metal is folded into a basket inside it and lined with landscape fabric before soil goes in.
Get the full tutorial at DIY JOY.
70. DIY Cement Jack-O-Lantern Planters
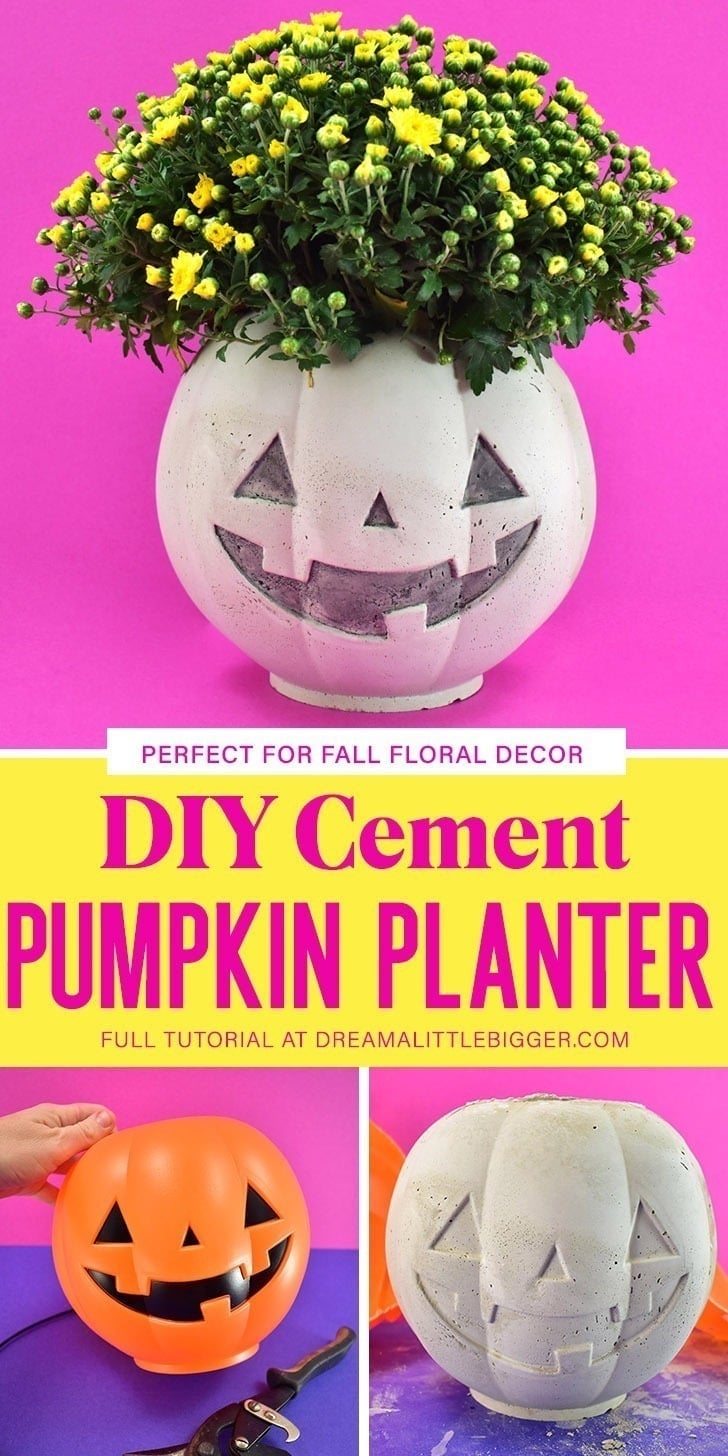
Plastic trick or treat pails become giant cement jack-o-lantern planters! Snip off the handles and cut the pail along its seams with metal snips, tape it back together and spray it with cooking spray. Fill it with Rapid Set Cement All and press a plastic paint tub into the middle for the planting well. Once it cures, peel off the plastic and paint the face black with a small stiff brush. Fill them with mums for the porch!
Get the full tutorial at Dream a Little Bigger.
71. Concrete Pumpkin DIY for Fall
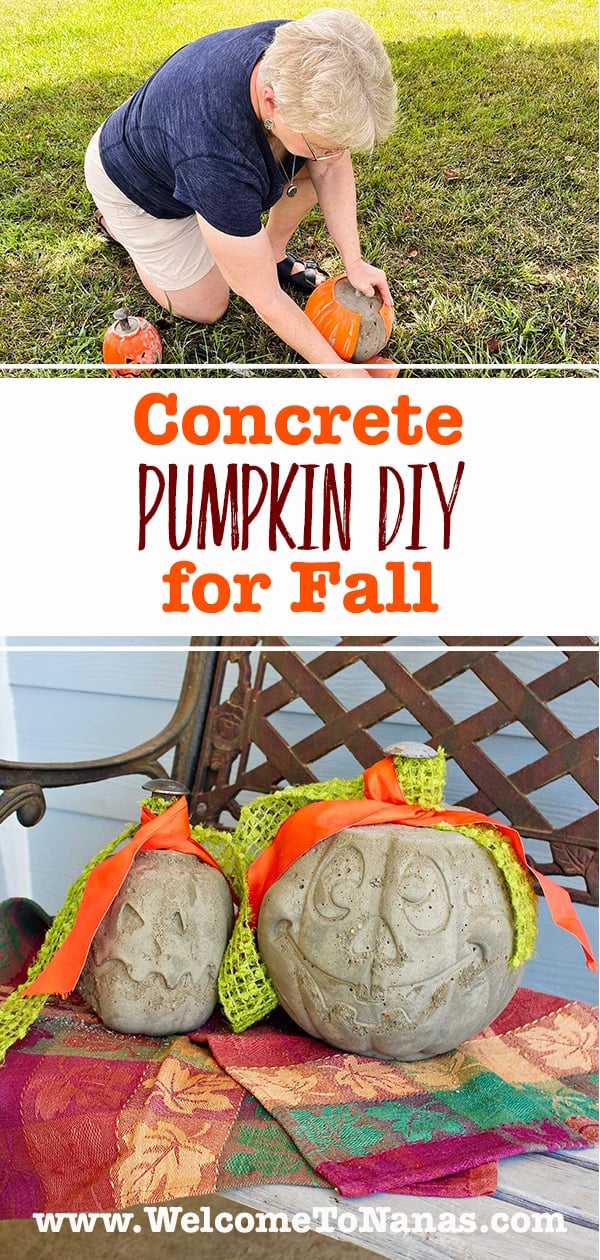
A plastic jack-o-lantern treat bucket makes the mold for this sturdy front porch pumpkin, and the surprise is it has a face on one side and a plain pumpkin on the other! Turn it around for Halloween. This one’s a more advanced craft, so older kids can help while an adult handles mixing the concrete, cutting the plastic and lifting the heavy bag. A screw or bolt pushed into the top makes the stem.
Get the full tutorial at Welcome To Nana's.
72. DIY Easy Concrete Pumpkins
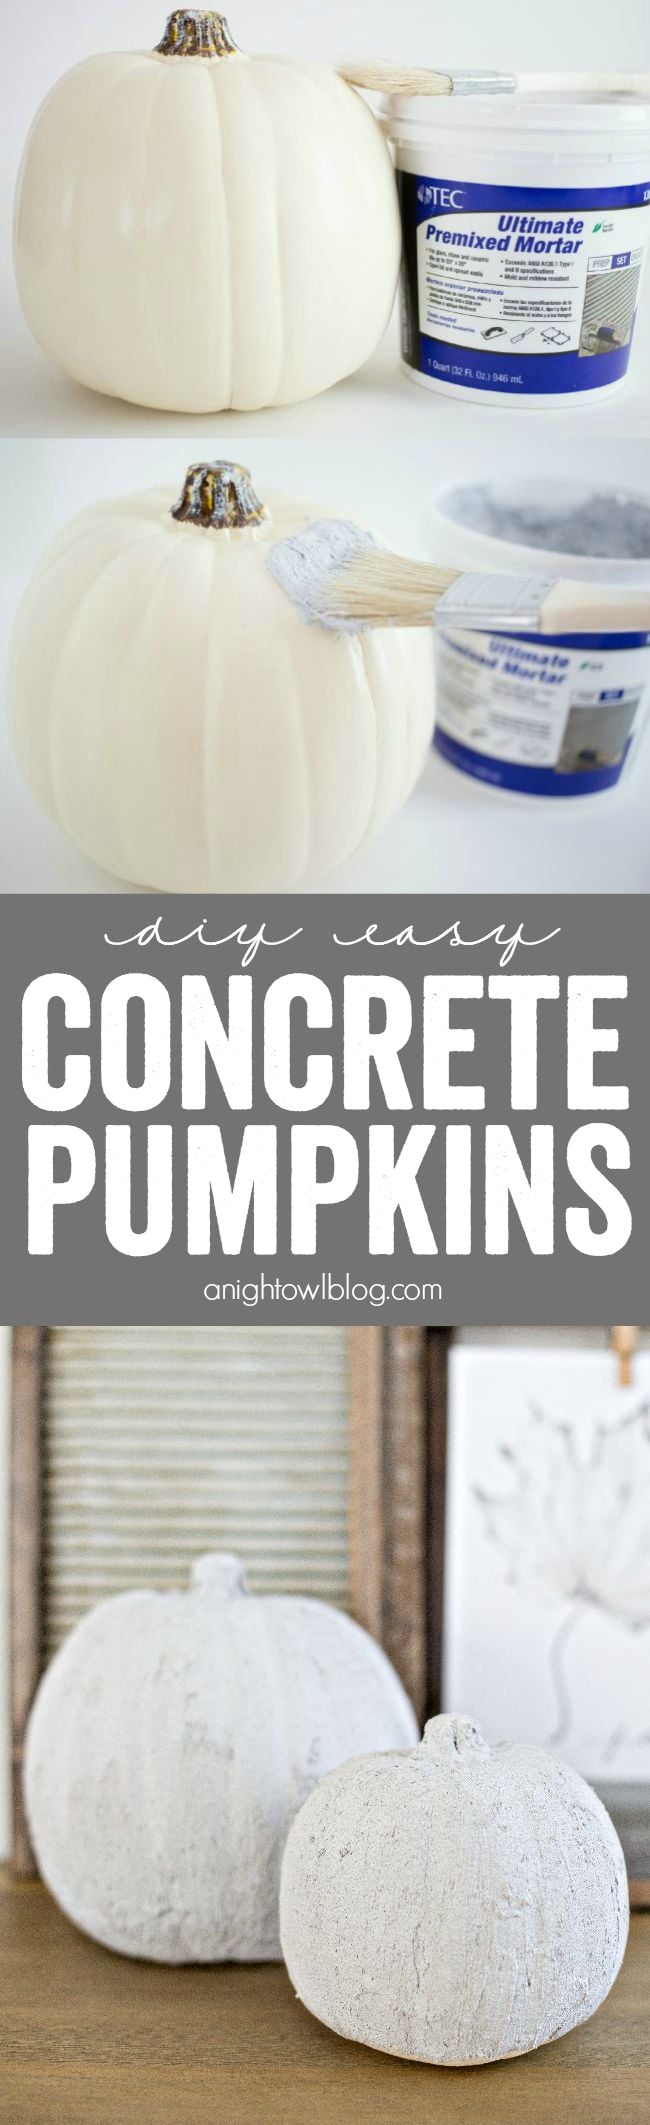
Want the concrete pumpkin look without casting anything? Paint it on! Grab some craft pumpkins and a tub of premixed mortar. Stir the mortar, then use a chip brush to paint a thin layer over the whole pumpkin for good grip. Let it dry an hour or two, then add a second coat to fill in the gaps and build up texture. Smooth or rough it up as you like. They’re perfect for neutral, rustic fall decor.
Get the full tutorial at A Night Owl.
73. Concrete Skull Candle Holder for Halloween
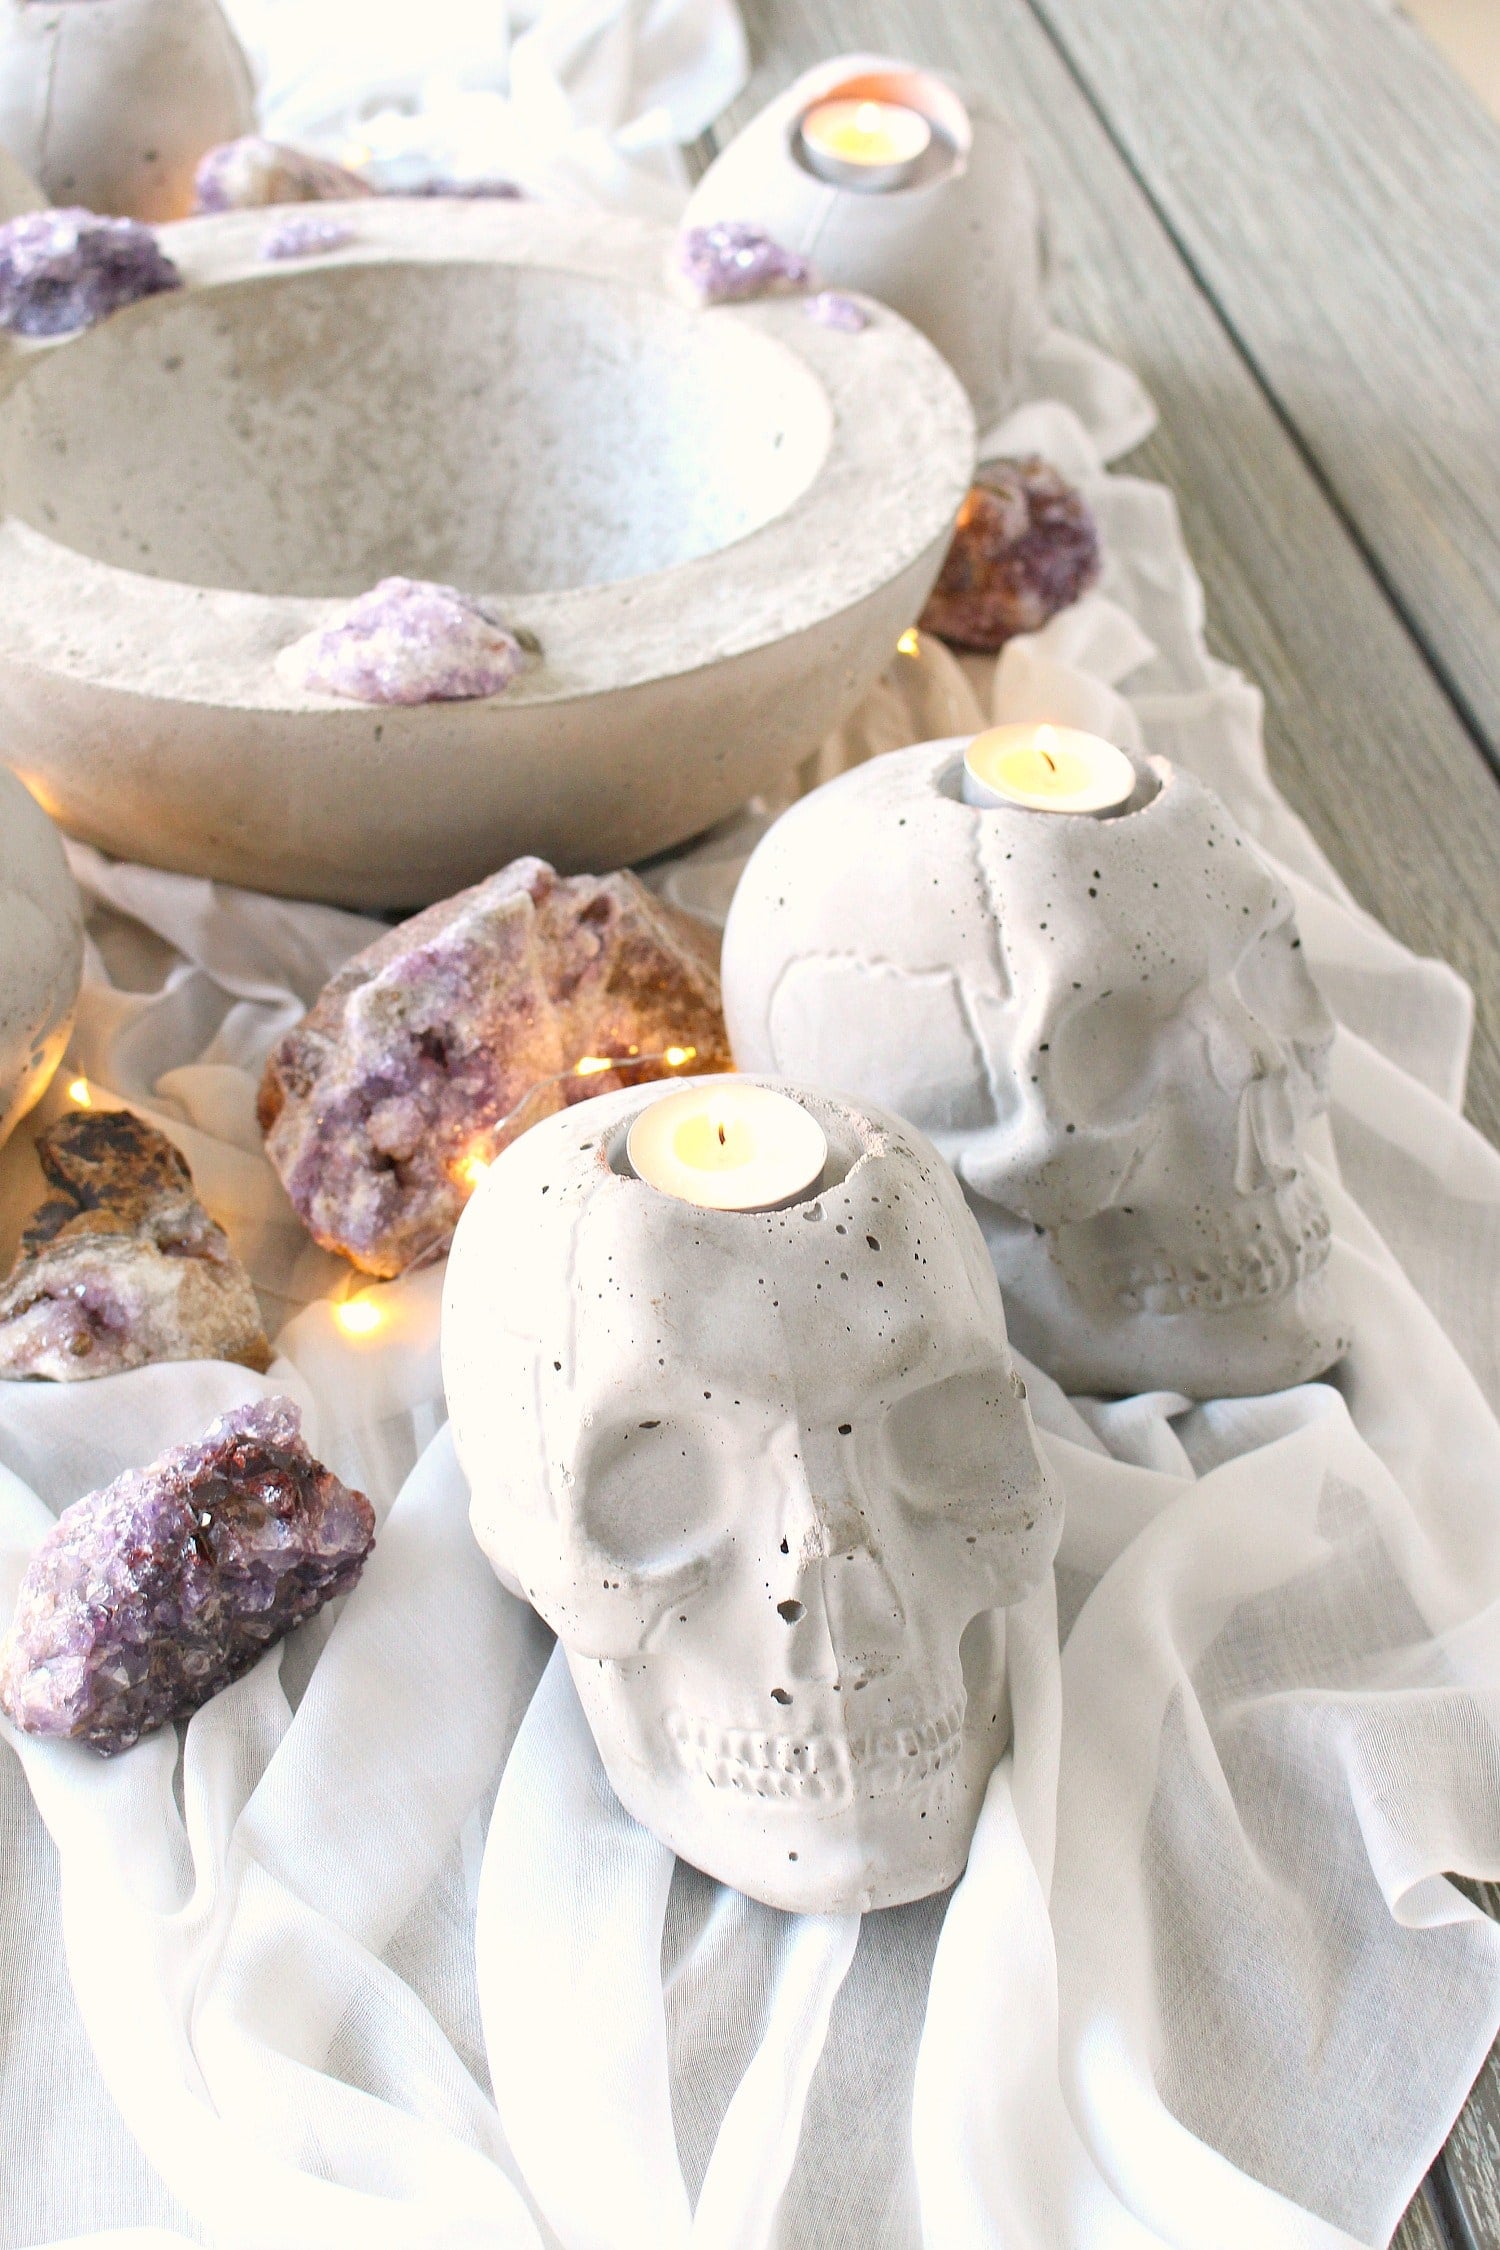
Hollow plastic skulls from the Halloween aisle become molds for these spooky concrete candle holders. Pick one with the design showing inside too. Cut it open, tape it back with duct tape and fill it with about half a 10 pound bag of concrete. An ABS cap hub from the plumbing aisle, pressed into the top, leaves the perfect divot for a tealight. Sand it, add felt feet, and set out a whole skull tablescape!
Get the full tutorial at Dans le Lakehouse.
74. DIY Concrete Christmas Ornaments
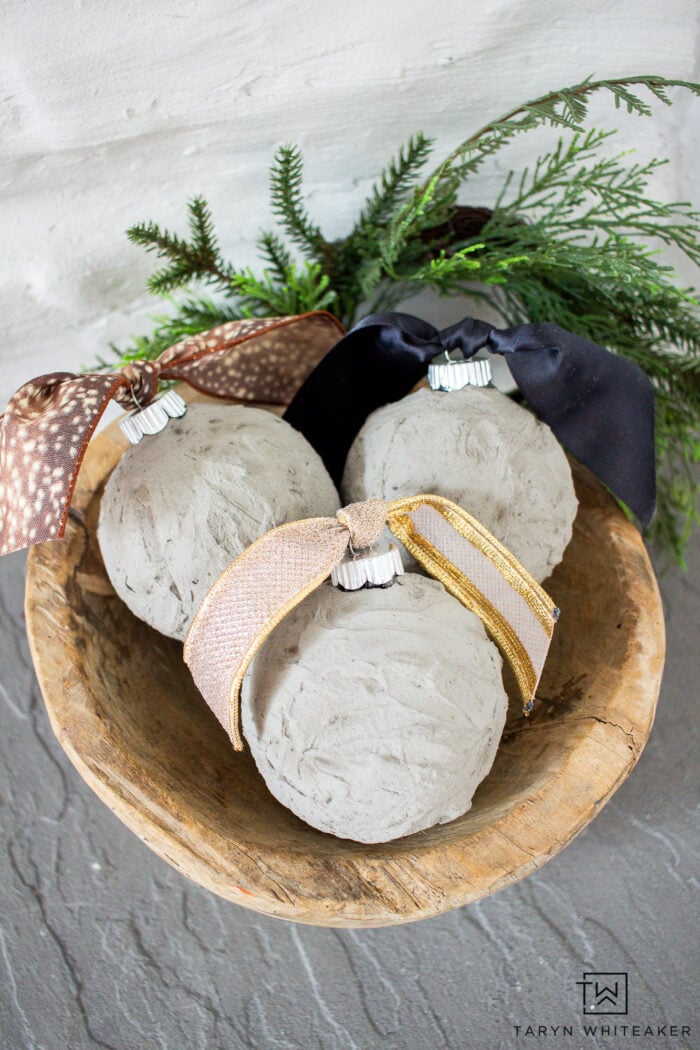
You only need two things for these: Henry Feather Finish concrete and plastic ball ornaments! Mix the concrete with water until it’s like peanut butter, then use a spoon to gloop it on and swirl it all over the plastic. Don’t worry about making it smooth, the texture gives them character. Let them dry overnight on a little drying rack, then dip a few in white paint and tie on a pretty ribbon.
Get the full tutorial at Taryn Whiteaker Designs.
75. Easy Concrete Ornaments
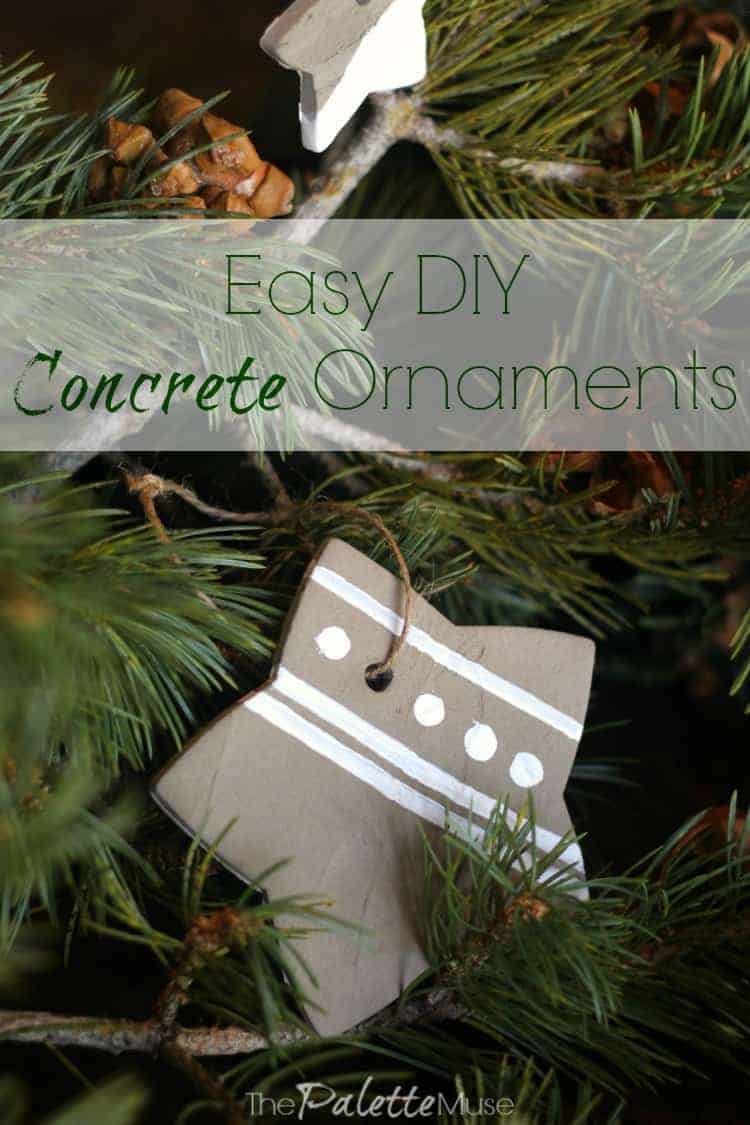
Think of these like salt dough ornaments, but with concrete instead of dough! The maker used leftover Henry Feather Finish from a countertop project. Mix a few cups of dry concrete with water into a dough, roll it out and cut shapes with cookie cutters. Poke a hole at the top for the hanger, let them cure, then paint on stripes or dots. A star with white stripes looks so pretty on the tree.
Get the full tutorial at The Palette Muse.






