Plain paper plus a really good bow beats fancy paper with a sad one every single time. So if you’ve ever wondered how to make a bow that doesn’t flop, this is your list. A gift bow is just loops gathered and tied at the center: ribbon pinched into loops and wired, paper strips curled and glued, or yarn tied up into something cozy. You’ll find a classic ribbon bow, a paper bow cut from one sheet of colored paper, a ribbon tying hack that skips the struggle and a finger crochet yarn bow that needs no hook at all. There are felt bows you can reuse, korker curls baked in the oven and a giant paper bow for presents too big to wrap (yes, even a car). Learning how to make a gift bow saves real money, too. Perfect for Christmas wrapping, birthday presents, wreaths and anyone who loves a DIY gift bow more than the gift.
1. Simple Ribbon Bow
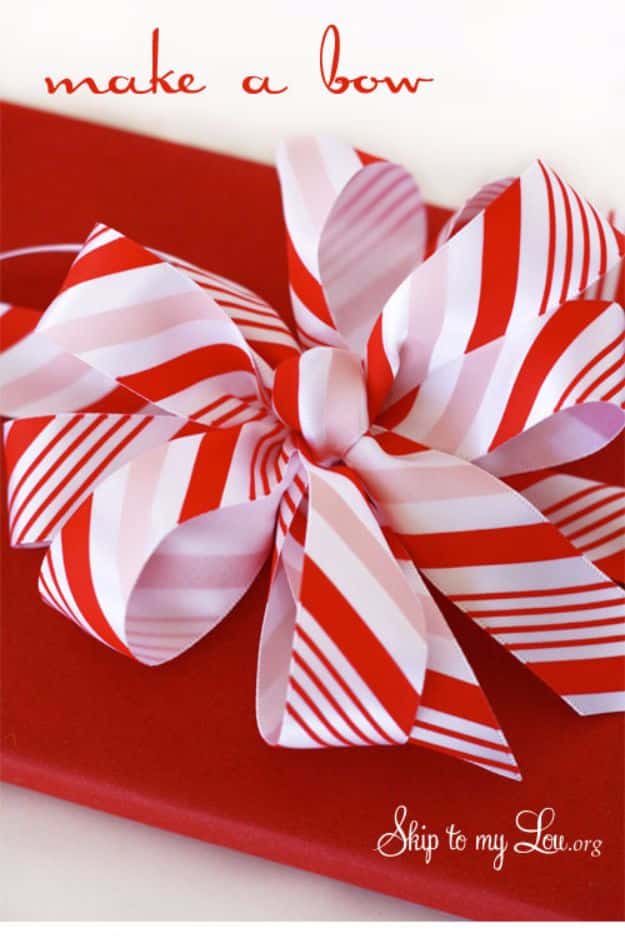
If you only learn one bow, make it this one. You work straight off the spool, so you never cut a piece that turns out too short. Make a loop like a bunny ear, swing the ribbon to the other side for another loop, pinch the middle and keep going (about six loops is the sweet spot). A twist tie, floral wire or even a pipe cleaner holds the center, then the ribbon tails tie it right onto the box. Satin or grosgrain is best for packages. Perfect for every gift on your list.
Get the full tutorial at Skip to my Lou.
2. Fabric Ribbon

Store ribbon adds up fast, so why not make your own from fabric scraps? Cut strips with a rotary cutter and mat (scissors work, they’re just slower), stitch the ends right sides together and you’re done. No hemming and no pinking shears required, and a little tugging on the edges gives a soft frayed look. One yard of fabric makes about 66 feet of 2 inch ribbon. Tie it into a big floppy bow on a kraft box and it looks like a boutique wrapped it. Perfect for cookie gifts and party favors.
Get the full tutorial at Tikkido.
3. Make Beautiful Bows Every Time

You know those big shiny pull bows from the store? This is how to make a gift bow just like them at home. Roll your ribbon into circles, fold it in the middle and cut the ends into a V shape, then tie a knot and pull and twist the petals out one by one. It looks fussy, it isn’t. Make them any size you want, from a small package topper to a gigantic bow for the front door (they make great tree toppers, too). Perfect for anyone tired of paying for bows.
Get the full tutorial at DIY JOY.
4. Tulle Pom Pom Bow

A roll of tulle and scissors. That’s the whole supply list, believe it or not. Cut a 10 inch piece for tying, then wrap the tulle around your hand 20 times, slip it off and tie it tight at the center. Snip all the loops open, fluff it up and give it a haircut until it’s round. Want a bigger one? Wrap around a cardboard circle instead of your hand. It’s soft, poofy and wildly cute on top of a present. Perfect for baby showers, birthday gifts and party favors.
Get the full tutorial at The NY Melrose Family.
5. Double Ribbon Bow

Two ribbons, one big showstopper. Stack two kinds of 2.5 inch ribbon, measure your loops from your hand to your elbow (about 12 inches for most people) and roll fold them back and forth. Cut notches at the center, cinch it with floral wire, add a tail, then pull the loops out front and back until it’s full. No twisting and turning, which makes it a great method if your hands get sore. Mixing a print with a polka dot is half the fun. Perfect for wreaths and big gifts.
Get the full tutorial at Carolina Pottery.
6. Perfect Red Bow

The secret to a perfect bow every time is a simple bow maker board, and you can build one from a scrap 2×4 and two 3/8 inch dowels. Wired ribbon goes between the dowels, you pinch and twist at the center and make six loops on each side, then a small loop in the middle. Floral wire cinches it tight, it slides right off and you fluff the loops. The result is that lush, round bow everyone assumes came from a florist. Perfect for wreaths, trees and big Christmas boxes.
Get the full tutorial at The How-To Home.
7. Tissue Paper Flower Bow

Who doesn’t want flowers on their present? This one takes just five pieces of tissue paper and a few basic supplies, and there’s a short video to walk you through it. The sheets get stacked, folded and gathered, then each layer gets pulled up into a full bloom that looks a little like a carnation. A polka dot tissue on a white box with a matching ribbon is so sharp. No green thumb required. Perfect for birthday gifts, bridal showers and any present that needs a little wow.
Get the full tutorial at Hallmark Ideas.
8. Paper Bows With The Gift Box Punch Board

Tiny boxes need tiny bows, and this punch board makes both. The Gift Box Punch Board scores and cuts the box, then designer paper gets shaped into soft looped bows held with Glue Dots and dimensionals. A button in the center and a strip of washi tape around the box finish it off. It’s an easy way to package little treats that look way more expensive than they are. Perfect for party favors, place settings and small gifts like jewelry or chocolate.
Get the full tutorial at Creative Stamping.
9. Music Sheet Bows

Old sheet music is way too pretty to toss. Cut 3/4 inch strips: three at 8.5 inches, three at 7 inches and one tiny 3 inch piece. Twist each into a loop and hot glue it (double stick tape, glue dots or staples work too). Glue the three big loops into a star, add the second row on top, then the little loop in the middle. On kraft paper with twine it’s simple, vintage and completely charming. Book pages and magazines work the same way. Perfect for a music lover’s gift.
Get the full tutorial at Urban Daisies.
10. Make a Bow with Multiple Ribbons

Have a fancy ribbon but only a couple of yards? Mix it with three less expensive ones and nobody will ever know. Each ribbon adds its own layer of loops (5 inch, 6 inch, then 7 inch), stacked one behind the other and tied off with a pipe cleaner. Keep the fourth ribbon tail short and it tricks the eye into seeing an extra loop (sneaky, right?). Red, green and burlap together look so cozy. Perfect for wreaths, garlands, the tree and big gifts.
Get the full tutorial at Southern Charm Wreaths.
11. Felt Bows

Store bows from cheap plastic ribbon can cost more than $2 each, and they’re trash by New Year’s. These felt bows get used again and again. Print the free PDF pattern, trace it onto felt or fleece scraps (paper works too) and cut it out. Fold the loop ends to the center, glue the loops onto the tail and wrap the little center piece around. A few dots of hot glue and you’re done in minutes. Add a clip and it doubles as a barrette. Perfect for kids gifts.
Get the full tutorial at Bren Did.
12. Korker Ribbon Bow

Yes, you bake this ribbon in the oven. Wrap 3/8 inch grosgrain tightly around wooden dowels, clip the ends with clothespins and bake at 275 degrees for 30 minutes. Then the hard part: let it cool completely, or the curls won’t stay (walk away from the oven, seriously). Slide the ribbon off, trim the flat ends and give the edges a quick swipe with a lighter so they don’t fray. Bunch the bouncy curls on a package or a hair clip. Perfect for little girls’ gifts.
Get the full tutorial at The Moody Blonde.
13. Punch Gift Box Topper

This one looks like a little paper poinsettia sitting on a box. The Bow Builder Punch cuts the loops, bands and tails, and running each loop over a bone folder first helps it curve without harsh creases. Two loops make a bow, two bows get stacked in a cross, then four tails tuck in between the loops and a pearl goes in the center. Kraft and white chevron paper keeps it modern. Perfect for small boxes, chocolate bars and teacher gifts that need a little dressing up.
Get the full tutorial at Rachel Legge Stampin' Up.
14. Make A Burlap Bow

Bought a gorgeous roll of burlap and then realized it doesn’t tie like ribbon? This fixes that, and you don’t need floral wire. Decide how wide you want the bow, multiply by three and cut both the burlap and some twine to that length (24 inches for an 8 inch bow). Fold the ribbon into three sections, wrap the twine around the middle, knot it and trim. Done. Go 12 to 18 inches wide for a tree topper. Perfect for rustic gifts, wreaths, pews and chairs.
Get the full tutorial at Made With Happy.
15. Crochet Gift Bow

A wee bit of leftover yarn turns into a gift tie you can use year after year. The ties are just long crochet chains, 150 to 200 of them, wrapped around the box and tied into a bow (wrap twice on a smaller package). A tiny five petal flower made with a size H hook dresses up a kraft tag. Soft pinks and creams on white paper look so sweet. It’s beginner friendly and you’ll use up your yarn scraps. Perfect for birthdays, baby showers and Mother’s Day.
Get the full tutorial at Grateful Prayer Thankful Heart.
16. Ribbon Bow With Ornament

Speedy and so festive. String a handful of mini ornaments (these are tiny disco balls) onto a piece of string and double knot it into a little loop. Tie a striped ribbon around the box, knotted off center toward a corner, thread one end through the ornament loop and tie your bow. That’s it. The ornaments make a second little gift, too, because who doesn’t keep those? Bright pinks, blues and golds on polka dot kraft paper look like a party. Perfect for last minute wrapping.
Get the full tutorial at Homey Oh My.
17. 5-Minute Ribbon Tying Hack
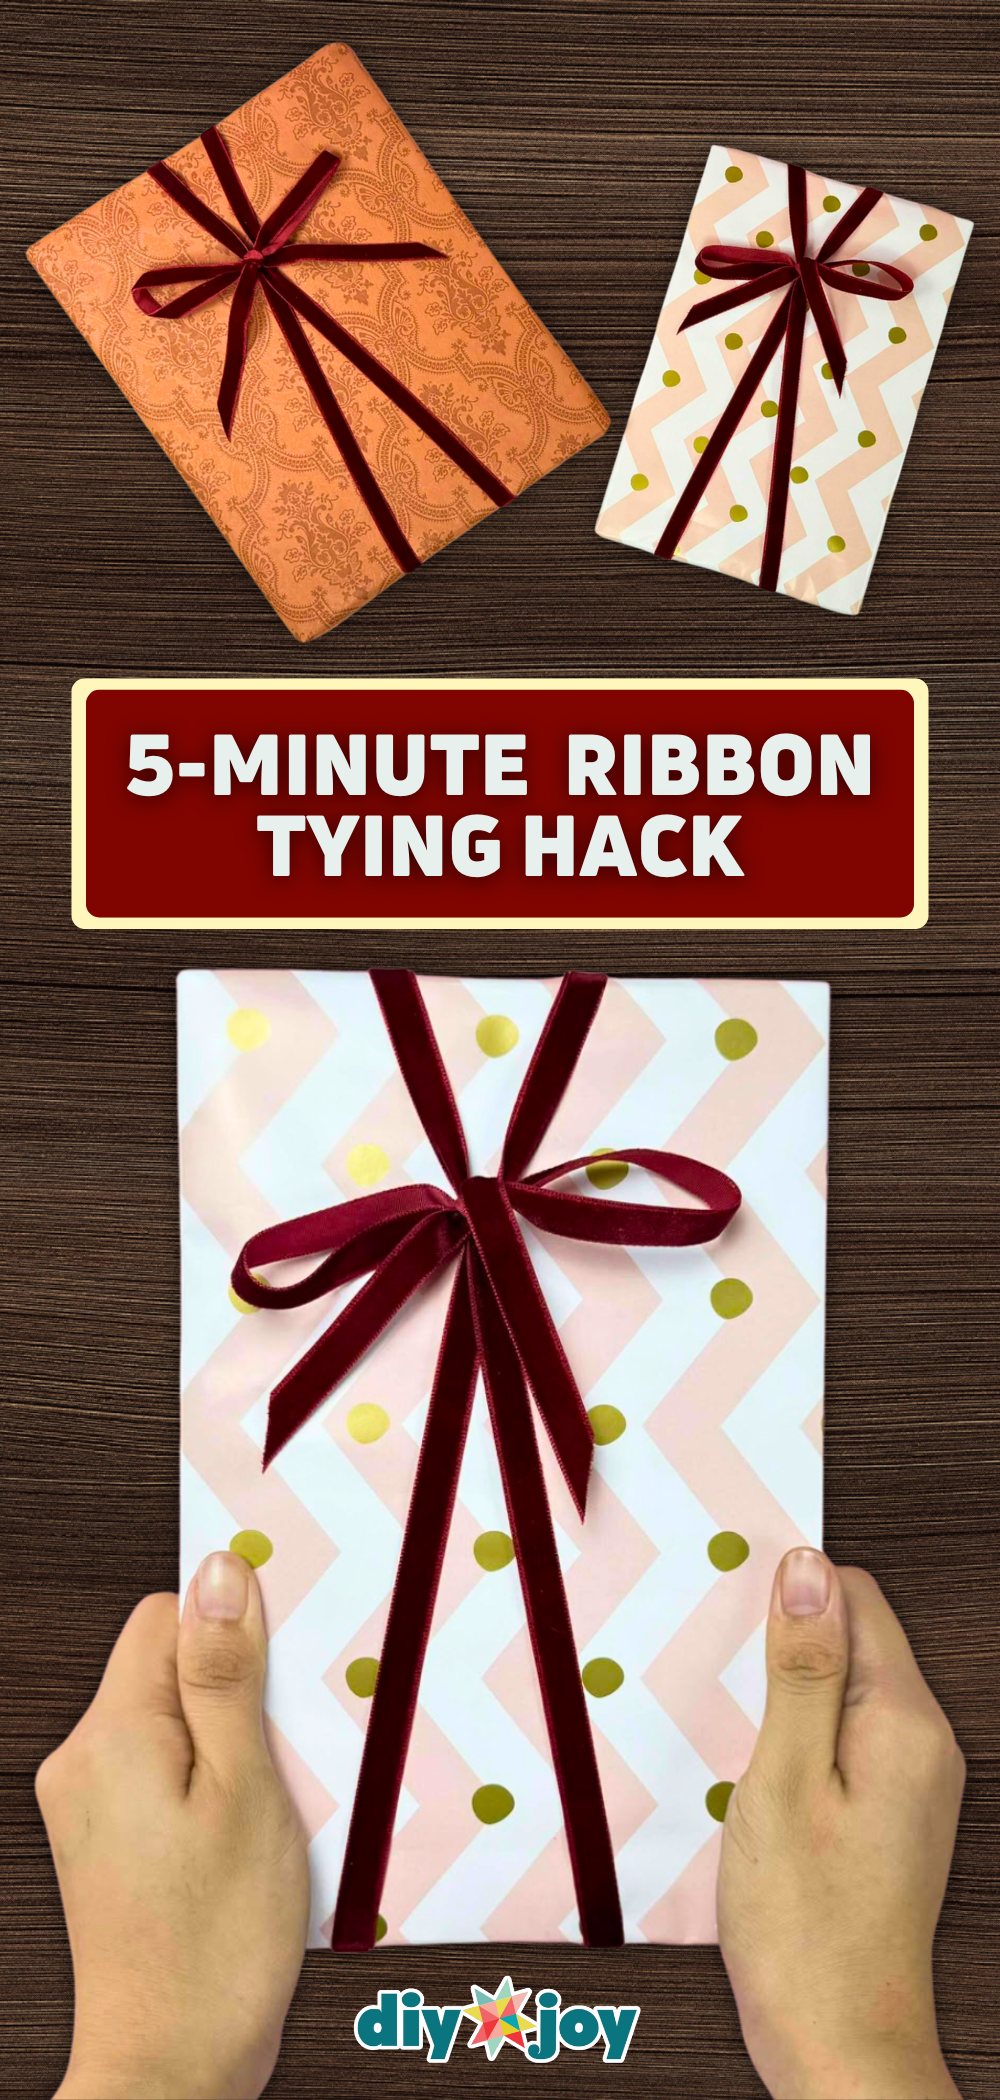
If your ribbon always ends up crooked, this trick is your new best friend. Fold a long ribbon in half, set the gift on top, bring the loop over and pull the tails through it. Wrap one tail around the back, tie it to the other, then loop and tuck to form the bow. It’s secure but slips off easily when it’s time to open, and the ribbon isn’t damaged. Thin velvet ribbon looks so elegant this way. It even works on round gifts. Perfect for big wrapping nights.
Get the full tutorial at DIY JOY.
18. How to Make a Paper Bow
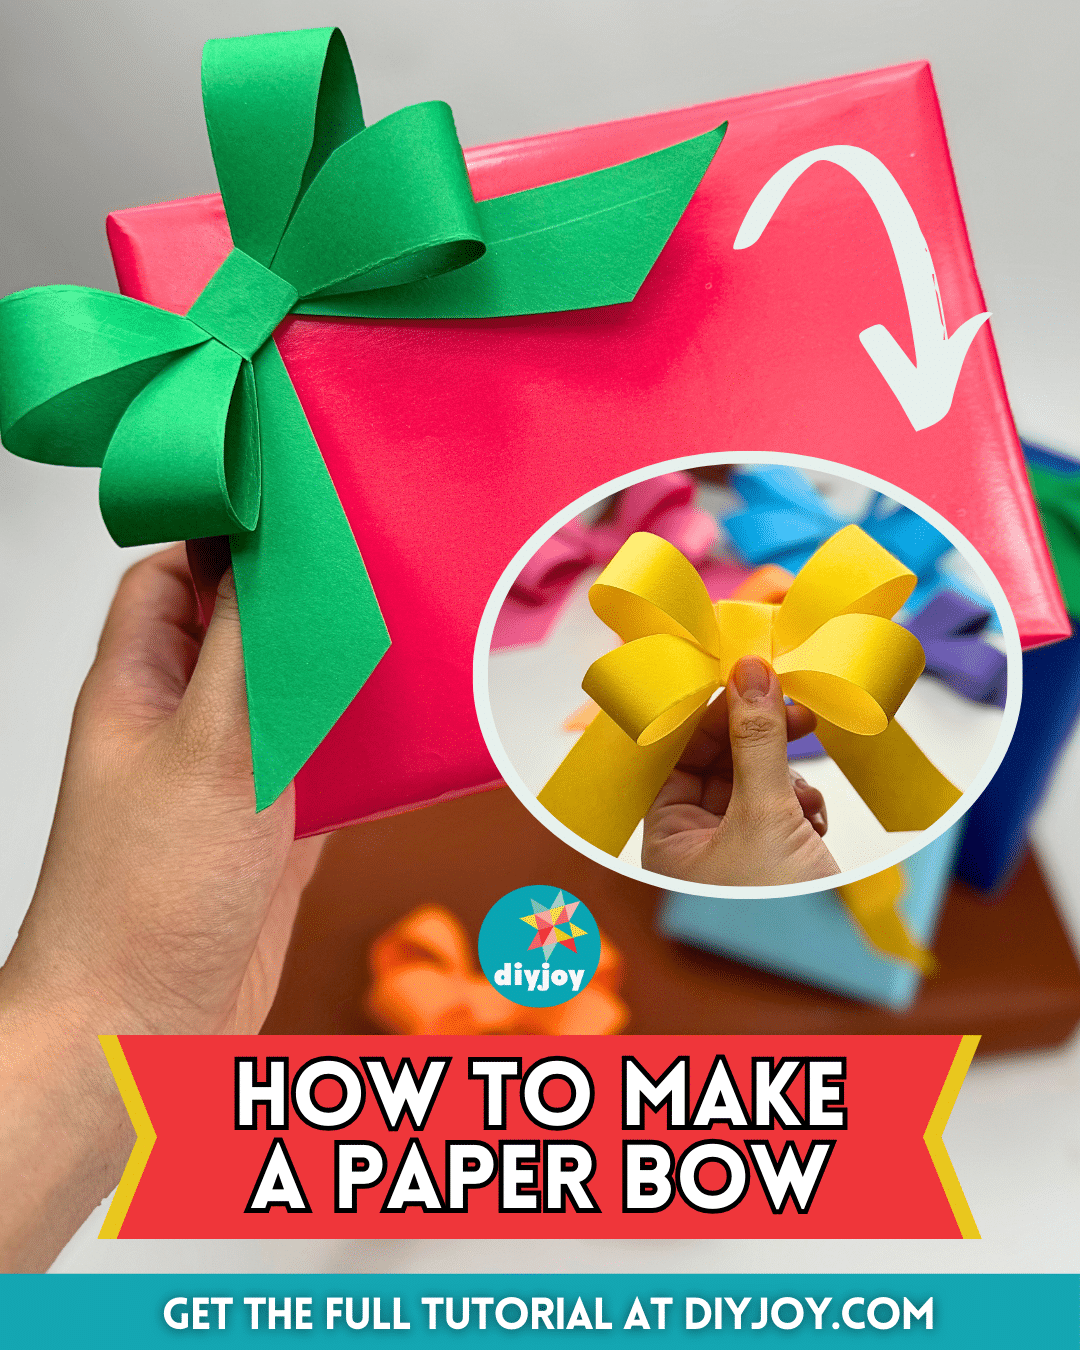
One sheet of colored paper, glue, scissors and a ruler. That’s all it takes for this bright paper bow. A few folds turn the sheet into a square, a curved cut makes the loops, then the tails get snipped and everything glues together with a little band wrapped around the middle. Thicker paper holds the shape best (wrapping paper works, just handle it gently). Tuck one on a card with a gift card inside and it’s instantly special. Perfect for gift toppers and classroom crafts.
Get the full tutorial at DIY JOY.
19. Easy Finger Crochet Yarn Bow

No hook? No problem. This chunky yarn bow is crocheted entirely on your fingers. Wrap the yarn around your thumb, weave it across your fingers, then lift the bottom loops up and over the top ones, row after row, until the chain is as long as you want. Lock the last loops, slide it off and tie it into a bow. Thicker yarn holds the shape better. Bright red on a white box looks so cozy. Perfect for gifts, hair clips and even craft fair tables.
Get the full tutorial at DIY JOY.
20. Easy Satin Ribbon Rose
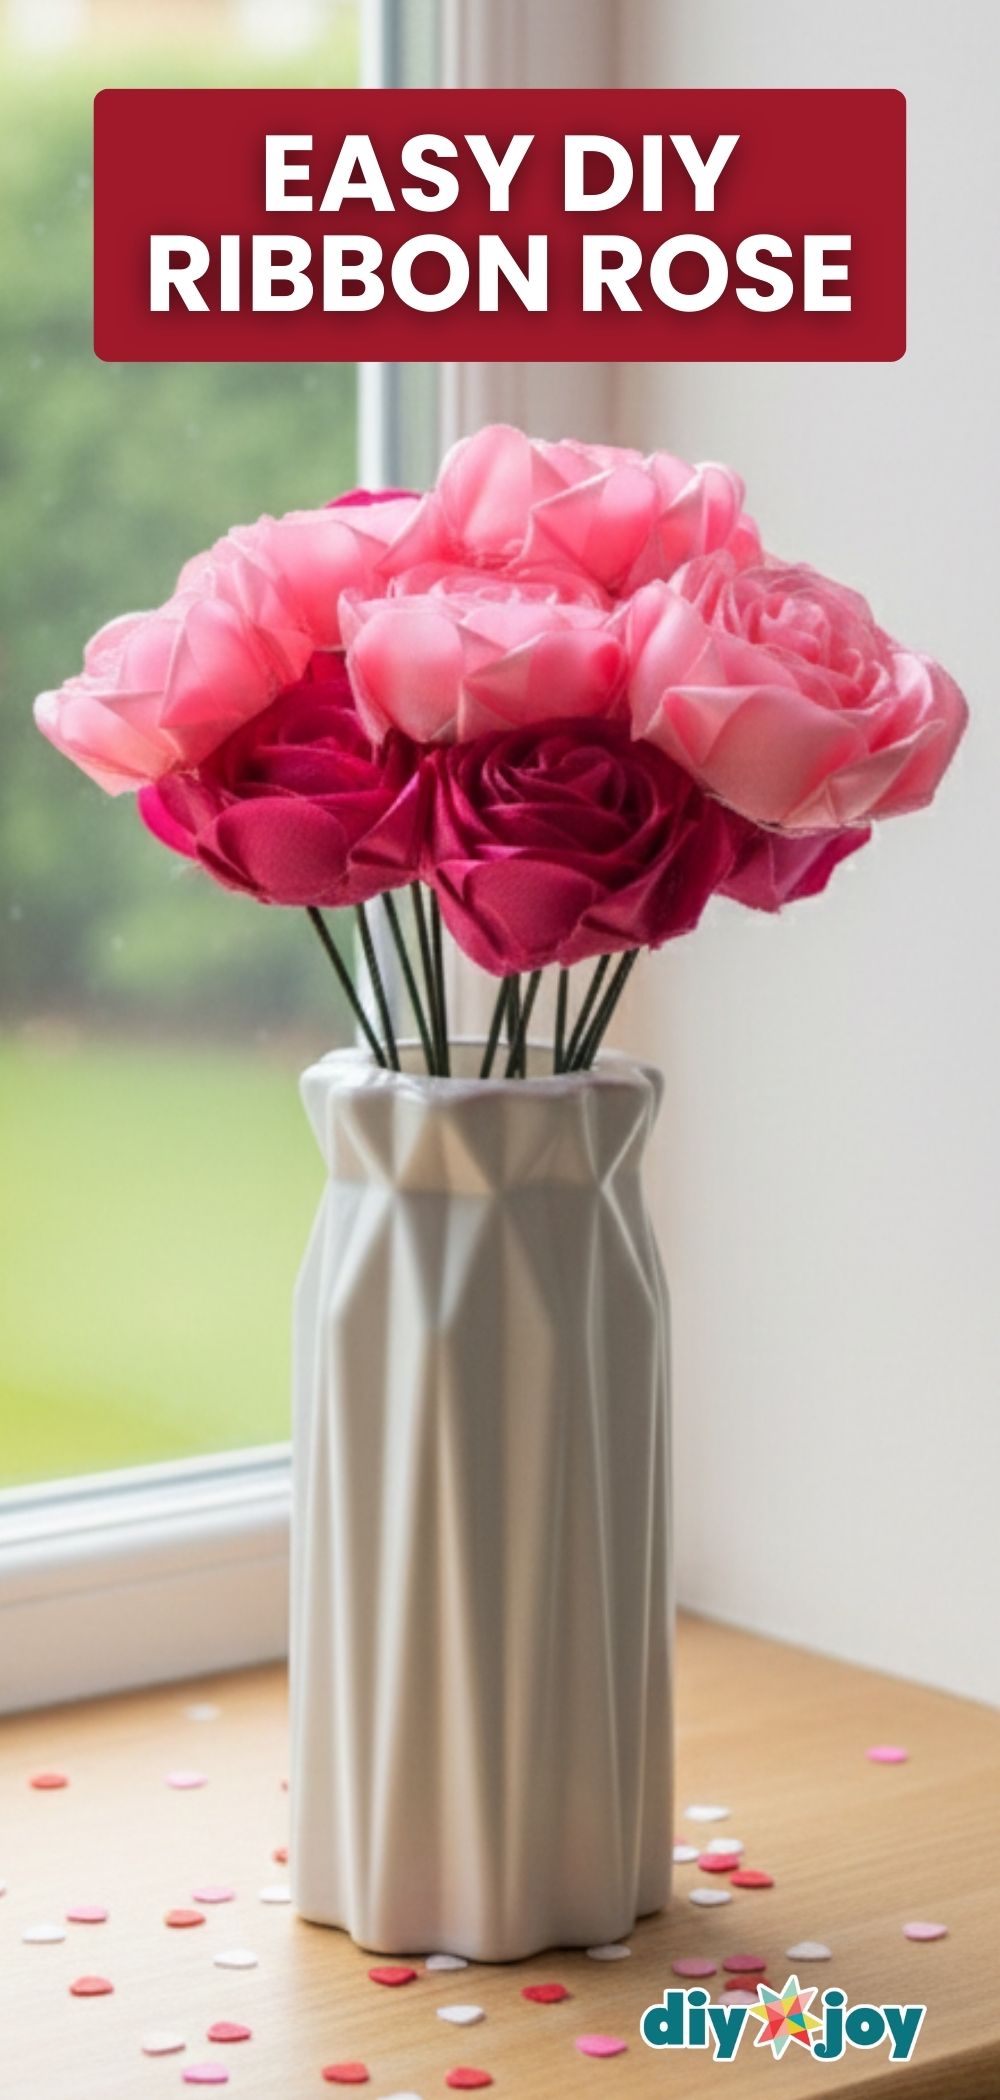
Swap the bow for a rose that never wilts. Cut 25 pieces of satin ribbon, each about 7 cm long. Fold each one into a triangle, fold the tip down and seal the edge with a quick pass of flame so it can’t fray. Hot glue the petals together side by side, then roll them around a floral stem, gluing as you go. Wider ribbon makes a bigger rose, and mixing two pinks adds depth. Tie one onto a package. Perfect for Valentine’s Day, Mother’s Day and birthdays.
Get the full tutorial at DIY JOY.
21. Easy 2-Minute Ribbon Rose

Two minutes, a ruler and some double sided tape. Wrap ribbon diagonally around the ruler, overlapping as you go, then run tape along the bottom edge and peel off the backing. Slide the ribbon off the ruler without crushing it and roll it up from one end, pressing the bottom together. A tiny bit of tape holds the end, and a lighter seals the edges if you want. Red satin looks surprisingly real. Tuck one into a gift bow or onto a tag. Perfect for quick toppers.
Get the full tutorial at DIY JOY.
22. Pom Pom Christmas Light Gift Topper
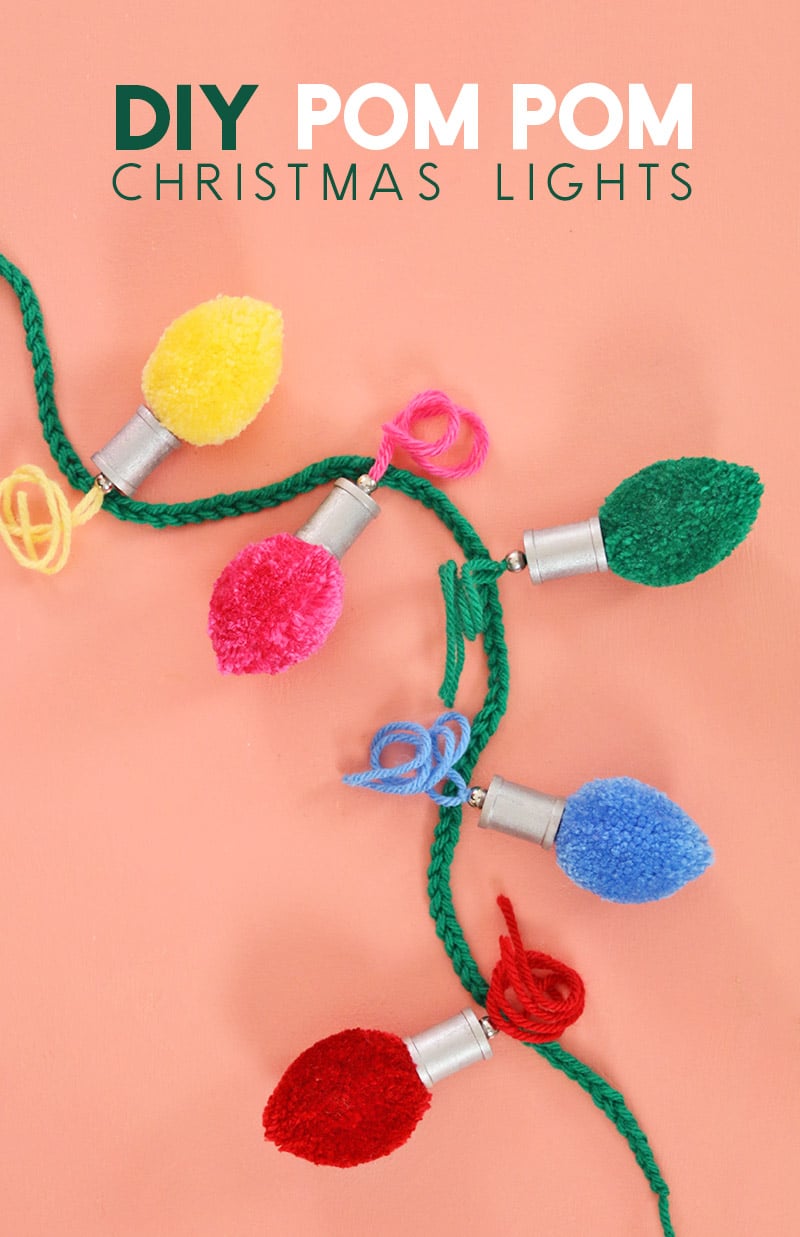
Retro Christmas lights you can tie on a present? Yes please. Make a big pom pom with worsted acrylic yarn (a Clover pom pom maker makes it easy), then trim it into an oval bulb shape. Paint a small wooden spool silver, thread the pom pom tails through the spool and a silver bead and knot them. Tie a couple onto a gift as a topper, or string a bunch for a garland. It’s a great project for a cheesy Christmas movie night. Perfect for kids and yarn stash busting.
Get the full tutorial at Persia Lou.
23. Wired Ribbon Bow
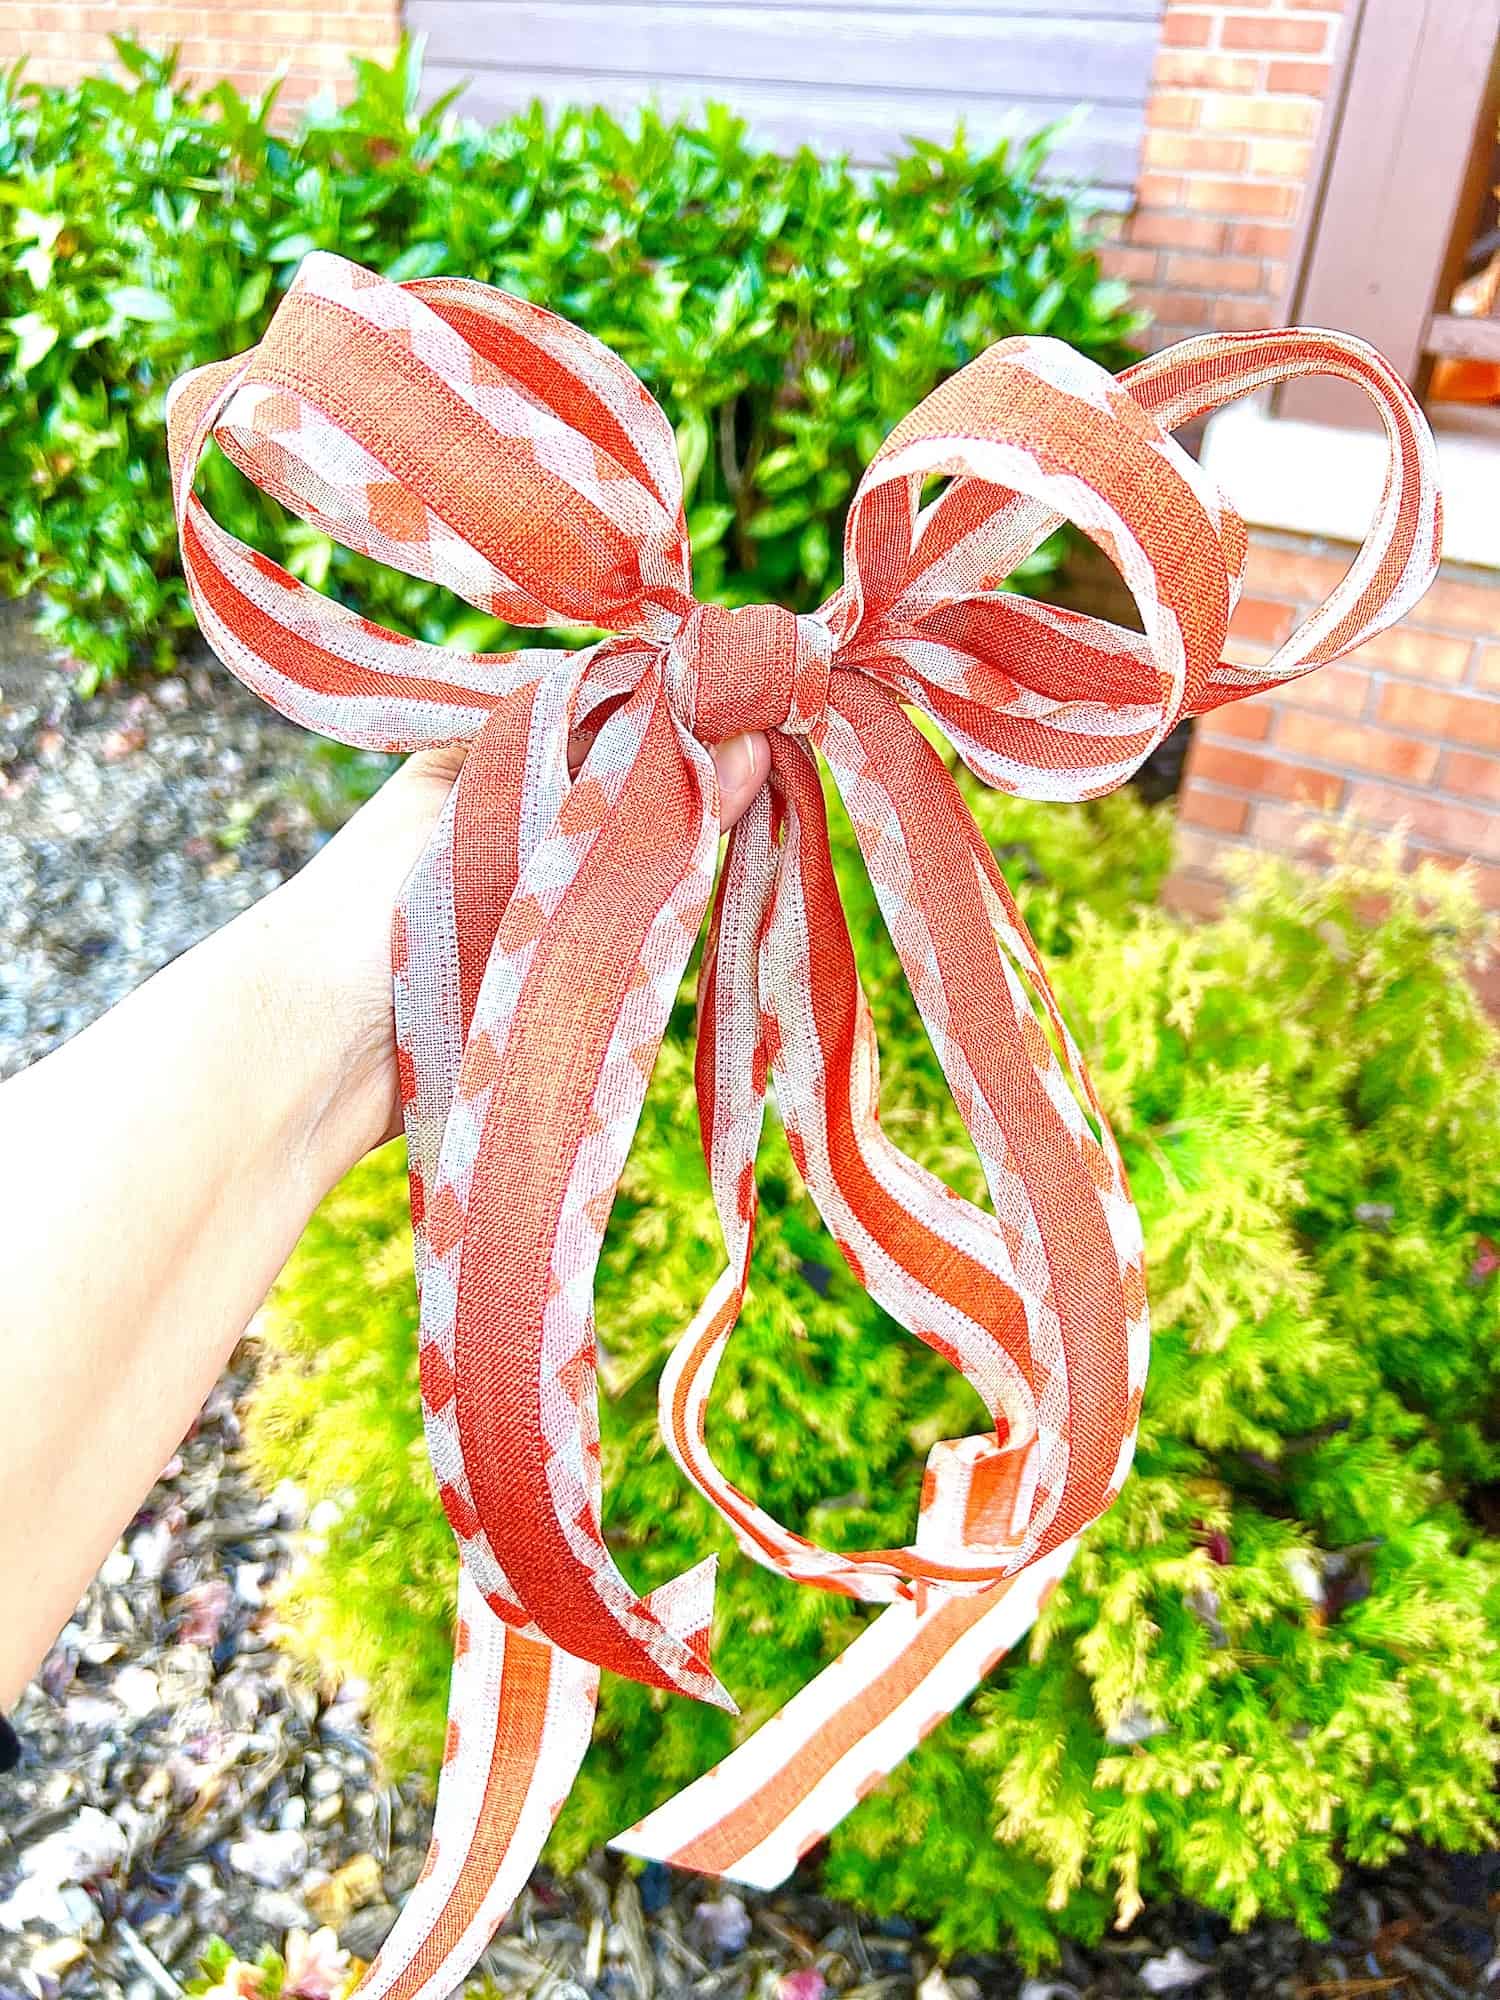
If you can tie your shoe, you can make this big loopy bow. A 4 yard roll of wired ribbon gets cut into three pieces: 48, 62 and 30 inches. Tie the 48 inch piece into a regular bow, then tie the 62 inch piece a little bigger. Stack the small bow on the big one and use the 30 inch piece to tie them together at the center. Twist any loop showing the wrong side so the pretty side faces out. Perfect for porch railings, wreaths and big gifts.
Get the full tutorial at Single Girl's DIY.
24. Mini Bauble Gift Toppers
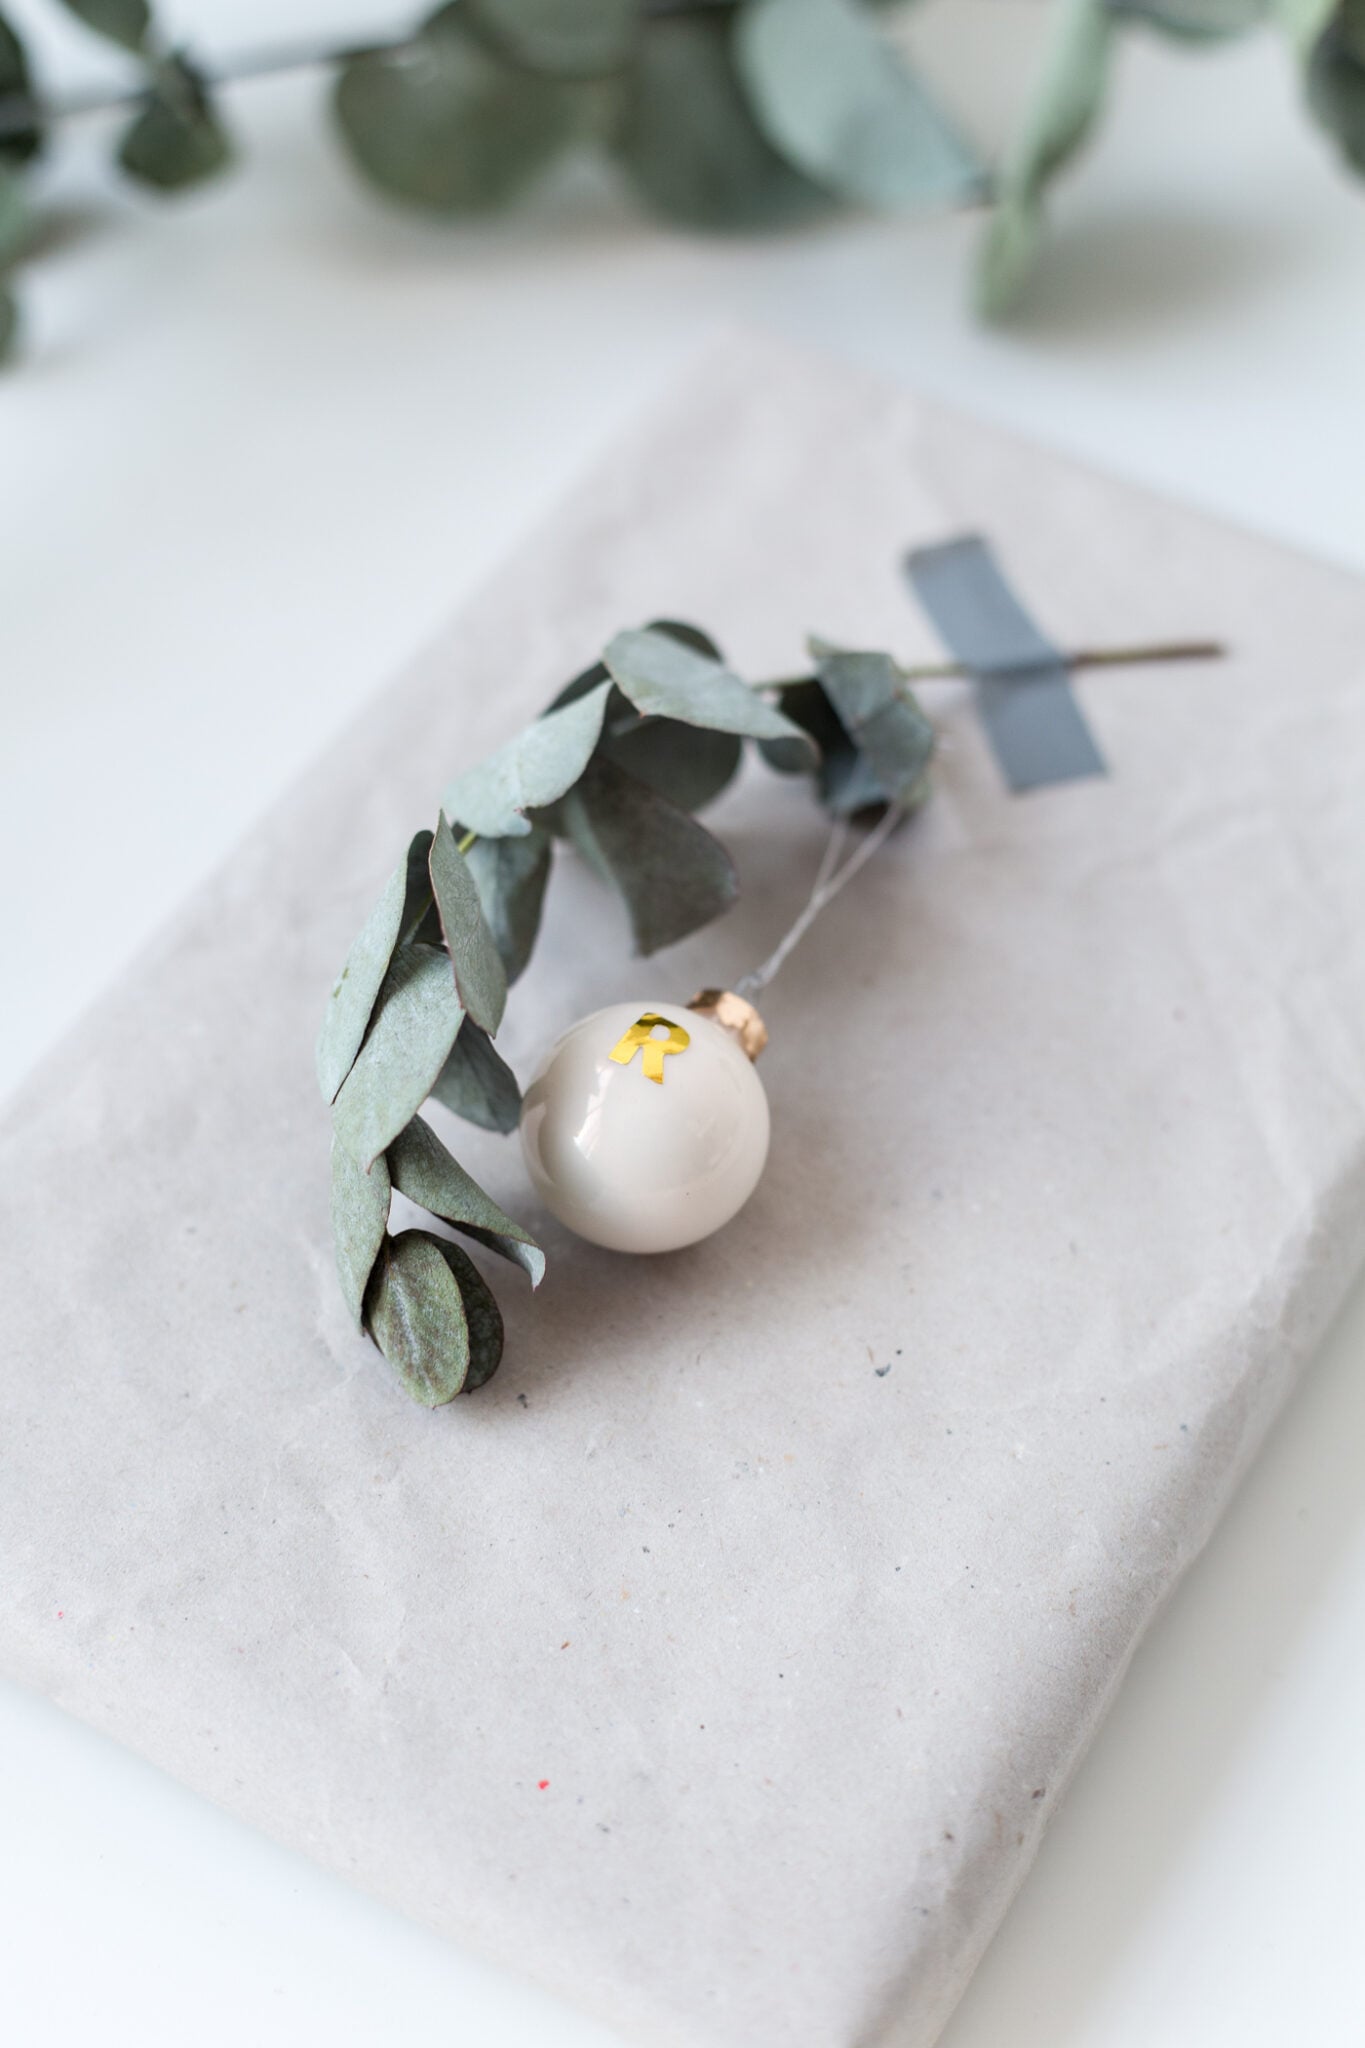
This is the fastest topper on the whole list. Grab small baubles and letter stickers, stick an initial on each bauble (both sides, if your family has a few people with the same letter) and hang it from a sprig of eucalyptus. Washi tape holds the sprig to the package. That’s it. The bauble doubles as the gift tag, so there’s nothing to write out. Soft gray paper with the greenery looks calm and modern. Perfect for anyone wrapping at midnight on Christmas Eve.
Get the full tutorial at Fall For DIY.
25. Book Page Gift Bows
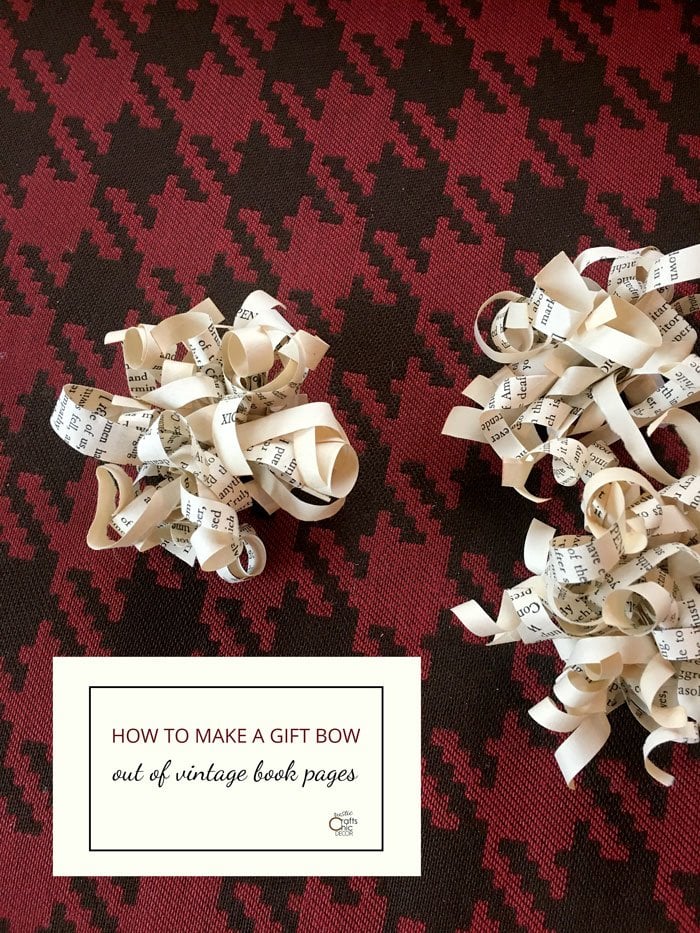
An old book page becomes a curly little bow, and all you need is scissors and tape. Fold the page in half and in half again, cut narrow 1/4 inch strips (leave about a half inch at the top uncut), then unfold and cut the seam. Curl every strip over the flat side of the scissors, roll the page up, fold it in half and tape the center. Fluff the curls until you love it. Vintage song sheets make bigger bows. Perfect with kraft paper or grocery bag wrapping.
Get the full tutorial at Rustic Crafts & DIY.
26. Giant Wrapping Paper Gift Bow
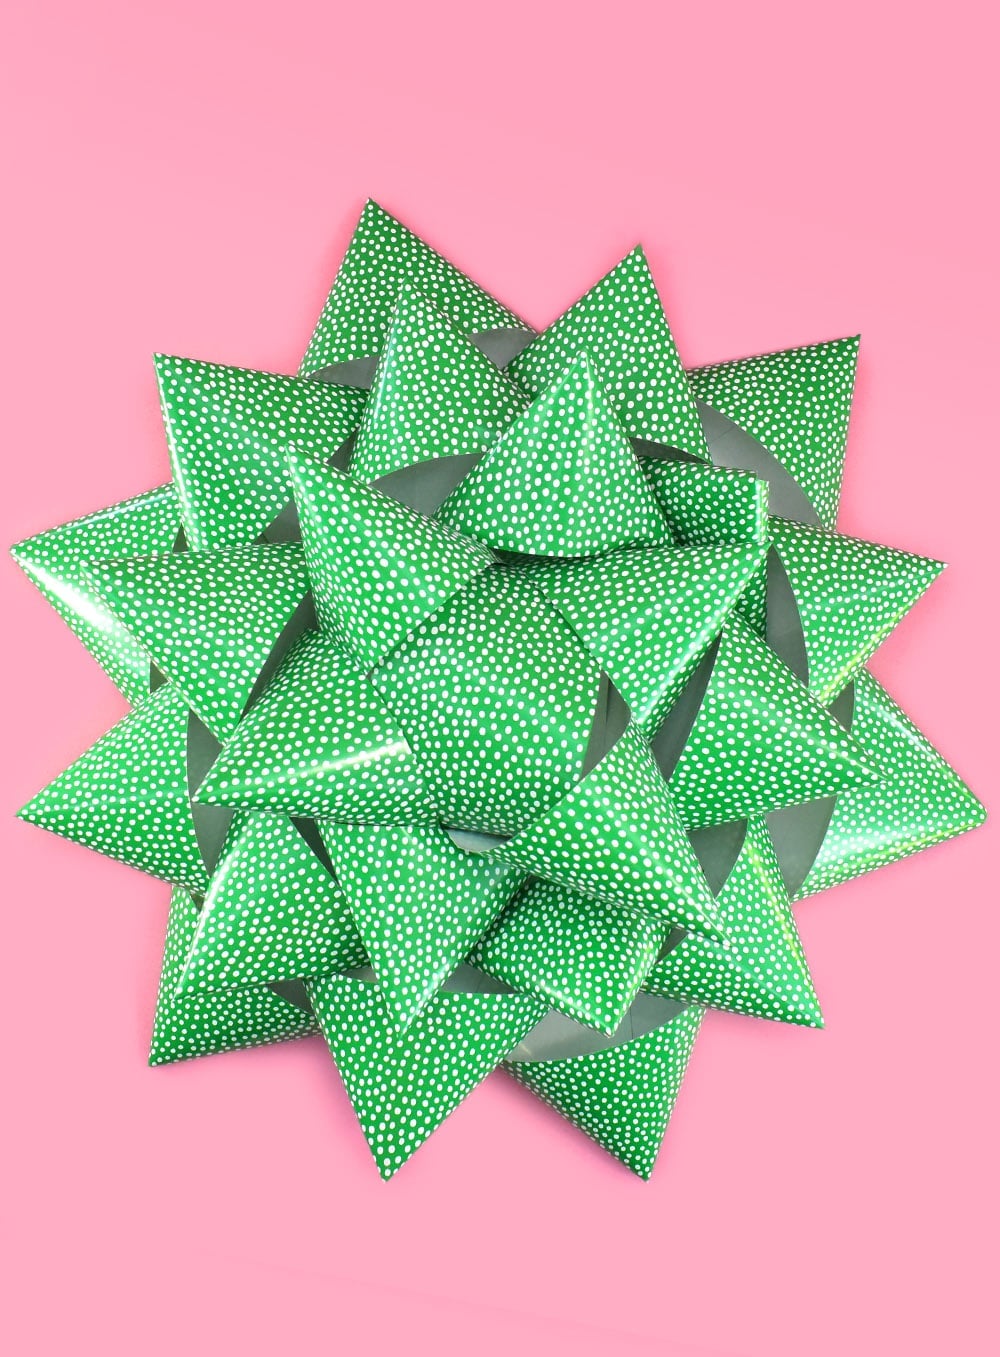
Got a gift too big to wrap, like furniture or even a car? This bow is your answer. Thick wrapping paper with a grid on the back makes cutting easy, and 4 inch strips make a bow about 24 inches across (6 inch strips get you about 34 inches!). Each strip folds into points, a hole punch keeps every piece lined up and the rounds get taped inside each other until the center fills in. Cheap thin paper flops, so skip it. Perfect for over the top surprises.
Get the full tutorial at Dream a Little Bigger.