
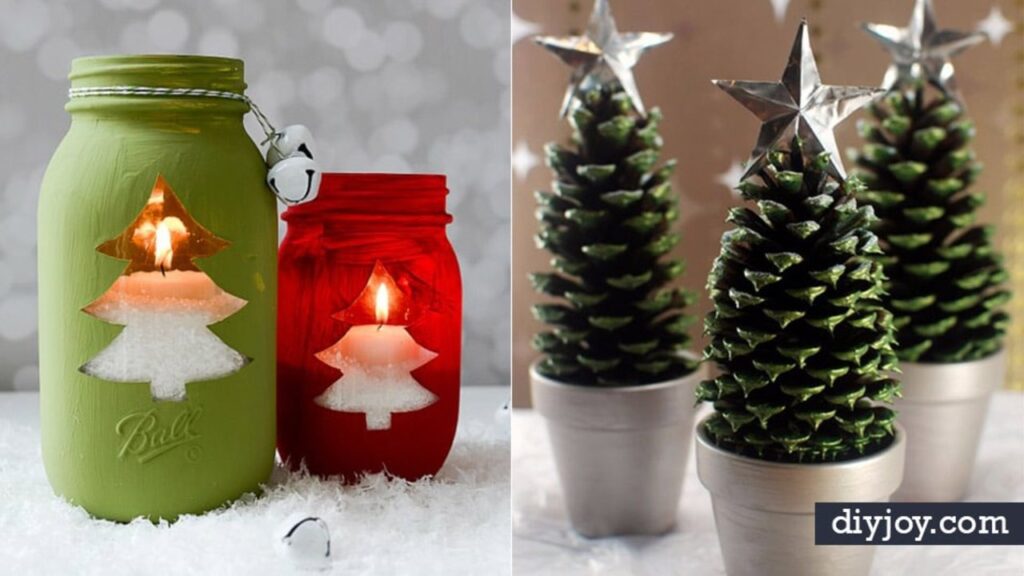
Dollar store Christmas decor is the secret behind half the holiday houses you admire, and this list proves it. These 38 DIY Christmas decor ideas start with dollar store finds, craft drawer leftovers and things already headed for the recycling bin, and every one of them looks like it cost far more than it did. There are wreaths and garlands, table centerpieces, painted pillows and tiny trees made from pine cones, corks and tin cans. Recruit the kids or a friend, turn on the Christmas music and you'll want to pick a few to make this weekend. Every project links to the creator's step by step tutorial, and a handful of them are ours!
1. Twine String Christmas Trees
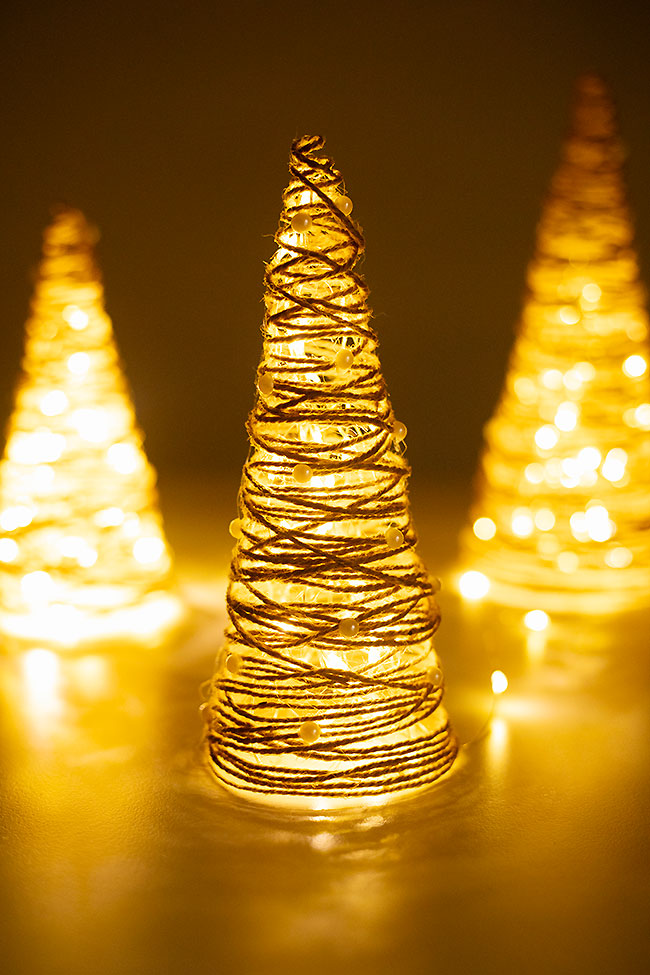
Twine, tacky glue and a paper cone make these glowing string trees. Debbie Chapman at One Little Project prints a free template in three sizes, rolls each into a cone, wraps it in plastic wrap and winds glue soaked twine around it until the shape holds. Once the twine dries, the cone slides out. Pearl stickers become the ornaments and a strand of white LED lights inside makes it glow. Set three on the mantel and turn the lamps off. The printable and video are at One Little Project.
2. Easy Yarn Christmas Trees
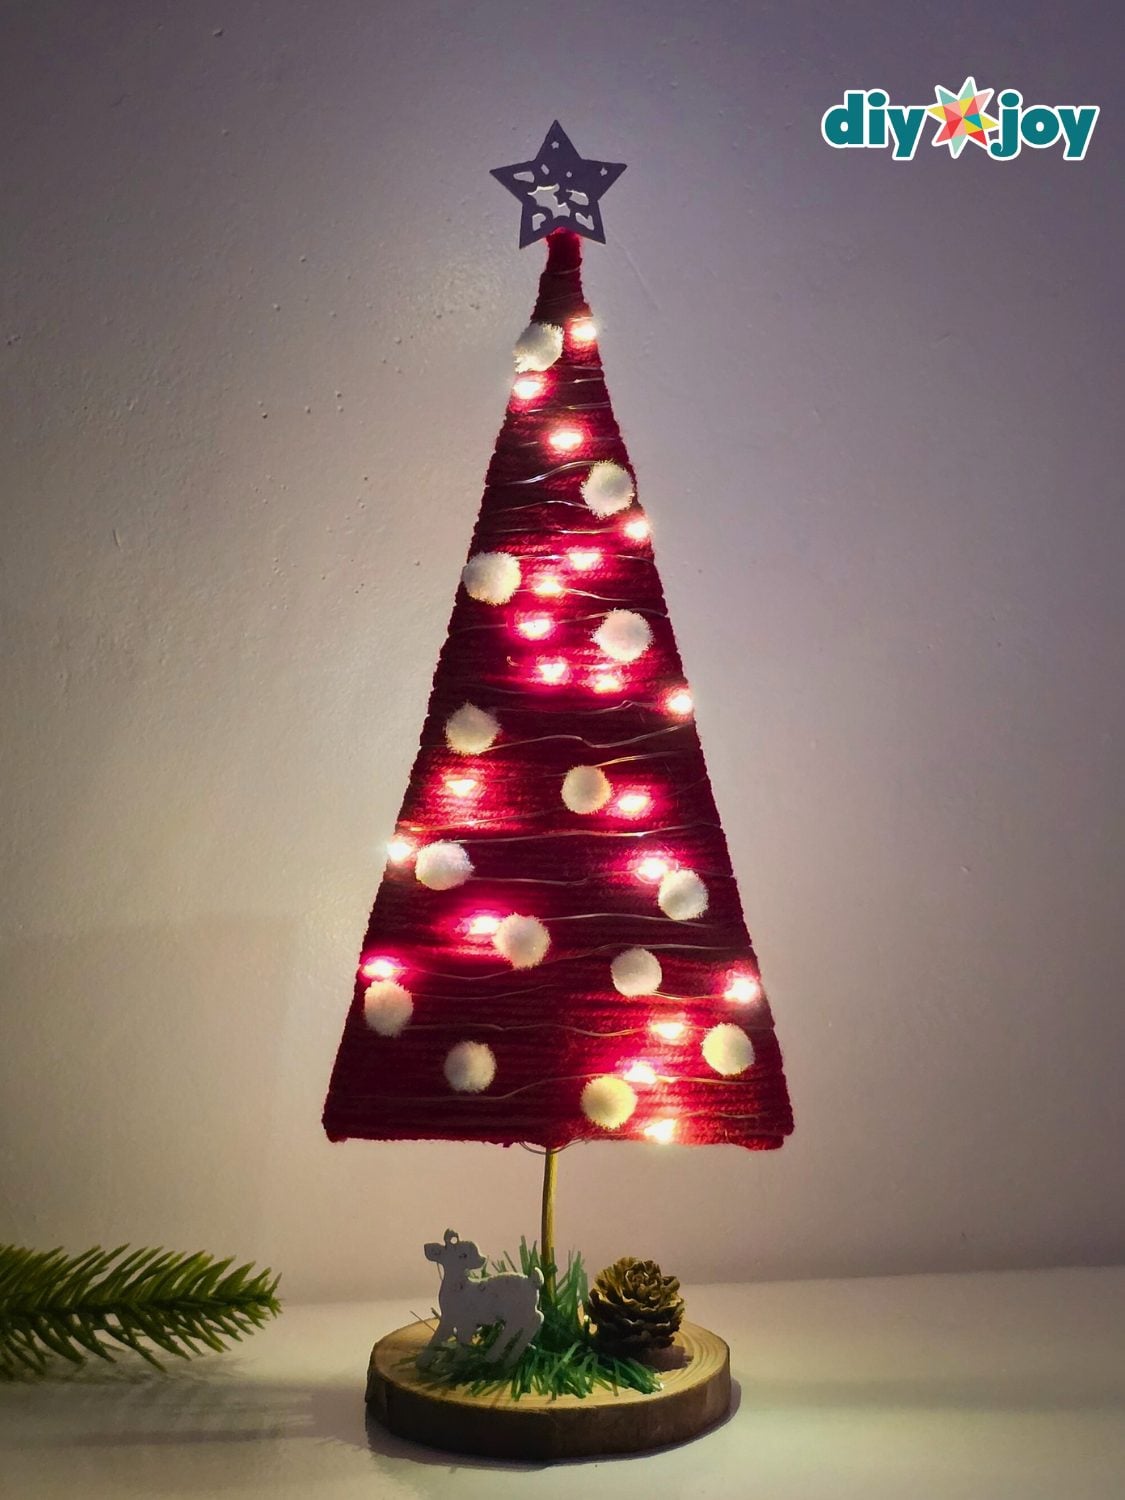
A cardboard triangle, a skewer and one ball of chunky yarn is the whole tree, and it lights up. Hot glue the skewer on as a trunk, wrap yarn from tip to base until the cardboard disappears, then stand it on a wood slice. Fairy lights spiral down from the top, mini pom poms play the ornaments and a paper star tops it. Ours took about ten minutes. Make a little forest in green, white and red for the table, then grab the steps and video on DIY Joy.
3. Shatterproof Ornament Wreath
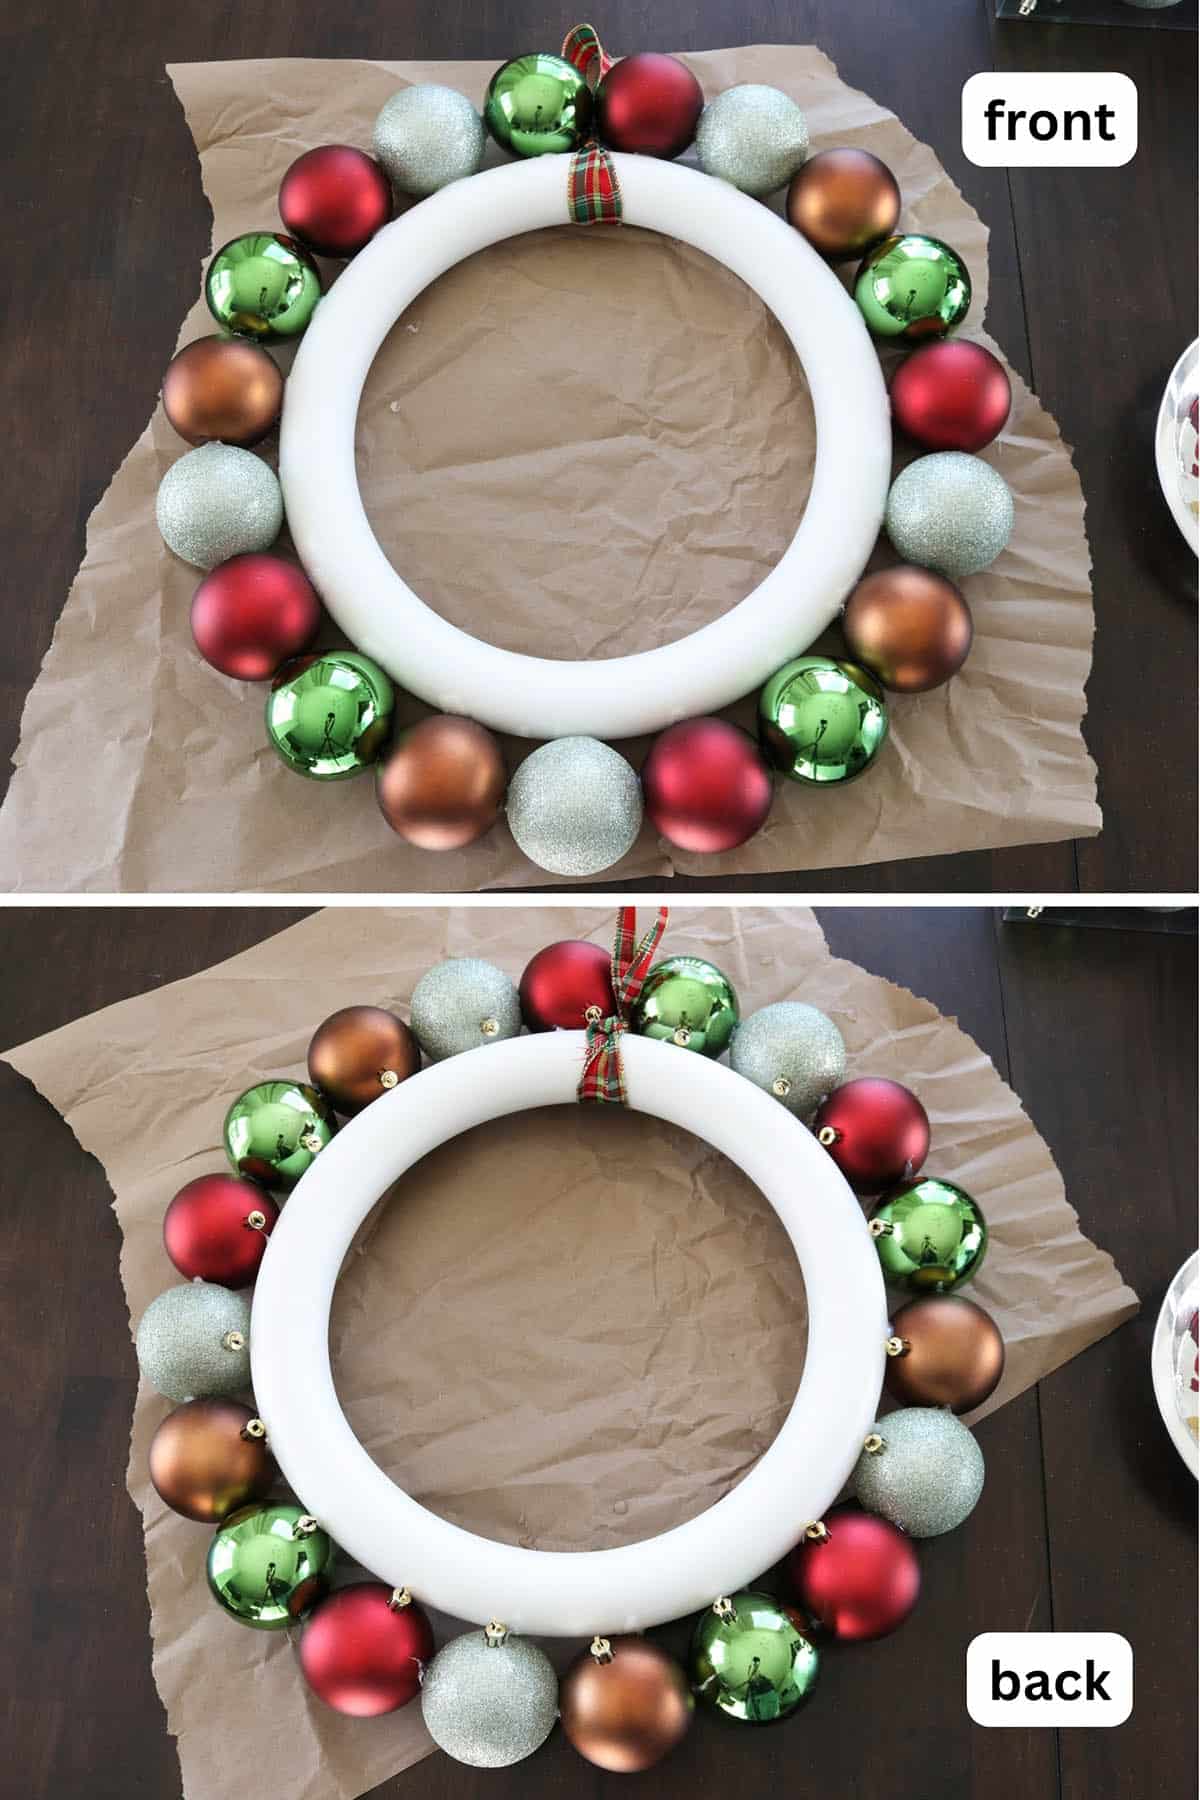
Shop the after Christmas sales for boxes of shatterproof ornaments and this wreath costs a few dollars. Aubree hot glues ball ornaments in three or four sizes onto a styrofoam wreath form, biggest first, then fills the gaps with smaller balls until no foam shows. Wrap the form with tinsel garland first to hide gaps. Skip glitter ornaments unless you enjoy vacuuming sparkle for a month. A 15 inch form finishes about 21 inches wide. Her how to, with wire and evergreen versions, is at Aubree Originals.
4. Scrap Wood Block Houses
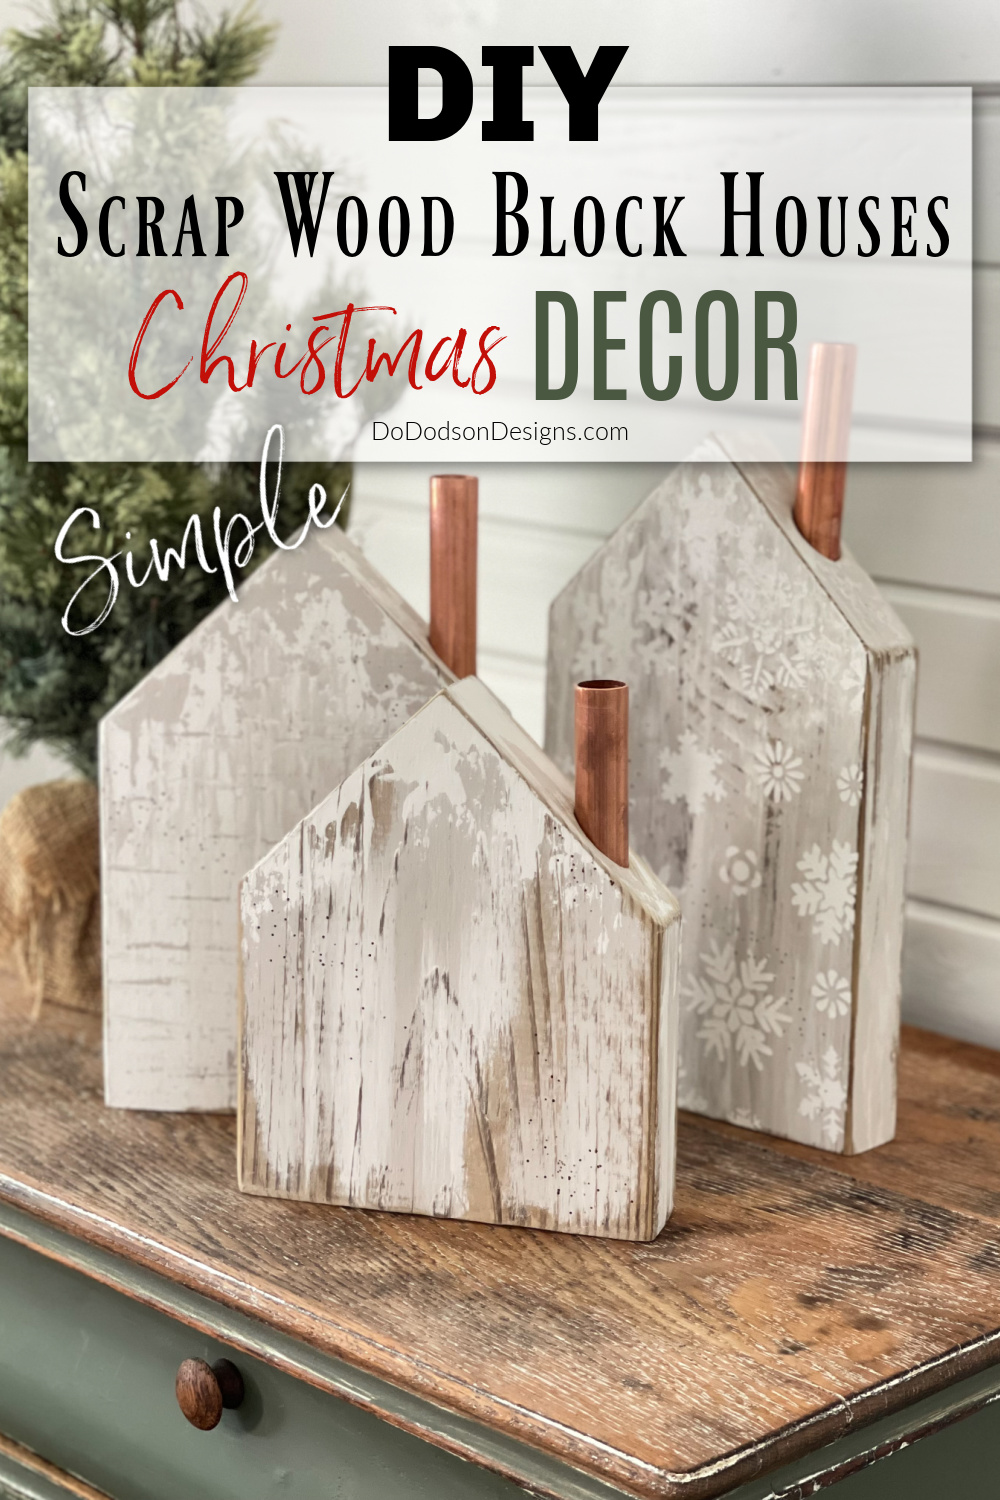
Cut a scrap 2×10 into three lengths, put a 45 degree roof on each and you have a little village. Do Dodson Designs drills a hole in each roofline and drops in a short piece of copper pipe as the chimney, the detail that makes them look store bought. Dry brushed clay paint in white and tan, sanded at the edges, gives the weathered farmhouse finish, and one house gets a snowflake stencil. A friend sold a batch for Christmas cash. Every cut is at Do Dodson Designs.
5. Tin Can Snowman
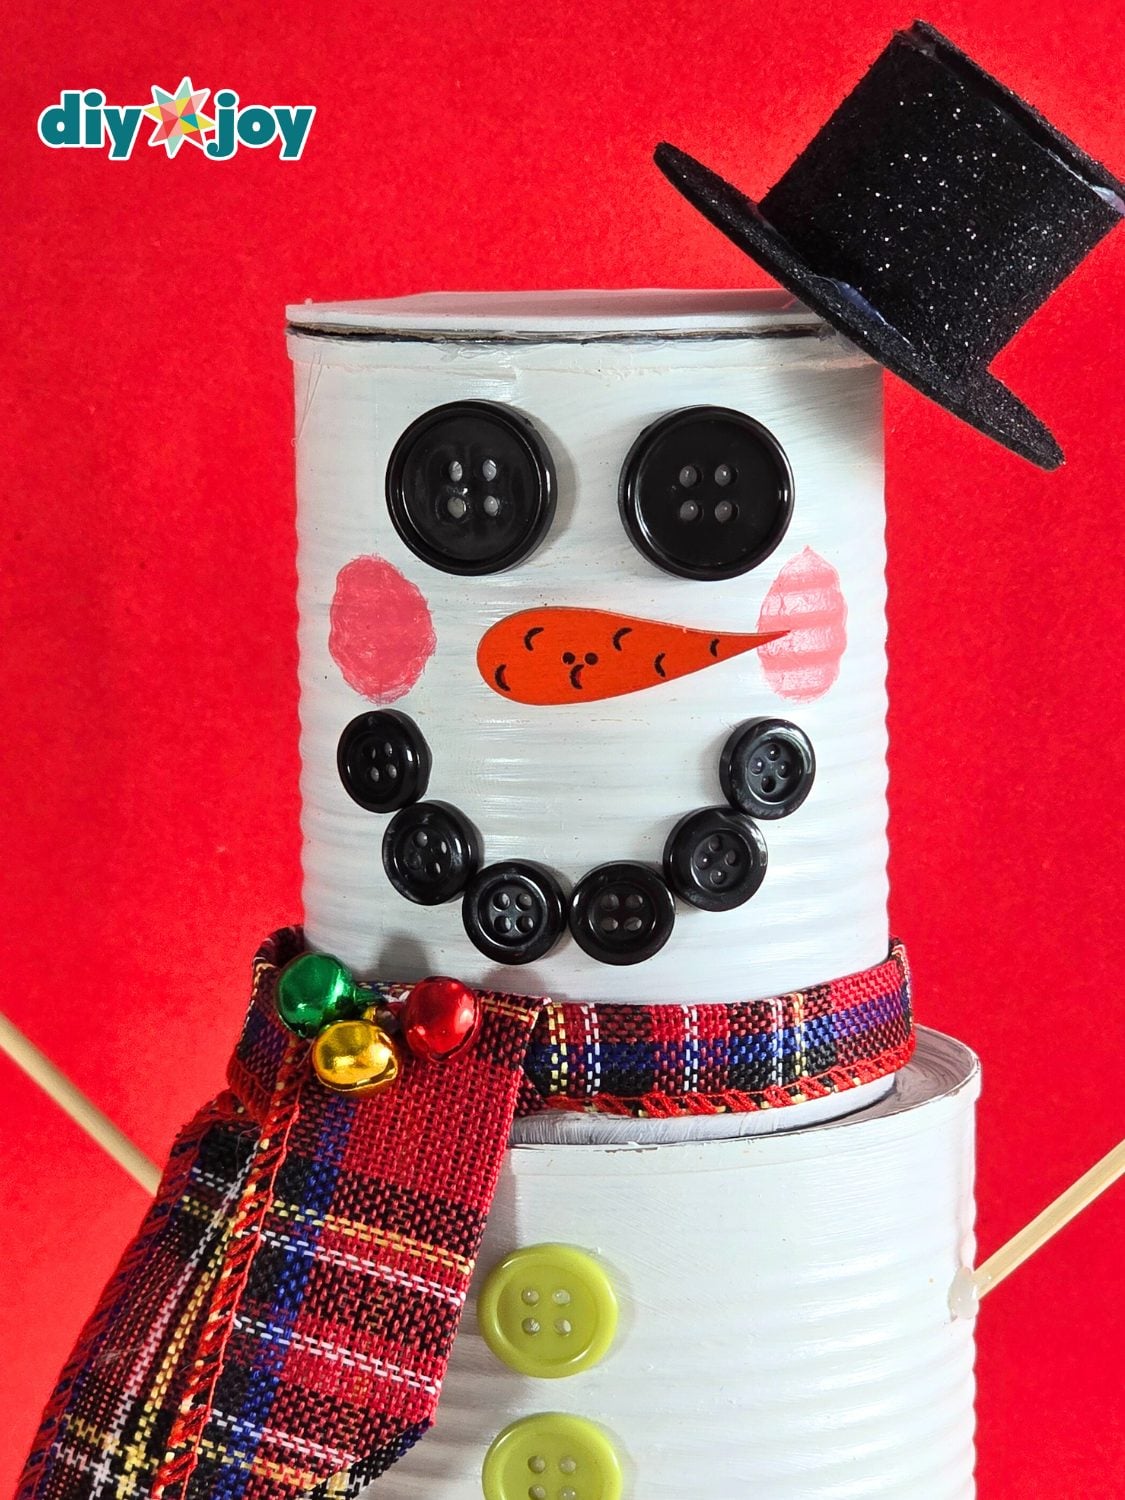
Three empty cans, a coat of white paint and a drawer of buttons turn into a snowman who never melts. Stack them largest to smallest, glue on button eyes and a curved row of black buttons for the smile, then a carrot button nose and pink cheeks. The scarf is plaid ribbon tied on with tiny jingle bells, and the top hat is glitter foam rolled into a cylinder with a brim. Ours took two coats to cover the ridges. Every step is photographed on DIY Joy, video included.
6. Snowy Pinecone Candle Jars
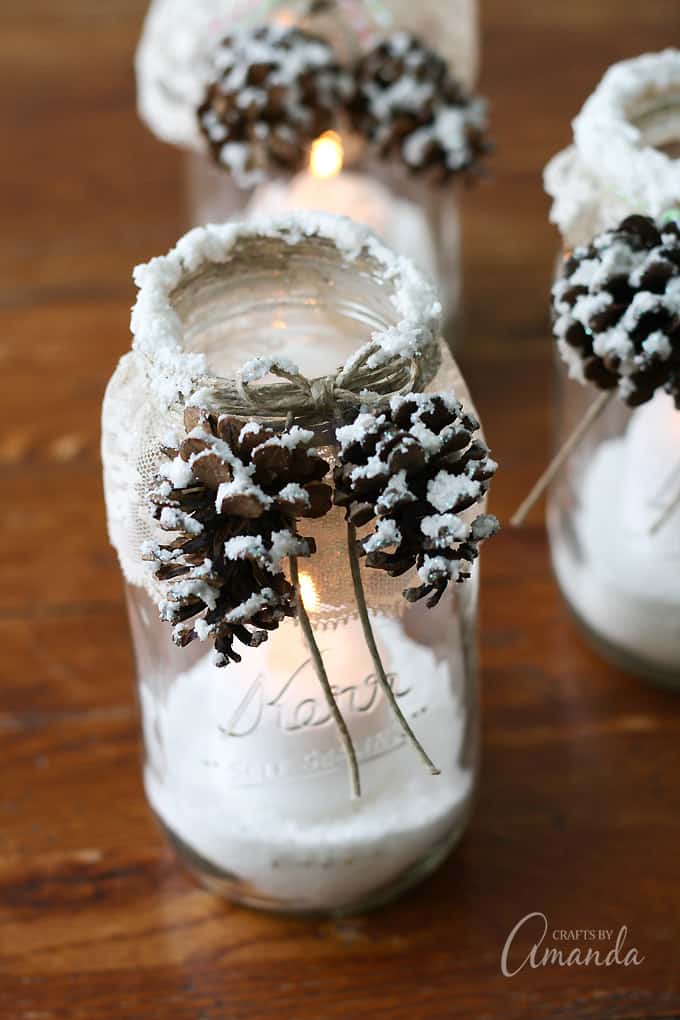
Lace around the rim, a couple of pine cones tied on with twine and a thick coat of snow texture paint, and a plain jar turns into a winter luminary. Amanda works the Snow-Tex on with a palette knife, then her fingers, which give more control on the cones. An inch of Epsom salt goes in and the candle goes in with tongs so the wet snow stays put while it dries. Pine cones are free on any walk. Her full tutorial is at Crafts by Amanda.
7. Dollar Store Stenciled Sign and Gold Snowflakes
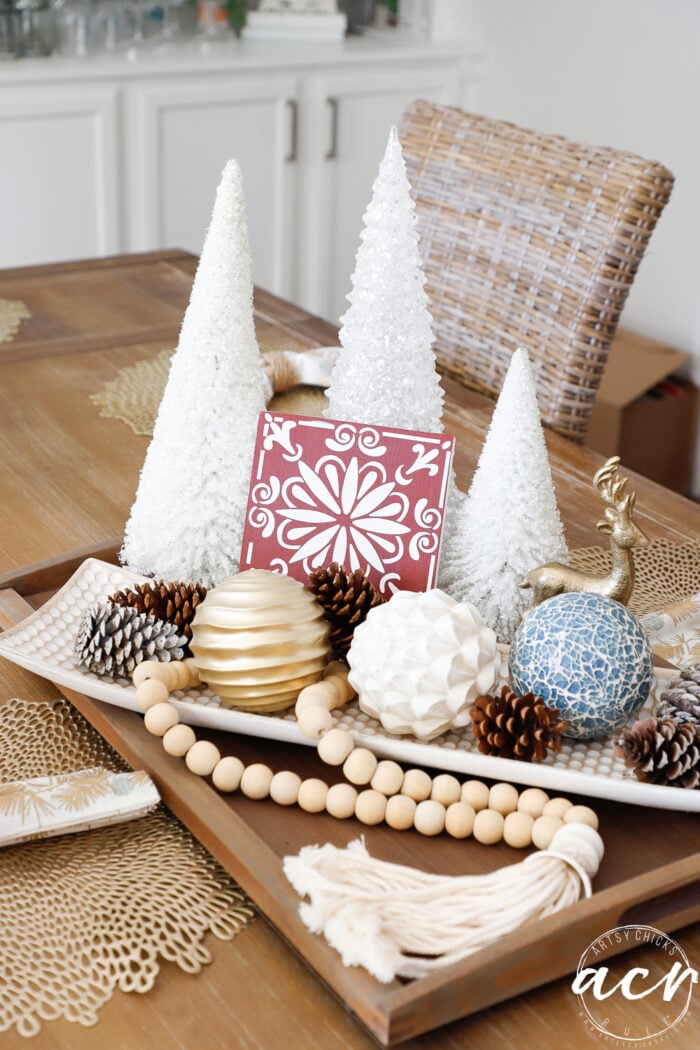
A dollar store fall sign, a stencil and a jar of pearl embossing paste, and the dining table has a new centerpiece. Nancy Christopher at Artsy Chicks Rule peels the paper off a Grateful sign, sands it, paints it red and spreads embossing paste through a snowflake stencil for a raised white pattern like ceramic. The dollar store snowflakes get gold spray paint, then gold glitter spray, and hang from fishing line in the window. She notes kid friendly swaps. The tutorial is at Artsy Chicks Rule.
8. Wine Cork Reindeer
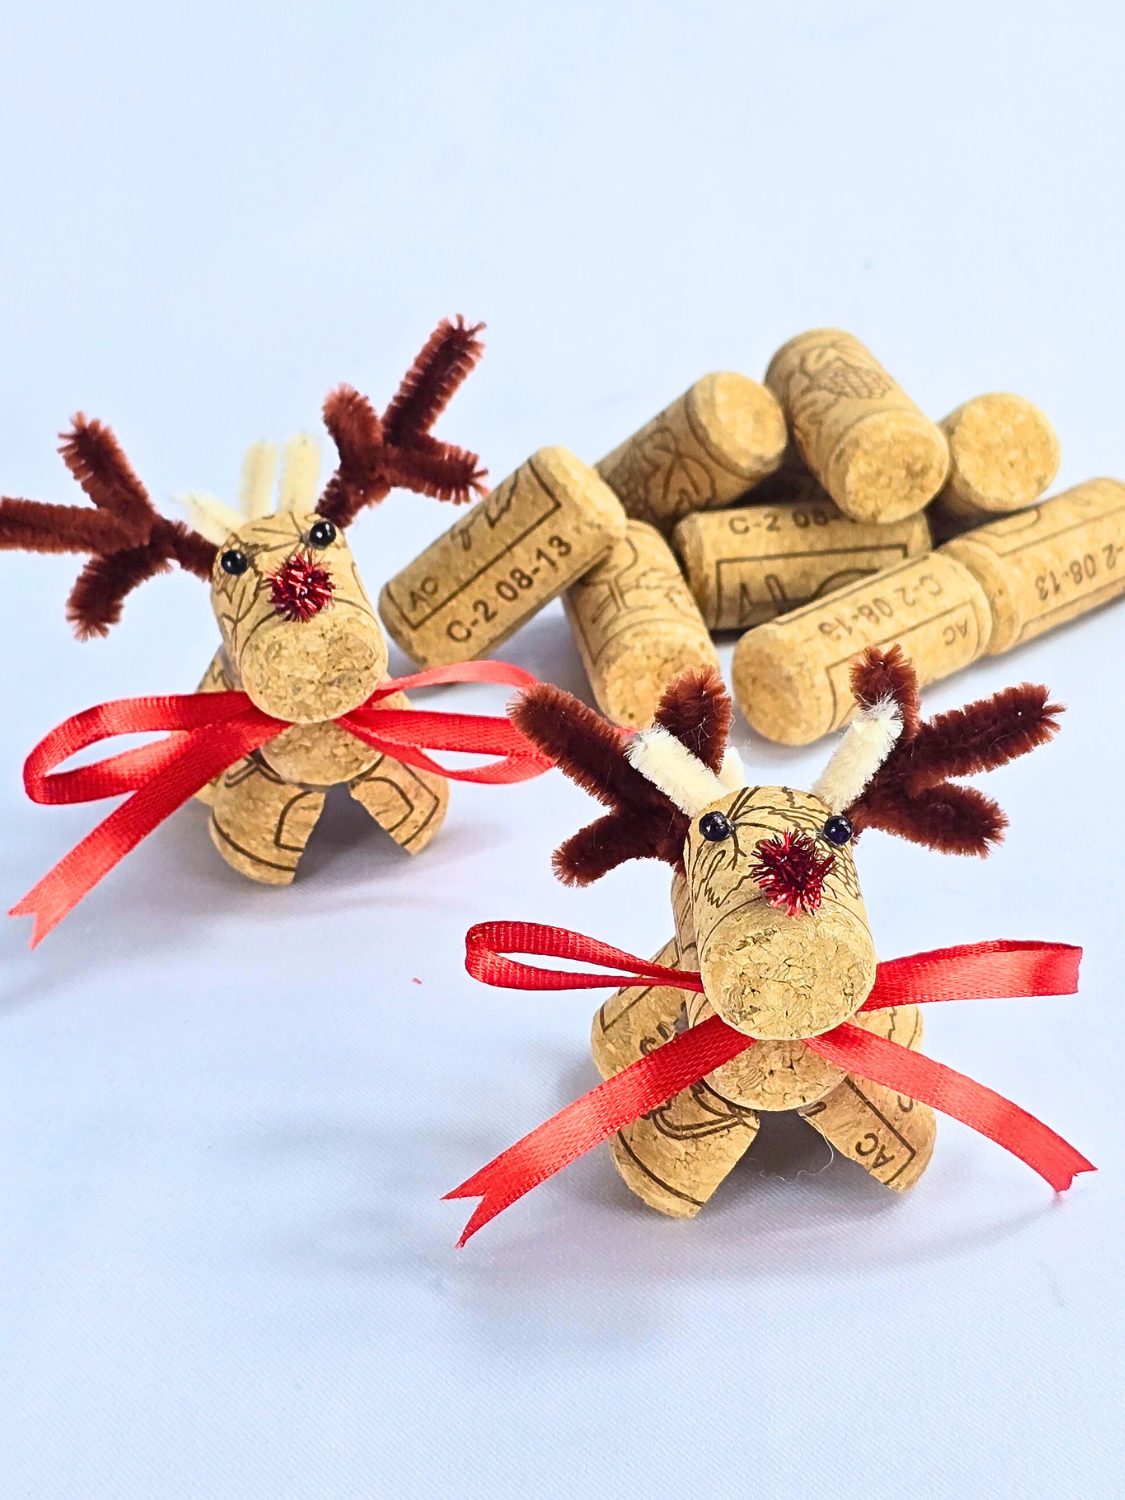
Save three corks and you have a reindeer. One whole cork is the body, a short piece is the head and quarter corks are the legs. Brown pipe cleaners twist into antlers, a red pom pom makes the nose, black beads are the eyes and a skinny ribbon ties on as a scarf. A toothpick between head and body keeps the glue joint from wobbling. Cutting the corks needs a sharp blade and adult hands. Ours line up along a shelf, and the tutorial and video are on DIY Joy.
9. Christmas Village Silhouette Mantel
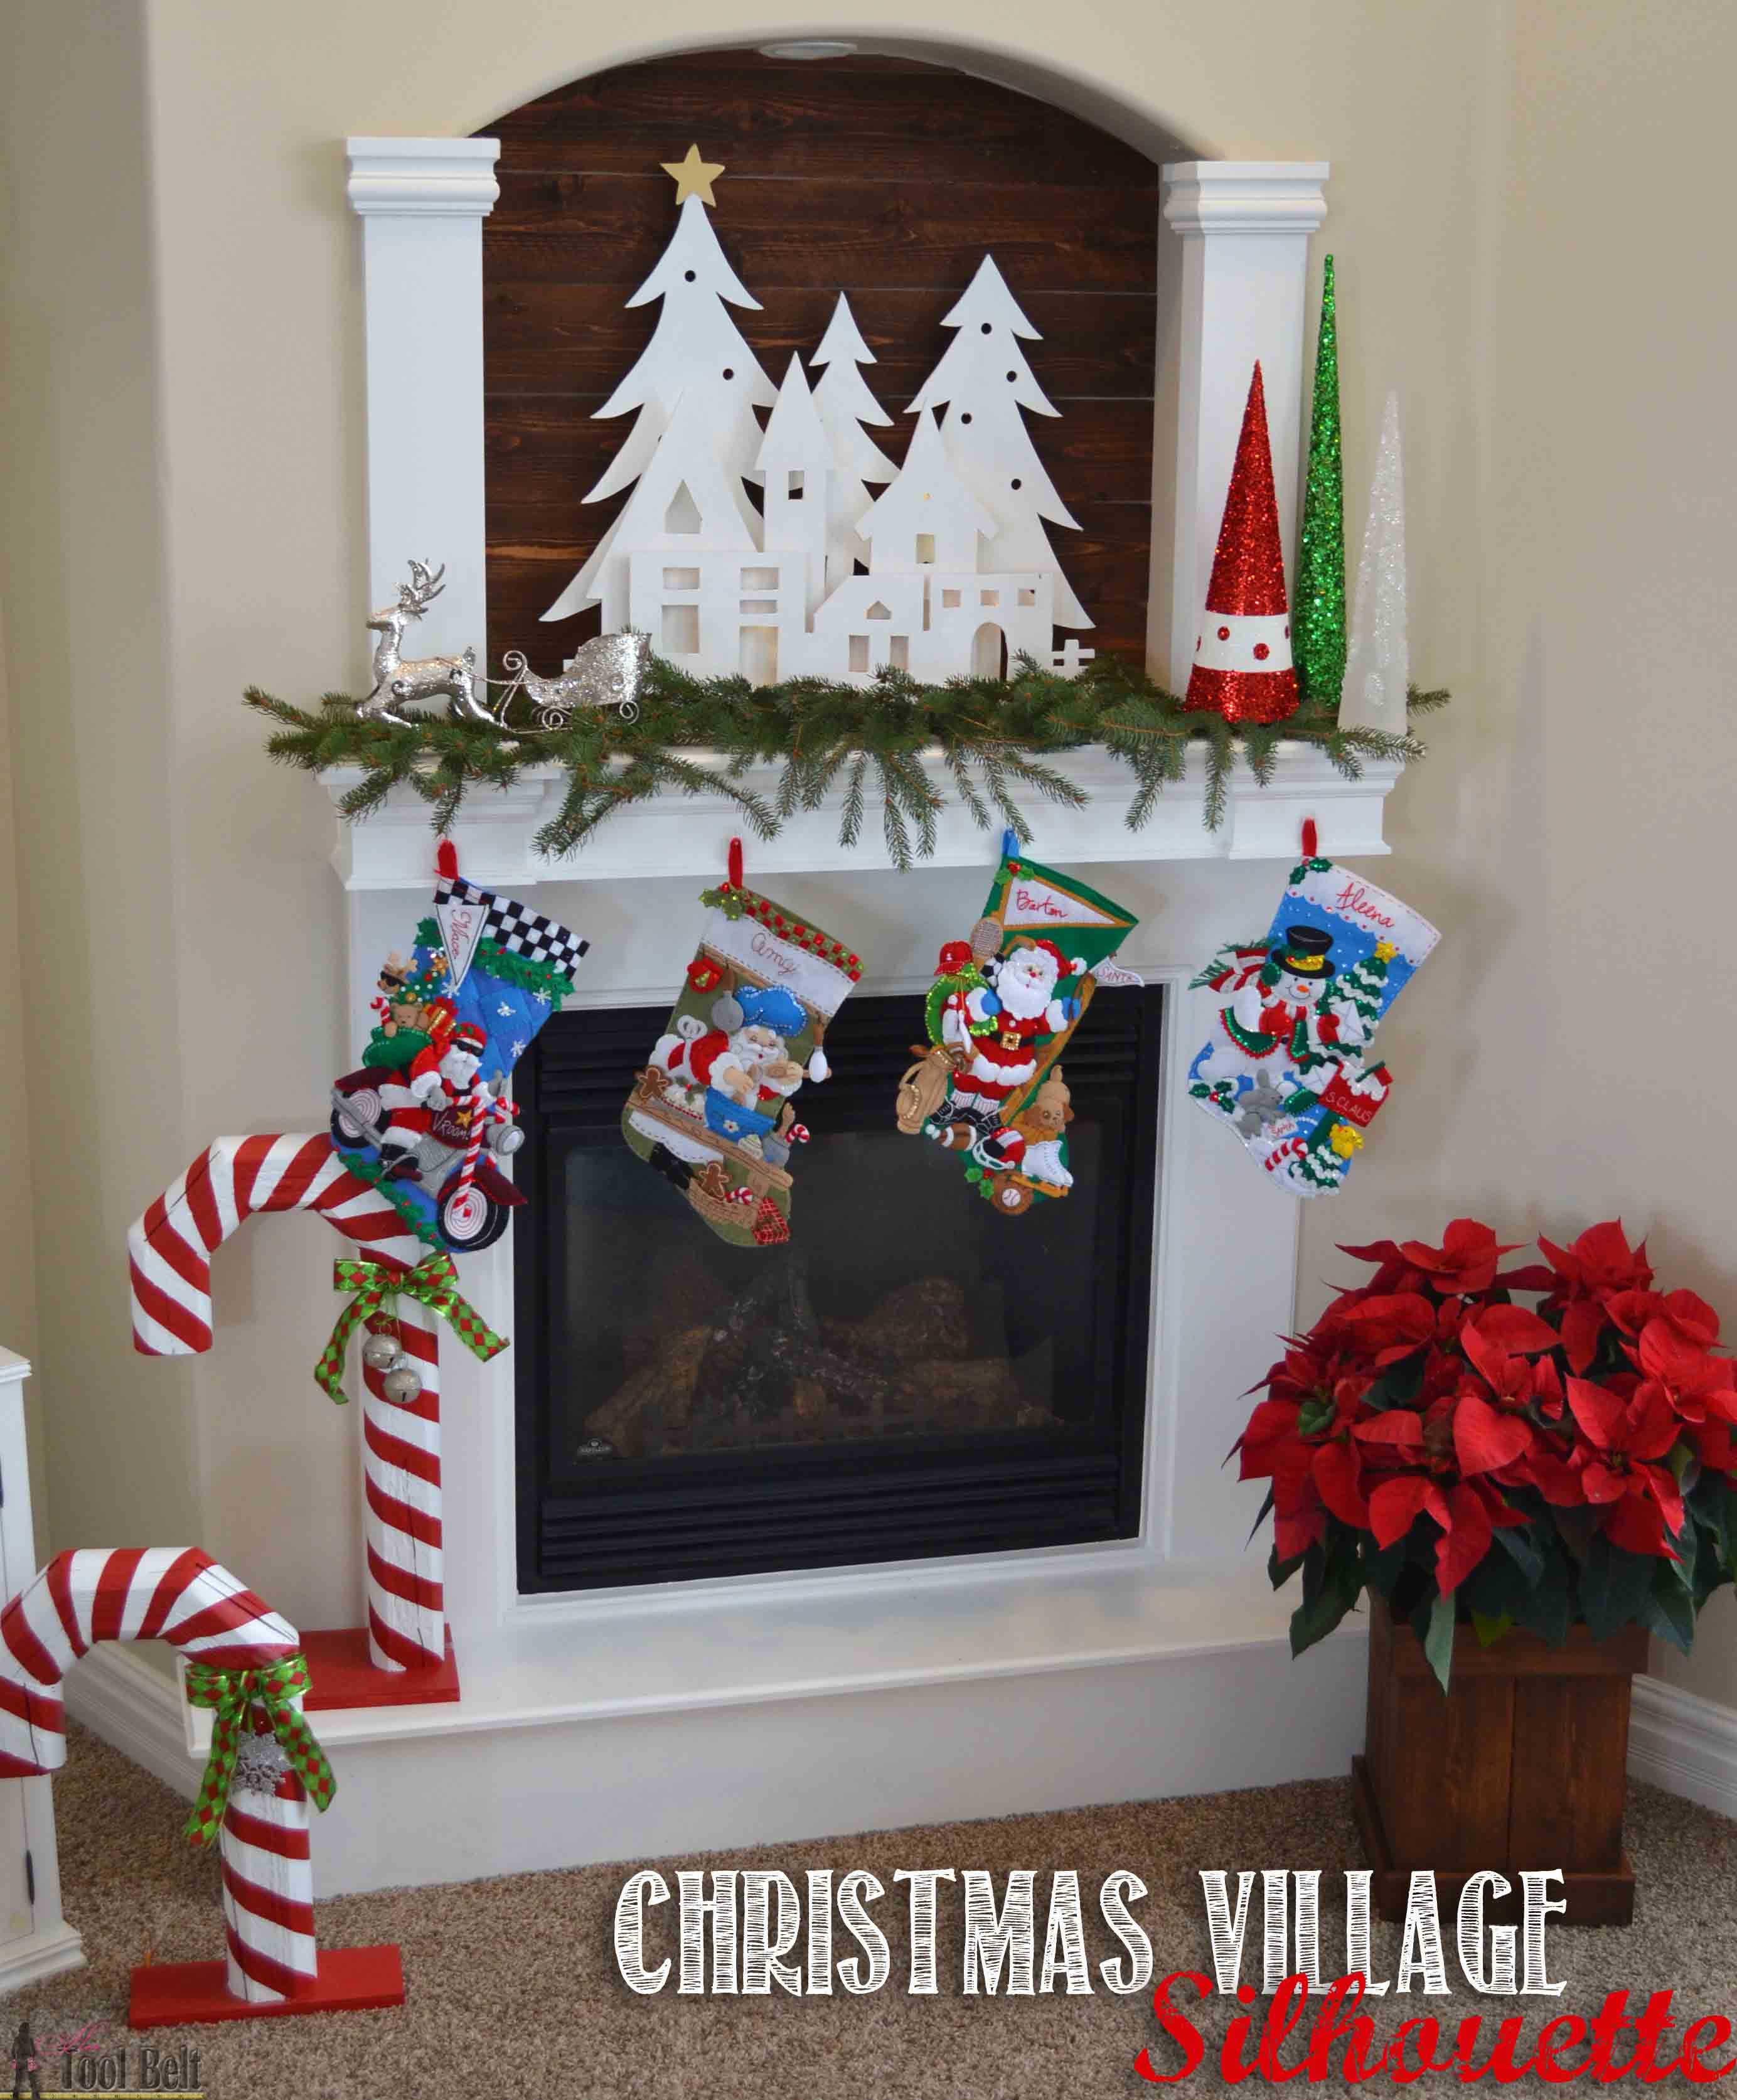
This is the Pottery Barn Kids tree scape, built in an afternoon from three pieces of thin plywood. Amy at Her Tool Belt draws trees and rooftops across a 30 inch back layer, a 22 inch middle and a low front strip, cuts them with a jigsaw, paints everything white with a gold star, then sets the layers into grooves cut in a 2×4 base. Lights taped behind each layer make the village glow at night. The measurements are at Her Tool Belt.
10. Pine Cone Christmas Trees
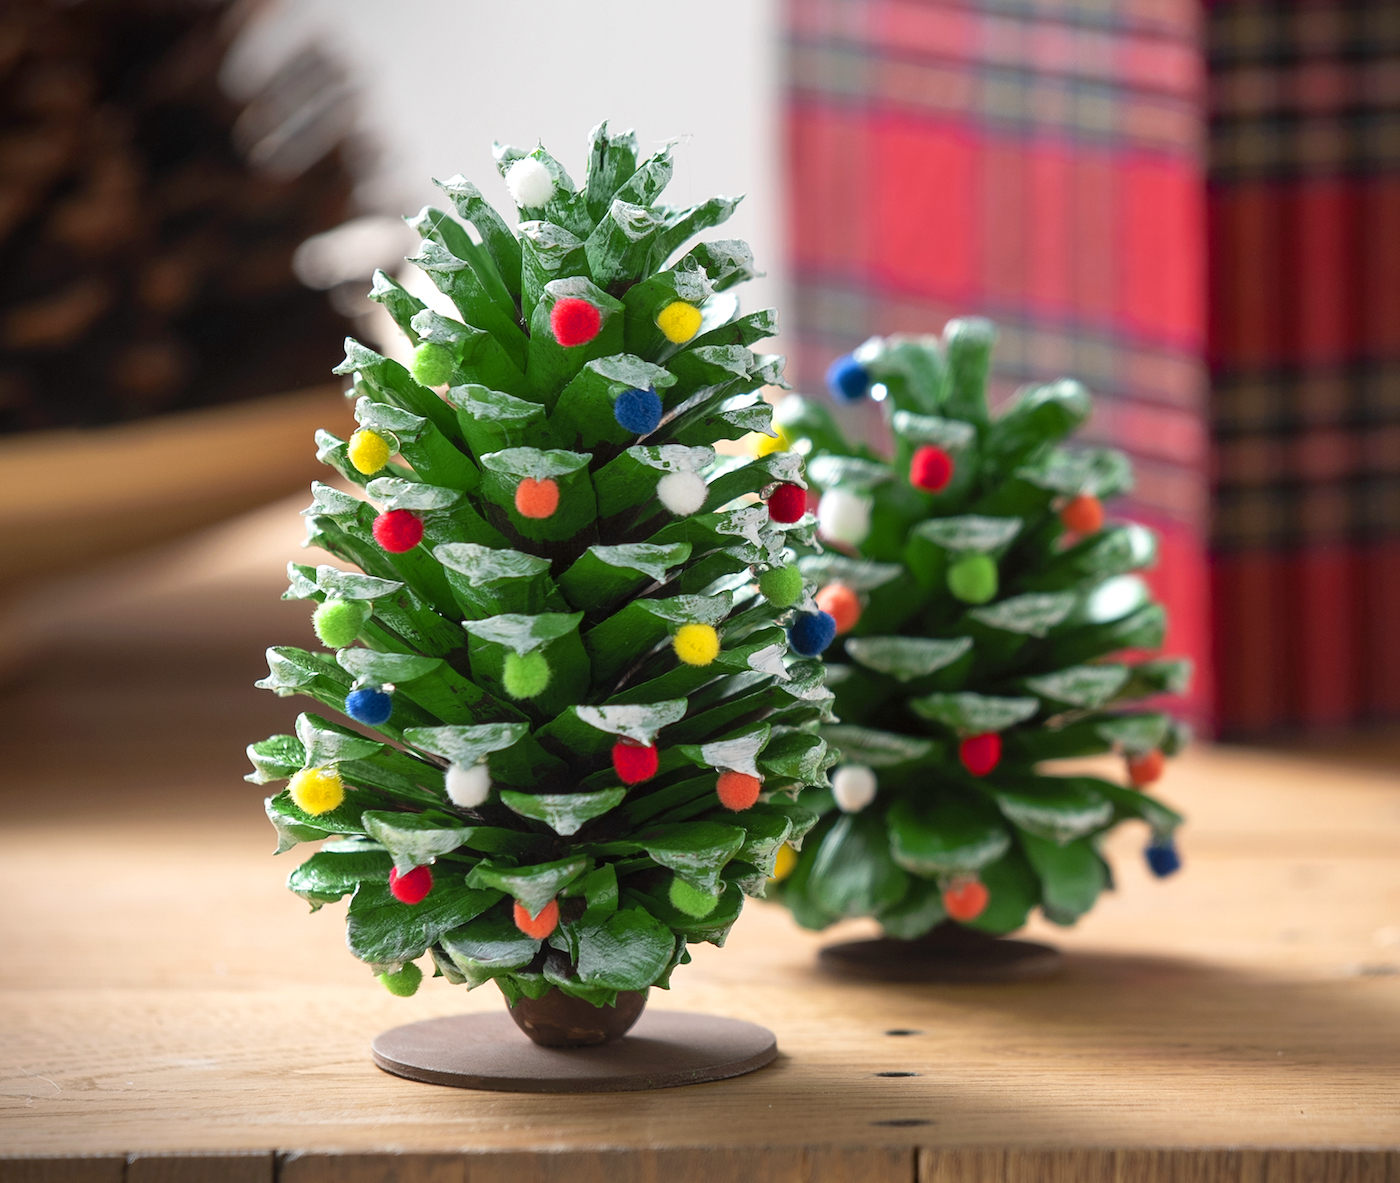
Every pine cone in the yard is a free Christmas tree once you paint it green. Thirty mini pom poms go on each one as ornaments. DIY Candy bakes the cones at 225 for half an hour first, sets them on wood circles with a bead underneath for a trunk, and gets two trees out of about two dollars. It is a rare kids craft you will want on the mantel. Amy's tutorial at DIY Candy has the printable how to card and upscale variations in white and silver.
11. Paper Rosette Christmas Wreath
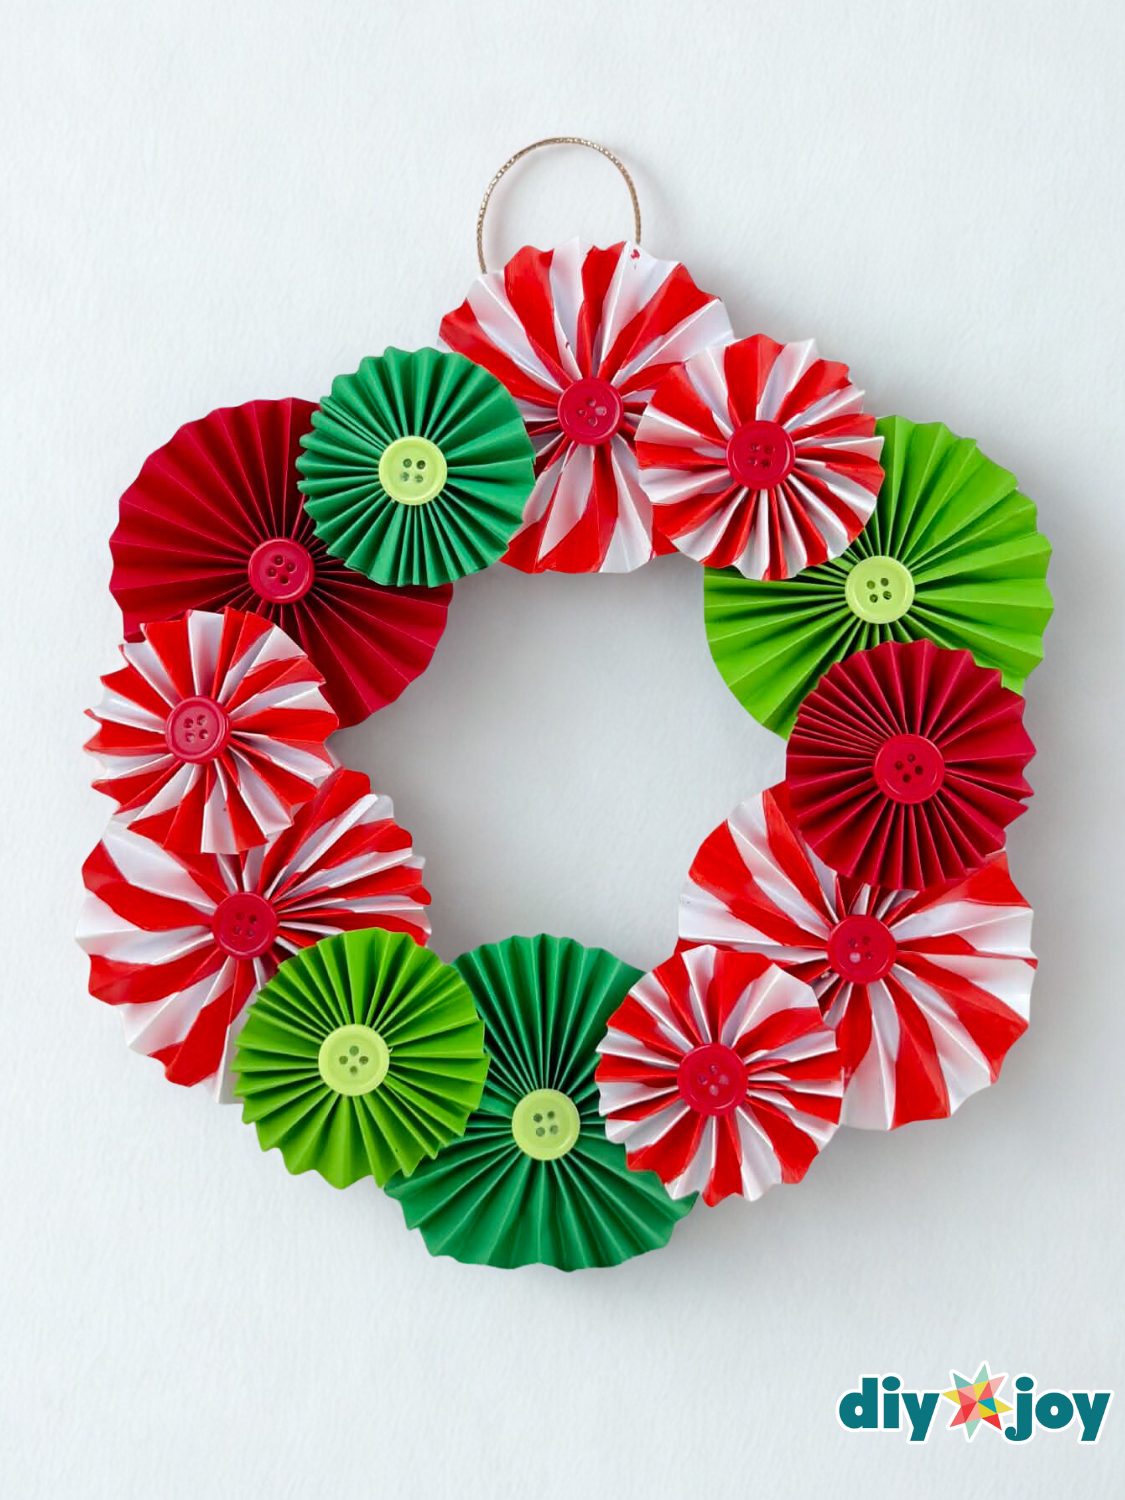
Colored paper, a scoring board and a handful of buttons make a wreath that looks store bought. You score strips every half inch, accordion fold them, join two strips into a circle and press the center flat into a rosette, then glue a button over the middle. Mix dark green, light green and red with a peppermint version striped red on white. Hot glue the rosettes around a wreath form and overlap a few so no foam shows. Ours is on DIY Joy with every fold photographed.
12. Glass Jar Winter Scene
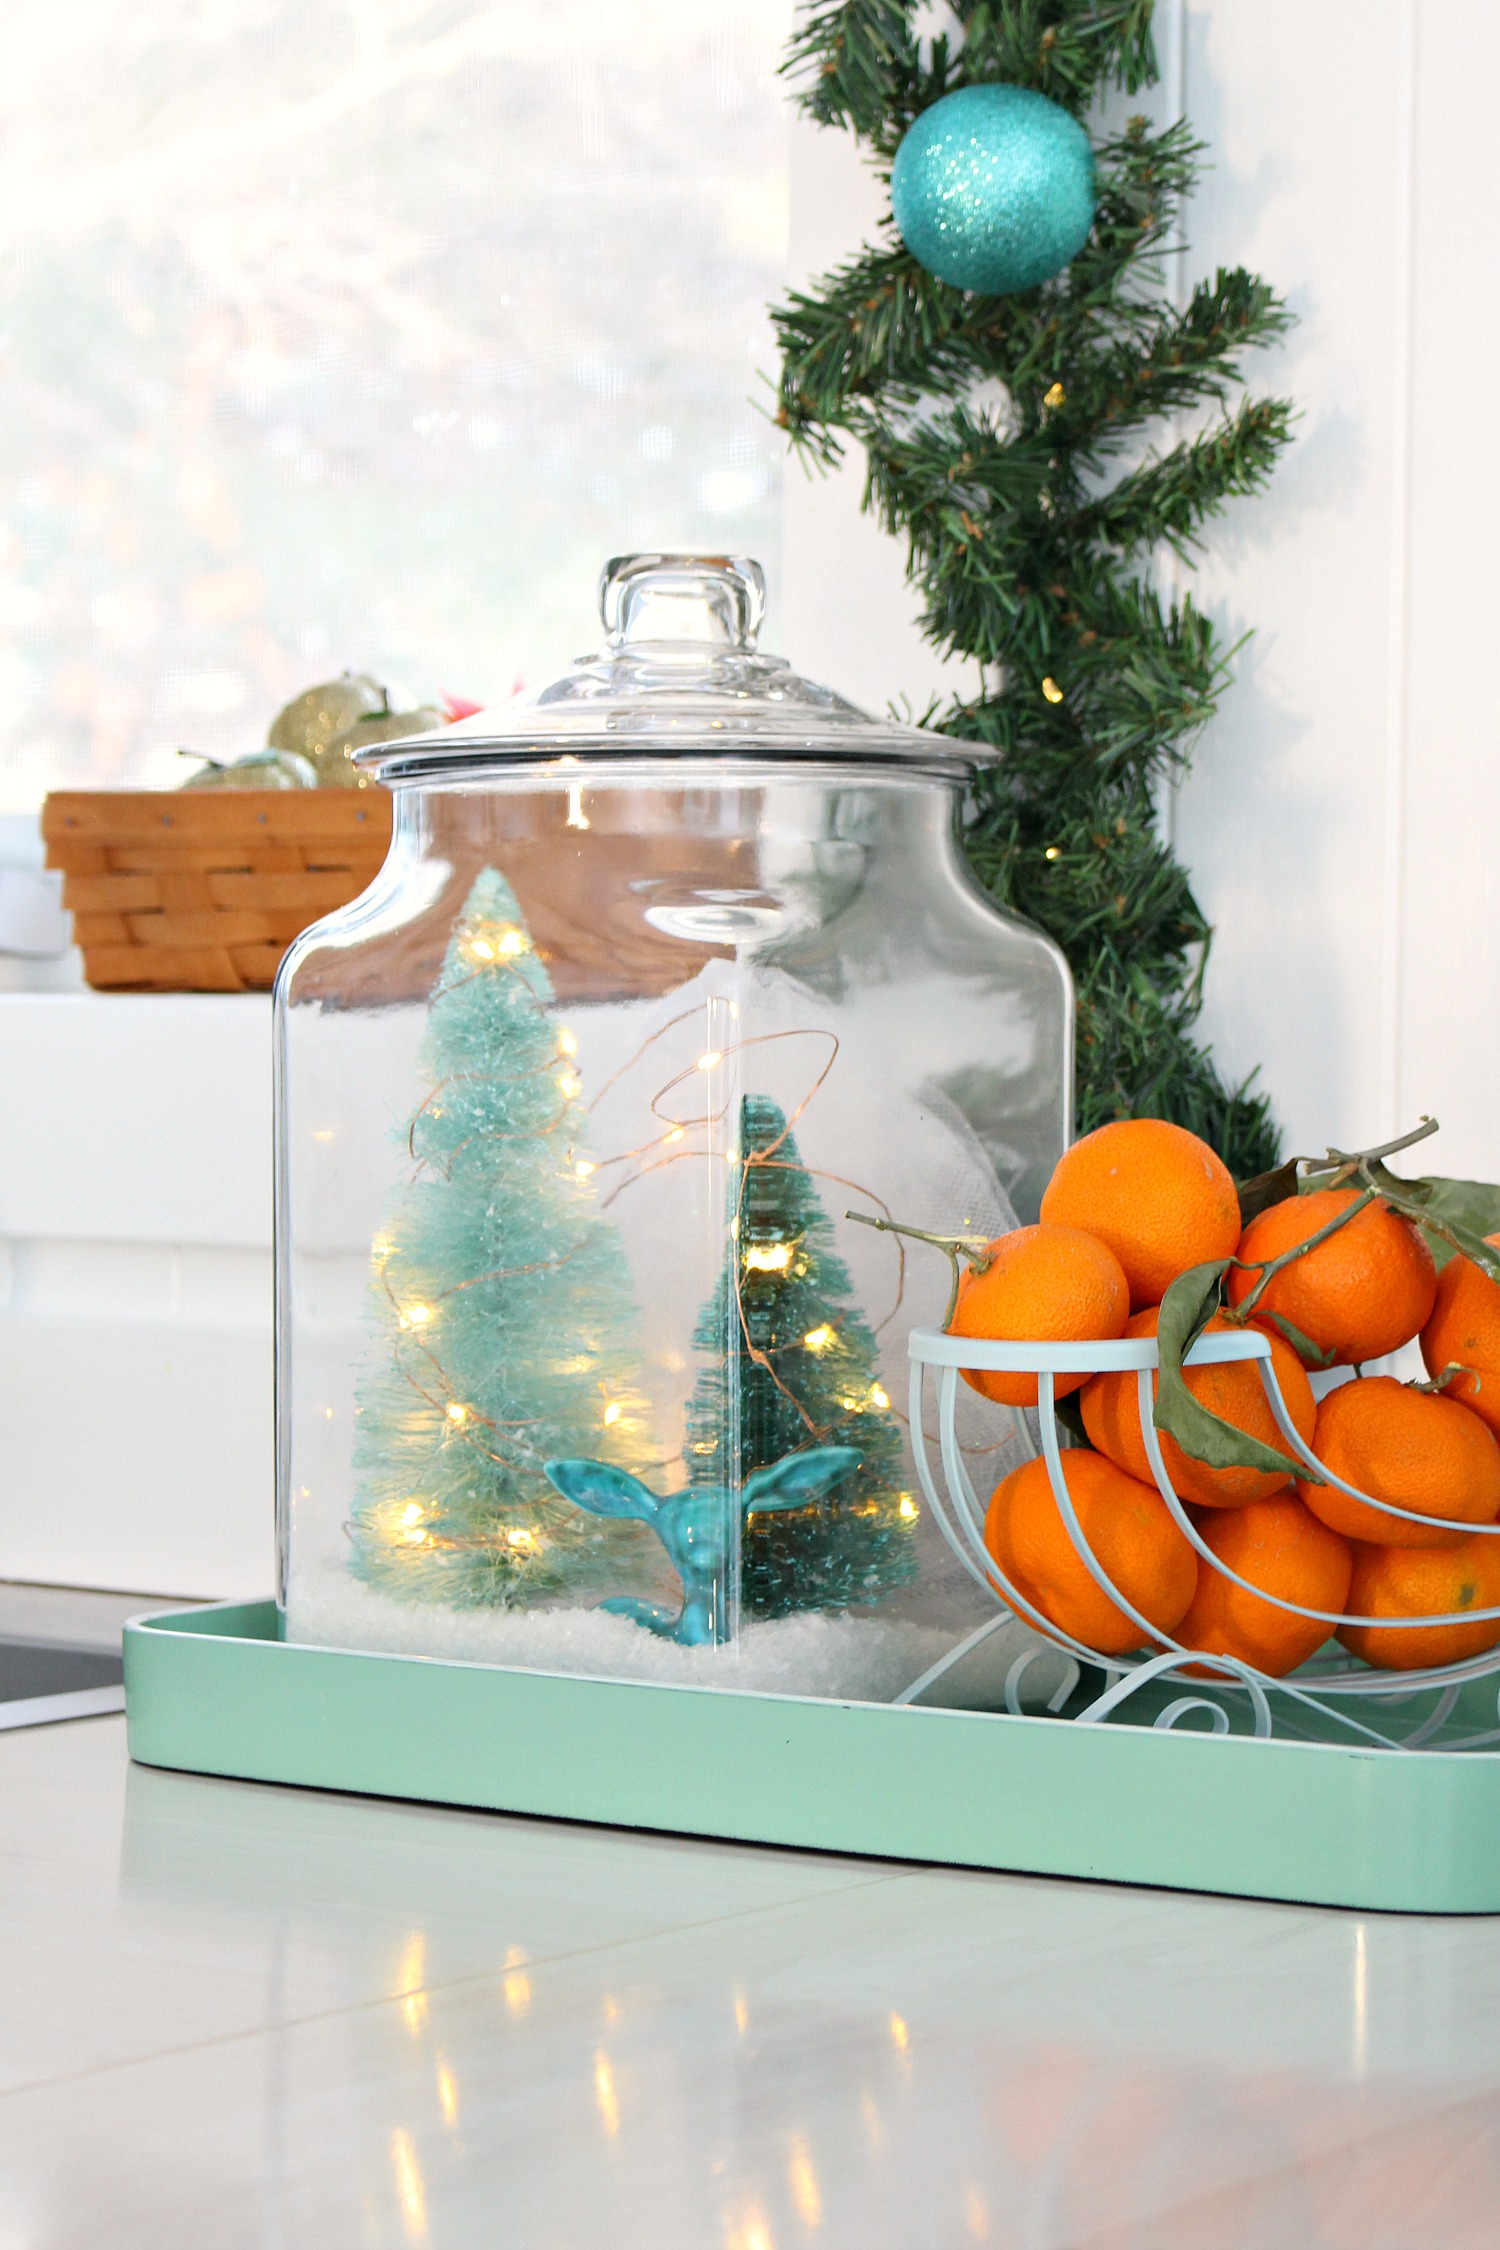
A big glass storage jar, two bottle brush trees, a thrifted ceramic deer and a strand of wire lights make a winter scene on the counter. Tanya at Dans le Lakehouse sets the trees and deer on faux snow, winds copper wire lights around the trees and tucks sparkle tulle behind them so the jar glows. No glue, so the kids can rearrange it. Epsom salt works as snow and toy cars work as figurines. Her dyed bottle brush trees are their own tutorial at Dans le Lakehouse.
13. Lighted Burlap Garland

One strand of white mini lights and three rolls of burlap ribbon become a garland that glows. Create Craft Love cuts the natural, red and green ribbon into eight to ten inch pieces, slices each one down the middle so the knots stay small, then ties them along the light wire in a repeating color pattern. It is movie night work, and their strand has lasted three seasons without the burlap getting warm. Drape it across the mantel or up the banister. The how to is at Create Craft Love.
14. Honeycomb Paper Christmas Trees
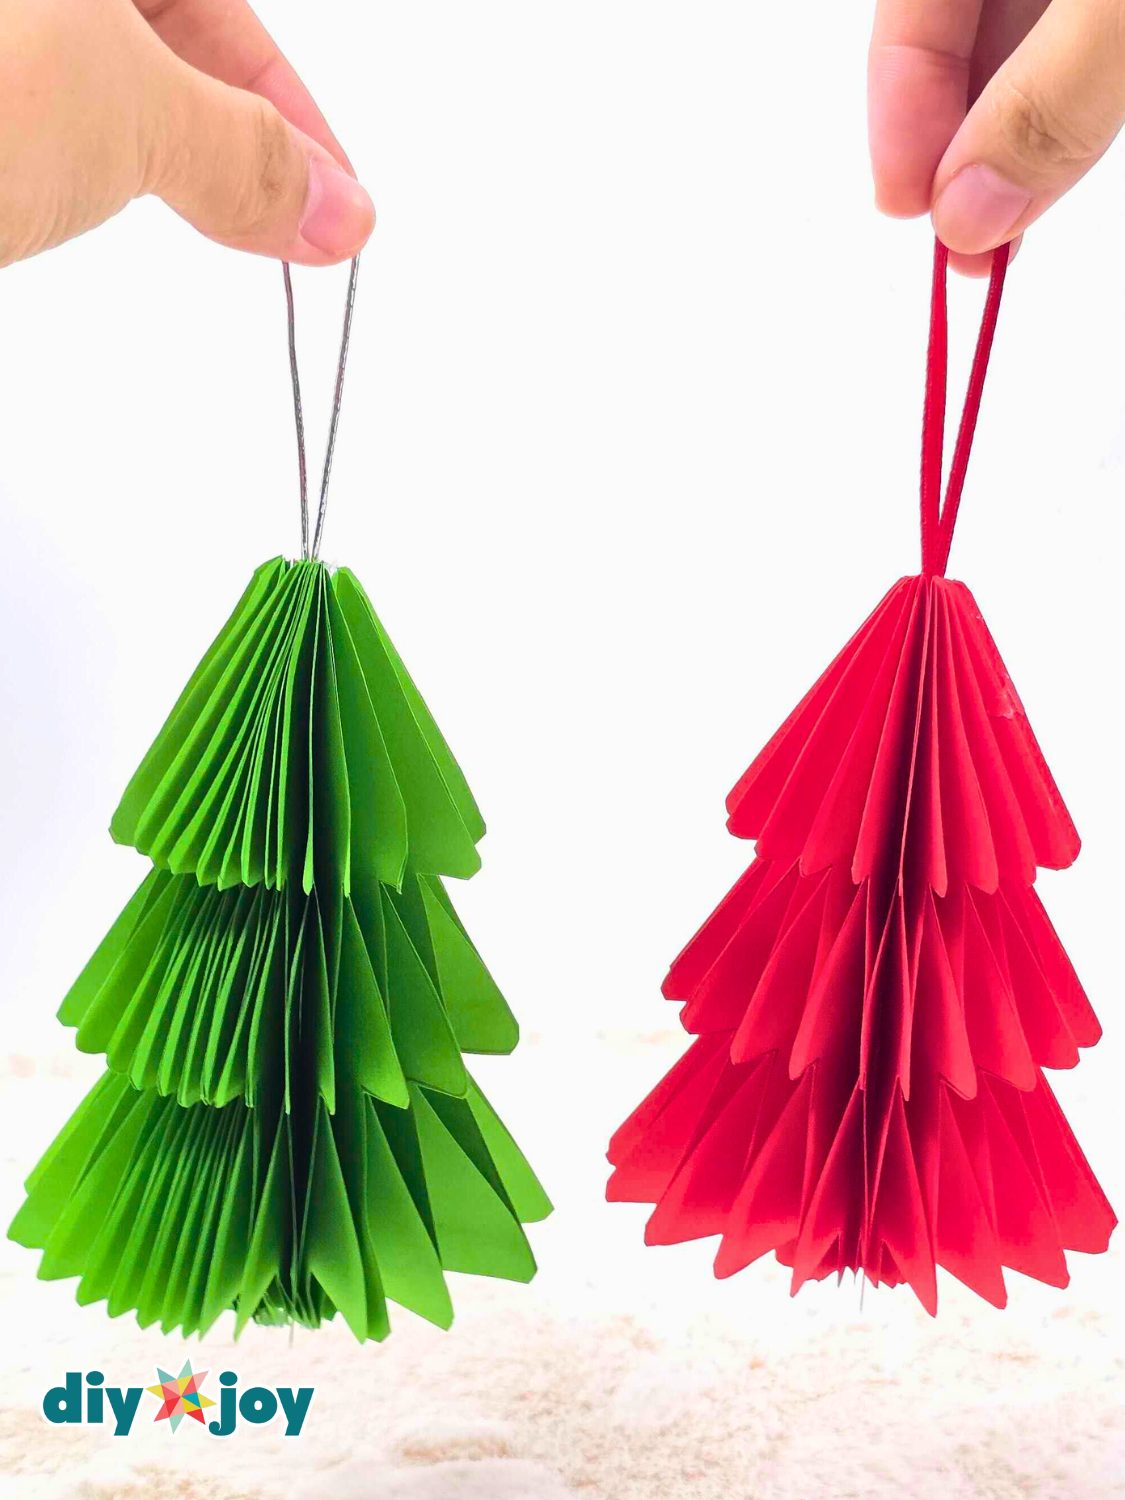
Twenty little paper trees cut from one printable template glue into a honeycomb that opens like a fan and folds flat for storage. The trick is gluing in two alternating patterns so the layers hinge open instead of stacking, and the template marks where each glue line goes. Tuck a loop of ribbon into the middle before you close it and it hangs on the tree, strings into a garland or stands on a shelf. Ours took red and green cardstock. The template and video are on DIY Joy.
15. Dollar Tree Candy Cane Sock Wreath
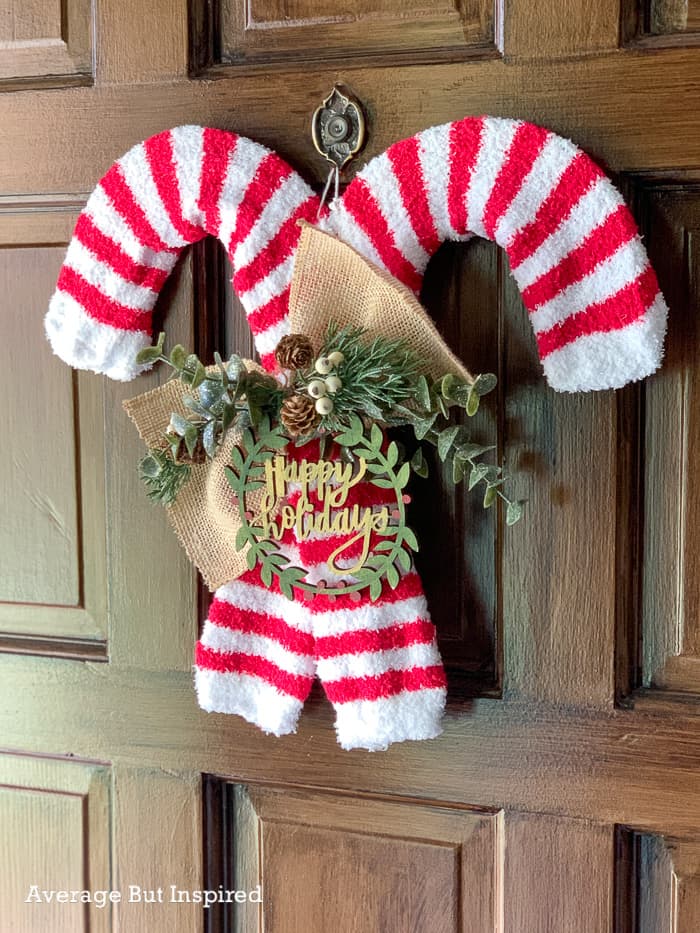
The candy canes are socks. Red and white striped cozy socks from Dollar Tree slide over two metal candy cane wreath forms, toe at the curved tip, and the extra fabric gets hot glued flat on the back. Average But Inspired glues the two canes into a crossed pair, wires on frosted greenery and a burlap bow where they meet, and hangs it from twine. It costs a few dollars and takes under an hour. The forms come and go at the dollar store. Full steps at Average But Inspired.
16. Metallic Pine Cone Star Ornaments
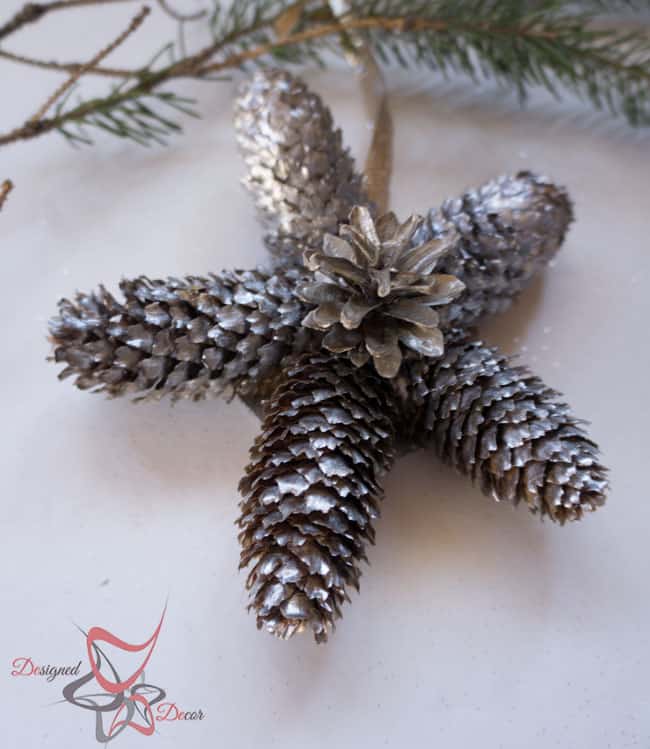
Five long pine cones glued in a star on a cardboard circle, a small cone in the middle, metallic spray paint and a ribbon loop. DeDe Bailey of Designed Decor puts its cost at zero since every cone came off the ground on her walks. She used platinum silver and champagne paint so the stars catch the tree lights, and if you lack a small cone, snip the tip off a big one. It is part four of her decorating on a budget series, at Designed Decor.
17. Glitter Clothespin Snowflake Ornaments
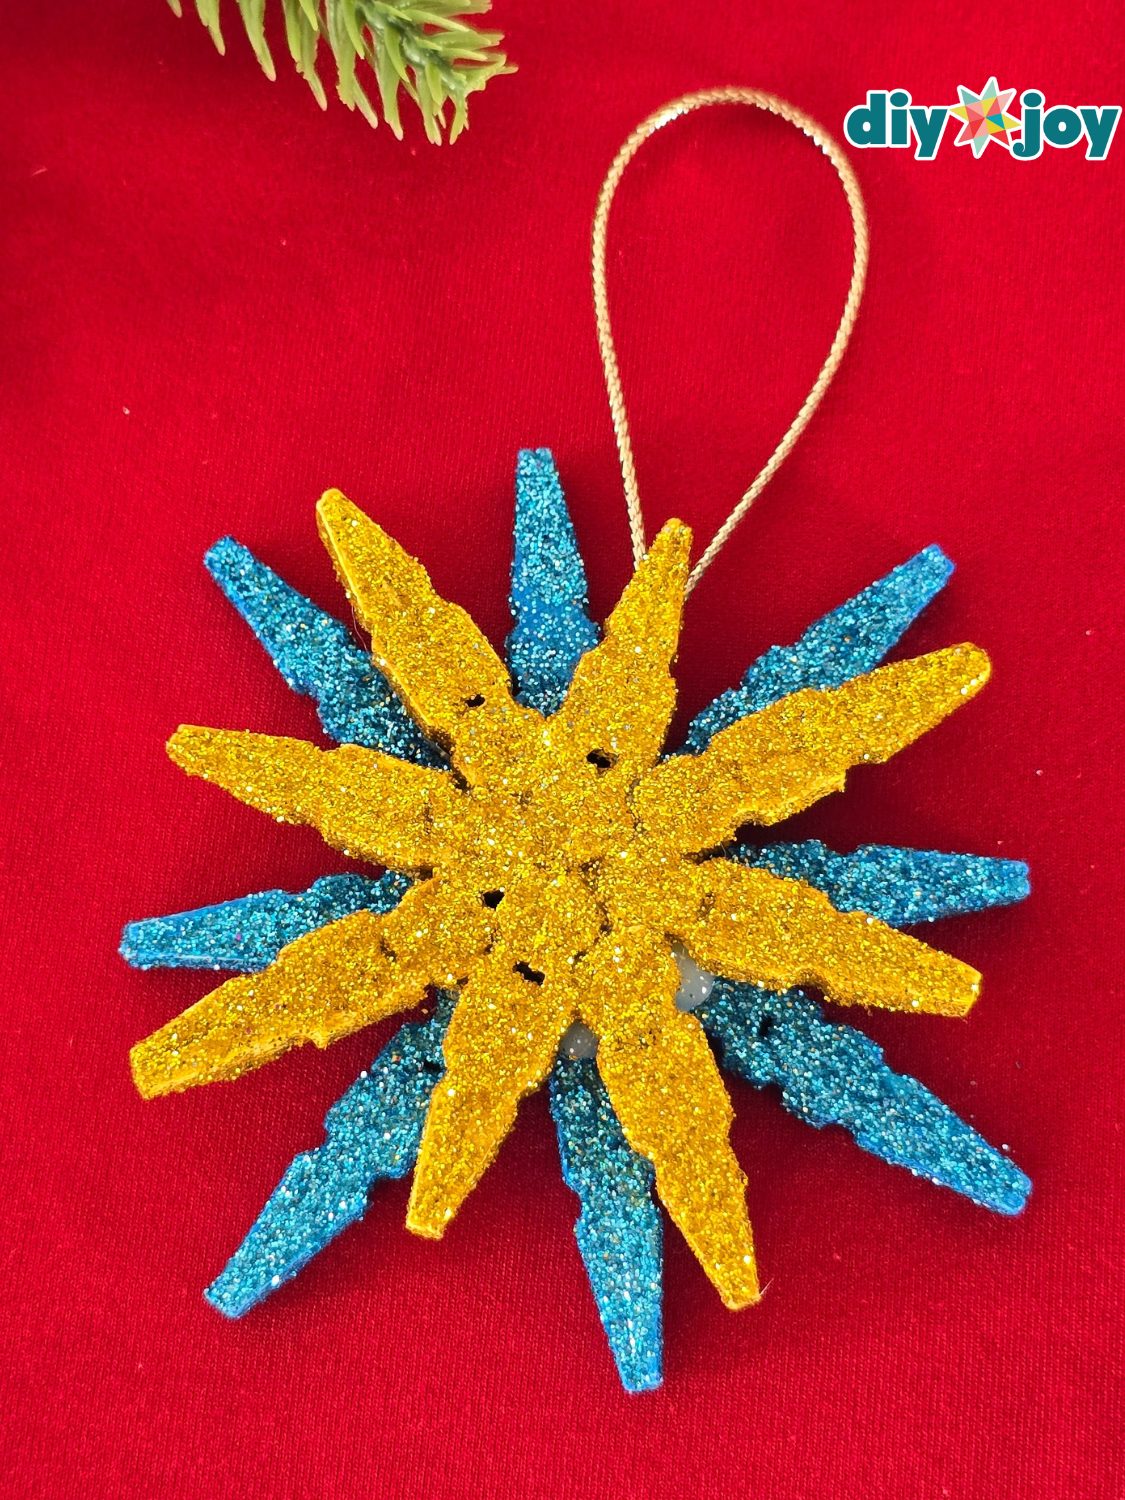
Wooden clothespins pulled apart and glued back to back become the points of a snowflake, and a coat of paint and glitter turns it into an ornament that catches the light. You set aside eight pairs in two lengths, hot glue each pair flat sides together, build the long points first and layer the short ones on top, then paint, glitter and add a loop of metallic elastic cord. Ours are gold over blue. Bigger clothespins make a tree topper. The steps and video are on DIY Joy.
18. Spray Painted Christmas Pillows

Plain drop cloth pillow covers, a stencil cut from clear contact paper and a can of spray paint, and the couch is dressed for December. Kimberly at A Wonderful Thought cuts the Santa and Reindeer Feed designs on a Cricut, weeds the letters, presses the stencil with a brayer and masks the rest of the cover with cardboard before painting. Contact paper costs a fraction of vinyl and gets tossed anyway. The two color design takes two passes. Her files and tutorial are at A Wonderful Thought.
19. Stacked Book Christmas Tree

If you own a lot of books, you already own a Christmas tree. Bigger Than The Three Of Us stacked about 630 books into a six and a half foot tree, coffee table books on the bottom, each layer bridging the seams below and stepping in so it tapers. A level keeps it from leaning at that height. A string of lights tucked between the layers finishes it. The how to is at Bigger Than The Three Of Us.
20. Crepe Paper Poinsettia
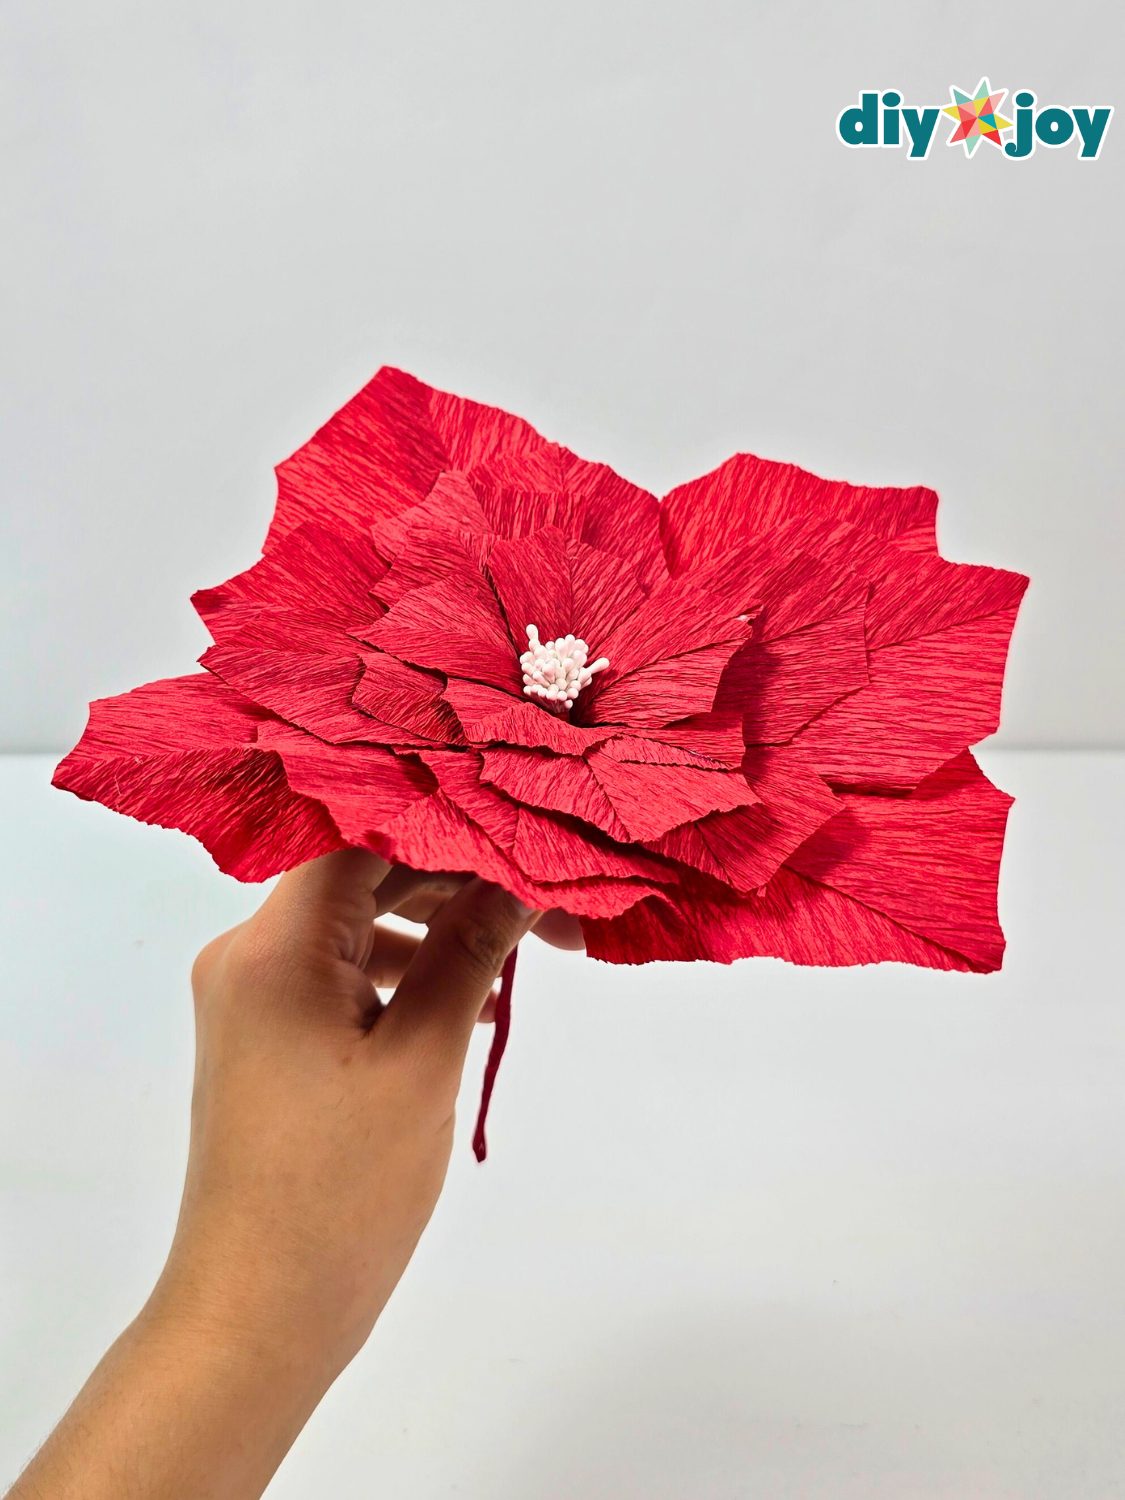
Italian crepe paper cut into three sizes of petals, stretched and shaped, then glued around a cluster of stamens on a floral wire stem makes a poinsettia that looks real. Cut the petals in two shades so the flower reads as full, draw a diagonal to align the grain, curl the edges, and tape the stem. One flower takes a sitting. Ours are classic red, but the tutorial shows blue too. Tuck a few into a wreath, garland or vase. The petal measurements and video are on DIY Joy.
21. Dollar Store Winter Vases
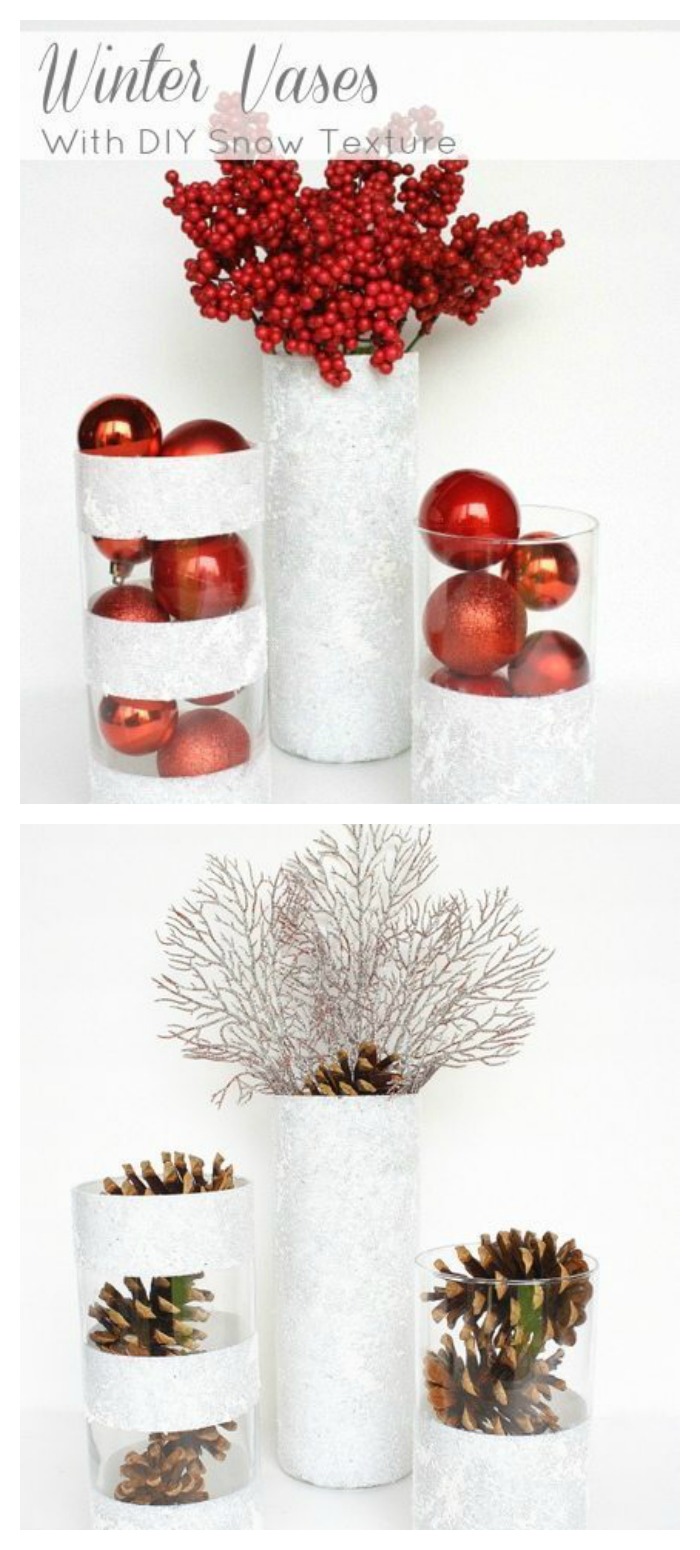
Three glass cylinders from the Dollar Tree, a jar of snow texture paint and a stencil brush make cheap Christmas decor that looks boutique. Taryn Whiteaker dabs the paint on, never brush strokes, and stacks painter's tape in bands for the striped versions. Everything inside, red ornaments, pine cones, silver sprigs, came from the dollar store too, so the trio lands under ten dollars. Swap the fillers and they carry you through winter. Her tutorial at Taryn Whiteaker Designs shows all three looks.
22. Beeswax Poinsettia Candles
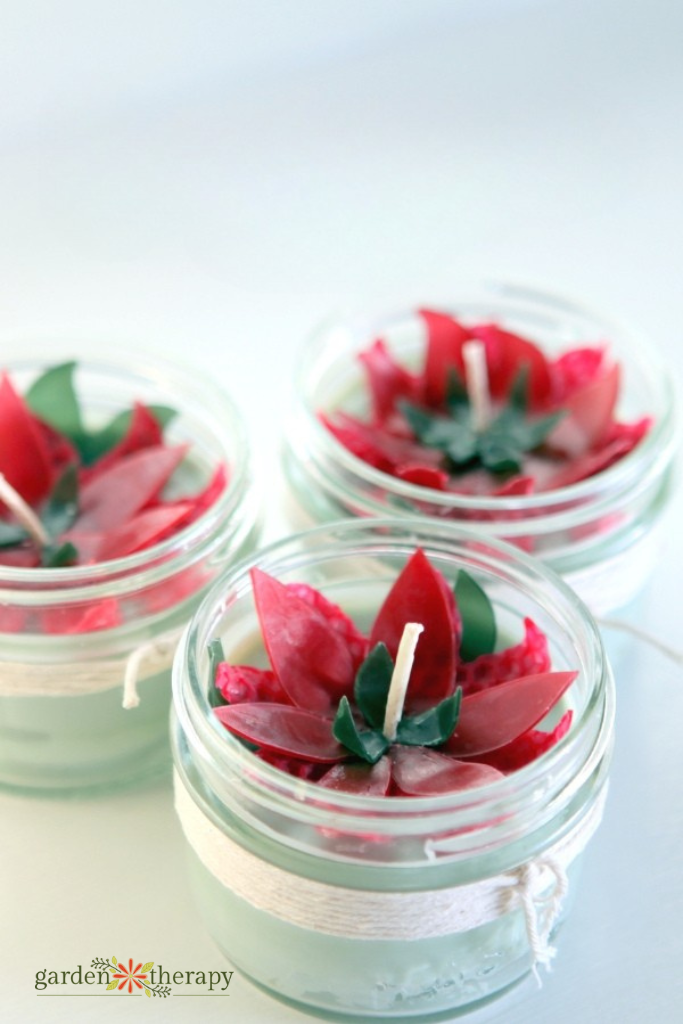
A plain soy candle in a small jar becomes a poinsettia with two sheets of beeswax. Garden Therapy cuts flower shapes from red beeswax with a cookie cutter, layers them, presses green leaves underneath, scores the petal veins with an empty pen and sticks the flower onto the top of the candle with tacky wax. When it burns, the beeswax melts in and the room smells like honey. Make the jar candles from scratch or buy them and add the flower. The steps are at Garden Therapy.
23. Tuna Can Shadow Box Ornaments
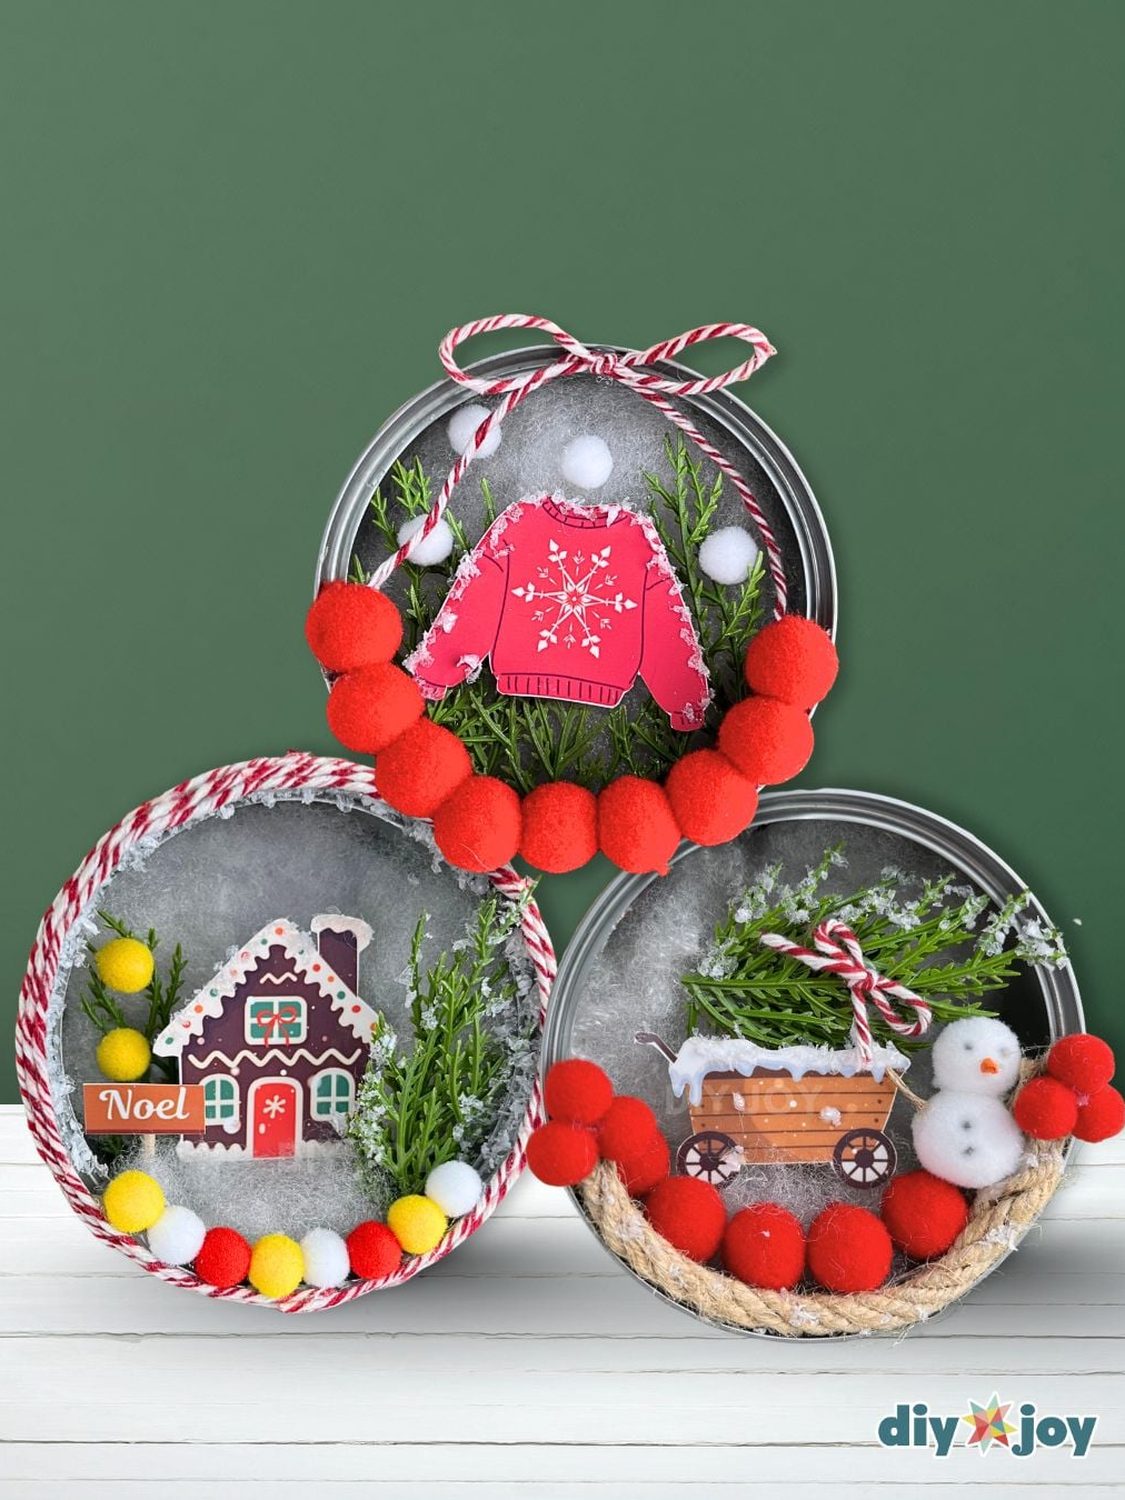
Empty tuna cans with the easy open lids become round shadow boxes for a Christmas sweater, a gingerbread house or a snowman with a tree, with fiberfill for snow, faux pine sprigs for greenery and pom poms around the rim. You file the can edge, glue in a felt base, layer the fiberfill and pine, add the printed design and finish with pom poms, twine or a baker's twine bow, then tie a string to hang it. The three printable designs are free. Everything is on DIY Joy.
24. Mason Jar Lid Ornament Tree Wreath
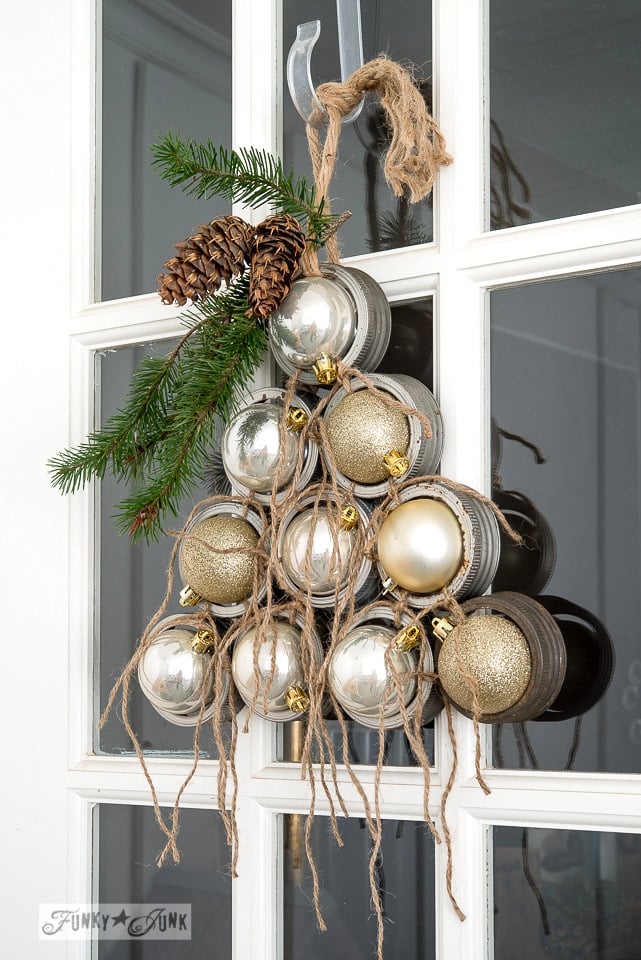
Donna at Funky Junk Interiors ties old mason jar lid rims together with twine in the shape of a tree, hot glues a gold or silver ornament into every rim and hangs the whole thing on the front door as a wreath. Wired pinecones and evergreen finish the top, and she leaves the twine tails long for the scrappy look. Her tip is a paint stir stick glued across the back so the tree doesn't buckle forward. The how to is at Funky Junk Interiors.
25. Light Filled Trees From Plastic Waste

The trees are made of cling wrap. Michelle at A Crafty Mix traces a plate on a clear plastic sheet, cuts it in half, rolls each half into a cone and tapes it, then wraps the cone in layers of crumpled cling film packaging waste that would otherwise go in the bin. Fairy lights inside turn the plastic into frosted glass, and a few dots of clear glue on the outside catch the light like ice. It costs nothing but the lights. The walkthrough is at A Crafty Mix.
26. Terra Cotta Pot Christmas Bells
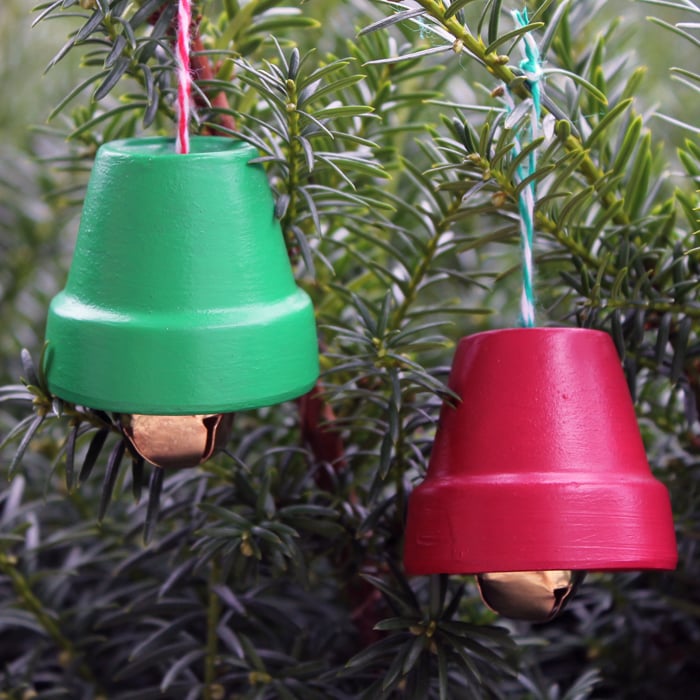
Mini clay pots are bells once you flip them over. Angie Holden at The Country Chic Cottage paints them inside and out, then knots a jingle bell onto baker's twine so it hangs under the rim and threads the twine through the drainage hole as the hanger. Three steps, and the kids can do every one. Hang a cluster on the tree or tie them along a garland so they ring. Her tutorial at The Country Chic Cottage covers colors too.
27. Vintage Sheet Music and Fresh Pine Basket
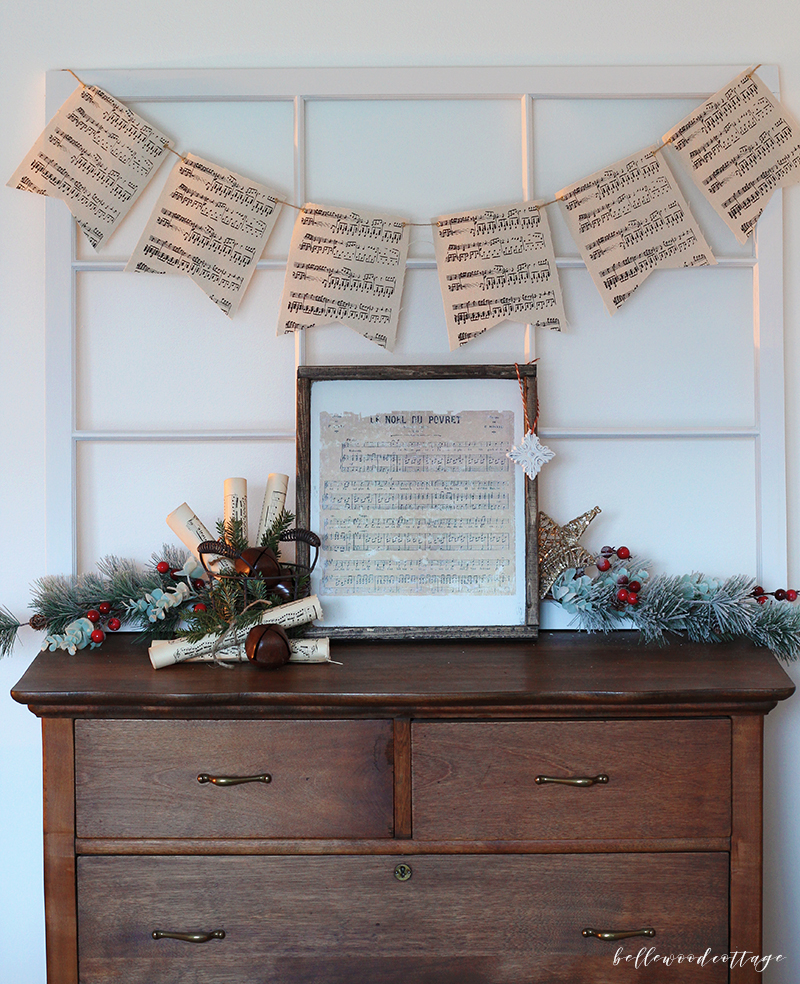
Pull a few pages from a falling apart book of vintage sheet music, roll them, tie each with twine and tuck a sprig of pine into the knot. Bellewood Cottage arranges the rolls in a basket with more pine trimmed from the tree and sets sleigh bells on top, a five minute vignette that makes a dresser or entry table look styled. Old music books turn up at thrift stores for a dollar, and the pine is free once the tree is up. The photos are at Bellewood Cottage.
28. Dollar Store Snow Globes
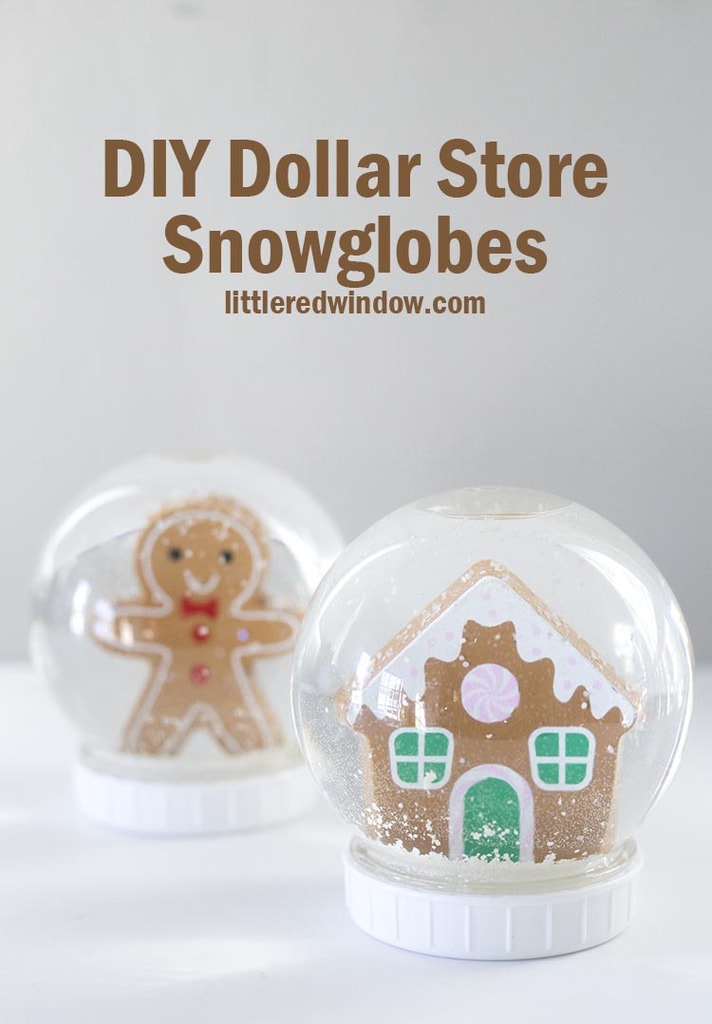
Dollar Tree sells a real snow globe kit with a screw top and an inner stopper, and Little Red Window says grab it when you see it. Sand the inside of the base so glue grips, hot glue a waterproof gingerbread ornament to it, let it cure a full day, and use chunky white glitter, since fine glitter clouds the water within a week. Fill with water, add the stopper and shake. They're the cheapest globes that actually function. What not to use is at Little Red Window.
29. Painted Snowman Vase

The top hat is a second vase. A white terracotta pot makes the head, a tall black vase drops in for the hat, and chipboard covered in felt makes the brim. Terracotta drinks paint, so give the white a third coat before penciling in the face and the striped scarf. Fill the hat with evergreen or a poinsettia for a centerpiece. Kimberly of Crafting Cheerfully leaves all three pieces separate, and her tutorial walks the brim template step by step.
30. Modern Mini Cardboard Holiday Village

Cereal box cardboard, paint and scrap paper make a tiny modern village the kids can build all season. Amanda Eldridge at Barley and Birch cuts simple house and tree shapes from cardboard, paints them in bright colors or chalkboard black, glues on scrap paper doors and windows and doodles the trim with a white paint pen. Her first set took 45 minutes and lives on the mantel with fairy lights woven through. Add a house a day for an advent calendar. The templates are at Barley and Birch.
31. Christmas Tree Mason Jar Votives
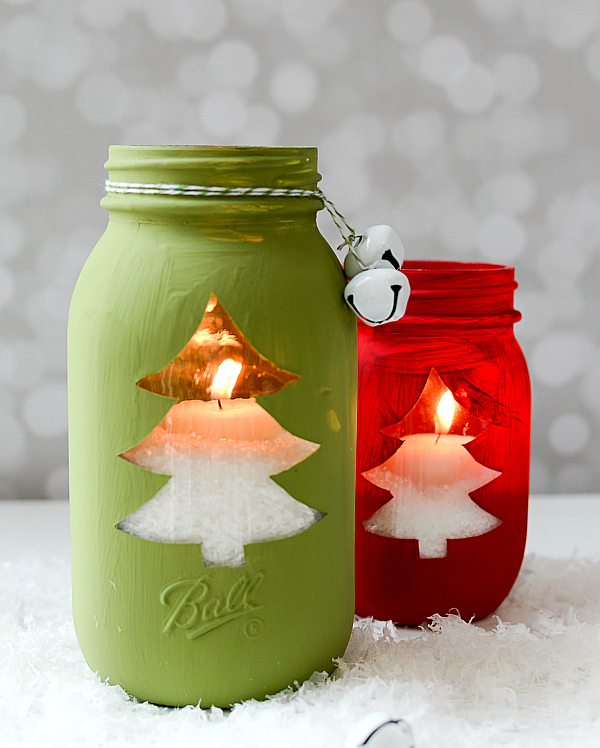
No vinyl cutter, no problem. Linda at Mason Jar Crafts Love layers painter's tape, traces a printable tree onto it, cuts the shape and sticks it to a smooth jar as a faux vinyl decal. Two coats of chalky paint in red or green, peel the tape, and the tree glows clear when a tea light goes in. Epsom salt in the bottom reads as snow and steadies the candle. The stencil download and the rest of her jar ideas are at Mason Jar Crafts Love.
32. Giant Paper Lantern Ornaments

Paper lanterns painted in your colors, with a peanut butter jar lid on top, read as giant ball ornaments. Club Crafted paints white paper lanterns in satin acrylic, sprays the jar lids silver, pokes a hole through each lid, threads a folded pipe cleaner through as the loop and hot glues the lid over the lantern's top. Mix sizes and hang them from the porch ceiling or a bare corner. Spray paint if you plan to light them, since brush strokes show. Steps at Club Crafted.
33. Ragged Fabric Strip Christmas Trees

Ribbon trees are lovely and ribbon is expensive, so Kara at Creations by Kara tore up fabric instead. Strips about an inch wide and four inches long, torn so the edges fray, get a dot of hot glue at one end and go on in rows around a dollar store styrofoam cone, overlapping like shingles. Green homespun, cream canvas and a scrap of red for a bow took under an hour. Stand them on candlesticks so they look like topiaries. Her tutorial has the row spacing at Creations by Kara.
34. Beaded Wire Candle Cuffs

Those beaded candle rings from the fancy garden catalog cost a fortune, and Delineate Your Dwelling makes them from two gauges of craft wire and a handful of beads. Three lengths of 16 gauge wire get braided, wrapped around a taper to size the ring, then thin 24 gauge wire strung with red, silver and green beads is twisted on in sprays like berries. Slide one over each taper on the table or mantel, a quiet, sparkly movie night project. The wire lengths are at Delineate Your Dwelling.
35. Rustic Glam Gold Pine Cones

Bake the pine cones first. Holly Gagnon at Ribbons and Glue puts them in a 200 degree oven for about forty five minutes before anything else touches them. Then it's a light brush of Mod Podge and a shake of gold glitter, or a quick pass of metallic gold spray paint, and plain cones become the shiny part of a rustic porch. She piles hers on a vintage ladder with greenery and lanterns, cheap and fast. Her porch how to is at Ribbons and Glue.
36. Balloon Garland Christmas Tree
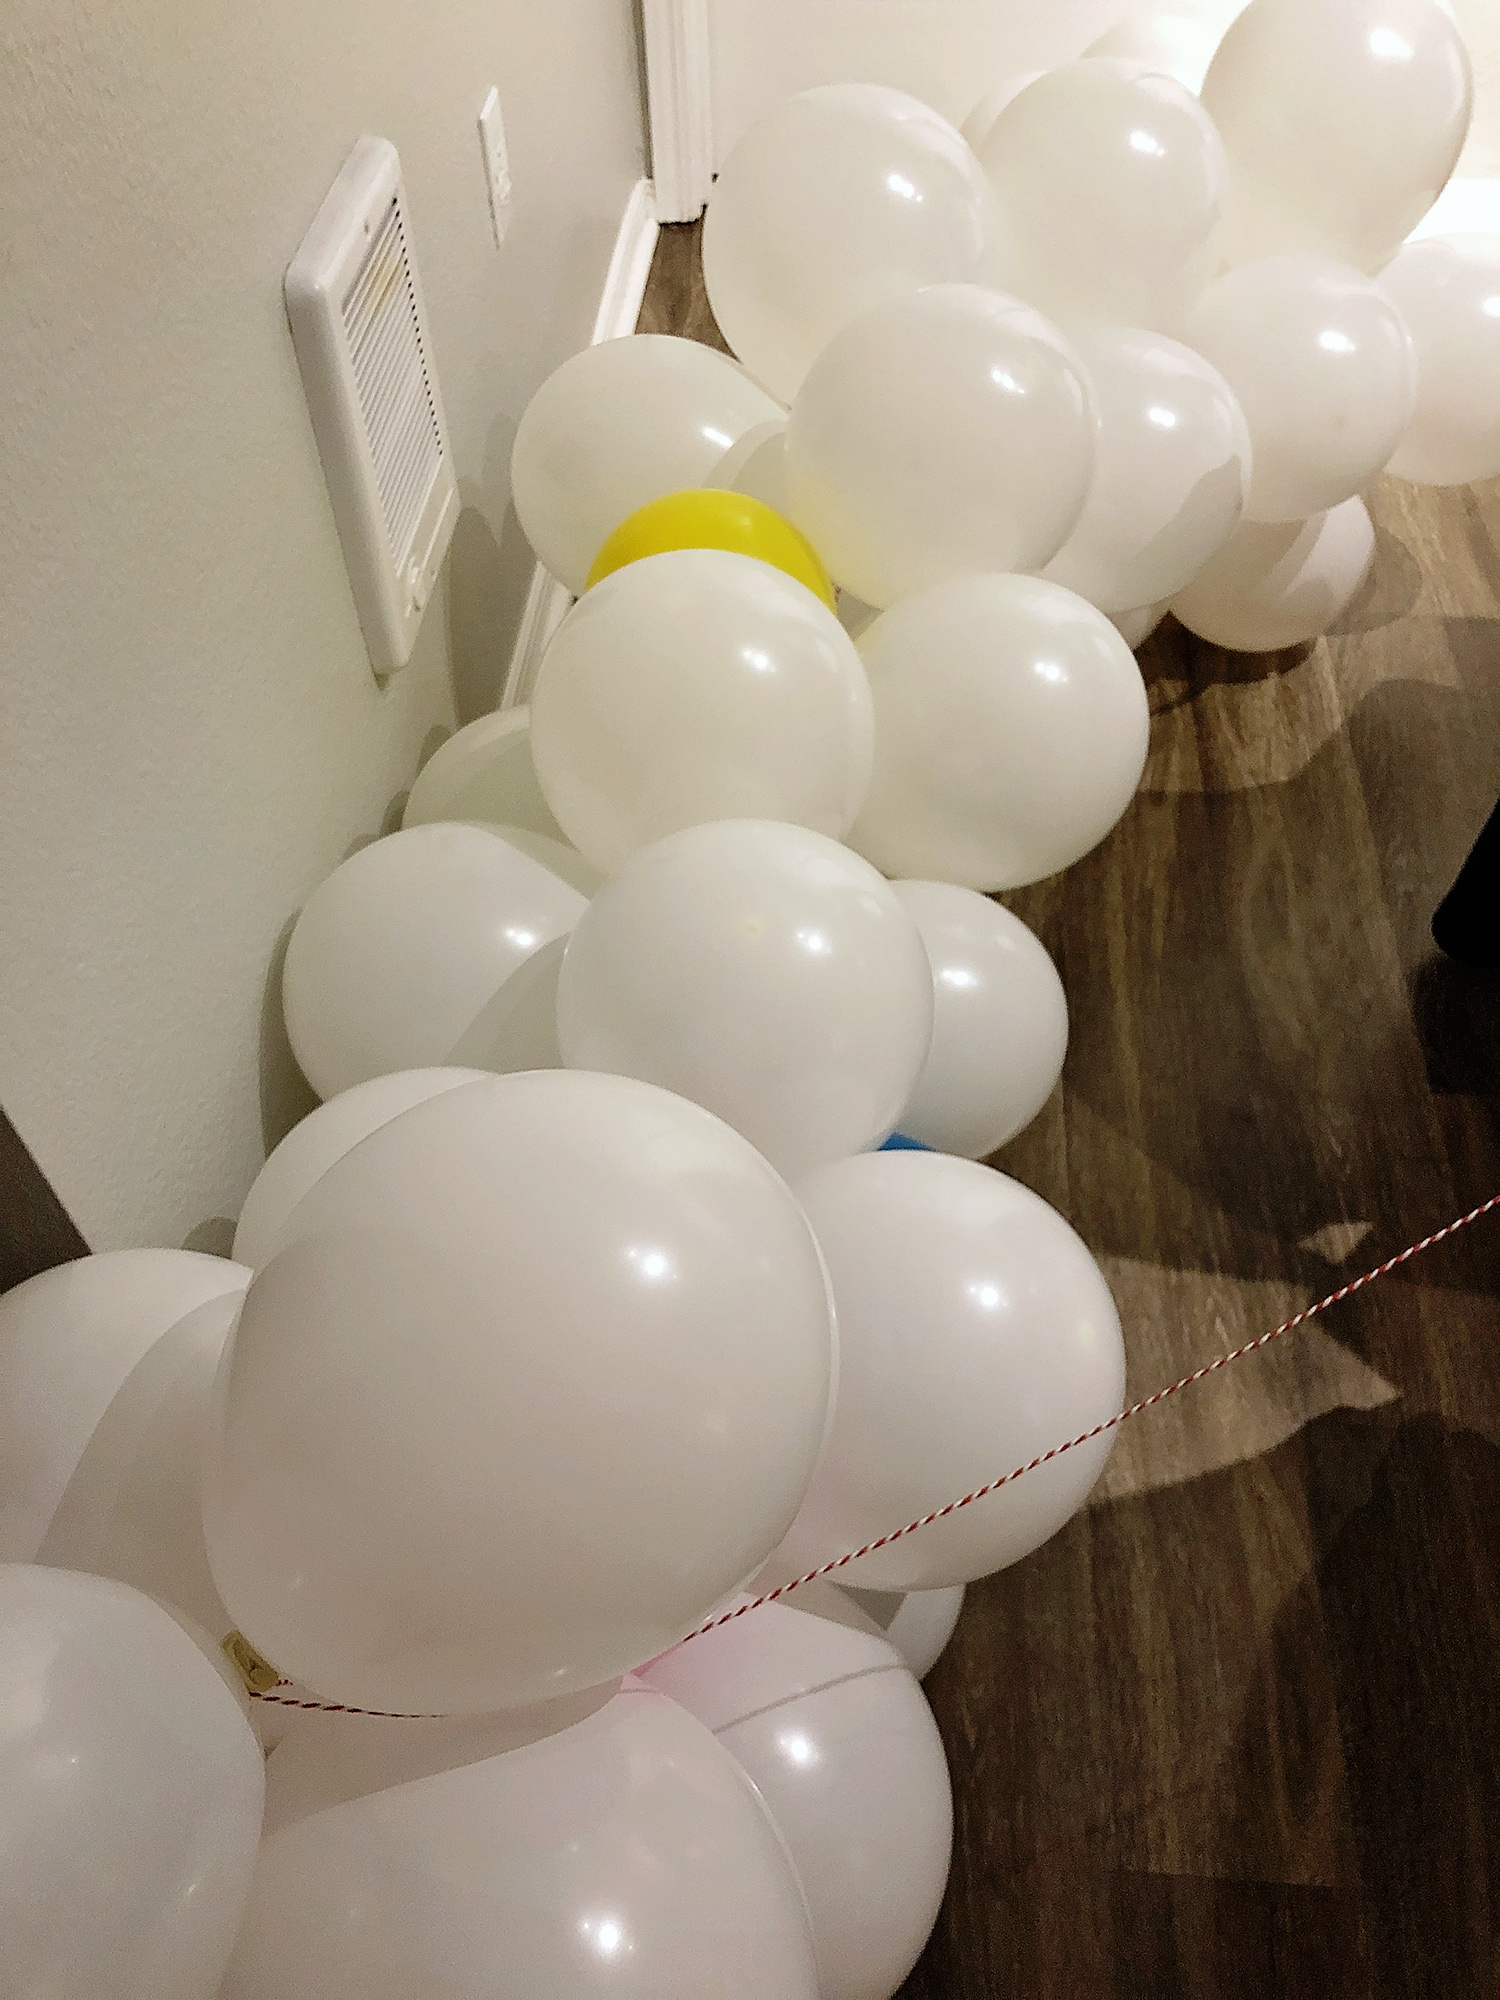
Skip the ornaments one year and wrap the tree in balloon garland. A Well Crafted Party blows up a pile of 5, 10 and 12 inch balloons, mostly white with a few colors, ties them onto baker's twine in clusters and winds the garland around the tree from the top down. No chicken wire, no hot glue, just twine and a balloon pump, the one supply she says not to skip. The kids loved it and the balloons lasted the season. Her method is at A Well Crafted Party.
37. Glitter Paper Tree Lanterns
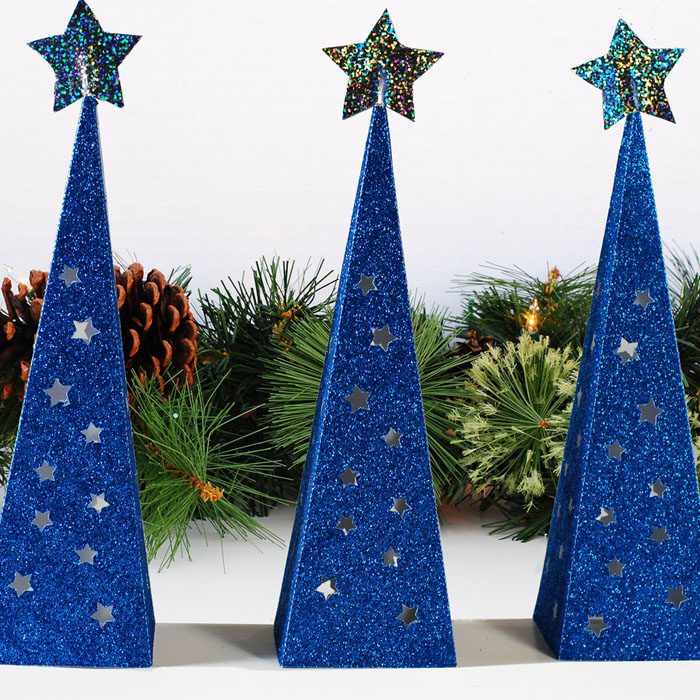
Glitter scrapbook paper costs two dollars a sheet, and Easy Paper Crafts spray glues cheaper glitter wrapping paper to cardstock for the same sparkle at pennies a sheet. Cut the free triangle tree template, score and fold it, punch a few stars through the sides and glue the tab, then set a battery tea light underneath so the stars glow. Peel the glitter off the glue tab first or nothing sticks. A row of blue ones down the table looks like a night sky. Template at Easy Paper Crafts.
38. Snowy Mason Jar Centerpiece

Three jars in three sizes, brushed with glue, rolled in Epsom salt and glitter, filled with faux greenery and tied with red velvet ribbon. Crystal Owens at A Pumpkin and a Princess sets them in a wooden tray with evergreen and twinkle lights, and the salt catches the light like snow. Bare spots get a dab of glue and another sprinkle, and jars stored from past years still look new. It reads as florist work for a few dollars. Details at A Pumpkin and a Princess.






