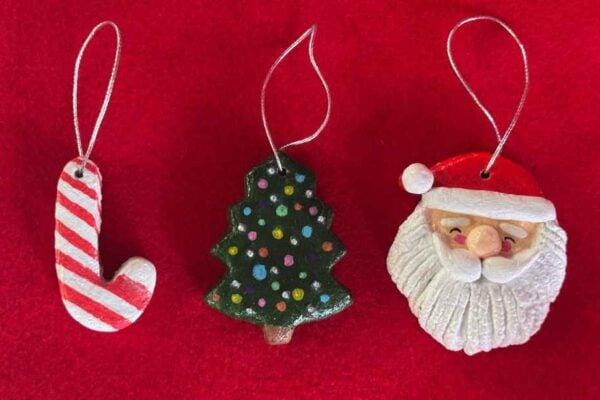
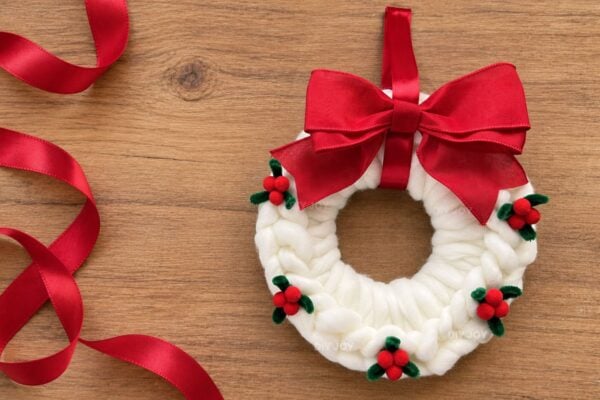
Clay pot crafts are proof that the humblest thing in the garden center can turn into almost anything. A plain terra cotta pot costs very little, takes paint beautifully and stacks, glues and wraps into shapes nobody expects. These 54 clay pot crafts go way past the planter: a gumball machine candy jar, a garden lighthouse that glows after dark, a stone toad house, polka dot mushrooms, a bird bath, wind chimes and an olla that waters the garden for you. There are quick painted pots too (ombre, gold foil lettering, puff paint, a French decal finish) plus holiday favors for Halloween, Thanksgiving and Christmas. Most of these terra cotta pot crafts take an afternoon. One tip that saves a lot of frustration: clay is porous and drinks paint, so plan on an extra coat, or prime first, and use outdoor paint or a sealer on anything that lives outside.
1. Metallic Clay Pots

Metallic clay pots prove a plain garden center pot can pass for boutique decor. Brush on two coats of metallic paint (a black nickel shade gives that dark, satiny farmhouse look), letting each coat dry fully so the brush strokes stay smooth and the paint doesn’t lift. Glue a foam ball inside, snip faux flowers into single sprigs and poke the wired stems into the foam until it looks full. No soil, no watering, nothing to keep alive. They look great on a porch shelf by the front door.
Get the full tutorial at See Lindsay.
2. Easy Fabric Covered Pots

Fabric covered pots are the best excuse yet to use that scrap stash (old denim and bandanas count). Wrap fabric around each terra cotta pot and cut it with about two inches extra at the top and an inch at the bottom. Brush matte Mod Podge over the outside, wait a couple of minutes until it’s tacky, then press the fabric on vertically and wrap it around, stretching slightly as you go. Lightweight cotton and fat quarters behave best. Fold the extra over the rim and seal it all down.
Get the full tutorial at DIY JOY.
3. Moss Covered Clay Pots

Moss covered clay pots get their garden-ruins charm from paint, not real moss. Spray each pot with one light coat of white, leaving some terra cotta peeking through on purpose. Once it’s dry, dab forest green craft paint randomly around the pot with a paper towel or sponge so it reads as moss creeping up the sides. A transfer and chalk paste add the bee graphic in black. Fill them with faux greenery and white flowers for a rustic farmhouse table centerpiece that looks decades old.
Get the full tutorial at Refresh Restyle.
4. Make a Garden Art Lighthouse from Clay Pots

A garden art lighthouse is three or four clay pots in graduated sizes stacked upside down, with a small saucer on top as the deck. Wash the pots first and sand off any glaze so the paint sticks. Paint the tower white, then add red or black bands, little windows and trim (photos of real lighthouses are great for design ideas). Top it with a small solar patio light or a battery lantern so it actually glows at night. Tuck a few into a flower bed and the garden suddenly has a coastline.
Get the full tutorial at Empress of Dirt.
5. Clay Pot Mushroom Decor

Clay pot mushroom decor takes about 15 minutes of actual work (the rest is drying time). Paint an upside down clay pot white for the stem and paint a saucer red for the cap, covering both sides of the saucer since the underside shows. Dab on white dots with a round sponge brush, adding a second coat if they look thin. Glue the saucer to the pot with strong adhesive and stack books on top while it cures. Use outdoor paint and it’ll brighten a flower bed or fairy garden all summer.
Get the full tutorial at The Country Chic Cottage.
6. Beverage Dispenser Stand

A beverage dispenser stand from clay pots lifts the lemonade up where guests can reach the spigot. Pick a terra cotta saucer that fits the base of your dispenser and a clay pot with a wide, sturdy base (it has to hold a lot of weight once it’s full). Spray paint each piece, then sand the edges lightly for a distressed look. Glue the saucer to the pot with E6000 and let it cure. The same trick makes cake stands and even a cloche with a rope handle.
Get the full tutorial at Refresh Restyle.
7. Mini Hand-Drawn Art Clay Pot Planter

Mini hand-drawn art clay pot planters only need white paint and a fine black Sharpie. Paint the mini pots white and leave the rims bare terra cotta, then let them dry completely. Draw flower doodles or any design you like right onto the paint (chalk paint takes the pen especially well). Test your pen on a painted scrap of cardstock first so there are no surprises. Hot glue a strong magnet on the back if you want them on the fridge, then add a little plant, real or faux.
Get the full tutorial at 100 Directions.
8. Photo Gift Clay Pot Craft

A photo gift clay pot takes about 15 minutes of hands-on time, plus some patience while it dries. Paint the pot and saucer white, including the top inch inside the rim. Print a collage of about six family photos on plain computer paper (photo paper is too stiff to hug the curve). Trim the photos, brush Mod Podge on the pot, smooth them on and seal with another coat. Add a plant and a handwritten label and it’s ready for grandparents, who will put it front and center forever.
Get the full tutorial at The Crazy Craft Lady.
9. DIY Bird Feeder From Clay Pot
A DIY bird feeder from a clay pot uses a 6 1/2 inch pot, two saucers and a 2 liter bottle hidden inside as the seed reservoir. The large 9 1/2 inch saucer becomes the perch platform and the smaller 7 1/2 inch saucer sits on top as a roof that keeps rain off the seed. Drill small holes around the pot so seed trickles out, then hang the whole thing with a fishing swivel and picture hanging wire. Fill it, hang it where you can see it and wait for the cardinals.
Get the full tutorial at All Things Heart and Home.
10. Mini Ombre Herb Pots

Mini ombre herb pots cost under $5 for a set and use just white plus one color of acrylic paint per pot. Mix three shades as you go: white with a spot of color, then half and half, then color with a spot of white to soften it. Paint the bottom band first and work up. Acrylic dries so fast on terra cotta that the first band is ready by the time the next shade is mixed. Plant them with rosemary, sage or basil and line them up on a sunny kitchen sill.
Get the full tutorial at A Crafted Passion.
11. Vertical Clay Pot Garden

A vertical clay pot garden strings pots along threaded rods so a whole column of plants hangs from one hook. Sketch the layout first and decide how many columns you want, keeping in mind each loaded rod can weigh over 30 pounds, so anchor the screw eye into solid wood. Choose pots with at least a 1/2 inch center drain hole. Each pot sits on washers and a flange along the rod, so the spacing can be anything you like. It’s a real weekend build, and a balcony stunner.
Get the full tutorial at The Horticult.
12. Potted Candle Planters

Potted candle planters are a planter by day and a garden light by night. Put an inch or two of soil in a large clay pot, then drop in a pot about two inches smaller so the rims sit level. Fill the center pot with pea gravel and pack soil around the outside ring. Plant flowers in that ring, then set a pillar candle in the gravel and cover it with a glass hurricane. When the evening is over, bring in the candle and hurricane and the planter drains like normal.
Get the full tutorial at Family Chic.
13. Chandelier Planter Tutorial

A chandelier planter gives a thrift store light fixture a second life over the patio. Pull off the plastic candle sleeves and cut out all the wiring. Spray paint the frame in an outdoor-rated color, then attach a terra cotta saucer to each arm with plumber’s epoxy putty and waterproof glue (the putty also lifts the pot a little for drainage). Glue the pots on, let it set for an hour or two, plant with moisture control potting mix and hang it from an S hook.
Get the full tutorial at DIY Show Off.
14. DIY Solar Light Planters

DIY solar light planters stack two terra cotta pots, one 10 inches or larger and one 8 inches or smaller, both with drain holes. Paint them however you like: a weathered look comes from a nearly dry chip brush dragged across the pot, and an artist’s brush handles house numbers. Fill the big pot with soil, nest the small one on top, plant flowers in both and push a long-stake solar light down through the center. The result is a tiered planter that lights the front steps after dark.
Get the full tutorial at Average But Inspired.
15. Clay Pot Snail with FolkArt Paint

A clay pot snail is a smiling garden friend built from ten 2 inch pots, three 1 1/2 inch pots and foam balls. Base coat the 2 inch pots in pairs of pink, yellow, citron, sky blue and white, and paint the smaller pots patina for the body. Paint a foam ball for the head and add a face with a liner brush. Thread the pots onto jute so they curl into the shell and glue the body together. It’s a great family project, and nobody ever argues about whose turn it is with the paint.
Get the full tutorial at Plaid Online.
16. Chalkboard Herb Pots

Chalkboard herb pots look like a boutique buy and take an afternoon. Give three terra cotta pots and saucers two solid coats of white multi-surface paint (it dries fast, which helps). Write the herb names on oval chalkboard labels, stick them on, then lightly sand the edges with 100 grit paper for a rustic, vintage look. Plant chives, parsley and oregano and set each pot on a birch round. One heads up: check whether your herbs are indoor or outdoor varieties before they settle in on the sill.
Get the full tutorial at Taryn Whiteaker.
17. DIY Clay Pot Chimes

DIY clay pot chimes use four pot sizes, 1 1/2, 2, 3 and 4 inches, painted in bright patio paint so they stand up to weather. Some colors need three coats. Let everything dry completely, then cut a long piece of jute (more than you think you need). Add a bead and clamp a fishing sinker below it so the first pot sits right, then string the rest from smallest to largest with a bead between each. Hang them from a shepherd’s hook in the garden and enjoy the soft clink.
Get the full tutorial at Lady Behind the Curtain.
18. DIY Aged Pots With a Vintage Image

Aged pots with a vintage image take about an hour and a half, mostly waiting. Dab a brush in paint, blot most of it off on a paper towel and brush it over the pot and saucer for a weathered, chalky finish. Tape tissue paper to printer paper, print a vintage graphic on it, peel it off and cut closely around the design. Brush on Mod Podge, smooth the tissue in place with a finger and brush more over the top. A clear spray sealer inside and out protects the whole thing.
Get the full tutorial at Virginia Sweet Pea.
19. Ombre Drip Flower Pots

Ombre drip flower pots are acrylic pouring at its easiest, and the mess stays contained. Cover the work surface, then set a terracotta pot upside down. Squeeze or pour small amounts of one craft paint color down the sides, starting from the bottom edge and letting it slide toward the rim. Layer a second shade the same way for the ombre effect. Let it dry fully before flipping it. Every pot comes out one of a kind, so it’s a fun one to do with kids, and old pots from the shed work perfectly.
Get the full tutorial at Mad in Crafts.
20. Pumpkin Place Card

A clay pot pumpkin place card is so easy you don’t even need paint, since the terra cotta is already pumpkin orange. Hot glue a cork into the bottom of a small upside down pot so it covers the drain hole and becomes the stem. Tie a few strands of raffia around the cork and trim them. Write each guest’s name on a faux fall leaf with a permanent marker, snip off the stem and glue the leaf to the pot. A whole table’s worth comes together in minutes.
Get the full tutorial at The Country Chic Cottage.
21. DIY Decorative Clay Pots with Herbs

Decorative clay pots with herbs get a soft, worn look from a dry brush. Paint three pots and bases white with one quick coat that doesn’t fully cover (on purpose). Dip a dry brush in blue, wipe almost all of it off and drag it lightly over the pots and saucers. For the labels, snip a piece of each herb, photograph it on white, give it a watercolor effect in a photo app, print it and attach it to a round wood medallion on the front. Plant the herbs and they’re labeled by their own portraits.
Get the full tutorial at Artsy Chicks Rule.
22. Distressed White Terra Cotta Clay Pot

A distressed white terra cotta pot is a five minute flip (not counting dry time). Brush on two coats of white chalk-style paint, letting the first dry before the second. Then take sandpaper to the rim and sharp edges first, where wear would naturally happen, and then work over the body. Porous clay soaks up paint, so it can take some elbow grease to sand back. Skip the wax and sealer if you love a matte finish. Fill it with a plant, or with seashells from your last beach trip.
Get the full tutorial at Petticoat Junktion.
23. DIY Whitewashed Terra Cotta Pots

Whitewashed terra cotta pots are a soft, imperfect twist on the classic orange pot. The finished set pairs a rough, streaky white finish (with a little clay showing through) with bold black crosses and triangle patterns, and the saucers get the same whitewash. The look is modern and earthy at the same time, a little boho and a little Scandinavian. Plant them with aloe and other spiky succulents and group them on a sunny shelf next to a woven blanket or a kilim pillow, where the black and white really pops.
Get the full tutorial at Love & Specs.
24. Fruit Inspired Terra Cotta Pots

Fruit inspired terra cotta pots turn a plant shelf into a fruit stand. For the pineapple, spray paint the pot and saucer bright yellow. Terra cotta is porous, so plan on three or four coats, or use a primer first and save some colored paint. Draw rows of little brown V’s with a permanent marker. For the watermelon, tape off the rim, paint the body and saucer red, then tape the body and paint the rim dark green. Add black seeds and you’re done. Acrylic paint works just as well as spray.
Get the full tutorial at created by v.
25. Age Terra Cotta Pots With Paint

Aging terra cotta pots with paint skips the years of sitting out in the rain. Dry brush white paint around the pot horizontally, keeping it uneven, heavier in some spots and lighter in others. The catch: porous clay drinks paint almost instantly, so it can’t really be wiped off once it’s down. Go light and build up. To soften any brushy look, dab on a light gray layer with a paper towel. Use patio paint, or seal craft paint with an outdoor topcoat, if the pot lives outside.
Get the full tutorial at Creekline House.
26. Painted Doily Flower Pots

Painted doily flower pots borrow the pattern from an ordinary paper doily. Cut slices out of a doily to use as stencils, hold one against a small terracotta pot and lightly dab white outdoor paint over it with a foam pouncer. Lift the doily right away so it doesn’t stick, then grab a fresh slice for the next section and keep rotating around the pot. Let it dry completely. Fill them with soil and small succulent cuttings for wedding favors, shower favors or a windowsill row.
Get the full tutorial at Freutcake.
27. DIY Terra Cotta Pot Luminaries

Terra cotta pot luminaries turn a plain pot and saucer into a glowing lantern for the garden path. The finished piece is painted a clean white, with small cutouts in the side of the pot that let candlelight flicker through, and a tealight sits inside on the saucer. Set a few along a walkway, on the porch steps or among the daylilies for an evening party, and use flameless candles anywhere a breeze or kids might be a problem.
Get the full tutorial at The Birch Cottage.
28. DIY Terra Cotta Pot Fountain

A terra cotta pot fountain is a tabletop water feature built from stacked pots and saucers with a small pump hidden inside. Seal the largest bottom dish with a few coats of clear waterproofer (outdoors, it’s smelly) and soak any piece that needs drilling for a few hours to keep down dust and cracks. Drill the top plate for the hose. Instead of filing notches for water flow, which is slow, tedious work, lift the largest pot on old canning jar rings. Add river stones and plug it in.
Get the full tutorial at Flower Patch Farmhouse.
29. DIY Heart Print Terra Cotta Cactus Pots

Heart print terra cotta cactus pots are a sweet little gift for Valentine’s Day or just because. The finished pots are a soft blush pink with a dusty, washed finish and rows of tiny white hearts painted around the sides, with matching saucers underneath. Each one holds a small cactus and a heart-shaped tag with a pun like stuck on you or let’s grow old together. Line them up on a sunny desk or kitchen sill and they’ll make someone smile every single day.
Get the full tutorial at Love & Specs.
30. Fabric Decoupaged Terra Cotta Flower Pot

A fabric decoupaged flower pot costs about $3 and takes 45 minutes. Cut a length of fabric that wraps once around the pot with extra at the top and bottom, then snip slits along the top edge so it won’t pucker. Coat a section of the pot with Mod Podge, press the fabric on and coat over it, working all the way around. Trim the overhang to under an inch, fold it into the rim in neat pleats and seal it down, then do the same at the base. Bold florals look amazing.
Get the full tutorial at Mod Podge Rocks.
31. Pretty Lace Terra Cotta Pots

Pretty lace terra cotta pots pair warm clay with crisp white lace trim, and they’re one of the easiest pot makeovers around. The finished pots wear lace or eyelet trim wrapped around them, sometimes a band at the base and sometimes a stripe across the middle. Mix pots that are fully covered with ones that only get a ribbon of lace, then plant cactus and succulents and group them on a stack of old books or a brick ledge. Romantic, a little vintage and very budget friendly.
Get the full tutorial at A Beautiful Mess.
32. DIY Coastal Terra Cotta Pots

Coastal terra cotta pots get a sandy, sun-bleached texture from a thick, textured paint. Brush a gray base color on in a loose X pattern with a stiff natural bristle brush, leaving some clay bare. Don’t be shy about laying it on thick, it adds to the texture. When that’s dry, brush a sandy white over the top the same way and push the paint around so it builds up in spots. It will look splotchy at this stage (that’s fine), and a light sanding blends the colors into a beachy weathered finish.
Get the full tutorial at The Crafty Blog Stalker.
33. Easy DIY Rustic Herb Planters

Easy rustic herb planters look like they came from an old French market. Paint plain terra cotta pots with white milk paint and keep the brush strokes loose and rough. Instead of sanding to distress, blend small amounts of gray chalk paint over the white for a weathered look with less work. Then stamp the herb names on the sides with typewriter-style letter stamps, keeping them a little crooked on purpose. Stamped ink can rub off, so these are best for an indoor herb garden by a sunny window.
Get the full tutorial at Boots & Hooves Homestead.
34. DIY Garden Planter and Birdbath

A garden planter and birdbath in one is a tipsy pot tower with a dish on top. Thread one 8 inch base pot, four 6 inch pots and one smaller pot onto a 62 inch length of rebar driven into the ground, tilting each pot as you stack. Prime and spray paint every pot first (turquoise looks amazing against a wood fence). Glue a shallow glass dish on top as the bath with aquatic-safe adhesive and add a little ceramic bird. Plant flowers in each tipped pot and it blooms all summer.
Get the full tutorial at Home Stories A to Z.
35. DIY French Made Pots

French made pots look like they’ve lived on a Paris windowsill for decades. Paint terracotta pots with a coat of black acrylic and let it dry, then rub them with a wax candle where you want wear to show. Brush on white acrylic, let it dry for a few hours and sand hard with 120 or 180 grit paper so the black peeks through the waxed areas. Print French graphics on waterslide decal paper and apply them (the decal film is translucent, so the distressing shows through). Finish with matte spray.
Get the full tutorial at Dreams Factory.
36. Terra Cotta Pot Unicorn

A terra cotta pot unicorn is pure magic for kids. Turn the pot upside down on a paper plate and paint it white, then let it dry completely. While it dries, punch paper flowers from colored cardstock, glue small rhinestones in the centers and cut a triangle horn from gold scrapbook paper. Hot glue the flowers around the rim and the horn inside it (a grown-up job). Draw sleepy closed eyes and nostrils with a black marker, then stuff it with tissue paper and give it away proudly.
Get the full tutorial at Glued to My Crafts.
37. DIY West Elm Inspired Succulent Planter

A West Elm inspired succulent planter recreates a pricey store look with spray paint and tape. Set a clean, dry pot upside down on cardboard and spray two coats of metallic aged copper, letting each dry. Flip it and give the rim and inner edges two coats too. Then press two strips of painter’s tape into a triangle pointing up from the base, burnishing the inner edges so nothing seeps. Fill the triangle with white paint (it can take four coats), peel the tape and plant a succulent.
Get the full tutorial at Ann's Entitled Life.
38. DIY Terra Cotta Garden Mushrooms

Terra cotta garden mushrooms bring a little storybook whimsy to the flower bed. Paint a terra cotta pot and its matching bottom saucer red with a foam brush and let them dry (they dry fast). Add white dots with a small brush. Glue the saucer onto the upturned pot with E6000, working in a ventilated spot with the table covered. In a wet climate, a marine-grade waterproof adhesive holds up better outdoors. Any size pot works, so make a family of them to cluster around a garden frog.
Get the full tutorial at Ann's Entitled Life.
39. DIY Gold Foil Lettering on Flower Pots

Gold foil lettering on flower pots turns inexpensive white pots into sassy little planters with personality. Prime and paint the pots with two coats of white acrylic and let them dry completely. Cut words from gold foil printable paper, which is thicker and easier to handle than vinyl, and stick them on. For a glitter dipped base, tape off the bottom, brush on Mod Podge, add glitter a third of the pot at a time and seal it again the next day. Funny sayings make them a perfect gift.
Get the full tutorial at Nest of Posies.
40. Flower Pot Gumball Machine Candy Jar

A flower pot gumball machine candy jar is pure nostalgia in a gift. Prime and paint a clay flower pot, its saucer and a wooden ball in classic red (or any color), adding coats as needed. Flip the saucer and hot glue the ball on top as the knob, then glue a straw cut to the height of a round glass fish bowl to the saucer’s underside so it lines up perfectly with the ball. Join the bowl to the upturned pot with E6000 plus hot glue, fill with gumballs or candy and add the saucer lid.
Get the full tutorial at DIY JOY.
41. Fingerprint Flower Pot
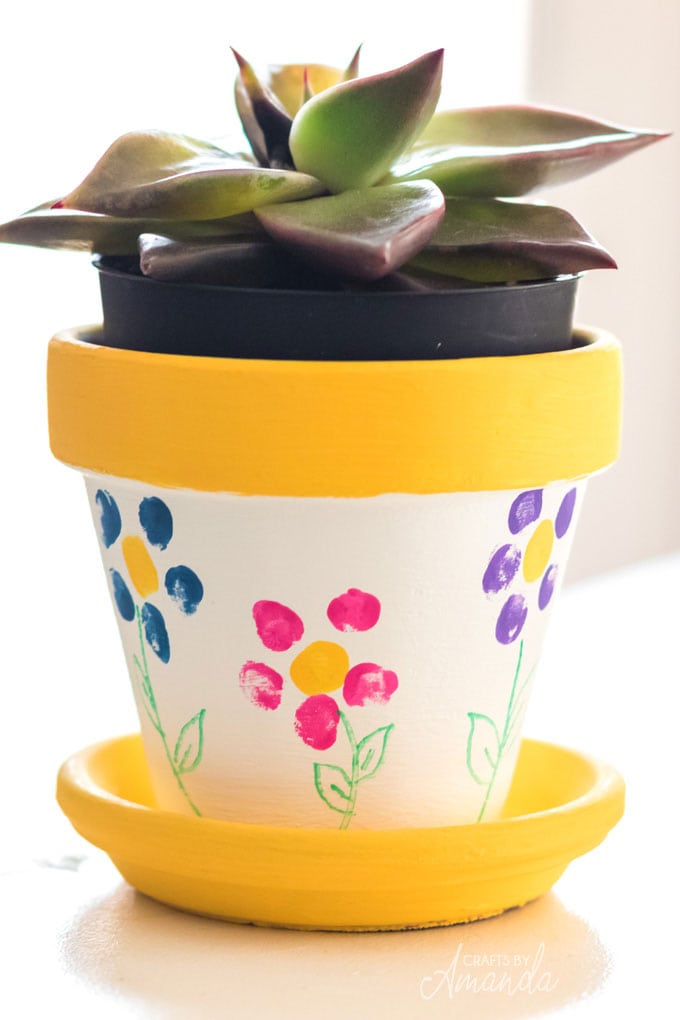
A fingerprint flower pot turns little hands into a keepsake. Paint a terra cotta pot white with a yellow rim and saucer and let it dry. Then let the kids dip a fingertip in acrylic paint and press a ring of prints for each flower, adding a yellow fingerprint center. Once dry, draw the stems and leaves with a green paint marker. Plant seeds or flowers inside and it’s a Mother’s Day or birthday gift no store can match. Old plastic pots work too, just scuff them with fine sandpaper first.
Get the full tutorial at Crafts by Amanda.
42. Clay Pot Crows
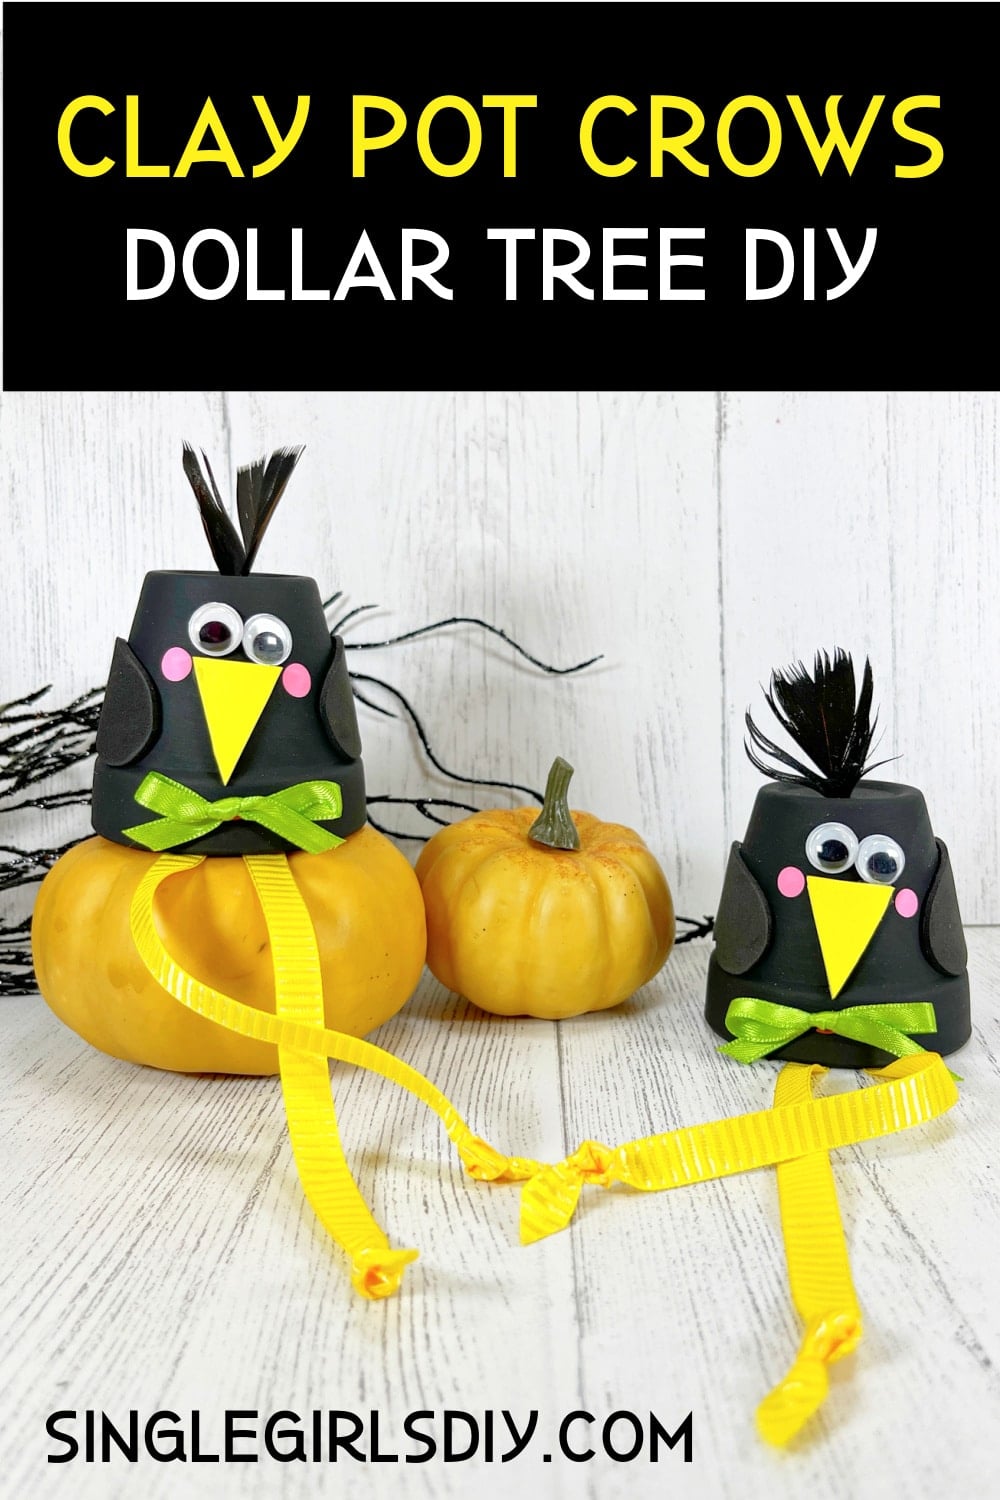
Clay pot crows are a Dollar Tree Halloween craft with a goofy streak. Peel the labels off 2.5 inch clay pots and paint them black (plan on two coats). Cut a little yellow foam triangle beak and glue it under two wiggle eyes, then stamp pink cheeks with a new pencil eraser. Poke a black craft feather or two into the drain hole for a tuft. Knot two 8 inch lengths of yellow ribbon for legs and glue them inside, then add a ribbon bow tie. Perch them on a shelf edge so the legs dangle.
Get the full tutorial at Single Girl's DIY.
43. DIY Terra Cotta Olla Watering System
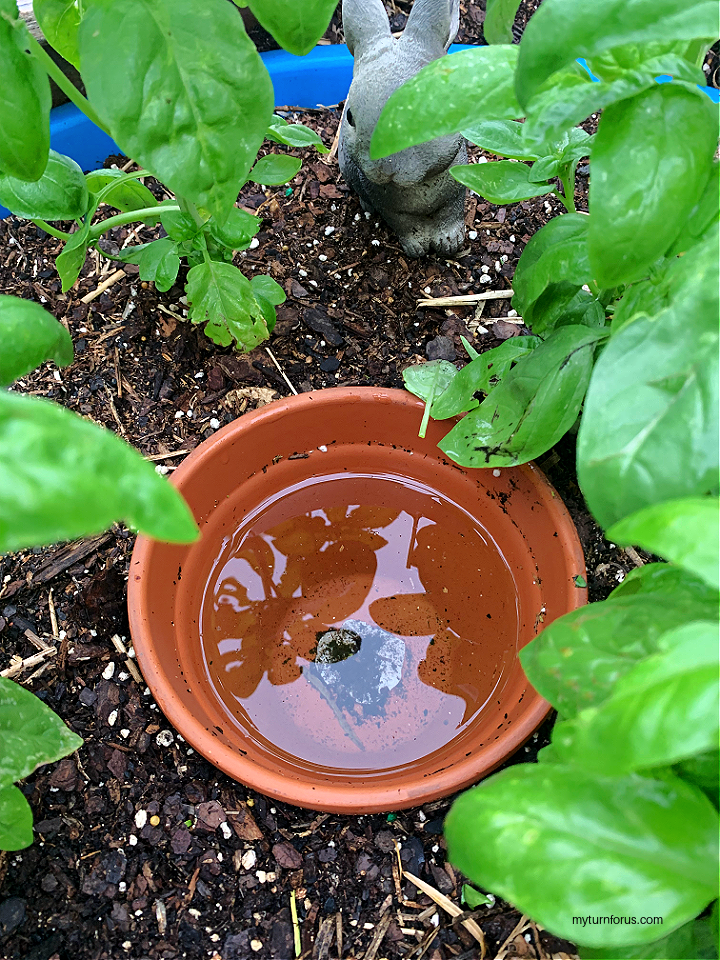
A DIY terra cotta olla waters the garden from below, slowly. Water seeps through the unglazed clay walls straight to the roots, so less is lost to runoff and evaporation. Use an unglazed pot about 6 inches wide (glazed won’t seep) and a saucer big enough to cover the top. Remove any stickers, then seal the drain hole from the inside with reusable putty, working on parchment so it doesn’t stick to the table. Bury the pot to the rim among the plants, fill it with water and set the saucer on as a lid.
Get the full tutorial at My Turn for Us.
44. Cut Terracotta Pot Tree Planters
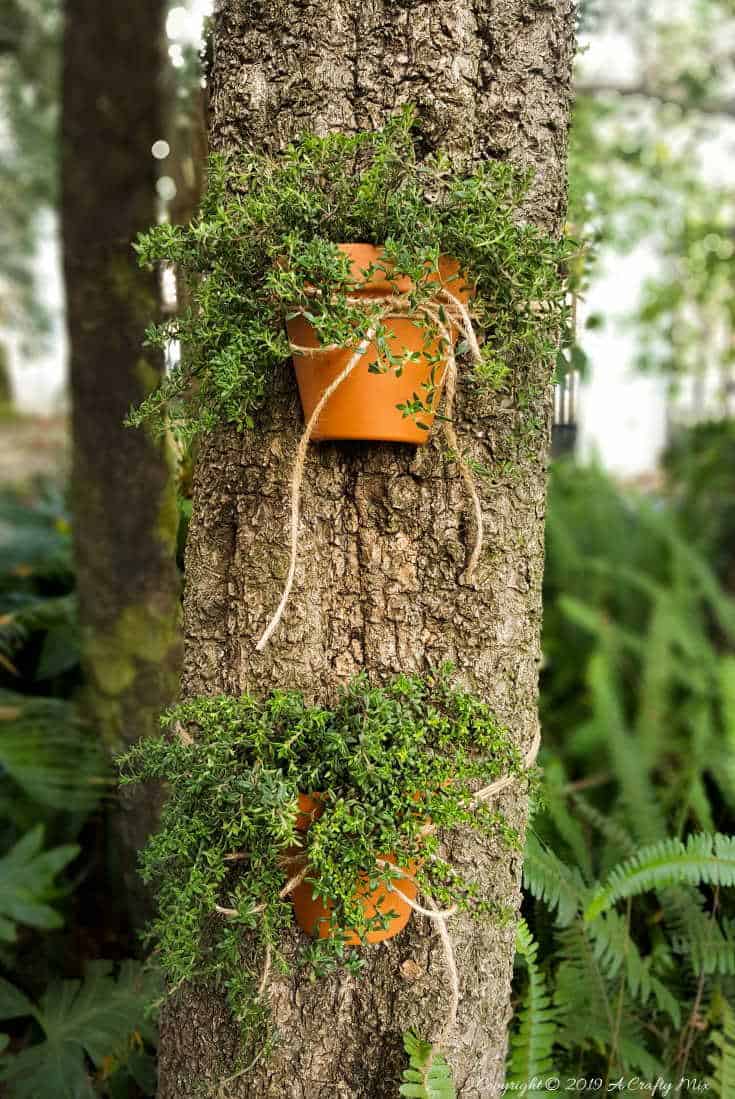
Cut terracotta pot tree planters look like the tree grew its own little garden. Soak the pots in water for about 20 minutes to cut down the dust, let them dry a few minutes, then mark the cut line and clamp the pot steady. Wearing gloves and a dust mask, run a Dremel with a diamond cutting wheel slowly along the line, then flip it, score the other side and it should crack cleanly. Sand the edges, tie the halves to a trunk with garden twine (not too tight) and plant creeping thyme.
Get the full tutorial at A Crafty Mix.
45. Holiday Character Candy Pots
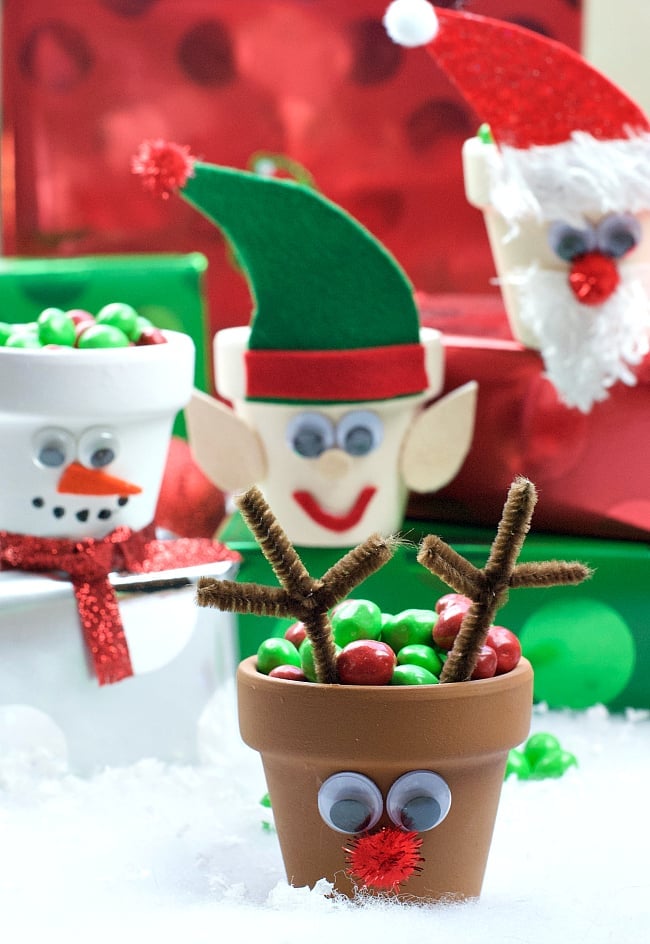
Holiday character candy pots turn mini flower pots into a snowman, an elf, Santa and Rudolph, each one filled with candy. Paint the pots (brown for the reindeer, white for the snowman and so on) and let them dry. Then add googly eyes, pipe cleaner antlers, a pom pom nose, felt hats and ears, and a ribbon scarf. Painted felt makes the elf ears just the right color, and cotton balls make a fluffy Santa beard. Help with the hot glue, then let the kids go wild and fill them with candy.
Get the full tutorial at Crazy Little Projects.
46. Stone Toad House
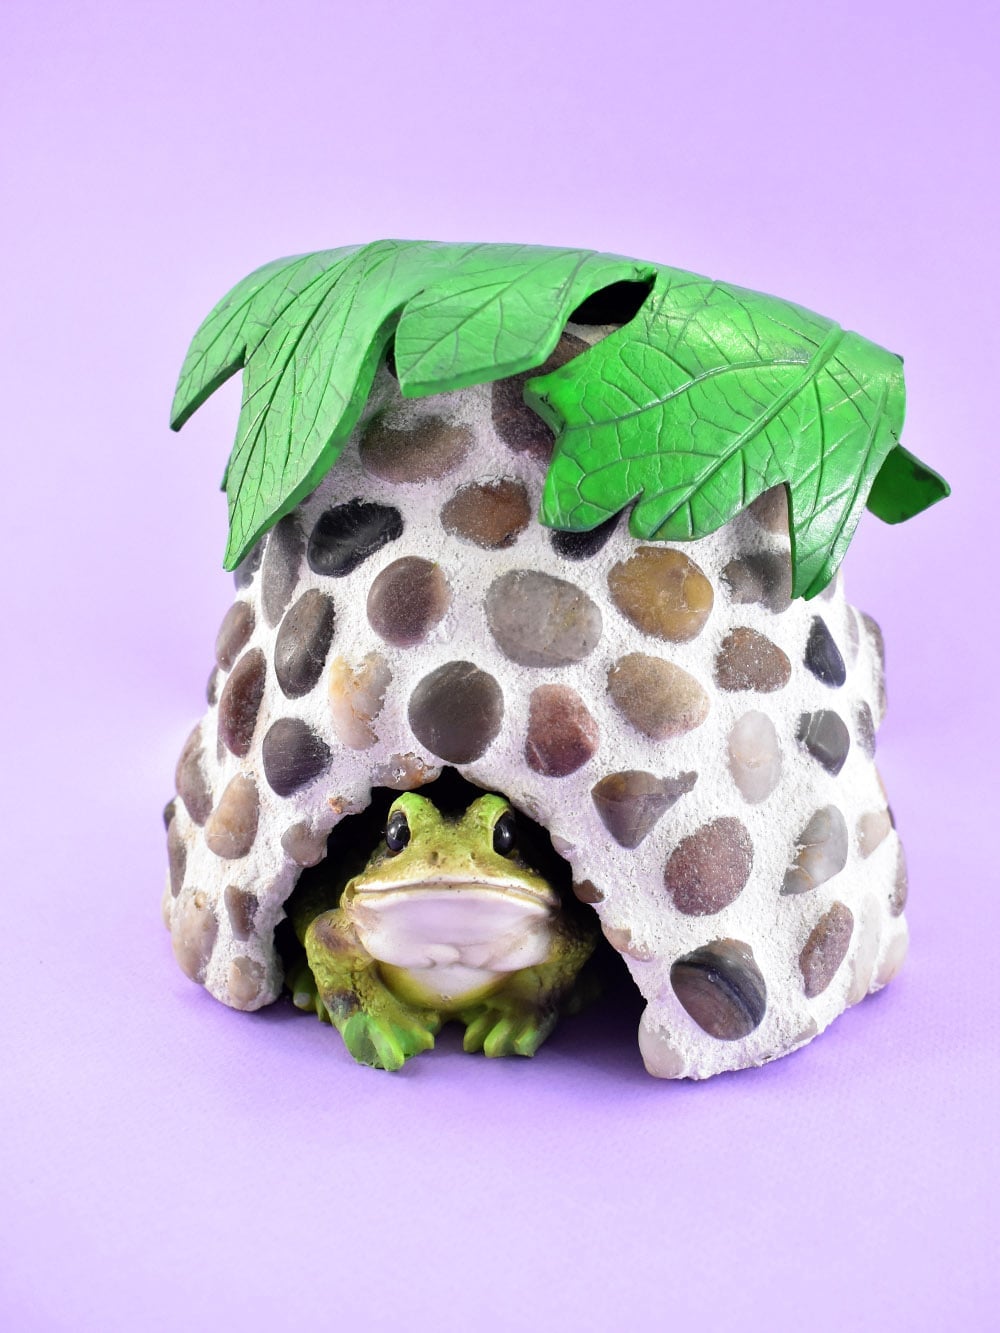
A stone toad house gives garden toads a cool place to hide on hot days. A 6 inch terra cotta pot is the ideal size (don’t go smaller than 4 inches). Cover the outside with small stones glued on with E6000, then fill the gaps with mosaic grout for a cottage stone look. Shape a roof from polymer clay pressed with fresh leaves, paint it green and attach it with Gorilla Glue. Terra cotta stays cool where metal would bake. Tuck it in a shady, damp corner of the garden and wait for a tenant.
Get the full tutorial at Dream a Little Bigger.
47. Plant Pot Frog
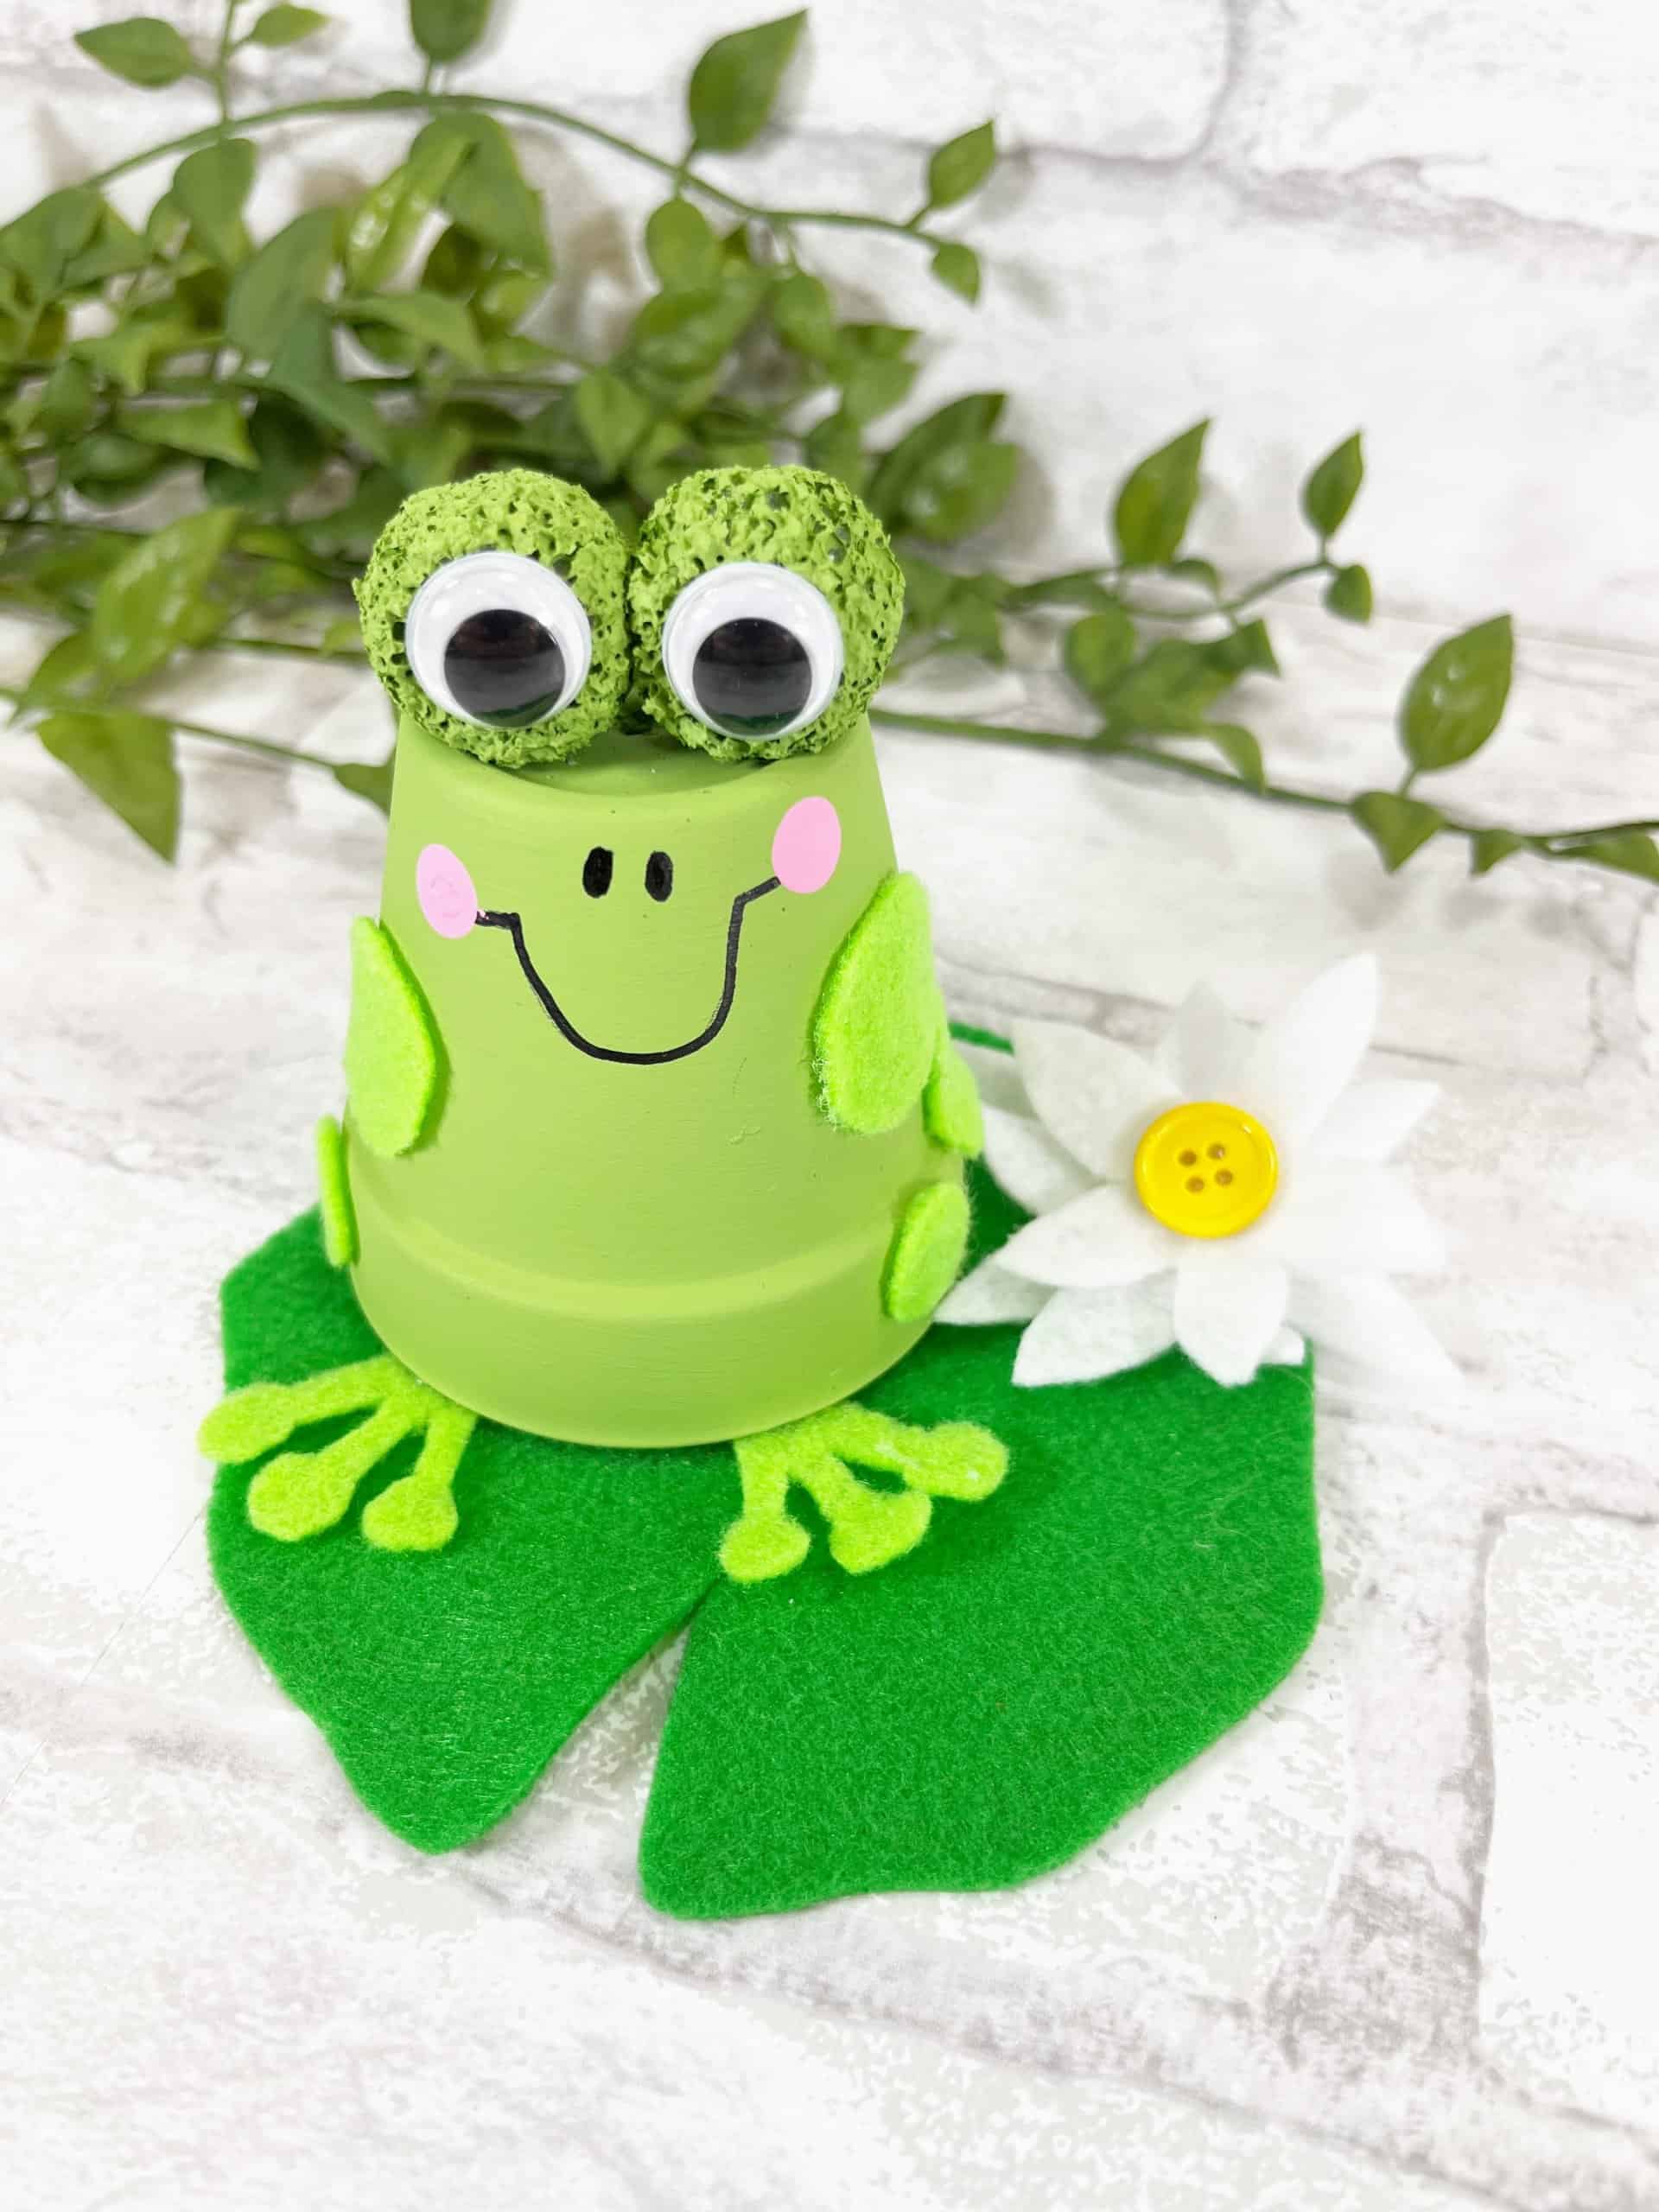
A plant pot frog is a cheerful little craft that starts with a 2.5 inch dollar store clay pot. Paint it light green, adding a second coat if needed. Have an adult slice a shallow piece off two 1 inch foam balls so they sit flat, paint them green and glue them on top as eyes with googly eyes stuck on. Add pink cheeks stamped with a pencil eraser, draw a big smile with a black marker and cut felt legs and a lily pad. A yellow button on a felt flower is the cutest finishing touch.
Get the full tutorial at Homemade Heather.
48. Modern Puff Paint Plant Pots
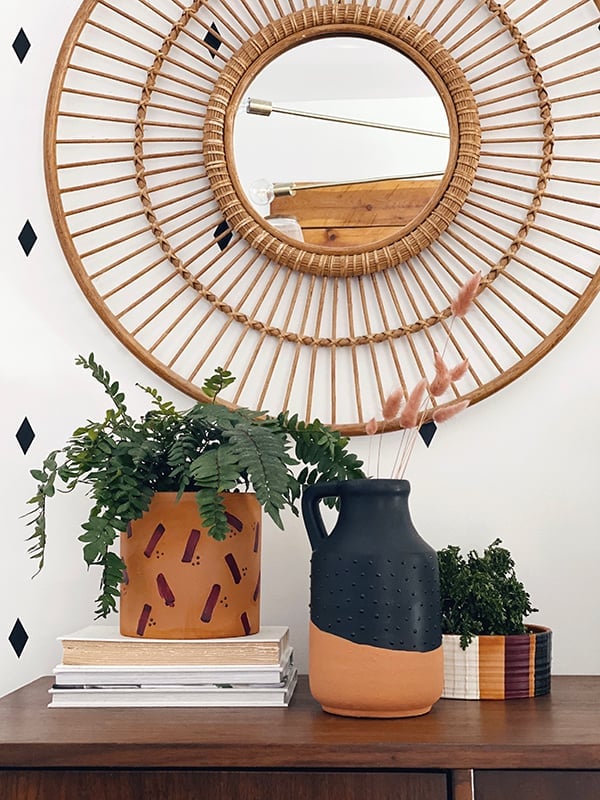
Modern puff paint plant pots bring the 90s favorite back, all grown up. Tape off vertical stripes on a terra cotta pot and paint them with regular acrylic in muted wine, black and white, using a pencil line as a guide. Trace along the stripes with white or black 3D puffy paint for raised texture, then set it aside to dry without touching. Black glitter puffy paint makes tiny raised polka dots on a terra cotta pitcher. Muted colors keep it modern rather than middle school.
Get the full tutorial at Delineate Your Dwelling.
49. Hello There Stenciled Flower Pots
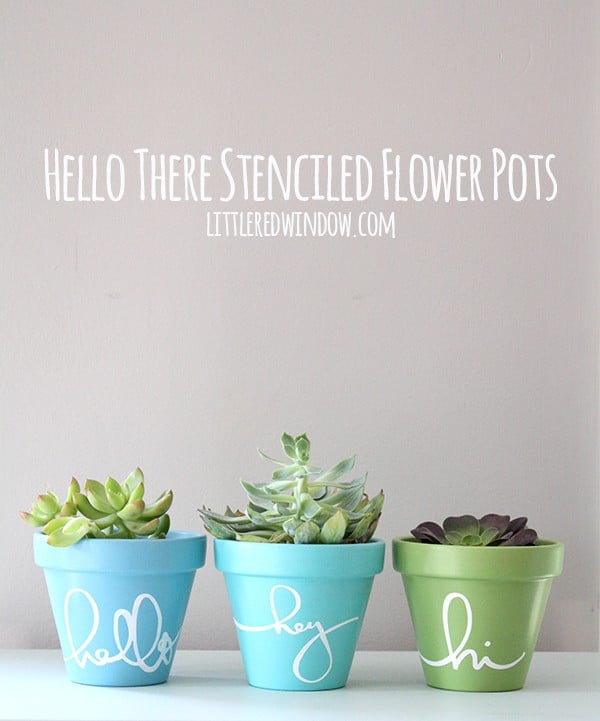
Hello there stenciled flower pots greet everyone in the kitchen with a hello, hey or hi. Give each small pot two coats of outdoor craft paint, even for indoor plants, since terra cotta absorbs moisture every time it’s watered. Cut a script word stencil from contact paper or vinyl with a craft knife or a cutting machine. Press the stencil down hard around every edge (a credit card works) so the paint doesn’t bleed, then dab on about four coats of white. Peel it off and plant succulents.
Get the full tutorial at Little Red Window.
50. Flowerpot Turkey Thanksgiving Favors
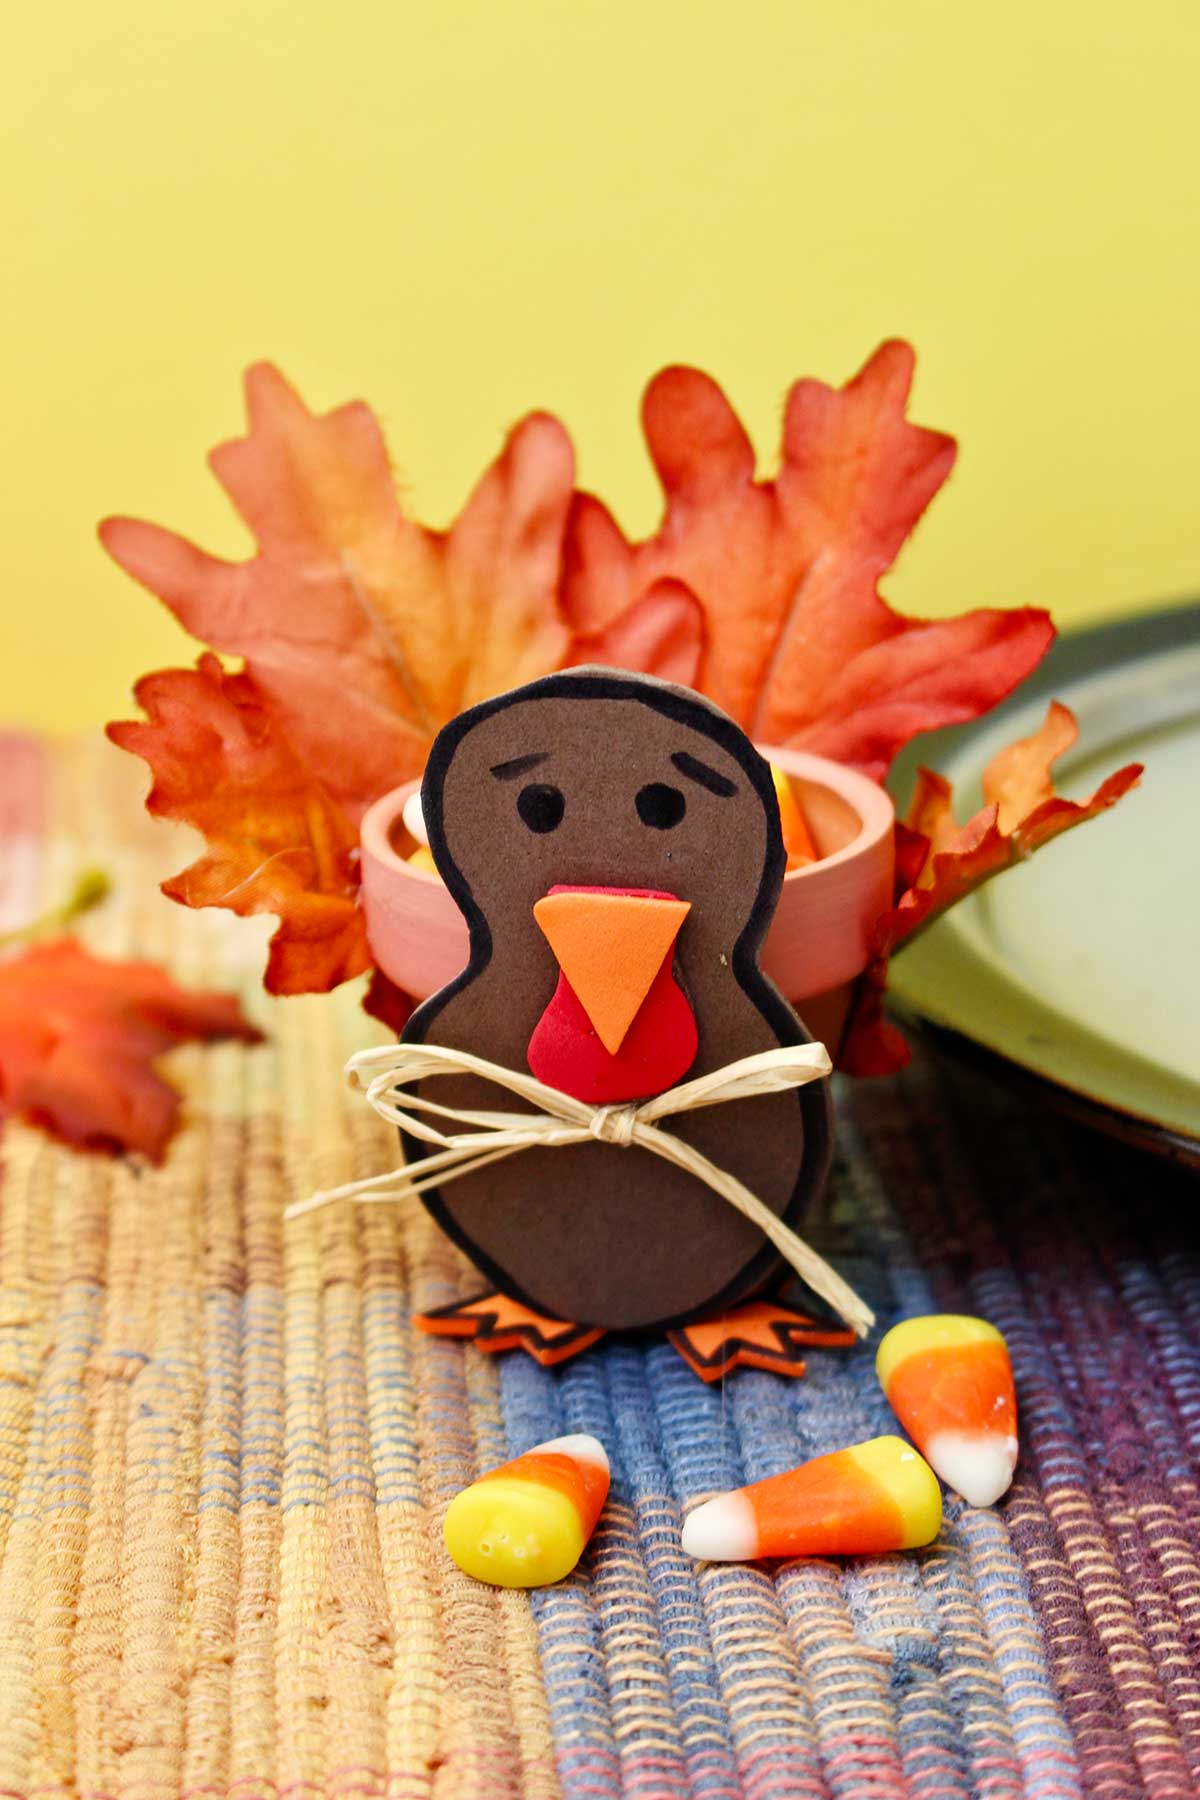
Flowerpot turkey favors hold a handful of candy corn at every place setting. Draw a peanut-shaped turkey body on brown craft foam with a black marker, about half an inch taller than a 2 inch mini flowerpot, and cut just outside the line so the black edge stays (it looks crisp). Add a small orange triangle beak, a red wattle, eyes and little feet. Hot glue fall leaves behind for the tail feathers, glue the turkey to the pot, tie on a raffia bow and fill it with candy.
Get the full tutorial at Welcome To Nana's.
51. Terracotta Clay Hanging Planters
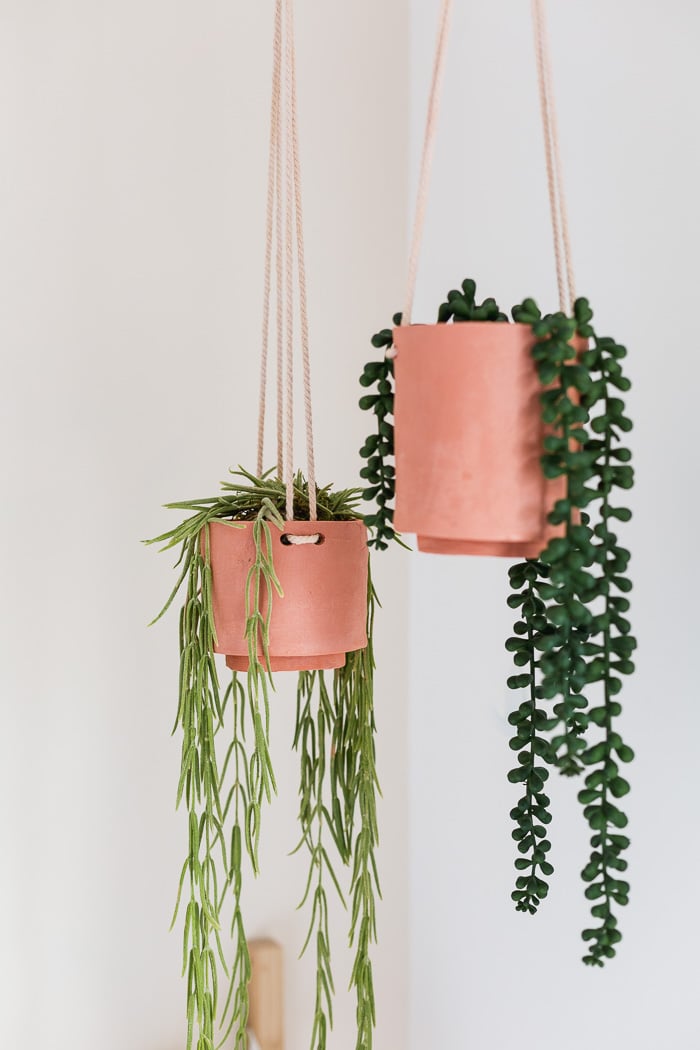
Terracotta clay hanging planters are made from scratch with terracotta-colored air dry clay. Roll the clay to about 3mm thick between wood strips, then cut a base with a large cookie cutter. Roll a long strip, measure it to wrap around the base and push a straw through it at the quarter and three-quarter marks to make holes for the rope. Score the edges, add water, wrap the strip around the base and smooth the seams. Once dry, thread rope through and fill with faux trailing plants, since air dry clay and watering don’t mix.
Get the full tutorial at Fall For DIY.
52. Terra Cotta Pot Succulent Centerpiece
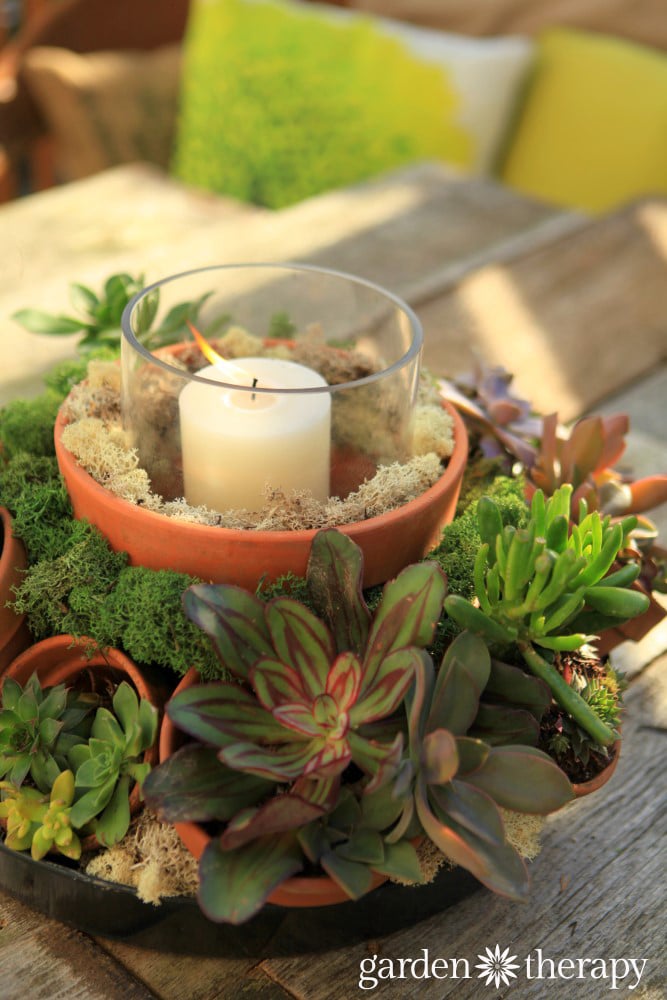
A terra cotta pot succulent centerpiece starts with a humble wire hanging basket frame. Pick a stubby, medium pot for the center and smaller pots to circle the outside, moving them around until it looks balanced. Wire each pot to the frame with strong garden wire, set the whole thing on a plant tray and line the pots with newspaper or coffee filters before filling them with succulent soil. Plant succulents, tuck reindeer moss into the gaps and set a pillar candle in a glass hurricane on top.
Get the full tutorial at Garden Therapy.
53. Textured DIY Flower Pots
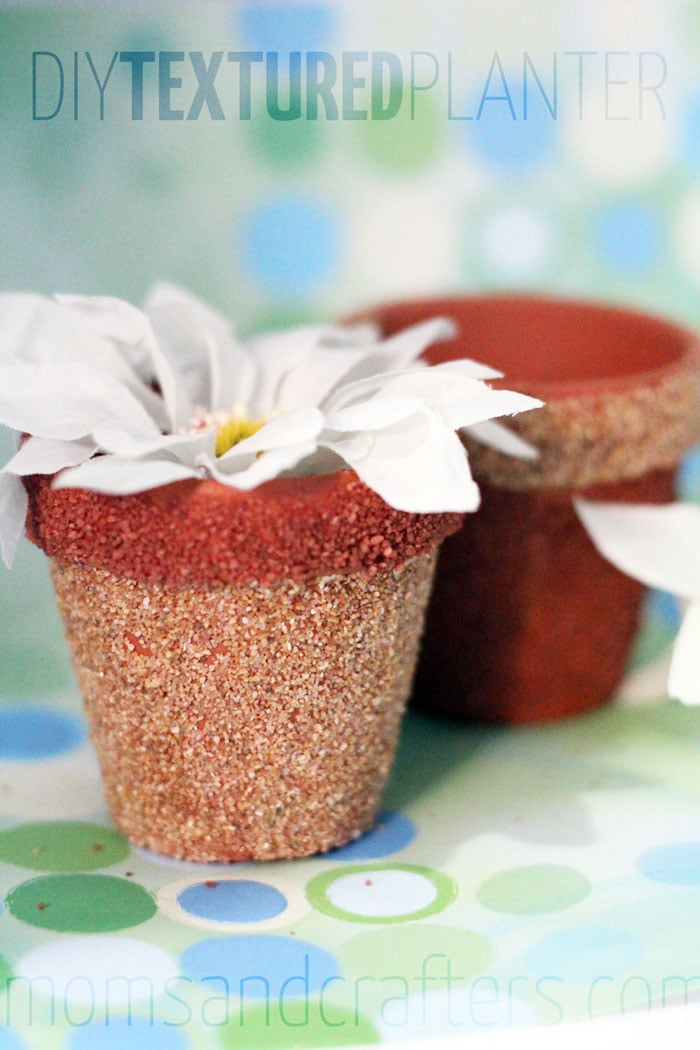
Textured DIY flower pots get their sandy, speckled finish from coarse decorative sand and Mod Podge. Pour the first color of sand into a bowl. Brush Mod Podge generously, but not dripping, on the area of the pot that should get that color, then dip the pot into the bowl and coat it. Let it dry, then repeat with a second color for a two tone look. Natural shades keep the clay’s charm, colored sand goes bold. Seal with a thick coat of Mod Podge, smoothed on with fingers, to stop shedding.
Get the full tutorial at Moms and Crafters.
54. Vintage Crock Numbered Planters
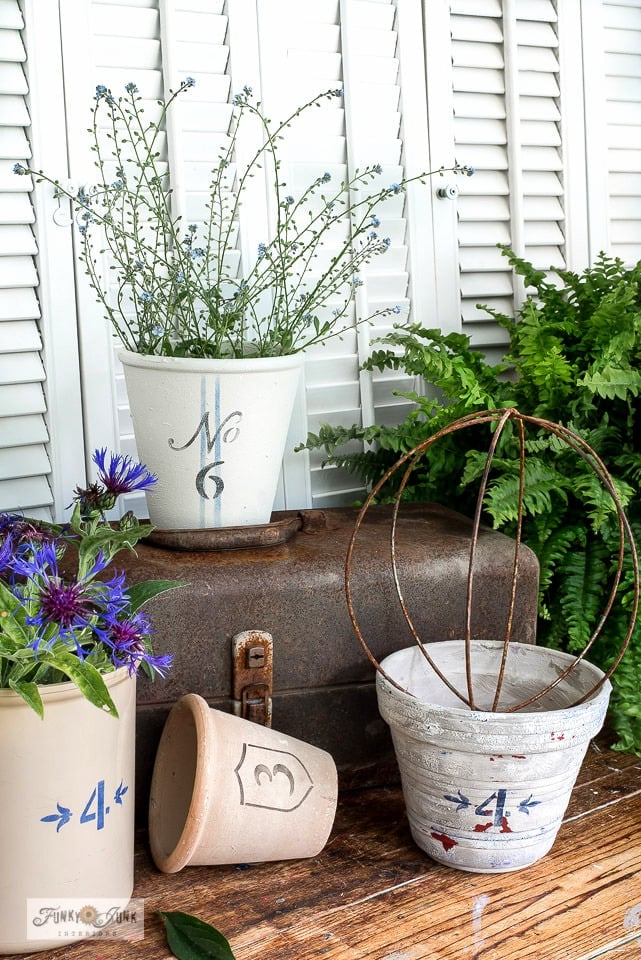
Vintage crock numbered planters turn any plant pot, even a $1 plastic thrift find, into something that looks like an antique stoneware crock. First mix a texturizing powder into paint to give the pot an old world clay finish and brush it on. Once it’s dry, stencil crock-style numbers with little arrow borders in blue, brown or black. The results look straight out of a farmhouse pantry. Fill them with ferns and wildflowers, or use them as storage for kitchen utensils and office supplies.
Get the full tutorial at Funky Junk Interiors.