These watercolor painting tutorials for beginners cover everything from the first wash to a finished piece worth framing. Learn the basics with an apple, loose flowers, a stippled lavender sprig and a complete how to watercolor guide, then try the tricks that make watercolor so much fun: salt for agate speckles, crayon and vinyl resists for crisp white words and a roller for brick walls.
There are easy watercolor painting ideas for kids too, like wet on wet process art, homemade paints and salt painting with glue, plus projects that leave the paper behind entirely: a painted pillow, swirly plates, art on wood and a whole watercolor wall. Every tutorial here is free. One tip before starting: tape your paper down on all four sides, because 140 lb watercolor paper still buckles when it gets really wet.
Watercolor Techniques and Tutorials
1. How to Paint an Apple With Watercolor

An apple is one of the friendliest first subjects in watercolor, and this free step by step lesson proves it. The outline is traced onto the paper, then a pale yellow wash goes down first so it can glow through later. Layers of crimson with a touch of brown follow the curve of the fruit, and a highlight is lifted out with a damp brush to reveal the yellow underneath. More layers deepen the shading around the stem until the apple looks round enough to pick up.
Get the full tutorial at artinstructionblog.
2. Loose Watercolor Flowers Tutorial

Loose watercolor flowers are the happiest way to practice brush control, and nothing has to look botanically correct. Petals go down as quick presses of a round brush in purple, plum and soft blue, with a darker dot of color dropped into each center while the paint is still wet so it blooms outward. Thin stems are pulled up in a single stroke of pale green. Paint a whole page of them and the loose, airy style starts to come naturally.
Get the full tutorial at thepostmansknock.
3. Crepe Paper and Watercolor Flower

Watercolor paint on crepe paper makes a soft, blushing paper flower that looks almost real. Petals are cut from white crepe, draped over an upside down microwave safe bowl and misted with water so they curl into shape. Paint is brushed on and allowed to run down each petal, getting lighter toward the edge. A 30 second spin in the microwave dries them in their cupped shape. The petals are then hot glued around an old faux flower stem and wrapped with florist tape.
Get the full tutorial at craftberrybush.
4. How to Paint a Venice Boat in Watercolor

A water taxi cutting through a Venice canal is a dramatic scene that teaches one big lesson: let the background stay quiet. The buildings go in first as a dull, dark wash of cobalt blue and violet with only a few soft yellow highlights, so nothing competes with the boat. The bright turquoise water and the warm wooden boat come next, with crisp white sparkles saved for the end. Wax crayon and white gouache help keep the glints on the water bright.
Get the full tutorial at jenniferbranch.
5. Painted Watercolor Pillow

A painted watercolor pillow brings soft pastel color to a sofa without any dyeing. Watercolor style washes of pink, blue and lavender are painted onto sturdy pale fabric, letting the colors bleed and blend into each other the way paint does on paper. Thick fabrics like canvas, twill or linen work best because they hold their shape and hide the pillow form. Once dry, the fabric is sewn into an envelope closure cover, which slips on and off a pillow form with no zipper needed.
Get the full tutorial at tidbits-cami.
6. Brick Texture in Watercolor

Painting a believable brick wall is all about texture, and this technique gets it with a roller. Masking fluid protects the mortar lines first. Then a damp roller loaded with paint is rolled across the bricks, leaving a mix of completely dry spots and patches of color that look like worn, pitted stone. Experimenting with how wet the roller is changes the result. Once dry, the masking fluid is rubbed away and the background and brick shadows are painted in.
Get the full tutorial at fenfolio.
7. How to Paint People in Watercolor

Little figures bring a beach or street scene to life, and they are much simpler than they look. This lesson keeps people loose: a small head, a shaped body block in a bright shirt color, then legs that taper to almost nothing at the feet. A long, soft shadow on the sand anchors each figure. The secret is to suggest rather than draw, leaving out faces and fine details so the figures feel like they are moving.
Get the full tutorial at pjcookartist.
8. How to Paint a Rainy Cityscape

A rainy city street is the perfect watercolor subject, because wet paint already looks like wet pavement. The paper is stretched and the buildings, cars and traffic lights are sketched in pencil. Masking fluid saves the white spots for headlights and lamps. Then washes go on loose and wet, letting colors run together for those blurry reflections, and coarse salt sprinkled into damp paint adds the speckle of raindrops. Peel away the mask at the end and the lights glow.
Get the full tutorial at paintingdemos.
9. Step by Step Watercolor Farm Scene

A quiet farm on a hillside is a lovely way to practice landscape layering. The sky goes in first with soft washes of blue and violet, left to dry before the hills start. Warm golds and browns build the grassy slopes from back to front, with the far fields kept paler so they sit in the distance. The white farmhouse, red roofs, bare trees and tiny grazing sheep are added last, with fine brushwork in the foreground grass.
Get the full tutorial at lesliefehling.
10. Simple Watercolor Cards

Simple watercolor cards prove you do not need to paint a masterpiece to make something sweet. Each card features tiny, cheerful doodles: a steaming teacup, a red balloon, little robots and aliens, a rocket in a starry sky. Small subjects mean small mistakes, and a few strokes of color plus a fine pen line do most of the work. Paint a stack at once and there is always a handmade card ready for a birthday or a quick thank you.
Get the full tutorial at createinthechaos.
11. Watercolor Agate Slices

Watercolor agate slices look like polished stone, and the texture comes from a kitchen staple. Taped down 140 lb watercolor paper keeps everything flat. Start with a light wash in the agate shape, then add darker rings working inward, letting colors blend wet in some spots and stay crisp in others. Coarse salt dropped into the damp paint pulls the pigment into crystal speckles. Looking at photos of real agate first helps place the lights and darks.
Get the full tutorial at persialou.
12. Watercolor Resist Technique

The resist technique uses wax to keep watercolor off the paper wherever it is drawn. Words or shapes are written in crayon or a white wax resist, then a wash of watercolor goes over the top and simply beads away from the wax. The lettering pops out bright and clean against the color. Here it fills a journaling page with stripes of rainbow color behind words, but the same trick works on cards, bookmarks and kids’ secret message art.
Get the full tutorial at illustratedfaith.
13. Watercolor Succulent Tutorial

Watercolor succulents and cacti are forgiving subjects since no two real plants look alike anyway. For a spiky cactus, pencil a large oval with smaller ovals stacked on top, then wash each one with a light green, adding a second coat at the edges while the first is still wet so it blends. Once dry, spikes are drawn on with a fine pen. Rosette succulents in blue and green follow the same layering, petal by petal.
Get the full tutorial at cutoutandkeep.
14. Herbal Watercolor Paintings

Herbal watercolor paintings make a charming set for a kitchen wall. Each herb gets its own small study: slim chive stems with purple blossoms, tiny thyme leaves, broad oregano. Pale green washes go down first and darker greens are layered on top for depth, then each one is labeled in neat lettering underneath. Framed together in mismatched gold and silver frames, they look like a page from an old botanical book.
Get the full tutorial at thepostmansknock.
15. Watercolor Christmas Card
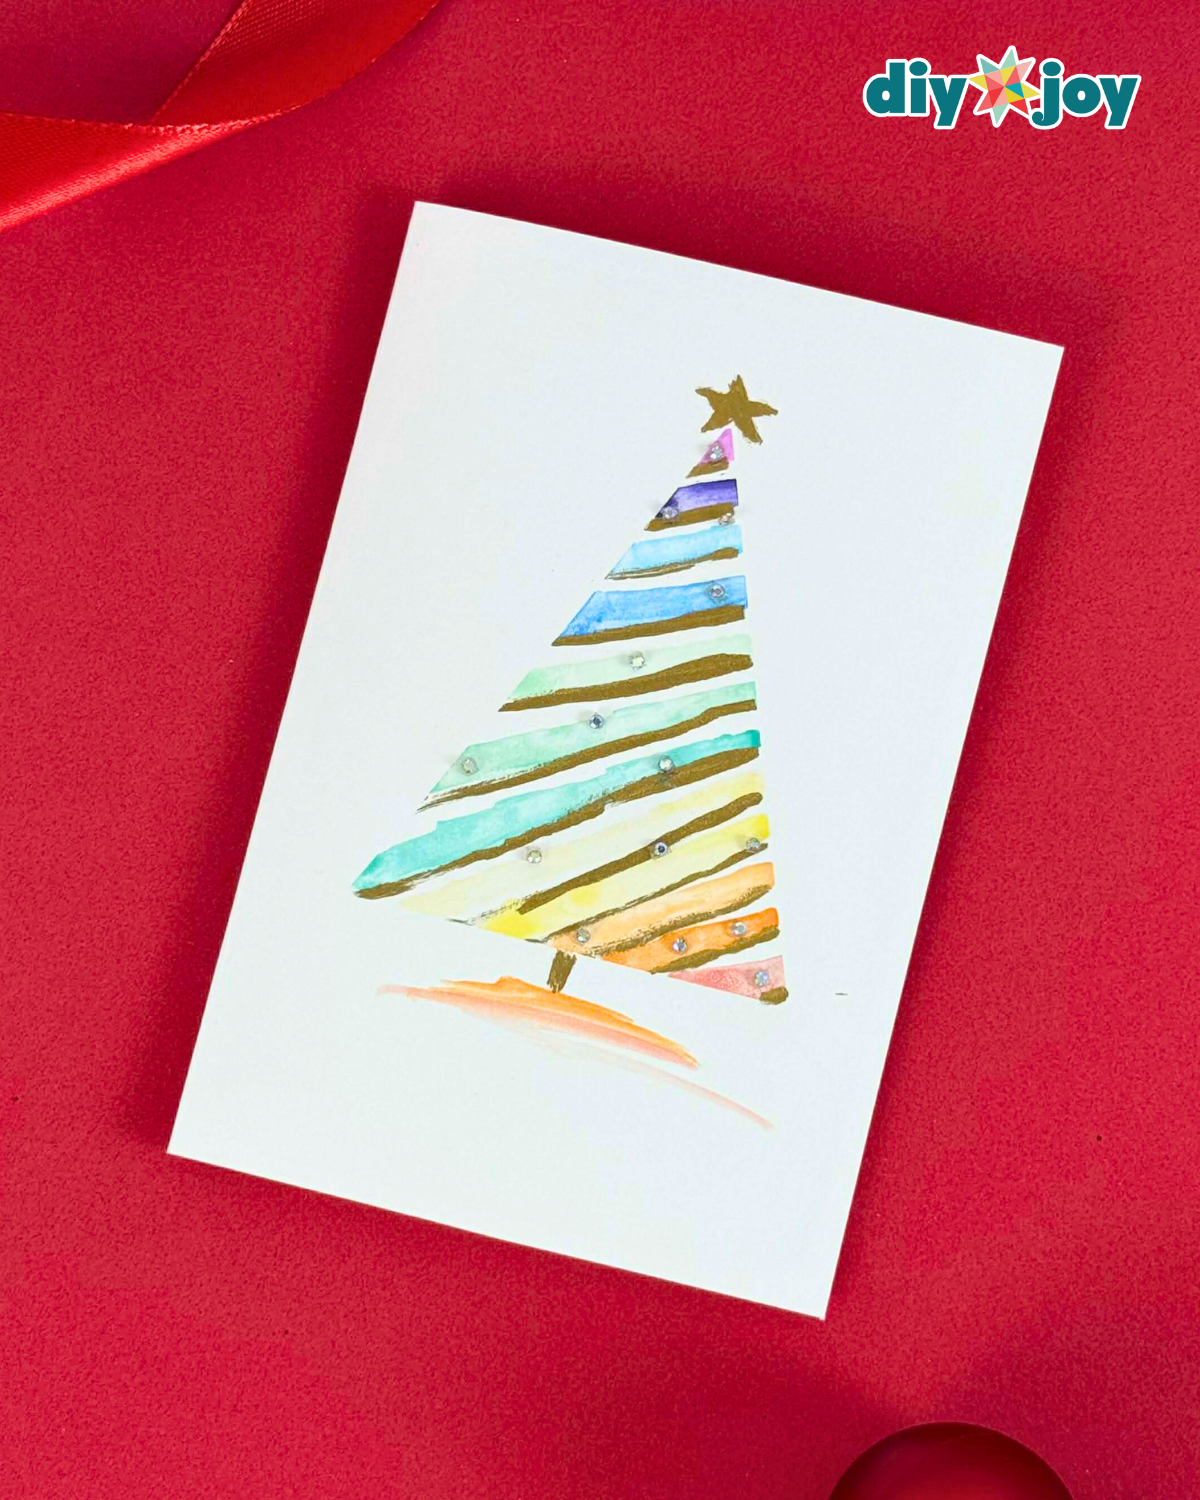
This watercolor Christmas card turns a few stripes of paint into a tree. The triangle is marked out on cardstock, then filled with bands of watercolor in every color, letting each stripe touch the next so the colors run softly together. Thin gold paint lines and a few sticky rhinestones add sparkle, and a gold star finishes the top. Washi tape helps keep the edges neat. It doubles as a gift card holder, so the present arrives looking handmade.
Get the full tutorial at DIY JOY.
16. Salt Painting With Glue and Watercolor
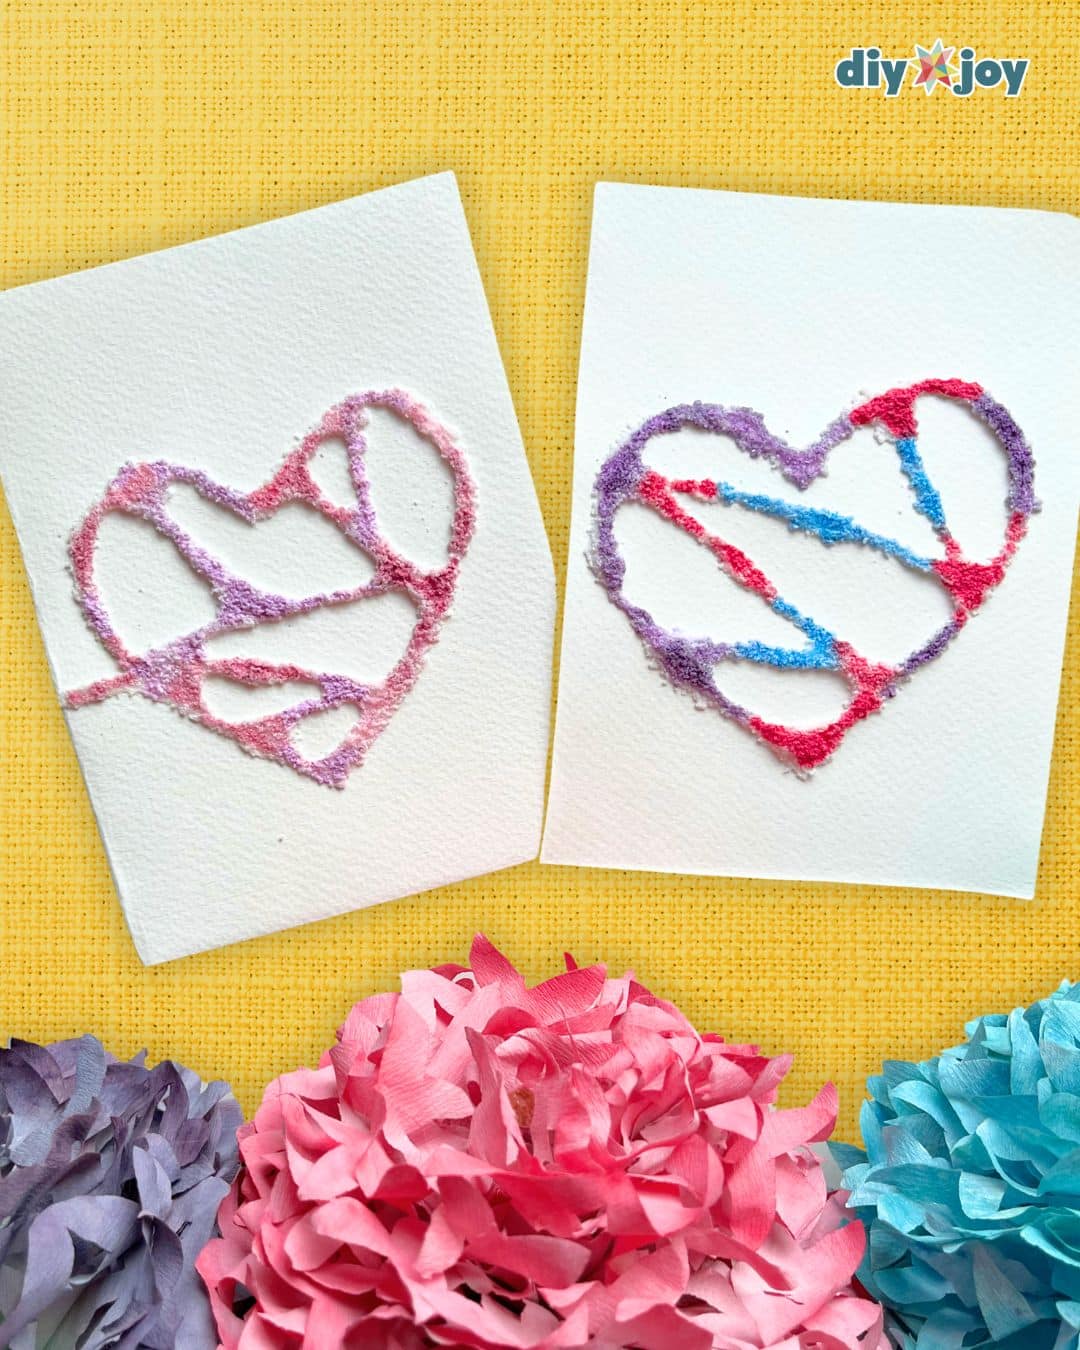
Salt painting is a watercolor project kids get hooked on fast. Draw a shape in white school glue on cardstock, a heart works beautifully, then pour salt over the wet glue and tip off the extra. Touch a dropper or brush of liquid watercolor to the salty lines and the color races along them, blending where two shades meet. Once dry, the raised, sparkly texture looks great. Thick paper helps prevent warping from all that water.
Get the full tutorial at DIY JOY.
17. How to Watercolor for Beginners
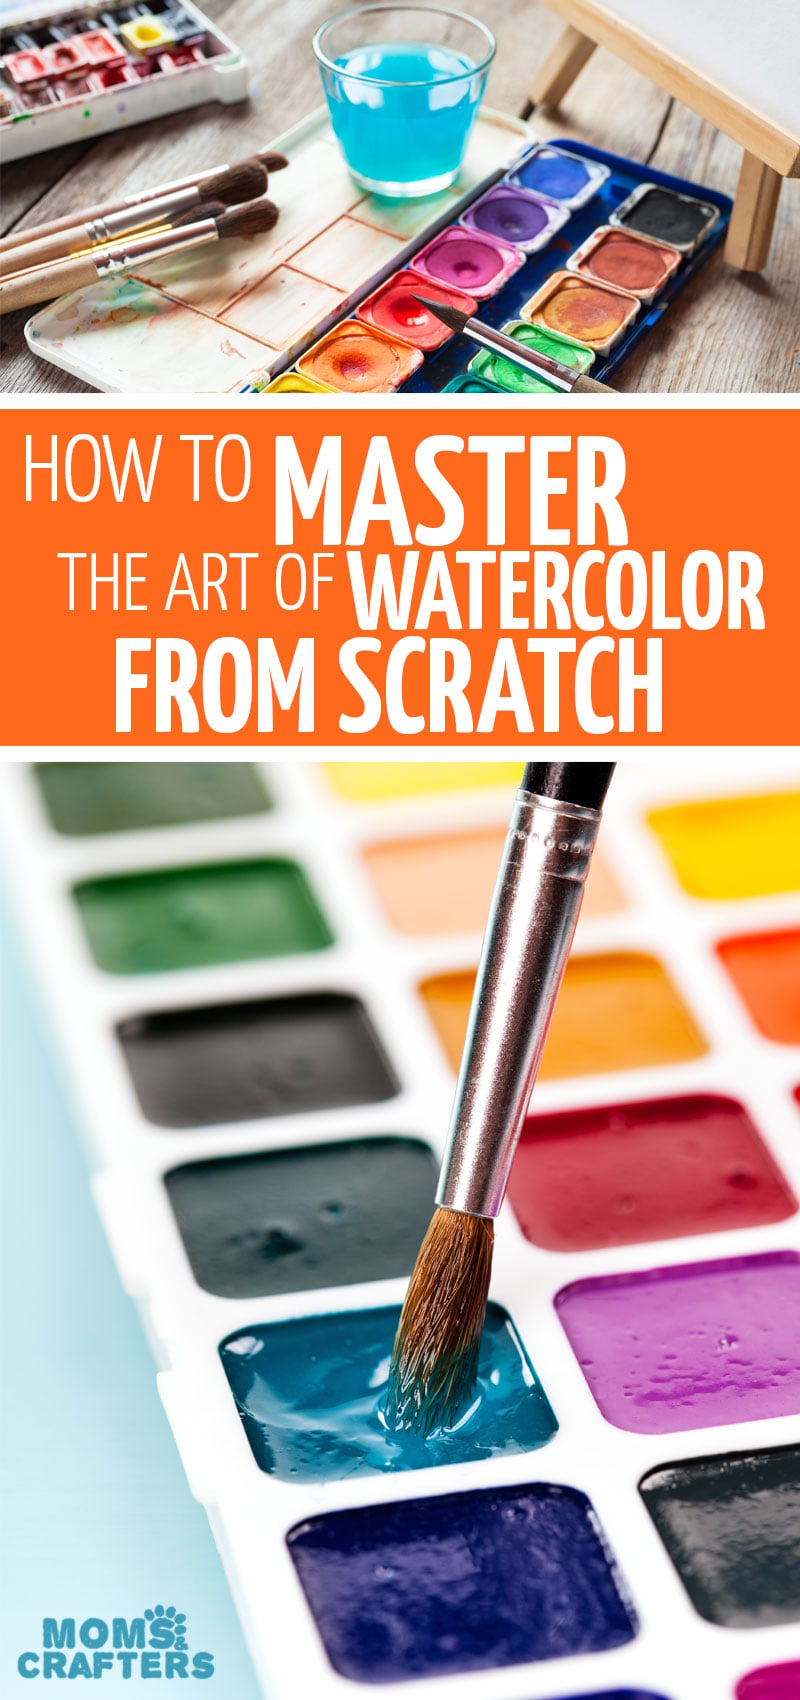
This complete beginner guide to watercolor starts at the very beginning, with choosing paints, brushes and paper that suit the way you want to work. From there it walks through the basic techniques worth practicing before any real painting: flat and graded washes, wet on wet, wet on dry and simple color mixing. Recommended books are suggested for anyone who wants to go deeper. It is a great page to bookmark before trying any other tutorial here.
Get the full tutorial at momsandcrafters.com.
18. Abstract Watercolor Triptych
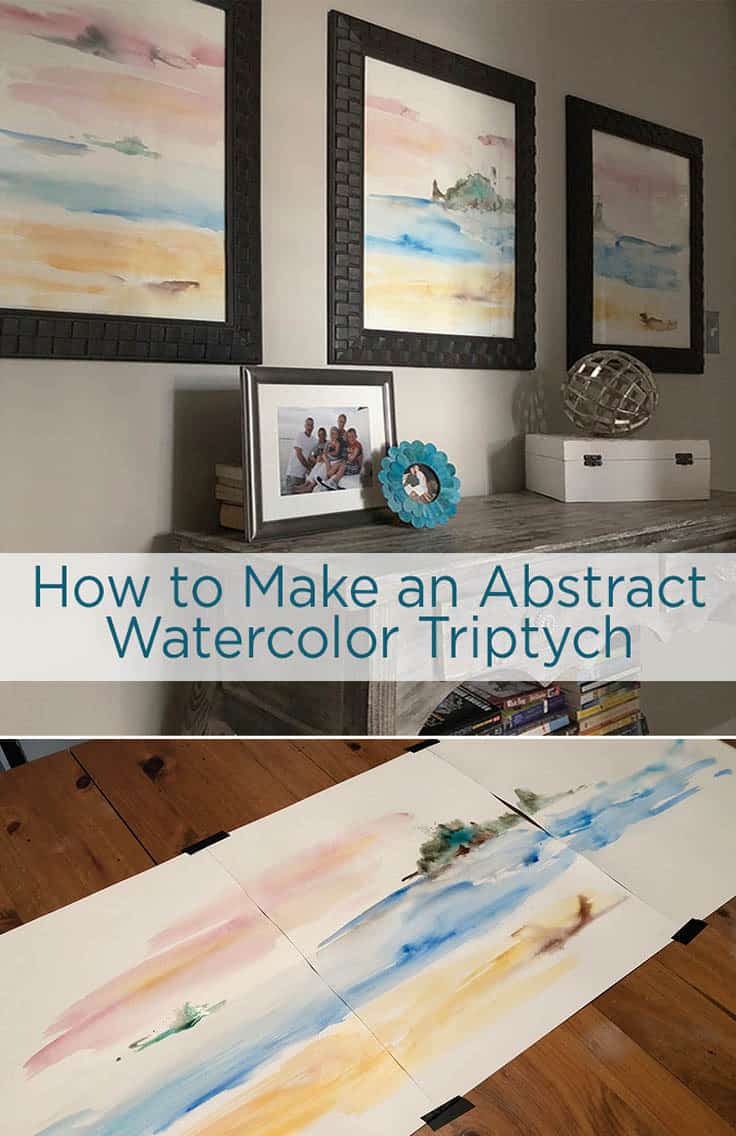
An abstract watercolor triptych gives a big blank wall real art for very little money. Three sheets of 140 lb cold press paper are taped together on the back so they can be painted as one piece. With one water jar for rinsing and one for spreading water, soft washes of pink, gold and blue are swept across all three sheets so the colors flow from panel to panel. Separated and framed in reused frames, they read as one calm seascape.
Get the full tutorial at kenarry.com.
19. Homemade Watercolor Paints
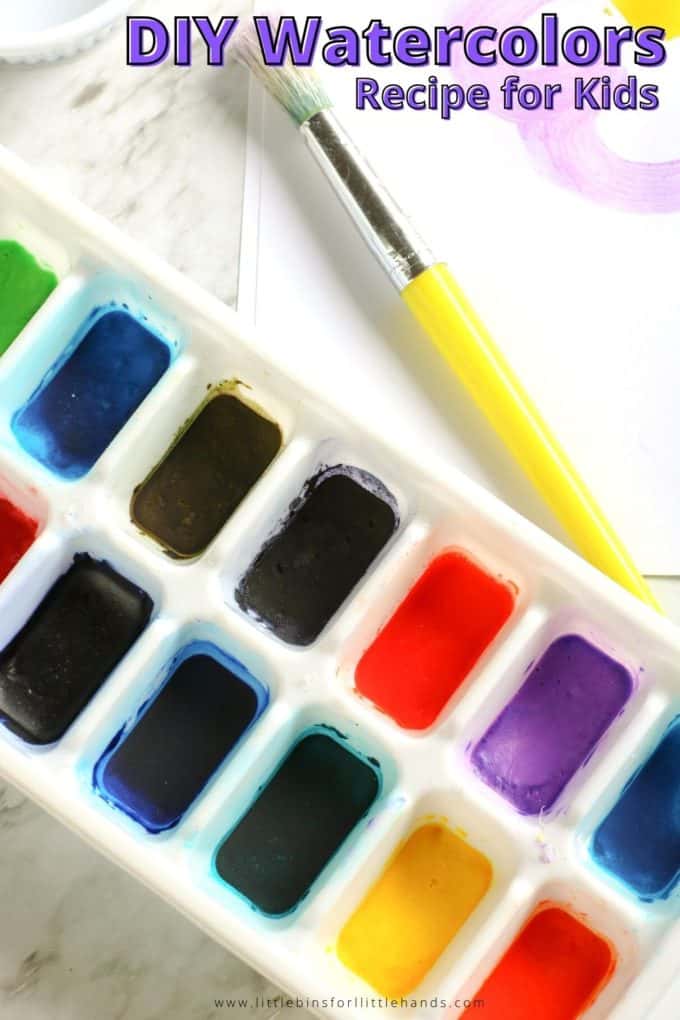
Homemade watercolor paints mix up from pantry staples, and kids love making them almost as much as using them. Baking soda and white vinegar fizz together first, then cornstarch and a little light corn syrup are stirred in to make a smooth base. Divided into an ice cube tray, each well gets gel or paste food coloring. Let them dry and they work just like a store bought pan set, ready to rewet with a brush again and again.
Get the full tutorial at littlebinsforlittlehands.com.
20. Watercolor Gem Art
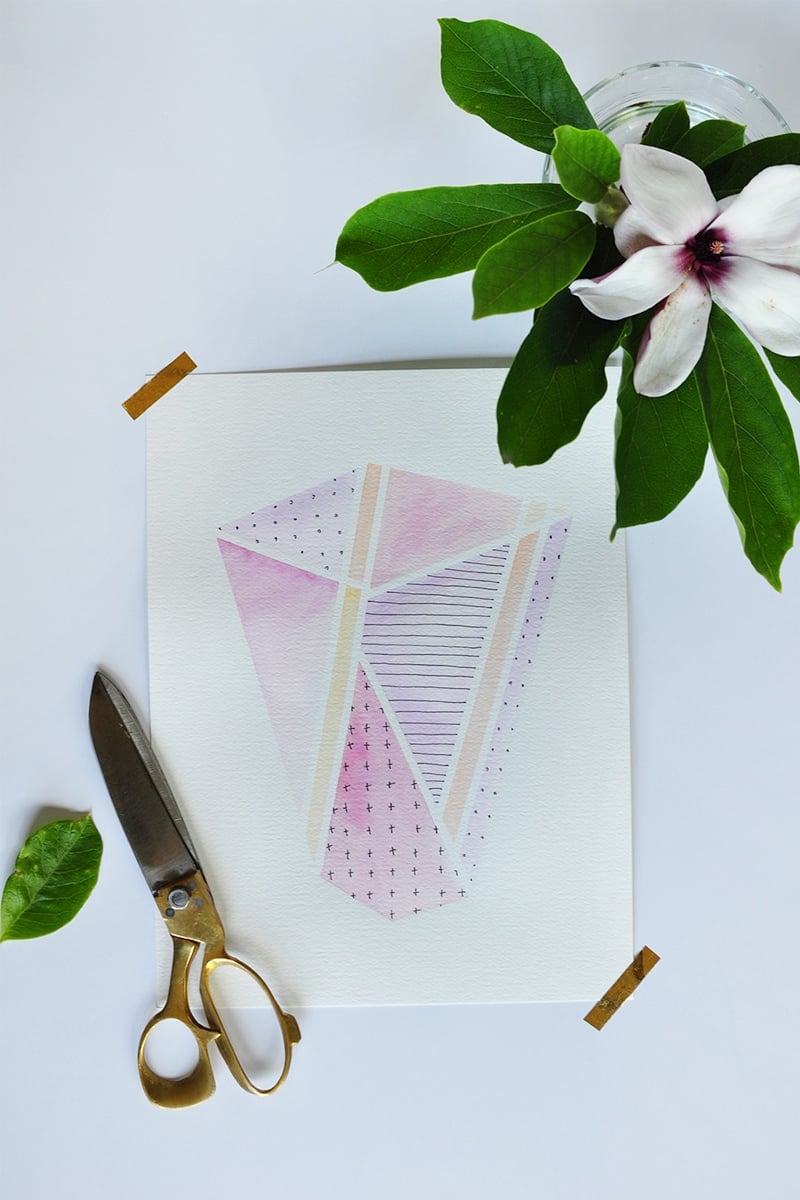
Watercolor gem art uses painter’s tape to do all the precise work. A thick tape lays out the big gem outline on watercolor paper, then thinner tape divides the inside into facets, with a few stripes added for fun. Pressing all the tape edges down firmly is the key to crisp lines. Each little shape is filled with orange, yellow, purple or fuchsia, then the tape is peeled away once dry. A thin ink pen adds dots and lines for a modern finish.
Get the full tutorial at delineateyourdwelling.com.
21. Tropical Watercolor Art on Wood
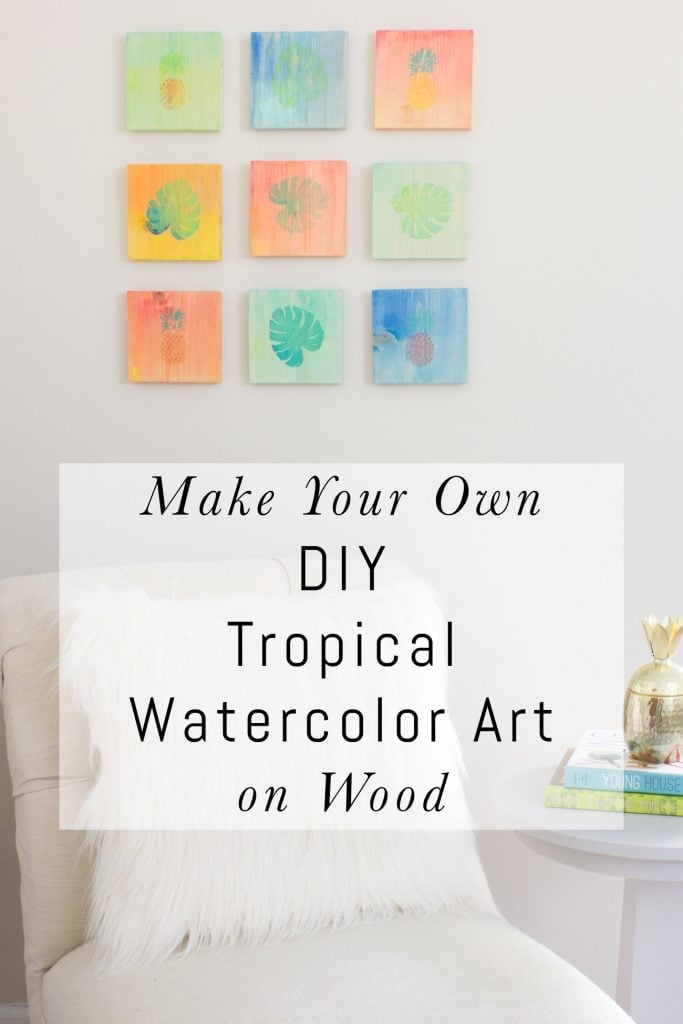
Watercolor on wood gives tropical wall art a soft, natural grain. Squares are cut from a 1×6 board and sanded, or pre-cut wood blocks save a step. Each square is painted in three ombre bands from one color family, with water used to fade them into each other, blotting with a paper towel whenever the wood gets too wet. Leaf and pineapple shapes add the tropical touch. Hung in a grid of nine, they make a bright gallery wall.
Get the full tutorial at erinspain.com.
22. Abstract Watercolor Art for Framing
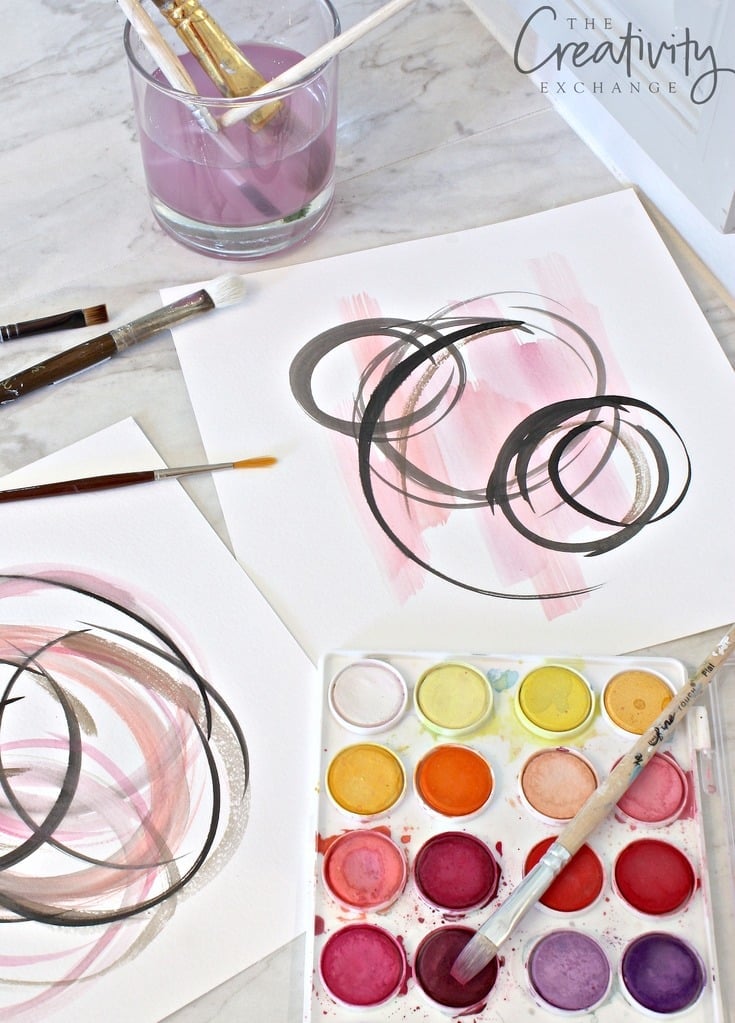
Abstract watercolor art for framing is the most freeing kind of painting, because there is no subject to get wrong. Soft pink and blush washes are laid down loosely, then bold swirling circles in black or gray are brushed over the top once dry. The contrast between the pale washes and the confident dark lines is what makes it look designer. An inexpensive pan set works perfectly. Paint several and frame the favorites.
Get the full tutorial at thecreativityexchange.com.
23. Watercolor Paper Heart Decoration

This watercolor heart decoration starts with a cardboard heart padded with balled up kitchen paper and covered in papier mache strips dipped in a half glue, half water mix. Once dry it is painted in bright pinks and reds with watercolor ink, which gives a mottled, glowing finish. Smaller painted paper hearts are strung on threads hanging from a twig beneath it. The result is a cheerful mobile for Valentine’s Day or a nursery wall.
Get the full tutorial at pillarboxblue.com.
24. Watercolor Tableware
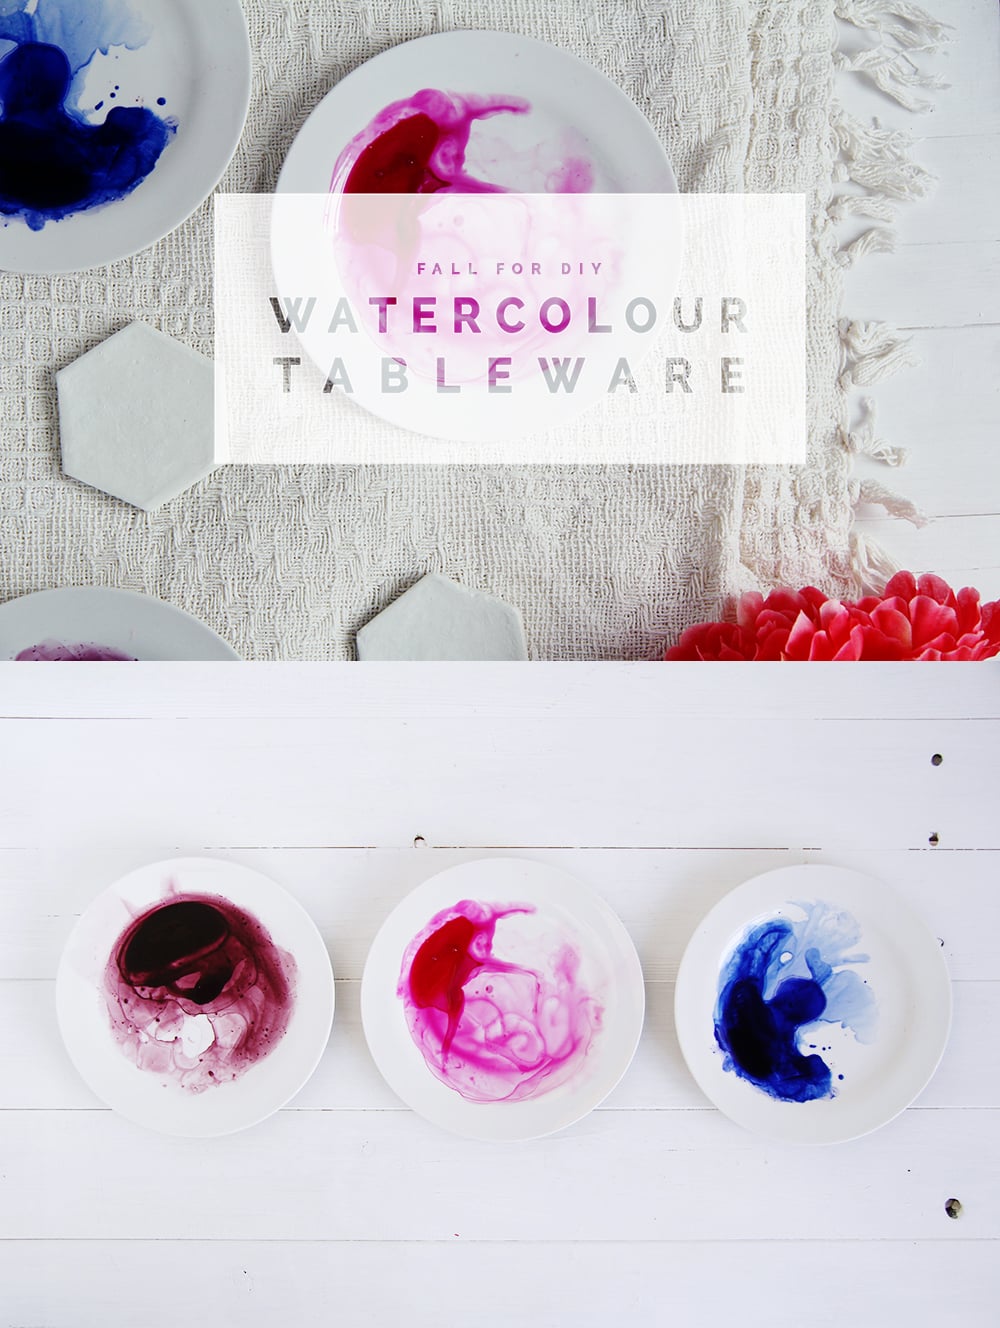
Watercolor tableware uses porcelain paint and plain water to get the look of ink spreading on paper. A good amount of paint is dabbed onto one part of a white plate, then water is dripped at its edge until the color thins and starts to run. Tilting the plate lets it flow in an organic swirl, with paint pooling back to one heavy spot. Each plate comes out different, in deep blue, magenta or plum, and baking sets the paint.
Get the full tutorial at fallfordiy.com.
25. Wet on Wet Watercolor Painting for Kids
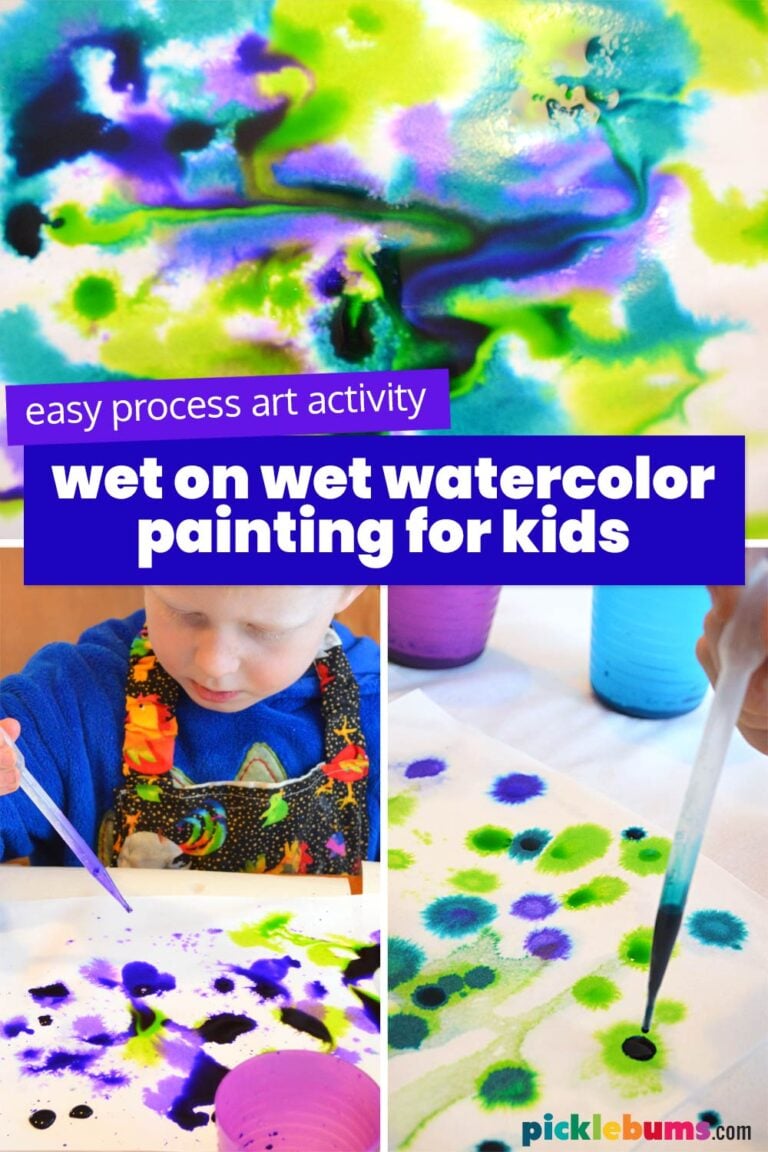
Wet on wet watercolor painting is process art at its most magical. Kids wet the paper first with a squirt bottle or damp sponge, then drop on liquid watercolors with droppers, spoons or brushes and watch the colors bloom and bleed into each other. Watercolor paper works best, though printer paper gives a different, fun effect and takes longer to dry. Cover the table and add smocks, because this one gets happily messy.
Get the full tutorial at picklebums.com.
26. Watercolor Blending With Cricut Markers
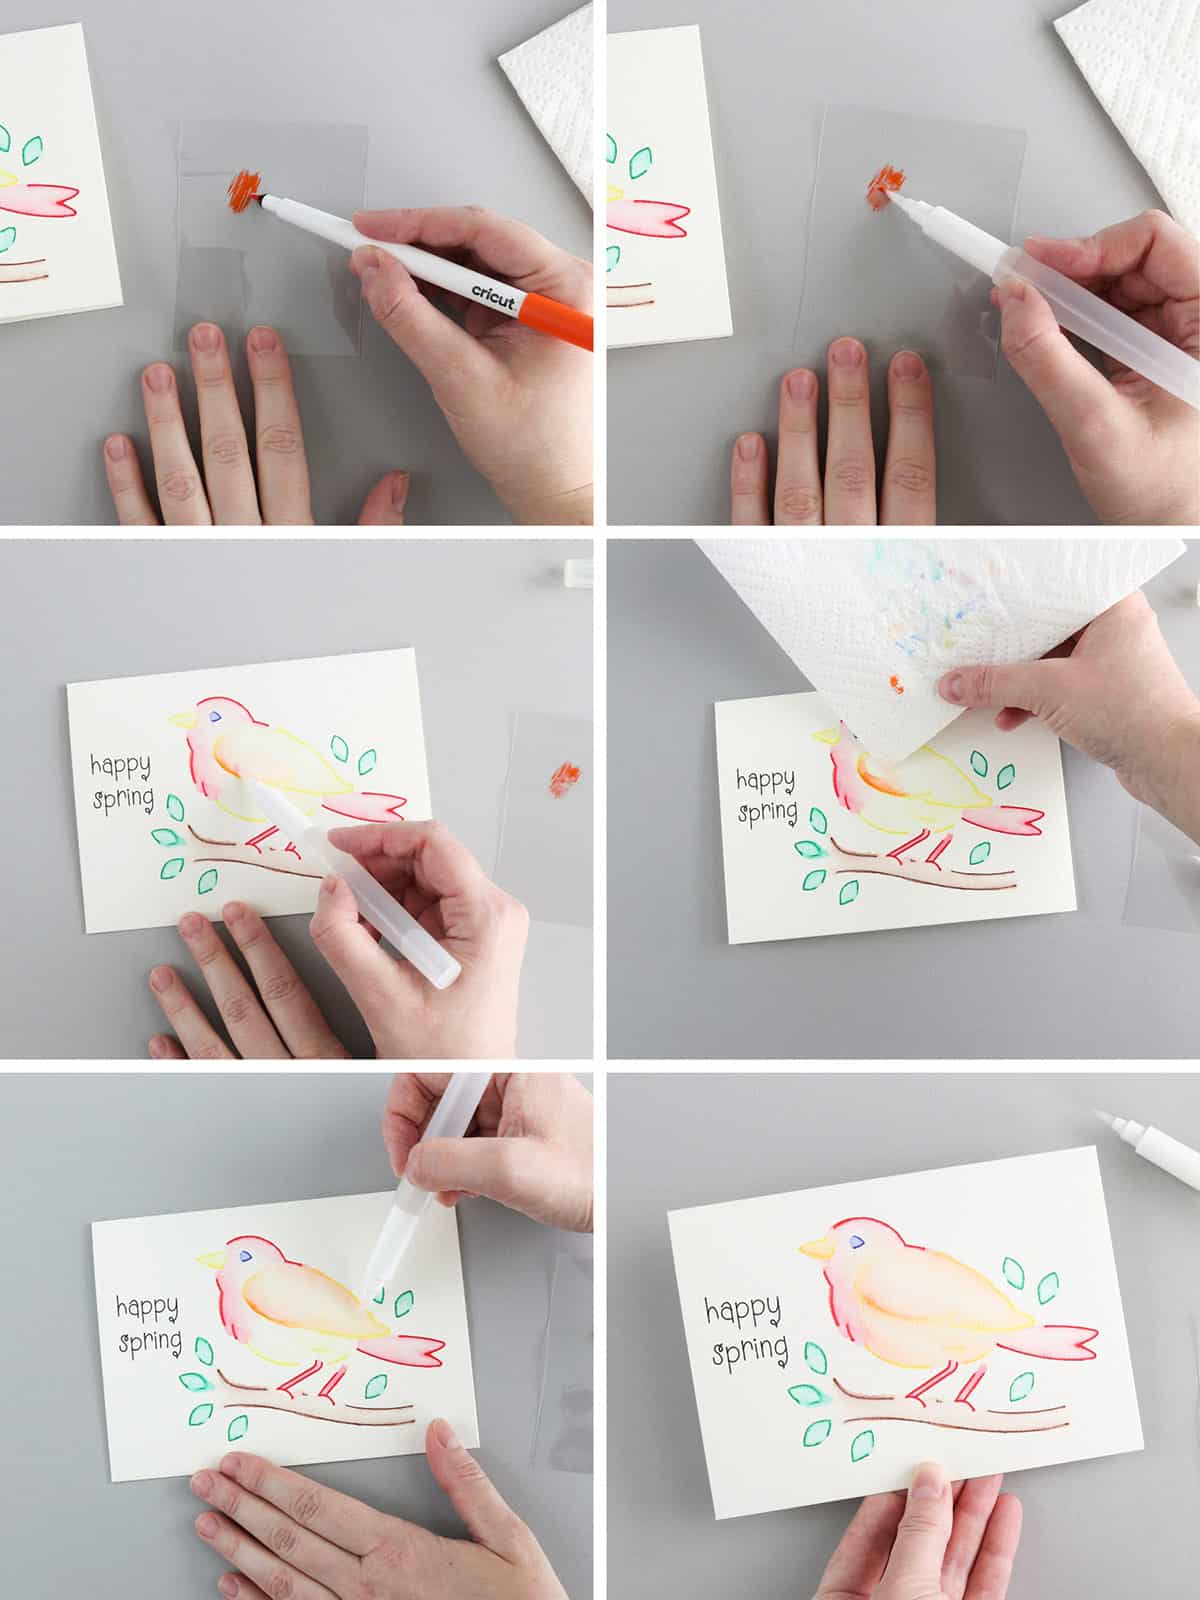
Cricut watercolor markers make watercolor cards possible for anyone who is nervous about a brush. A rectangle set to Guide shows the card size in Design Space, and images filtered for watercolor markers have extra space between lines to stop colors bleeding. The machine draws the design in marker, then a water brush is run along the lines to pull the ink outward into soft color. The result is a sweet painted bird card with crisp outlines.
Get the full tutorial at aubreeoriginals.com.
27. Watercolor Wall Mural
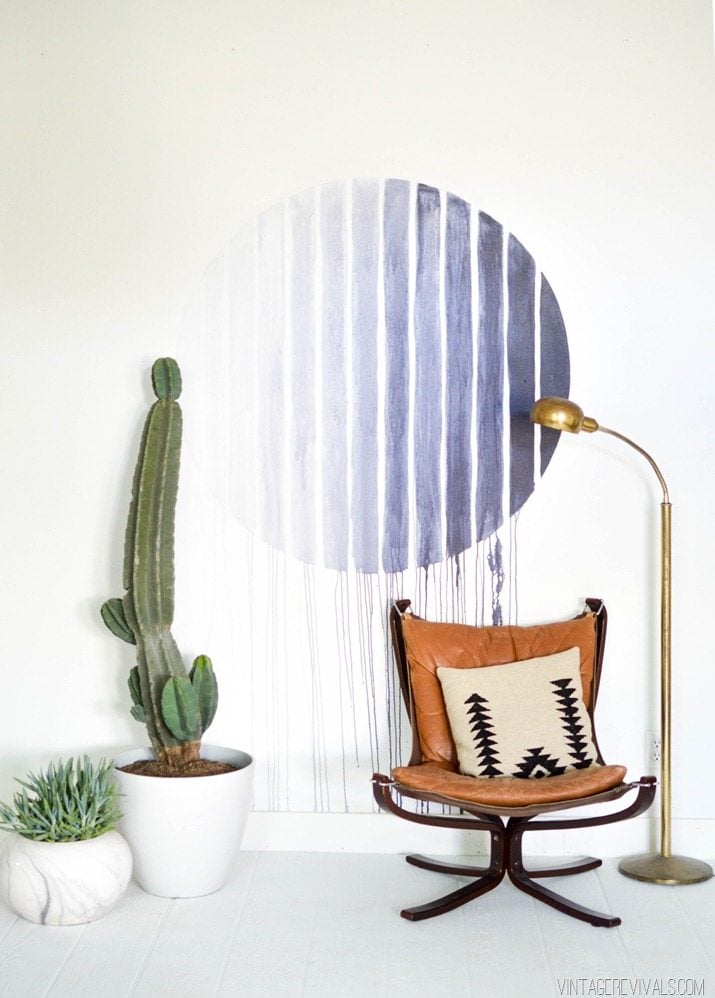
A watercolor wall mural turns a plain wall into a statement without hiring an artist. A huge circle is filled with soft vertical stripes of watered down blue gray paint, each one fading as it runs, so the whole shape looks like a giant watercolor wash. The loose drips are part of the charm, so there is no need to be precise. It pairs beautifully with simple furniture and a big potted cactus for a calm, modern corner.
Get the full tutorial at vintagerevivals.com.
28. Watercolor Butterfly Painting
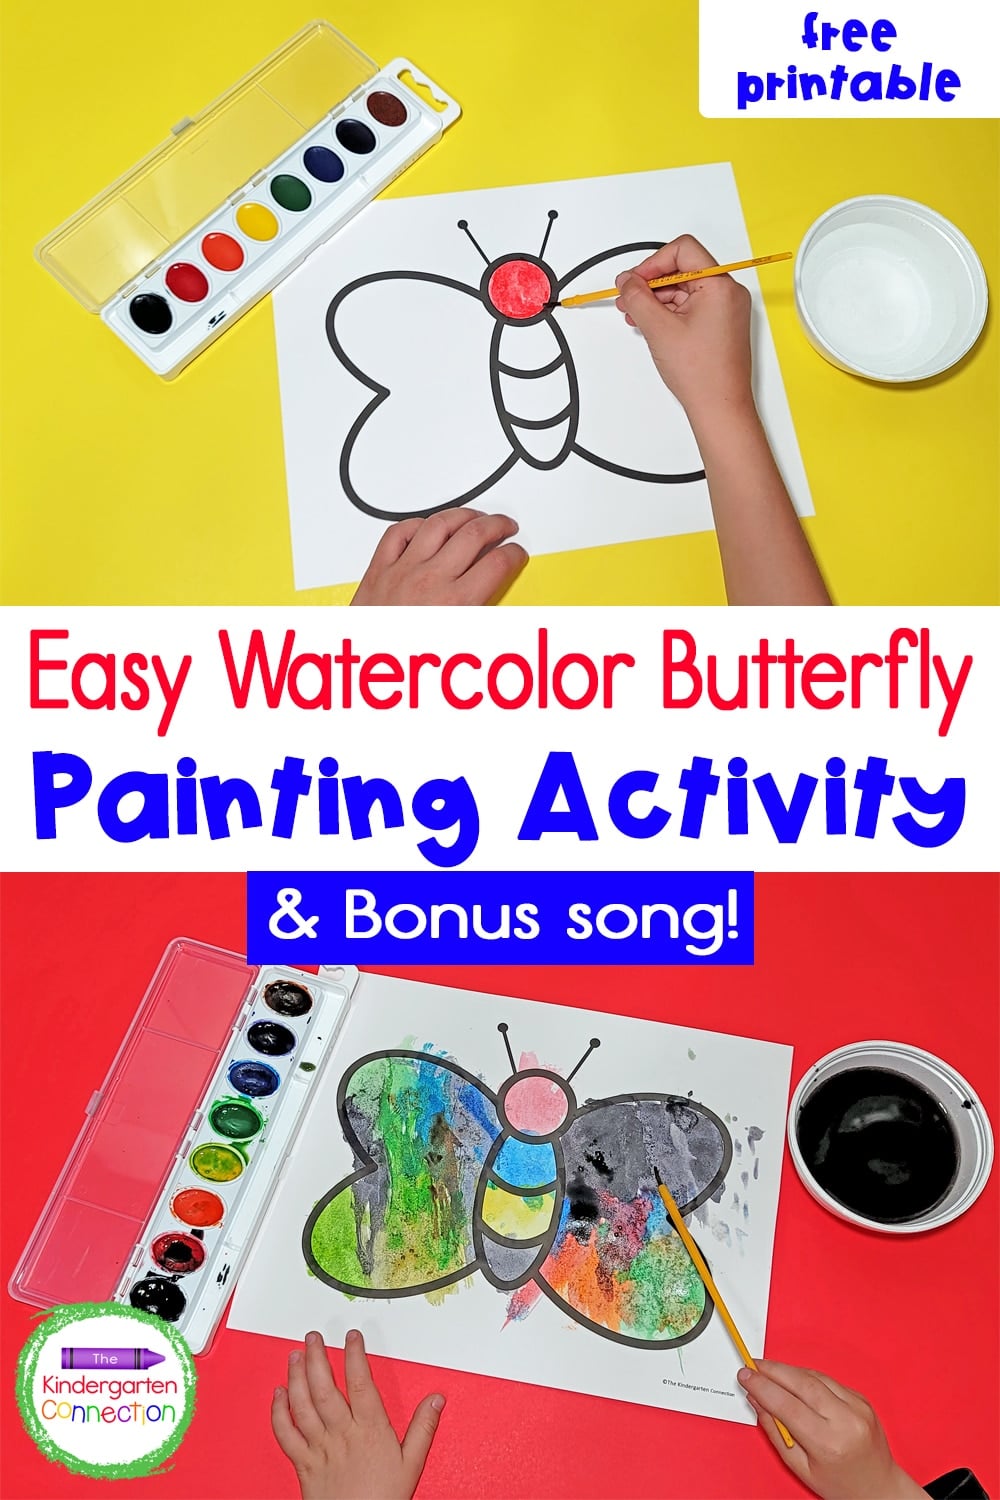
A watercolor butterfly painting is a classroom favorite that sneaks in a little science. A free printable butterfly outline goes on white cardstock, which holds up to wet paint better than regular paper. Before painting, looking at real butterfly photos introduces symmetry, since both wings truly match. Kids can paint matching wings or go completely their own way, because there is no wrong answer. All it takes is a pan of watercolors and a cup of water.
Get the full tutorial at thekindergartenconnection.com.
29. Watercolor Art in Minutes
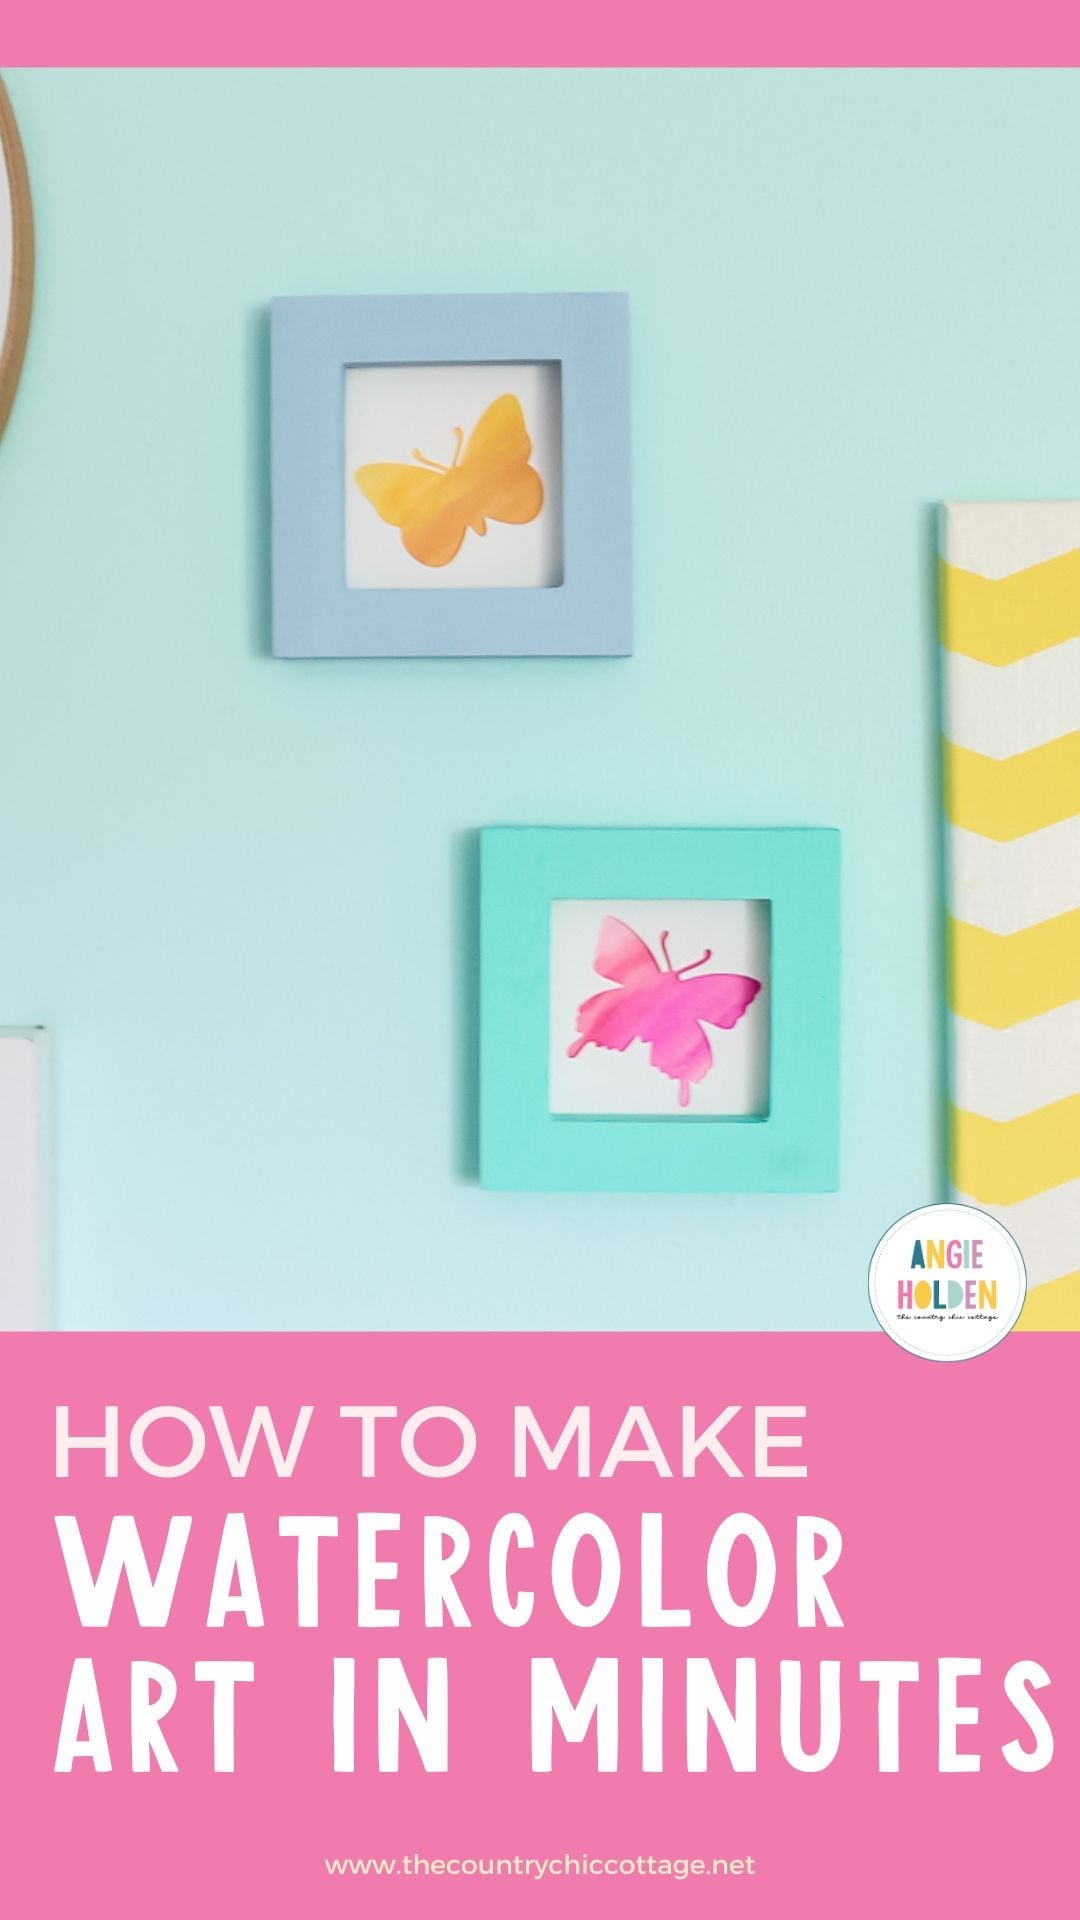
Watercolor art in minutes is exactly what it sounds like, and the cut shapes do the heavy lifting. A sheet is painted with loose washes of pink, orange or yellow, then a die cutter or Cricut cuts a butterfly from the painted paper once it is dry. Popped into a small square frame, each one looks like boutique art. It is easy enough for kids to make on their own and works as a sweet Mother’s Day gift.
Get the full tutorial at thecountrychiccottage.net.
30. Watercolor Hand Lettering for Beginners
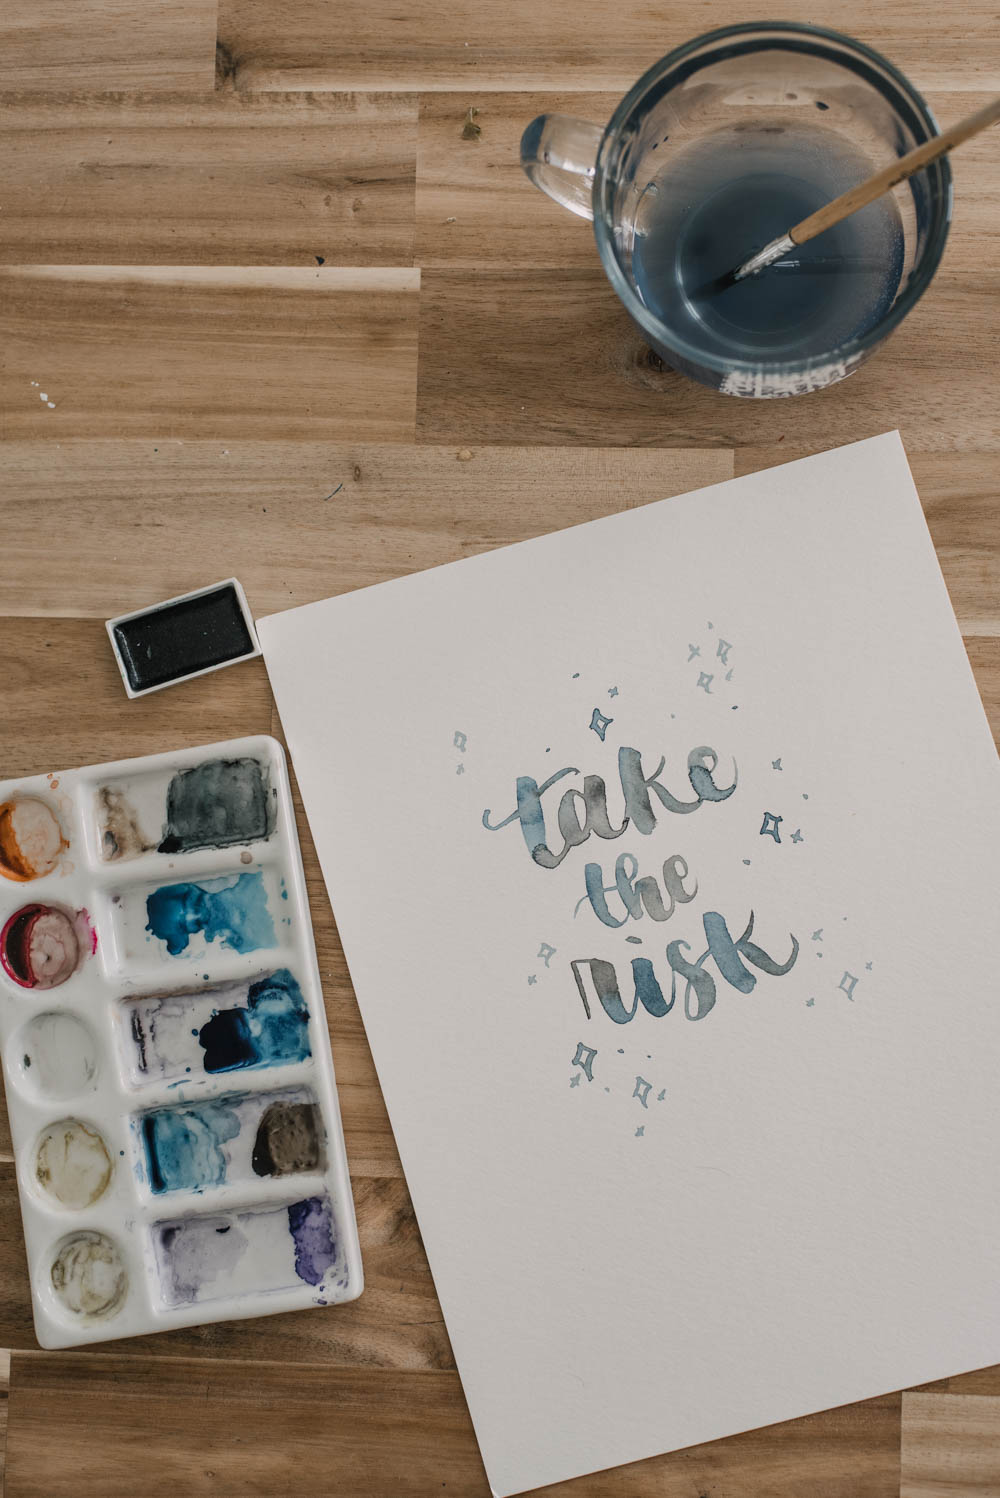
Watercolor hand lettering looks fancy but follows a few simple rules. The big one is keeping each letter wet while it is being painted, because adding color to a stroke that has already dried leaves visible lap marks. Connecting strokes are painted while the previous one is still damp so the pigment can be nudged to blend. A letter that dried too soon gets repainted whole. Pressure on downstrokes and a light touch on upstrokes create the thick and thin look.
Get the full tutorial at lemonthistle.com.
31. Watercolor Art With a Vinyl Stencil
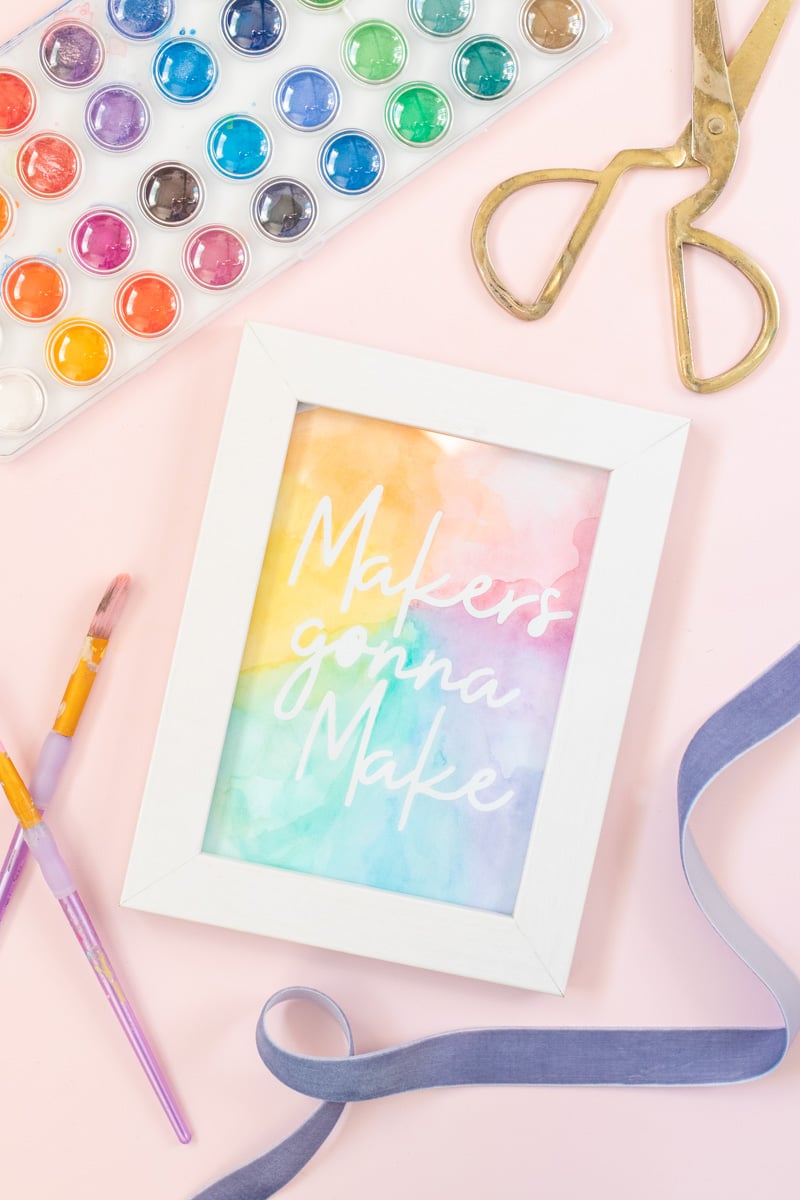
This watercolor art hack uses removable vinyl as a resist, so the lettering stays bright white. A word or phrase is cut from removable vinyl, weeded, and moved onto white cardstock with transfer tape, pressed gently so it does not tear the paper later. Then watercolors are painted right over the top in a rainbow color wheel pattern, blending as they go. Peeling the vinyl once dry reveals crisp white words, ready to frame.
Get the full tutorial at clubcrafted.com.
32. Watercolor Flower Garden Card
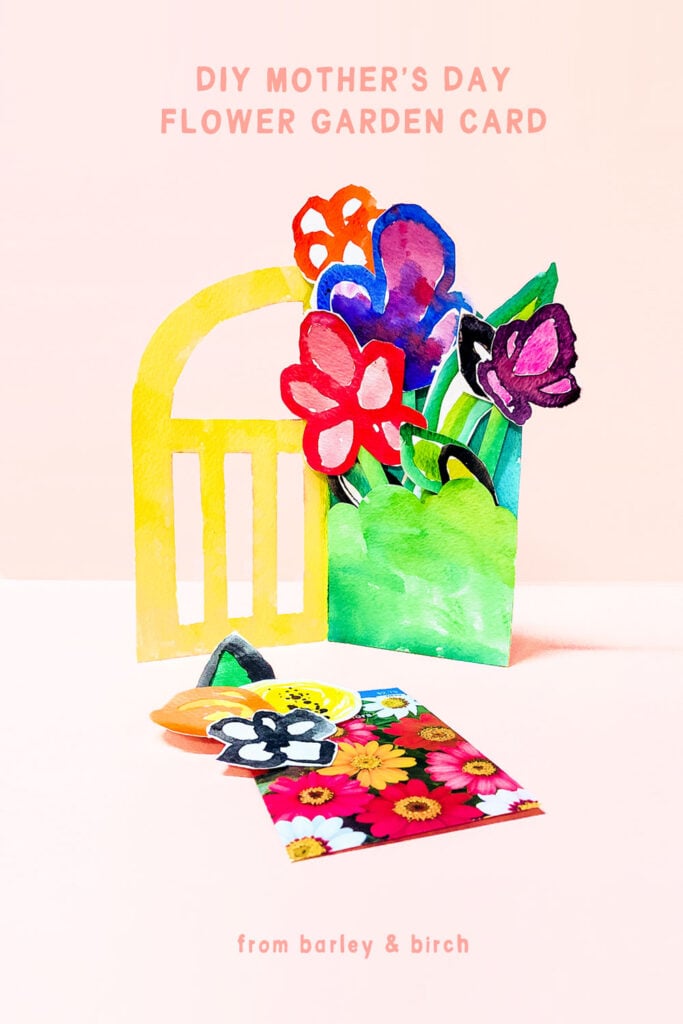
A watercolor flower garden card pops up with a little garden gate on the front. The flowers and leaves are painted a few different ways: bold outlines filled with color, simple painted circles and playful splatters. Once dry they are cut out and tucked behind a cut paper gate so the blooms peek over the top. Kids can paint the flowers while grownups handle the cutting, and the card makes a lovely Mother’s Day surprise.
Get the full tutorial at barleyandbirch.com.
33. How to Paint Watercolor Lavender
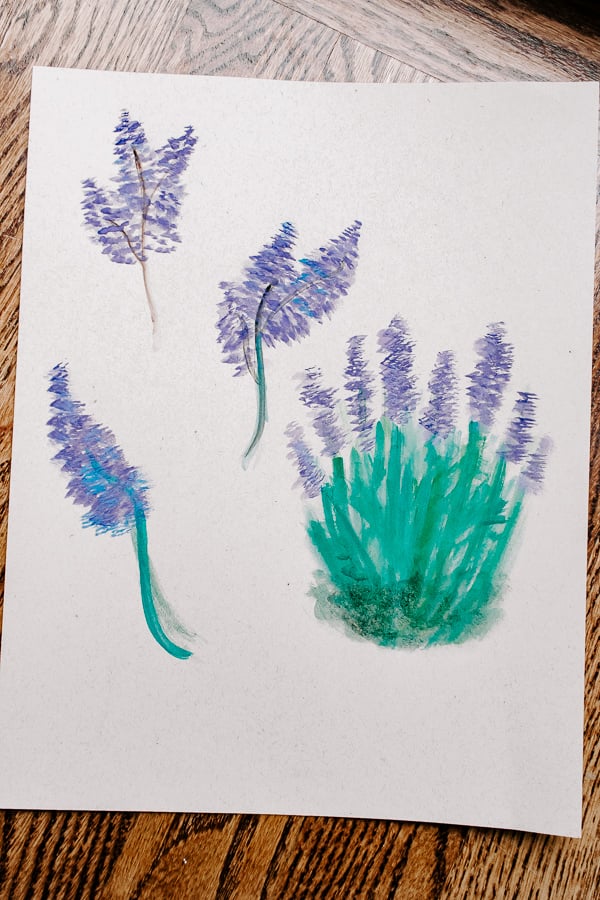
Lavender might be the easiest flower in all of watercolor, which makes it a perfect confidence builder. A small brush pulls a few thin brownish lines down to a single point for the stem. Then the side of a medium brush dabs purple along each stem, narrow at the top and wider at the bottom, in a stippling motion where imperfection actually helps. A second pass in deeper purple or blue adds depth. For a fuller look, swap the stems for a clump of green strokes and paint a whole lavender bush.
Get the full tutorial at prettyhandygirl.com.
34. Easy Aspen Trees in Watercolor
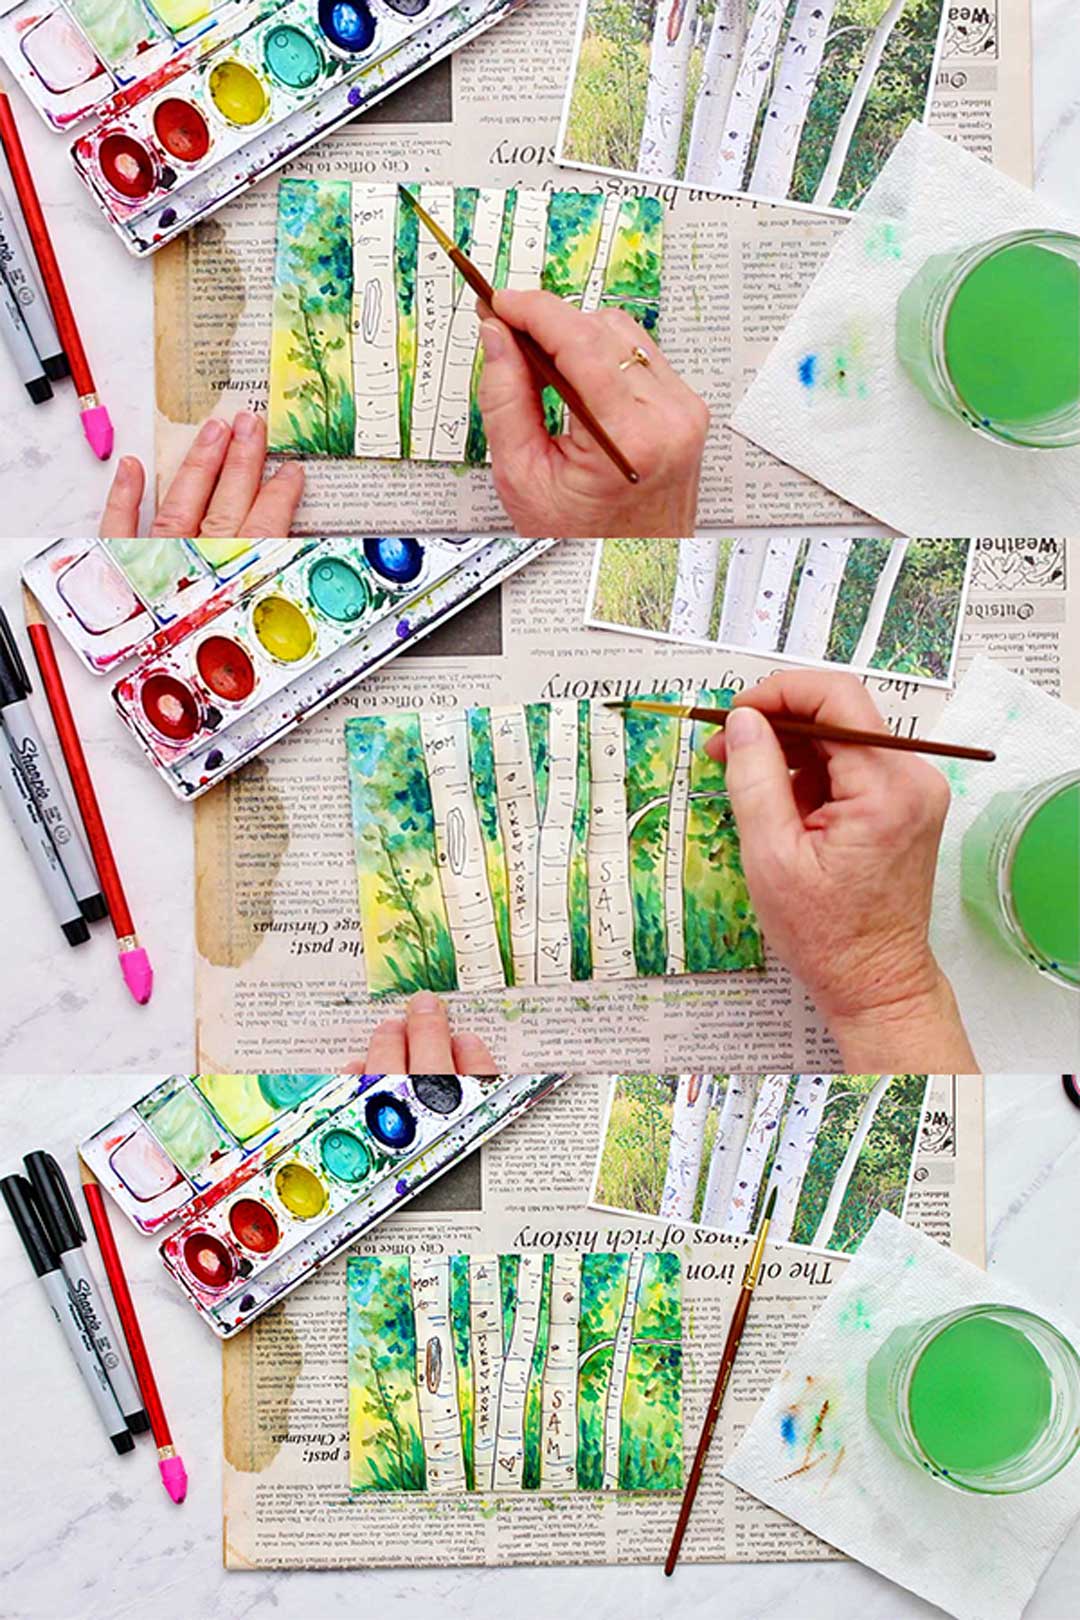
Pale aspen trunks against a glowing green and gold background make a small painting that looks far harder than it is. The trunks are drawn in pencil and traced with a fine permanent marker so the lines survive the paint. The background goes on wet, with yellow low, green high and darker dabs of green mixed with brown or blue for shadowy leaves. Once dry, the trunks get just a whisper of brown at the edges, plus darker knots and notches. A plain boxed paint set works fine, and the finished piece folds into a lovely card.
Get the full tutorial at welcometonanas.com.
35. Easy Watercolor Techniques on Handmade Cards
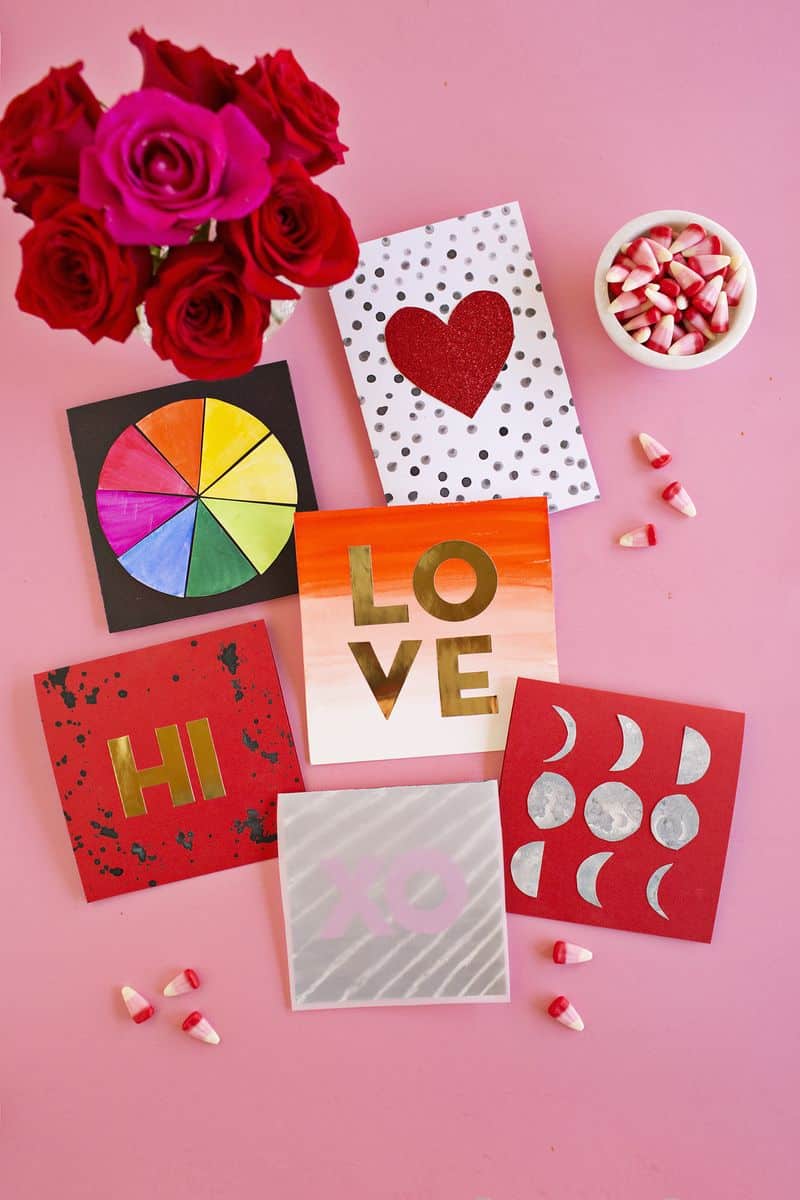
Five handmade cards, five different watercolor techniques, and every one of them is doable on the first try. Salt and a little nail polish remover give cut out moon phases a cratered texture. White crayon drawn first resists the paint for stripes that stay crisp. Thinning one color with water makes a soft ombre background for big gold letters, a cotton swab stamps watercolor polka dots and a messy splatter frames a short message. Painted triangles make a bonus color wheel card. It is a fun sampler of tricks to reuse on any project.
Get the full tutorial at abeautifulmess.com.
36. Fall Watercolor Leaf Wreath
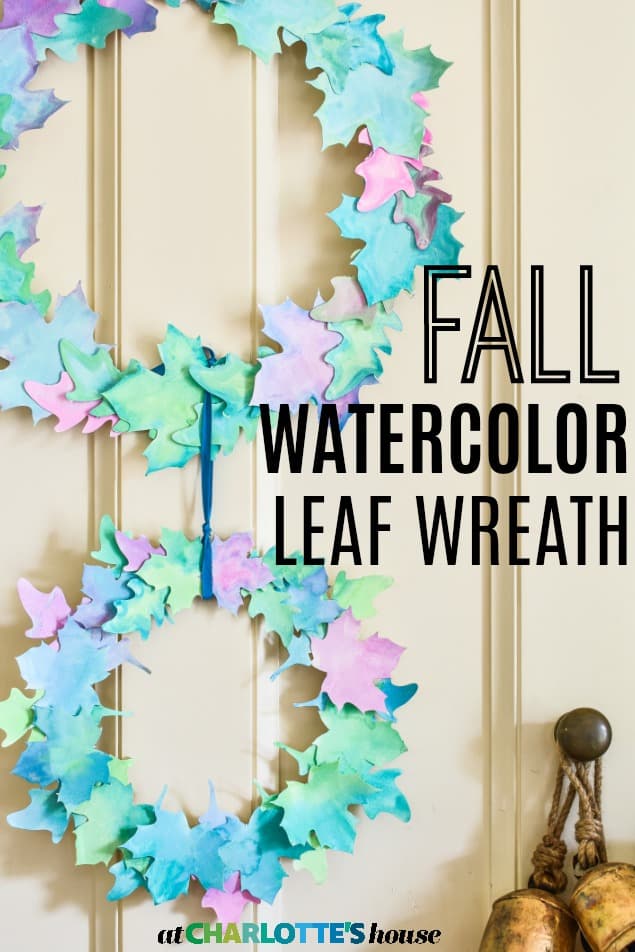
A fall wreath made from painted paper leaves is a cozy craft that uses supplies already on the shelf. Leaves are cut from watercolor paper with scissors, a craft knife or a cutting machine. A very wet 1 inch brush loads one color onto half of each leaf, then a second color goes on the other half and overlaps in the middle so the two run together. More water means more blending. Once dry, the leaves are glued around a wreath form (a cardboard ring works too) and hung on a ribbon.
Get the full tutorial at atcharlotteshouse.com.