

Rainy afternoon, long weekend or a chorus of “I’m bored” coming from the living room? These easy crafts for kids turn ordinary stuff like glue, yarn, pipe cleaners and empty toilet paper rolls into slime, toys, jewelry and gifts worth showing off. Ten of these DIY projects for kids are DIY JOY originals, including pipe cleaner bouquets, yarn chicks, Q-tip flowers and painted beach rocks, each with a step-by-step video. Every project notes which steps need a grown-up, like the hot glue gun, the iron or the borax, so kids can take over everything else. Perfect for rainy days, summer break, classrooms, birthday parties and handmade gifts!
1. Squirt Gun Painting

Here’s how to turn “there’s nothing to do” into an afternoon of happy shrieking. Clip watercolor paper to an easel out in the yard, fill squirt guns with liquid watercolors and let the kids blast away. No easel? Tack the paper to a tree instead. The colors run and drip into bold, splattery art that looks great framed. Set the wet paintings in the grass with a rock on each so the breeze doesn’t steal them. Sturdier squirt guns hold up much better than the dollar store multipacks, which tend to break fast.
Get the full tutorial at Fireflies and Mud Pies.
2. Perler Bead Fruit Magnets

Watermelon, lemon and orange slices that hold up the grocery list? Adorable. Kids set Perler beads on a small circle pegboard, building the U shaped peel first, then the seeds or white lines, then filling in the color. Free printable templates make the patterns easy to follow, and tweezers help small fingers. A grown-up handles the iron: about 20 seconds under ironing paper, flip, then about 15 seconds more. Parchment paper works if ironing paper is missing. Let them cool, stick on a peel off magnet and it’s fridge time in about 15 minutes.
Get the full tutorial at Frugal Mom Eh!.
3. Pipe Cleaner Flower Bouquet

A bouquet that never wilts and costs next to nothing. This tutorial walks through four pipe cleaner flowers, tulips, baby’s breath, daisies and lilies, all made by bending and twisting chenille stems into petals and wrapping them around a stem. No glue and no mess, so there’s no grown-up step at all. The fuzzy texture makes the finished flowers look far more real than they have any right to. Pair the tulips with baby’s breath for one bunch, then wrap it up as a gift for a teacher or grandma.
Get the full tutorial at DIY JOY.
4. Egg Carton Daisy Flowers
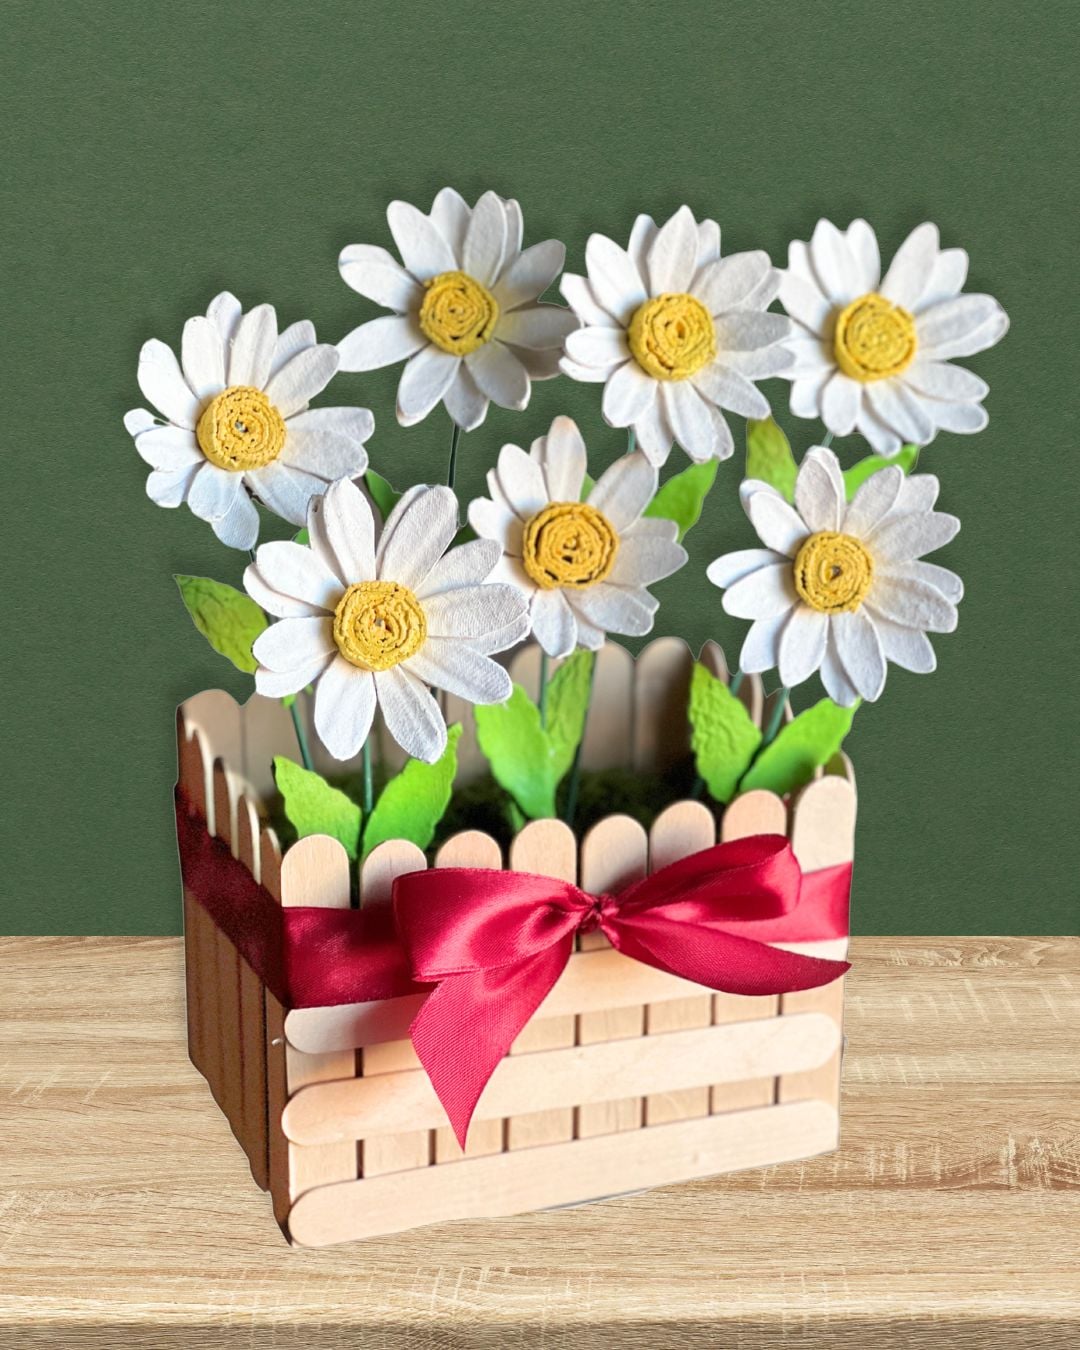
Don’t toss that egg carton just yet! These daisies start as cut up cardboard egg trays, painted white with yellow centers and green leaves, then threaded onto floral wire stems. Clean the carton first, since a quick wipe and a sprinkle of baking soda handle any smell. Kids can cut and paint the petals, while a grown-up helps with the gluing and the wire ends. Tuck the finished flowers into a little craft stick fence planter with a bow. It’s a recycled craft that looks like a real spring centerpiece.
Get the full tutorial at DIY JOY.
5. Birdy Flower Markers

Garden markers so cute they might upstage the actual flowers. Wooden bird cutouts from the craft store get a fabric cover, traced and cut about 1/8 inch inside the line so a little wood border peeks out. Decoupage glues the fabric down, then a white oval holds the plant name, and a colorful jute bow finishes the neck. Mount each bird on a dowel and push it into the dirt. Kids can pick the fabrics and write the labels, which is a great way to get them invested in the garden too.
Get the full tutorial at Crafts by Amanda.
6. DIY Wooden Robot

A first woodworking project that ends with a new best friend. This little robot is built from wooden blocks and wood scraps, so everything comes already cut. Blocks get glued into a head and body, then arms and legs hang from heavy duty string threaded through drilled holes. A woodburning pen adds the face and a heart right on the chest. The drill and woodburning pen are grown-up jobs, while kids can pick the blocks and plan the look. Thrift store blocks work perfectly, which keeps the cost close to nothing.
Get the full tutorial at Adventure in a Box.
7. DIY Yarn Chicks
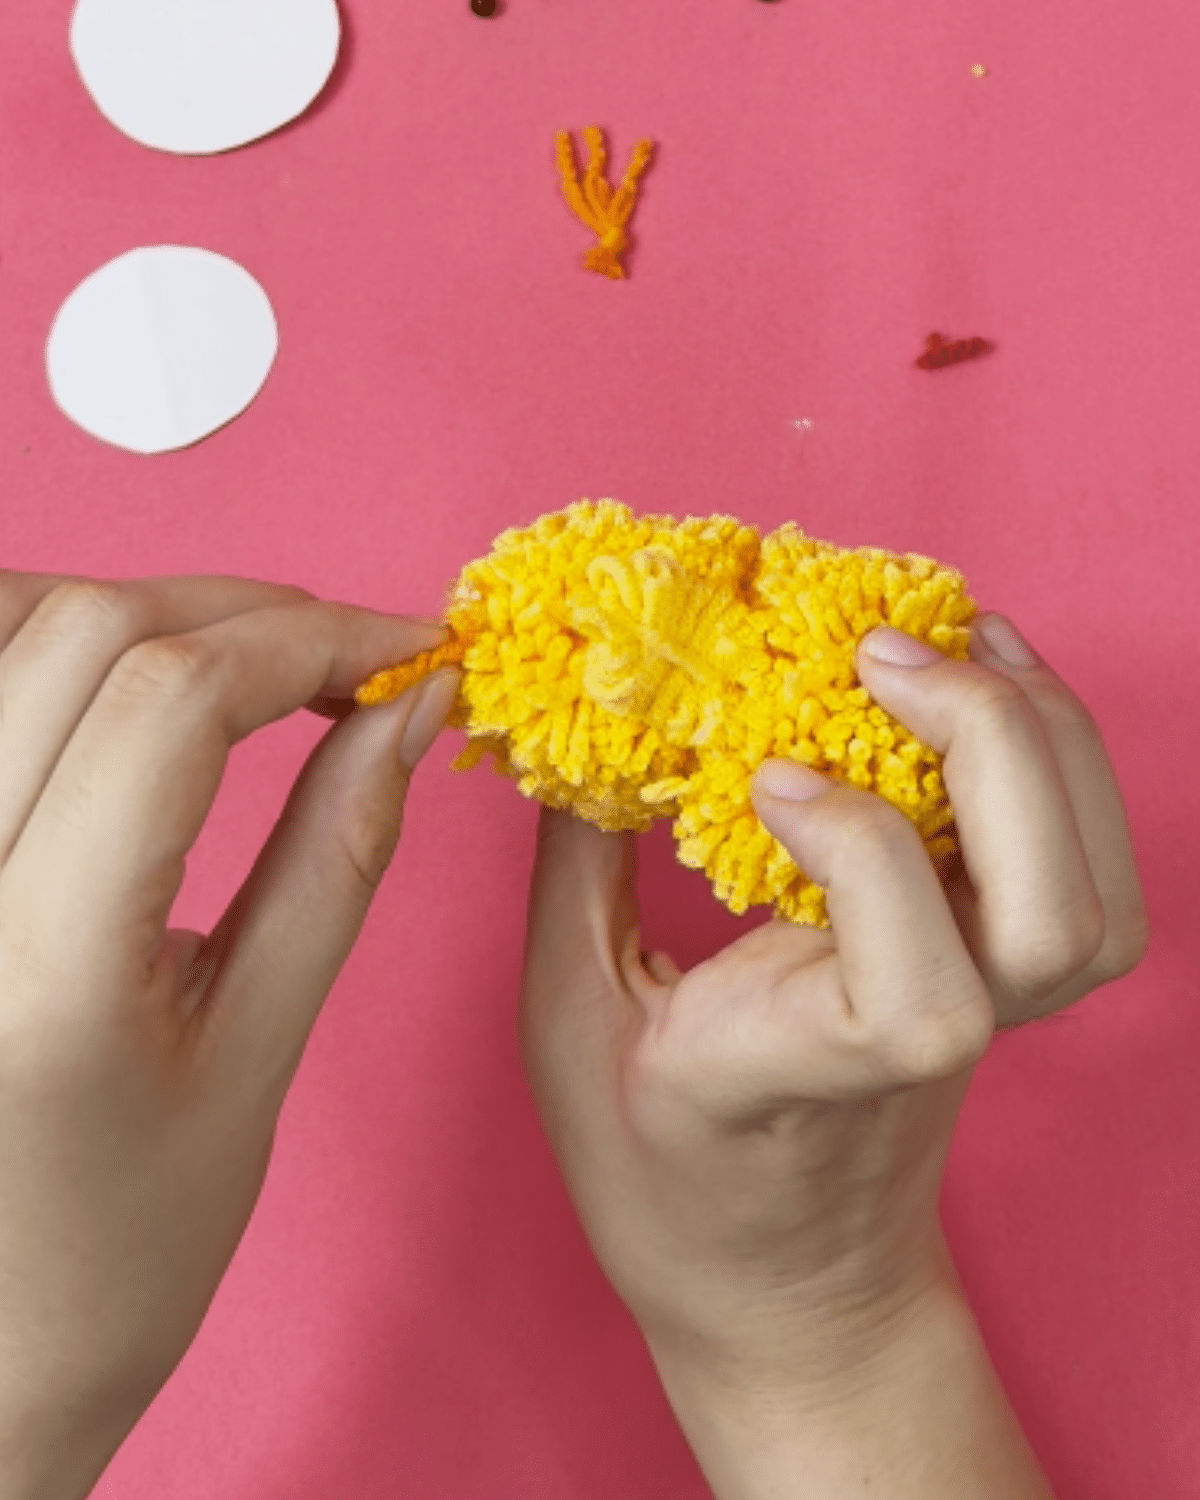
Fluffy, round and ridiculously cute, these yarn chicks are basically pom poms with personality. Yellow yarn gets wrapped around small cardboard rectangles, tied tight in the middle, cut through the loops and trimmed into a ball. Make a bigger pom pom for the body and a smaller one for the head, then add bead eyes and a little beak. Kids can do most of the wrapping and trimming on their own. The hot glue gun is the one step that needs a grown-up. Line up a whole family for Easter baskets.
Get the full tutorial at DIY JOY.
8. Kid Made Dish Towels

The gift every grandparent will actually use. Kids trace a cookie cutter shape onto contact paper, cut it out and stick it on a plain white dish towel. Then they dip the eraser end of an unsharpened pencil in fabric paint and stamp dots all around the edges. Peel off the contact paper for the big reveal, and there’s a crisp shape outlined in polka dots. Tape the towel to the table and slip paper underneath, because the paint bleeds through. Two colors per towel tends to look best. Pick any holiday or season.
Get the full tutorial at I Can Teach My Child!.
9. Laundry Basket Skee Ball

Indoor energy burner, no broken lamps required. A big cardboard box becomes the ramp: cut off the top and one end, then curve a couple of cereal boxes inside and duct tape them in place. Set two laundry baskets behind it, label the near one 50 points and the far one 100, and grab a pile of ball pit balls. Kids kneel and roll the balls up the ramp so they launch into the baskets. The box cutting is a grown-up job. It’s quiet enough for rainy afternoons, and cleanup is just tossing balls back in a basket.
Get the full tutorial at Frugal Fun For Boys and Girls.
10. Easy Bunny Pom Poms

No-sew bunnies made from nothing more than yarn and a few scraps. The trick is the thickest yarn available, since it fills the pom pom forms fast. Wind two forms, one big and one small, tie the middles tight, cut them free and trim them into shape. Leave the tying strands long, then knot the head and body together, so no glue is needed. Add little ears and a face, and a whole bunny family hops into being. Make them in a mix of colors for a party favor everyone will want to take home.
Get the full tutorial at ikat bag.
11. DIY Mason Jar Fairy Lights

Painted in daylight, glowing after dark, which means double the fun from one craft. Any clean jar works. Kids dab glow in the dark paint inside the jar with a long brush, in several colors if possible, and add a little glitter with white school glue if they want extra sparkle. It’s done in under 30 minutes, and a perfect paint job isn’t required for it to look magical. Charge it in the sun or under a lamp, then switch off the lights. It makes a dreamy nightlight for a bedroom.
Get the full tutorial at DIY JOY.
12. 3-Ingredient Glitter Slime

Sparkly, stretchy and done with just three ingredients. Empty a whole bottle of glitter glue into a bowl with a tablespoon of water. Separately, stir a teaspoon of borax into a cup of warm water, then pour the borax water in slowly while mixing until slime forms. A grown-up should handle the borax. Want to skip it? About a teaspoon of liquid starch stirred into 4 ounces of glue works too. Cover the table first, because this one gets messy. Pink glitter glue tends to be the crowd favorite.
Get the full tutorial at Mom Luck.
13. Paper Tulips
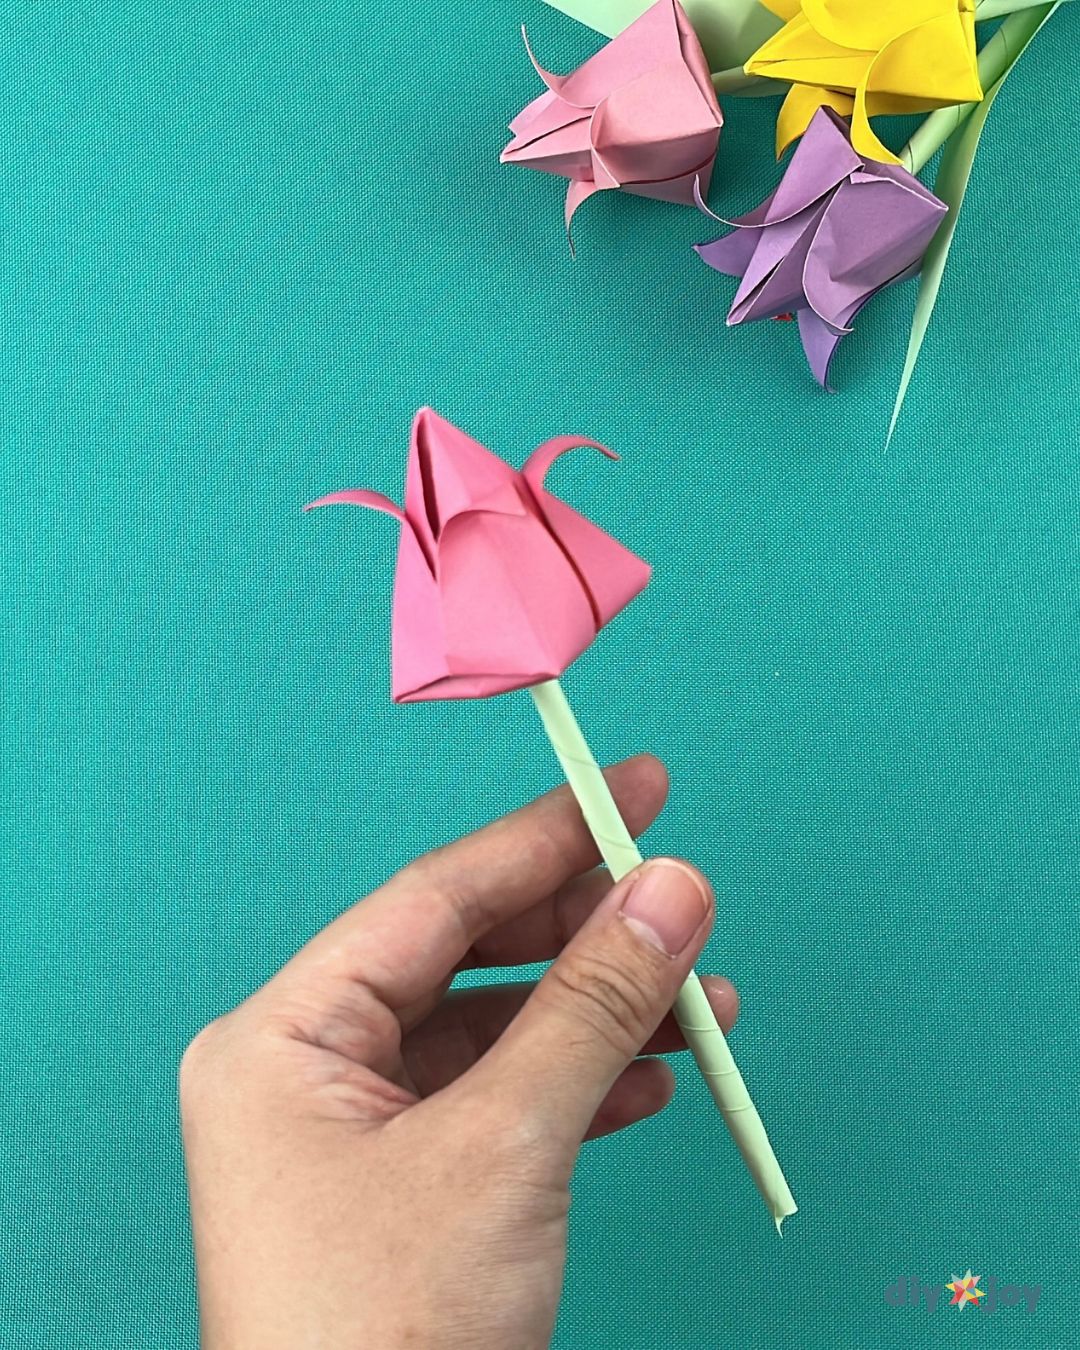
These folded tulips are so pretty, they’ll look store bought sitting in a vase. Each bloom starts as a square of origami paper, folded diagonally both ways and then in half, until it collapses into a tulip shape. Green paper wraps around a wooden skewer for the stem, and a cut leaf finishes it off. Pastel paper gives the softest, most real looking flowers. Kids old enough to fold paper airplanes can handle the folding. A grown-up may want to help with the skewer’s pointy end. Make a few colors and tie them together with a ribbon!
Get the full tutorial at DIY JOY.
14. Toilet Paper Flower Bouquet
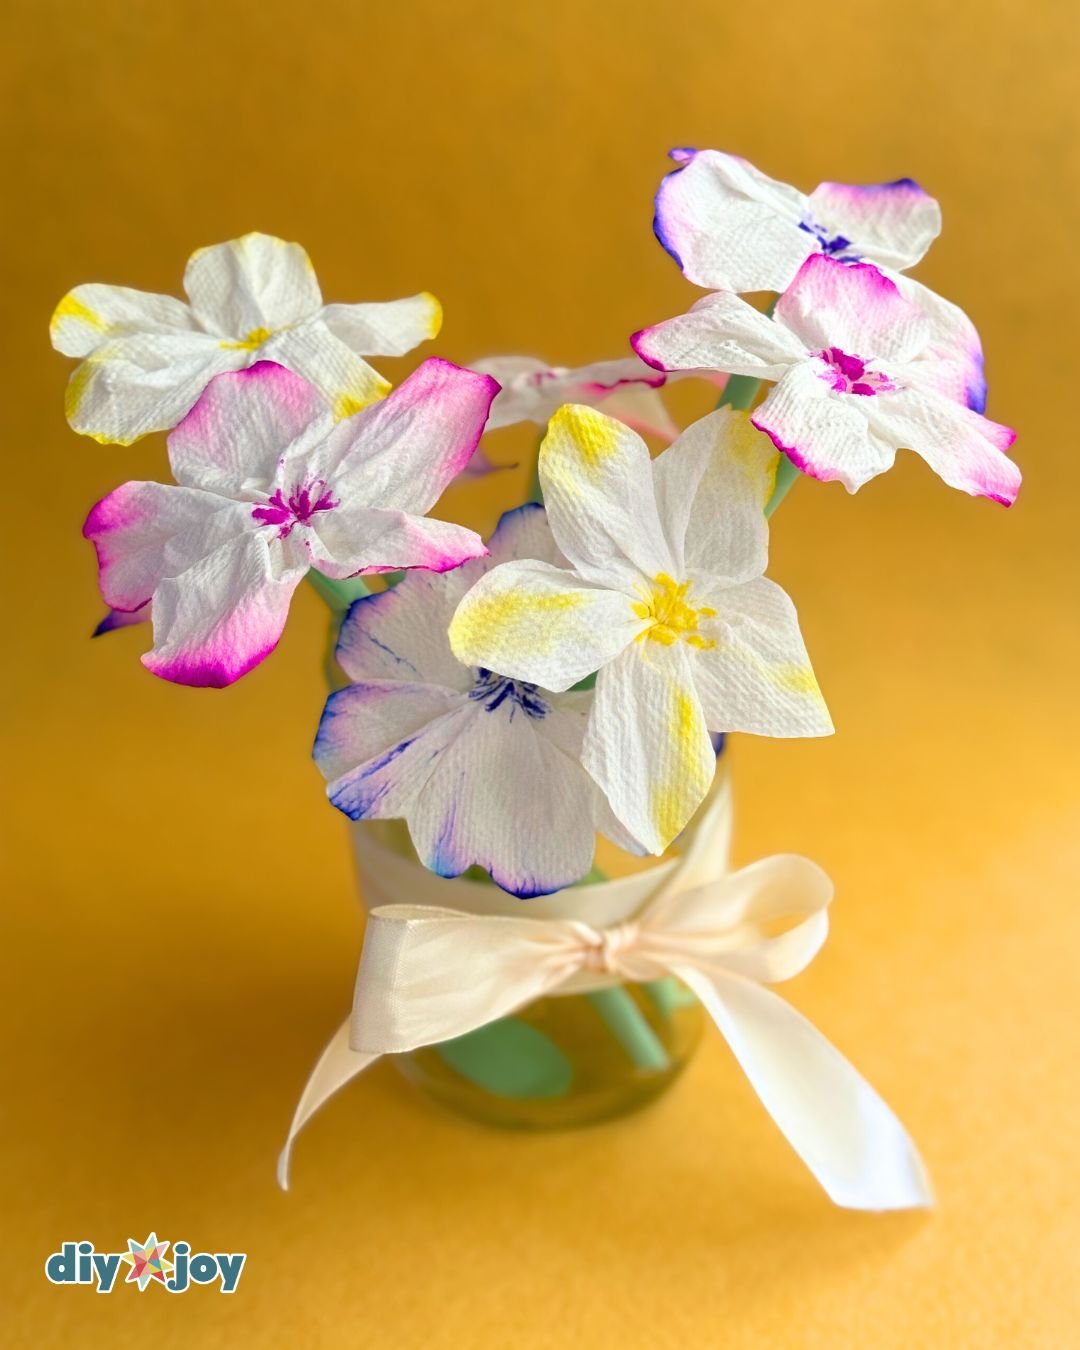
Toilet paper flowers sound like a joke right up until the colors start bleeding. Accordion fold a piece of tissue, cut a petal shape, open it up and gather the petals into a flower, secured at the bottom with painter’s tape. Then color the center with a water based marker and set it in a little water. The color creeps up the petals like magic, which is honestly the best part. Once dry, they hold their shape surprisingly well. No grown-up step at all, just a lot of watching color travel.
Get the full tutorial at DIY JOY.
15. Ladybug Fabric Scrap Fridge Magnets

Fabric scraps finally have a job. Trace a round plastic lid on fabric, cut out the circle and glue stick it to felt, then glue the felt to card stock. Paint a black half circle for the head, dot on white eyes with the handle end of a paintbrush, and add black pupils with a toothpick once dry. Trim around each ladybug to leave a felt border, then glue a magnet on the back. Every ladybug comes out different depending on the scrap. Make a whole batch for party bags or little thank you gifts.
Get the full tutorial at Crafts by Amanda.
16. Glitter Foam Flowers
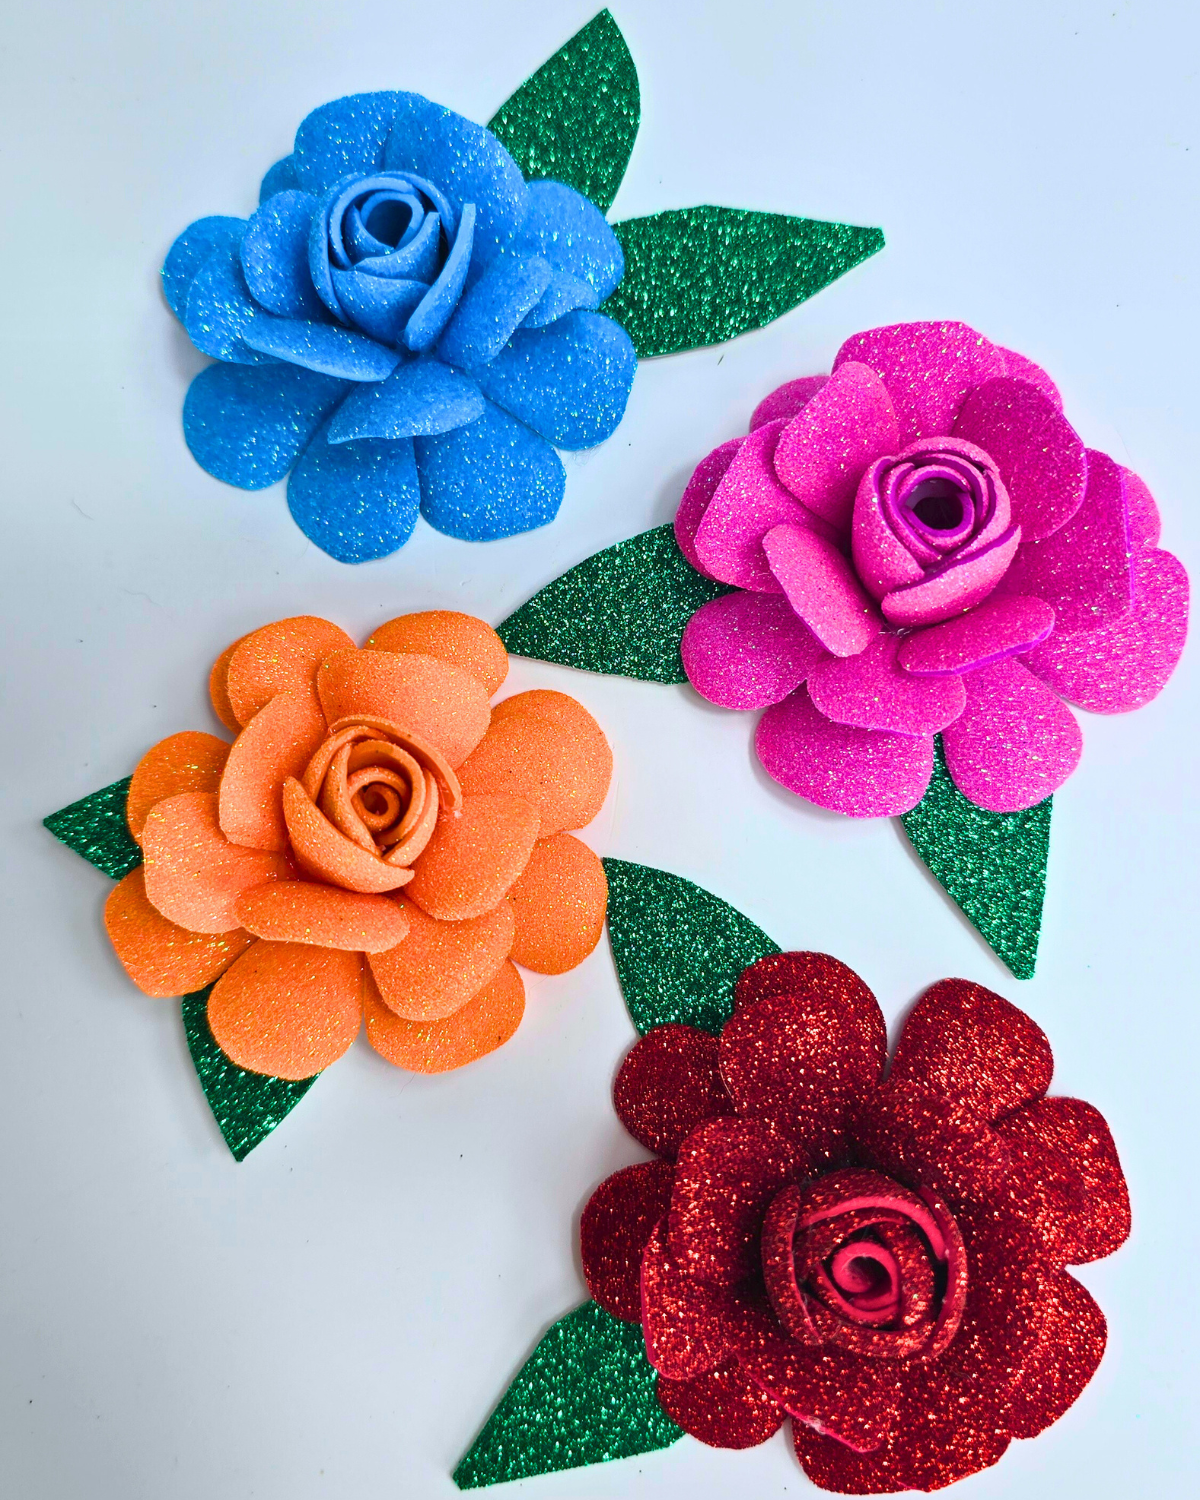
Sparkly roses that won’t crush in a backpack. Trace circles onto glitter foam sheets with a lid or cup, cut them out and shape them into layered petals, then roll the center into a rosebud. Add a green glitter foam leaf and the flower is done. They’re lightweight and durable, so they work as hair clips, pencil toppers or gift bag toppers. The pieces are glued together with a hot glue gun, so that’s a grown-up step. Mix colors to match a party theme, from pastels to bold red and gold.
Get the full tutorial at DIY JOY.
17. DIY Paper Clips To Mini Hangers

Tiny hangers from a regular paper clip, and it’s only four steps. Open the clip a little, bend one side into the hanger hook shape and snip off the extra wire with pliers. That’s it. They’re perfect for a dollhouse closet or for hanging doll clothes, and they also make a sweet embellishment on handmade cards. The snipping with pliers is the one step for a grown-up. Make a whole rack and hang them on a skewer or dowel for an adorable mini wardrobe. It’s a great boredom buster for the cost of a paper clip.
Get the full tutorial at Agus Yornet Blog.
18. Daisy Bead Rings
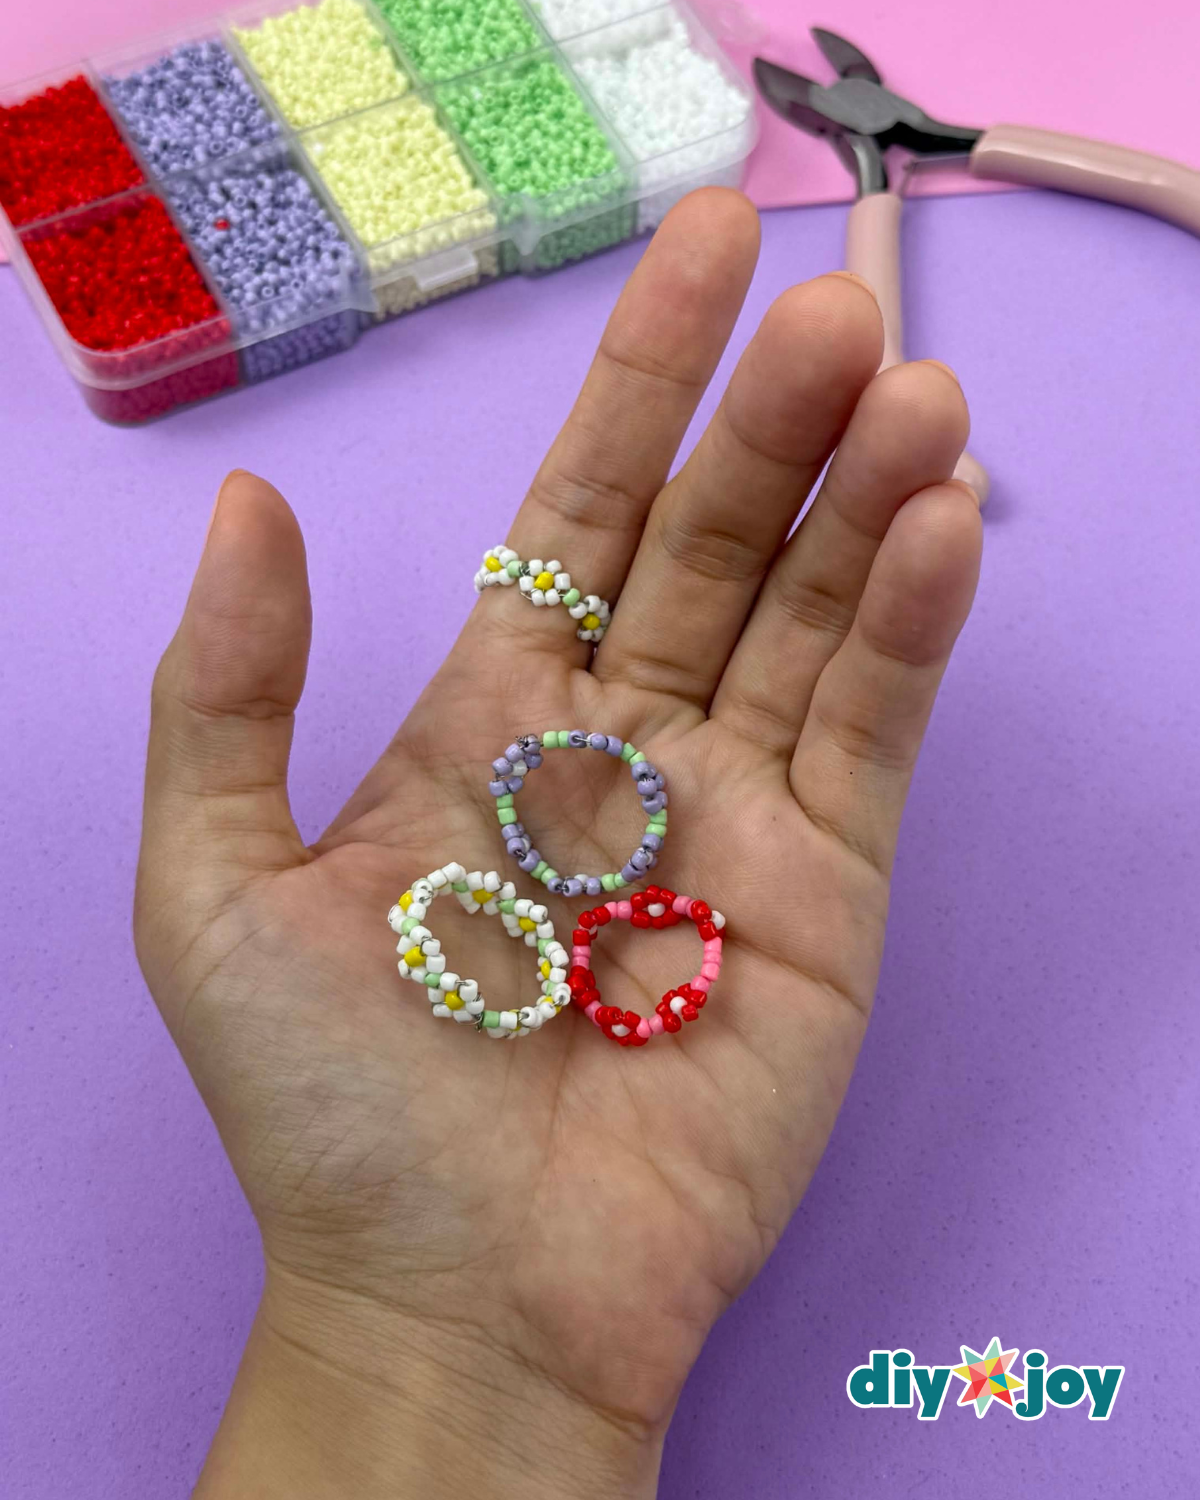
Daisy chain rings that look like they came from a boutique. Each daisy is built from white seed beads around a yellow center, then locked in with a green bead, and the steps repeat around the band. It might look tricky at first, but once the rhythm clicks, the rings go fast. When making them with kids, swap the jewelry wire for fishing line, which is safer for little fingers, or supervise closely. Make a stack in different colors to trade with friends. They’re perfect for sleepovers and summer camp crafts.
Get the full tutorial at DIY JOY.
19. Q-Tip Flower Bouquet
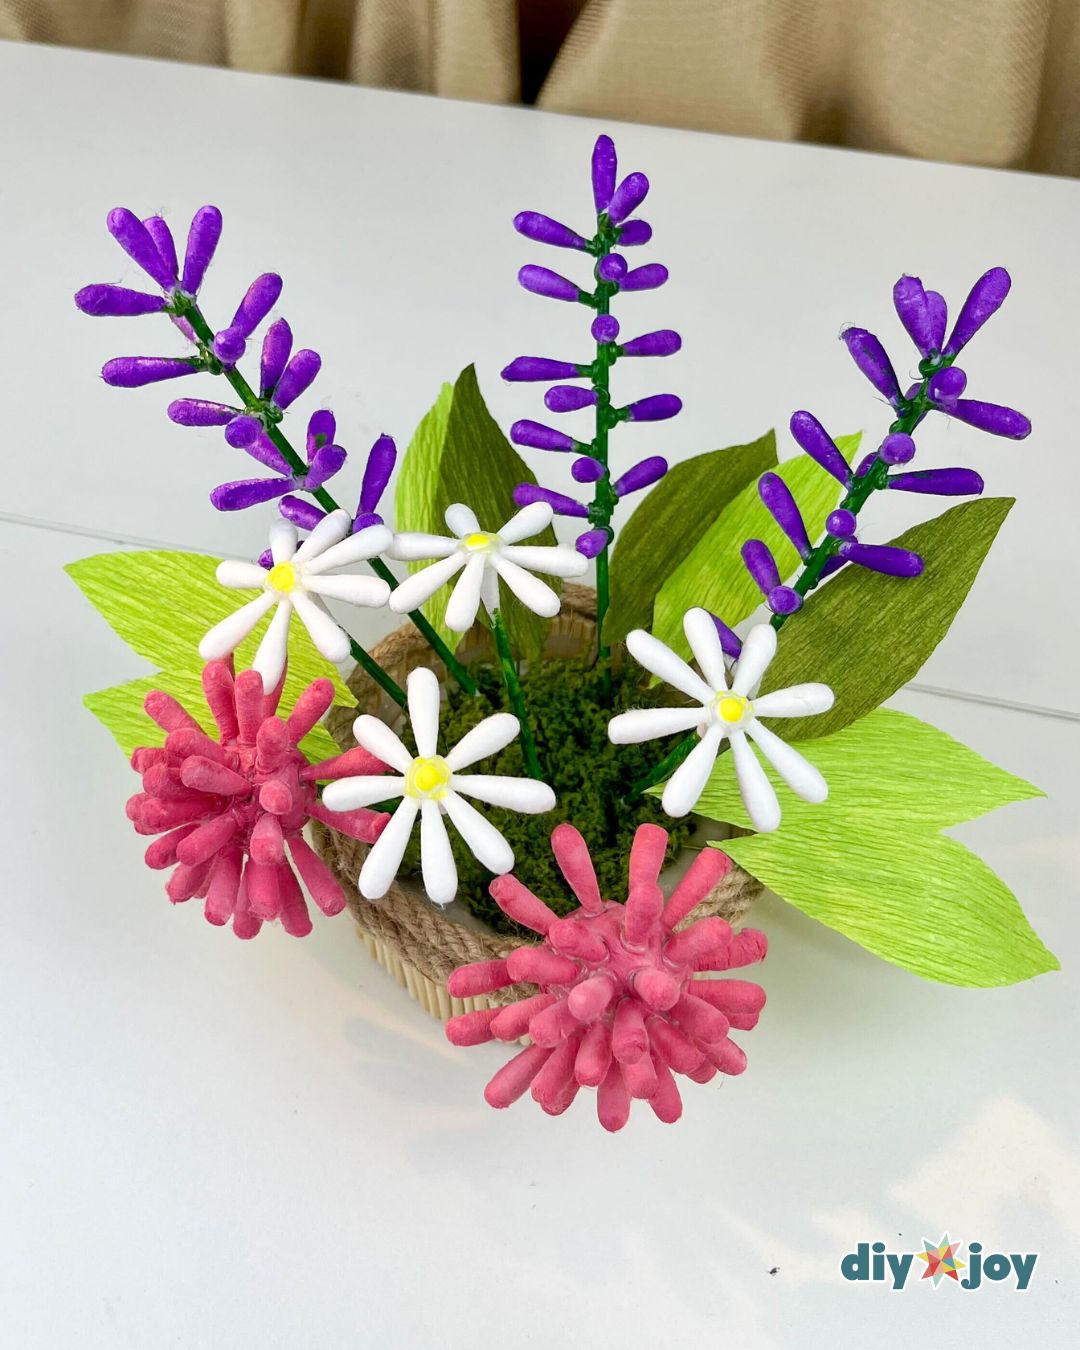
Who knew cotton swabs could bloom like this? This bouquet mixes three Q-tip flowers: fluffy pom pom blooms made by pushing swab ends into a ball of air dry clay, lavender stems built up on floral wire, and daisies with white tips around a yellow center. A little hot glue holds the pieces in place, so a grown-up should man the glue gun. The vase is an old plastic container wrapped in skewers and jute rope. It’s a desk or table centerpiece made from bathroom cabinet supplies.
Get the full tutorial at DIY JOY.
20. Rice Krispies Treat Lamb Pops

Edible crafts always win. Rice Krispies Treats go on lollipop sticks, get dipped in melted white Candy Melts, then rolled in tiny marshmallow bits for that woolly look. Black candy wafers make the faces and ears, with candy eyes and pink confetti sprinkle noses. No ear cutter? Large chocolate chips work as ears instead. Melting the coating is the grown-up part, and kids can take over for the decorating. One batch makes six lambs, which is enough for a few Easter baskets.
Get the full tutorial at Hungry Happenings.
21. Beach Rock Painting

A little beach scene that fits in the palm of a hand. Pick a smooth, flat river rock, clean and dry it, then paint the top in ocean blue and the bottom in sandy tones. Dot on white for the foamy waves and finish with a tiny golden starfish. Let each layer dry before adding the next, and a hair dryer speeds things up. Seal it if the rock is going outside. One tip worth knowing: bring stones from home, since taking them from the beach is illegal in most places. No grown-up step needed!
Get the full tutorial at DIY JOY.
22. Cardboard Heart Garland

Empty toilet paper rolls, meet your glow up. Flatten a roll, trace a heart pattern on top and cut it out. Each roll becomes a 3D heart that pops open once it’s off the tube. Paint them in pastels, or go bold, then string them on twine and hang. Scissors, paint, a brush, a pencil and string are all it takes, so it’s basically a zero cost craft. The cutting through flattened cardboard can be tough for small hands, so a grown-up may help there. It’s sweet Valentine’s decor for a classroom or bedroom.
Get the full tutorial at DIY JOY.
23. DIY Pinwheel Necklace

A necklace and a painting lesson rolled into one. Start with a slab wooden wheel from the hobby store and paint triangles around it in a pinwheel pattern, mixing widths and letting some wood show through. Flip it and paint a whole new design on the back, so it’s two necklaces in one. Once dry, thread a lanyard, yarn or ribbon through the center with a slip knot. Kids around six and up can handle the patterns, and littler ones can just paint freely. Neon pink plus sage green is a fun combo to try.
Get the full tutorial at Handmade Charlotte.
24. DIY Wool Felt Ball Coasters

Rainbow coasters that look like candy dots for your mug. Each one takes roughly 90 to 100 wool felt balls in the 1 cm size, glued in circles onto a cork coaster. Start with one ball in the center and work outward ring by ring. A long skewer helps place the glue exactly where it’s needed. Pause to let the glue dry now and then so the balls stay packed tight. The strong craft glue is a grown-up job, while kids can choose colors and press the balls in. They make a cheerful gift for teachers.
Get the full tutorial at Inspired by Charm.
25. DIY PVC Bow And Arrow

Backyard archery, minus the scary part. The bow is 4 feet of 1/2 inch PVC pipe with a slit cut in each end, a string anchored with small nuts, and a 2 inch piece of pool noodle hot glued in the middle as a grip. The arrows are 1/4 inch dowels cut to 2 feet with a Nerf dart tip glued on. The sawing, bending and hot glue are all grown-up jobs, and bending the pipe takes some muscle. Set up a target and the kids will carry these around all day. It’s a hit for reunions and birthday parties.
Get the full tutorial at Uplifting Mayhem.
26. DIY Bath Paints

Permission to paint the bathtub walls, and it all washes away. Mix 1/2 cup of baby body wash with 1/2 cup of cornstarch, then stir in 2 tablespoons of water. It should be thick enough to stick to the tub walls without running. Spoon it into a divided tray and add a drop or two of food coloring to each section. Hand over some kid paint brushes and bath time turns into art class. Rinse the walls right after painting to avoid any staining. Getting little ones out of the tub might get harder, though.
Get the full tutorial at Modernly Morgan.
27. Fake Snow For Kids

Snow day, no forecast needed. Pour 1 pound of baking soda into a bin, spray in shaving cream a little at a time and let kids knead until it turns into cool, packable snow. Unscented shaving cream is the best pick, and a couple drops of lavender essential oil add a nice smell. It forms almost right away. Spread a blanket on the floor and play on that, then just shake it out outside. Sand toys make perfect mini snow castles. Any leftover on the carpet vacuums right up.
Get the full tutorial at Playtivities.
28. Bath Time Play Dough

Play dough that actually gets kids clean, which feels like a parenting cheat code. This soft, squishy dough is made with castile soap, all purpose flour, salt, cream of tartar, oil and water, plus optional food dye. It suds up a bit when wet and rinses off the tub without residue. Castile soap gives the most consistent results. Skipping the salt works too, though the dough gets softer and won’t last as long. A grown-up should handle the mixing, and gloves help keep the dye off hands while making it.
Get the full tutorial at Sugar, Spice and Glitter.
29. DIY Bouncy Balls

A five minute science experiment that bounces. Stir 1 tablespoon of borax into 1/2 cup of warm water. In another cup, mix 2 tablespoons of white school glue with 1 tablespoon of cornstarch and a few drops of food coloring. Pour the glue mixture into the borax water, let it firm up, then roll it into a ball. A grown-up should handle the borax. Want a swirl? Divide the glue mix, color each part separately and press them together at the end, because mixing colors in one batch can turn muddy.
Get the full tutorial at The Stem Laboratory.
30. Craft Stick Crocodile Craft

Snap snap! These little crocodiles are crafts and toys at the same time. Color a craft stick green, or start with pre-colored ones, then wrap a green pipe cleaner around it from the middle toward one end, twisting out little legs as you go. Repeat on the other end. Zig zag scissors cut a strip of teeth to glue underneath, then add googly eyes and draw nostrils with a marker. Kids can make the whole thing themselves with regular white glue. Make two and they’re ready for a swamp showdown.
Get the full tutorial at Easy Peasy and Fun.






