Rose crafts split into two camps, and both are here. One camp makes the rose: folded from cardstock, rolled from crepe paper, coiled from satin ribbon, cut from an old pair of jeans, stamped onto a tea towel with the cut end of a celery bunch. The other camp uses the real thing, because dried petals turn into lip scrub, sugar scrub, bath soak, lotion bars and a salve that smells like nothing you can buy. A few of these are twenty minute projects with supplies already in the cupboard. A few are patient, fiddly and worth every minute. Every one links back to the person who worked it out, and the DIY JOY tutorials are ours.
1. Painted Rose Mason Jars

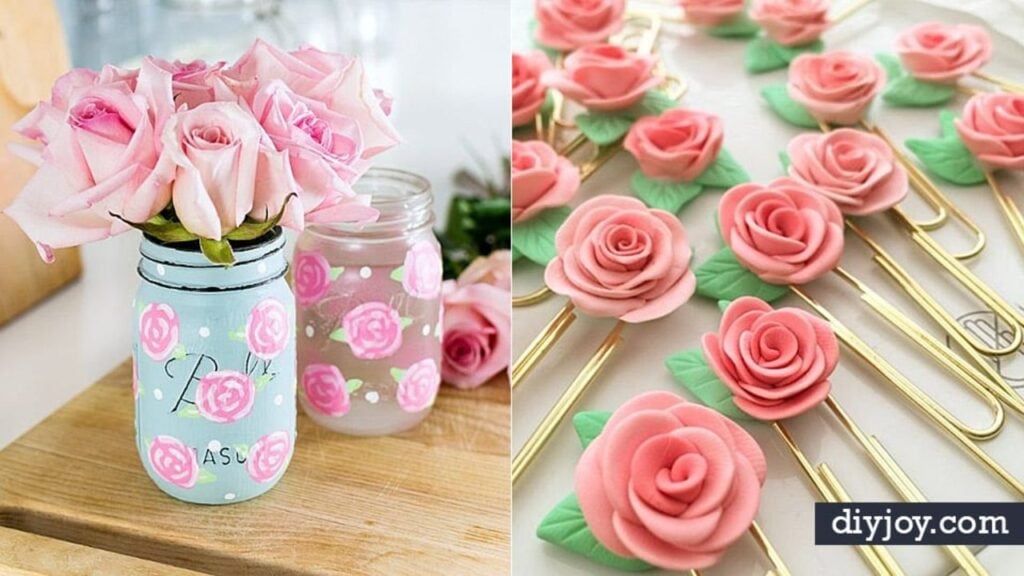
A pale blue jar and a grey jar, both hand painted with loose pink cabbage roses and white dots, holding real pink roses on a wooden board. It All Started With Paint gives the jars two coats of Rust-Oleum Chalked in Serenity Blue, lets them dry, then distresses the raised areas with 80 grit sandpaper. The roses are Americana Baby Pink, Pistachio and white. Here is the part that makes it work: the roses are rough circles, then a ragged light pink line around the outer rim and a few curved lines inside. Rough, not perfect. Seal with matte clear coat.
Get the full tutorial at It All Started With Paint.
2. Tin Can Floral Lantern

A tin can covered shoulder to shoulder in fabric rose petals, deep pink at the base fading to peach at the top, with loose petals scattered around it. The construction is the clever bit. Smart School House glues each petal onto the bowl of a plastic spoon, then glues the spoons to the can starting at the top rim and working down, so every row overlaps the one below like real petals. Bare metal showing through gets a petal glued straight on. A flameless candle goes inside. The whole thing came in under five dollars.
Get the full tutorial at Smart School House.
3. Beauty and the Beast Rose Centerpiece

A single deep red rose apparently floating under a glass cloche on a scratched wooden table, one petal fallen beneath it. Crafty Anne prints the petals onto red shimmery paper, then curls and creases each one by hand, smallest first, around a twelve inch length of floral taped wire. The petals are overlaid with the original 1740 French text of the story, which is the detail nobody expects. The float is fishing line glued into the top of the cloche with E6000, and the jar sits upside down until the glue is fully dry. There is a free template.
Get the full tutorial at Crafty Anne.
4. Burlap Rose

A single cream burlap rose with loose ruffled petals, photographed on a sheet of burlap. TheMamasGirls stiffens the burlap first with matte Mod Podge, dabbed on with a sponge brush, not heavy, and dried flat on wax paper. That step is what stops the weave unravelling the moment you cut it. Each rose is built from three identical flower shapes cut from about a five inch circle, layered and hot glued in order, with the center rolled from a scalloped piece. Burlap roses cost almost nothing and never look out of season.
Get the full tutorial at TheMamasGirls.
5. Rose Stamp

Pink roses stamped in a loose repeat across a white cotton tea towel, with the stamp itself sitting in the corner of the frame. The stamp is a bunch of celery, cut straight across the base. That cross section is already rose shaped, so no carving is involved at all. Craftberry Bush brushes DecoArt paint mixed with fabric medium directly onto the cut celery, two shades of pink with yellow in the middle, and tests it on a paper towel before touching the fabric. Leaves go on afterwards with a brush. Children can do this one.
Get the full tutorial at Craftberry Bush.
6. Denim Wreath Felt Roses

A wire wreath frame wrapped tightly in old jeans seams, with a cluster of felt roses in plum, dusty pink and cream sitting on one side. Pillar Box Blue builds each flower from about ten petals, glued one at a time to a central wire stem with fabric Mod Podge, then adds a leaf cut from a folded square of green felt and threaded onto the stem. Seven roses are enough for the cluster. The denim seams hot glue straight onto the frame as you wind, and the rose stems just twist on. No sewing at all.
Get the full tutorial at Pillar Box Blue.
7. Rose Petal & Mint Lip Scrub

A small jar of white sugar scrub flecked with crushed dark rose petals, a wooden spoon beside it and red petals scattered on weathered boards. Simply Designing uses six tablespoons of castor sugar, a handful of dried rose petals, one and a half teaspoons of jojoba oil and three drops of peppermint essential oil. Castor sugar matters here. It is finer than granulated, and granulated sugar is genuinely rough on the thin skin of your lips. The petals go through a blender or food processor first. It makes a good small gift in a hexagon jar.
Get the full tutorial at Simply Designing.
8. DIY Rose Petals Luminary

A large glass globe completely covered in lilac fabric petals, sitting on a patio table with a planter of petunias behind it. Purple Hues and Me used one hundred clear plastic spoons and two packs of rose petals, two hundred petals for two dollars. Cut the handles off the spoons, glue a petal to each bowl, then start at the top rim of the glass and work down, staggering each row between the one above. Tacky glue was abandoned partway for hot glue because the drying time was unbearable. Leave a flat row of plain petals at the base.
Get the full tutorial at Purple Hues and Me.
9. DIY Paper Roses Wreath

A dense ring of small rolled paper roses on a white mantel, each bloom coiled from printed paper so the type shows in the folds. The DIY JOY tutorial rolls them from newsprint, old book pages or a phone book, which is the best use anyone has found for a phone book in twenty years. Packed tightly onto a form they make a surprisingly heavy, substantial wreath. Keep it indoors, since paper and weather do not mix. A light mist of silver, gold or any color over the finished wreath changes it completely if the natural look is too plain.
Get the full tutorial at DIY Joy.
10. Rose Clips
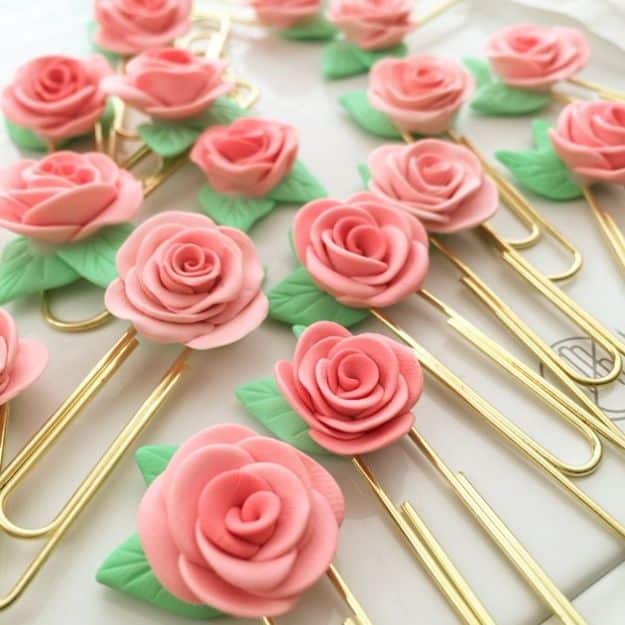
Pink clay roses with small green leaves, each one glued to the head of a jumbo gold paperclip, laid out in rows. It is a ten minute project and one of the few crafts that genuinely improves a working day, because a planner or a stack of bills looks better held together with these than with a bulldog clip. Air dry clay or polymer clay both work. Press the petals thin at the edges before rolling so the finished bloom does not look like a solid lump, and use a strong glue rather than hot glue, since paperclips get handled constantly.
Get the full tutorial at Elo7.
11. Enchanted Rose Mickey Ears

A headband with two clear domed ears, each holding a single red silk rose suspended in iridescent glitter, with a gold brocade bow between them. Crafty Chica cuts the ears from heavy clear upholstery vinyl and holds the pattern down with large washers instead of pins, because pins leave permanent holes in vinyl. Each ear is sewn with a half inch seam, stopped half an inch from the bottom so it lies flat on the headband. The glitter is the touch that sells it, falling around the rose exactly like the petals in the film.
Get the full tutorial at Crafty Chica.
12. DIY Felt Rose Stems

Six felt roses in shades of dusty pink, rose and deep raspberry, on green wire stems standing in a small wire basket. The tutorial comes with a free printable pattern and the whole rose is one cut piece rolled up, which is why it suits a beginner: snip a quarter inch between the petals, glue the end of an 18 gauge wire a quarter inch in, then roll the strip between your fingers with a modest line of glue as you go. A folded leaf slides onto the stem underneath. Spend the extra on wool felt rather than thin acrylic, because wool holds the curve and acrylic springs flat. Press the finished bloom face down on the table to flare the petals.
Get the full tutorial at The Yellow Birdhouse.
13. Rose Brooch Bouquet

A domed wedding bouquet packed with peach and cream satin roses and fabric blossoms, each flower centered with a pearl or a rhinestone. The build is more sewing than crafting and the numbers are precise. Free-Tutorial starts with a hard felt circle six centimeters across, cuts a sector out and sews it into a shallow cone, then works a single satin ribbon two and a half centimeters wide and sixty five to seventy centimeters long around it, folding and stitching a square at a time until the felt is covered. One ribbon makes one rose. It is repetitive, portable handwork.
Get the full tutorial at Free-Tutorial.
14. Rose Lotion Bars

Three cream colored lotion bars molded into a leaf, a flower and a star, arranged on a bamboo board with two open magenta roses and rose leaves. A lotion bar is solid at room temperature and melts on contact with skin, which makes it the least messy way to carry moisturizer around, and the reason it works is the ratio rather than any ingredient: equal parts wax, butter and oil. Silicone soap molds give the shapes. Keep them out of a hot car, because a bar that has melted and reset never has the same smooth face again.
Get the full tutorial at Grow Forage Cook Ferment.
15. Rose Pendant

A coiled copper wire rose hung on a purple cord above a long copper feather. Wire Workers Guild makes the rose from about a metre of 0.8mm, roughly 20 gauge wire, wrapped once around a glue stick as a mandrel and twisted where the wires meet. The wires then spiral outward, kept flat against the mandrel so they cannot slip behind each other. The final move is the clever one: cut straight through the back loop and straighten the wires out, and a ring becomes a two sided connector you can link into a chain.
Get the full tutorial at WireWorkers Guild.
16. Intoxicating Rose Salve

A small glass jar of pale pink salve with a black lid, photographed on white marble with dried rose buds and petals scattered around it. A salve sits between a balm and a lotion: no water in it at all, so it does not need a preservative and it keeps far longer than anything whipped. That makes it the sensible first project for anyone nervous about making skincare at home. It goes on thick and is best kept for elbows, heels and cuticles rather than a face. Small jars make it feel like a gift rather than a batch.
Get the full tutorial at Humblebee and Me.
17. Crochet a Beautiful Lace Ribbon Rose

Two crocheted roses, one teal and one deep purple, lying on a white doily with balls of yarn behind them. The shape is built from a long crocheted strip with a scalloped, lacy edge that is rolled up and stitched at the base, which is why the finished flower has that ribbon look rather than the flat coaster look most crochet flowers end up with. Cool Creativity points to Ninuska’s step by step picture guide. Sew one to a hat, a bag, a cardigan or a hair clip and it earns its half hour.
Get the full tutorial at Cool Creativities, from a picture guide by Ninuska.
18. Rose Petal Spa Sugar Scrub

A mason jar of pale pink sugar scrub flecked with crushed petals, finished with a fabric lid cover and a spotted ribbon, with loose petals on the table. A sugar scrub is the easiest homemade gift there is and the one most likely to go wrong in storage, because the sugar draws water. Keep it away from the shower stream, spoon it out with a dry hand and it lasts. Dried petals belong in the jar; fresh ones do not, since they brown within days. It is a good use for the last of a bunch that has dried on the stem.
Get the full tutorial at Happiness is Homemade.
19. DIY Pretty Origami Twisty Rose

A twelve panel grid of folding steps in cream paper, ending with a wreath of small yellow origami roses and green leaves. The twisty rose is the origami rose most people can actually finish, because the petals come from twisting the finished form rather than from separate pleats. Work with thin paper. Standard printer paper fights back at the twist and the middle tears, while origami paper or a good quality gift wrap turns cleanly. Make a dozen in an evening in front of the television and they become a wreath, a card front or a table run.
Get the full tutorial at Wonderful DIY.
20. Rose Cardamom Body Lotion

A frosted glass jar of pale pink lotion on white marble with its red lid beside it and dried rose buds scattered around. Lotion is the hardest of the rose skincare projects on this list and worth knowing why before you start: a real lotion is oil and water emulsified together, so it needs an emulsifying wax to hold and a preservative to stay safe, since anything containing water will grow something. Follow a tested formula by weight rather than improvising. Cardamom with rose is a genuinely good pairing, warm and slightly peppery against the sweetness.
Get the full tutorial at Humblebee and Me.
21. Rose Inspired Clock
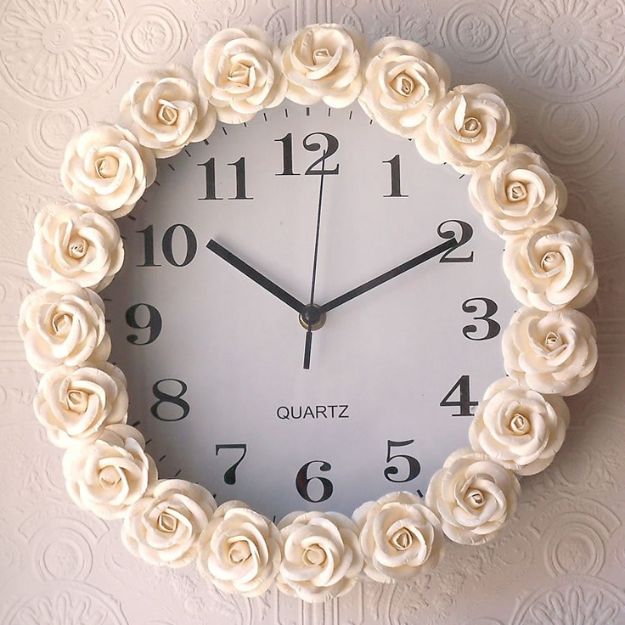
A plain white wall clock with a ring of cream resin roses glued all the way around the rim, hung on an embossed white wall. It is the best value idea here for a rented room, because the clock underneath is a supermarket one and the roses are craft store flowers, and the two together read as a boutique piece. Use a strong craft glue rather than hot glue, which goes brittle and lets go on a vertical surface in a warm room. Paint the whole ring one flat color afterwards if the clock face is busy.
Get the full tutorial at Es la Moda.
22. Rose Petal Bath Soak

A mason jar of white bath salts shot through with crushed dried rose petals, topped with a chalkboard label, with a fresh rose and loose petals beside it. A Pumpkin and a Princess mixes one and a half cups of Epsom salts, half a cup of sea salt, a quarter cup of baking soda, half a cup of dried rose petals and fifteen optional drops of rose oil, and that is the entire method. One warning from her that matters: use the petals or the oil, not both, because the oil soaks into the petals in the jar and cuts the shelf life to about a week.
Get the full tutorial at A Pumpkin and a Princess.
23. Enchanted Rose Ornament

A clear fillable ball ornament holding a single red rose in a drift of shredded gold crinkle, sealed with gold rhinestone trim and finished with a gold bow. The Farm Girl Gabs trims a miniature red rose to fit the diameter of the ornament and hot glues it to the bottom half, adds a little of the gold filler, then closes the ball and runs the rhinestone trim right around the seam to hide it. That trim is doing two jobs at once, sealing the halves and turning the join into the prettiest part of the ornament.
Get the full tutorial at The Farm Girl Gabs.
24. Mini Paper Rose Framed Artwork

Nine small paper roses in two shades of pink, arranged in a block inside a white shadow box frame and hung above a shelf of books. Lia Griffith builds it in an Ikea Ribba shadow box, swapping the paper behind the mat for a matching cream, then filling the window with nine mini roses rolled from metallic text weight paper in Jupiter and Rose Quartz. Her own answer to a reader is the useful tip: squash the pointed base of each finished rose slightly flat so it has something to glue against, or the flowers sit at angles.
Get the full tutorial at Lia Griffith.
25. Paper Rose Tutorial Step-by-Step
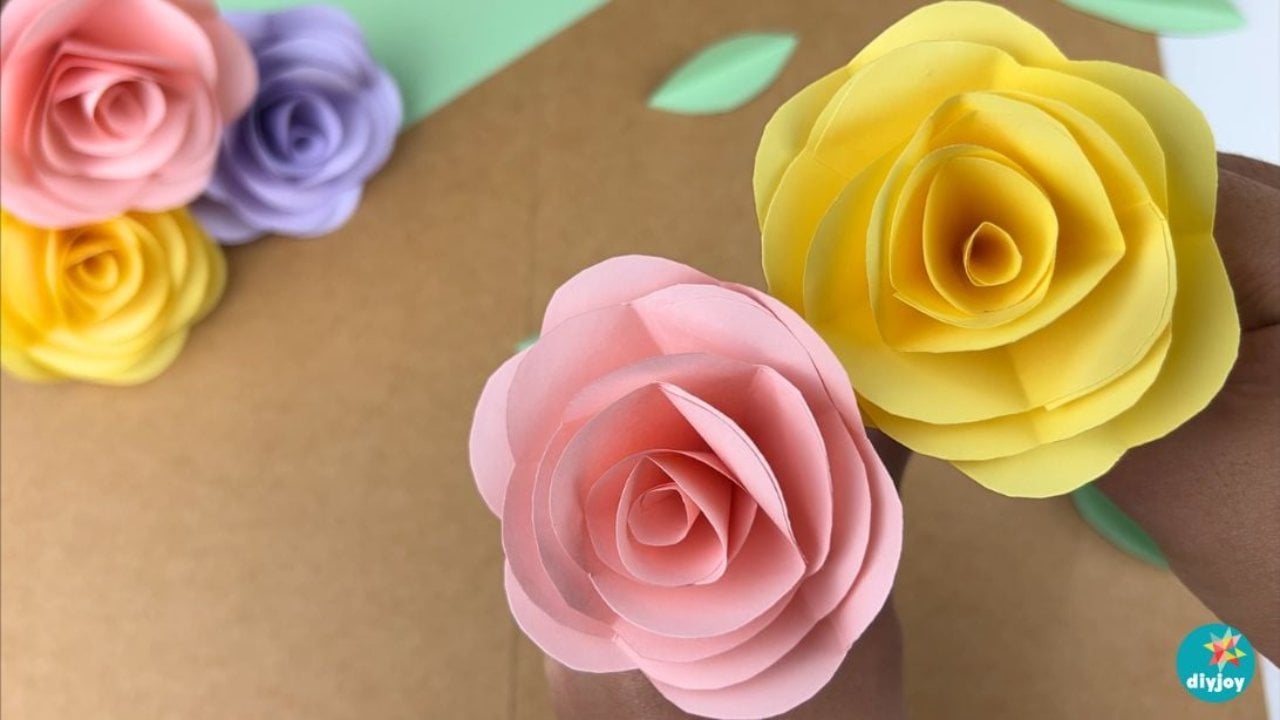
Open cardstock roses in blush pink and buttercup yellow lying on kraft paper with smaller roses and cut leaves behind them. This is the DIY JOY tutorial, and the supply list is three things: cardstock, PVA glue and scissors. Cardstock is what makes these stand up and hold an open cupped shape where thinner paper flops, and it is the reason this rose photographs so well flat on a table, a card or a gift box. The full video sits on the post. Once the petal shape is in your hand a rose takes a few minutes.
Get the full tutorial at DIY Joy.
26. Paper Roses For Beginners
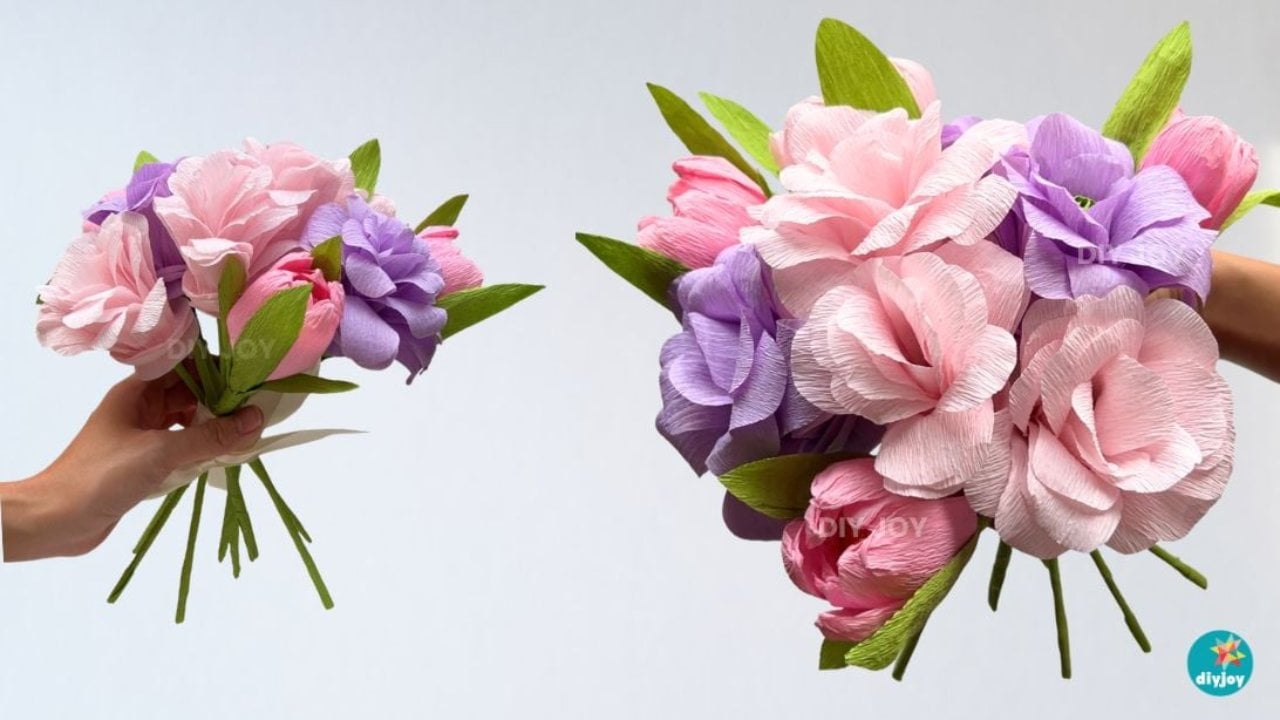
Two hands holding a small bouquet of crepe paper flowers in pink, blush and lilac with green crepe leaves, against a white wall. This DIY JOY tutorial takes one long strip of crepe paper, green crepe and a skewer, and that is the whole list. Nothing is cut petal by petal, which is why it is the beginner version and why a single rose takes ten minutes or less once the technique clicks. Crepe stretches, and that stretch is what gives the petal edge its ruffle without any shaping. Make a dozen and you have a bouquet that never wilts.
Get the full tutorial at DIY Joy.
27. How to Make Roses With a Paper Cup
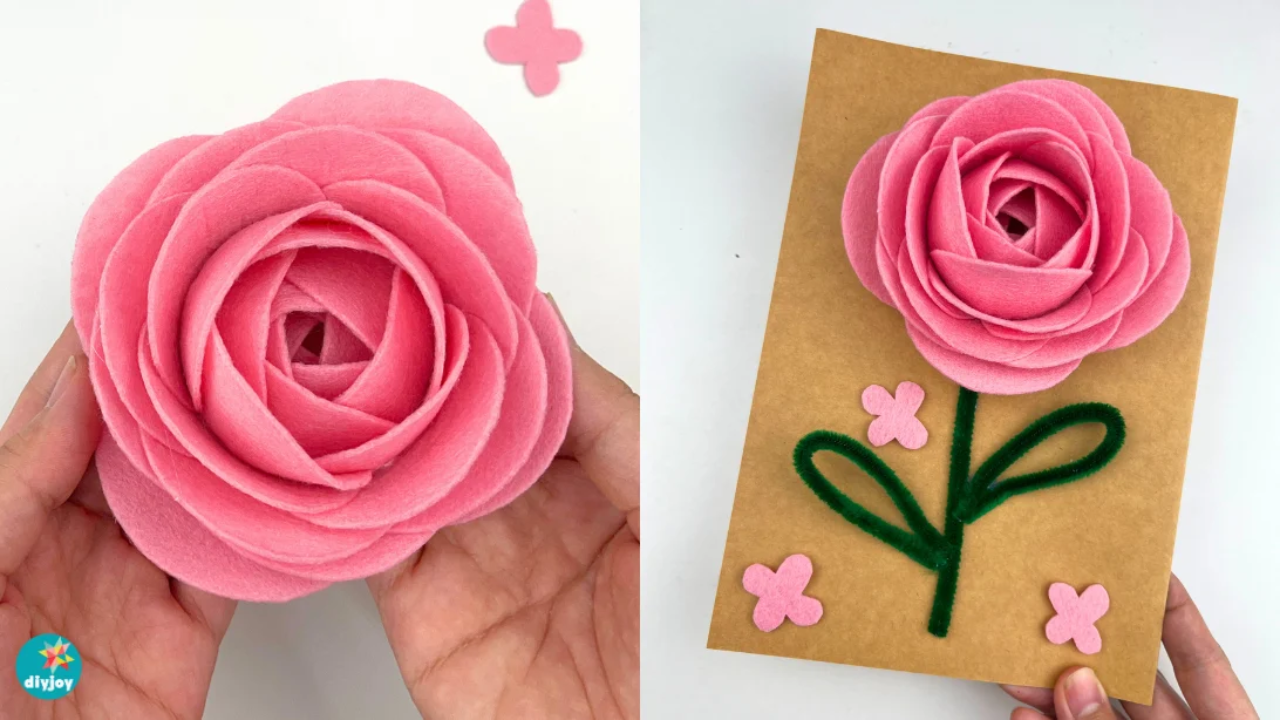
A hand holding a large open rose made from soft pink felt paper, beside a kraft card with a felt rose and a stitched green stem. The paper cup is the tool, not the material. The DIY JOY tutorial traces seventeen circles two and a half inches across onto felt paper, cuts them out, sets one aside, and uses an upturned cup to build and shape the rest into a bloom. No printed pattern, no petal shapes and no cutting machine are involved anywhere. It is the same method that makes salami roses on a charcuterie board, which is a fair description of how simple it is.
Get the full tutorial at DIY Joy.
28. How to Make an Easy Ribbon Rose
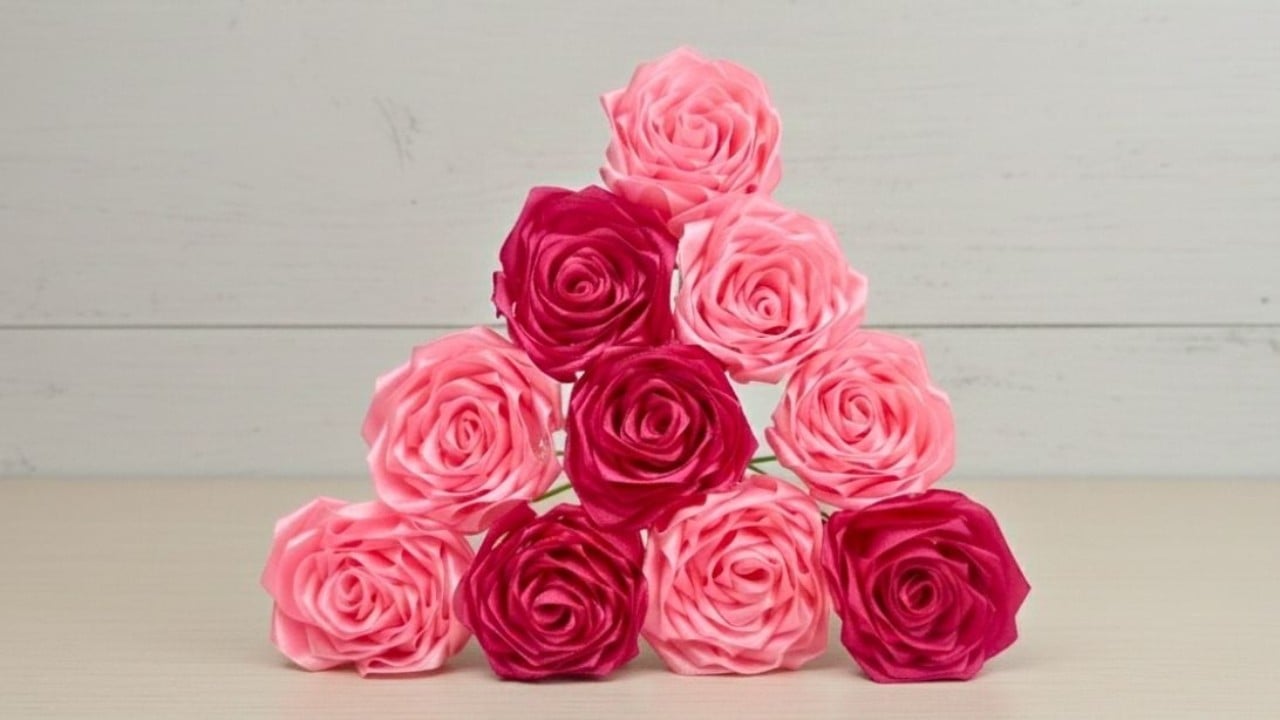
A stacked pyramid of satin ribbon roses in pale pink and deep magenta on pale wood. The DIY JOY tutorial builds each rose from twenty five pieces of satin ribbon, every one about seven centimetres long. Fold each piece diagonally into a triangle, fold the tip down to the bottom edge, then seal the folded edge with a quick pass of flame so it cannot fray. The petals are hot glued to one another and rolled onto a floral stem. Change the ribbon width and the rose changes size; use two or three colors together and the petals gain real depth.
Get the full tutorial at DIY Joy.
29. How To Make Denim Roses
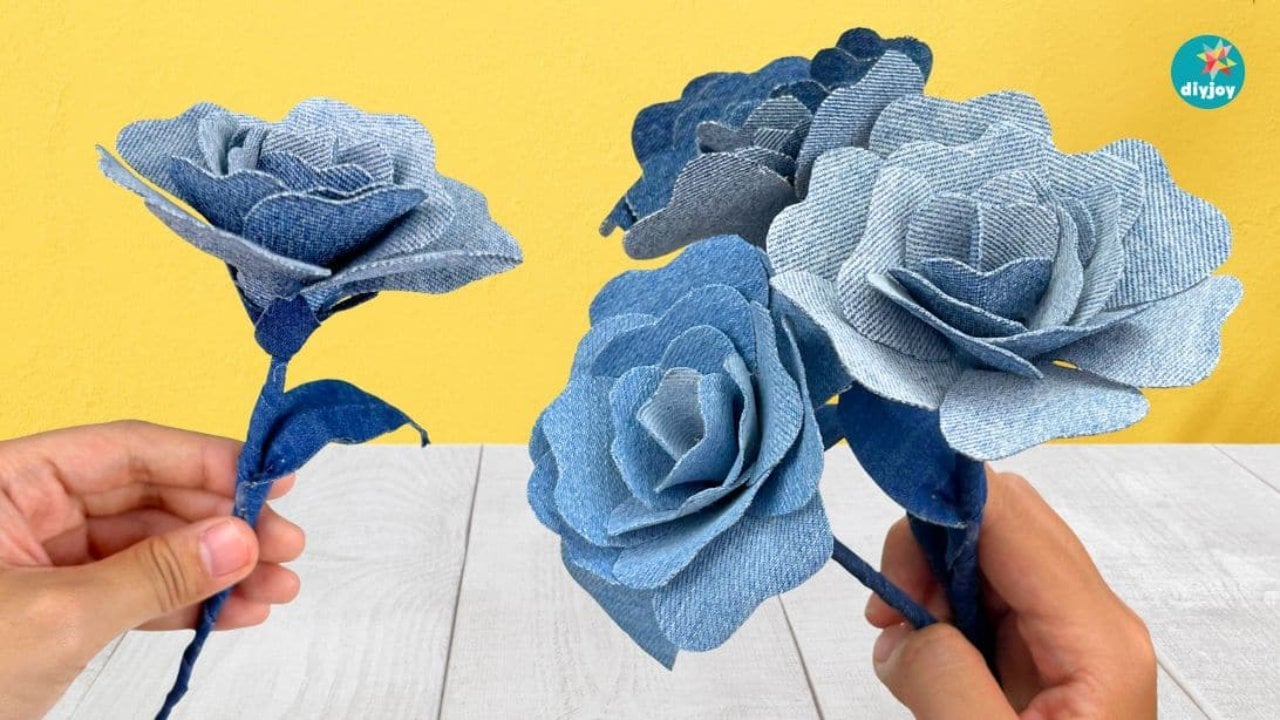
Two hands holding stems of denim roses in three shades of blue against a yellow wall, with more roses on the table below. There is no sewing in this DIY JOY tutorial at all. The one problem denim always brings is fraying, and the post lists every fix: Fray Check, a zigzag stitch, fabric glue, Mod Podge, PVA glue or pinking shears. PVA is the one used here, because most people already have it. An old pair of jeans or a worn out jacket turns into flowers that last for years, which makes them a keepsake rather than a craft.
Get the full tutorial at DIY Joy.
30. Budget-Friendly Dollar Tree Mesh Rose Wreath Tutorial
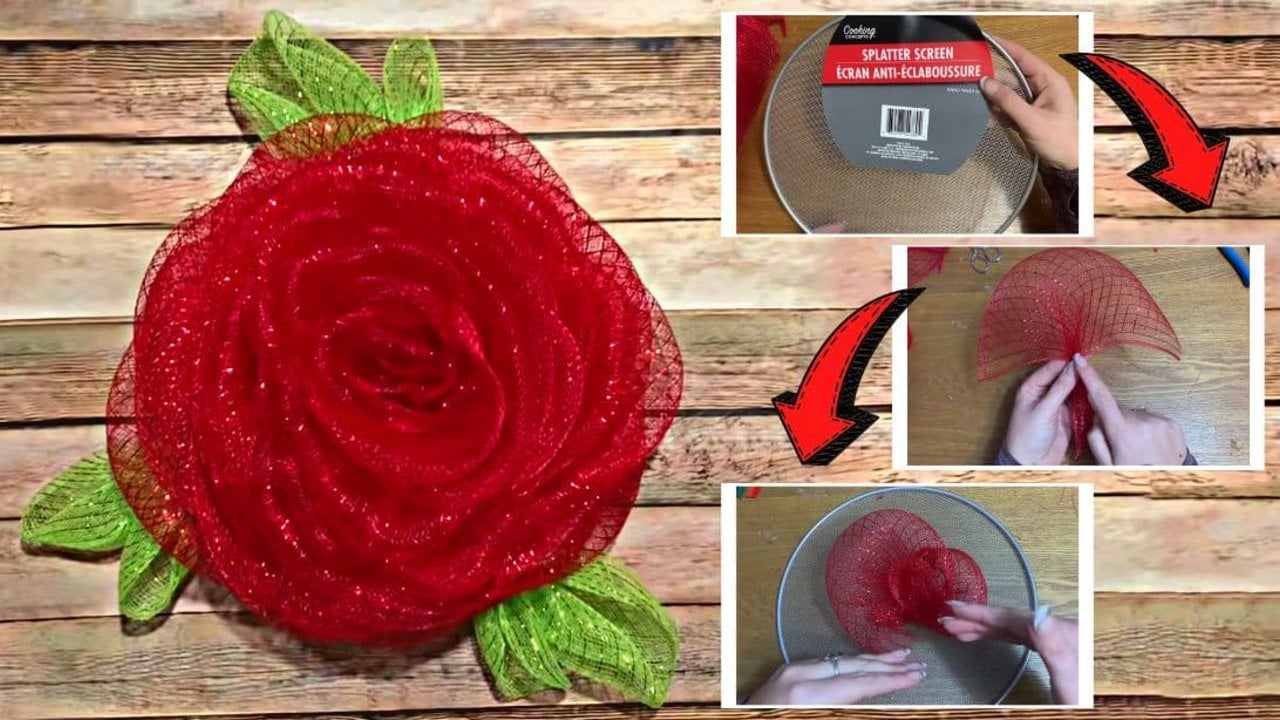
An enormous red deco mesh rose with glittered green leaves, mounted flat on weathered barn boards. The form underneath it is a splatter screen from the kitchen aisle, which is the whole reason this costs so little, since a wire wreath frame is the expensive part of any wreath. The mesh is cut into ten inch squares, folded diagonally into triangles, rolled into buds and held with half a pipe cleaner at the neck. Three to five supplies total, most of them already at home, and it goes together in minutes rather than an evening.
Get the full tutorial at DIY Joy.