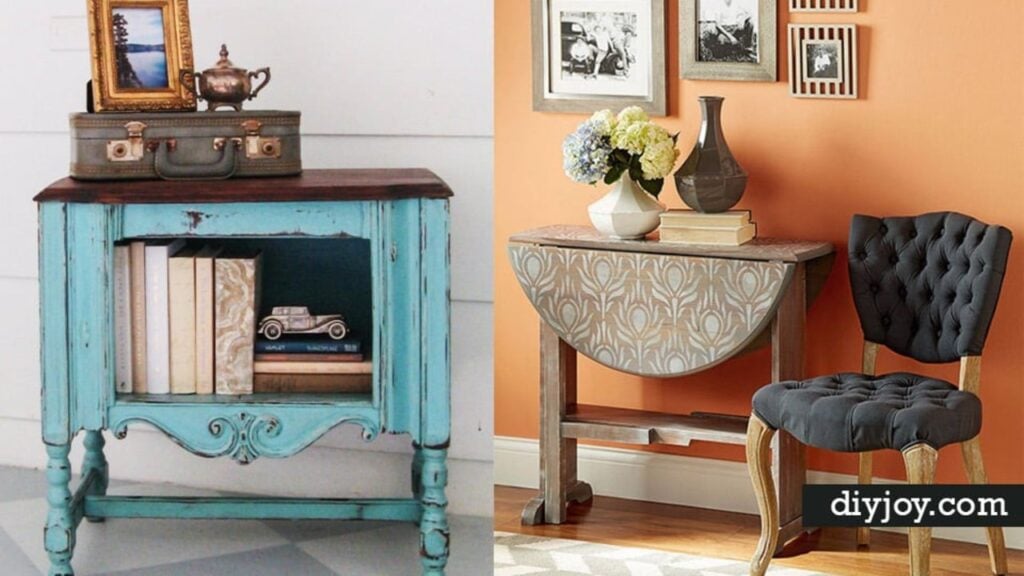
There is a piece of furniture in your garage right now that you cannot bear to throw out and cannot bear to look at either. That is who these furniture refinishing tips are for. The before and after photos below still astonish me, and most of the transformations come down to one decision made correctly: gel stain instead of a weekend of stripping, sanding paint before it has fully cured, or simply knowing where real wear would land on a piece before you take sandpaper to it. Thrift store bones plus a quart of paint genuinely does beat most of what is sitting in a furniture showroom, and it costs a fraction of it. Some of these are ten minute rescues with something already in your pantry. Others are proper weekend projects with a reveal worth photographing. Every one of them comes with a full tutorial from the person who did it.
1. French Provincial Furniture Flip
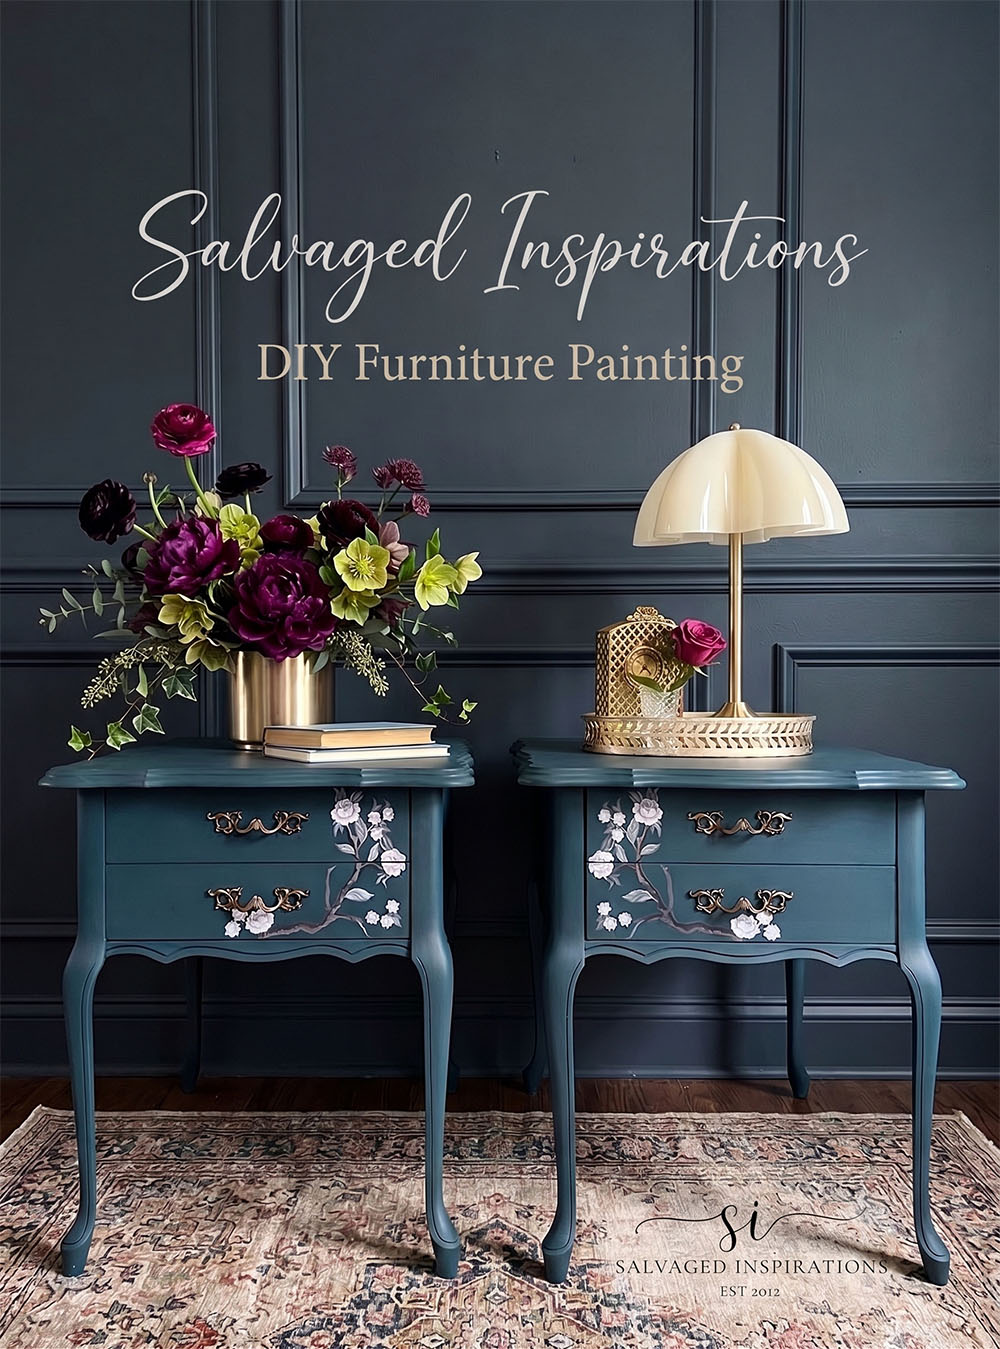
This one exists because a reader wrote in to say all the tools in furniture painting videos looked intimidating and asked for a beginner-friendly flip using basic supplies. The answer is a pair of French provincial side tables taken to a deep, dramatic color with decorative transfers over the drawer fronts, using nothing exotic. There is a full YouTube video with the written post. The reassurance is the real content here: years of scrappy, thrifty supply lists came before any of the nice tools, and the finished piece does not know the difference.
Get the full tutorial at Salvaged Inspirations.
2. Vintage Dresser Painted Blue
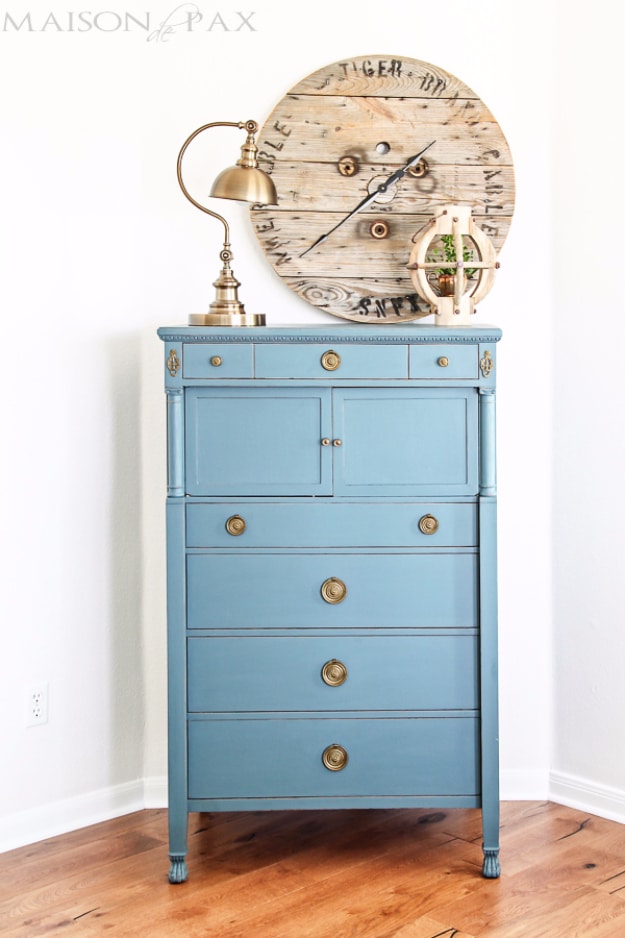
The paint is Fusion Mineral Paint in Homestead Blue, and its selling point is the one that matters on a tall chest: it adheres like a chalk paint but is acrylic based, so it needs no topcoat at all. On most pieces it goes on with essentially no prep. This particular dresser was an exception, since the old varnish was so deeply scratched that filling it would have taken pounds of wood filler, so it got sanded smooth first. The original hardware stayed. If you plan to distress it, do so soon after the paint is dry to the touch.
Get the full tutorial at Maison de Pax.
3. Gel Stain Essential Tips
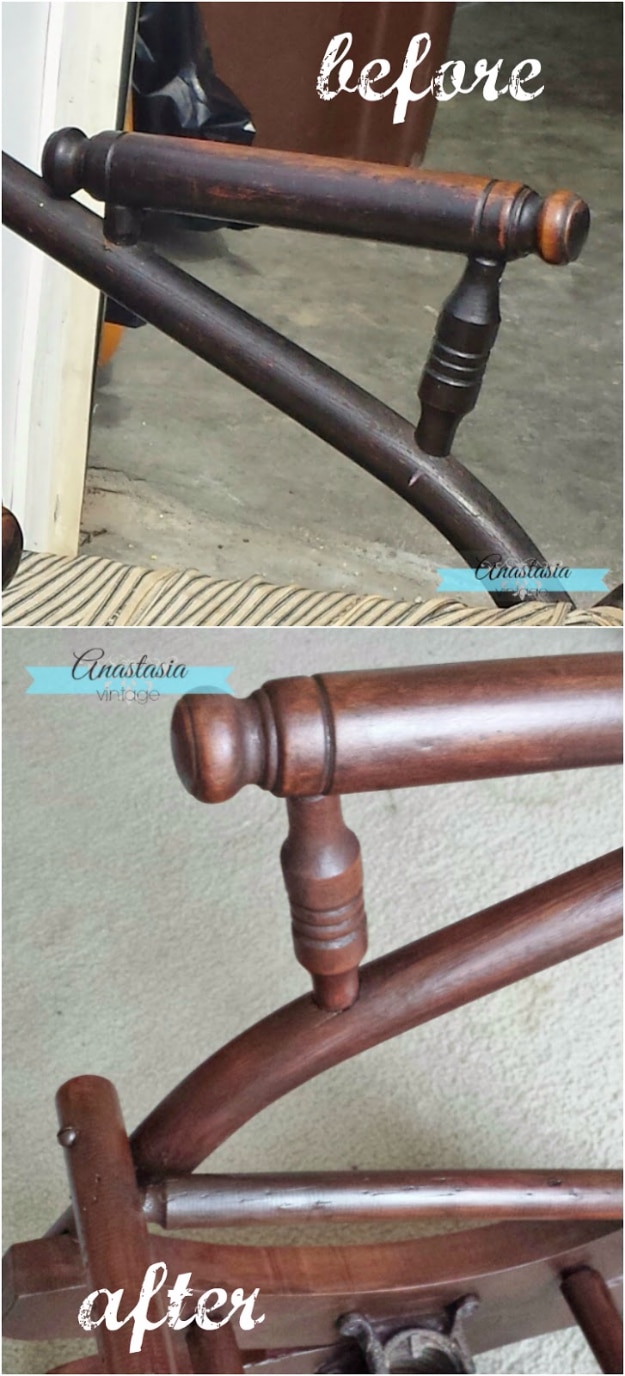
Gel stain is the forgiving one, and the rule that saves people the most work is about direction of travel. Going from a lighter piece to a darker stain, you do not need to strip anything, just sand it well first. Going the other way, light over dark, means stripping the piece completely, and after stripping, every trace of stripper has to come off before staining, scrubbed with a mild detergent and #0000 steel wool. Kit is minimal: a foam brush, shop towels or a staining pad, and an artist’s brush for detail. Gloves, goggles, mask and real ventilation, preferably outdoors.
Get the full tutorial at Anastasia Vintage.
4. Glamorous Dresser Makeover
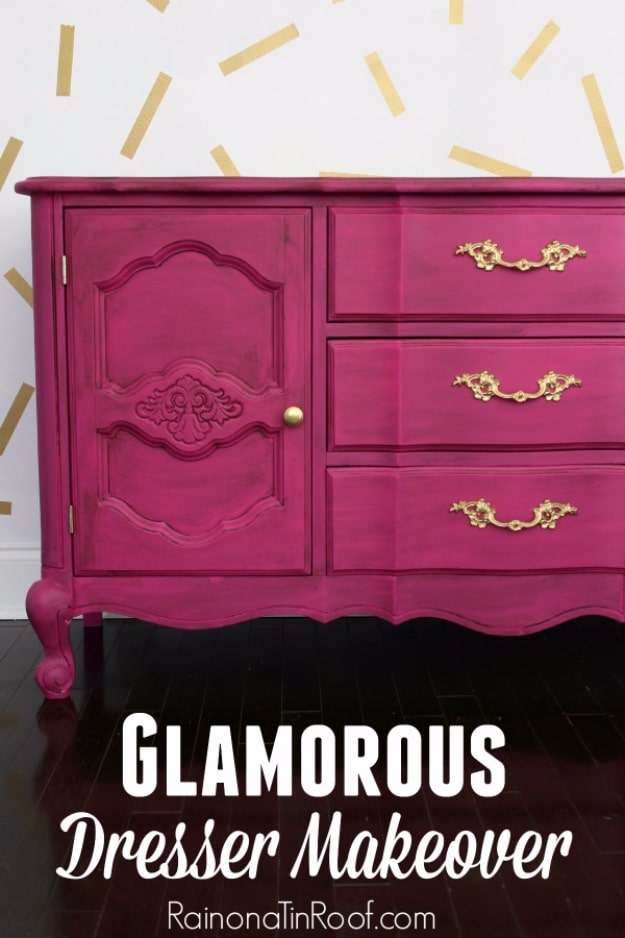
No priming and no topcoat required, which is most of the appeal. This dresser came out of a coworker’s garage for free, and the paint is Velvet Finishes in a rich pink shade actually called Glamorous. The top had paint already lifting in one patch, so rather than paint unevenly over it the whole top was stripped with a heat gun, and the rest of the piece got a thorough clean and nothing more. Four light coats of paint went on with a brush, then a glaze was layered over the top to add depth. New pulls carry more of a transformation than people expect.
Get the full tutorial at Rain on a Tin Roof.
5. Re-Coating The Buffet
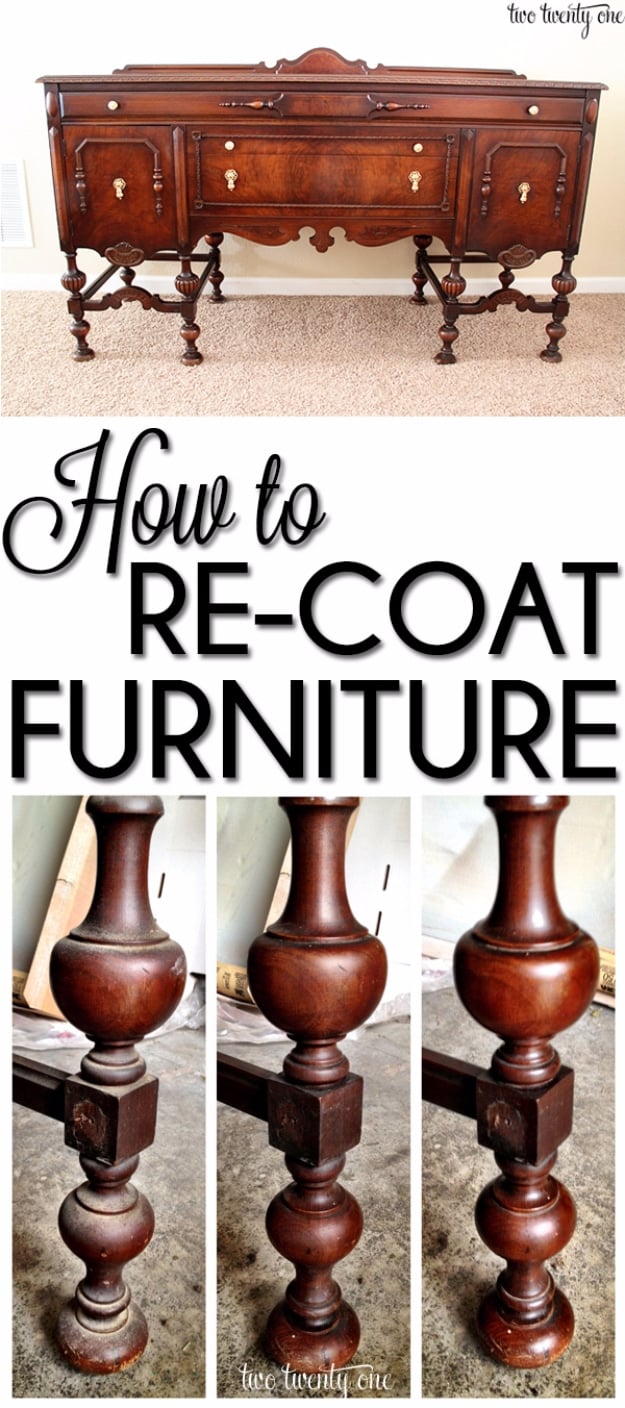
Sometimes a piece needs reviving rather than repainting, and this 1920s buffet was talked through step by step with someone at Minwax. Start by cleaning with a TSP substitute, since traditional TSP is banned in some states and is hard on the environment, using a rag on the broad surfaces and a toothbrush in the grooves, wiping the excess off rather than letting it sit. Gloves on. Then touch up the scratches on the top with a Minwax stain marker, and finally wipe on Wipe-On Poly with a clean lint-free rag. No stripping and no priming anywhere in it.
Get the full tutorial at Two Twenty One.
6. Simple Aqua Redo
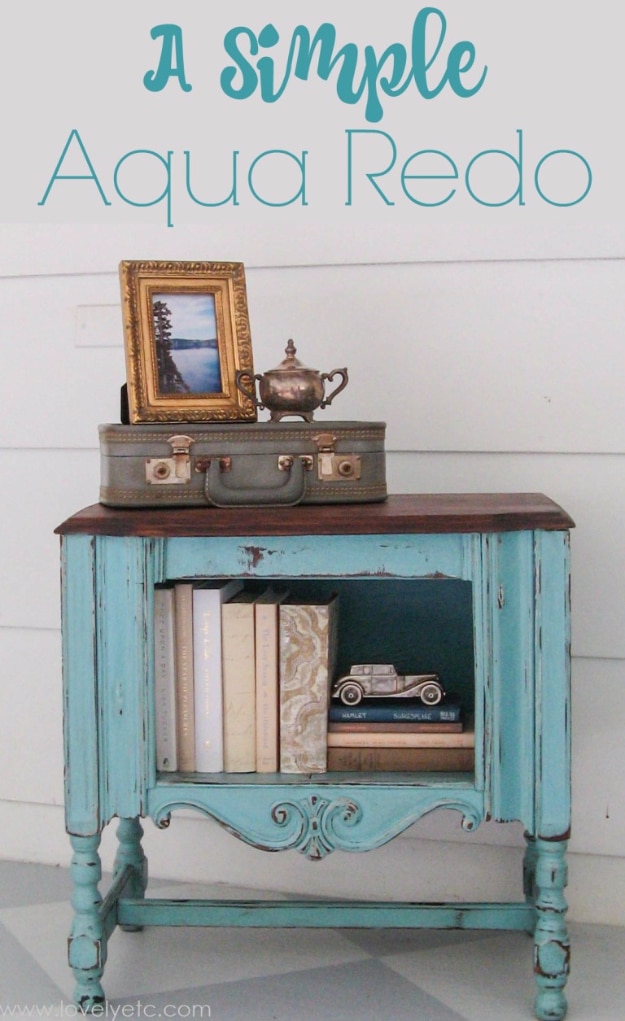
Five dollars at a yard sale bought this little radio cabinet in genuinely terrible condition. The veneer on the top was dry and peeling badly enough that wood filler was pointless, so it was scraped straight off with a paint scraper, revealing a hardwood top pieced together from strips of different woods that was never meant to be seen and turned out to be the best part of the piece. The paint is plain latex, a five dollar mistint gallon. Then 100 grit sandpaper to distress it heavily on the curves and corners, and Minwax English Chestnut stain wiped on and off for age.
Get the full tutorial at Lovely Etc..
7. Farmhouse Style Finish
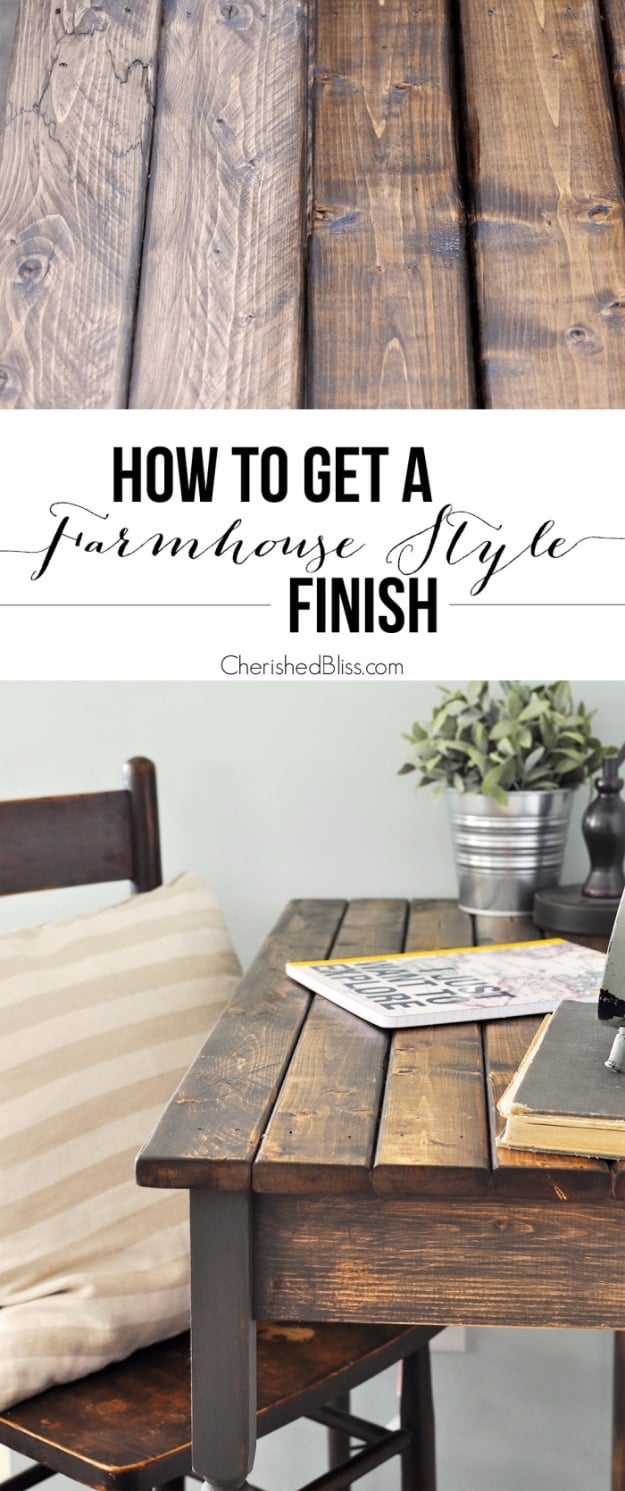
This is a layered finish rather than a single coat, and the order is what makes it. Minwax Special Walnut stain goes on first, rubbed in by hand with a lint-free rag for a hand-rubbed look. Once dry, the base gets latex paint, Sherwin Williams Urban Bronze, brushed on without fussing over full coverage since some of it comes straight back off. Sand while the paint has not fully set, because it rolls off more easily then, using steel wool rather than sandpaper for a softer result. On the top, dry brush grey and wipe it off immediately with a damp rag so it settles into the grooves.
Get the full tutorial at The Crafty Blog Stalker.
8. Two Toned Pedestal Side Table Makeover
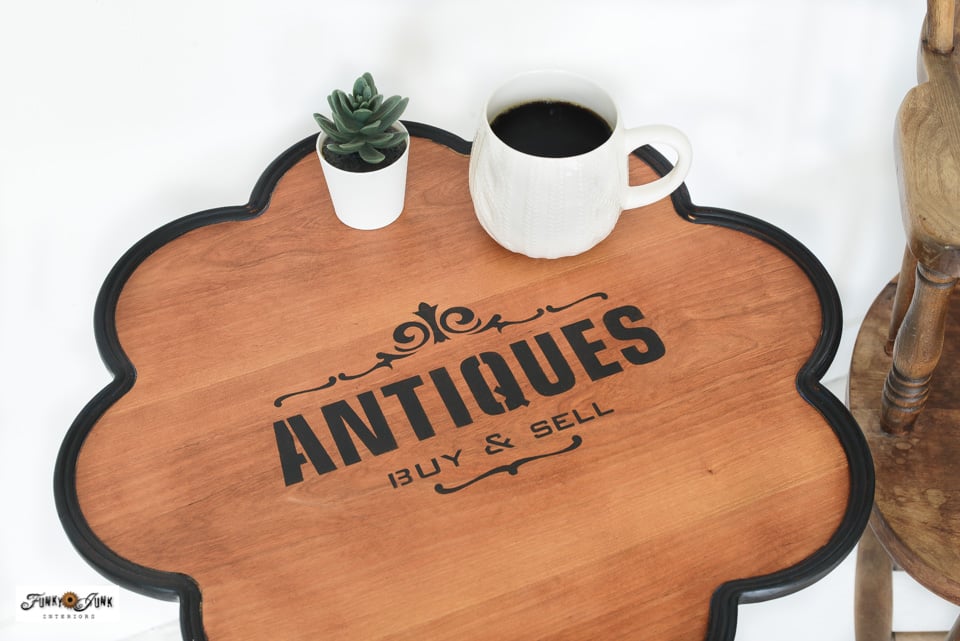
A free curbside find painted a deep blue, solid wood rather than veneer or particle board, with one leg that kept wiggling loose. The makeover splits it in two: the top comes back to bare wood grain and carries a stenciled Antiques sign, while the base stays painted, using Fusion Mineral Paint. Two tones do more for a cheap table than any single color can, because the line between them reads as a design decision. The shape is a reproduction pie crust table and the height happens to be perfect as a sofa-side tray table.
Get the full tutorial at Funky Junk Interiors.
9. Distressing Painted Furniture
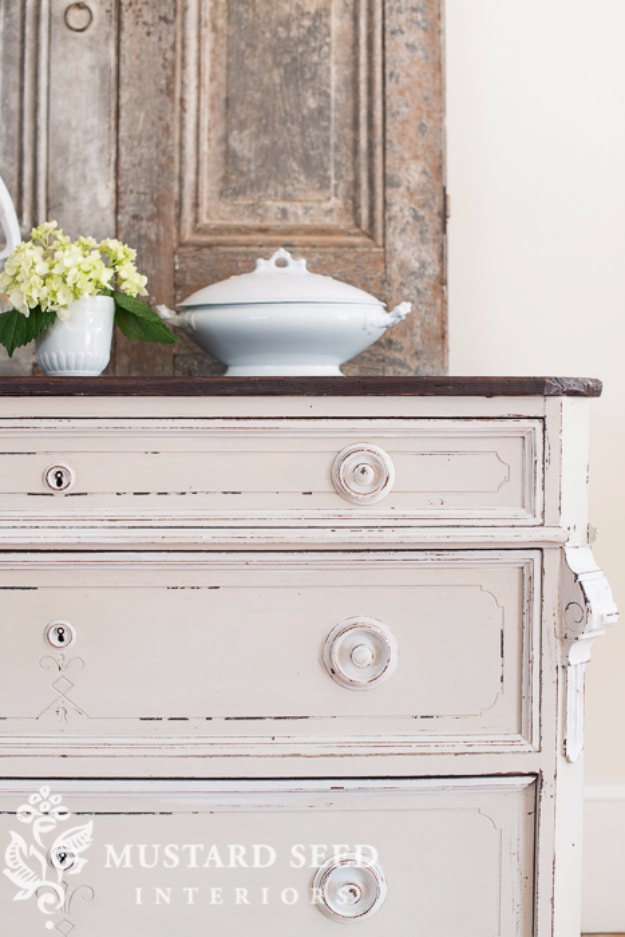
Distressing is not roughing a piece up, it is removing paint from the high points in a way that looks like it happened over years. The giveaway on a badly distressed piece is an orbital sander mark in the middle of a drawer front, because wear does not happen there and it certainly does not happen in swirls. Work by hand with 100 grit in flicking strokes along the edges, around the drawers and drawer openings, the corners, and around handles and keyholes. Follow with medium and then fine sanding sponges, which soften the scratchiness, and step back every few minutes.
Get the full tutorial at Miss Mustard Seed.
10. Updating A Nightstand
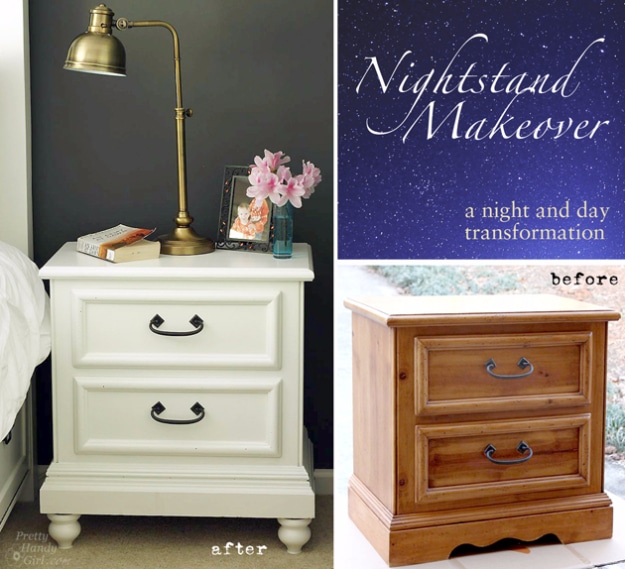
This is not a paint-and-new-knobs job, it is a height fix. A knotty pine nightstand was too short for a newly built taller bed, so it got baseboard moulding glued and finish-nailed around the base and four turned tulip feet on straight leg top plates underneath. The moulding ends are cut at interior-facing 45 degree bevels at the front corners and straight at the back. Nail holes and the factory dimples get wood putty, then Zinsser BIN primer and Benjamin Moore Advance paint to match the bed. Gorilla Glue, finish nails and a miter saw do the work.
Get the full tutorial at Pretty Handy Girl.
11. Victorian Gothic Table Makeover
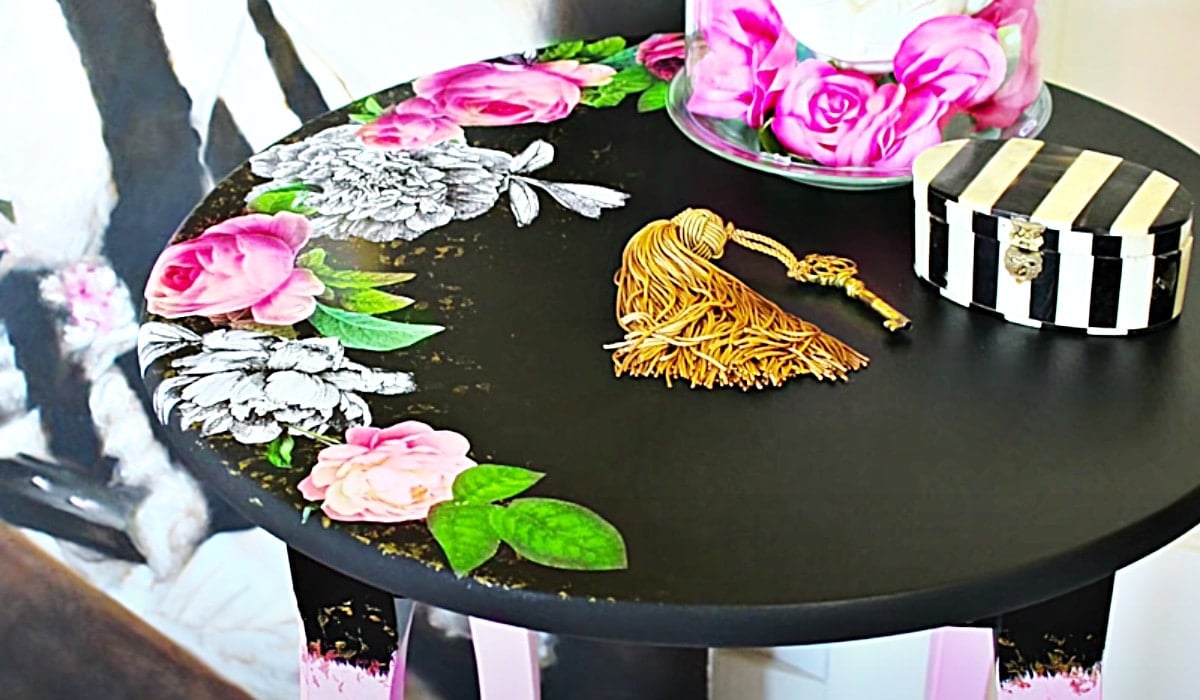
Any table will do for this one, and the pattern would be extraordinary on an antique bed. The materials are chalk paint in pink, white, brown, green and black, gold metallic paint, decoupage glue, crumpled paper and a spray matte finish. The crumpled paper is what creates the aged, leathery texture under the color, and the gold picks out the detail on top. Americana is the brand favored in the tutorial, though Waverly chalk paint from Dollar Tree does the same job for a lot less if you are covering a large surface.
Get the full tutorial at DIY Joy.
12. DIY Gold Dipped Bar Stools
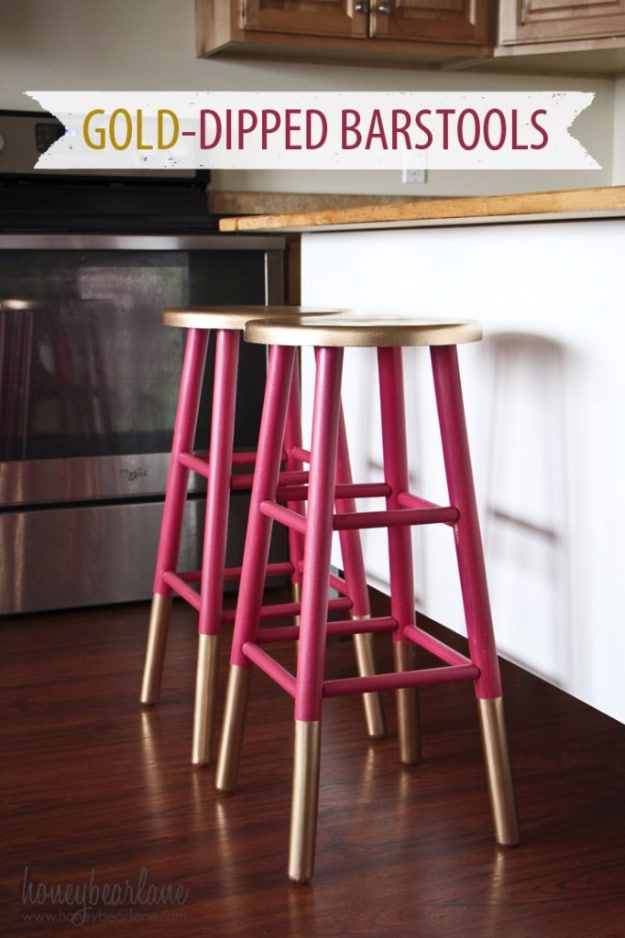
Old nineties bar stools, painted raspberry pink first, then gold dipped with Krylon gold spray. The actual technique is better than tape alone. Wrap the legs in craft paper and spray the seat top gold first. When that is dry, flip the stool, measure and tape the point where each dip should stop so all four legs match. Then cut a ten by ten inch square of cardboard, trace the leg in the middle and cut the shape out with an X-Acto, slide the leg through the hole, and spray without worrying about overspray. Let it dry fully before removing the cardboard.
Get the full tutorial at Honeybear Lane.
13. Refinishing Folding Chairs
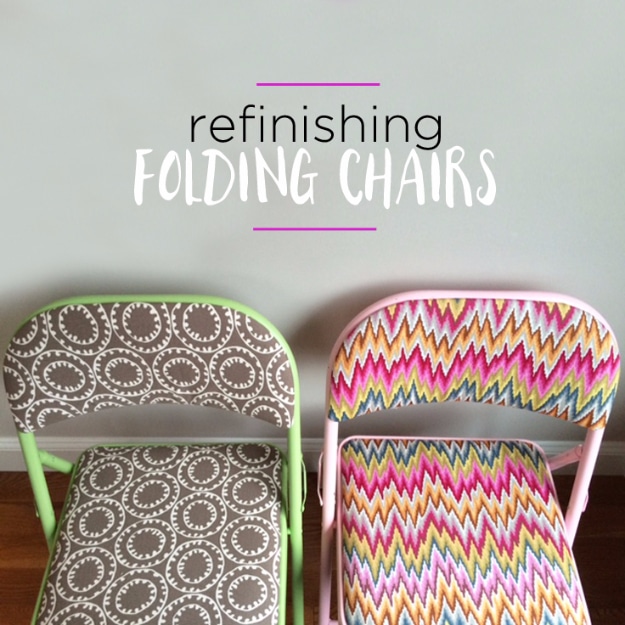
Cushioned folding chairs with back and seat pads attached by standard screws, taken from beige to cheerful with spray paint and remnant fabric. Take the pads off first and put the screws somewhere you will find them again, because you need them at the end. Spray the frames with a paint that holds up on metal, two or three coats, and budget about a can per chair. Each pad takes under half a yard of fabric, stapled over the existing cushion. A staple gun runs about ten dollars anywhere that sells basic tools, and the chairs still fold flat afterward.
Get the full tutorial at Ideas for the Home by Kenarry.
14. Paint Oak Cabinets With A Smooth Finish
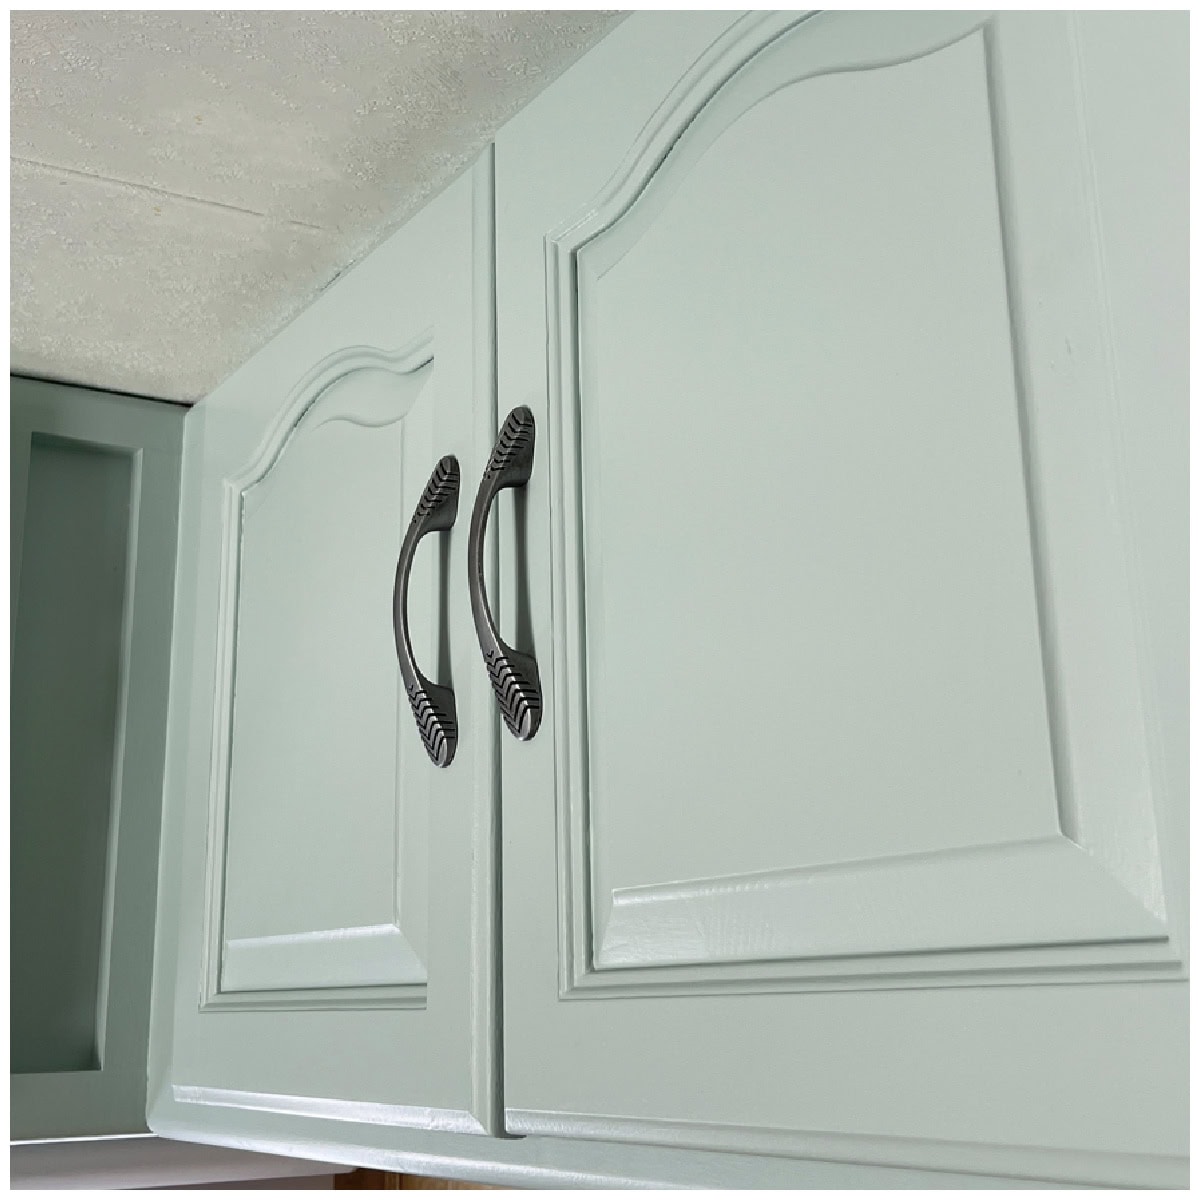
Oak grain is the problem and no amount of paint will fill it, which the author demonstrates with a close-up of a patch of paint sitting in a gap that is still plainly a gap. These are RV kitchen cabinets going from golden oak to a soft painted finish, and the whole point of the write-up is getting genuinely smooth rather than merely painted. The cabinet hardware was refinished alongside, the countertops redone and the wallpaper border removed. She is explicit that the mistakes came first and the method second, which is the most useful kind of tutorial.
Get the full tutorial at My Wee Abode.
15. Watercolor Nesting Tables Makeover
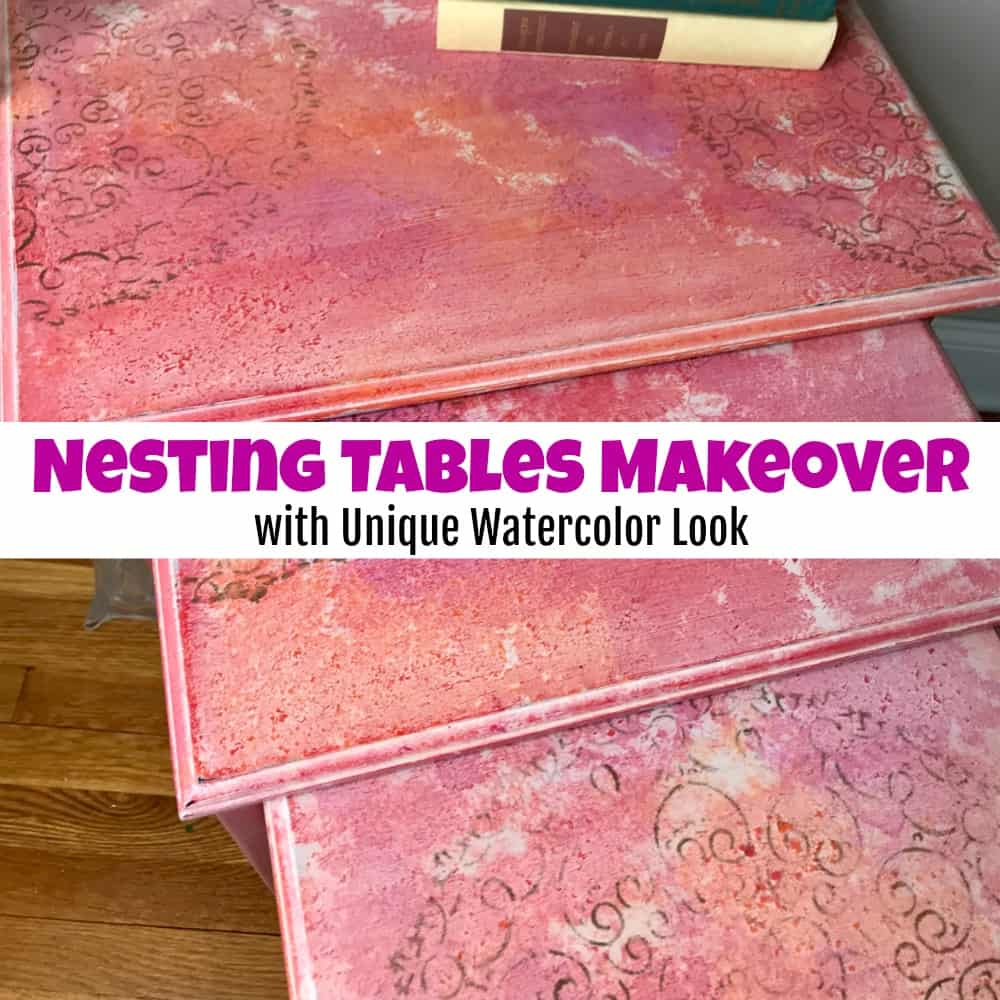
A marketplace set of three Bombay Company nesting tables, plain dark brown, taken to a soft washed watercolor effect on the tops. The paints are Wise Owl, gray primer first then Oyster, Mandarina, Poppy, Lotus and Kashmir with Heavy Metals bronze metallic gilding paint, plus Salt Wash for texture and a clear sealer over the finished tops. Zibra or Cling On brushes, sandpaper, a stencil, a lint-free cloth and a shop vac make up the rest of the kit. Nesting tables really are the overachievers of small-space living, and three of them take one afternoon rather than three.
Get the full tutorial at Just the Woods.
16. Quick And Easy Way To Refinish Wooden Furniture
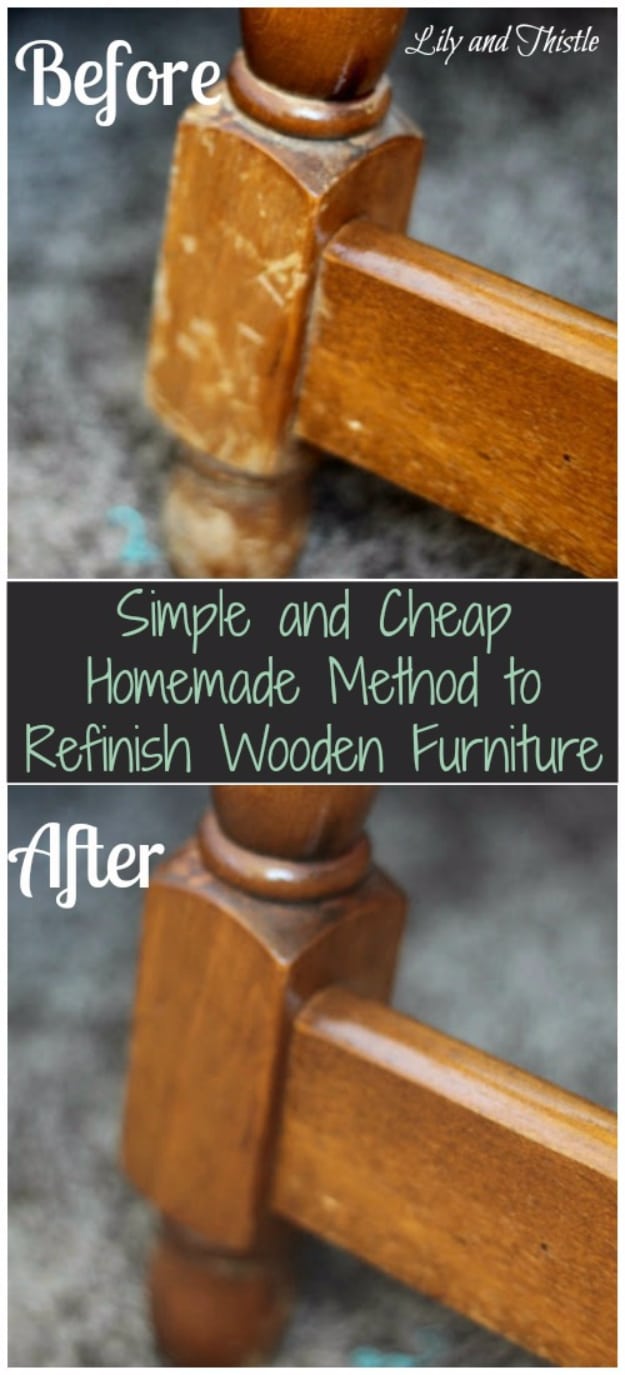
This is the pantry version and it takes minutes. Three-quarters of a cup of olive or vegetable oil, a quarter cup of white or apple cider vinegar, mixed together, a rag dipped in it and wiped over the piece. It fills the small nicks and brings the shine back, and because neither ingredient harms the wood you can redo it as often as you like. One honest caveat from the comments, left by a refinisher of thirty years: vegetable oil is not a drying oil, so it stays tacky and collects dust, and it complicates any proper refinishing later.
Get the full tutorial at DIY & Crafts.
17. Stain Over Stained Furniture Without Sanding
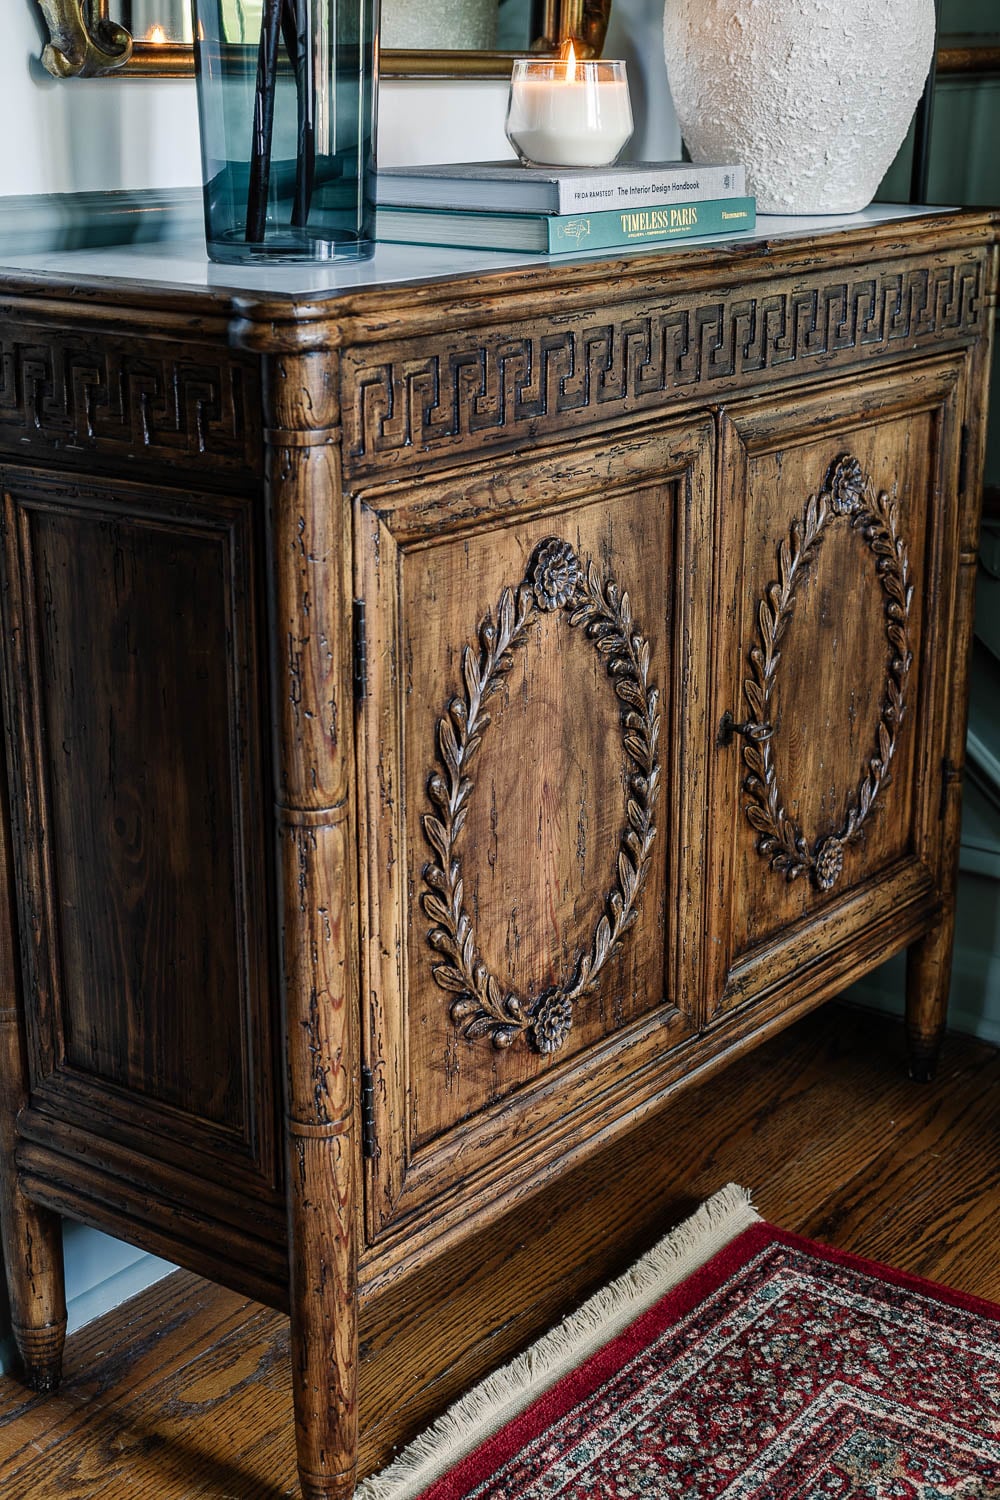
Four conditions decide whether this works, and they are worth reading before you buy anything. You can only go darker over lighter, never lighter over darker, and going lighter still means stripping. The piece has to be sound, with no water damage and no peeling or cracking in the surface. And the stains have to match chemistry: oil-based gel stain over an existing oil-based stain, water-based over water-based, because they do not mix in furniture refinishing any more than they do anywhere else. Meeting all four, a full weekend project becomes an evening one, with no stripper anywhere in it.
Get the full tutorial at Bless'er House.
18. Fix Faded Aluminum Patio Furniture
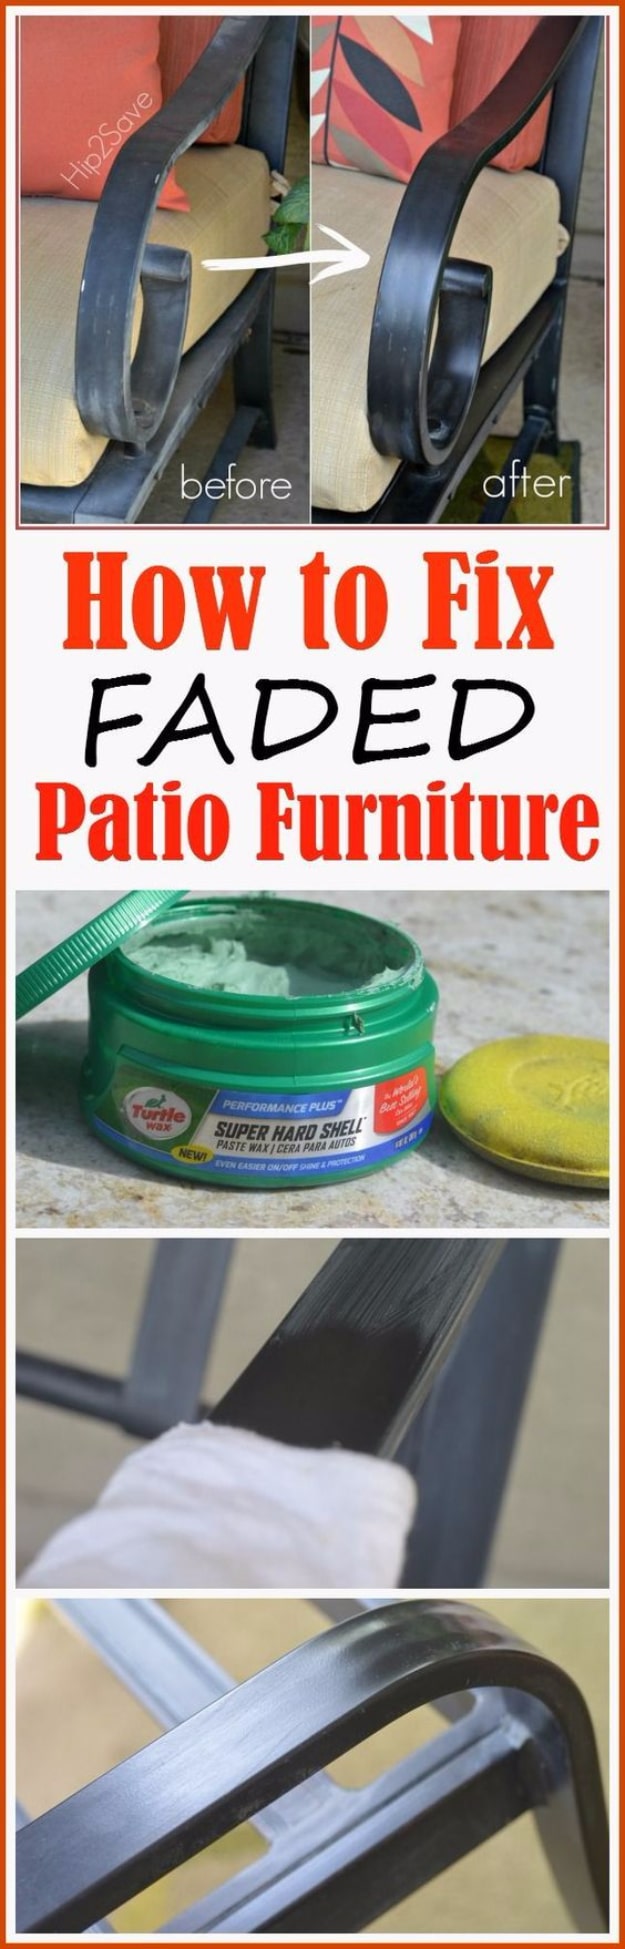
Two supplies: automobile wax, the kind that comes with a sponge, and dry microfiber towels. Take the cushions off and wash the frames well with a rag and a little soapy water, then let them dry completely. Wipe a thin layer of wax onto one section, and note that it dries within about a minute. Buff it off entirely with a clean dry cloth and the surface comes back smoother, darker and shinier. The mistake she made first time was waxing two whole chairs at once and letting it sit too long, which makes it much harder to remove.
Get the full tutorial at Hip2Save.
19. Whitewashing Furniture
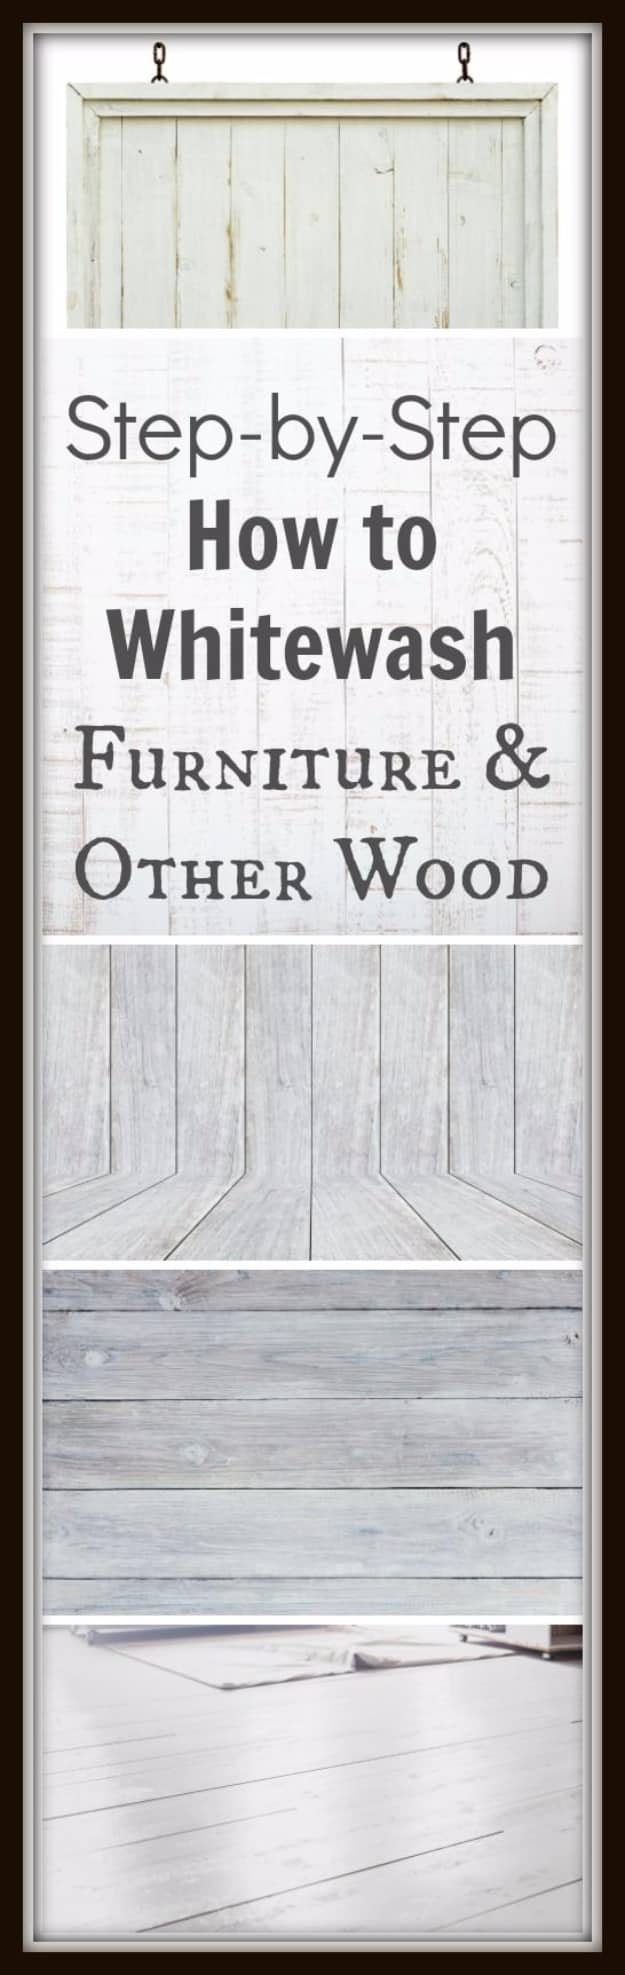
The recipe is one part water to one and a half parts white flat finish latex paint, and the reason for thinning it is simple: adding another layer is easy, taking one away is not. Test it on the back of the piece or a spare board before you commit. Sand first at 60 or 80 grit, then clean with alcohol or a one to one mix of water and vinegar, which both cleans and dries the surface out so the wood drinks the paint in properly. Stop there for a rustic finish, or sand once more for something smoother.
Get the full tutorial at Painted Furniture Ideas.
20. Decoupaged Furniture
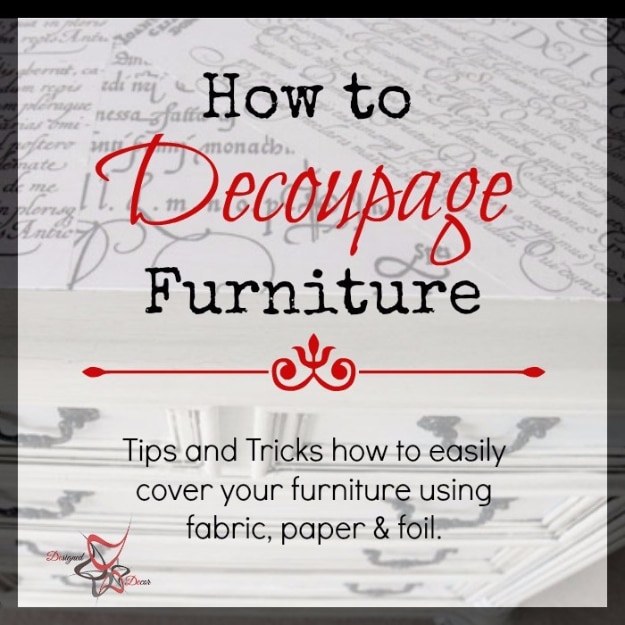
Decoupage comes from the French decouper, to cut out, and on furniture it delivers pattern that paint simply cannot: florals, maps, book pages, wrapping paper worth keeping. The guide is built around the questions people actually ask, which are what supplies you need, which material works best, how to seal it, whether to paint the piece first and what paper to use. Her own kit starts with Wunda Size, and the same method applies whatever material is going on. Drawer fronts and tabletops are the natural places for it, and a topcoat armors anything that gets touched daily.
Get the full tutorial at Designed Decor.
21. Refinishing Wrought Iron Patio Furnitures
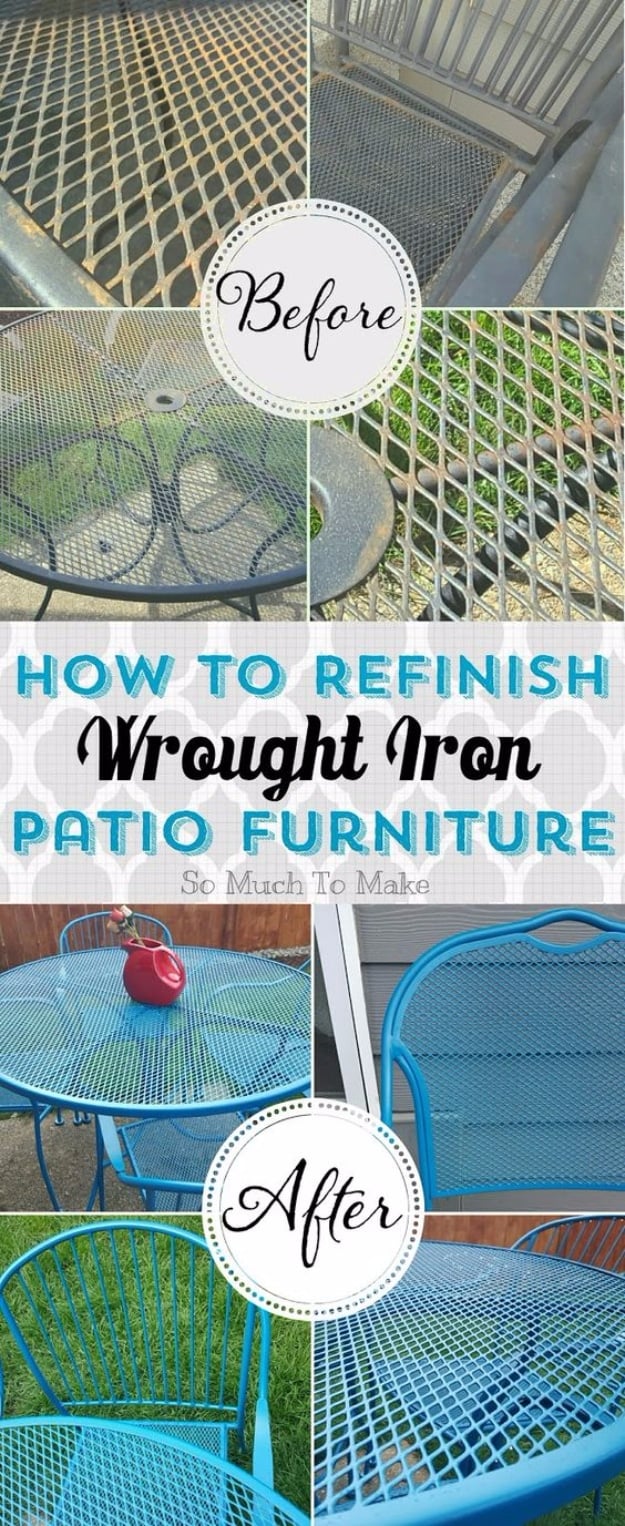
Real numbers on this one. Seven cans of rust-resistant spray paint at about four dollars each covered one large round table and five chairs, and with the wire brush, sandpaper and rags already on hand the whole set came to thirty dollars. Wire brush the welded joints, where flaking paint hides, and use sandpaper on the flat sections. Wipe the dust off with an old rag, lay drop cloths with plenty of margin for overspray, and spray from ten to twelve inches away in short sweeps, never lingering in one spot. One side in the morning, the other in the afternoon.
Get the full tutorial at So Much To Make.
22. Perfectly Striped Drawers
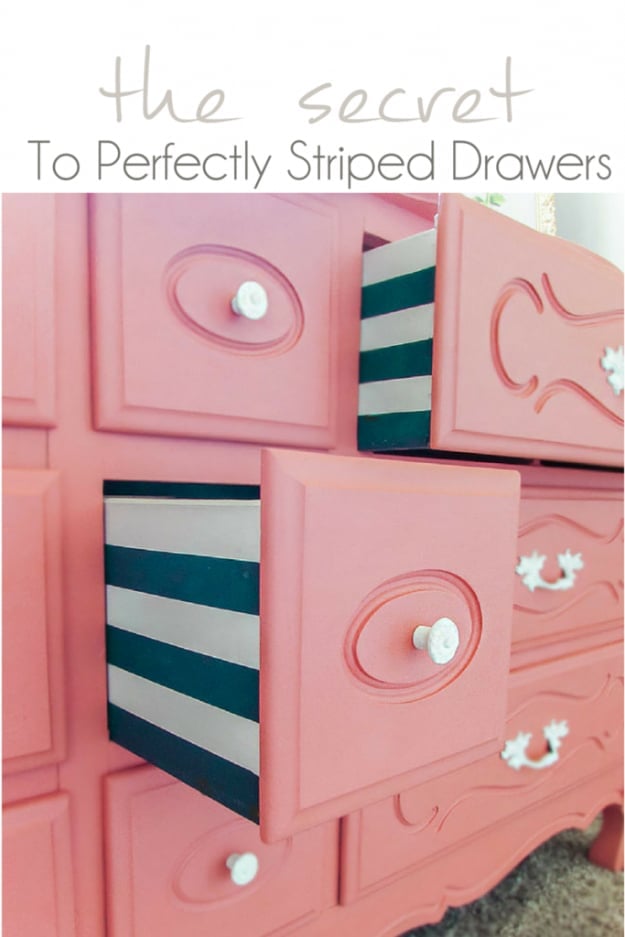
The stripes here run down the sides of the drawers rather than across the fronts, which is why the dresser reads as plain coral until somebody opens it. Two solid coats of white chalk paint go down first as the base, and white is chosen deliberately because painting dark over light is far easier than the reverse. Because these drawers had a slightly rounded top edge that would have been miserable to transition, the layout starts on a white stripe so that awkward area blends inside and out. Even spacing is the other half, and tape spacers get you there without endless measuring.
Get the full tutorial at Pocketful of Posies.
23. Sanding Furniture Tips
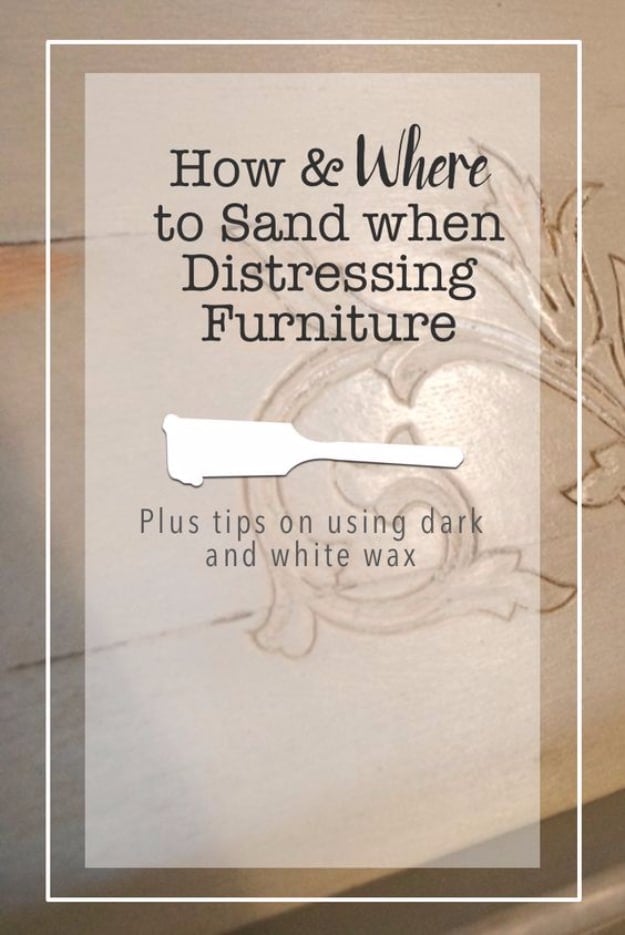
About ninety percent of the sanding done here when distressing a piece is by hand, not with a power sander, using a sanding block that is just a scrap of wood with paper wrapped around it. The common grits run 220 down to 80, lower being rougher, and 80 is used carefully because it will cut through paint into the wood and leave deep marks. She buys 9 by 11 sheets and quarters them, which fits both the palm sander and the block. The best line in it: on chalk based paint, no sandpaper was used at all, just a wet rag.
Get the full tutorial at Country Design Style.
24. Limewashed Table Makeover
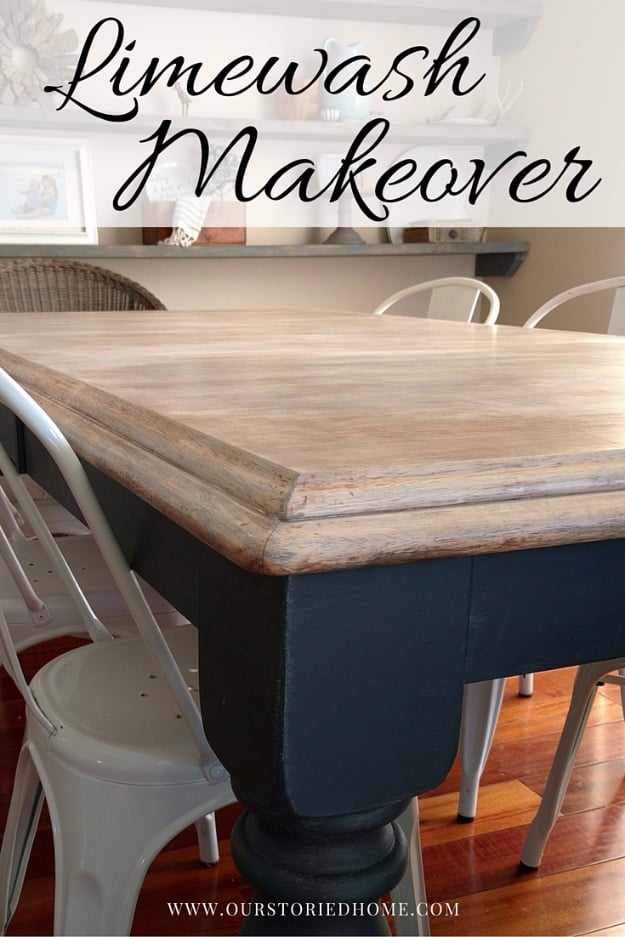
The table was scraped back through layers of polycrylic, latex paint and stain, which also took off a decade of marker doodles and impossible food stains, leaving a clean slate to work on. Valspar’s Limewash Glaze was then worked into the tabletop for a soft, beachy, sun-softened finish. The legs went in a different direction entirely, painted Annie Sloan Graphite to anchor the whole thing, and everything got waxed with clear wax at the end. Black, white and wood tones together is a combination that keeps working, and this table is the argument for it.
Get the full tutorial at Our Storied Home.
25. Create Two Pieces Of Furniture From A Hutch
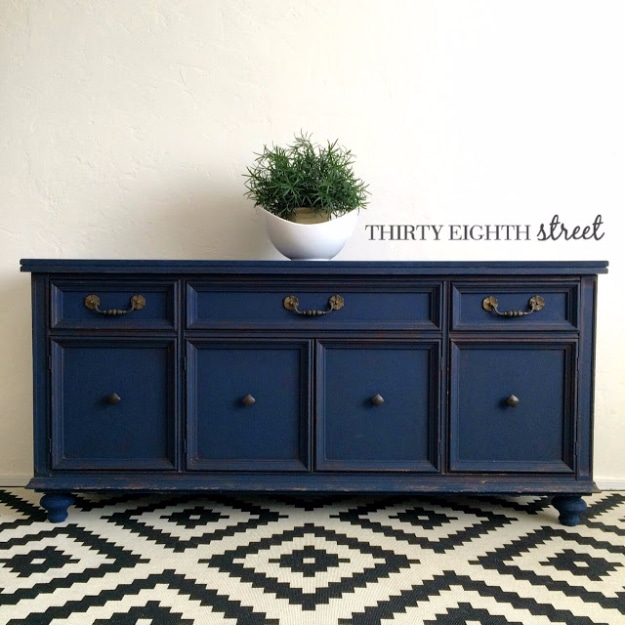
The trick most people miss is the legs. Separating the top and base of a tired china hutch gives you two pieces, but the base only stops looking like half a hutch once legs are added to it, and that is what turns it into a console worth having in a hallway. Hutches sell cheap precisely because they are enormous and nobody has the wall for one, which makes this the best value play in secondhand furniture. Both halves then get refinished independently, so they need not match at all, and one purchase furnishes two rooms.
Get the full tutorial at Thirty Eighth Street.
26. Liming Wax Drum Table Makeover
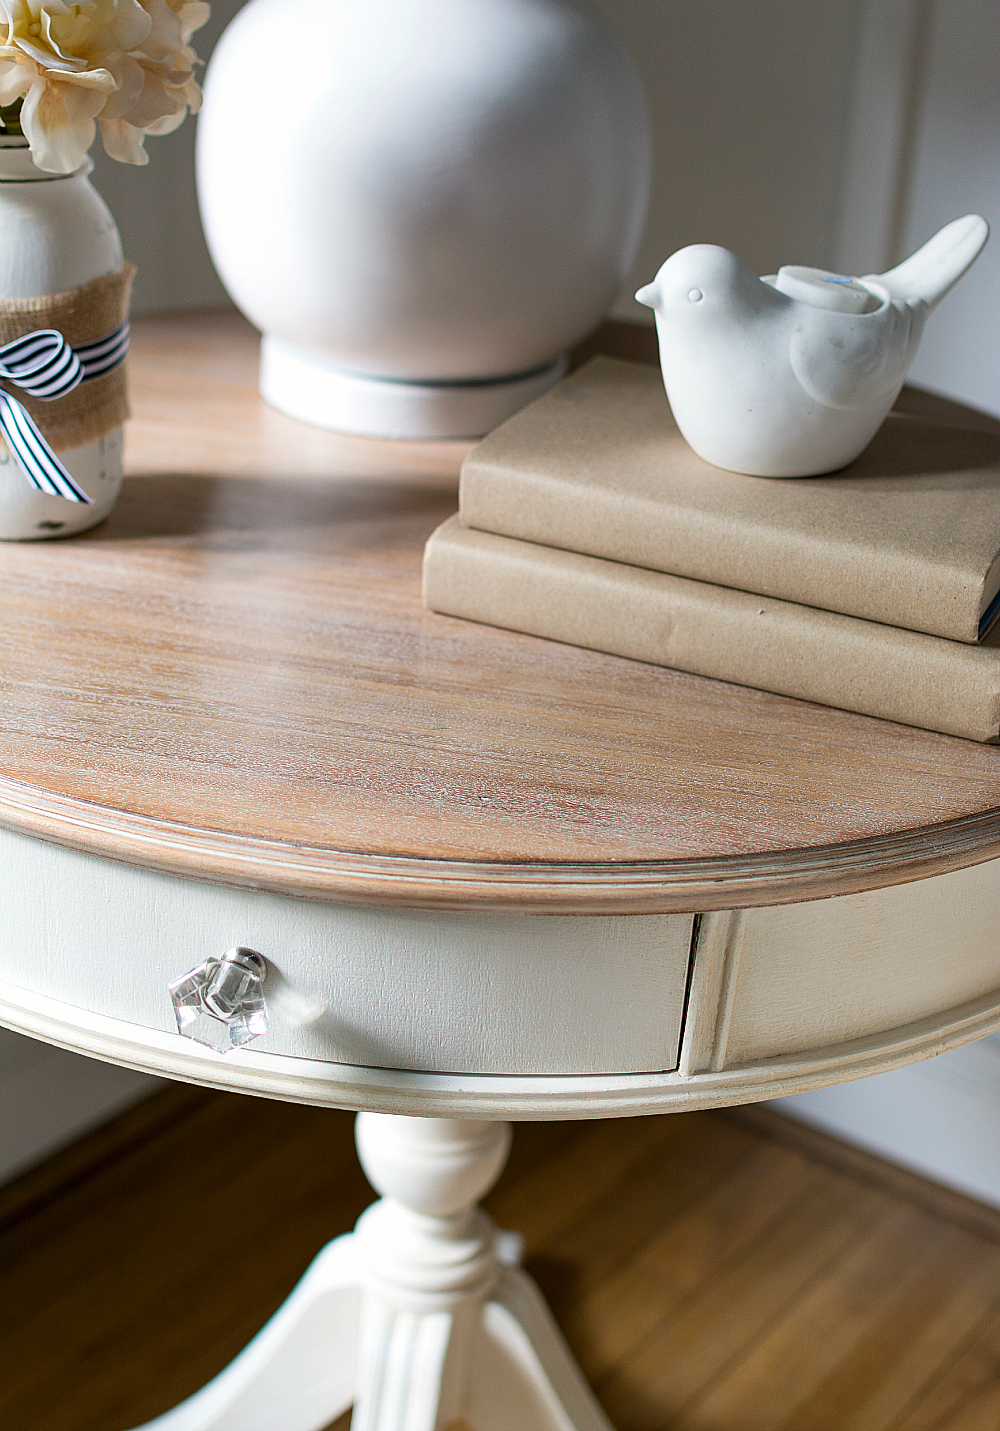
The prep is where this finish is actually won. The drum table’s top was sanded through 60, then 120, then 220 grit and cleaned with a tack cloth, then gone over with a wire brush moving with the grain, never across it, which opens the grain so the wax has somewhere to settle. Another tack cloth pass, then Amy Howard liming wax. The piece is over a hundred years old, with 1914 written under a drawer, and every trace of the original varnish had worn away. Stripping is optional: if you like the existing finish, skip straight to the wax.
Get the full tutorial at It All Started With Paint.
27. Faux Distressed Metal Furniture Makeover
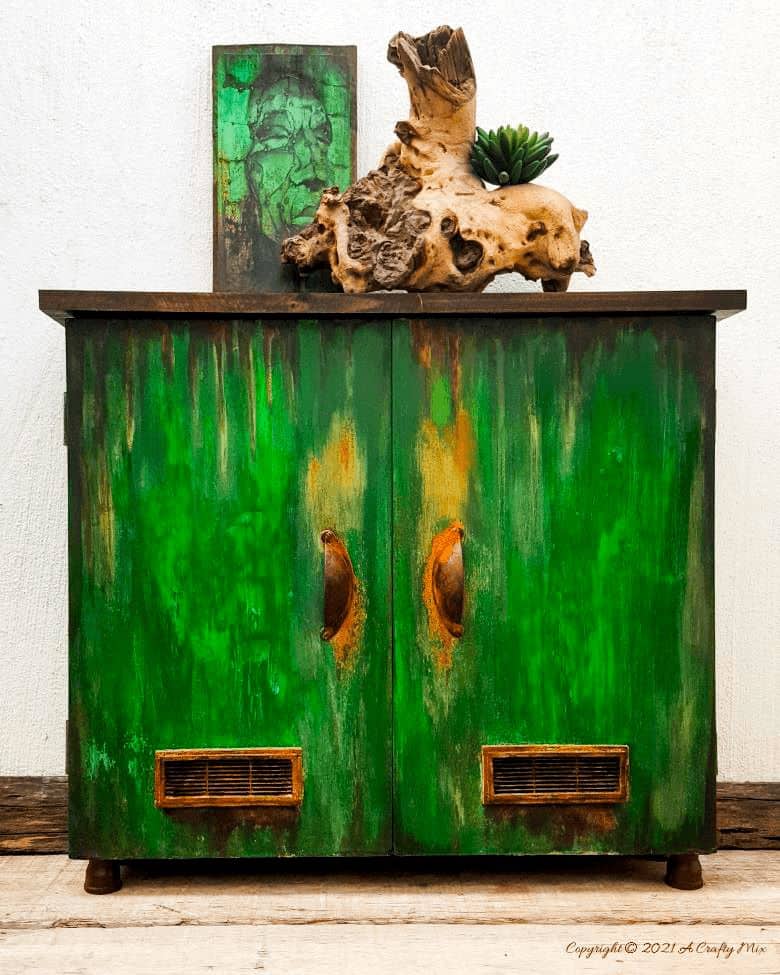
A battered melamine thrift store cupboard, dinged all over with the surface peeling in places, turned into something that looks like salvaged aged metal. Supplies are craft paint and brushes, Mod Podge in satin or gloss, and a rusting agent, with optional new handles, a piece of wood to enlarge the top and two plastic air vents. Melamine cannot be sanded to a grain because there is no grain, it is a coating over pressed board, so the prep is different from wood and matters more. The carcass had also started falling apart, which E6000 and some screws fixed.
Get the full tutorial at A Crafty Mix.
28. Vintage Cedar Chest Modern Redo
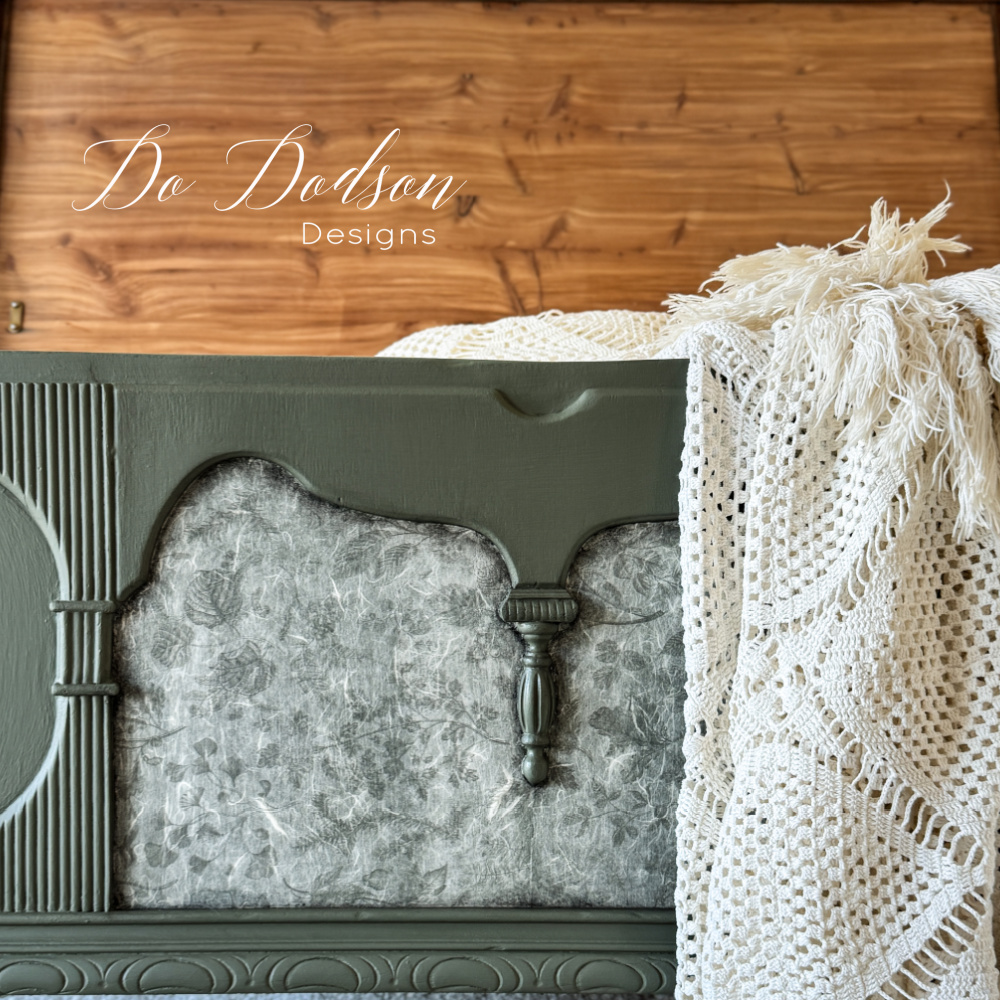
This is the second redo of the same chest, which is honest and worth saying, because the first one was nice and then taste moved on. It cost forty dollars in genuinely bad shape and she admits to crying about it afterward. The finish uses Dixie Belle paints and tools: a warm green on the body, a stained wood top, and vintage rice decoupage paper for detail. The aim was not to erase the chest’s history but to make its vintage side pop while the overall piece reads current, which is a useful way to think about any inherited furniture.
Get the full tutorial at Do Dodson Designs.
29. Easy DIY Mosaic Table Using Broken Dishes
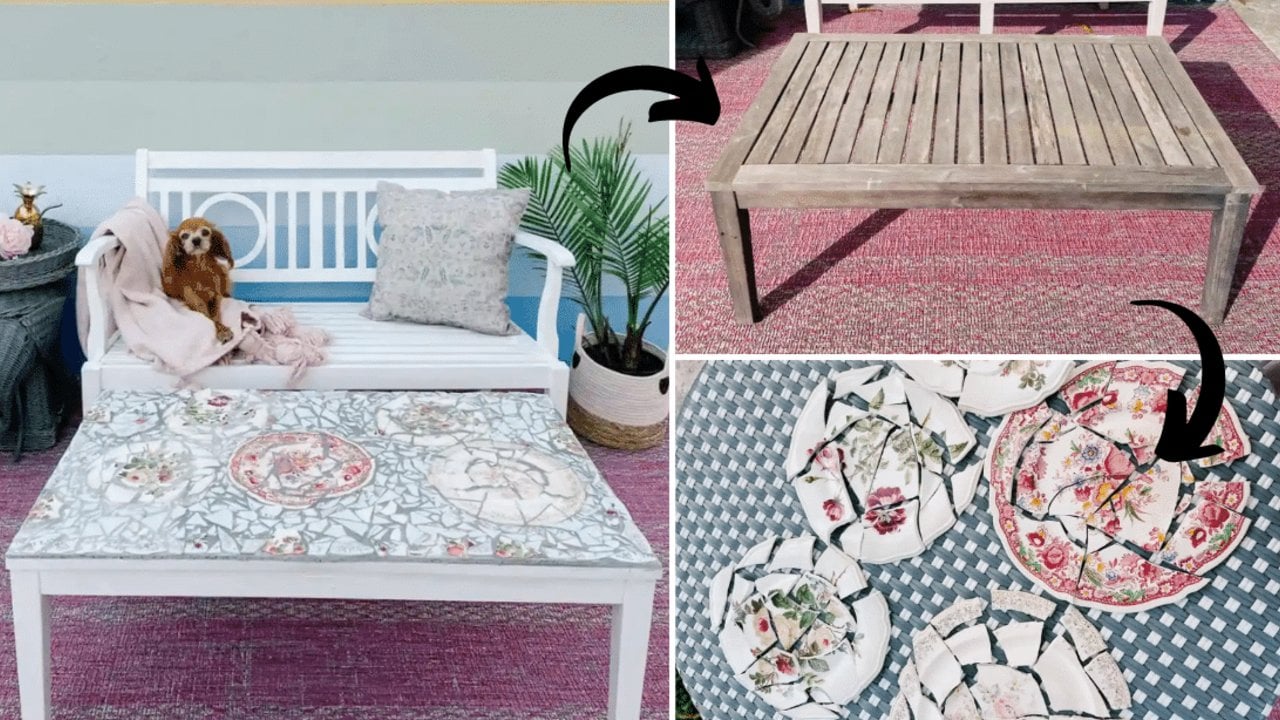
An old coffee table you do not want to throw out yet becomes a mosaic top made from thrifted or broken dishes, and pebbles or glass beads work just as well if china is not your thing. The supply list is longer than most on this page and worth reading first: TSP, white chalk paint, furniture sealer, quarter inch concrete backer board, tile adhesive, a mosaic glass cutter or tile nippers, a hammer, sanded grout, a rubber float trowel, a square notch trowel and a tile and grout sealer. The pattern is entirely up to you.
Get the full tutorial at DIY Joy.
30. Thrift Store Coffee Table Turned Tufted Ottoman
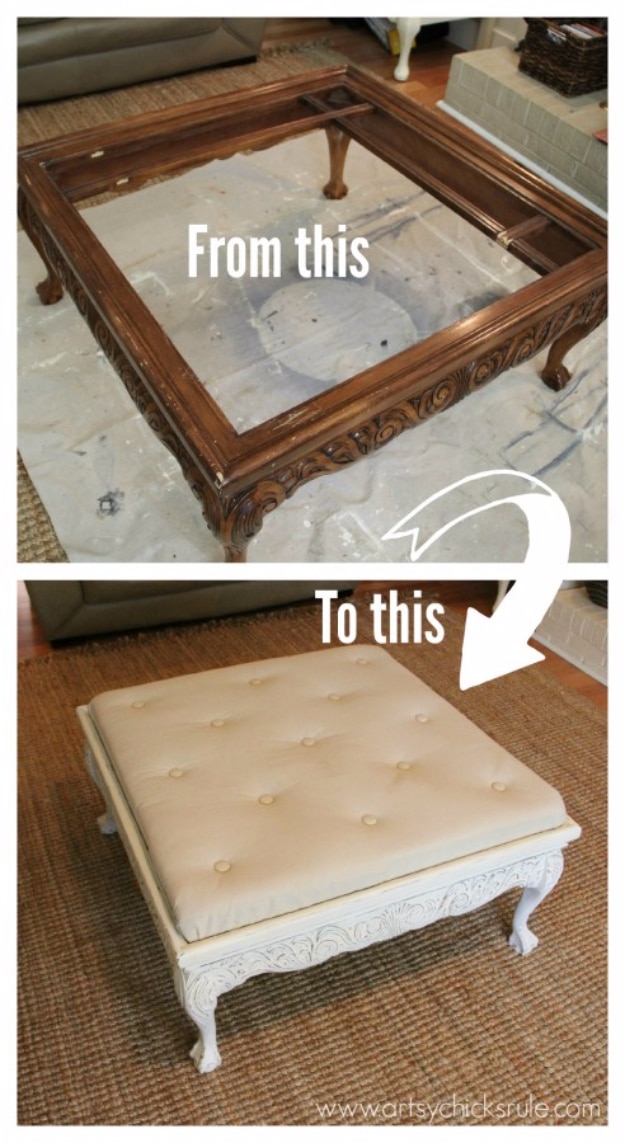
A beat-up thrift store coffee table with gorgeous woodwork detail and a glass insert, turned into a tufted ottoman that sits inside the square rather than wrapping the whole top, specifically so the carved detail stays visible. The glass and its underframe came out, the legs came off, and a sturdy new frame went in built with a Kreg jig, topped with a salvaged panel from an earlier project. The paint is Annie Sloan Chalk Paint, a mix of Old White and Pure White, heavy on the Pure White, sealed with clear wax, and the detail pops once distressed.
Get the full tutorial at Artsy Chicks Rule.