

Trash day is about to look a lot more interesting. These 26 classy DIY projects made from trash start with things that usually land in the bin or the recycling, like worn tires, empty bottles, burnt out bulbs, egg cartons, old jeans and printed coffee sacks, and turn them into decor worth keeping. Upcycling simply means giving a discarded item a new job instead of buying something new, and most of these need little more than paint, glue and an afternoon. Start with a quick win, like the stir stick sunburst mirror or the no sew coffee sack pillows, then work up to the rope wrapped tire side table. DIY JOY originals with step by step videos are mixed in too, from a plastic bottle pig planter to denim flowers. Before you toss anything this week, scroll through and see what it could become!
1. Upcycled Light Bulb Mini Planter
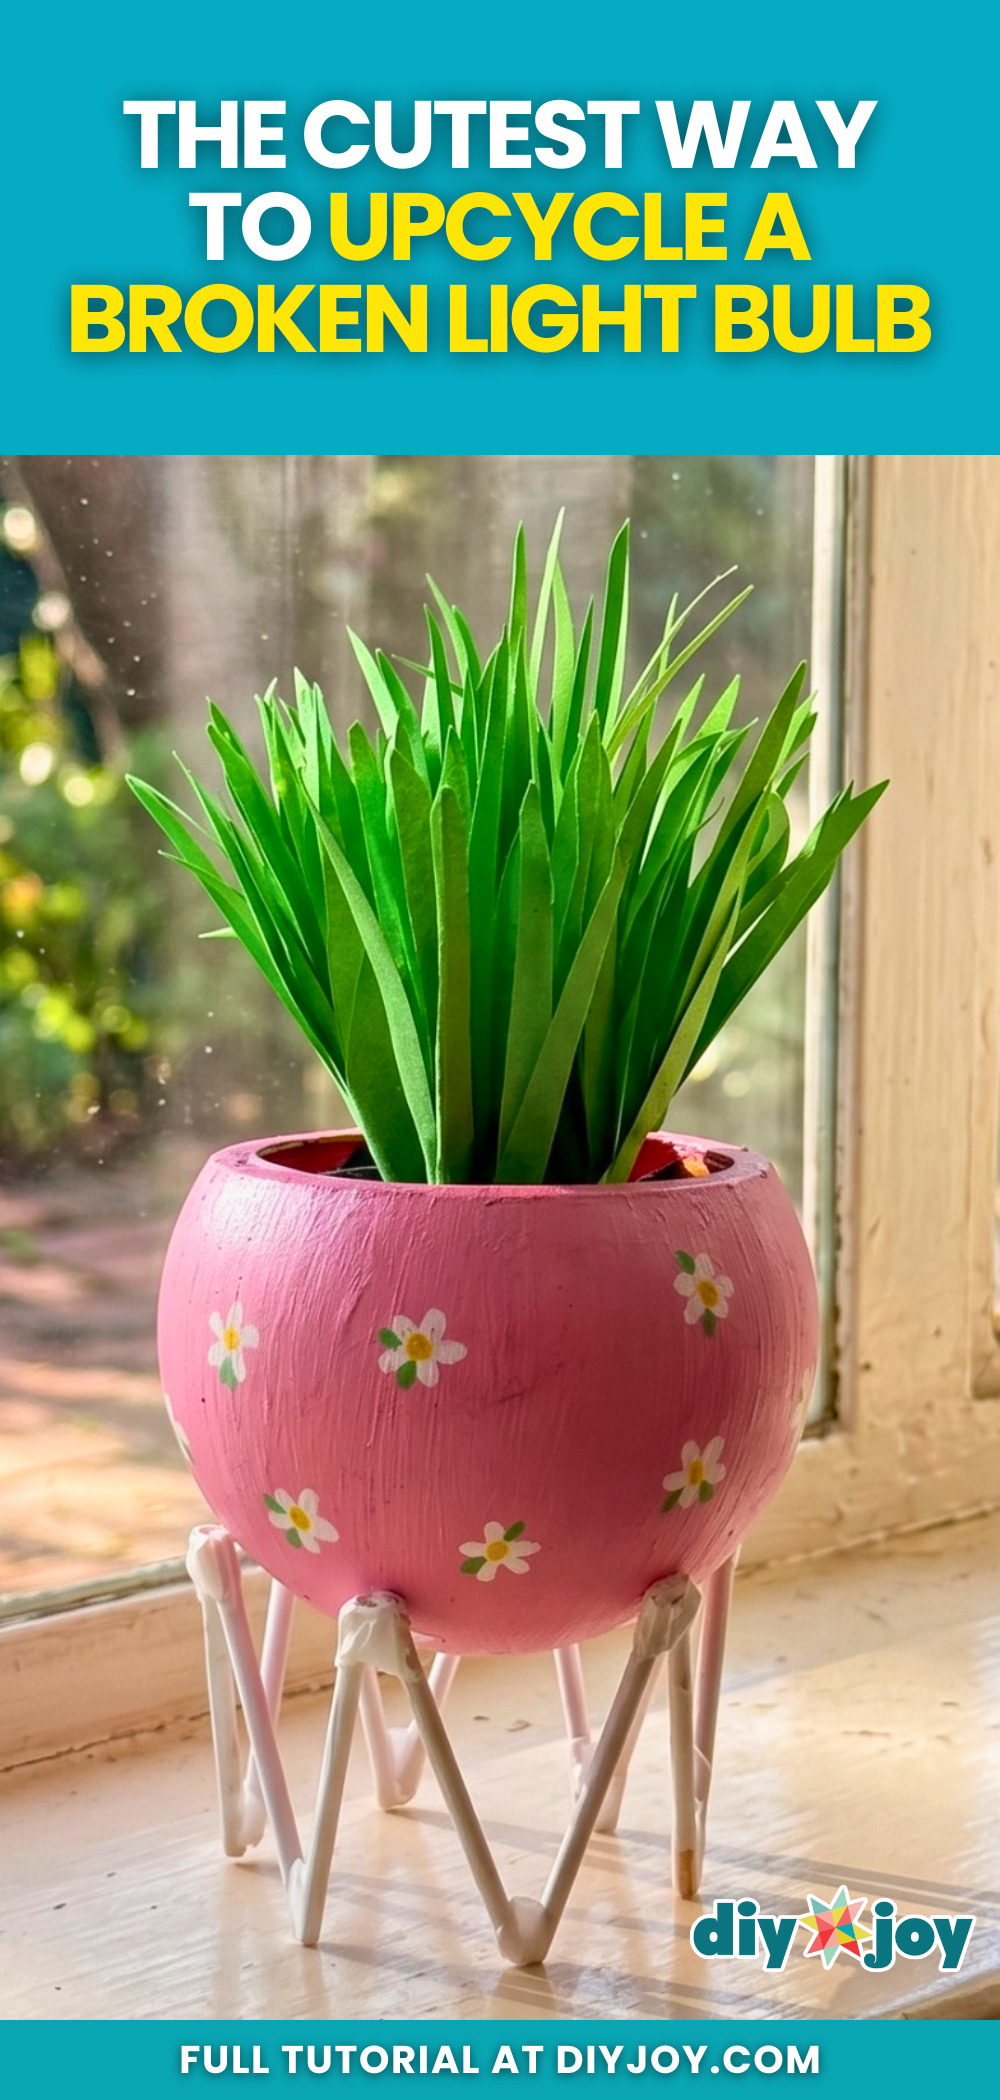
An upcycled light bulb mini planter gives a burnt out bulb a second life as desk decor. Carefully separate the glass globe from its metal base and sand the opening so no sharp edges remain. Paint the glass, add a second coat if needed, then doodle flowers on it with POSCA pens. A little stand made from 2 inch sticks hot glued into A shapes holds it upright. Fill the globe with crumpled brown paper and tuck in rolled paper grass, or use a tiny real succulent instead.
Get the full tutorial at DIY JOY.
2. DIY Whimsy Illustrated Eggshell Centerpiece

This whimsy illustrated eggshell centerpiece turns cracked breakfast shells into tiny vases. Wash the shells carefully, then print the free sleepy face clip art onto printable tattoo paper. Cut around each face as one piece rather than trimming every eye and nose, and press it onto the shell with a wet sponge, following the paper’s directions. Fill each shell with water and tuck in mini carnations, baby’s breath and a few greenery stems. Set them in a ceramic egg crate for Easter brunch or a spring shower table.
Get the full tutorial at Little Inspiration.
3. Trash Pile Tire Trendy Table

This trash pile tire table started as a curbside tire and ended up as a 24 inch side table. Scrub the tire with dish soap so the adhesive grips, then cut two plywood circles, one to fill the center and one for the base. Attach legs to the base, either wood ones you cut yourself or ready made legs. Glue the tire down with construction adhesive and coil sisal or manila rope around it, gluing as you go. Covering it took about 350 feet of quarter inch rope.
Get the full tutorial at While They Snooze.
4. Plastic Bottle Bracelet
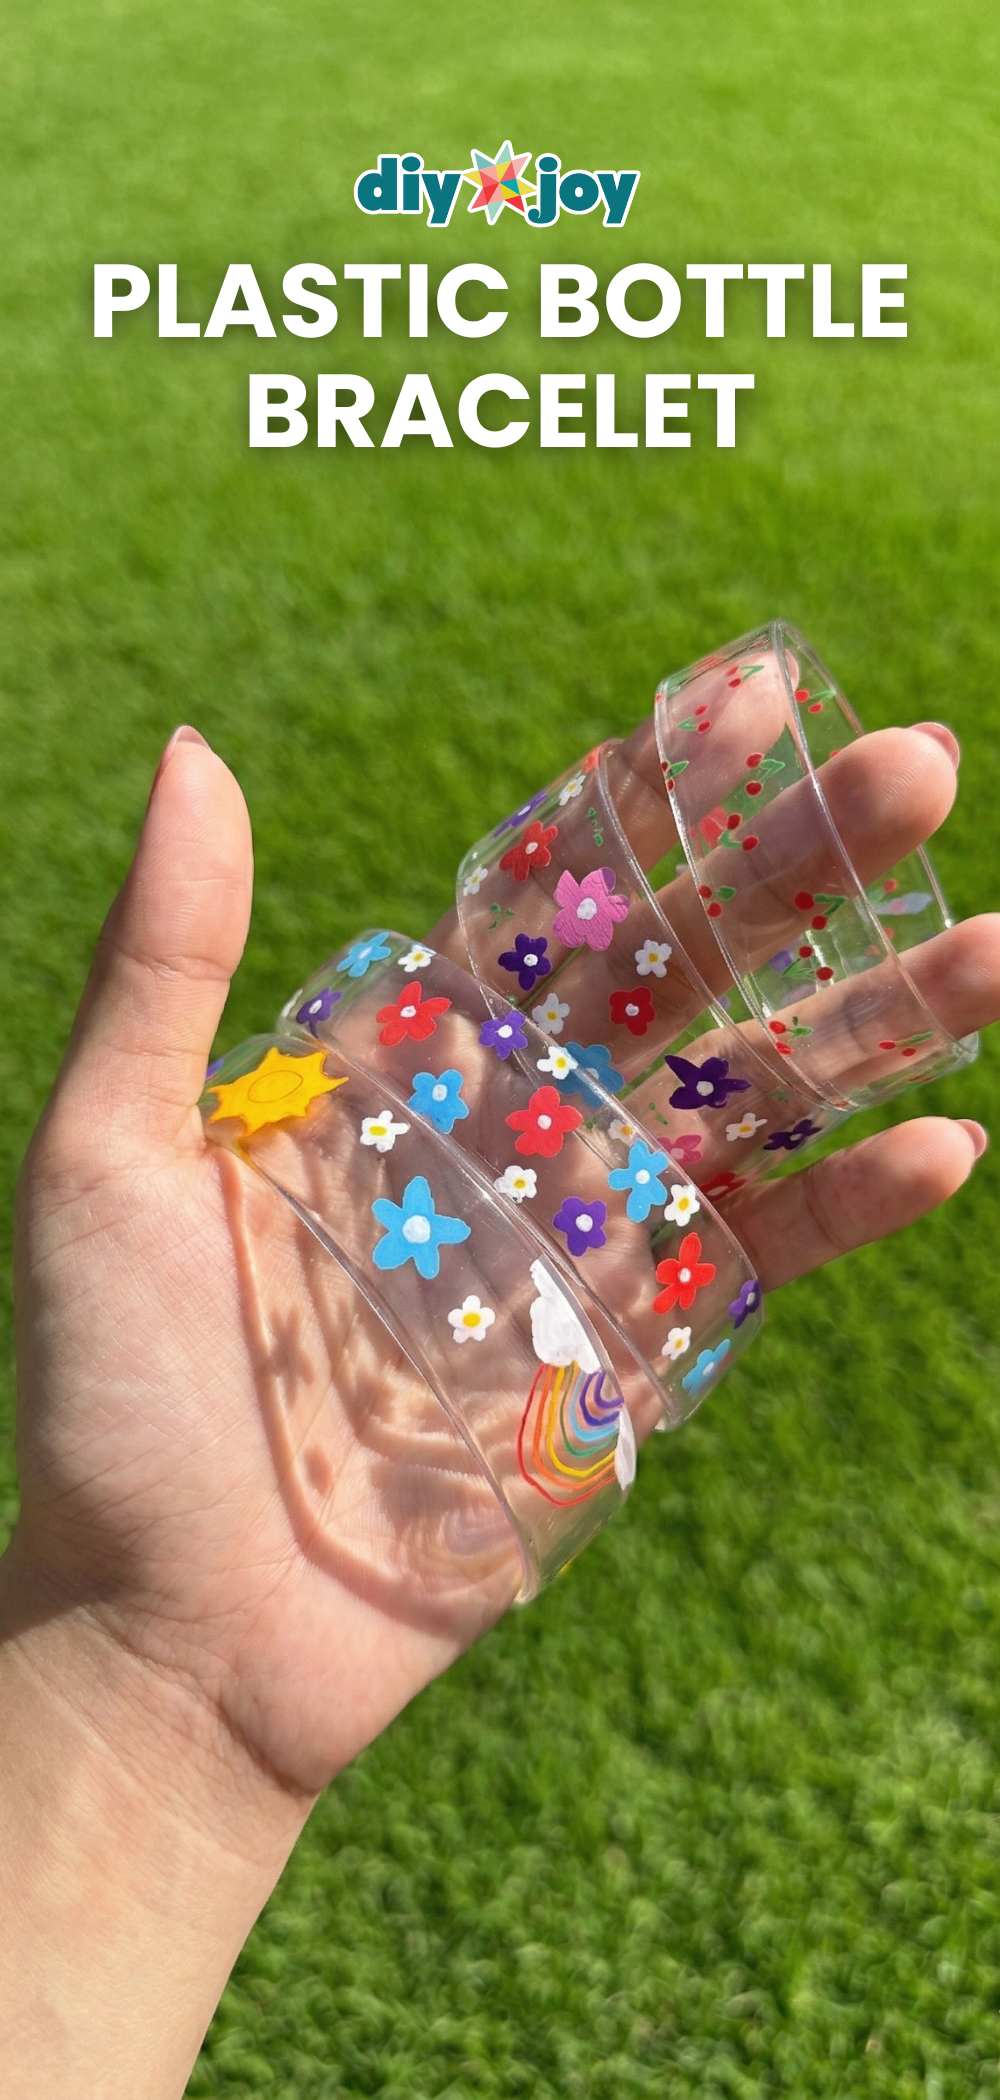
A plastic bottle bracelet turns an empty bottle into a clear bangle you can decorate any way you like. Cut a straight, even strip from the bottle, since the width of the strip sets the width of the bracelet. Draw flowers, hearts or dots all the way around with POSCA pens. Then hold each edge against the bottom of an iron on low heat so the plastic curls in and the sharp edge softens. Move slowly, because too much heat warps it. A light clear sealant protects the design.
Get the full tutorial at DIY JOY.
5. DIY Tire Planter Tutorial

A DIY tire planter takes an old tire from drab to cheerful in an afternoon. Scrub it with soap and water and let it dry, then give it a couple of coats of paint plus primer spray paint. Drill six half inch holes in the bottom for drainage, which takes a sharp bit and real pressure. Line the bottom with a scrap of weed barrier and a few packing peanuts, then add potting soil and flowers. Hang it on a sturdy nail or chain it from a tree branch.
Get the full tutorial at DIY Show Off.
6. Plastic Bottle Pig Planter
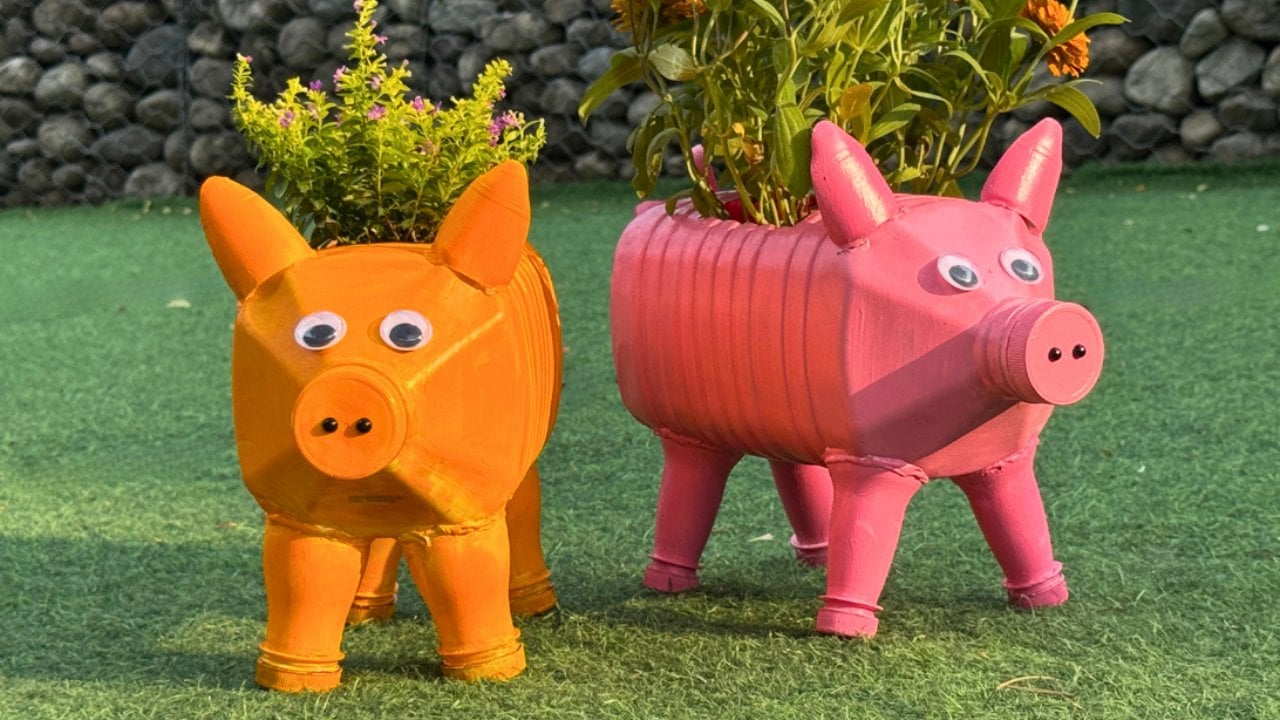
This plastic bottle pig planter starts with an empty gallon jug for the body and four small bottles for the feet. An adult should handle the cutting with a craft knife and smooth any sharp edges. Glue the pieces together, add ears and a snout, then cover the whole pig, caps and gaps included, in primer so the paint grips. Paint it any color, add a second coat if needed, and finish the face. A piece of cardboard inside cuts down on soil and keeps it light enough to move.
Get the full tutorial at DIY JOY.
7. Kitchen Grater Owl

Kitchen grater owl art turns an old cheese grater into a garden owl full of character. The eyes are two baby food jar lids sprayed silver, topped with bottle caps and big black buttons wired through drilled holes. A V cut from soft gold metal, like a scrap of a beverage can, becomes the beak and holds the eye wires in place. Cut a small spring into two pieces for feet and slide a twig through them as a perch. A thrifted grater runs about $7.
Get the full tutorial at My Turn for Us.
8. Upcycled Denim Jean Organizer

This upcycled denim jean organizer puts the back pockets of old jeans to work as wall storage. Empty a picture frame, keeping only the frame and its backing. Trace the frame on the back of the jeans and cut along the line. Fold the denim so both pockets sit close together in the center and hot glue the fold. Glue the backing to the wrong side of the denim, lock the frame on top, then knot jute rope at each end and glue it to the top corners for hanging.
Get the full tutorial at DIY JOY.
9. DIY Pallet Wood Planter Box

This DIY pallet wood planter box is built around a plain rectangular plastic planter, so it never needs a liner. Nail together two L shaped end pieces that support the plastic box from underneath, then cut four pallet boards the same length and nail them to the ends. Expect knots and dings, since that is the charm of old pallet wood. Paint over vinyl stencil letters with a dry brush, peel them off to reveal raw wood words, then seal with a few coats of polycrylic.
Get the full tutorial at House by Hoff.
10. DIY Magazine Art Bowl

DIY magazine bowls turn a stack of old magazines into colorful catchalls for keys, rings and small odds and ends. Cut out at least 25 vibrant pages and roll each one tightly around a toothpick from corner to corner, gluing the tip so it stays rolled. Flatten the end of a straw and coil it into a disk, sliding in a new straw each time one runs out. Let it dry for an hour, press the center out with your thumbs, then brush glue all over the inside.
Get the full tutorial at DIY JOY.
11. DIY Book Flower Vase

A DIY book flower vase gives a worn out book a second life on a shelf. Open the book to its center, draw a line across the page and count 12 pages to each side. Slip cardboard under the marked page, cut along the line with a blade and tear off the top section. Shift all the cut pages to one side, tape them together three at a time with double sided tape, and fold each bundle toward the middle. Dried lavender or paper flowers finish it.
Get the full tutorial at DIY JOY.
12. Burlap Coffee Bean Sack Wreath

A burlap coffee bean sack wreath uses the same method as a deco mesh wreath, just with burlap. Start with a wire wreath form that has twist ties or little branches, and an old one taken apart works fine. Cut the sack into strips about the width of poly mesh. Lay each strip between two of the ties, twist them closed, bunch the burlap and move to the next pair. Fill the outer row first, then the inner circle, and fluff it until it looks full.
Get the full tutorial at Along the Dirt Road.
13. Easy Egg Carton Daisy Flowers
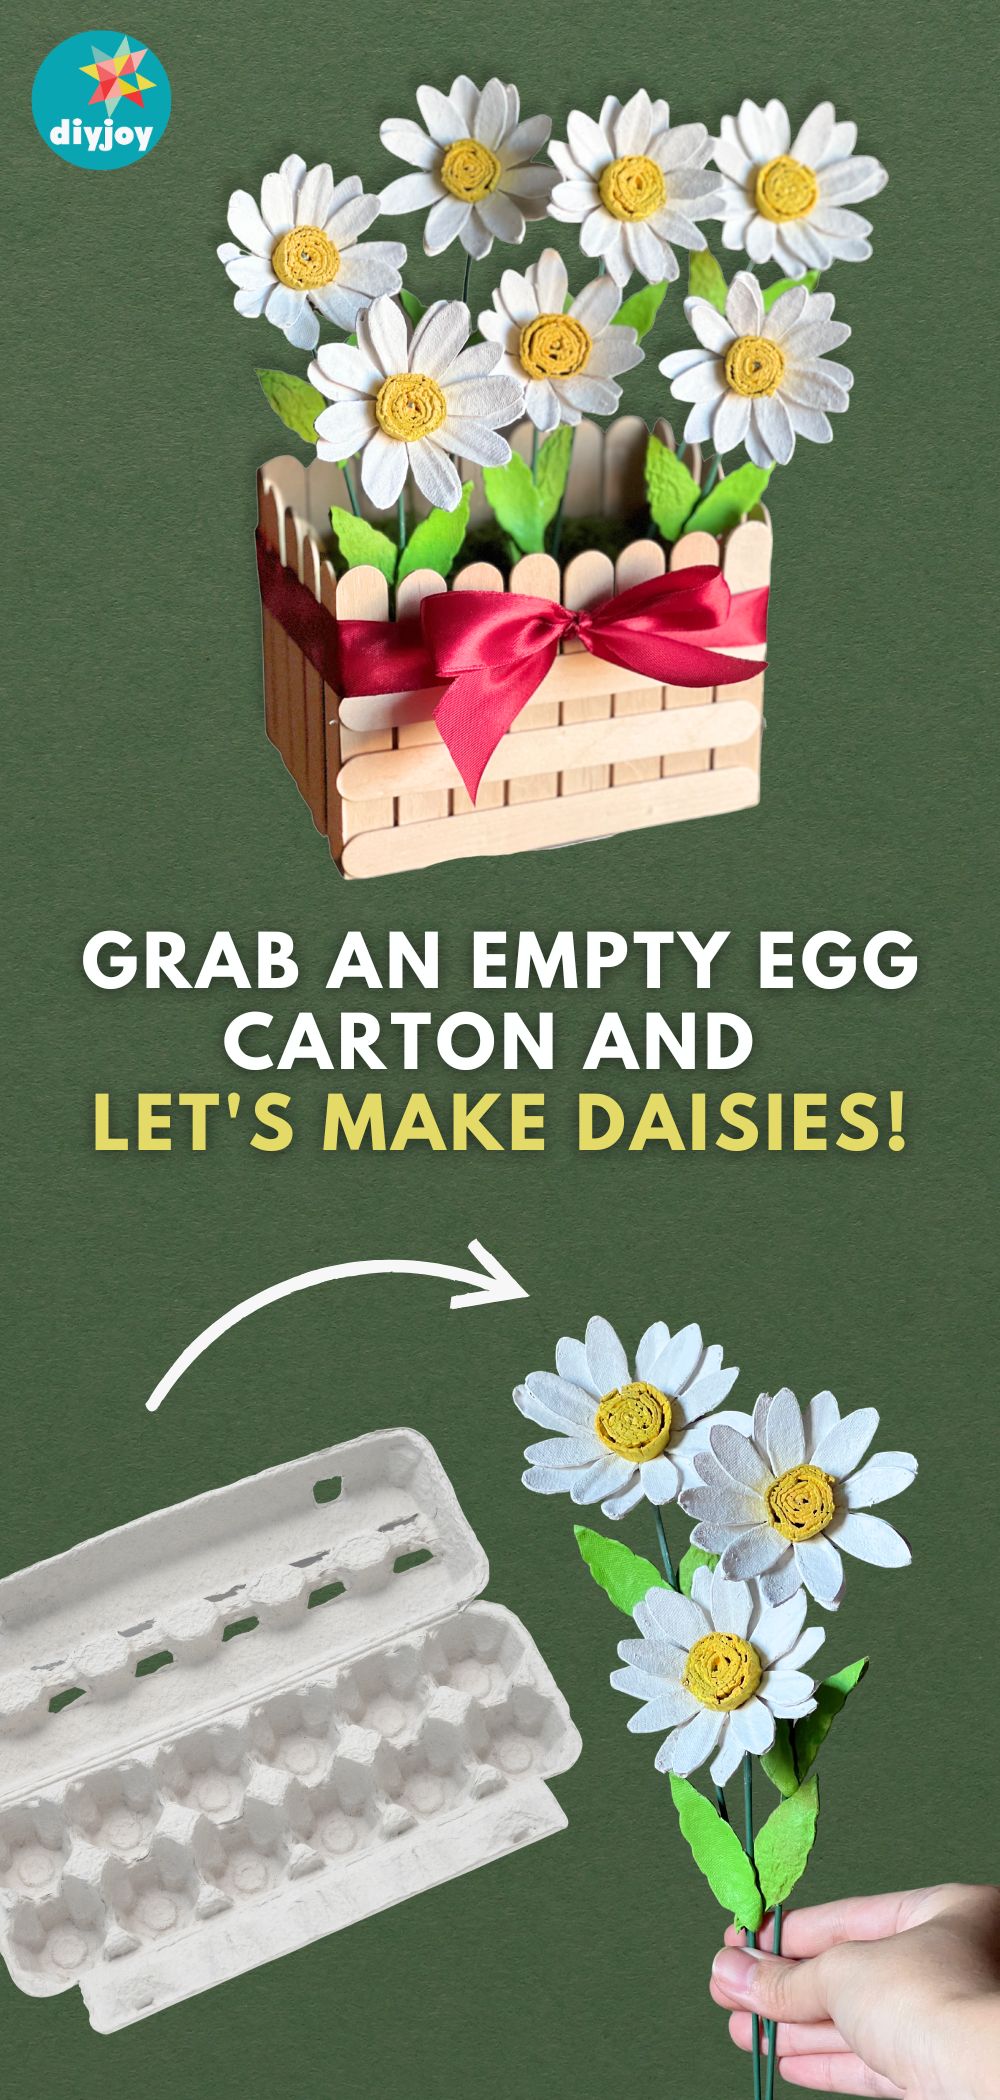
Easy egg carton daisy flowers come from plain cardboard egg trays and a little paint. Clean the trays first with a dry brush and a sprinkle of baking soda. Cut four cups per daisy: two become the petal layers, each sliced into 8 sections, and another becomes the pointed sepal. Fringe thin strips for the center and roll them up, leaving a hole for the floral wire stem. Shape leaves from a whole cup, paint every piece, then thread and glue them onto the stem.
Get the full tutorial at DIY JOY.
14. Denim Flowers From Old Jeans

Denim flowers from old jeans need no sewing at all. Stiffen the denim first by brushing diluted PVA glue onto the wrong side and letting it dry, which also stops fraying. Cut a 15 by 2.75 inch strip per flower, fold it lengthwise and glue the open edges. Snip a fringe up to a line 0.8 inch from the fold, glue three floral wires to one end and roll the strip tightly with hot glue. Add chambray leaves and wrap the stem in a fabric strip.
Get the full tutorial at DIY JOY.
15. Stirrers Sunburst Mirror
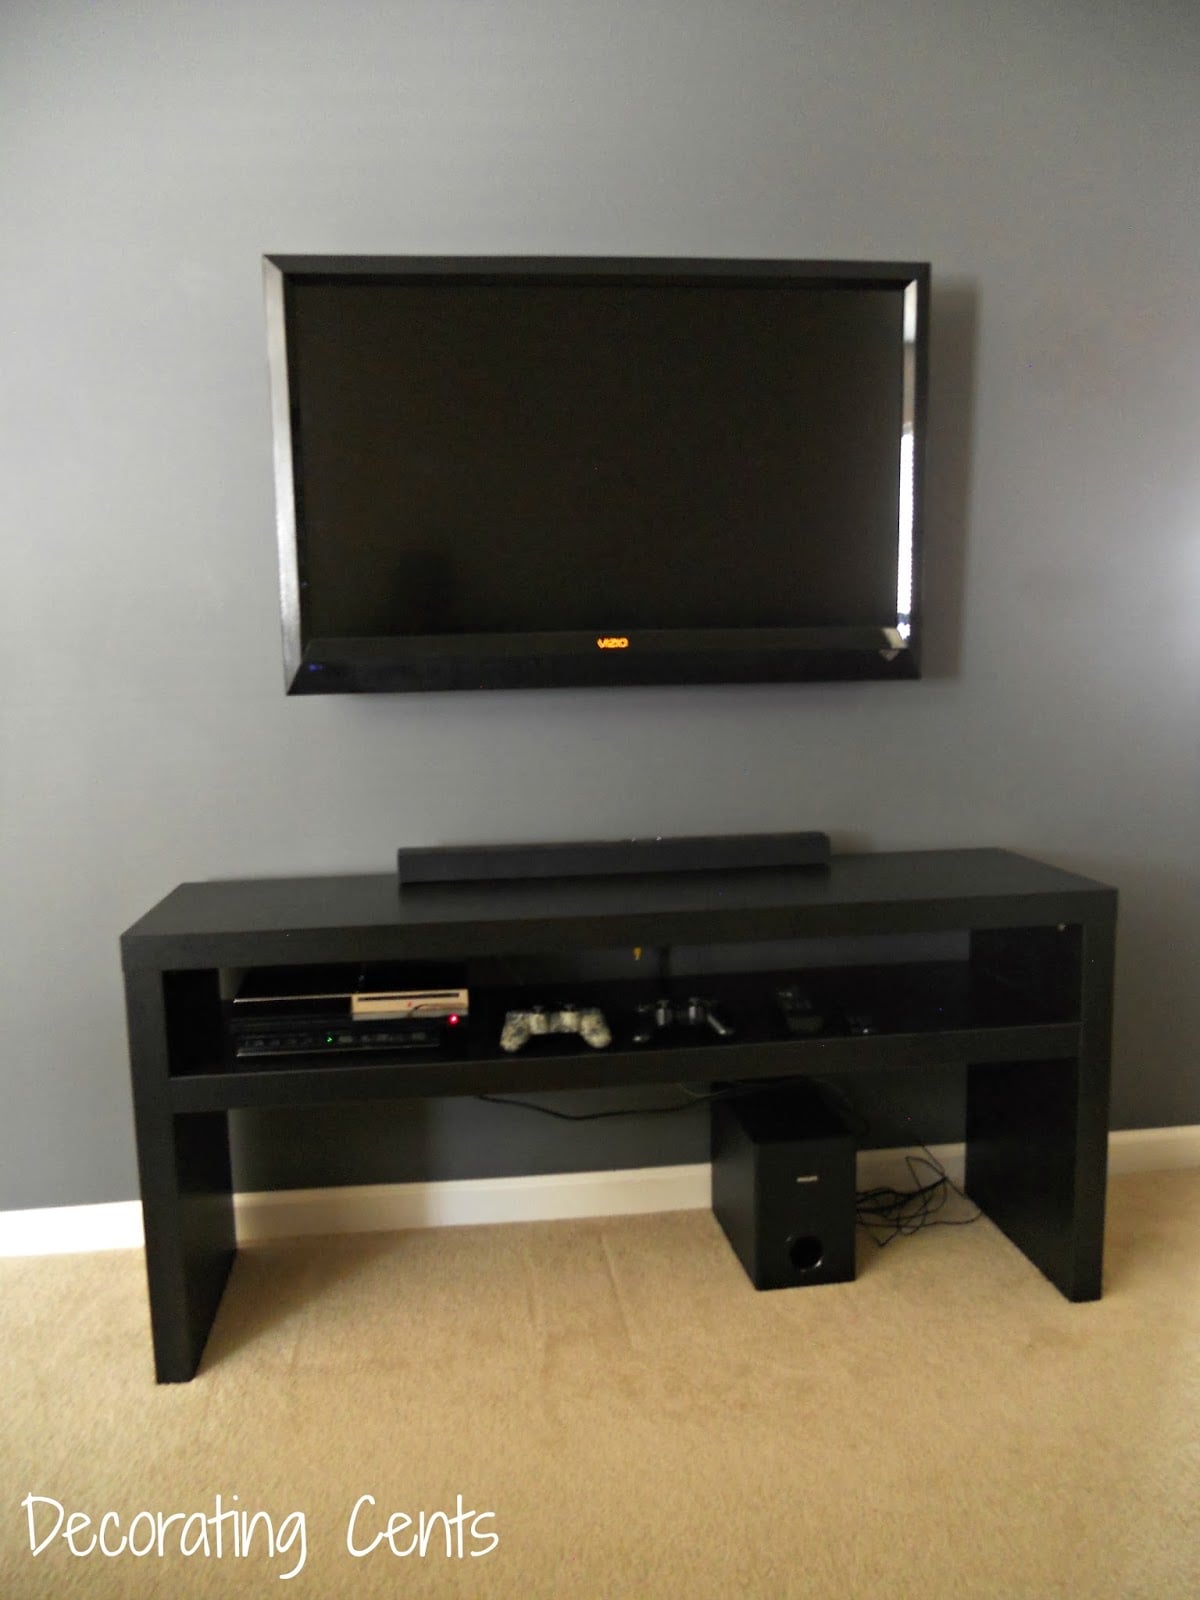
This sunburst mirror is made from free paint stir sticks and a 12 inch round beveled mirror. Stain the fronts and sides of the sticks, let them dry and lay them out to find the spacing. Glue the front row to the back of the mirror with tiny dots of Gorilla Glue, since it expands as it dries. Snap the rounded handle ends off this row after scoring them with wire cutters. Stagger a second, full length row behind it, add a picture hanger and weight it overnight.
Get the full tutorial at Decorating Cents.
16. Burlap And Fabric Produce Basket Tutorial

Burlap and fabric produce baskets keep potatoes, onions and garlic on the counter where they can breathe. Trace an oval platter onto burlap and lining fabric for the bottoms, then cut side panels; the large size uses a 13 by 10 inch oval and a 36 by 12 inch rectangle. Sew each side panel into a tube, zigzag the raw burlap edges, then stitch on the oval. Make a matching lining, leaving a 6 inch gap, nest the two, turn and topstitch.
Get the full tutorial at Creative Simple Living.
17. Vintage Zinc Mason Jar Lid Coaster DIY

Vintage zinc mason jar lid coasters need only old lids, adhesive backed cork board, a craft knife and a glue gun. Wash the lids well, keeping the rust and patina that give them character. Trace the bottom of each lid onto the cork, cut just outside the line with scissors, then trim to the exact shape with the craft knife. Leave the insert in the lid and use hot glue along with the cork’s own adhesive so it holds. Smaller lids suit soda bottles and juice glasses.
Get the full tutorial at Pink Fortitude.
18. Cardboard Heart Garland

This cardboard heart garland turns empty toilet paper rolls into pastel Valentine’s decor. Flatten a roll, lay a heart template on top, trace it and cut out the heart. Paint both sides white first and let them dry so the color goes on bright, then paint each heart pink, yellow, blue or any shade you love. Poke a hole in both sides of every heart with a pointed tool, thread twine through and hang the garland across a wall, window or doorway.
Get the full tutorial at DIY JOY.
19. DIY Burlap Subway Art

DIY burlap subway art turns a printed coffee sack into budget friendly artwork with big vintage lettering. Build the frame from baseboard trim joined at the corners with L brackets, then paint it black. Cut the burlap sack to size and staple it to a board cut to match the frame. Staple the frame onto that board as well so everything is secure, and add a picture hanger to the back. It suits a small space like a laundry room, where busy decor can feel cluttered.
Get the full tutorial at Liz Marie Blog.
20. Eco Bag Heart Wreath

An eco bag heart wreath turns a worn reusable shopping bag into a ruffled red heart. Draw a heart template on paper, trace it onto the bag, then mark a second outline about 5 inches outside it and cut out the frame shape, center included, in two layers. Backstitch around the inner and outer edges, leaving a gap, stuff it with fiberfill and sew it shut. Cut circles from the leftover bag, fold each into quarters with a dot of hot glue and cover the heart with them.
Get the full tutorial at DIY JOY.
21. Pottery Barn Inspired Grain Sack Lamp Shades

Pottery Barn inspired grain sack lamp shades start with plain drum shades you already own. Sew simple slipcovers from leftover drop cloth and pull them down over the shades like a sleeve. Tape off a stripe pattern, then paint on the classic grain sack bands. A pair of $5 thrift store lamps finished the look, but any lamp with a drum shade works. Since the drop cloth, shades and paint were all on hand, the whole update cost nothing.
Get the full tutorial at The Little French Farmhouse.
22. No Sew Burlap Coffee Bean Sack Sofa Pillows

No sew burlap coffee bean sack sofa pillows take about a minute once the sacks are in hand. Ask a local coffee roaster, since they receive beans in bulk and often have spare bags. Slide a sack over an existing pillow, like a thrift store find, flop the open end over the top and tuck it under. That is the whole tutorial. The covers come off in seconds for a quick change. Burlap does not wash well, so beat or wipe them clean, and expect a little scratchiness.
Get the full tutorial at Funky Junk Interiors.
23. Air Dry Clay Egg Tray
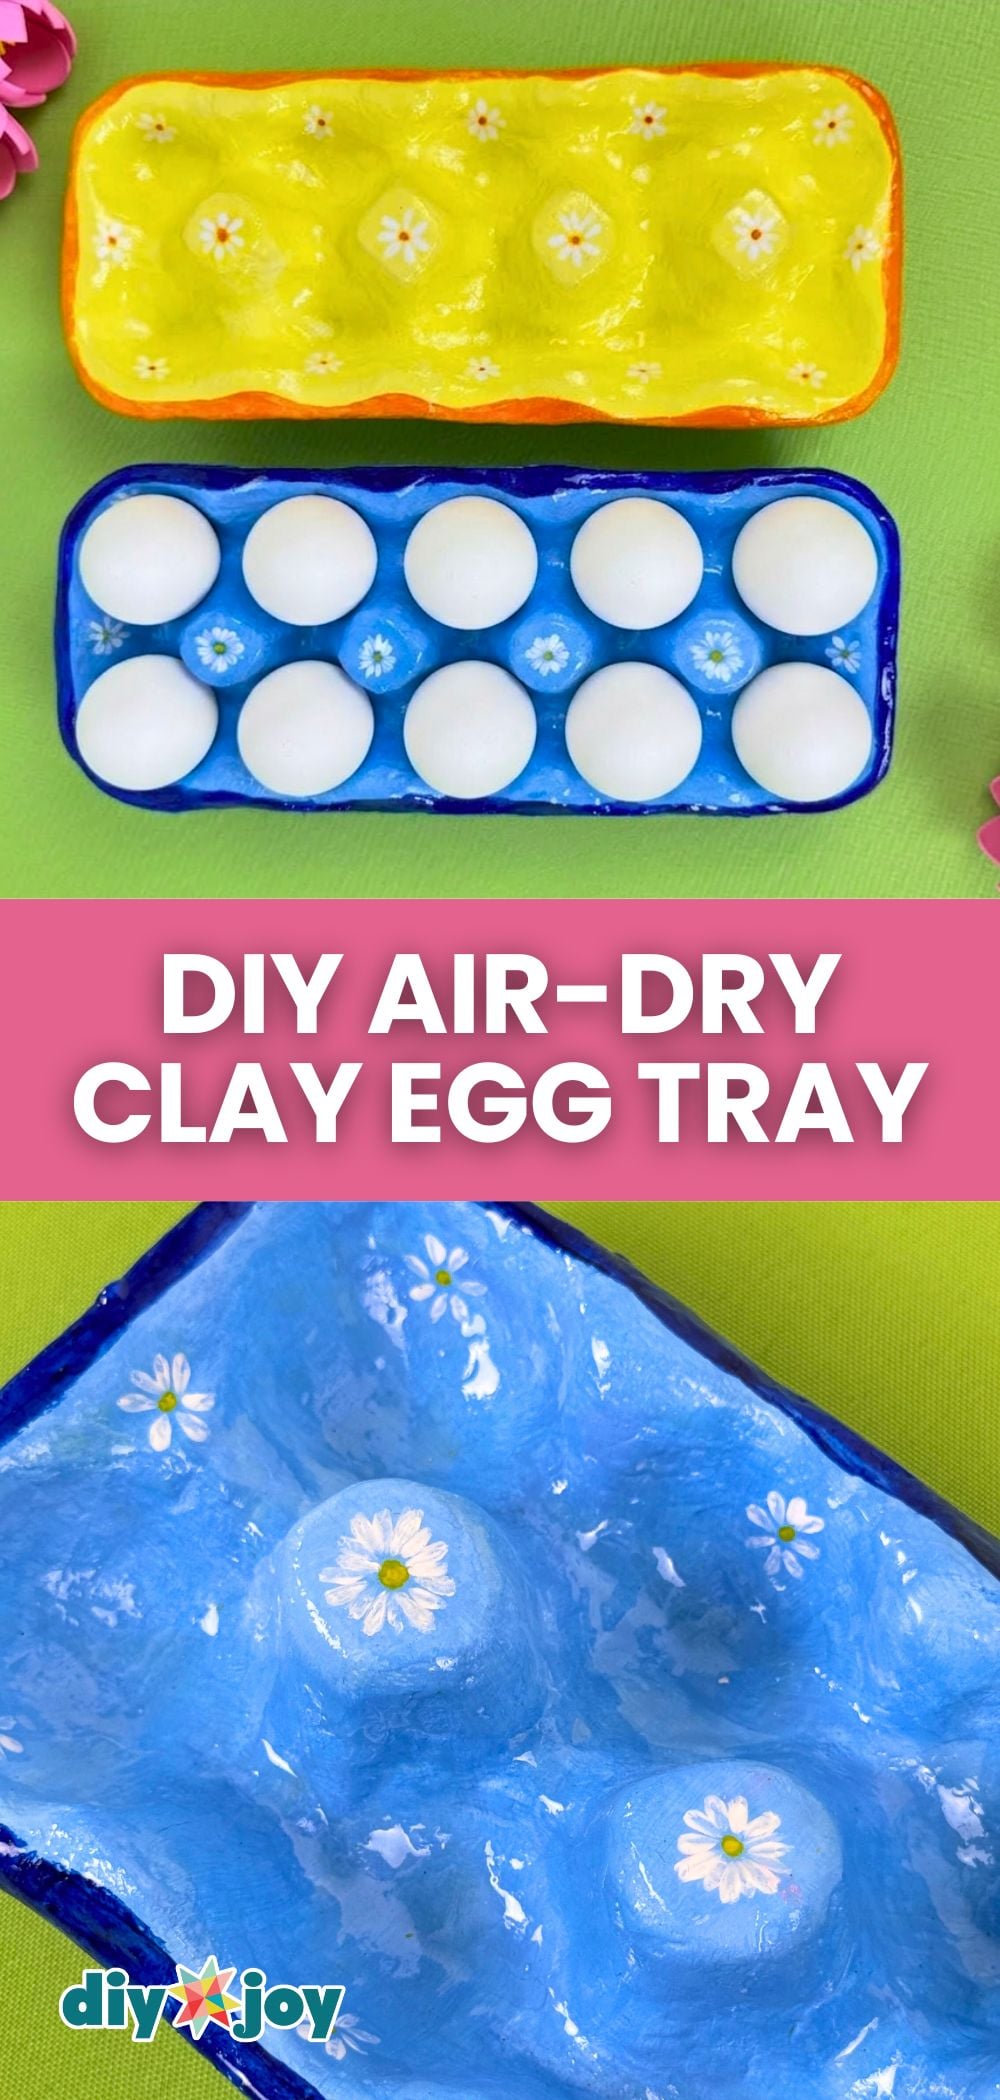
An air dry clay egg tray uses an empty egg carton as its mold. Trim off the lid and side flaps until only the base of the tray is left. Knead air dry clay until soft, roll it out and cut a rectangle big enough to cover the base, then press a real egg into each cup to shape the wells. Smooth any cracks with a damp finger and let it dry completely. Prime it, paint a base color, add flowers or dots and seal it with varnish or UV resin.
Get the full tutorial at DIY JOY.
24. Coffee Bean Sack Table Runner

A coffee bean sack table runner is about the simplest way to repurpose scrap burlap, and this one came together during a single afternoon nap time. The sack came home from a workplace that gets beans in bulk, so a coffee shop or roaster is the place to ask. The runner is simply the sack laid down the center of the table, with the printed stamps and stripes doing all the decorating. Expect a smoky, earthy burlap smell at first. A potted succulent finishes the look.
Get the full tutorial at Black and White and Loved All Over.
25. Easy Burlap Sandbag Pillow

An easy burlap sandbag pillow starts with a hardware store sandbag that costs about $1.25. Run a strip of craft tape down the center, place tape on both sides of it, then lift off the center strip to leave a clean stripe. Slip plastic wrap inside so paint will not bleed through, and paint the stripe with black acrylic craft paint. Pull the tape and let it dry, or sew on a house number instead. Stuff a small pillow inside, tie the top with twine and clip on a clothespin.
Get the full tutorial at Funky Junk Interiors.
26. DIY Seed Art

This DIY seed art turns grocery store dried beans into textured coffee and tea wall art. Sketch a coffee cup and the word coffee on one 9 by 12 inch canvas and a teapot and the word tea on another, or use a stencil for the letters. Each bean is about a quarter inch wide, so plan the lines with that in mind. Paint the black areas first so no white peeks through, then glue black beans in small sections. Fill the background with white beans, paint the edges and seal it.
Get the full tutorial at Suzy's Artsy Craftsy Sitcom.






