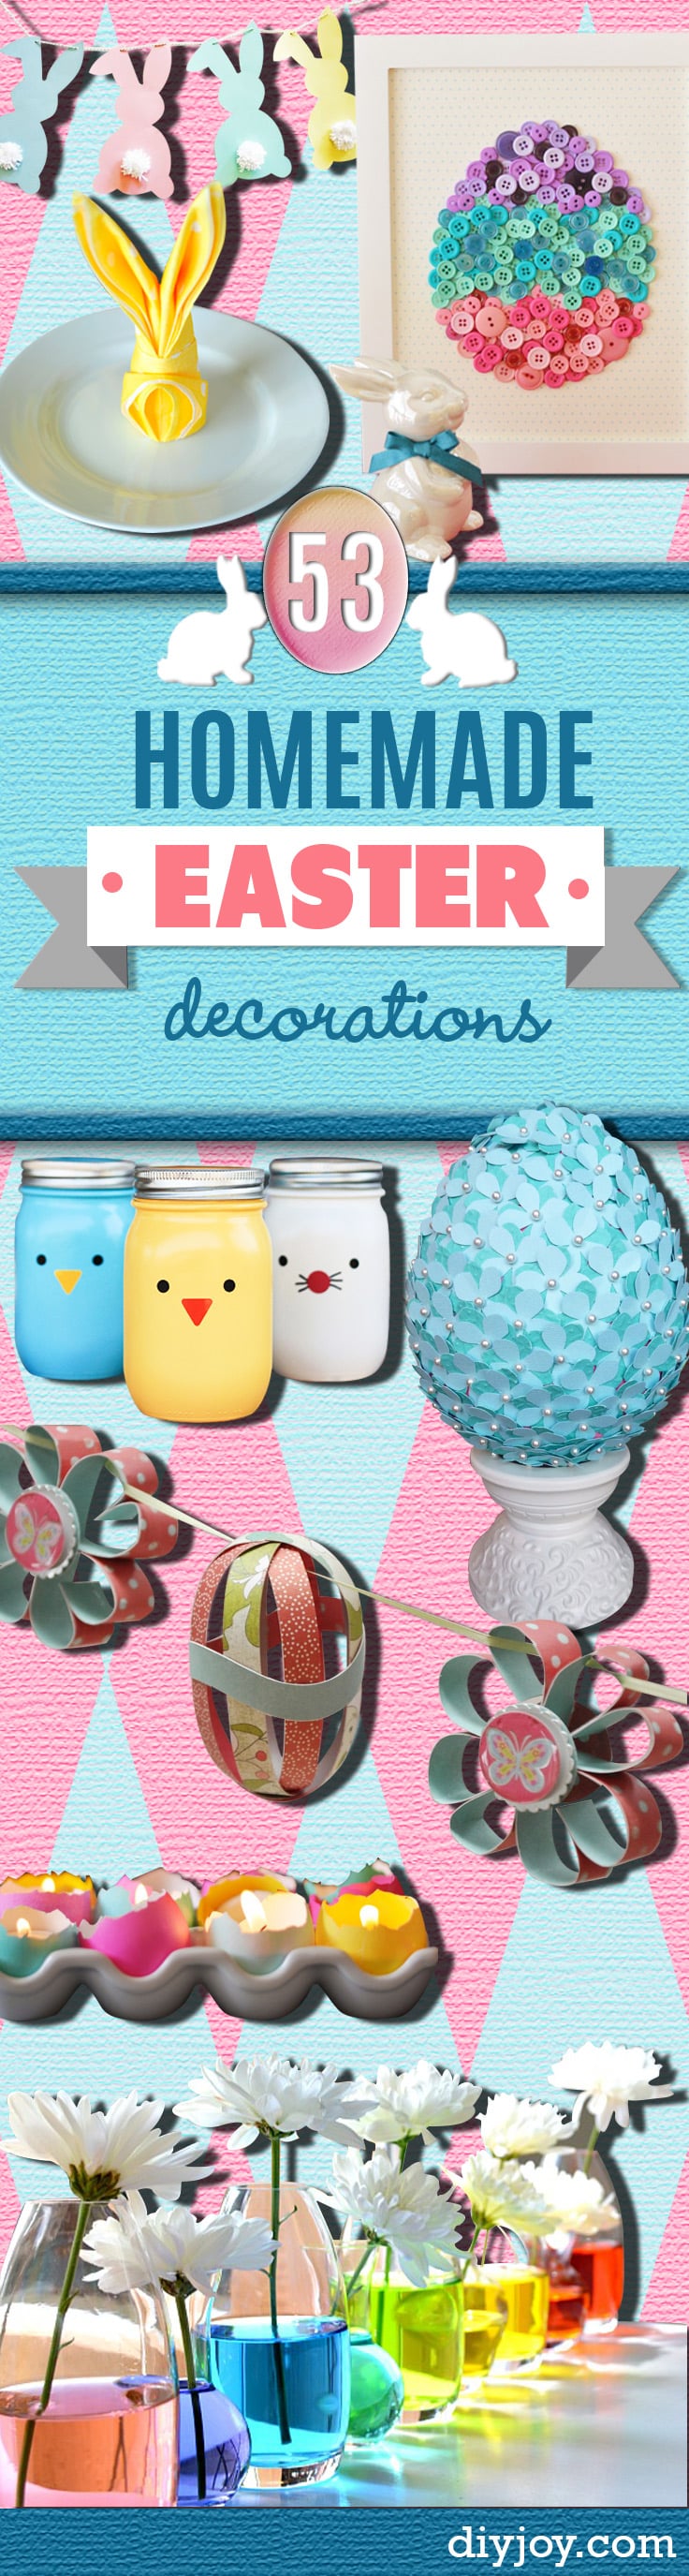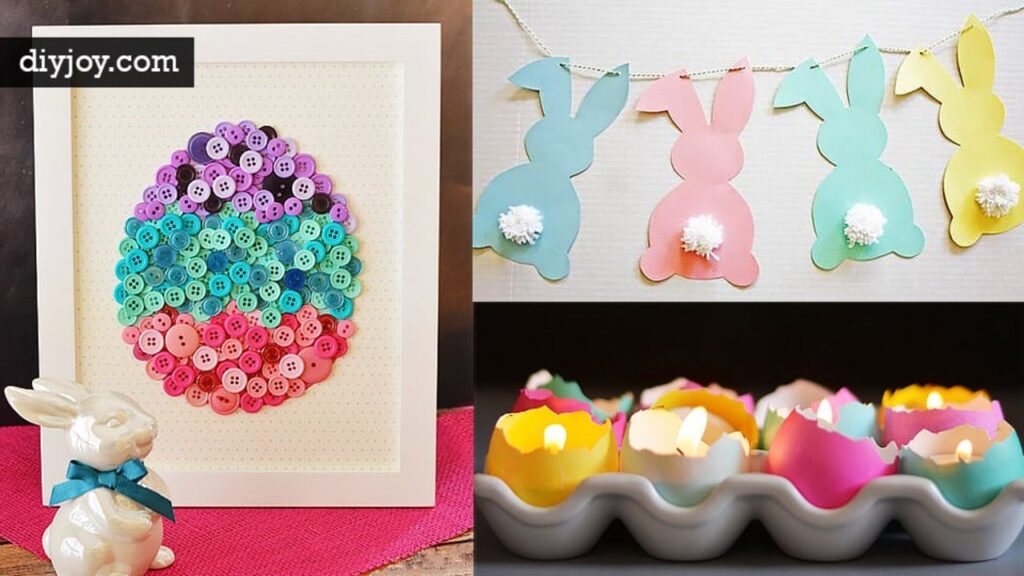
Ready to bring a little spring inside? These 31 DIY Easter decorations cover the whole house, from the front door to the dinner table. You’ll find a rainbow Peeps wreath and a fluffy pom pom wreath, eggs dressed up in moss, alcohol ink and paper napkins, plus bunny garlands, a paint chip egg garland and place cards that make Easter brunch feel special. Plenty of them start with things you already have, like egg cartons, toilet paper rolls, an odd sock and leftover yarn, and a handful are DIY JOY video tutorials you can follow step by step. Most come together in an afternoon, and lots are easy enough for the kids to help with. Find even more on the Easter crafts hub.
1. Egg Carton Daisy Flowers
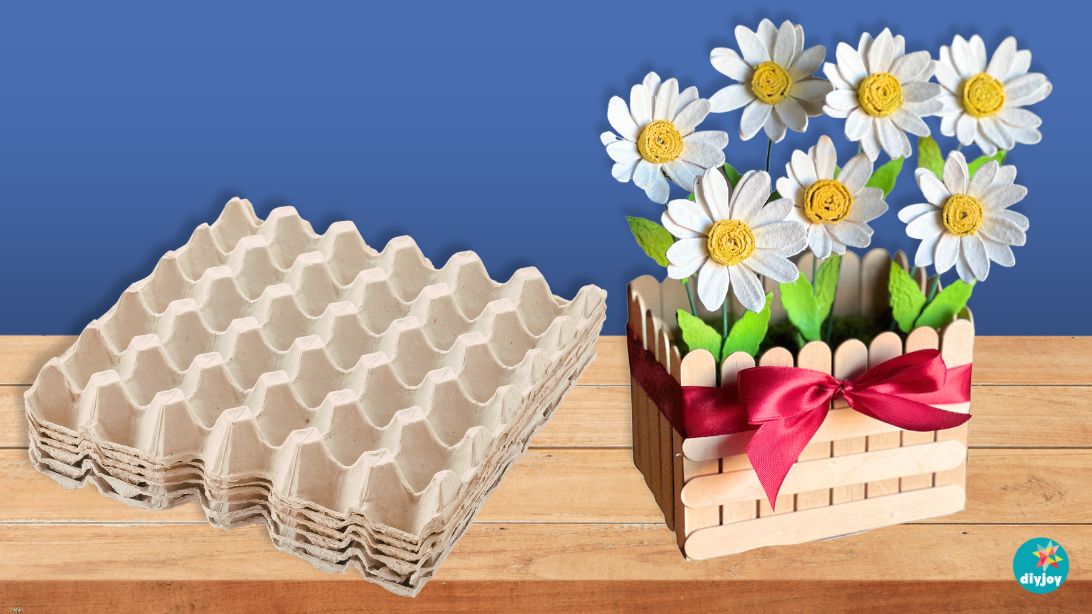
Don’t toss that egg carton! It’s about to become a pot of daisies for the Easter table. Cut single cups from a paper egg tray, snip two of them into eight petals each, and roll thin fringed strips into fuzzy centers. Trim a whole cup into leaf shapes, paint everything white, yellow and green, then poke a hole through each piece and thread them onto floral wire stems with a dab of glue. Stand the finished daisies in a little craft stick fence box filled with moss for a sunny spring centerpiece.
Get the full tutorial at DIY JOY.
2. DIY Eggshell Tealight Candle Centerpiece
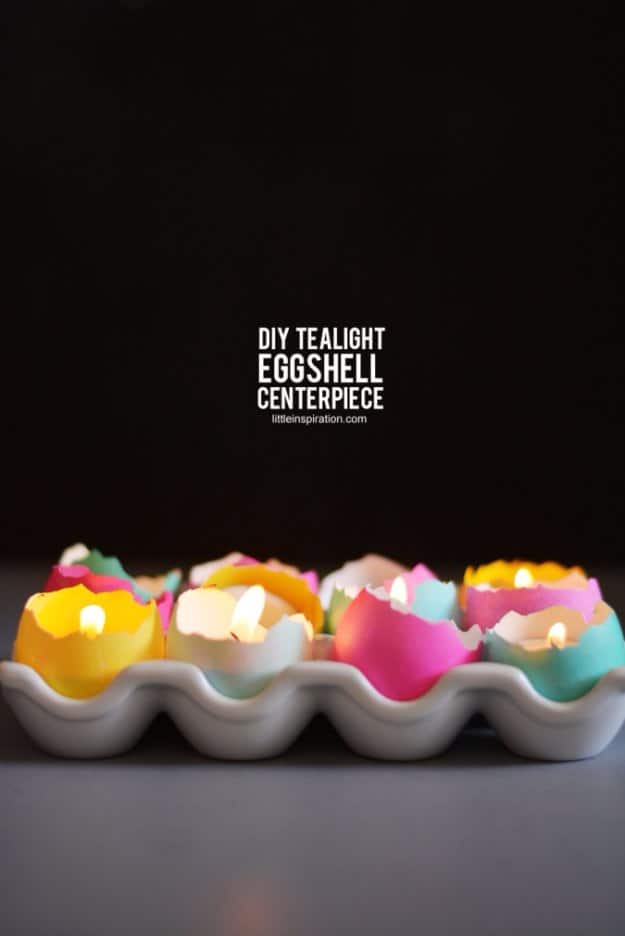
Save your eggshells the next time you scramble breakfast, because they make the prettiest little candle cups. Crack each egg near the top so the opening is wide enough for a tealight, rinse it and peel out the thin membrane. Dye the shells in warm water with a few tablespoons of vinegar and some food coloring for 5 to 10 minutes, then let them dry completely. Nestle them in a glass or ceramic egg holder, tuck a tealight into each one and light them up. Keep them well out of reach of little hands once they’re glowing.
Get the full tutorial at Little Inspiration.
3. Rainbow and Bunny Peeps Wreath
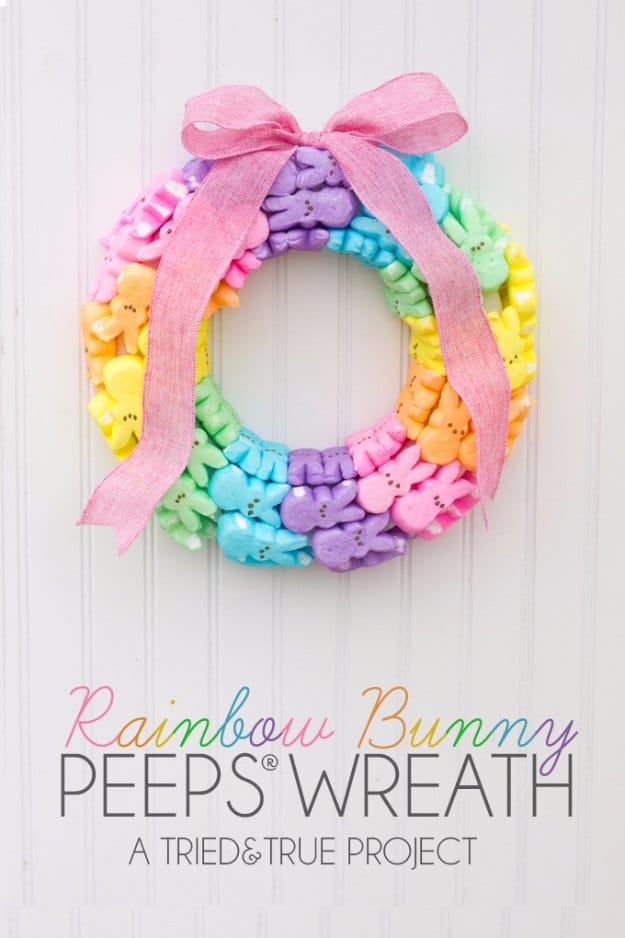
A Peeps wreath is about the sweetest thing you can hang on the front door. Unwrap a five-color sampler of Peeps bunnies and let them sit out for a couple of days so they dry and stop being sticky. Push two toothpicks into each bunny so it won’t spin, then work them around the front and outer edge of a 10 inch foam wreath before filling the center ring with bunnies standing upright. Finish with a big pink burlap bow pinned at the top. If heat or ants are a worry, a dab of glue and clear spray varnish help.
Get the full tutorial at Tried & True Creative.
4. Easter Mason Jars Craft
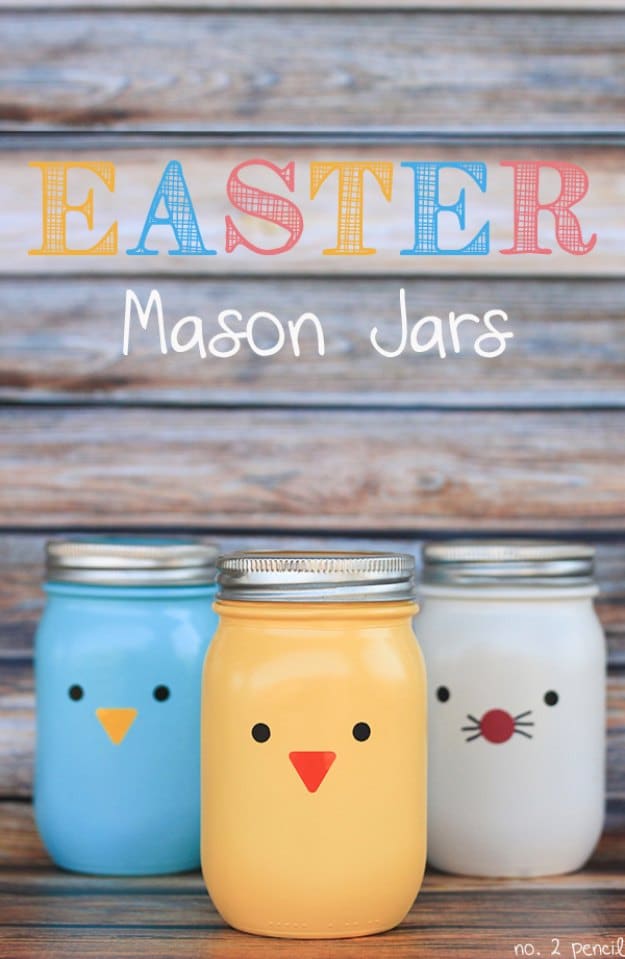
Plain mason jars become a chick, a bunny and a bluebird with nothing more than spray paint and a few vinyl shapes. Wipe the jars down with rubbing alcohol first so the paint grabs, then spray them aqua, yellow and white in smooth, even coats, letting each one dry. Cut simple circles and triangles from adhesive vinyl for eyes and beaks (a cutting machine makes it quick, but scissors work too), press them on and draw bunny whiskers with a permanent marker. Fill them with candy or fresh tulips.
Get the full tutorial at No. 2 Pencil.
5. Flowered Egg Topiary
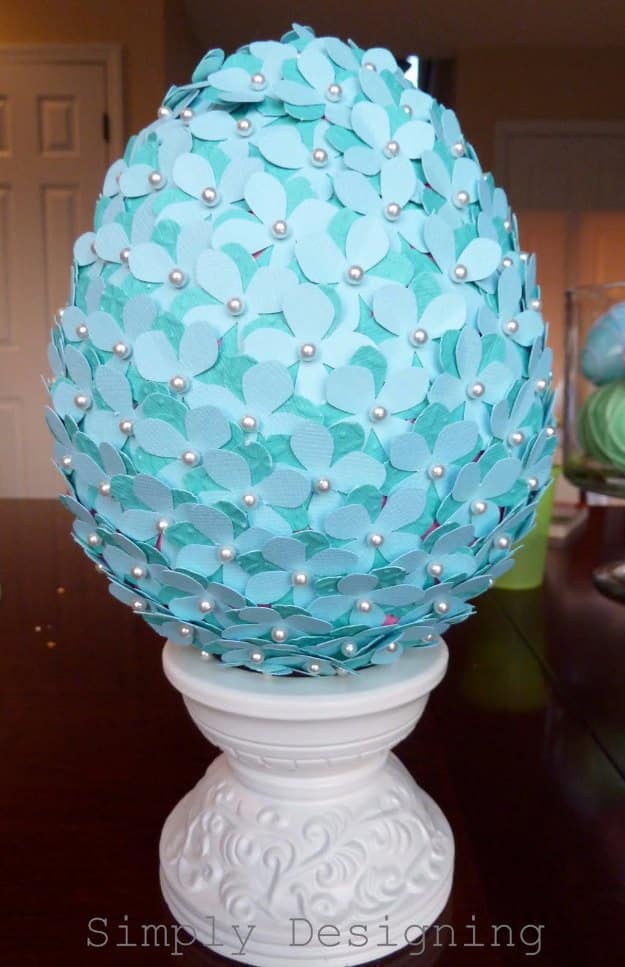
This flowered egg topiary looks like it came from a boutique, but it’s really just scrapbook paper and pearl pins. Grab a 7 inch foam egg, five or six 12 inch sheets of paper in two shades, two packs of pearl head pins and a hydrangea flower punch. Punch a big pile of flowers (you’ll need close to 400, so put on a movie!), stack two together and pin them into the foam. Keep going until the whole egg is covered, then set it on a thrifted candle stand spray painted white for a pretty Easter centerpiece.
Get the full tutorial at Simply Designing.
6. How to Make a Sock Bunny
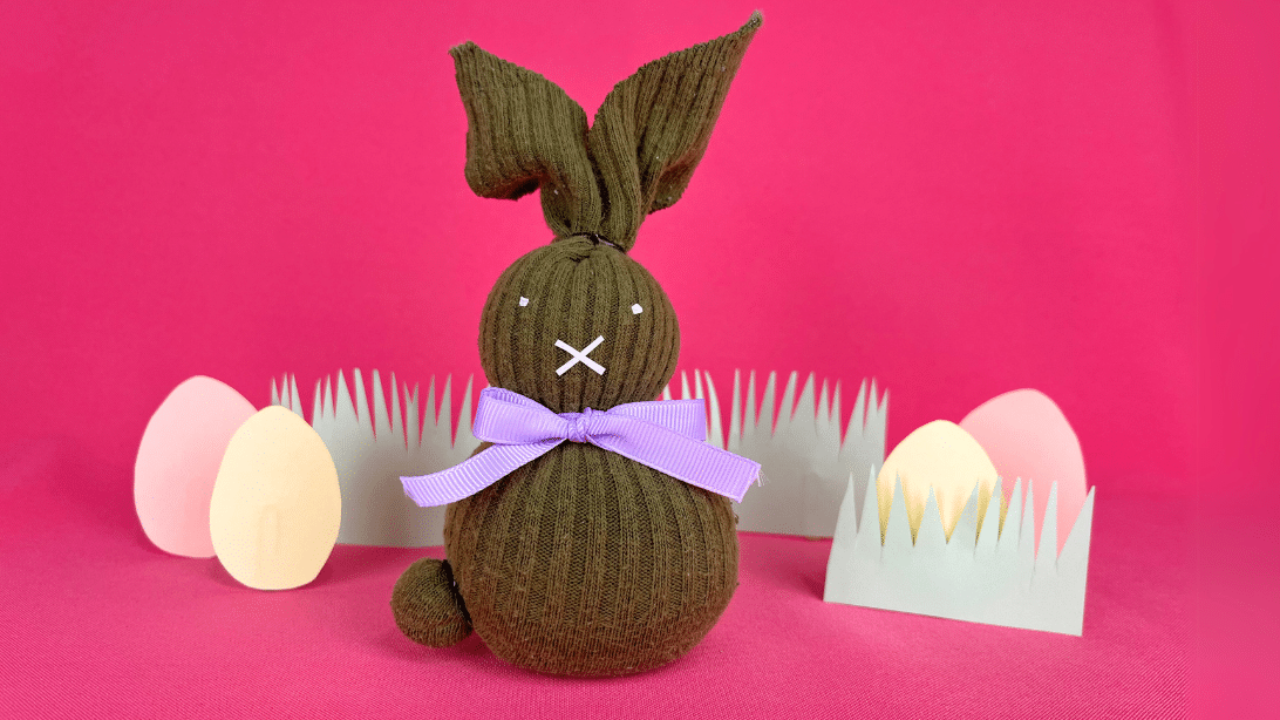
Got a lonely sock? Turn it into the cutest Easter bunny on the mantel. Slip the sock over a roll of tape to hold it open and pour in rice until the head and body are filled, leaving room at the top for ears. Tie it off with jute twine, then wrap another piece around to pinch in a head. Cut the top in half and shape two ears, pinch a little tail at the back with an elastic, and add a ribbon bow plus paper eyes and mouth. A few drops of essential oil in the rice makes it smell lovely.
Get the full tutorial at DIY JOY.
7. Cut out Paper Napkins Easter Egg Decor
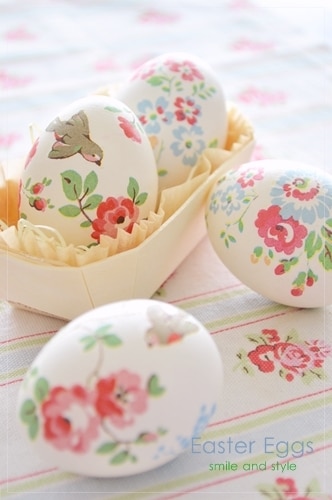
Decoupage is the easiest way to give plain eggs that pretty vintage floral look. Pick a paper napkin printed with small roses or songbirds and cut out the motifs you like. Brush a little decoupage glue onto a plain egg, lay a cutout on top and dab more glue over it with the brush, pressing gently so it hugs the curve. Keep adding pieces until the pattern feels full, then let them dry standing in an egg carton. It’s a calm, simple craft that kids love joining in on, and every egg comes out a little different.
Get the full tutorial at Smile & Style.
8. DIY Pom Pom Bunny
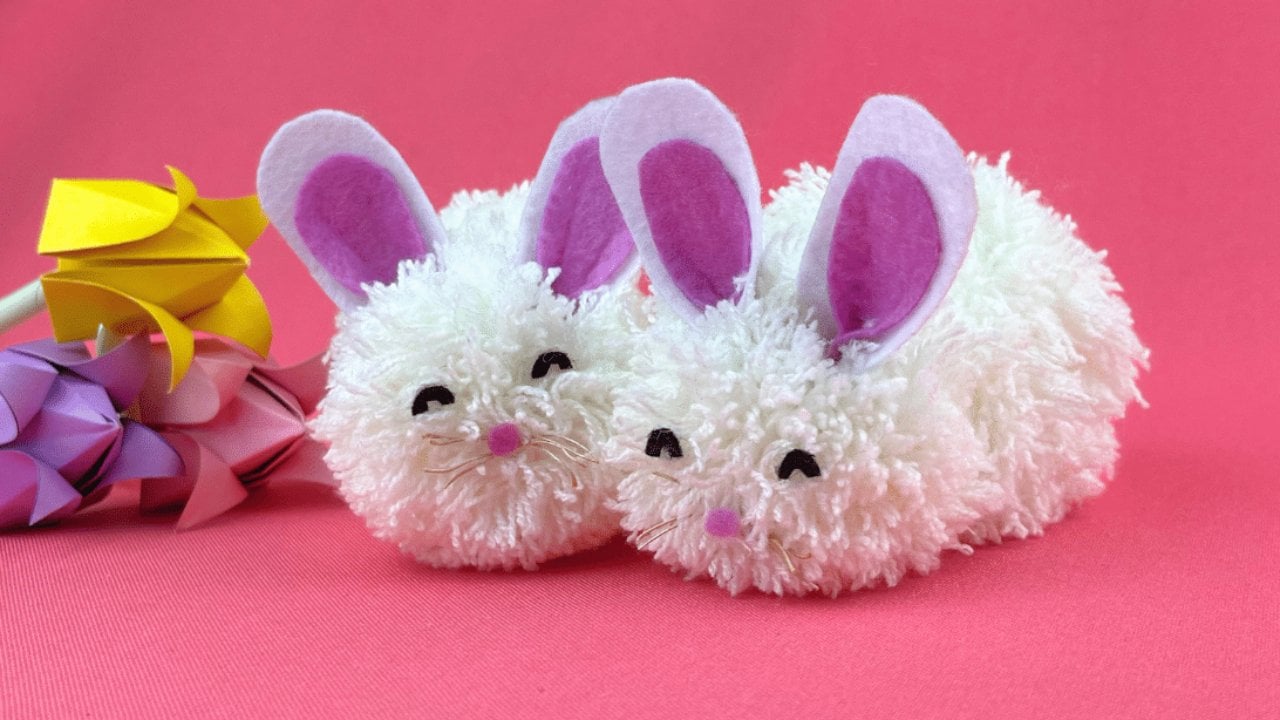
Pom pom bunnies are fluffy, cheap and so fun to make in front of a movie. Stack two large cardboard circles, wrap yarn around them many times, cut through the loops and tie a piece of yarn tightly between the layers. Pull it free, trim and comb the strands for a soft, round body. Repeat with smaller circles for the head, then wrap yarn around two fingers 40 times for a tiny tail. Hot glue everything together and add felt ears, eyes and a nose, plus a few short yarn whiskers.
Get the full tutorial at DIY JOY.
9. Simple Dollar Store Nest Wreath
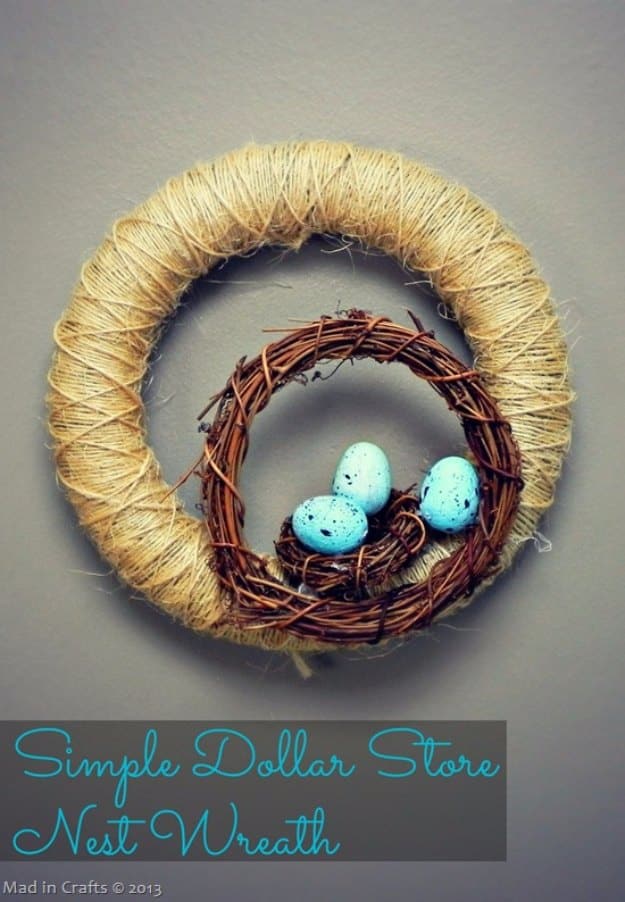
This nest wreath has a rustic, elegant look, and nearly everything comes from the dollar store. Wrap a foam wreath form in twine, then hot glue a larger grapevine wreath to one side of it. Nestle a smaller grapevine ring into the center so it sits like a bird’s nest. Paint a few foam eggs a speckled robin’s egg blue and glue them into the nest. It’s simple enough to finish in one sitting, and it carries from Easter right through spring. Reuse the twine base later for a summer or winter version.
Get the full tutorial at Mad in Crafts.
10. Easter Bunny Canvas Art
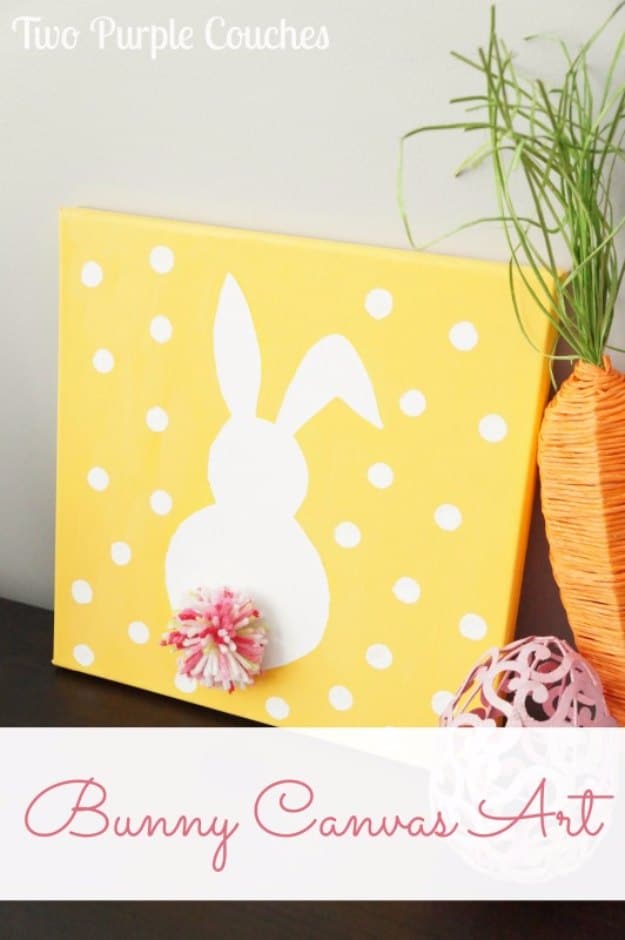
No art skills? This bunny canvas only needs a printed silhouette and some craft paint. Find a bunny silhouette online, print it to fit and lightly trace it onto a 12 by 12 inch stretched canvas. Paint the background a sunny spring yellow with two or three coats, working around the bunny shape. Once that’s dry, fill the silhouette with white acrylic and dab on polka dots with a small foam pouncer. Finish with a yarn pom pom tail attached with hot glue. It looks great propped on a mantel or a bookshelf.
Get the full tutorial at Two Purple Couches.
11. Air-Dry Clay Egg Tray
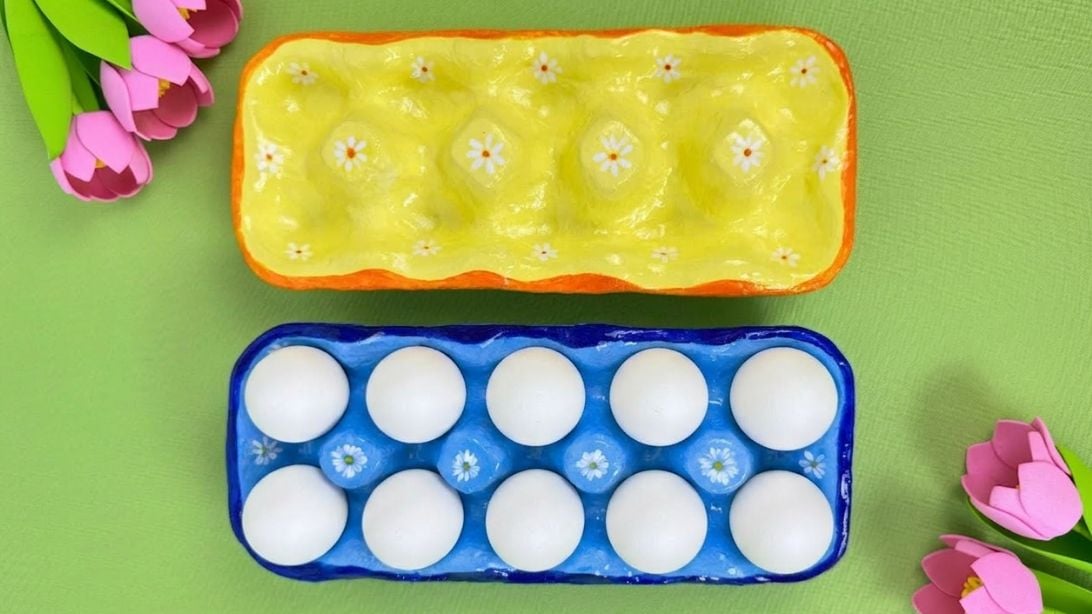
Flimsy egg cartons, meet your replacement. This air-dry clay egg tray needs no kiln and no oven. Trim an empty egg carton down to its base, then roll out kneaded clay into a rectangle big enough to cover it. Press an egg into each cup to form the wells, smooth any cracks with a damp finger and let it dry completely. Prime it, paint it a bright base color, add little flowers and a darker border, then seal it with a couple of coats of varnish. Fill it with dyed eggs for the Easter table.
Get the full tutorial at DIY JOY.
12. Origami Bunny Garland
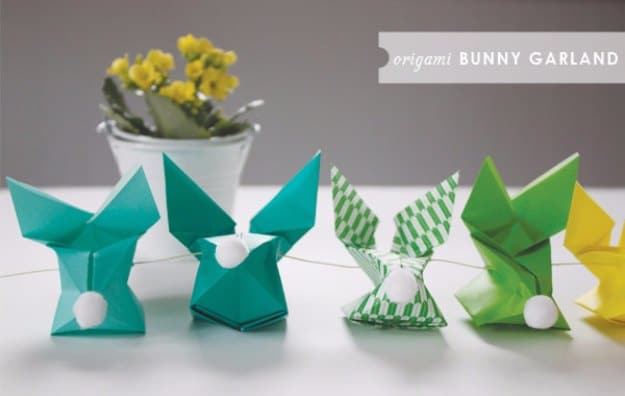
Origami bunnies strung on twine make a garland that feels a little more grown-up for Easter. Grab a pack of origami paper in greens and teals (or any palette you love) and fold as many bunnies as you want, following a video tutorial. Hot glue a small white pom pom to the back of each one for a tail. Thread thin natural twine through a large-eyed needle, then carefully push it through the body of each bunny so they’re all strung on one piece. Hang it across a mantel, a window or open shelves.
Get the full tutorial at Hellobee.
13. Easter Egg Candle Holder
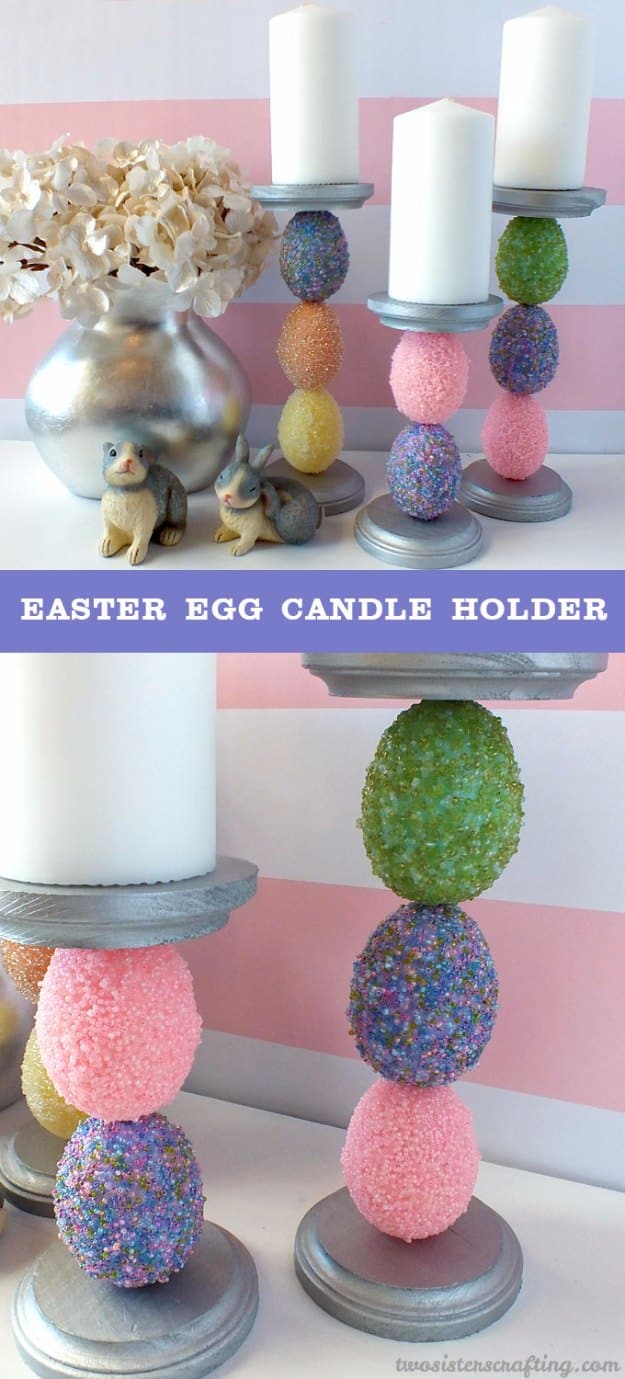
Stacked beaded eggs turn into elegant Easter candle holders. Drill holes through the tops and bottoms of plastic Easter eggs to match the size of a wooden dowel, then cover the eggs in seed beads with decoupage glue. Drill two 4 inch wooden discs, glue the dowel into the bottom disc with wood glue and paint all the wood a metallic silver. Slide two or three beaded eggs onto the dowel, trim it to height and glue the top disc in place. A slightly thicker dowel keeps them from wobbling.
Get the full tutorial at Two Sisters.
14. DIY Easter Egg Flying Cup Topiary
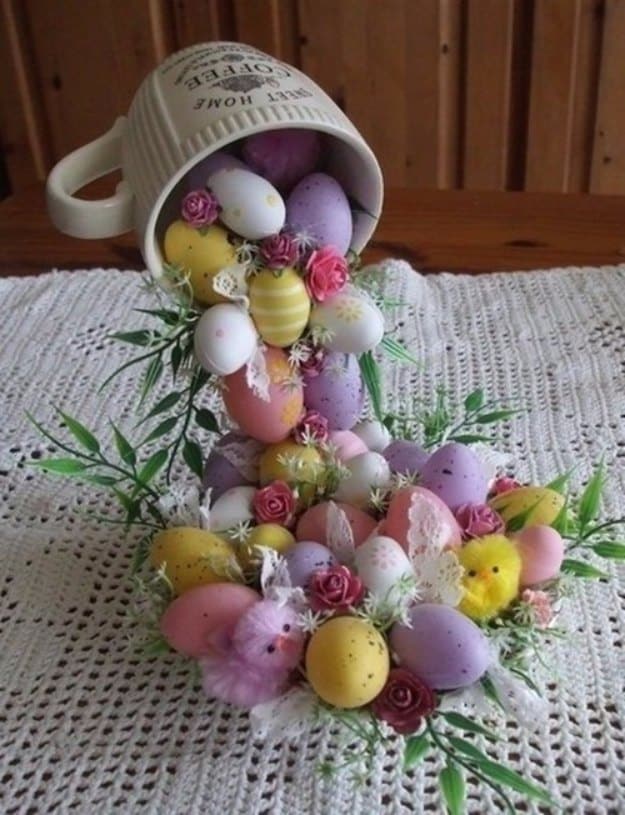
A flying cup topiary looks like magic, with eggs and flowers spilling out of a teacup that floats above its saucer. Bend a sturdy wire into an arch, then hot glue and tape one end to the saucer and the other inside the cup, adjusting until it balances. Cover the wire with glue and pile on small Easter eggs and faux flowers until it disappears. Add a butterfly, beads or ribbon if you like. An old coffee cup set works beautifully, and kids love finding a chocolate egg hidden inside the cup.
Get the full tutorial at Fab Art DIY.
15. Moss Covered Easter Eggs
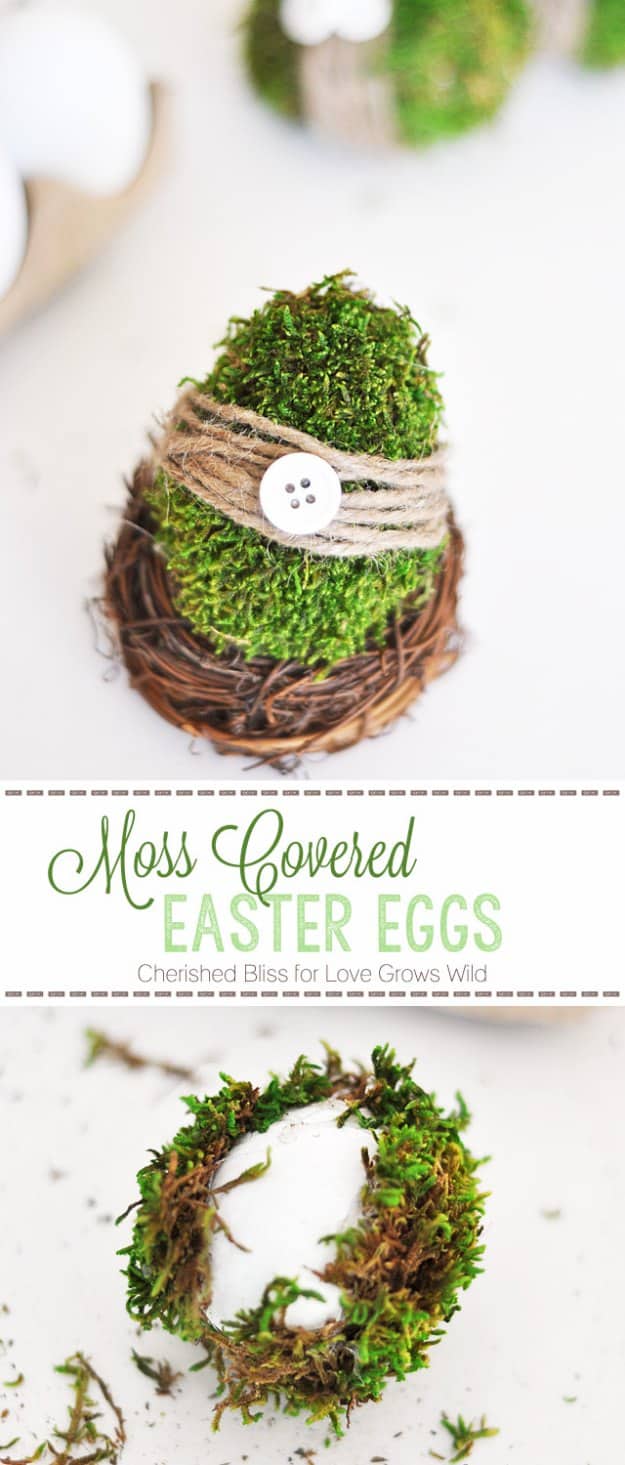
Moss eggs bring a little outdoor green inside, and they’re so easy. Put down some newspaper first, because moss is messy. Tear the moss into small pieces, add hot glue to a plastic egg a section at a time and press the moss on, shaping it to the curve. Fill any gaps with the bits that fall off, then give the egg a quick haircut with scissors to tidy stray strands. Wrap twine around the middle with a dot of glue and finish with a button. They look lovely piled in a bowl or set in a nest.
Get the full tutorial at Love Grows Wild.
16. Easter Succulent Centerpiece
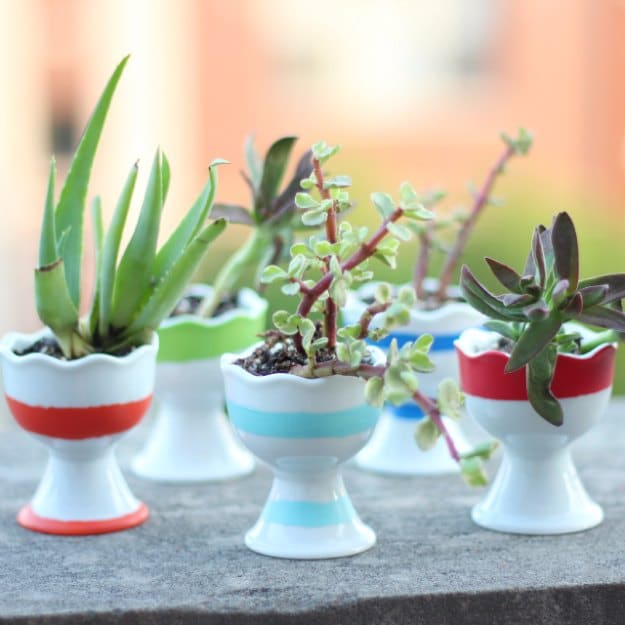
Egg cups and baby succulents make a cheerful centerpiece that lasts well past Easter. Paint inexpensive white egg cups with stripes using multi-surface paint, pressing thin masking tape down tight for crisp lines, or freehand them for a more relaxed look. Pick up the tiniest succulents you can find (some split neatly in two) and plant them with a cactus and succulent potting mix. Egg cups don’t drain, so add a couple of pebbles in the bottom and water with just a tiny bit at a time to keep the roots happy.
Get the full tutorial at Design Improvised.
17. Stamped Egg Place Cards
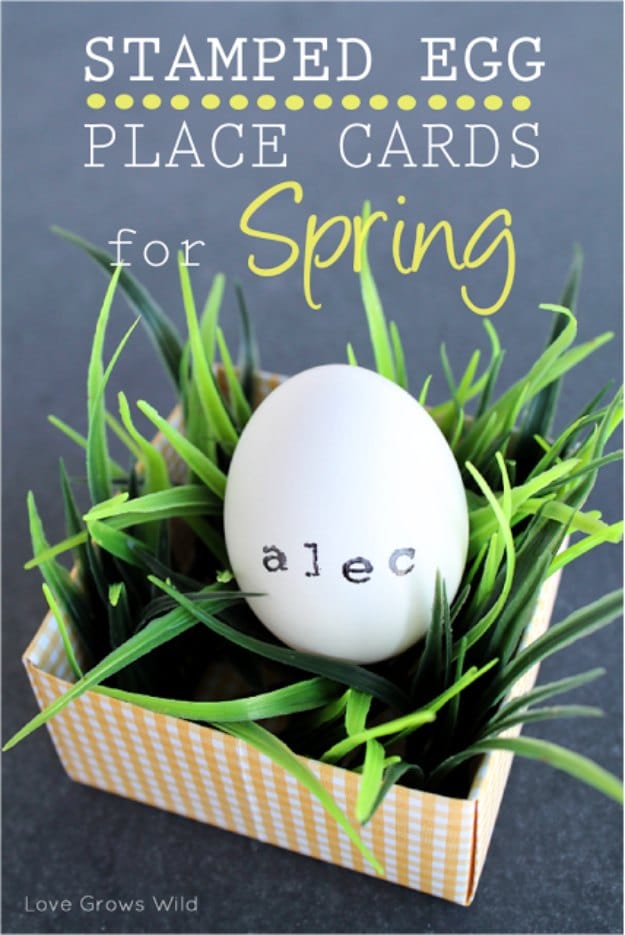
Stamped egg place cards cost about a dollar each and make every guest feel special. Trim a sheet of 12 by 12 inch yellow check scrapbook paper to 9 inches and fold it into a little origami box, using a bone folder for crisp creases. Cut a 3 by 3 inch square from a faux grass mat and set it inside. Hard boil a white egg, stamp a guest’s name on it with small letter stamps and permanent ink, then nestle it into the grass. Make one for every seat at Easter dinner.
Get the full tutorial at Love Grows Wild.
18. Easy DIY Yarn Chicks
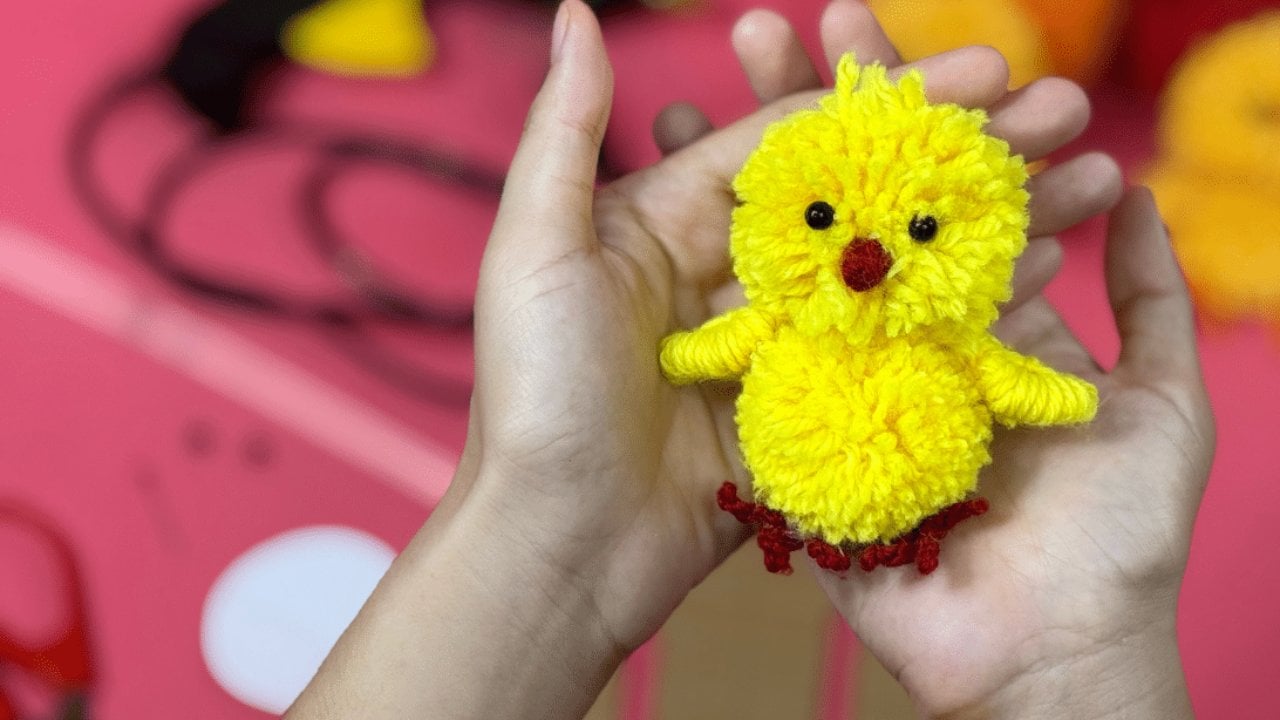
Yarn chicks are fluffy, round and perfect for an Easter basket or a spring mantel. Wrap yellow yarn 150 times around the largest cardboard pom pom template (count as you go), tie the loops tightly in the middle and slide them off. Cut through the loops and trim the ball round, using the circle template as a guide. Make a second, smaller ball the same way for the head and glue the two together. Add bead eyes, a tiny beak and little feet, and you’ve got a chick that never needs feeding.
Get the full tutorial at DIY JOY.
19. Stained Glass Easter Eggs
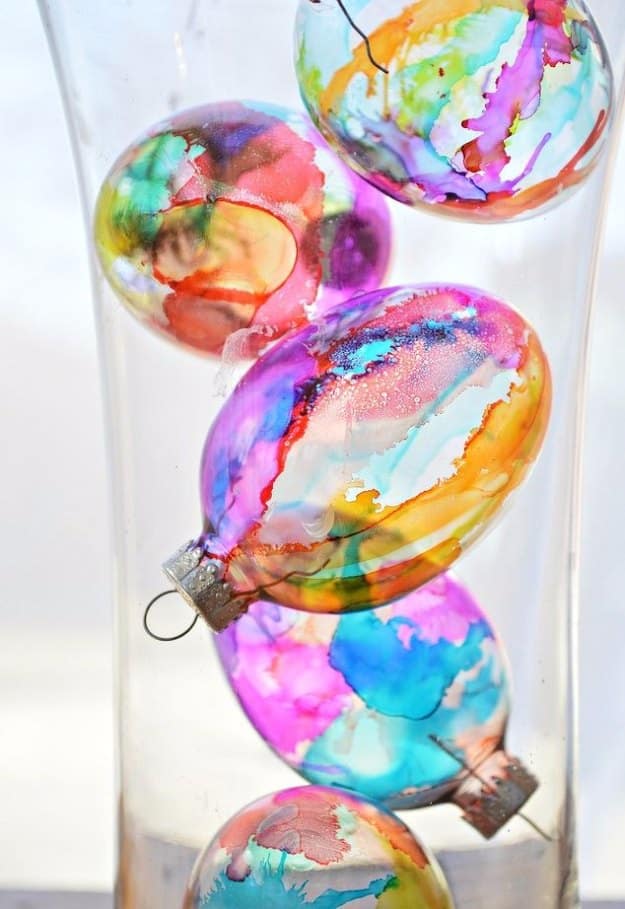
Alcohol ink turns clear glass egg ornaments into stained glass in a matter of minutes. Drip a few colors of ink onto a glass egg, then hit it with canned air so the ink spreads, layers and blends across the surface. Keep adding colors until you love the pattern, and you can finish several eggs in about 10 minutes. They look their prettiest with light shining through them, so hang them from a spring branch in a sunny window or pile them in a glass vase on the table.
Get the full tutorial at Mad in Crafts.
20. Easter Centerpiece
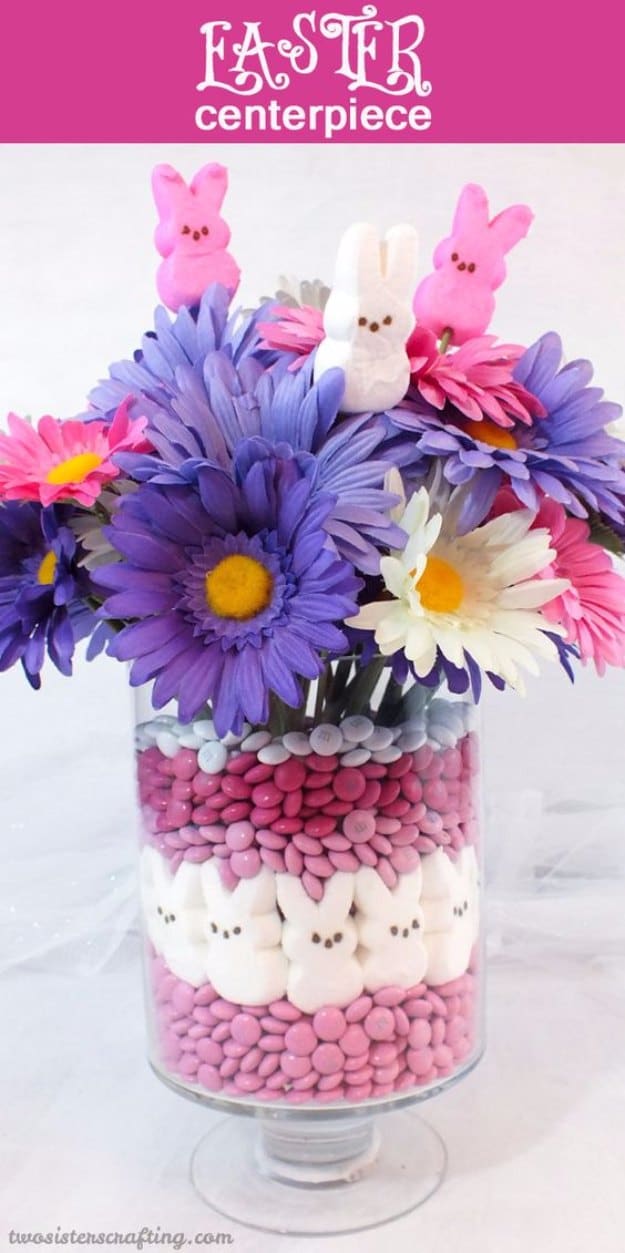
Candy layers make this Easter centerpiece as fun to look at as it is to snack from. Set a ramekin in the middle of a large hurricane vase and a small vase on top of it to take up space and hold the flower stems. Pour pink candy-coated chocolates around it, add a row of white marshmallow bunnies facing out, then layer darker pink and a few white candies. Arrange faux flowers in the inner vase and finish with a couple of bunnies perched on green painted skewers.
Get the full tutorial at Two Sisters.
21. DIY Spring Candle Decor
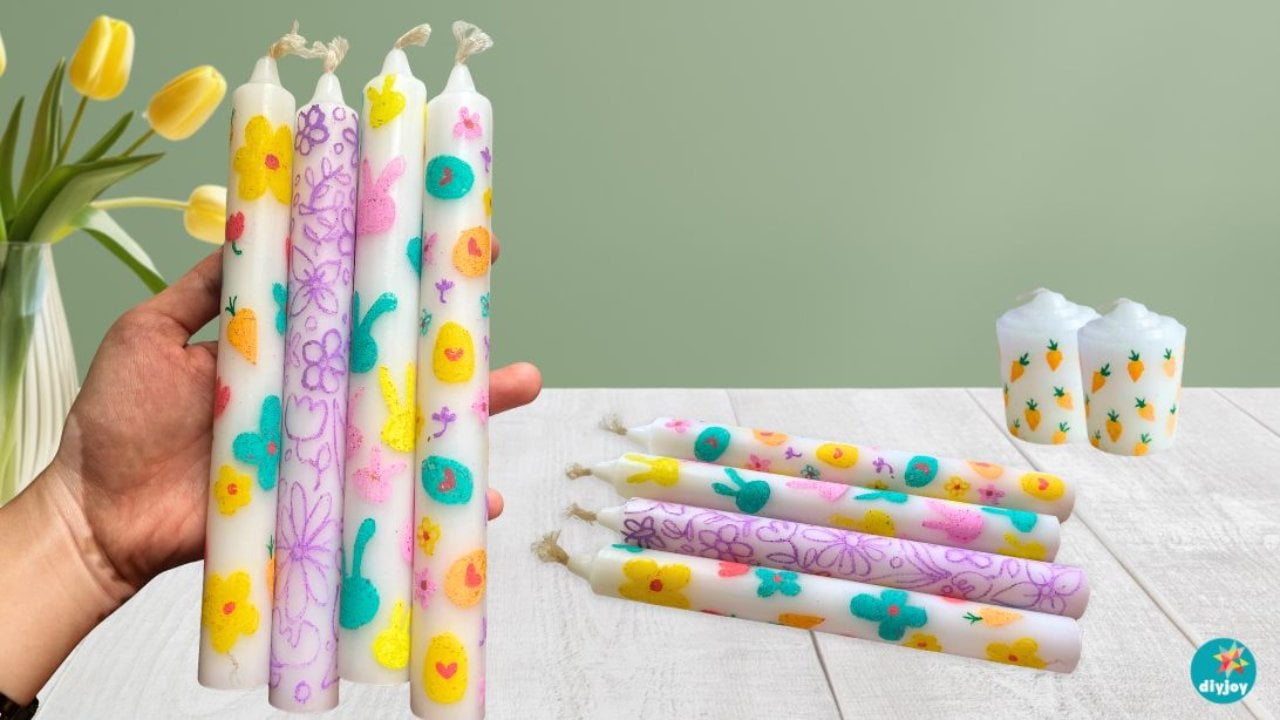
Plain white candles turn into spring decor with a set of acrylic paint markers. Decide on a design first, then draw the outlines one small area at a time so nothing smudges, letting each section dry before you switch colors. Fill in the shapes and add the little details last. Pastel eggs, bunnies, carrots, tulips and butterflies all look darling. Tie on a bow, set the candles in holders and tuck a few flowers around the base for a centerpiece. These are for display only, so don’t light them.
Get the full tutorial at DIY JOY.
22. How to Fold a Napkin Into a Bunny
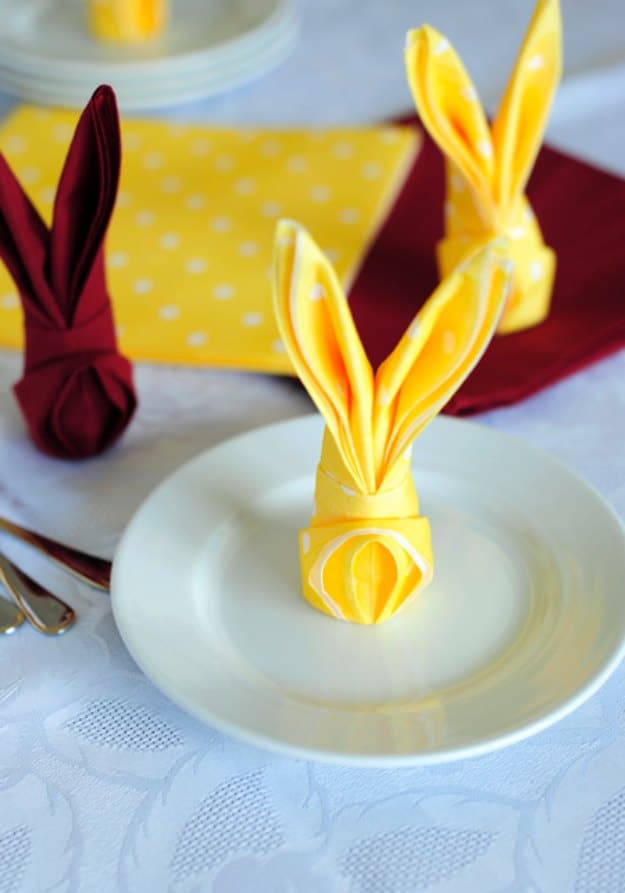
Napkin bunnies make an Easter table look polished in about a minute each. Open a large paper or cloth napkin, fold it in half and then in half again. Fold the left and right sides to the center to make a triangle at the top, then do the same at the bottom. Bring the lower corners in to the middle, flip it over and lift the bottom point up. Turn it over again, roll one side around the other, tuck the end into the pocket and gently pull the ears apart.
Get the full tutorial at Tortelina.
23. Toilet Paper Roll Easter Banner
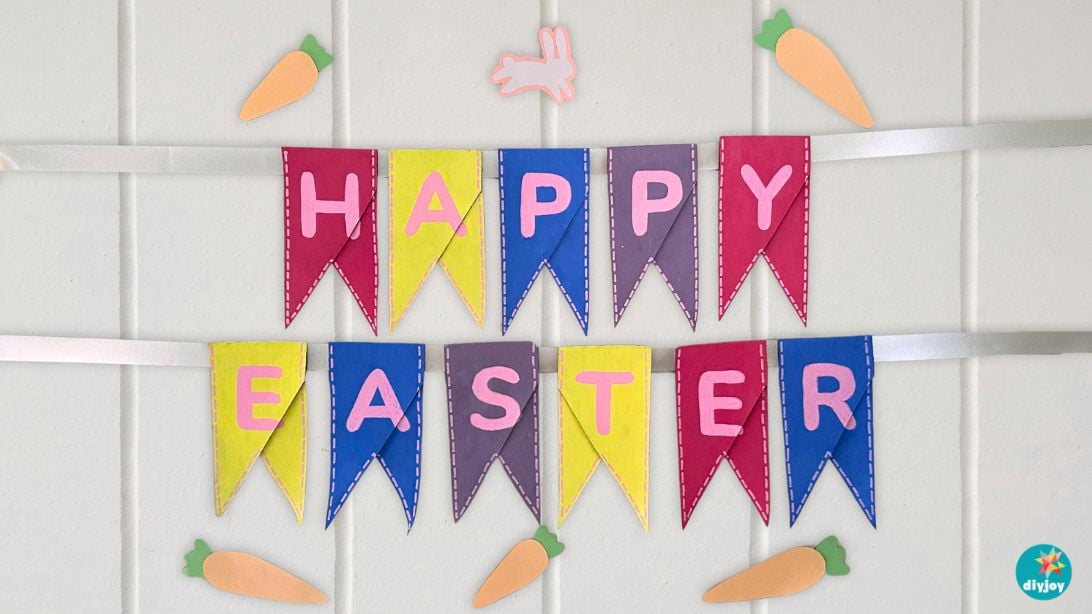
Save your toilet paper tubes, because six of them make a full Happy Easter banner. Soak the tubes in water for 2 to 3 minutes until the layers separate, peel the pieces apart, fold each one in half and let them dry. Paint them in bright colors, then draw the letters with acrylic markers (print and trace them if freehand feels scary). Add a dashed border, hang the pennants on a ribbon and stick it to the wall. Rolls from the same brand keep every pennant the same size.
Get the full tutorial at DIY JOY.
24. Easter Egg Planters
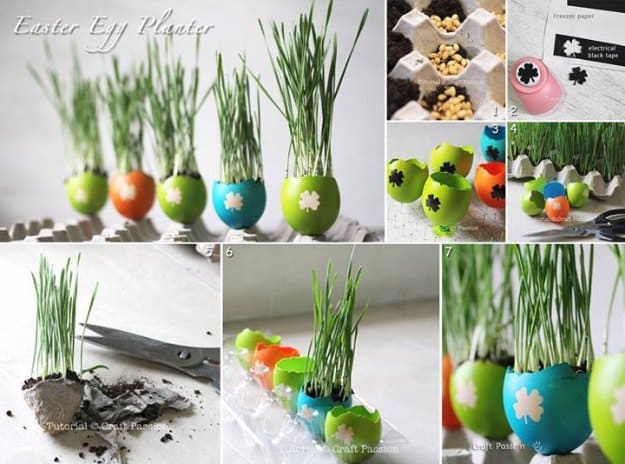
Wheat grass sprouting from dyed eggshells is such a fresh, living Easter decoration. Plant wheat grass seeds in organic soil in an egg crate about a week ahead so the grass has time to grow. Dye eggshell halves with food coloring and vinegar, using little punched freezer paper shapes and painter’s tape as stencils to leave a design. Once the grass is up, cut each sprouted section free with gardening scissors and tuck it into a shell. Set them back in a carton in a sunny window.
Get the full tutorial at Goods Home Design.
25. Easy DIY Pom Pom Wreath
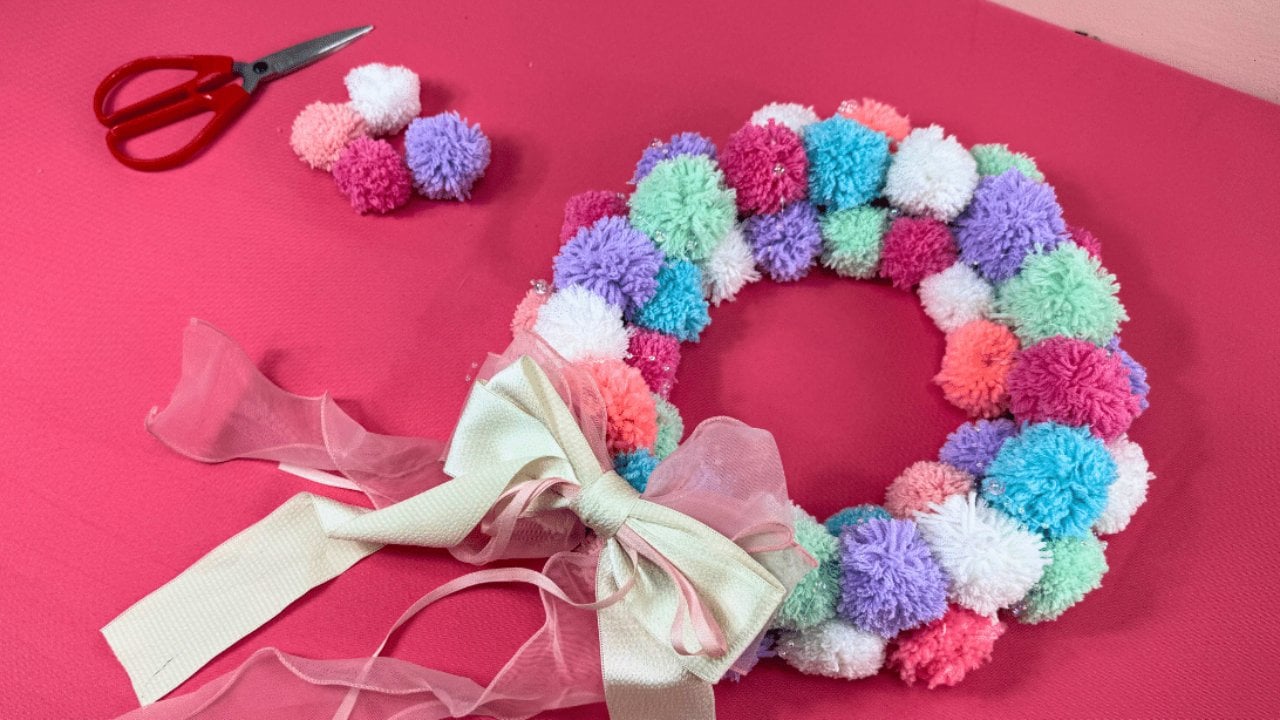
A pom pom wreath is soft, colorful and so cheerful on a spring door. Wrap yarn 80 times around a large cardboard template, not too tight, then tie it firmly in the middle and slide it off. Knot it a few times so it won’t unravel, cut the loops and trim it into a round ball. Make about 16 big pom poms in assorted colors and 18 smaller ones. Hot glue the big ones around a wreath form, then fill in with the small ones inside and outside. A ribbon bow finishes it.
Get the full tutorial at DIY JOY.
26. Easter Chick Craft Colorful Place Holders
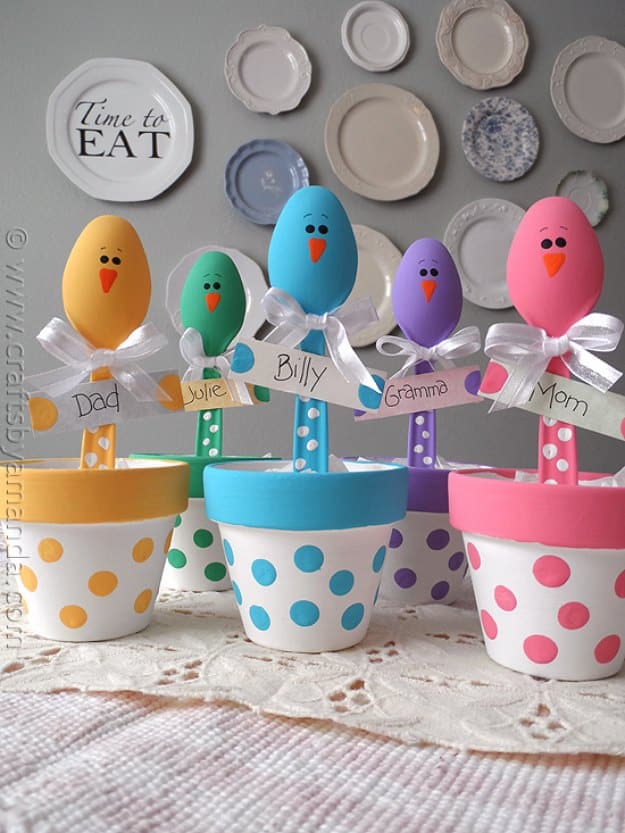
Plastic spoon chicks perched in polka dot pots make the happiest Easter place holders. Lightly sand the shine off five plastic spoons, paint them in pastel colors and stand them in floral foam to dry, then add white polka dots up the handles. Paint small terra cotta pots white, paint the rims and dot them to match each spoon. Glue a square of foam inside each pot, paint on beaks and eyes and push the spoons in. Tie on a ribbon bow, stuff with tissue and glue on a name tag.
Get the full tutorial at Crafts by Amanda.
27. Mesh Carrots Easter Decor
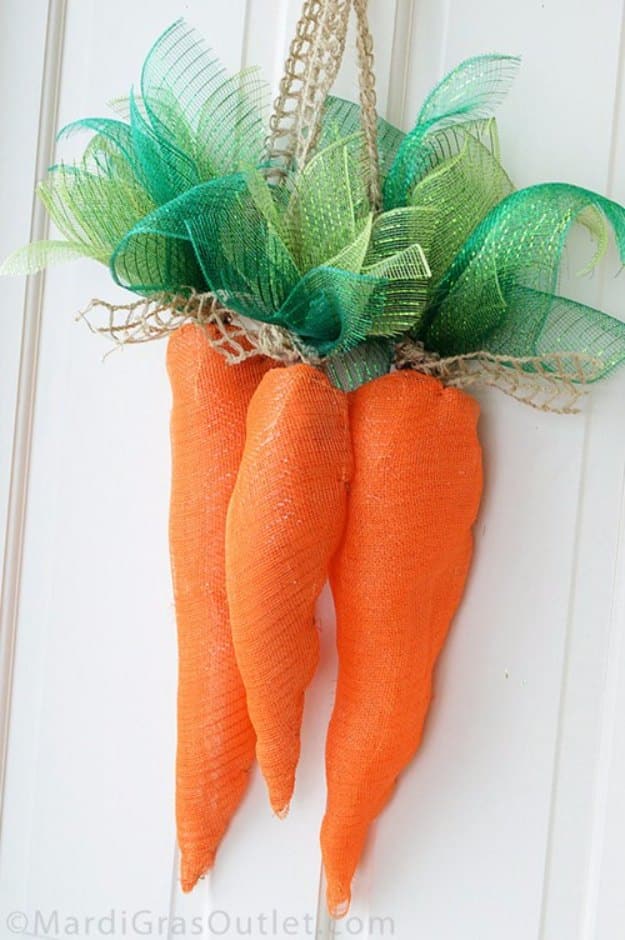
Deco mesh carrots make a fun, oversized door hanger for Easter. Bend aluminum craft wire into a carrot shape, folding the long piece in half for the point, then add a shorter wire lengthwise so it stands out in 3D. Layer three pieces of orange deco mesh, set the frame in the curl and attach the mesh with short floral wire ties, working back and forth from the tip. Puff green mesh into leafy tops, then tie three carrots together with jute window pane ribbon and hang them up.
Get the full tutorial at Mardi Gras Outlet.
28. DIY Paint Chip Easter Garland
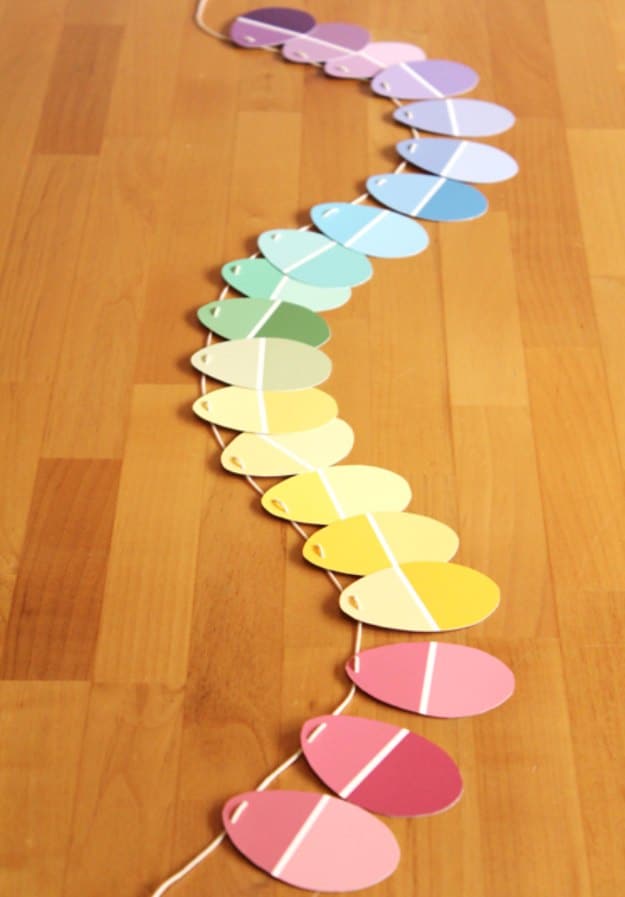
Those free paint chips from the hardware store make the cutest Easter egg garland. Pick cards with four shades each and cut them in half, keeping the thin white line between two colors so every egg looks like a plastic Easter egg. Print an egg template, trace it on the back of each chip so no pencil shows, and cut them out. Punch two tiny holes at the top of each egg and thread them onto waxed cotton cord, which keeps them from sliding. Hang it on a mirror, a mantel or a window.
Get the full tutorial at Modern Parents Messy Kids.
29. Easy DIY Yarn Birds
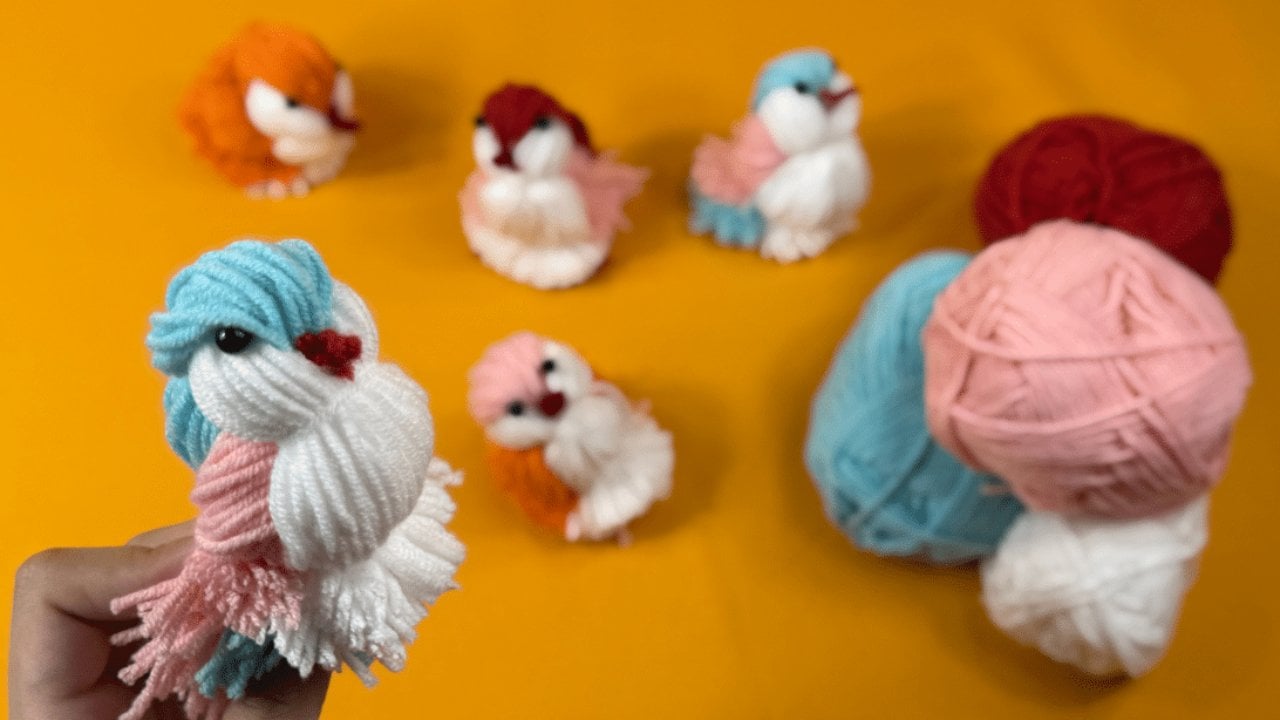
Yarn birds are a five-minute craft that brings a flock of spring color indoors. Wrap white yarn 50 times around the length of a cardboard template and cut the loops at one end, then make a blue set the same way. Wrap white around the width for the head bundle, tie it in the middle and wrap the blue bundle around it. Tie each side to shape the head, add a pink bundle for the breast, then trim and shape the tail and wings. Glue on bead eyes and they’re ready to perch.
Get the full tutorial at DIY JOY.
30. Twig and Moss Easter Frame
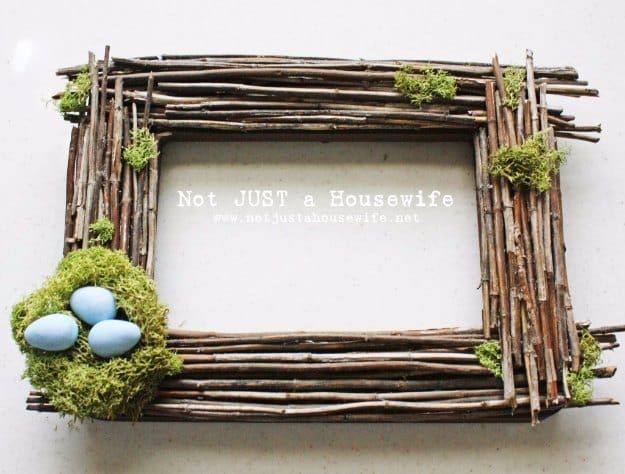
A dollar store frame, a handful of backyard twigs and a bag of moss make this rustic Easter frame. Paint an unfinished wood frame brown first, so any spots the sticks don’t cover won’t show. Hot glue the twigs in place, either in neat straight lines or a little messy like a bird’s nest, and go easy on the glue so it doesn’t ooze. Play with the moss placement before gluing it down, then tuck a tiny nest with speckled eggs into one corner. Hang it as is or add a ribbon.
Get the full tutorial at Not Just a Housewife.
31. DIY Rabbits on a String
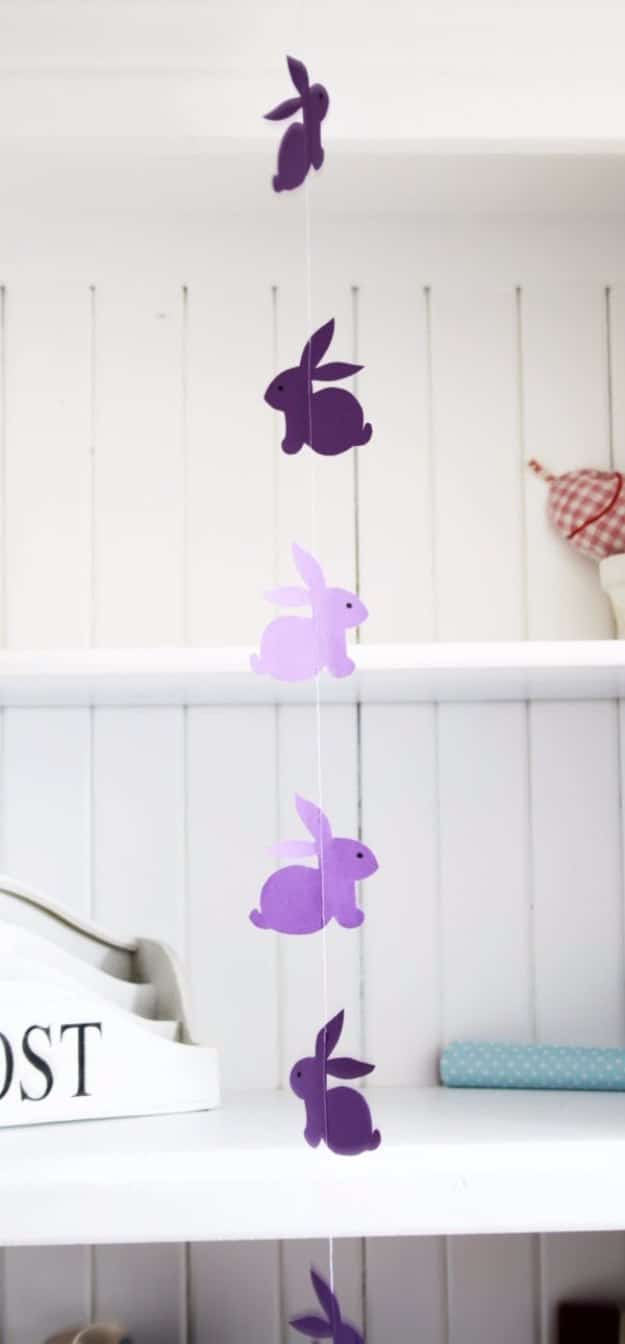
Rabbits on a string might be the easiest Easter garland ever. Print a simple bunny template, trace it onto colored paper or cardstock in a few shades of purple and lilac, and cut out a stack of rabbits. Then run them through the sewing machine one after another on a long thread, leaving a little gap between each bunny. Hang the strand from a shelf or a window frame so the bunnies twirl as the air moves. Make a few strands at different lengths for a pretty spring backdrop.
Get the full tutorial at titatoni.