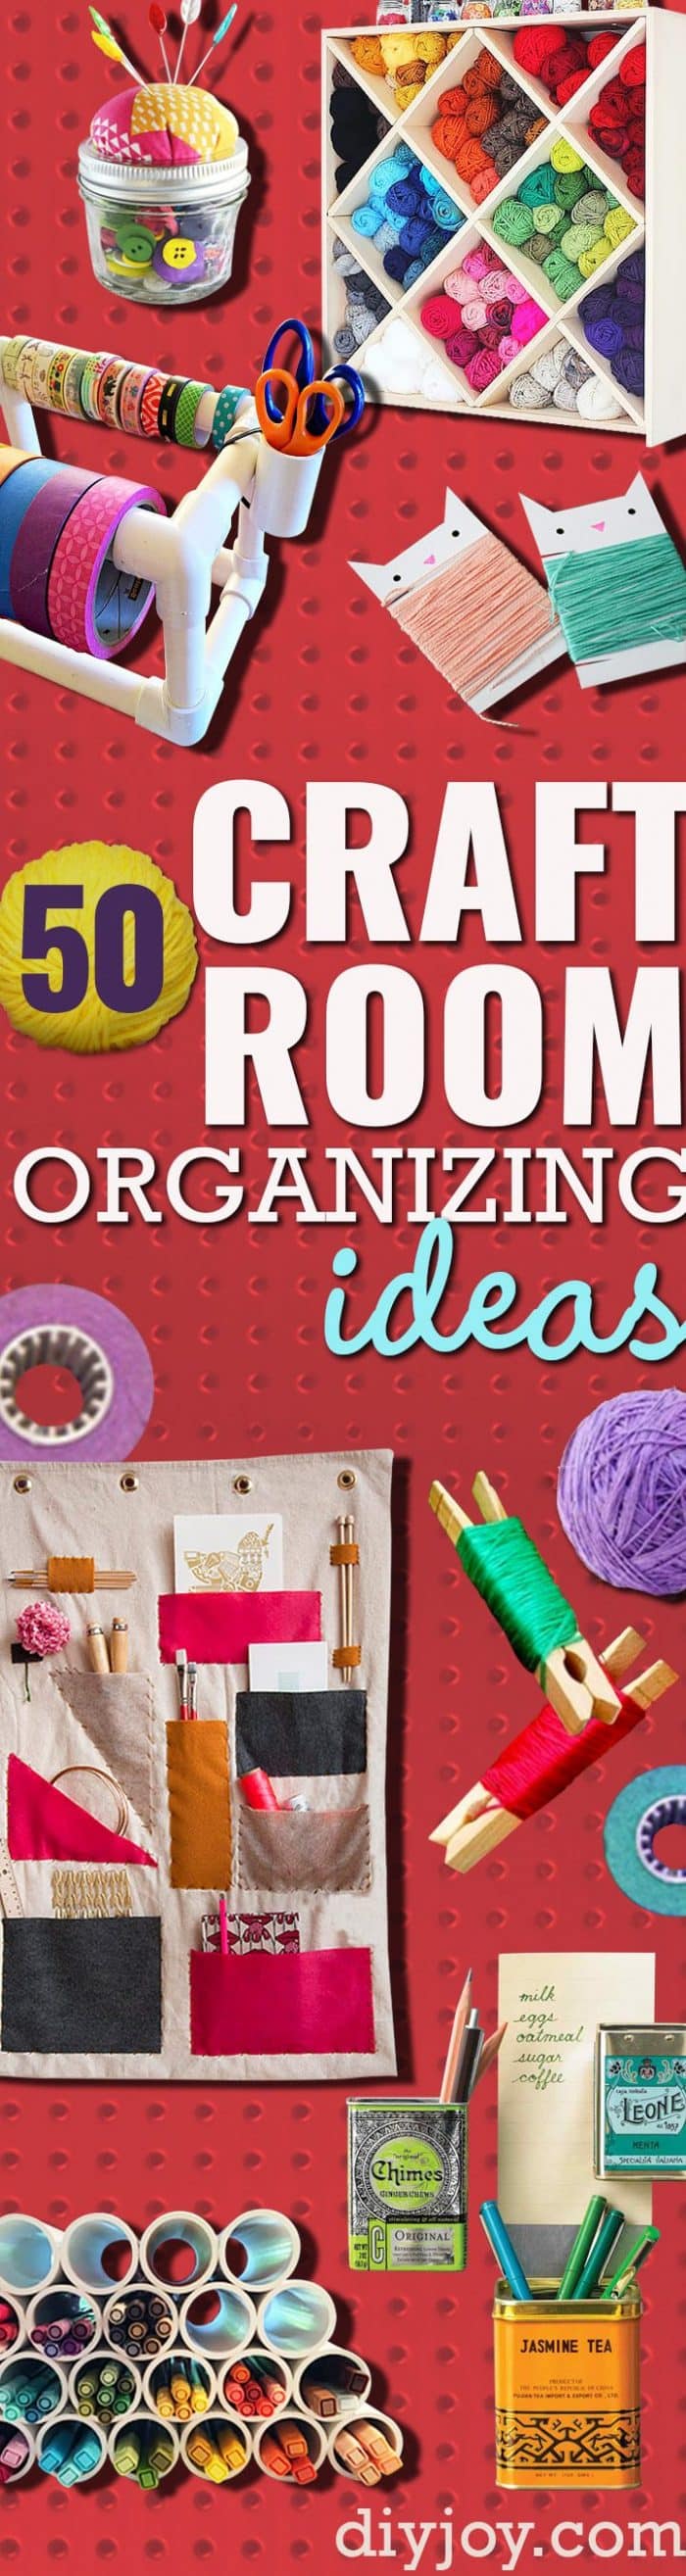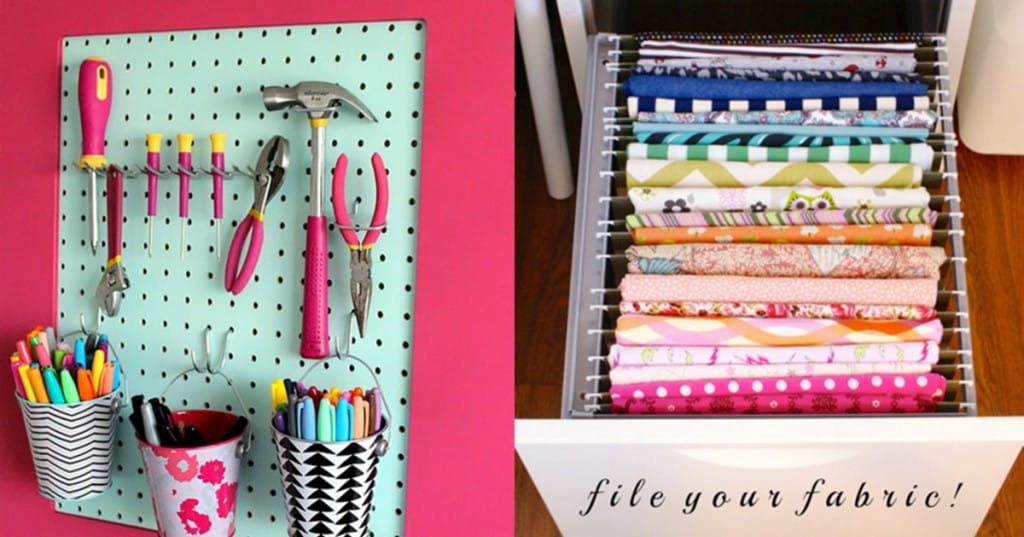
There is a particular kind of craft room mess where you own three of everything because you could not find the first two. These craft room organization ideas fix that, and they are sorted by the problem rather than the pretty picture, because a quilter and a painter do not need the same thing. Fabric filed upright like folders so you can see every print at once. Thread on dowels wedged into an embroidery hoop. Paint bottles hanging on wire shelves. Ribbon feeding out of a plastic tub. Twine on a bolt through a jar lid. Most of them cost a few dollars and an afternoon, several are built out of things already in the recycling, and every one of them means less time hunting and more time actually making something.
1. Giant Peg Board
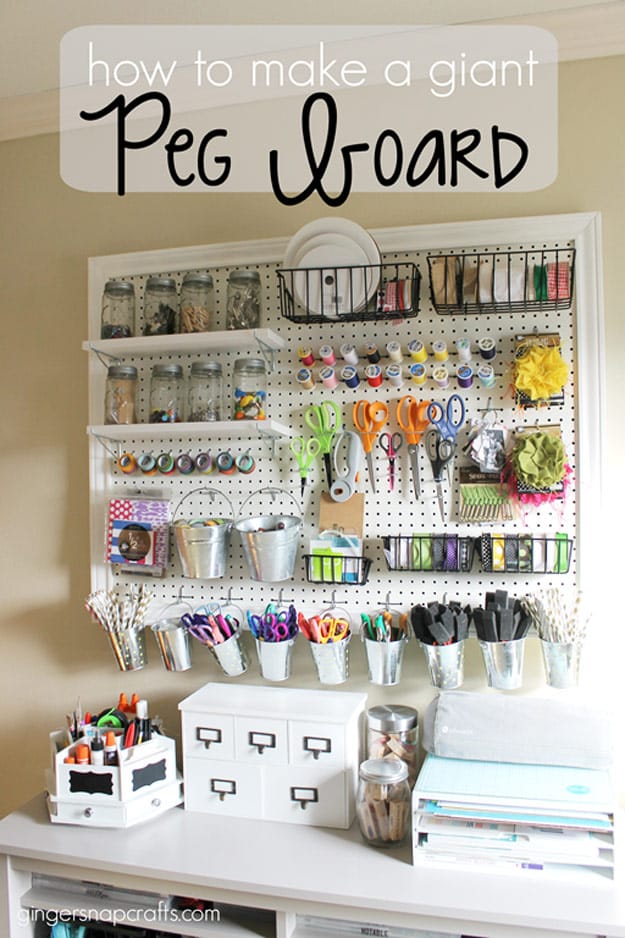
A four foot by three foot pegboard framed in white above a desk, hung with baskets, tins, spools, scissors and a row of small buckets. The detail that makes it work is on the back, where a 1×2 frame mitred at the corners holds the board off the wall so the hooks have somewhere to go. A second frame in nicer trim on the front is what turns a utility board into furniture. Glue and nail the board to the frame every couple of inches, caulk the joints and the nail holes, paint, then find the studs and hang it on screws.
Get the full tutorial at Ginger Snap Crafts.
2. DIY Tin Can Desk Organizer
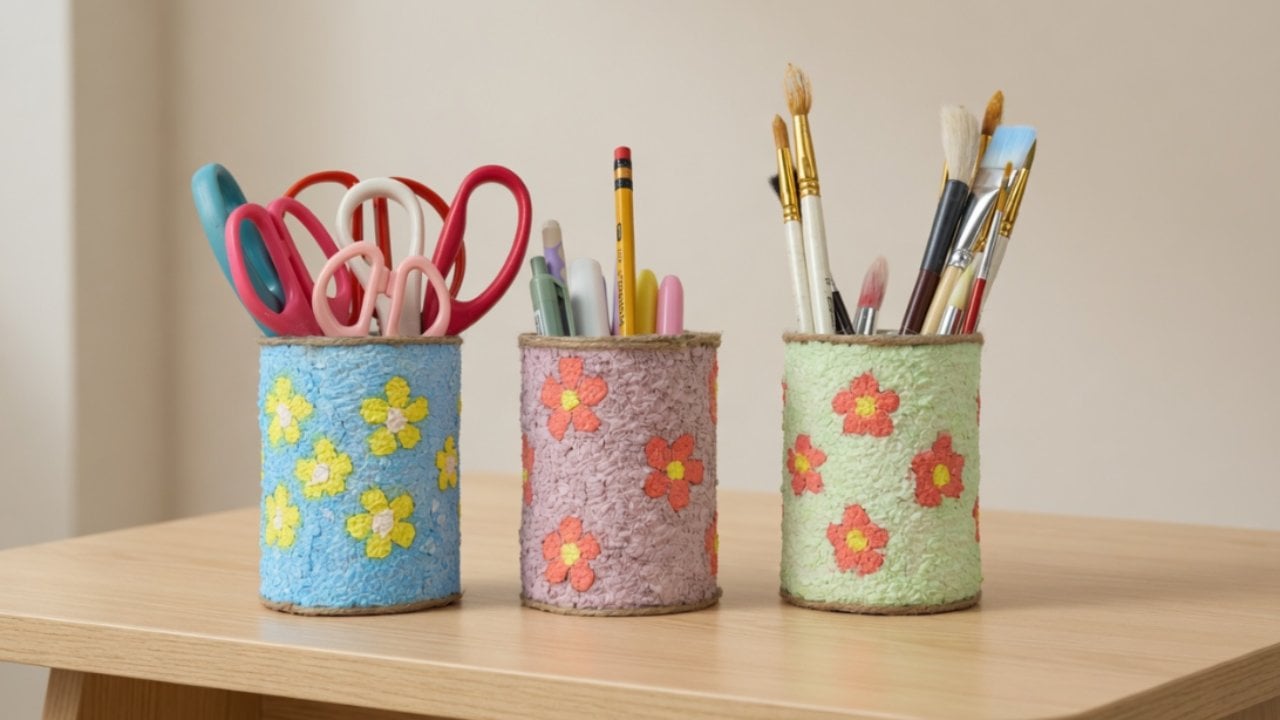
Empty tin cans turned into desk pots with a raised flower on the side, and the raised part is homemade paper mache rather than anything bought. Tissue is torn up, soaked, squeezed out and mashed to a pulp, then mixed with glue and paint until it is one color all the way through. Draw the design on the can first, and draw it big, because a large simple flower is far quicker to fill and far more forgiving than fine detail. Fill the background and the flower in different colors and let it dry hard.
Get the full tutorial at DIY Joy.
3. Organizing Embroidery Floss
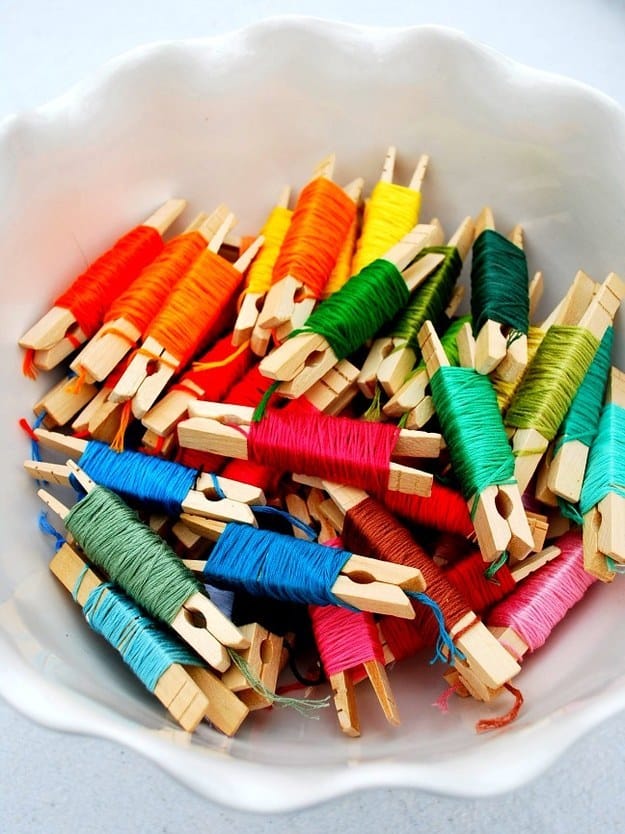
Embroidery floss wound onto wooden clothespins and piled in a white dish, sorted so every color is visible at once. Two packs of dollar store clothespins, thirty pins to a pack, so the whole system costs two dollars, which is the reason to do it this way rather than buying proper bobbins. The pin grips the loose end under the spring, which is the part that stops the tangle, and a rainbow of them in a bowl looks like a display rather than storage. Write the color number on the pin before you wind it.
Get the full tutorial at Mrs. Jones at Heather J's Life.
4. Bakers Twine Organizer
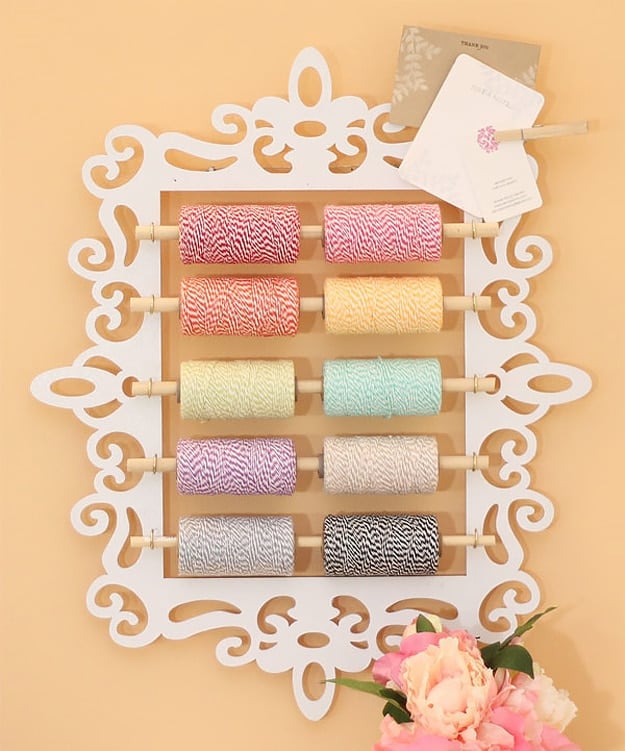
An open laser cut frame with rows of dowels across it, each one carrying spools of baker’s twine in pinks, greens and stripes. The engineering is all on the back. A square dowel nailed across behind the frame holds the whole thing off the wall, and without it the frame sits flush and the spools have no room to turn at all. On the front, brass cup hooks screwed in by hand down both sides carry half inch dowels cut a little longer than the opening, so a dowel lifts straight out when a spool runs empty. Notecards store flat in the same frame.
Get the full tutorial at Damask Love.
5. DIY Denim Jean Organizer
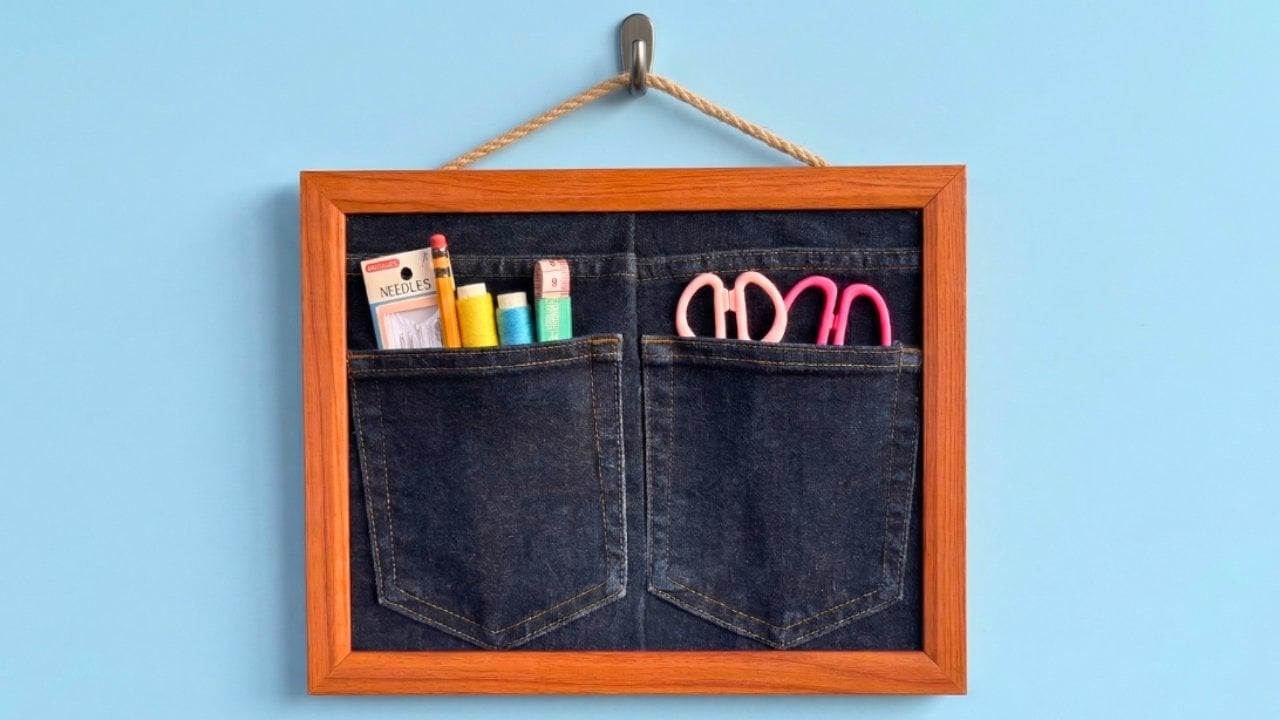
An old pair of jeans and an empty picture frame make a wall organizer that uses the pockets the jeans already have, which means no sewing and no pattern. Lay the frame on the back of the jeans, draw round it, and cut along the line with sharp fabric scissors. Fold one side over the other toward the middle so both back pockets sit close together, then hot glue that overlap down. Scissors, pens, brushes and rulers all stand up in the pockets where you can see them.
Get the full tutorial at DIY Joy.
6. Filing Fabric Organizer
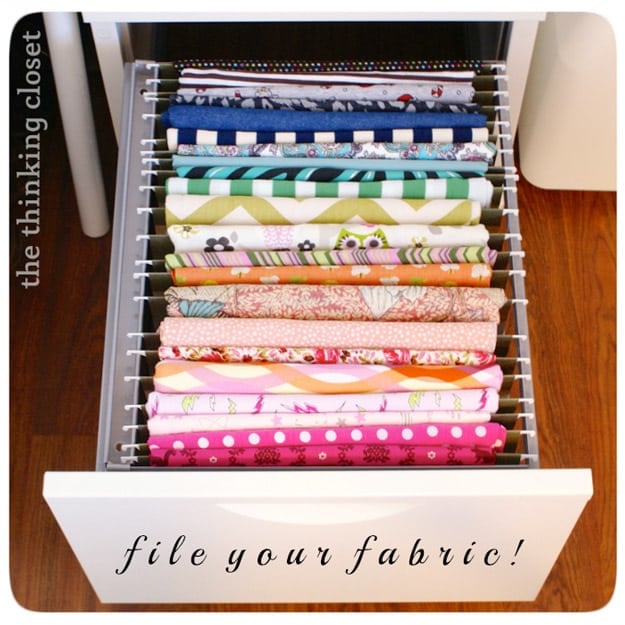
Folded fabric draped over file folders and stood upright in a filing cabinet drawer, sorted in rainbow order, so every print shows its spine. Stacked fabric is the enemy, because the piece you want is always the one at the bottom. The specific trick is cutting acid free file folders down the middle and draping the folded fabric over the cut half, which turns a fat quarter into something that files like a document. Acid free matters if the fabric is going to sit there for years. One bottom drawer holds a surprising amount.
Get the full tutorial at The Thinking Closet.
7. Lazy Susan Art Caddy
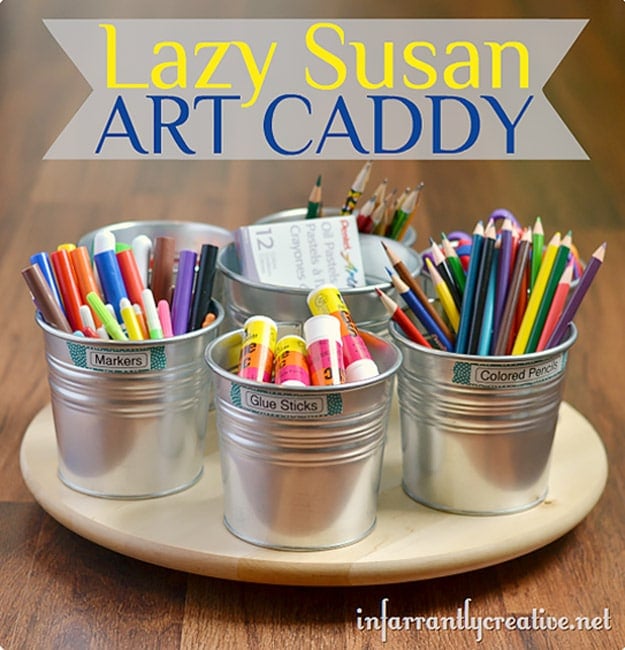
Three galvanized pails of markers, glue sticks and colored pencils on a wooden lazy susan, each pail labeled, spinning so everything at the table is within reach. The one modification worth copying is magnets: the pails are held on by magnets rather than glued down, strong enough that the caddy spins without them sliding, weak enough that a child can lift one off and take it away. A turntable solves the reaching problem that makes a shared craft table miserable. Label the pails by contents, not by owner.
Get the full tutorial at Beckie at Knock Off Decor.
8. DIY Air-Dry Clay Jewelry Organizer
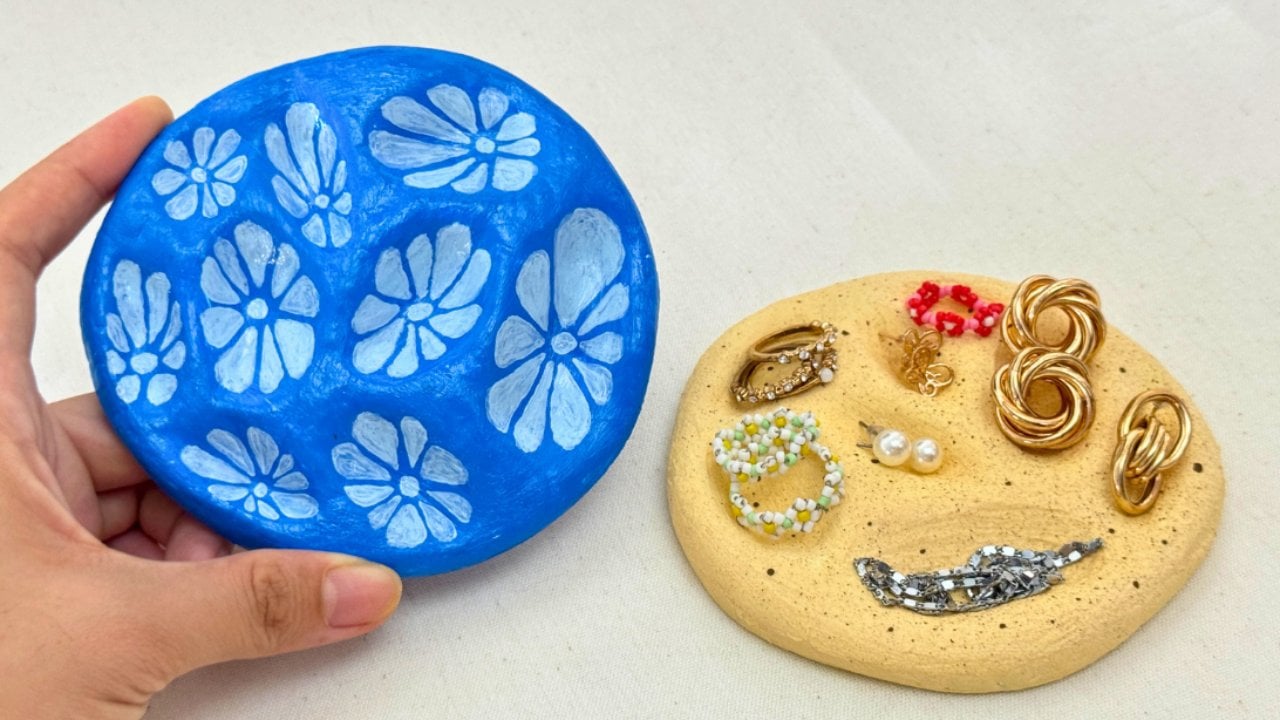
A round air dry clay dish with pebble shaped hollows pressed into it, each one the right size to drop a ring or a pair of earrings into. Roll the clay out evenly, shape it into a circle, then press pebbles in one at a time and lift them out again. Wet the stones first so they do not stick and pull the clay apart, and smooth the hollows over with damp fingers afterward to take out the cracks. The paint here is mixed with baking soda, which gives the finished dish a soft beachy texture.
Get the full tutorial at DIY Joy.
9. Inexpensive Craft Room Storage Containers
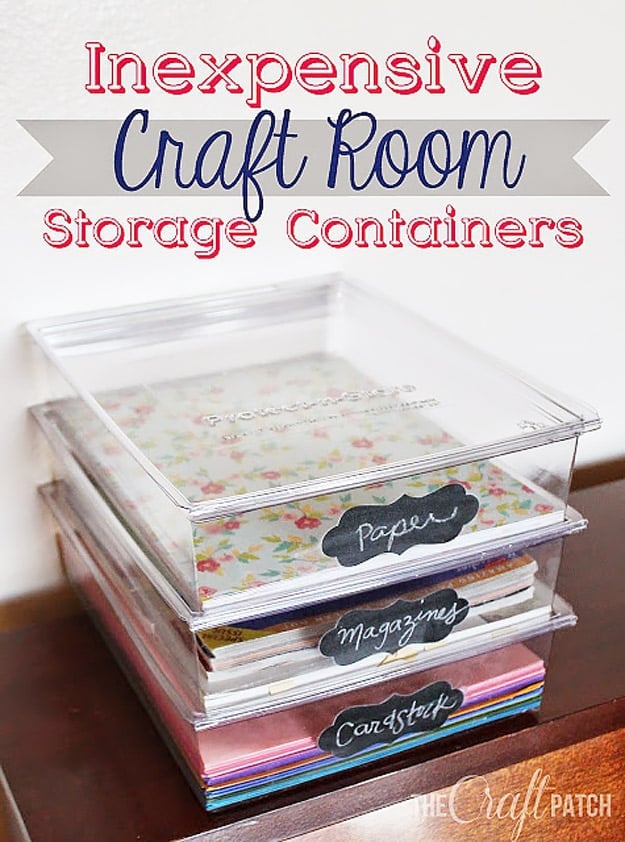
Clear plastic document boxes stacked on a desk, each one labeled with a die cut chalkboard sticker, holding paper, cardstock and magazines. Clear is the whole argument: you can see what is in a box without opening it, which is what stops you buying a fourth pack of cardstock. They come in letter, twelve inch square and five by seven so the paper sizes you already own fit without trimming. One tip that catches everyone out: season a chalkboard label before its first use by rubbing chalk over the whole surface and wiping it off.
Get the full tutorial at The Craft Patch.
10. Candleholder Twine Storage
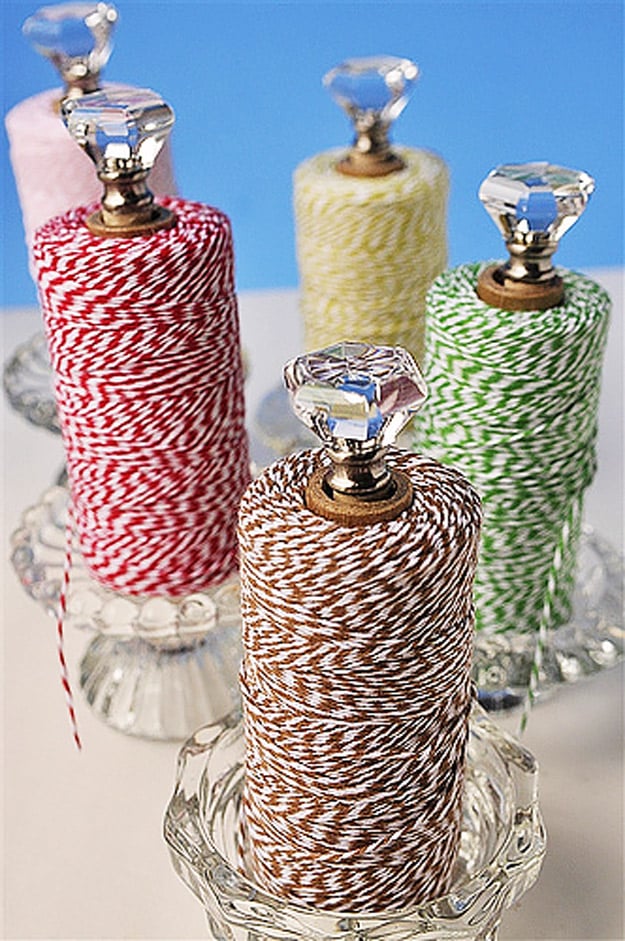
Four glass candleholders turned into twine dispensers, each with a dowel standing up out of it holding a spool of baker’s twine and a glass knob on top. The magnets are the engineering: one glued into the base of the candleholder and one on the bottom of the dowel, so the dowel lifts straight out when a spool runs empty and clicks back down. Measure the dowel against the holder with the twine on it, then subtract the height of the two magnets before you cut, because they lift the whole stack.
Get the full tutorial at Leigh Anne Wilkes at Your Homebased Mom.
11. Yarn Storage System
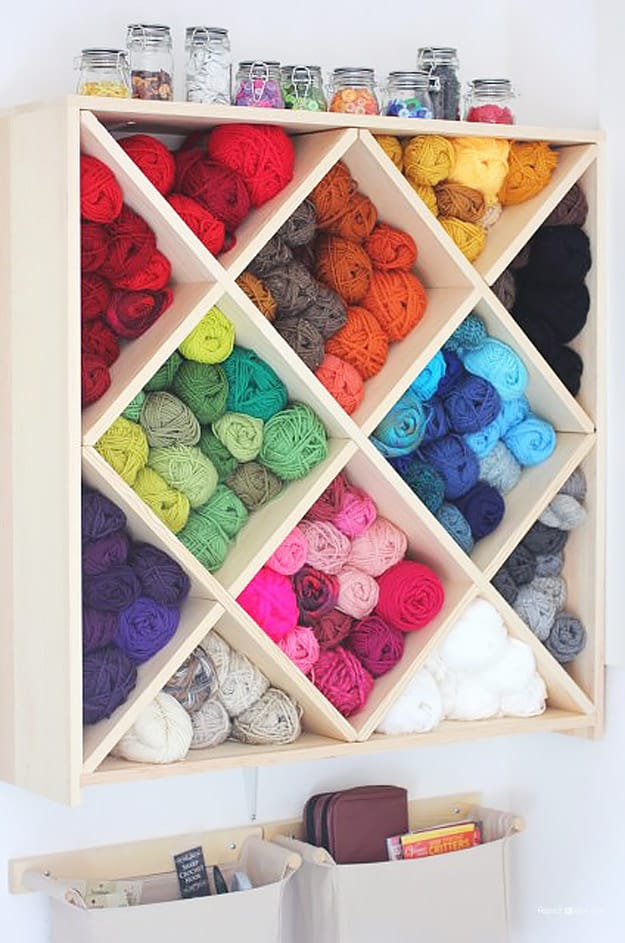
A twelve cubby wine rack mounted on the wall and filled with a hundred skeins of yarn sorted by color, with canvas bins hanging underneath. Yarn in a bin or a basket compresses, tangles and hides, and the diamond cubby is the answer because each hole holds a few skeins loosely and shows the color. The mounting is not optional: the unit weighs around forty pounds empty and is fixed to the wall with three shelf brackets, two under the top cubbies and one at the bottom, before any yarn goes in.
Get the full tutorial at Repeat Crafter Me.
12. Mason Jar Twine Holders
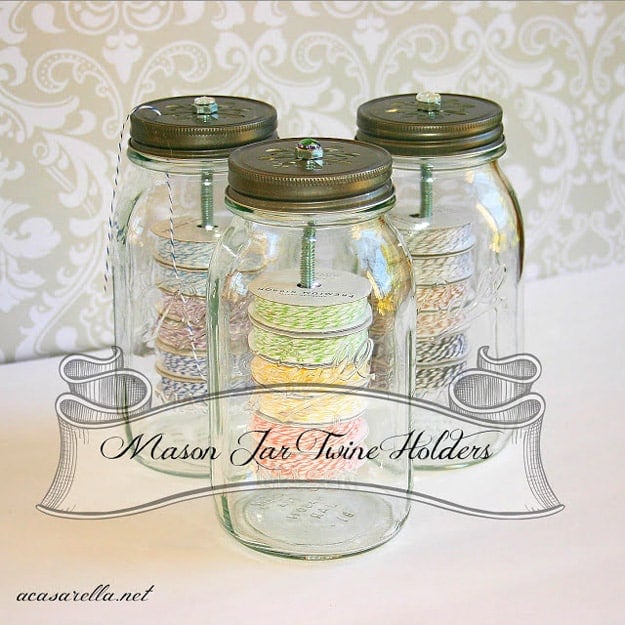
Three tall mason jars with daisy cut-out lids, each holding six spools of baker’s twine stacked inside on a bolt, with the ends threaded up through the holes in the lid. One spool in a big jar looks silly and several loose spools tangle instantly, which is the problem this solves. A quarter inch hex bolt goes through the middle of the lid, then spools and washers alternate down it, then a nut underneath holds the lot. The washers are what stop the spools rubbing, and the threads do not tangle as you pull.
Get the full tutorial at A Casarella.
13. Stickles Storage
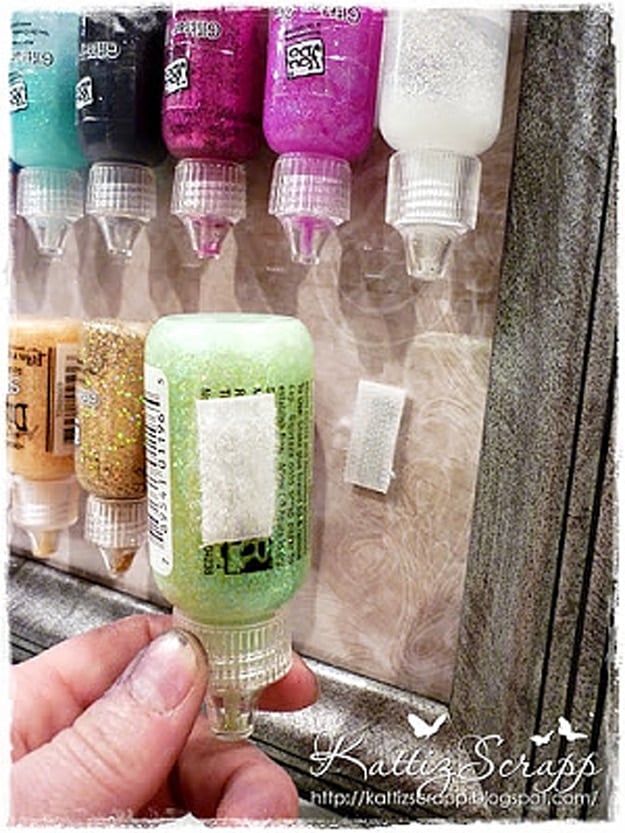
Glitter glue bottles stuck upside down to the glass of a picture frame, so the glitter settles down into the nozzle instead of taking a minute to arrive, and the whole frame hangs on the wall as a color chart. Velcro dots do the holding: the soft half superglued to the bottle, the hook half stuck to the glass. A sheet of pale paper behind the glass makes the colors read. Store any glitter glue nozzle down as a habit, whatever you mount it on, and you will spend less time waiting and less time unclogging.
Get the full tutorial at Kattiz Scrapp.
14. Mason Jar Storage Shelf
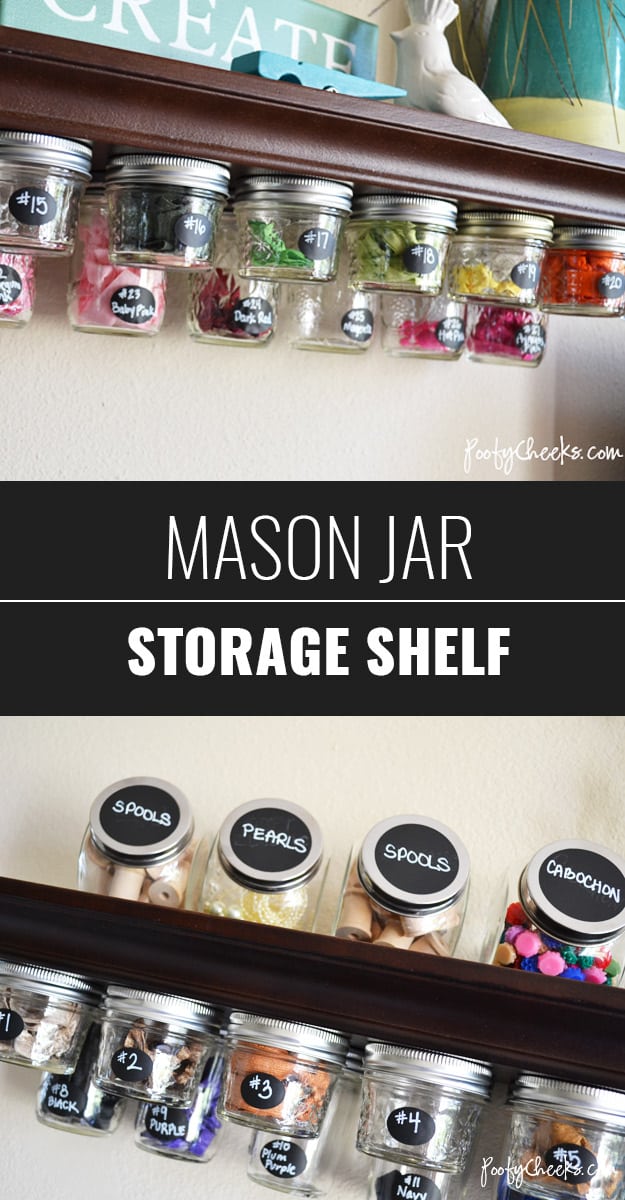
Mason jars hanging under a wall shelf by their lids, labeled with chalkboard stickers and full of buttons, pearls and elastics. The order of work is the part people get wrong: hang the shelf, take it down again, flip it over, screw the lids to the underside, then rehang it and screw the jars on. Doing it in place with a drill overhead is miserable. Leave enough space between lids that a whole hand fits in to unscrew a jar, and use half pint or pint jars, because quarts are too heavy hanging.
Get the full tutorial at Kelsey at Poofy Cheeks.
15. DIY Paint Storage
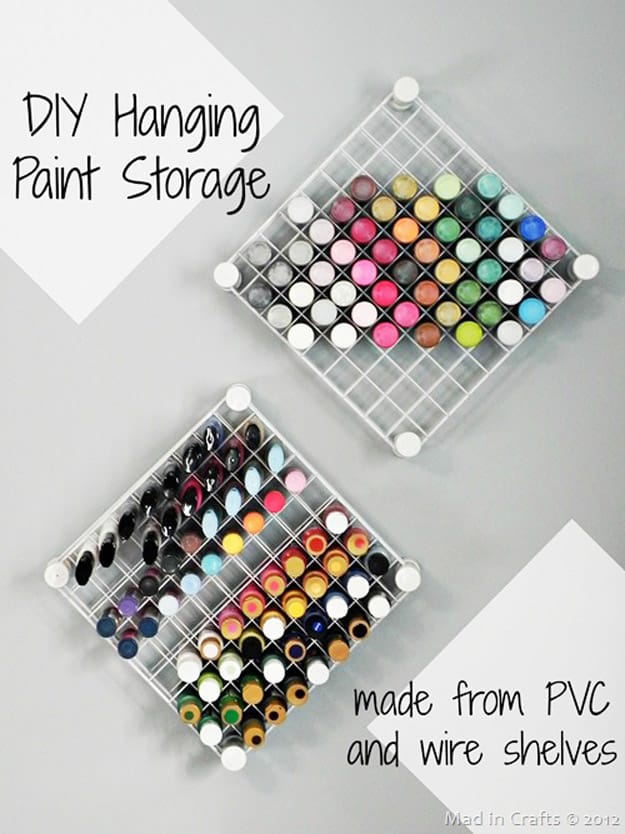
Two hanging racks on a wall, each one holding around sixty bottles of craft paint nozzle down in a grid, built from cheap wire dorm shelves and lengths of PVC pipe. The wire shelf is the frame and the pipe holds each bottle, which is why this takes so much less wall than a shelf would: the bottles sit in a grid instead of a row. Storing paint upside down means the color is at the nozzle when you open it. Two wire shelves per rack, and everything else comes cheaply from a hardware store.
Get the full tutorial at Jessica at Mad in Crafts.
16. Washi Tape Storage
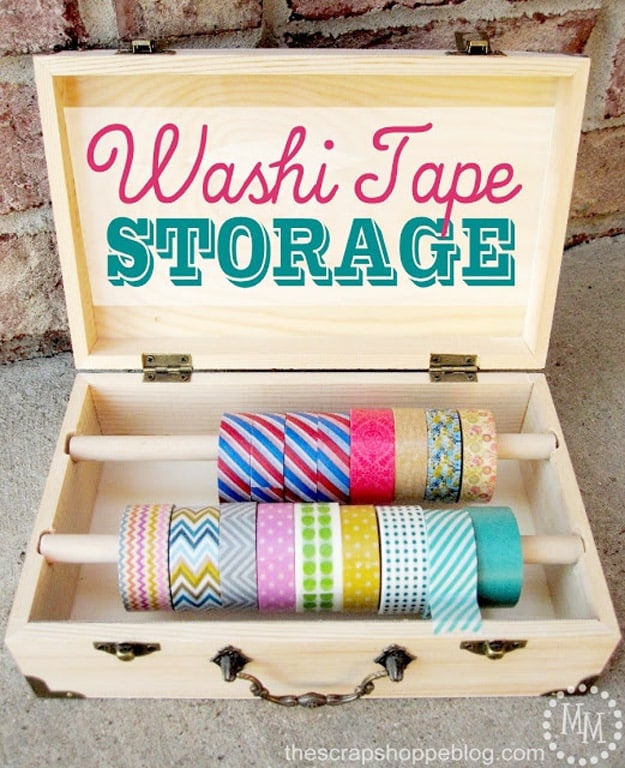
A wooden box from the craft store fitted with two dowels across it, rolls of washi tape threaded on so they turn like a dispenser, and the box closes over the lot. The build is more involved than most on this list and worth it: two grooves are routed into the box sides with a Dremel attachment, about halfway through the wood, so the dowels rest in a shelf rather than being glued. Do not cut the dowels to length until the grooves are cut. The cutting teeth off an empty foil box, glued to the front, tear the tape cleanly.
Get the full tutorial at Michele McDonald at The Scrap Shoppe.
17. Scrapbook Paper Storage
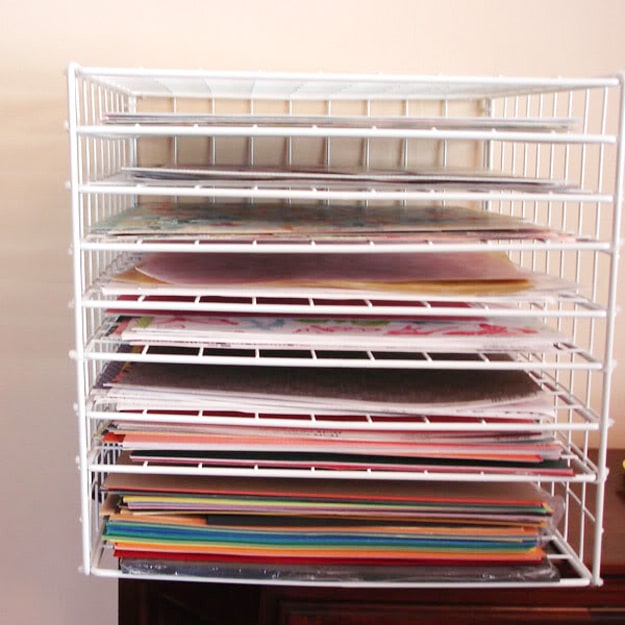
A white wire rack holding twenty or so shelves of twelve inch scrapbook paper, each sheet lying flat with its edge showing. Twelve inch paper is an awkward size that will not go in any office system, and stacking it means creasing everything below whatever you pull out. The rack is made by modifying cheap white wire storage grids, the kind sold as dorm cubes, into a stack of thin flat shelves. It costs very little, it holds any amount, and every sheet comes out without disturbing the rest.
Get the full tutorial at Cat's Creations.
18. Embroidery Hoop Thread Rack
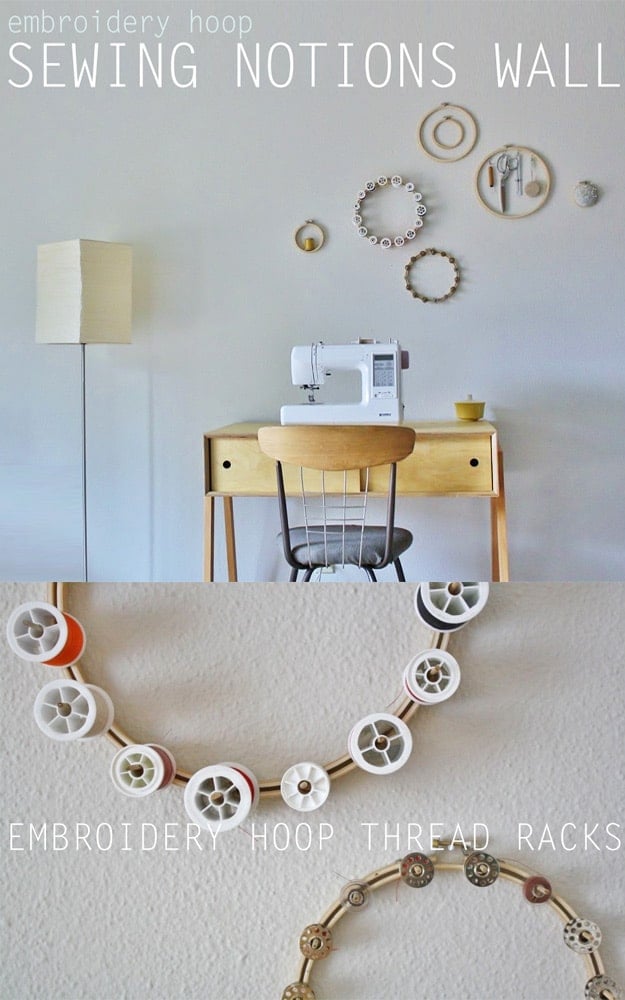
Two embroidery hoops hung on a wall with short dowels wedged around the inside of each, one rack for thread spools and one for bobbins. The wedging is the whole trick and it needs no glue to hold: loosen the hoop’s screw as far as it will go without coming out, push the dowels in between the two rings, then tighten. Space by putting one dowel at twelve, three, six and nine o’clock first and filling between. Three and a quarter inch dowels for spools, one and a half for bobbins, fifteen of each.
Get the full tutorial at Stacie at Yellow Spool.
19. DIY Paint Brush Holder
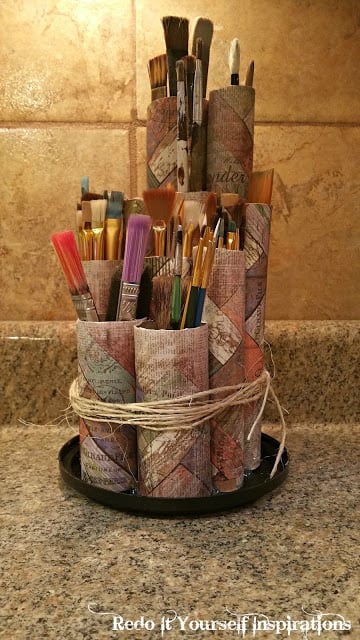
Cardboard tubes covered in decorative paper, cut to different heights and hot glued onto a plastic lid, holding artists’ brushes sorted short at the front and tall at the back. It is built entirely from the recycling: paper towel tubes, toilet roll tubes, gift wrap tubes and a plastic coffee tin lid. Covering the paper on with a school glue stick before you cut them to height is the right order, and a wrap of twine round the outside both finishes it and holds the tubes together if a glue joint gives.
Get the full tutorial at Redo It Yourself Inspirations.
20. Mason Jar Pin Cushion
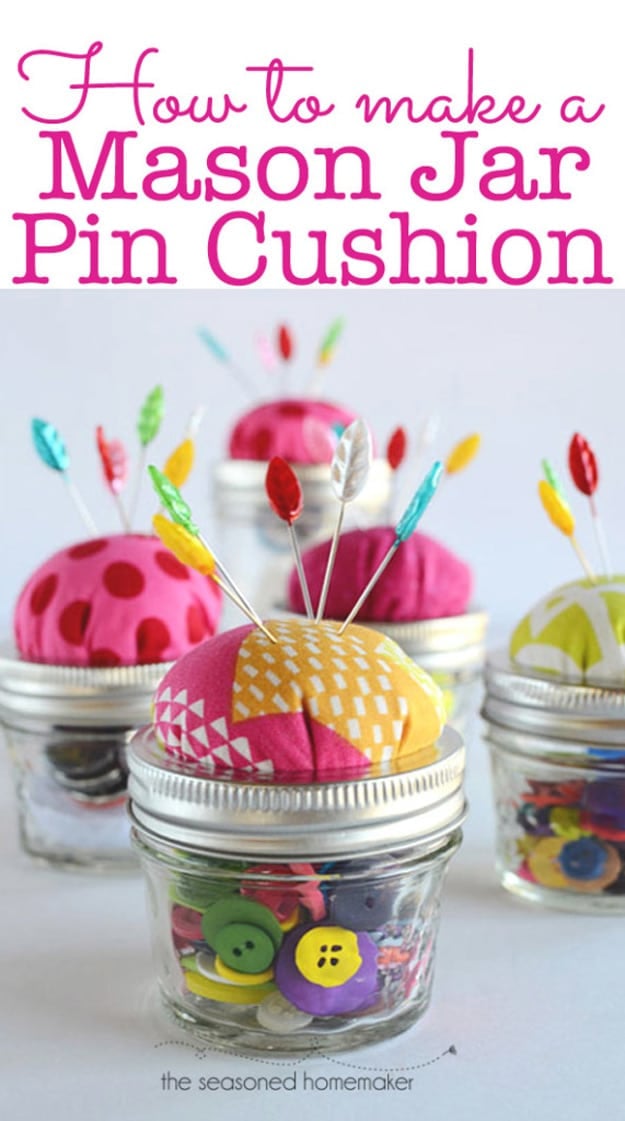
A mason jar full of buttons with a bright pink pin cushion set into the ring on top, so the notions live in the jar and the pins live on the lid. It is almost a no-sew project, one running stitch round a six inch fabric circle, gathered up over batting and hot glued to the lid insert. The genuinely useful detail is the stuffing: wool batting is the best filling because the lanolin in the wool slicks the pins, and they slide into fabric more easily afterward. A felt circle hides the raw edges.
Get the full tutorial at The Seasoned Homemaker.
21. Spice Rack Paint Caddy
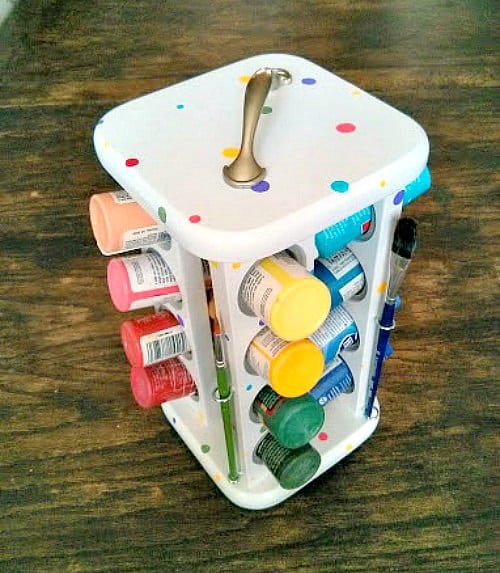
A thrift shop spice rack sanded, sprayed white, spotted all over in freehand colored dots and filled with craft paint bottles, with brushes stored in eye hooks down the side and a carrying handle on top. A dollar rack with its glass jars long gone is a perfect frame for paint bottles. Two practical notes: drill pilot holes before the eye hooks and they go in level and easily, and line each slot with weatherstripping foam tape, because paint bottles are narrower than spice jars and rattle about without it.
Get the full tutorial at The Palette Muse.
22. DIY PVC Pipe Tape Dispenser
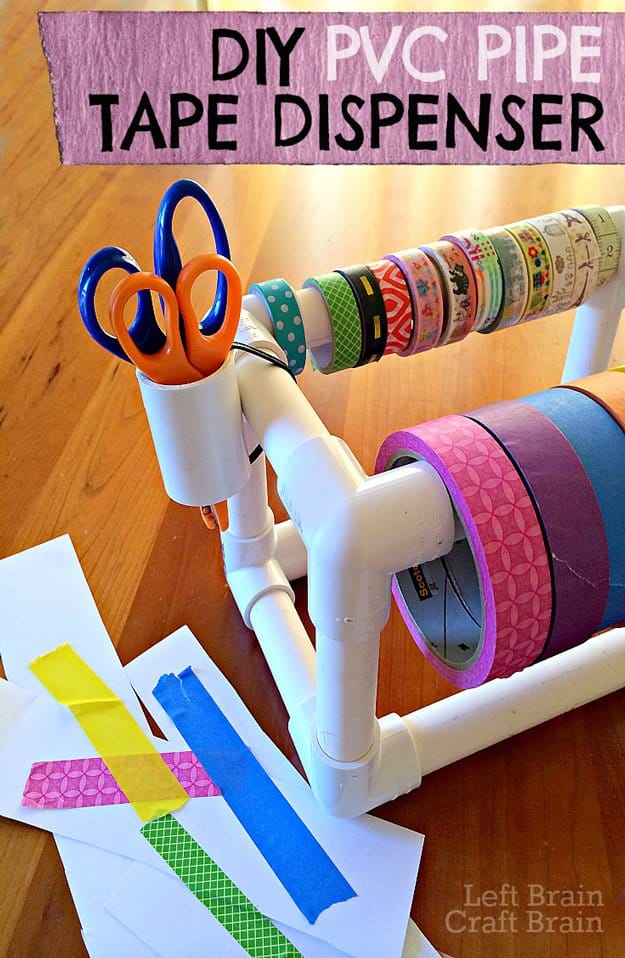
A rectangular frame of white PVC pipe with rolls of washi tape and masking tape threaded onto one bar, scissors hanging off the corner, standing on a desk. It is a cube built from straight lengths and side outlet elbows, which means no cutting angles and no glue. Sixty four inches of three quarter inch pipe cuts into four eight inch pieces and eight four inch pieces for the shape shown. The finished frame comes out a little bigger than the pipe lengths, because the elbows add their own depth, which is worth allowing for.
Get the full tutorial at Anne Carey at Left Brain Craft Brain.
23. 6 Pack Tool Caddy Organizer
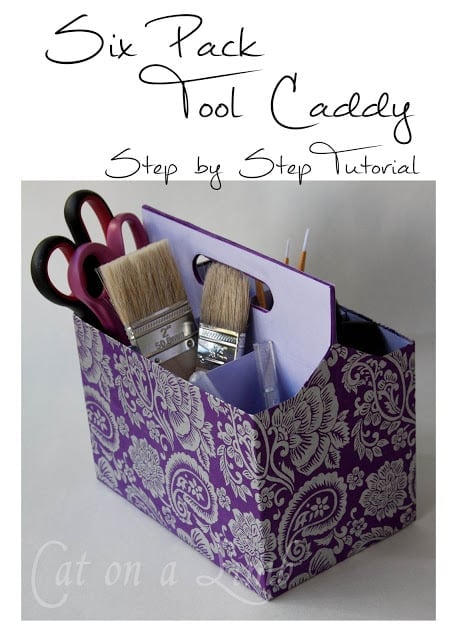
A takeout six pack carrier wrapped in purple damask paper, holding brushes, scissors and a folded cloth, with the handle wrapped as well. The carrier is free and already divided into six compartments with a handle on it, which is most of a tool caddy done before you start. Tape the carrier so it cannot fold up before you begin wrapping. Score the cardstock liners before folding them, feed each one in folded into a triangle and open it out inside, and cover the raw edges at the top and on the handle.
Get the full tutorial at Cat on a Limb.
24. Cereal Box Drawer Dividers
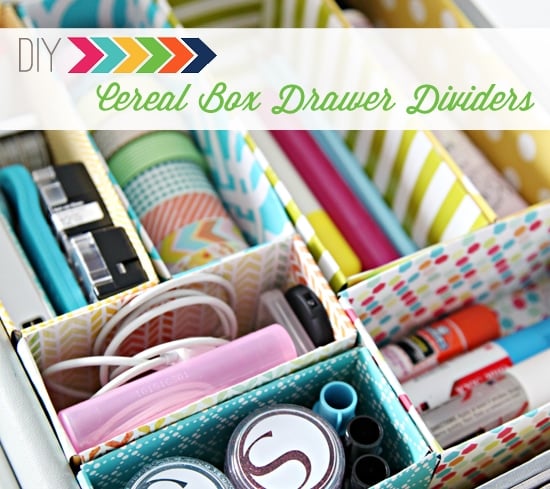
Cereal and granola boxes cut down, wrapped in wrapping paper and cardstock, and fitted into a desk drawer as dividers holding tape, cables, pens and glue. It costs nothing and it beats acrylic dividers on one count: you cut them to the drawer instead of buying a size and hoping. Put the boxes in the drawer first and mark the height against the drawer edge, then cut. Use a pencil eraser to push the paper into the inside creases as you wrap, which is what stops it tearing at the folds.
Get the full tutorial at IHeart Organizing.
25. Tube Paint Storage Idea
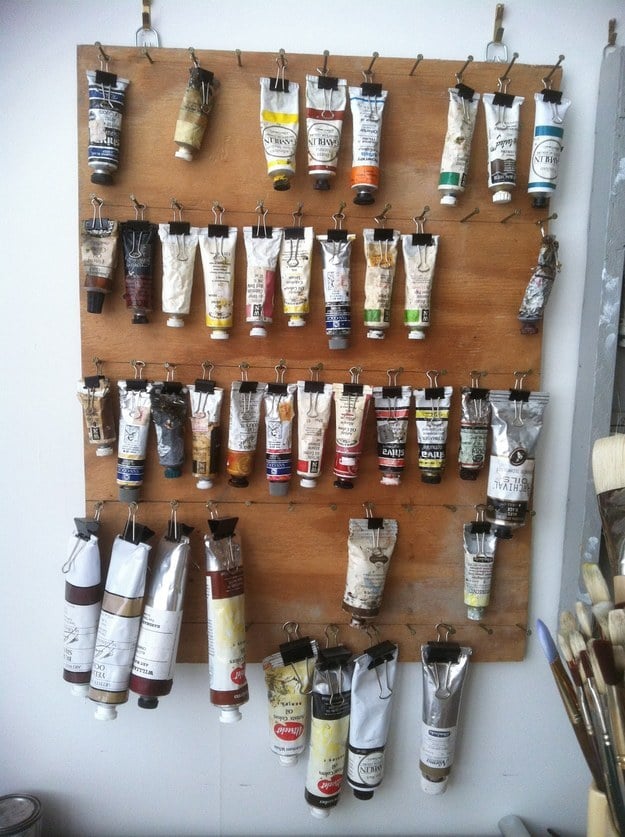
Oil paint tubes hung in rows from binder clips on a wooden board, every label facing out, in a working studio. It comes from a painter solving his own problem, which is that tubes in a drawer leak, go gummy and cannot be found. Hanging them means you see the whole palette at once and can squeeze a tube while it is still clipped up. Binder clips come in several sizes to suit different tubes. Picture hangers on the back let the board be moved or repositioned, which beats driving nails into the wall.
Get the full tutorial at Nick Jainschigg.
26. Ribbon Dispenser and Organizer
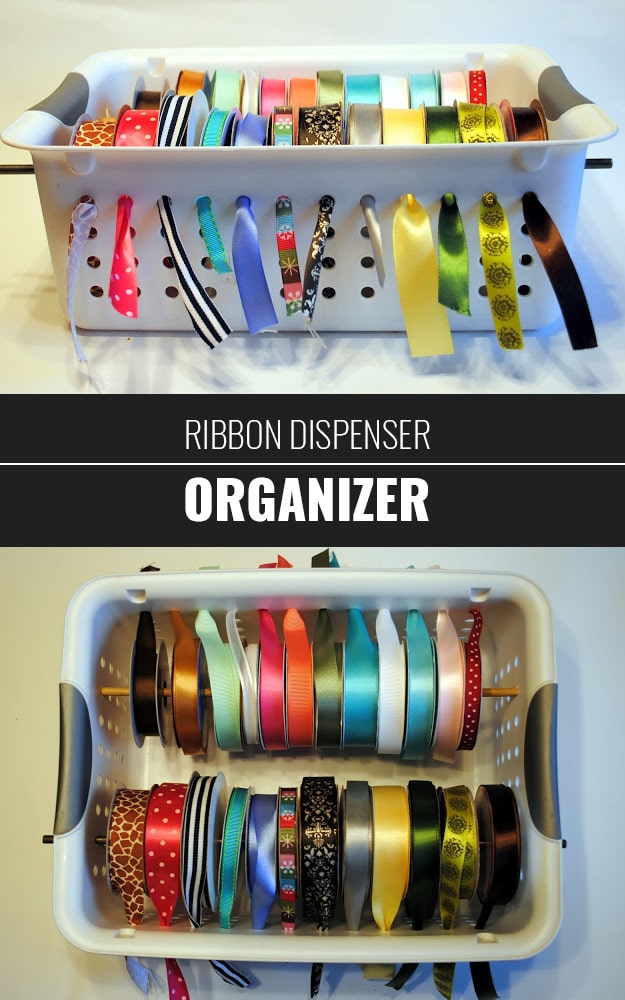
A white plastic storage tub with holes punched along the front edge, ribbon spools sitting inside and a ribbon end fed out through each hole, so you pull the color you want and cut. Around five dollars for the lot. Ribbon taken off its spool and dropped in a box turns into one knot within a week, which is what this prevents. Space the holes so a spool cannot slide sideways and cross with its neighbor, and a tub with a lid means the whole collection stacks or goes under a table when you are done.
Get the full tutorial at Spunky Junky.
Love these DIY craft room organization ideas?
Pin it to save and share on Pinterest