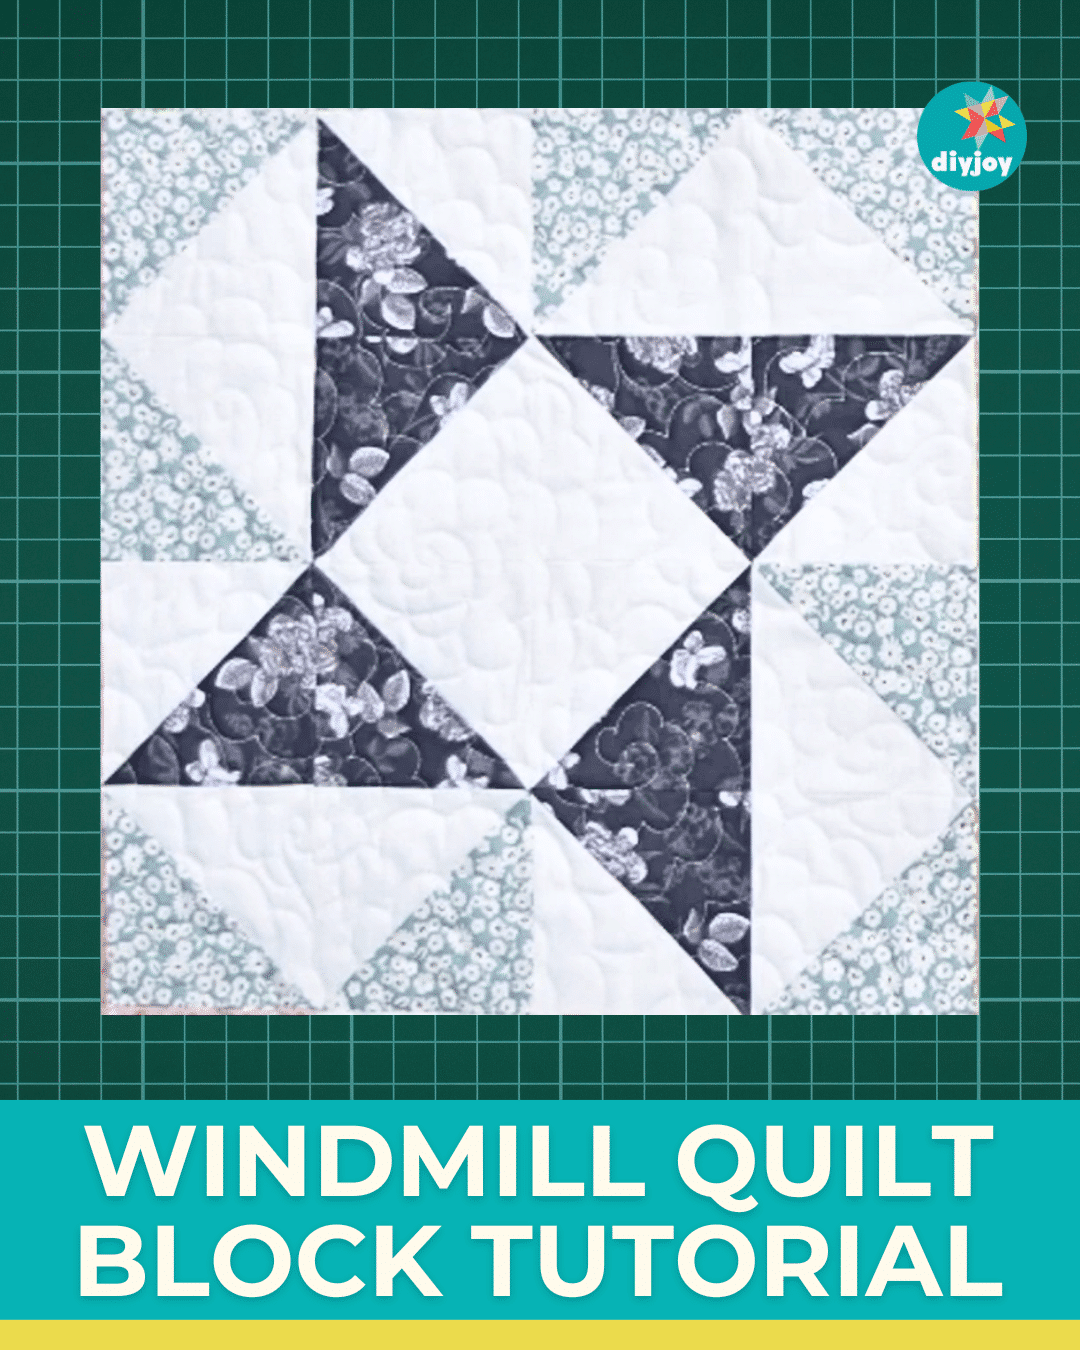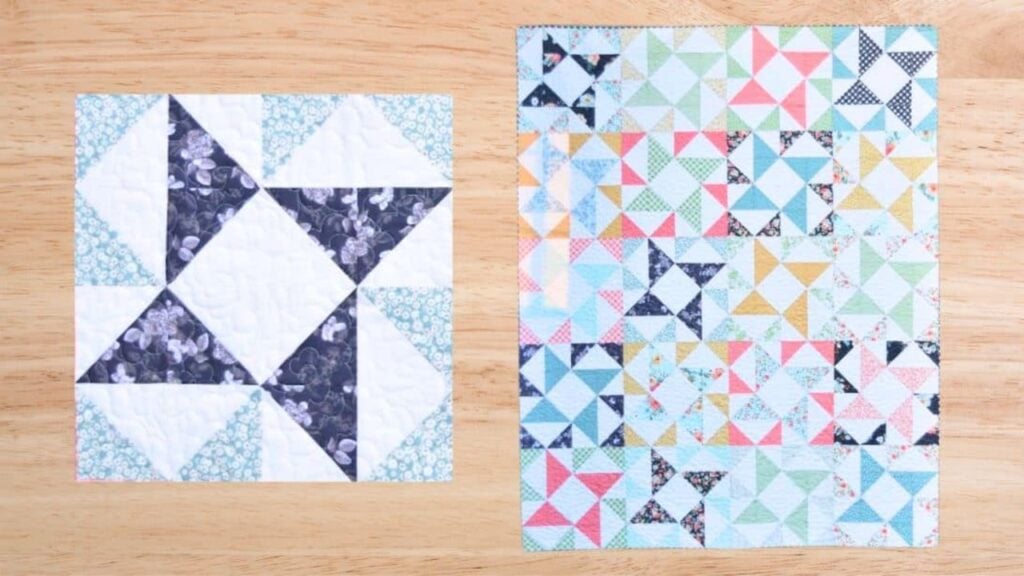
This windmill quilt is a fun and easy pattern that anyone can make. The block is entirely made of half-square triangles, so if you love making HSTs this sewing project is for you! The steps are incredibly simple, even beginners will not have any trouble with Material Girl Quilts‘ video tutorial below.
RELATED: Breezy Windmill Quilt With Jenny Doan
There are several ways to make half-square triangles. If you want to make the process faster, use the magic 8 method; it makes 8 half-square triangles at a time from 10″ pre-cut squares. There’s also a technique where you can create 32 HSTs at once. If you want to learn more about that check this out: Quilting Hack: Make 32 Half-Square Triangles at Once. It might come in handy on your next quilting project.
Easy Windmill Quilt Materials
- one 10″ square pack of colored fabric
- one 10″ square pack of background fabric
- 5 yards of backing fabric
- 2/3 yards of binding fabric
How to Make Windmill Quilt Block
Step 1:
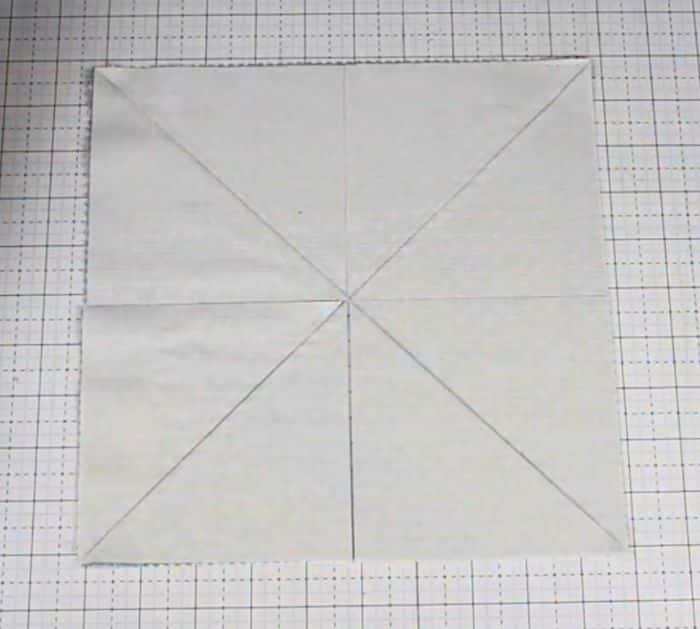
Take one colored 10″ square and one background 10″ square. Place them on top of each other right sides together. Draw diagonal lines from corner to corner in both directions. Sew 1/4″ away on either side of each line. Cut in half horizontally and vertically, then cut directly on the drawn lines. Open each one and press flat. Trim into 4 1/2″ squares. You should have 8 half-square triangles.
Repeat with the remaining 10″ colored and 10″ background squares.
Step 2:
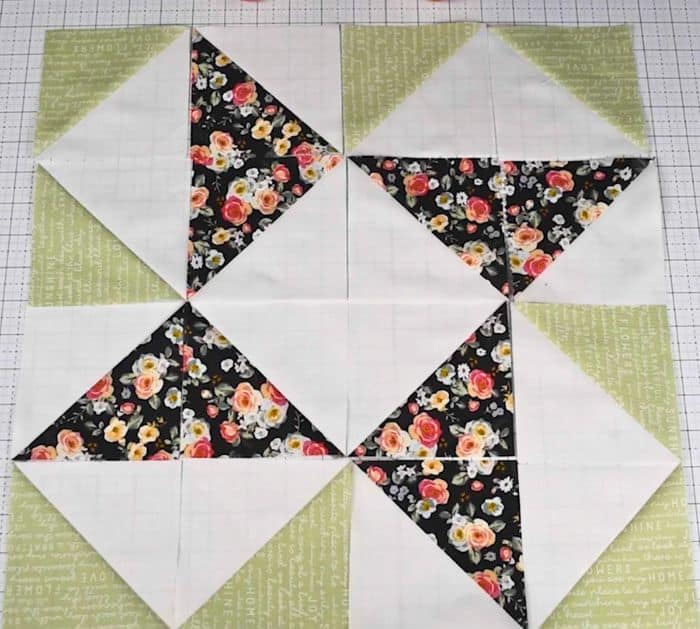
To make the block, you need to select the half-square triangles from two different pre-cut squares – 8 for the first color and 8 for the second color. You should create a square on point in the center first, then connect the remaining half-square triangles in the same pattern, forming flying geese blocks. The half-square triangles in the other pattern will be going in the opposite direction. Make sure they are going in the right direction. See the photo below for reference.
Sew them in rows first. Once done, sew them together to make the block.
Step 3:
You need to make 5 rows with 4 blocks each. The finished quilt should measure 64″ x 80″.
Windmill Quilt Tutorial