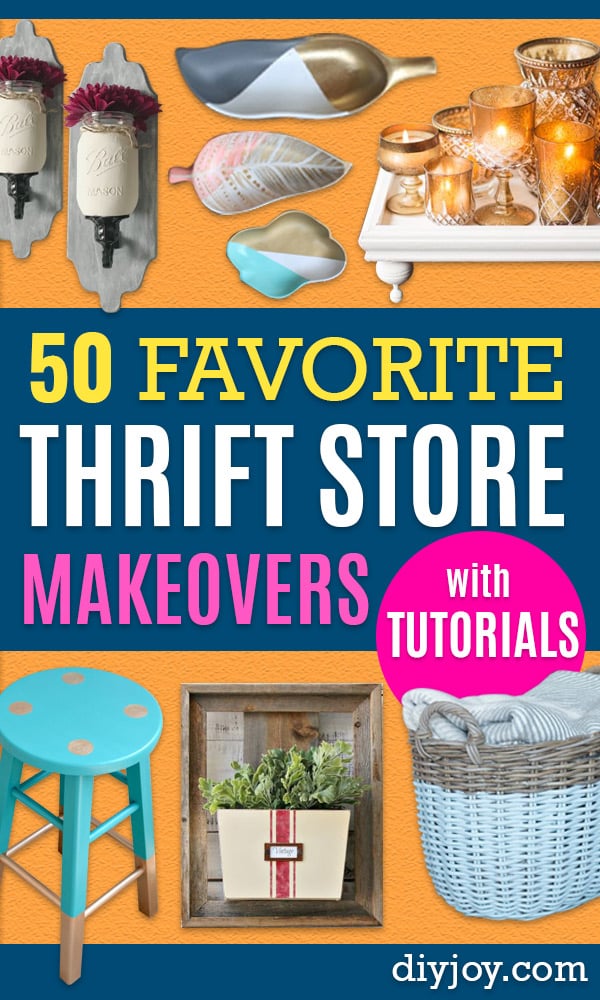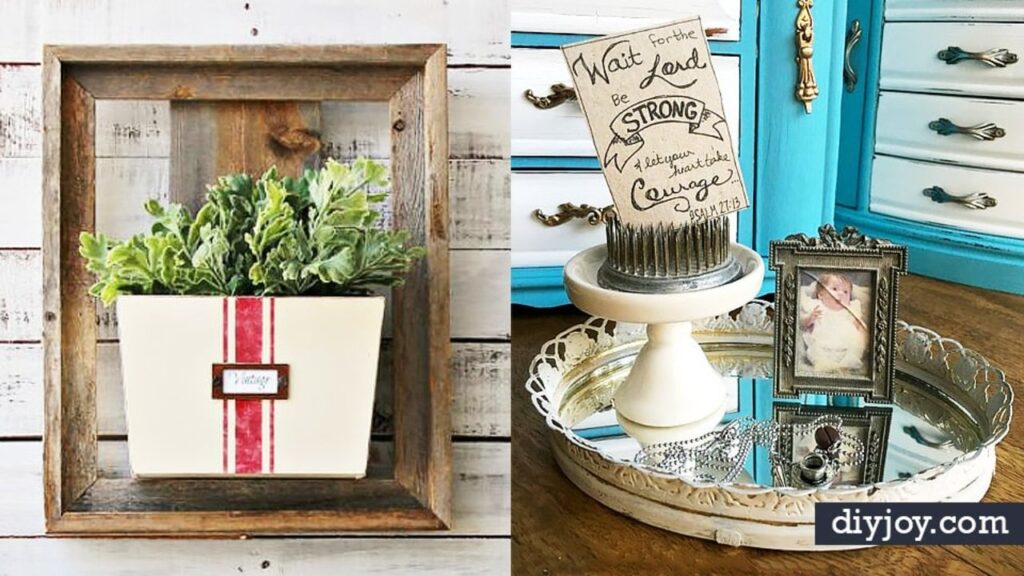
Thrift store makeovers are the most fun you can have with a five dollar bill. These 26 favorites start with things nobody else wanted: a $5 rolling cart, a $10 Goodwill cabinet with dated iron grill doors, a pair of ceramic roosters for a few dollars each, a $1 octagon tray with a dolphin inlay (missing part of its nose, of course). A little paint, a stencil or a new job does the rest. Lampshade frames turn into hanging herb baskets, a bread box hides the phone chargers, an old quilt rack holds a roll of kraft paper and a cookie sheet becomes a memo board. Most of these take an afternoon and a can of spray paint. The hard part is walking out of the thrift store with only one thing.
1. Thrifted Shelf Makeover

A $5 rolling shelf with nice midcentury lines and a grimy finish is about as good as a thrift store find gets. Clean it first (thrifted pieces are dirtier than they look), tape off the wheels so they stay metal, then unscrew the shelf so the frame and the top can be sprayed separately. Gloss white goes on the shelf and a soft mint on the frame. Taking it apart is the step that makes this easy, because spray paint never covers evenly around a joint you could have unscrewed.
Get the full tutorial at A Bubbly Life.
2. Bicycle Basket Planter

A bicycle basket from Goodwill turns into a hanging planter, and it’s one of those projects that is almost suspiciously easy. Weave burlap ribbon through the holes so it hangs, line the basket with a plastic garbage bag, poke a few drain holes and cover them with a coffee filter so the soil stays put. Then drop in a grouping of flowers that comes already planted. Never pass up a good basket at the thrift store, even with no plan for it. This is the plan.
Get the full tutorial at Refresh Restyle.
3. DIY Book Flower Vase
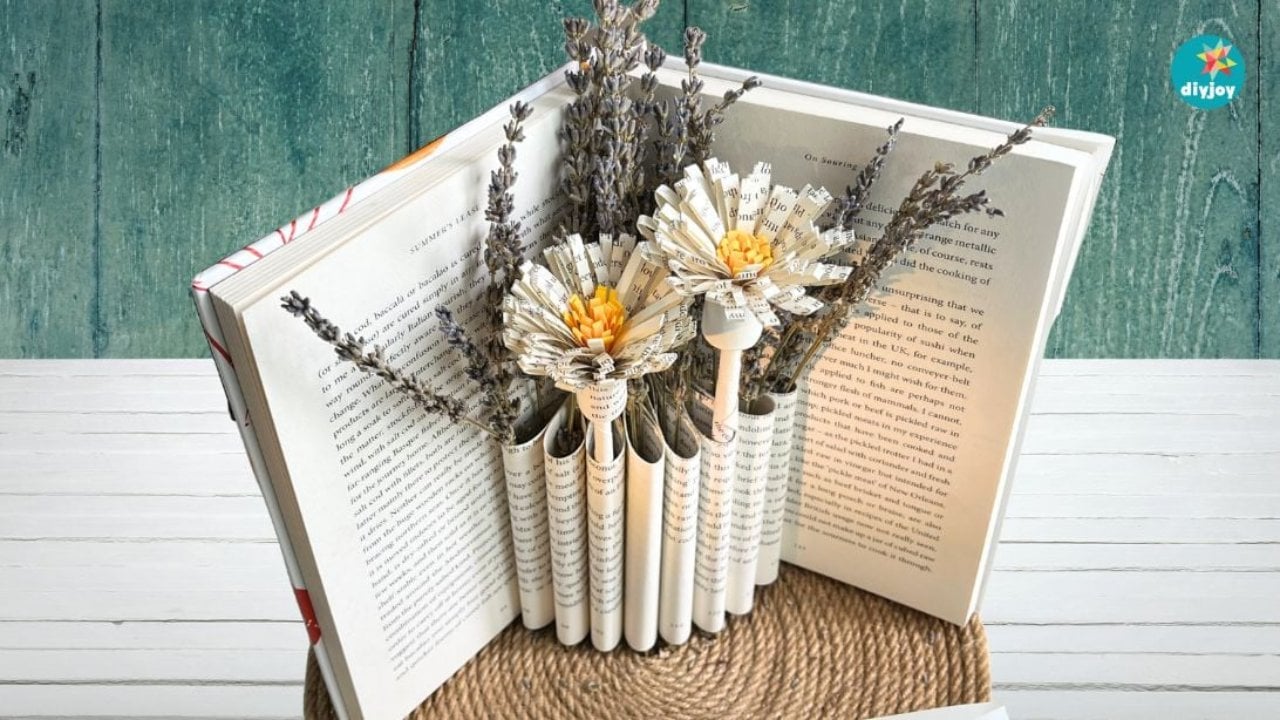
An old book becomes a folded vase for dried lavender or paper flowers, and it takes a few minutes with nothing fancier than double sided tape and a blade cutter. Open the book to the middle, mark 12 pages on each side, cut along a center line and tear the top away. Then tape the cut pages together three at a time and fold each bundle toward the middle. Thrift store shelves are full of hardbacks nobody wants, which makes them perfect for this. Use a sharp cutter, and slide cardboard under the page so you only slice the pages you mean to.
Get the full tutorial at DIY JOY.
4. Bread Box Charging Station

A $4.98 thrift store bread box becomes a charging station that hides every phone cord in the house. Spray it satin white, add one word in vinyl on the roll top and line the inside with pretty tissue paper set down with Mod Podge. Then drill two holes in the back for the chargers. Bread boxes turn up at almost every thrift store, so there’s no need to hunt. Keep the lettering simple. A short word reads better on a curved roll top than a whole phrase, which tends to look crowded.
Get the full tutorial at Artsy Chicks Rule.
5. Mail Organizer Makeover

A beat up wooden magazine holder from the thrift store goes coral, and suddenly the mail has somewhere to live. The whole makeover is one surface wipe and multi surface paint, no primer and no sanding, which is about as low effort as furniture gets. Choose a pigmented paint so the lattice front covers in fewer coats, since those little openings are a pain to go back over. A bright accent color on something small like this is the safest way to try a bold shade in a neutral room.
Get the full tutorial at Blooming Homestead.
6. DIY Planter Urns From Thrift Shop Finds
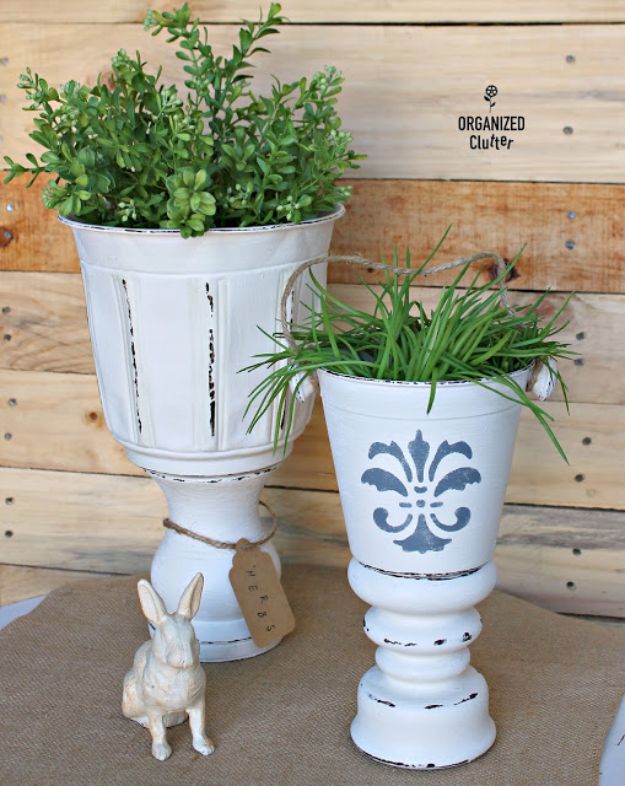
A metal flowerpot screwed on top of a chunky wooden candle holder makes a garden urn that looks like it cost real money. Both pieces get two coats of chalky paint, a stencil and a layering block rubbed over the edges for an aged finish. Here’s the step people skip: shellac a stained candle holder before any chalk paint goes on, or the stain bleeds right through. A shim evens out a dipped candle holder top so the screw goes in straight. Grab those chunky candlesticks whenever you see them.
Get the full tutorial at Organized Clutter.
7. Repurposed Picture Frame Serving Tray

A plain wooden picture frame from the thrift store becomes a farmhouse serving tray with handles. Rub petroleum jelly on a few spots before spray painting it white, and the paint lifts there later for an instant chippy finish. Bronze handles go on the short ends, a stenciled graphic goes on the original glass and blue ticking fabric sits underneath it. A piece of hardboard screwed to the back holds the whole sandwich together. Keep the glass from the frame. It’s the easiest tray surface there is.
Get the full tutorial at Anastasia Vintage.
8. Thrift Store Glass Bud Vase

Five little square glass jars from Goodwill, $2.50 in all, line up on a board as a bud vase that brightens any table. Tape off the tops and spray the bottoms a key lime green gloss. The board is scrap wood, sanded until the corners round off, then aged gray with white vinegar and steel wool (cheaper than stain and no fumes from a can). Paint the sides a green that is close to the jars but not identical, and glue the jars down with heavy epoxy.
Get the full tutorial at At Charlotte's House.
9. Wood Bead Garland From a Thrift Store Bracelet

A chunky wood bead bracelet for under $3 on a consignment store jewelry wall turns into a decorative bead garland in a few minutes. Cut the beads off their thin string and restring them on jute twine. Wrap a bit of tape or glue around the twine end so it won’t fray as it passes through. Leave a little slack between the last bead and each double knot so the garland can drape and fold. Drape it over a stack of books or let it spill out of a bowl.
Get the full tutorial at anderson + grant.
10. Wall Mounted Paper Holder

A tole painted wall quilt rack, $3.99 at the thrift store, comes back as a wall mounted paper roll for notes, menus or kids’ drawings. Unscrew the two pieces that held the quilt and trim them so the paper roll fits snug against the holder. Cut a dowel a little longer than the roll, then drill a small skewer sized hole in each end. A skewer pushed through stops the roll from sliding off. Paint the board to suit the room and letter a message straight onto the paper.
Get the full tutorial at Refresh Restyle.
11. Lampshades Repurposed Into Hanging Herb Baskets

Small thrift store lampshades have wire frames hiding under the fabric, and those frames make a vertical herb garden. Strip off the string and paper, then bend the bulb cage flat so it becomes a platform for a potted herb. Spray the frames gold, cut a lightweight chain into equal lengths and link the frames together with jewelry wire so they hang evenly. Carry one frame to the garden center when buying herbs to check the pots fit. Three in a column look better than four.
Get the full tutorial at Sadie Seasongoods.
12. Easy DIY Rustic Candlesticks

Never walk past wood candlesticks at the thrift store. They’re a dollar or two, and sanding off the dated stain leaves a lovely aged bare wood finish. Then glue two together with a strong adhesive like Gorilla Glue, top to top for a chunky holder with two flat ends, or base to top for something taller. Pair two matching tops with two bases of slightly different heights and the set coordinates without being identical. Mismatched singles look great together down a table.
Get the full tutorial at anderson + grant.
13. $2 Thrift Store Bulletin Board Makeover

Every thrift store has a cork bulletin board for a few dollars, and this one cost $2. Sand the frame lightly so paint can hold on, wipe it clean and paint the entire board, cork included, in thin coats of leftover house paint. It takes three or four coats to cover, so be patient. Painting the cork is the surprise here, and it holds up: a second board used as a necklace holder lasted over three years without chipping. Push pins keep the necklaces tangle free.
Get the full tutorial at At Home with Ashley.
14. Update Thrifted Lamps

A pair of dated pink and brass lamps, $5 each, goes crisp white in three easy steps. Wipe them with a damp cloth, then a tack cloth once dry, so no dust gets sealed under the paint. Painter’s tape covers the brass that should stay gold, a plastic bag keeps the cord out of the spray and a little foil wrapped around the socket keeps it clean. One coat of primer and two thin coats of flat white spray paint do the rest, because several thin coats always beat one heavy one. New white shades finish the look.
Get the full tutorial at The Home I Create.
15. Rolling Storage From Upcycled Wine Crates

Four old wine crates for $10 at a neighborhood yard sale become rolling storage that slides right under the coffee table. Cut a vinyl stencil for the front, add a painter’s tape border and drill the caster holes before any paint or stain goes on. Latex paint first, then walnut gel stain over it, then a coat of Polycrylic. IKEA casters are sturdy and cheap. Crates at coffee table height hide toys in the living room and work just as well under a bed.
Get the full tutorial at The DIY Village.
16. Chalkboard Dresser Buffet Under $50

A $34.99 Goodwill dresser and a $10 Craigslist mirror come together as a chalkboard dresser buffet. The dresser base gets a favorite gray paint, while the drawers are sanded back to raw wood with an electric sander (five drawers took about 30 minutes). The mirror’s glass was long gone, so its frame got sanded and two coats of black chalkboard paint, which went right over the cardboard backing. Gray paint next to raw wood is the combo that makes this one look custom.
Get the full tutorial at Nest of Posies.
17. Thrift Shop Wooden Wall Bin

A thrifted wooden wall bin and a glassless 11 by 14 barn wood frame team up as a wall pocket. Paint the bin with two coats of creamy chalk paint, sand the edges, then pounce three red grain sack stripes down the front with a stencil brush. Screw a dog ear cedar fence picket to the back of the frame and age it with one coat of weathered wood accelerator so it matches. Mount the bin onto the picket, add a sawtooth hanger and fill it with greenery or the mail.
Get the full tutorial at Organized Clutter.
18. Stylish Octagon Tray

An awkward wooden octagon tray with a dolphin inlay (missing a chunk of its nose) cost $1 at the thrift store. The shape was the selling point. Fill the cracks and uneven spots with wood filler, sand smooth, then paint the inside and rim off white and leave the wooden sides bare. A geometric stencil in two light coats of gray craft paint looks a little worn, on purpose. A coat of protective wax finishes it. The leftover wood showing on the sides is what readers loved most.
Get the full tutorial at Making Home Base.
19. Thrift Store Rooster Makeover

A pair of ceramic roosters at $2.99 each from Goodwill go glossy white, and they look like pricey pottery. Spray paint covers chips and old scuffs, but it takes several light coats to get there, so resist the urge to blast it all in one pass. Glossy finish matters on ceramic because it mimics a real glaze. White figures work in every season and fit right into the neutral white look. Group them with a white pitcher of lavender and a few green apples.
Get the full tutorial at Our Southern Home.
20. Magnetic Memo Board From a Cookie Sheet

An old scratched up cookie sheet becomes a magnetic memo board for recipes, notes and business cards. Prime the metal first so regular spray paint sticks to the shiny surface, then give it two quick coats in a fresh green. Instead of craft paper, the center gets vintage bed sheet fabric, Mod Podged down and left to dry overnight. A glossy clear coat over everything protects the paint. Retired baking pans and secondhand sheets are both easy thrift store finds.
Get the full tutorial at Sadie Seasongoods.
21. Pretty Vintage Headboard Makeover

A full size vintage headboard (54 inches wide and 28 tall) from the thrift store gets Paris Grey chalk paint, clear wax and new duck cloth panels. Pop out the old upholstered panels first. This one had caning underneath and two older fabrics layered on top. Staple the new fabric on, easing it around the curves and reattach the panels with epoxy. Chalk paint on fabric was tested here and didn’t make the cut. If three matching headboards are sitting there, buy all three.
Get the full tutorial at Thrift Diving.
22. DIY Dog Bowl Chairs

Two old wooden chairs too damaged for sitting become an elevated feeding station for a big dog. Sand off the finish, trace the dog bowl on the seat, then draw a second circle just inside the first. That inner line is the one to cut, so the bowl’s rim rests on a lip instead of falling through. Drill a starter hole for the jigsaw blade, cut, dry fit and recut if needed. Stencil the backs, stain and finish with spar urethane to survive slobber.
Get the full tutorial at The DIY Village.
23. Turn Thrift Store Finds Into an Outdoor Dining Set

A $10 garage sale X table with two benches, plus old dining chairs from the Salvation Army, make a long outdoor dining set for a deck. Paint the table and benches white, then put them end to end with an existing table to get the length of a big expensive patio table. The chairs get painted and recovered in outdoor fabric over foam topped with a thin layer of batting, which softens the edges. Keep them out of heavy rain and they hold up beautifully.
Get the full tutorial at The Happy Housie.
24. $10 Cabinet Makeover

A $10 solid wood cabinet from Goodwill had dated iron grill panels, and a few changes brought it into this century. The panels popped right out (always check that before buying, since cutting them out is much harder). Sand the scratched top, prime with a stain blocking primer so old oak doesn’t bleed, then paint it pure white. Custom cut mirror from the hardware store went in for $11.51, held with silicone and flat lattice cut at angles forms the X on each door.
Get the full tutorial at Centsational Style.
25. Don't Worry Be Happy Signs

Two old Home Interiors prints in dark gold octagon frames, thrifted and taken apart, become cheerful word art signs. Brighten the frames with metallic gold spray paint. The first try put gold vinyl letters over glass sprayed with mirror paint, and it was a fail: great at a sharp angle and unreadable from anywhere else. Citristrip wiped the mirror paint right off. Gold letters on clear glass with plain copy paper behind them did the trick. Proof that the second version is often the keeper.
Get the full tutorial at Artsy Chicks Rule.
26. Thrift Store Painted Stool

A sturdy $5 wooden stool from the thrift store becomes a knockoff of a designer bar stool that starts at $299. Tape off the bottom of each leg (the bottom rail is a handy guide) and paint below the tape with two coats of metallic gold. Once it’s completely dry, move the tape up to the gold line and paint everything above it with two coats of a turquoise chalk paint. Dab gold circles on the seat with a round sponge brush and seal with Mod Podge Furniture.
Get the full tutorial at Amy Latta Creations.