This snowflake quilt tutorial by Sew Yeah will definitely catch everyone’s attention. If you want to try something different and unique, choose this pattern. The block is easy to make but requires time and effort. Read on or watch the video below for full instructions. Happy sewing!
Materials
- Fabric A: 3 yards for the background
- Fabric B: 1 1/4 yards for the center and third ring
- Fabric C: 1 yard for the second ring
- Fabric D: 1/2 yard for outer ring
For cutting:
Fabric A
- Cut 5 pieces of 5 1/2″ X WOF strips then sub-cut to 32 pieces of 5 1/2″ squares
- Cut 22 pieces of 3 1/2″ X WOF strips then sub-cut to 256 pieces of 3 1/2″ squares
Fabric B
- Cut 3 pieces of 5 1/2″ x WOF strips then sub-cut to 16 pieces of 5 1/2″ squares
- Cut 8 pieces of 3 1/2″ x WOF strips then sub-cut to 96 pieces of 3 1/2″ squares
Fabric C
- Cut 2 pieces of 5 1/2″ x WOF strips then sub-cut to 10 pieces of 5 1/2″ squares
- Cut 5 pieces of 3 1/2″ WOF strips then sub-cut to 60 pieces of 3 1/2″ squares
Fabric D
- Cut 1 piece of 5 1/2″ x WOF strips then sub-cut to 6 pieces of 5 1/2″ squares
- Cut 3 pieces of 3 1/2″ x WOF strips then sub-cut to 36 pieces of 3 1/2″ squares
[social_warfare buttons=”facebook,pinterest,twitter,whatsapp”]
Instructions
Step 1:
Make half-square triangles (HST). Pair up all 5 1/2″ colored squares (Fabric B, C, and D) with the 5 1/2″ background squares (Fabric A) with right sides together. Sew around on all 4 sides of the block units, then press to set the seams.
Step 2:
Cut from corner to corner (diagonally) in both directions. Do not move them until you’ve cut in both directions to create 4 HST. Press them open towards the dark side, then trim them into 3 1/2″ squares.
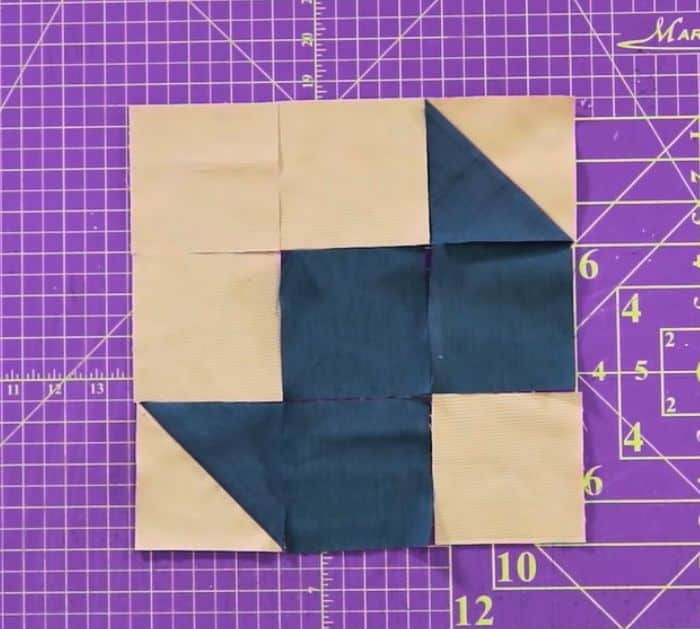
Step 3:
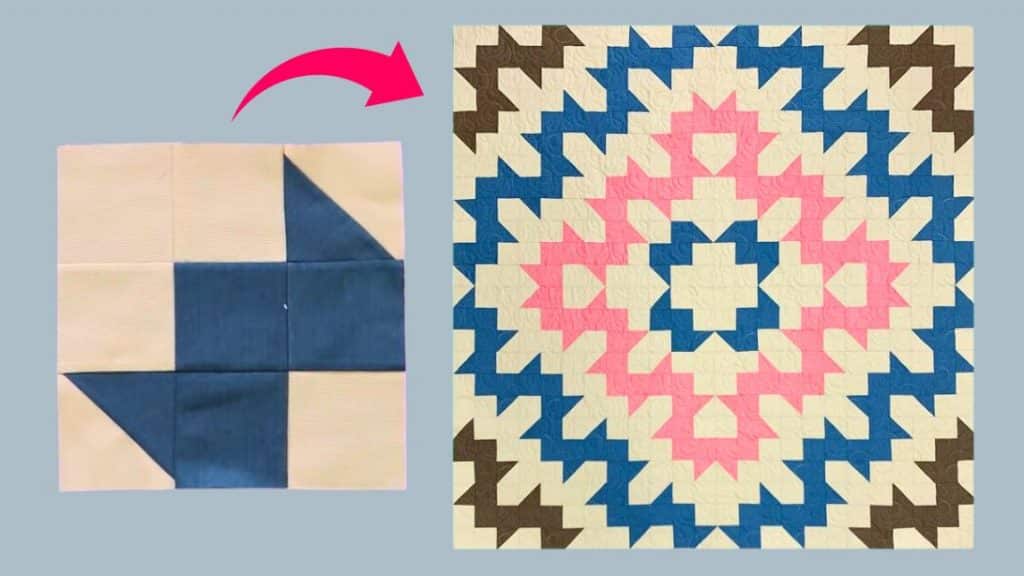
With your HST squares and plain 3 1/2″ squares, arrange them to make 64 blocks just like in the photo below.
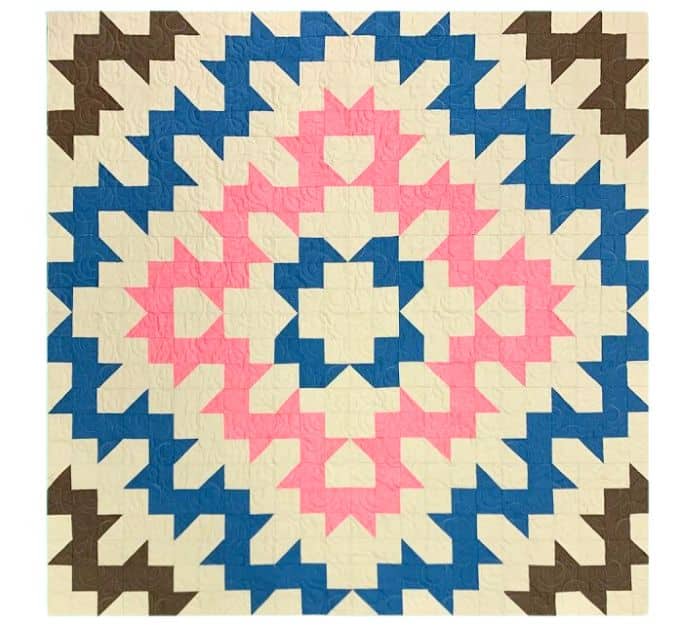
Step 4:
Arrange the blocks just like in the photo below to make the full quilt. You will have 8 rows of eight blocks each.
Snowflake Quilt Tutorial


