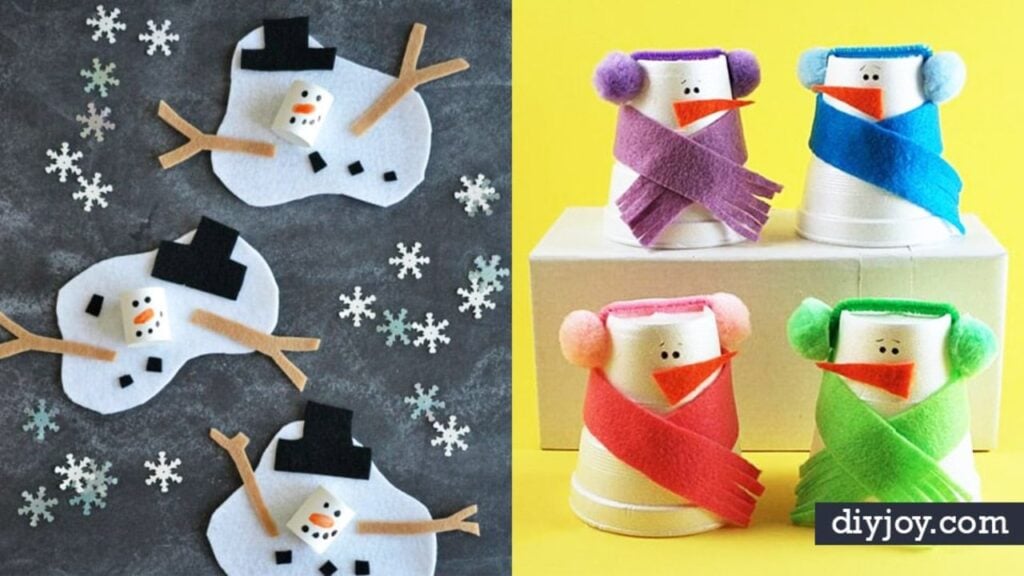
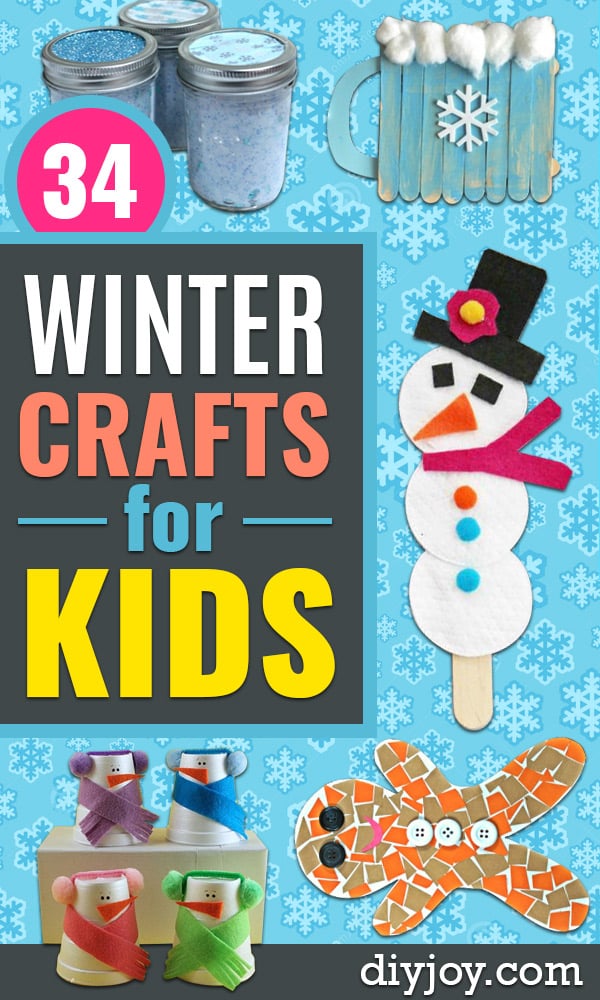
Winter crafts for kids earn their keep on the second snow day, when the novelty has worn off and there are still four more hours until dinner. That is exactly what this list is for. Some of them are five-minute rescues you can pull off with a paper plate and whatever paint is still wet, and some are the kind of slow, magical project where crystals grow on a pipe cleaner overnight and everybody keeps checking the jar. There are snowmen made from foam cups, snowflakes stamped with the bottom of a soda bottle, slime in a mason jar and sensory bags with no mess at all. Most of it comes out of the craft drawer you already have. Perfect for preschoolers, a classroom party, a grandparent visit or a January afternoon that will not end.
Winter Crafts for Kids
1. Stained Glass Mitten
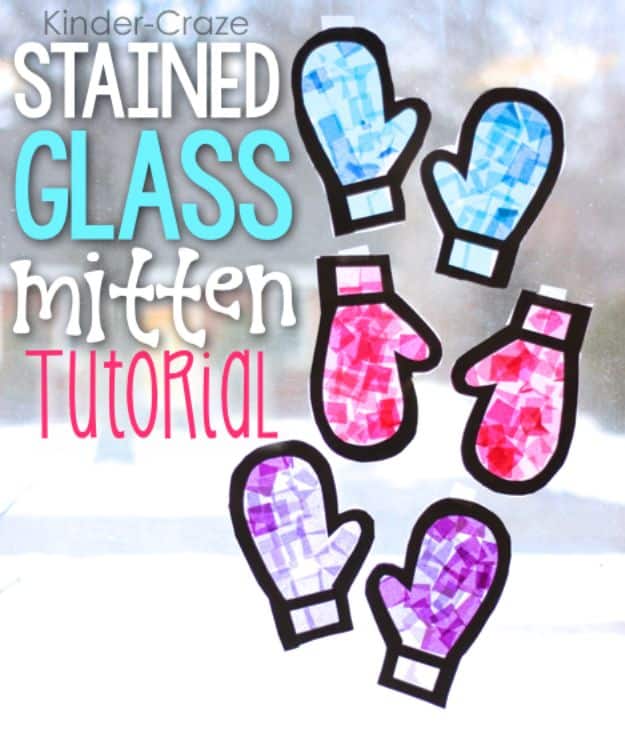
This is the one that turns a window into a light show, and the technique is genuinely foolproof. Each child gets two sheets of 12 by 18 inch clear contact paper laid sticky side up, two black construction paper mitten frames and a strip of black paper for the cuffs, then presses one inch squares of tissue paper into the sticky surface until the mitten fills in. Kinder Craze prepped five color schemes in separate containers, which is the trick that keeps a whole table from turning muddy brown. There is a free mitten template to print and trace.
Get the full tutorial at Kinder Craze.
2. Winter Hats Craft for Kids
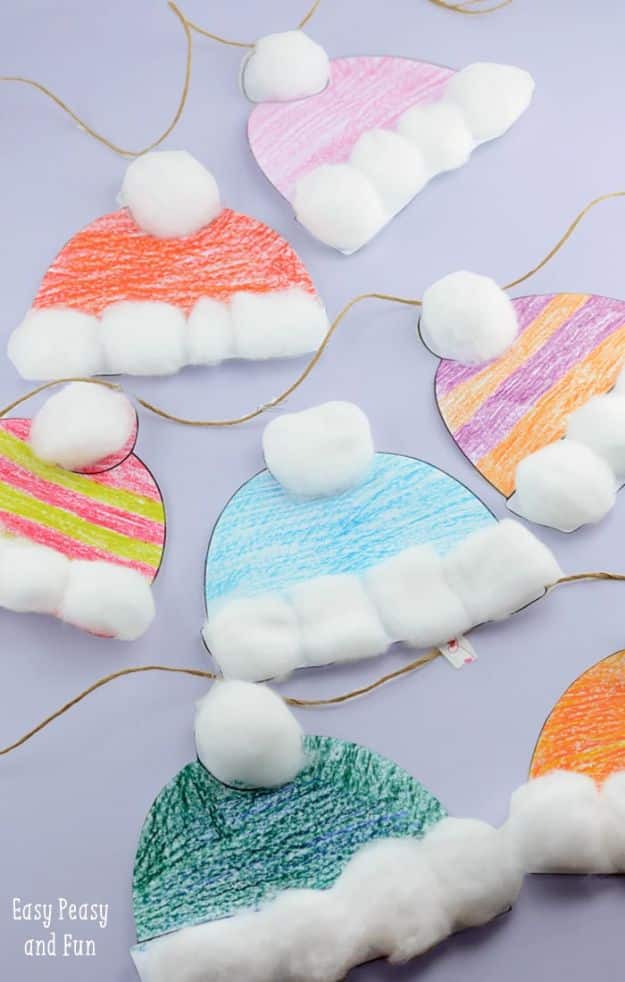
Print the hat template, hand over the crayons, then bring out the cotton balls. That is the whole project, and it is the rare craft where the least skilled kid in the room gets the best result, because a wobbly crayon job under a fat white brim just reads as charming. Easy Peasy and Fun suggests do-a-dot markers, watercolors or torn tissue for the hat itself, so you can pitch it at whatever age is sitting in front of you. White school glue holds the cotton balls. A row of finished ones makes a very cheerful bulletin board.
Get the full tutorial at Easy Peasy and Fun.
3. Easy DIY Tin Can Snowman
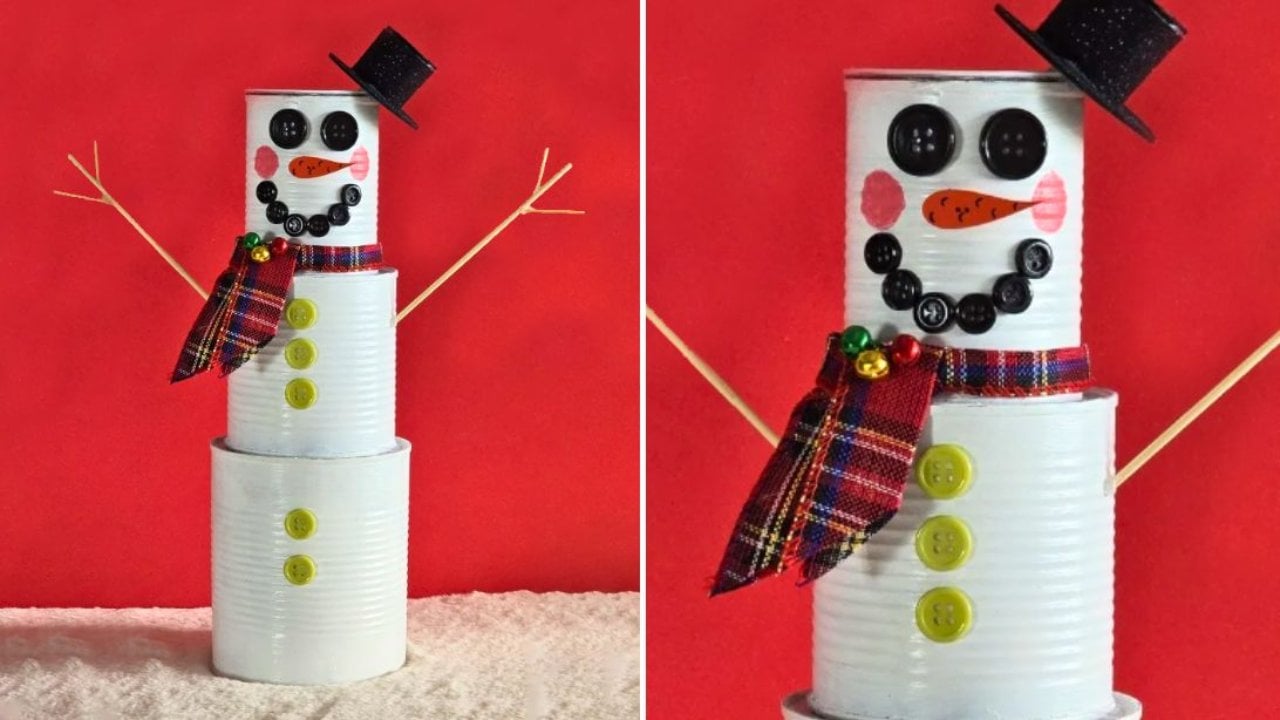
Three empty tin cans in large, medium and small, a couple of coats of white acrylic and suddenly the recycling is a snowman. Buttons become the eyes and the coal line down the front, a scrap of glitter foam makes the hat, and a length of plaid ribbon with a couple of mini bells does the scarf. Skewers run through to hold the stack together. It is the kind of project where the kids do all the decorating and an adult handles the can rims, and it lives on a mantel from the first cold week straight through February.
Get the full tutorial at DIY Joy.
4. Popsicle Stick Hot Chocolate Mug
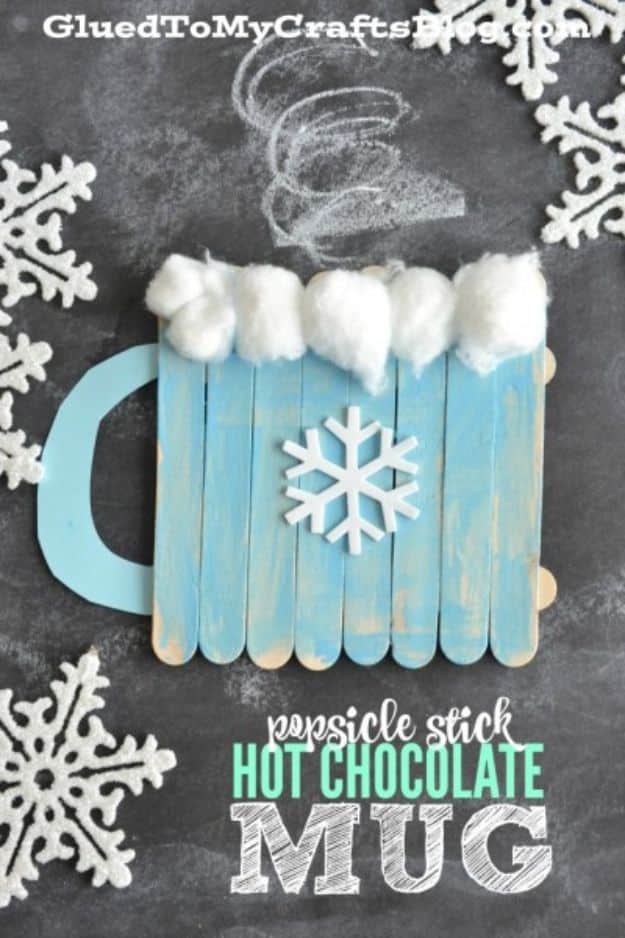
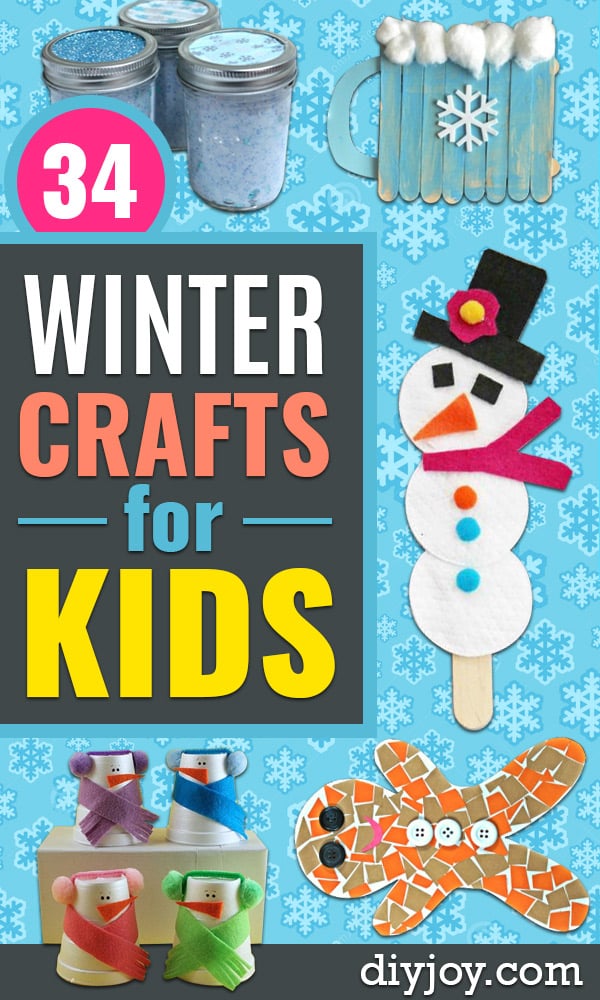
A mug of hot chocolate that cannot spill, cannot burn anybody and does not have to be finished before bed. Nine jumbo craft sticks glue into a fence pattern, eight across with two behind for support, then take a coat of light blue paint. A handle cut from cardstock glues onto the side, cotton balls pile over the rim as marshmallows and a snowflake sticker finishes it. There is a free printable too, and worth knowing before you go looking: the 2026 download password is GLUEDTOMYCRAFTS2026, with no sign-up needed.
Get the full tutorial at Glued To My Crafts.
5. Sparkly Icicle Craft
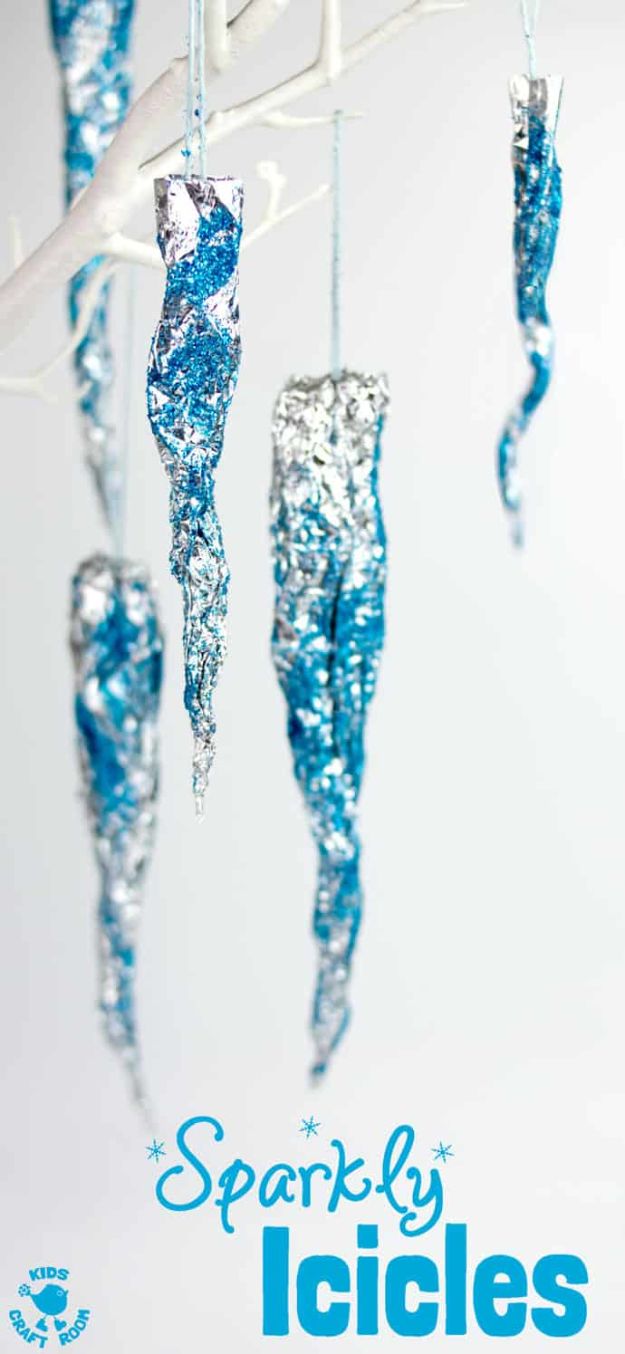
Tear a piece of aluminum foil a few centimeters longer than you want the icicle to be, tear the two lower corners off so it ends in a blunt triangle, and that shape is what makes it taper like the real thing hanging off a gutter. Twist it up, add glitter, hang it. Kids Craft Room is right that it does not get easier than this, and it is one of the few crafts on this list a two year old can genuinely do alone. Make a dozen and string them across a window.
Get the full tutorial at Kids Craft Room.
6. Clothespin Snowflake Ornament
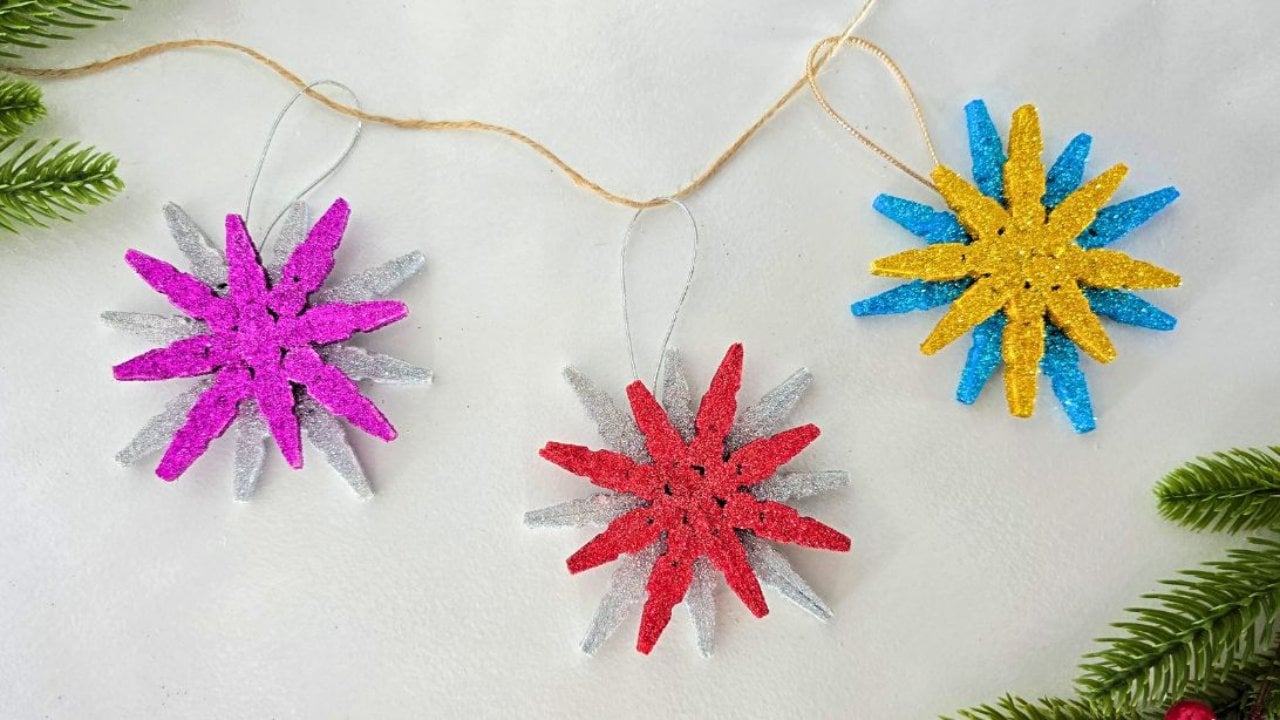
Wooden clothespins, pulled apart and glued back together in a radiating star, make a snowflake that looks like it cost money. Paint the halves, hot glue them out from a center point, brush on white glue and dip the whole thing in glitter, then add a loop of metallic elastic cord. Old clothespins from the laundry room work, or a pack from the dollar store costs almost nothing. Mix two glitter colors on one snowflake the way the tutorial does and it reads as deliberate rather than leftover.
Get the full tutorial at DIY Joy.
7. Borax Snowflake
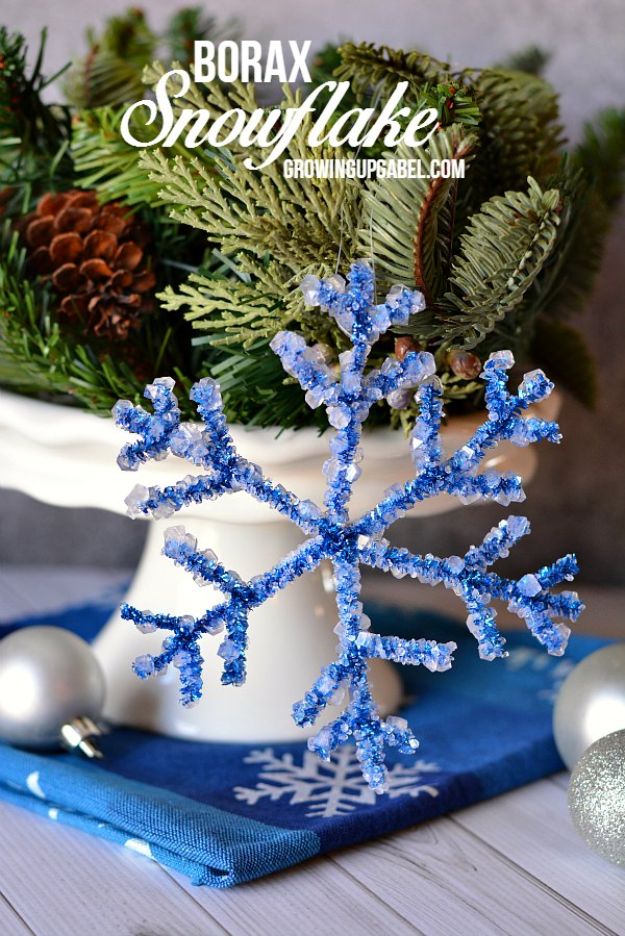
This is the slow one, and it is worth the wait. Four blue glittery pipe cleaners make one snowflake: cut two in half, use three of those halves for the six points, wrap the centers together to secure them, then add the tips. Suspend it in Borax and water in a large glass bowl, hanging from a wooden spoon or dowel, and the crystals grow over a couple of days while everyone checks on it. Growing Up Gabel notes to make sure it fits your frame first if you plan to frame one. Adults handle the Borax.
Get the full tutorial at Growing Up Gabel.
8. Toilet Paper Roll Snowflake
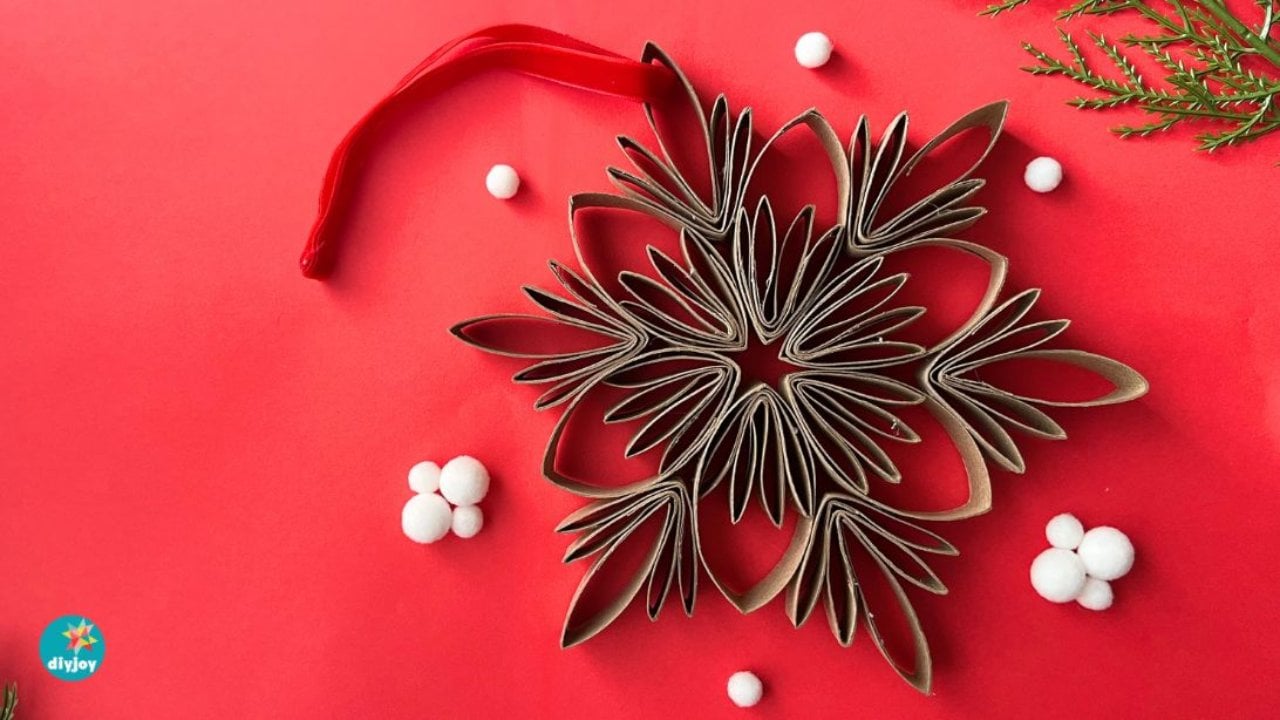
Six toilet paper tubes, flattened, divided into six equal pieces each and cut apart, become one very intricate looking snowflake. The steps are only ever cut and glue: six pieces glued into a flower shape, twenty four more folded in half and paired up, then layered inside and around the petals. It is the perfect winter craft to split by age, with kids doing the folding while an adult runs the glue gun. Nobody believes it started as toilet rolls, which is most of the fun of handing one over.
Get the full tutorial at DIY Joy.
9. Foam Cup Snowmen
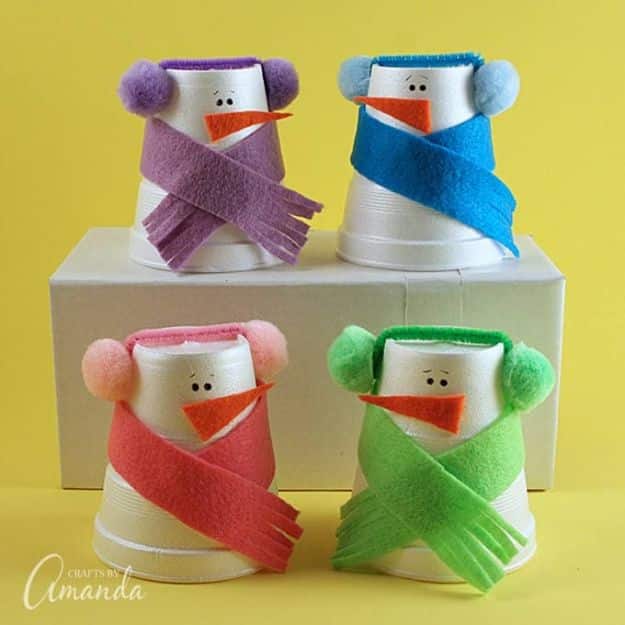
Turn a foam cup upside down and you have a snowman body already made, which is the whole reason this works for small hands. Felt scarves, pom pom earmuffs and a little orange nose do the rest, and Crafts by Amanda is right that kids can get through most of it with very little adult help. Make a set in four colors so each child claims one. They sit on a windowsill or a mantel for the whole season, and unlike most kid crafts they still look good in February.
Get the full tutorial at Crafts by Amanda.
10. Snow Slime
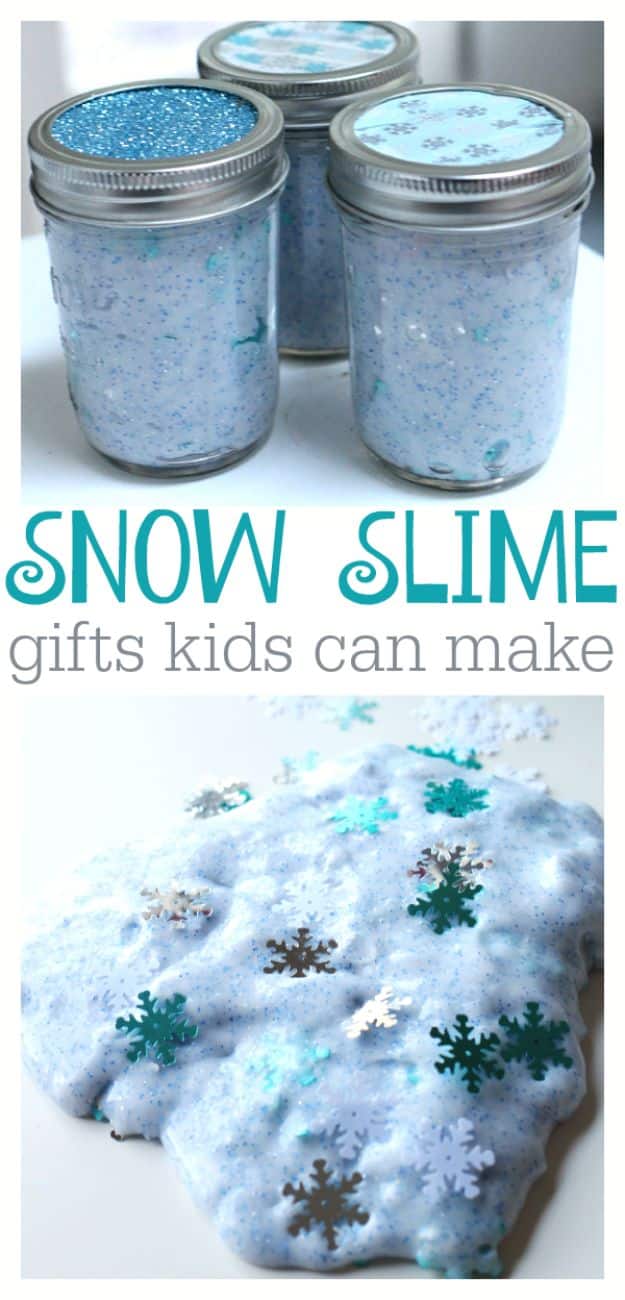
Three small mason jars of slime take two bottles of clear Elmer’s glue and one bottle of white, plus silver and blue glitter and foil snowflakes stirred through. Liquid starch is the activator: start with a quarter cup, knead hard for three minutes, then add another dash if you want it tougher. Less starch gives you runnier slime. No Time For Flash Cards checks that the foil snowflakes have no sharp edges before they go in, which is the kind of detail you only think of once. Washi tape on the lids and it is a gift.
Get the full tutorial at No Time For Flash Cards.
11. Shivery Snow Paint
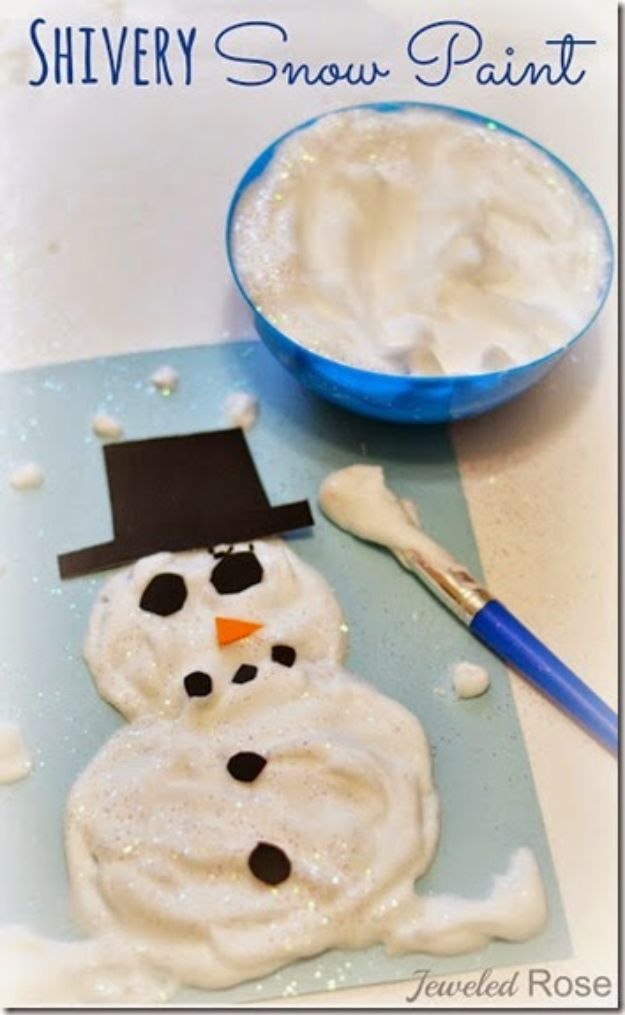
Most puffy paint recipes dry flat, and this one dries raised and comes out cold to the touch. The trick is in the prep. White school glue goes in the fridge overnight, then sits on the counter for about ten minutes to get flowing again before you mix. After that it is roughly equal parts chilled glue and shaving cream in a bowl, with iridescent glitter or buffalo snow stirred through and a few drops of peppermint extract if you want it to smell like winter too. Hand over paper and let them paint.
Get the full tutorial at Growing a Jeweled Rose.
12. Bubble Wrap Snowy Tree
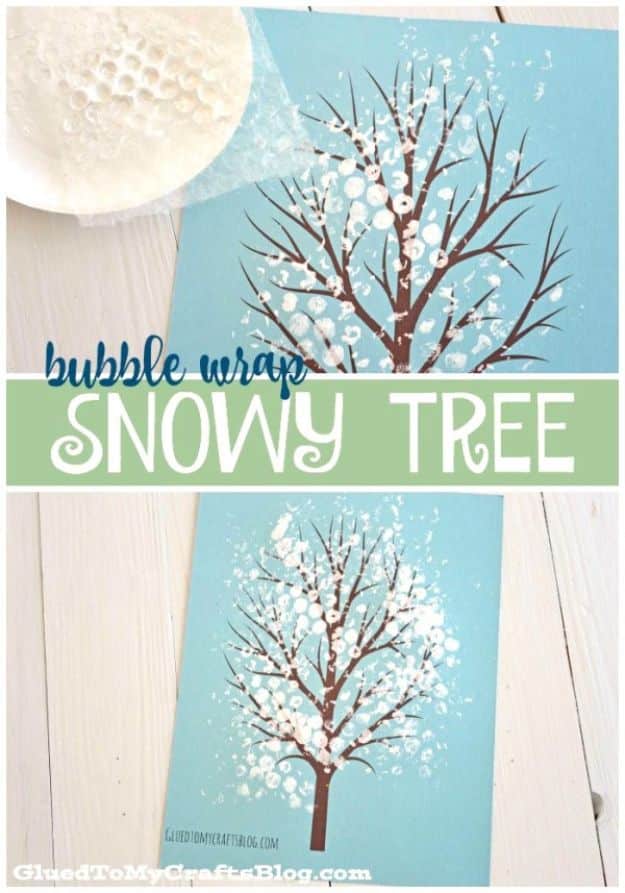
Bubble wrap pressed into white paint and stamped over a printed bare tree gives you snow on the branches in one motion, and it looks far better than a kid painting dots one at a time. Glued To My Crafts supplies the free tree printable, so the whole cost is a scrap of packaging and some white paint. Cut the bubble wrap into a piece small enough for a child to control. This is process art, so let them stamp it three times if they want. It hangs on a bedroom wall very nicely.
Get the full tutorial at Glued To My Crafts.
13. Melting Icebergs
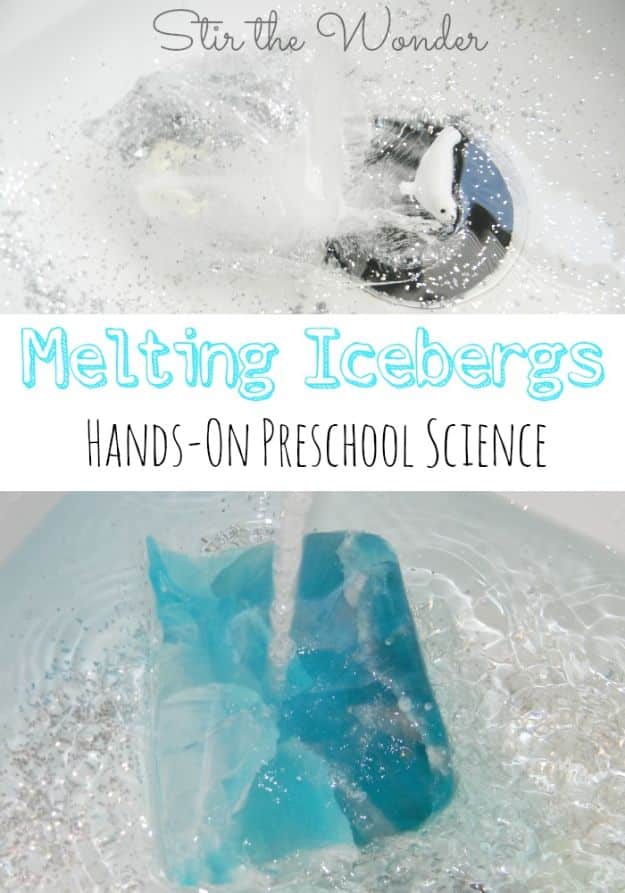
Line a large measuring cup with a gallon freezer bag, fill it with water, and before it goes in the freezer let the kids drop in glitter, blue food coloring and a handful of small Arctic animals. Two more icebergs go in sandwich bags. A couple of days later, tip them into a sink full of water and hand over cups of warm water and the sprayer. Stir The Wonder built this around a straightforward question: what is happening to the ice? Freeing the animals is what keeps them at it.
Get the full tutorial at Stir The Wonder.
14. Paper Bag Snowflakes
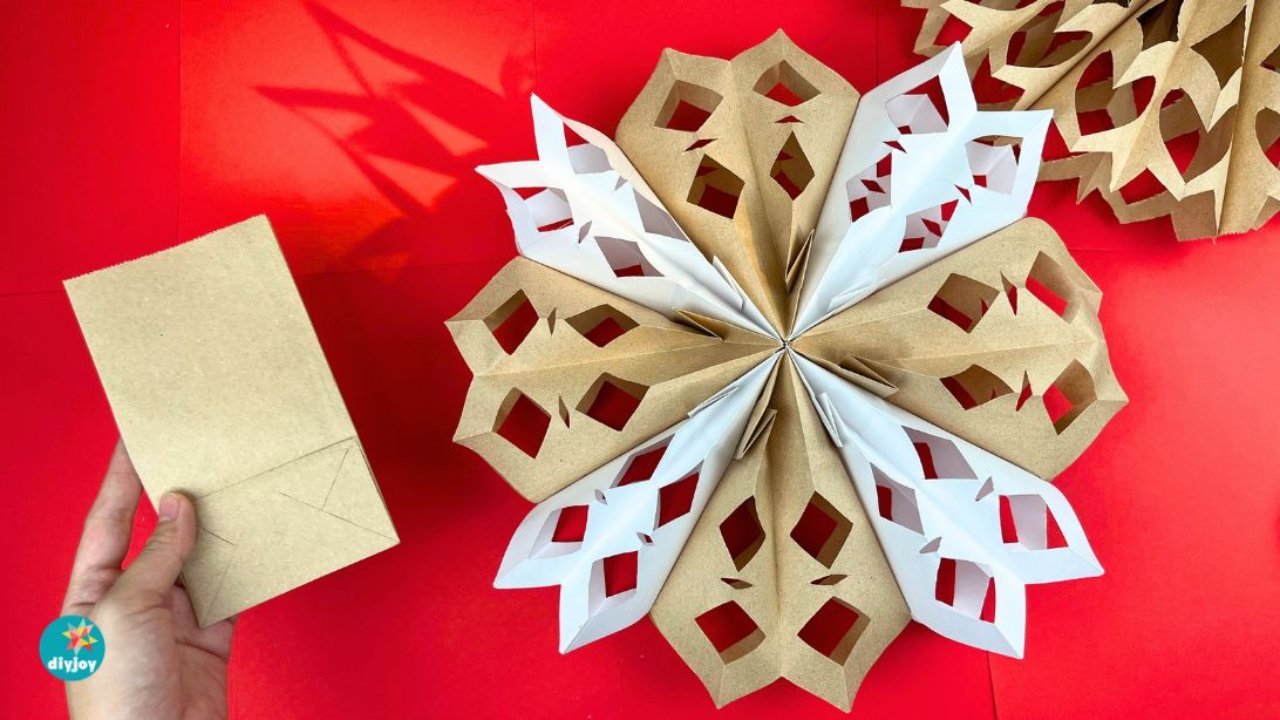
Stacked paper lunch bags, glued in a run, cut once and fanned open, give you a huge snowflake that looks like a paid decoration. Worth knowing before you start: the usual advice of seven bags per snowflake did not hold, and it took eight bags for the two-toned version and nine for the single color, because seven is not enough to glue the two ends together. White bags are thicker than brown, so brown cuts easier. Use sharp scissors and go two or three layers at a time.
Get the full tutorial at DIY Joy.
15. Watercolour and Oil Pastel Resist Snowflake
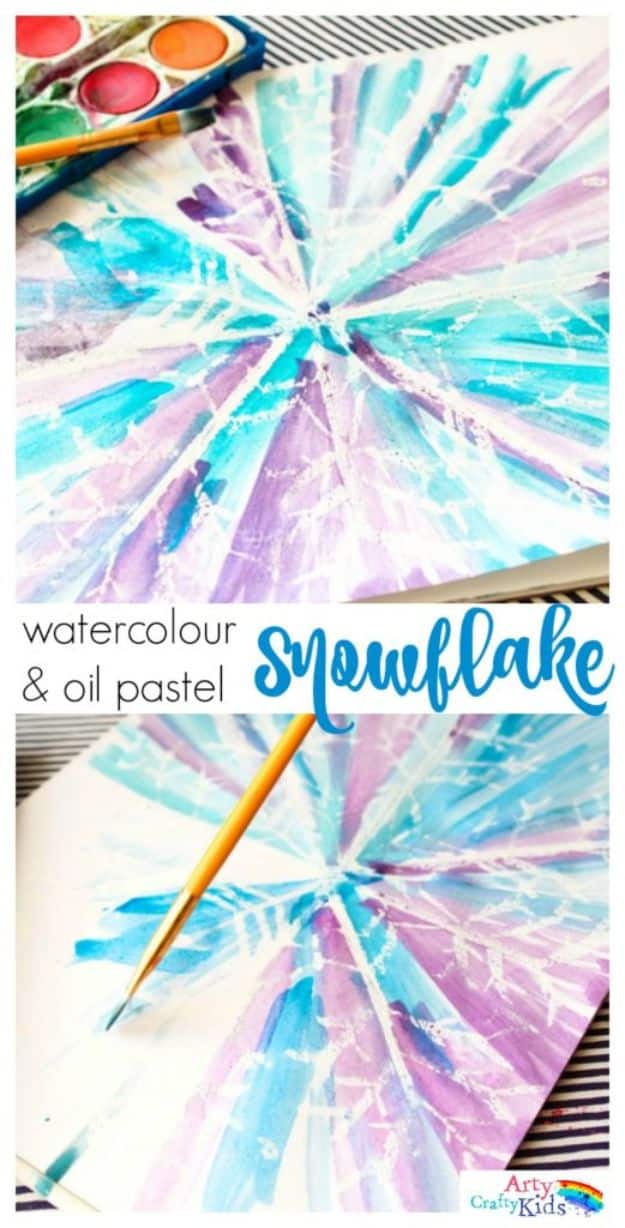
White oil pastel on white watercolour paper is invisible until the paint goes over it, and then the snowflake appears. Draw four criss-crossing lines of equal length so it looks like a star, join the branches with a zig-zag a couple of centimeters out from the middle, then add three V shapes at each tip. Arty Crafty Kids suggests dampening the paper with a sponge first for softer, easier spreading colour. Paint out from the centre along each arm. Older kids can be pushed to think about symmetry while they draw.
Get the full tutorial at Arty Crafty Kids.
16. Name Snowmen
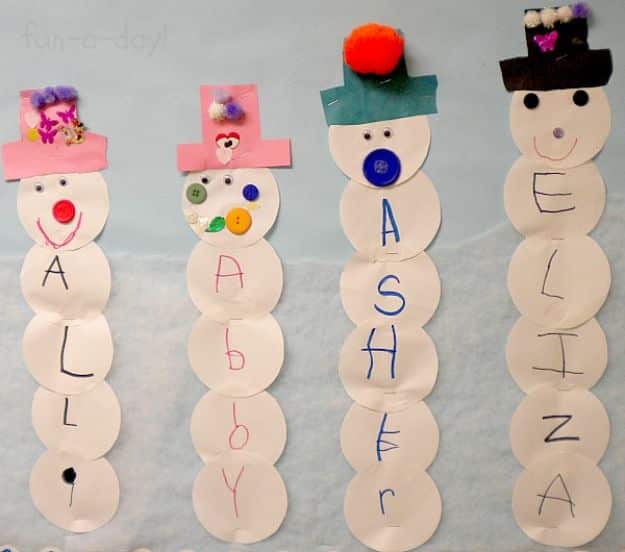
Every letter of a child’s first name gets its own snowball, plus one more for the face, and the whole snowman stacks up as tall as the name is long. Fun-A-Day cuts the circles from white construction paper at about three to four inches across and traces hat shapes onto colored paper, then sets out wiggly eyes, craft jewels, pom poms and buttons and lets them go. It is a literacy activity wearing a craft costume. There is a free printable alphabet version if you would rather not cut circles for a whole class.
Get the full tutorial at Fun-A-Day.
17. Sparkly Snowflakes
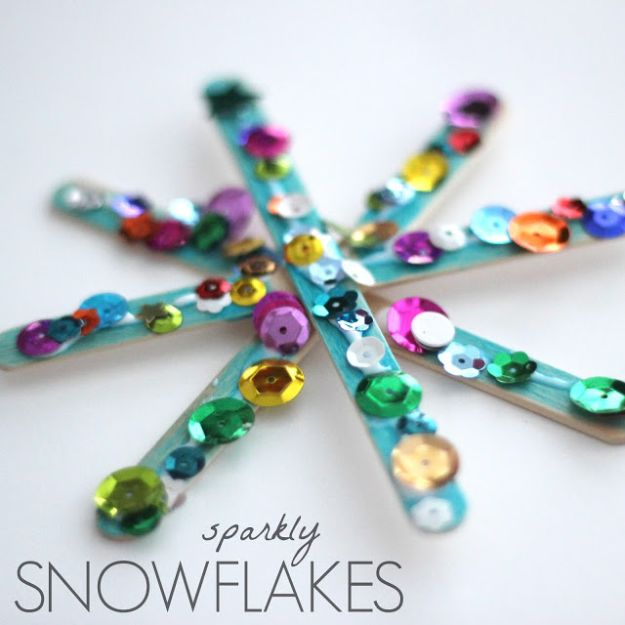
Four popsicle sticks hot glued into a star, and everything after that belongs to the kids. Toddler Approved colors the sticks with dot markers first, then covers them in white glue and pours on sequins, buttons, glitter or jewels. The tip that saves your floor: work over a big container so kids can shake sparkles on freely and the strays land somewhere useful. Once the glue dries they shake off the loose ones. A hot glue ribbon loop turns it into an ornament, and like real snowflakes no two come out the same.
Get the full tutorial at Toddler Approved.
18. Doily Snowman Craft
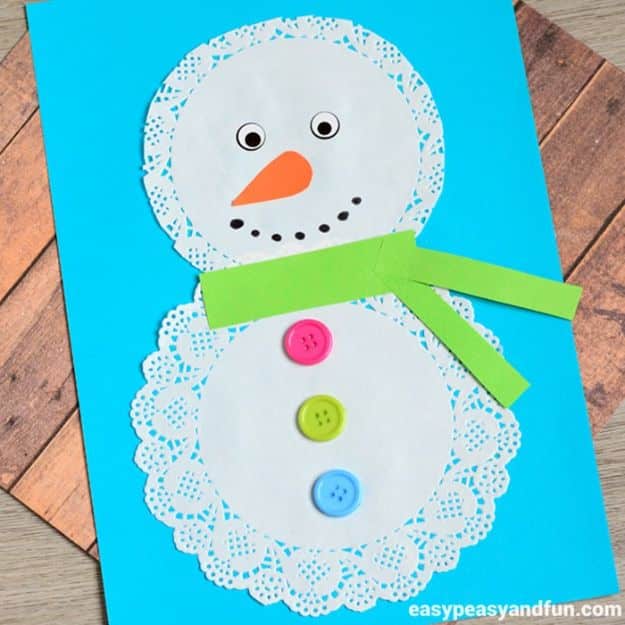
Two paper doilies, one trimmed slightly smaller than the other, stacked on blue paper and there is your snowman. The tip that makes it work is using a glue stick rather than liquid glue, because liquid glue wrinkles a doily beyond saving. Buttons go down the front, an orange paper triangle makes the nose, wiggle eye stickers handle the face, and Easy Peasy and Fun is right that a simple paper scarf is what makes the whole thing. Quick enough for a rainy Tuesday and pretty enough to put on the fridge.
Get the full tutorial at Easy Peasy and Fun.
19. Snowflake Handprints
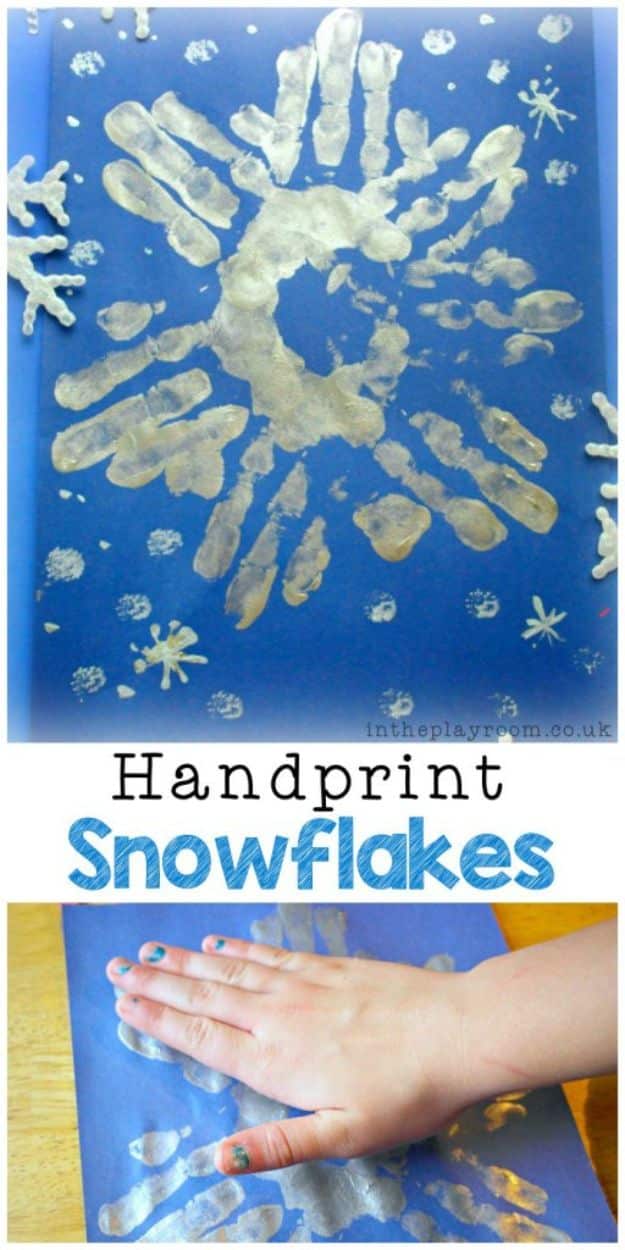
Six handprints pressed in a star around a center point, sometimes seven, and a snowflake appears out of nothing but hands and silver paint. Palm in the middle, fingertips pointing out, and go around. In The Playroom suggests making one every year so you can watch the hand grow, which is the sort of thing you are glad about a decade later. Squirt the paint onto a paper plate and either brush it on or press the hand straight in. Blue construction paper gives the best contrast. These make very good handmade Christmas cards.
Get the full tutorial at In The Playroom.
20. Paper Plate Penguin
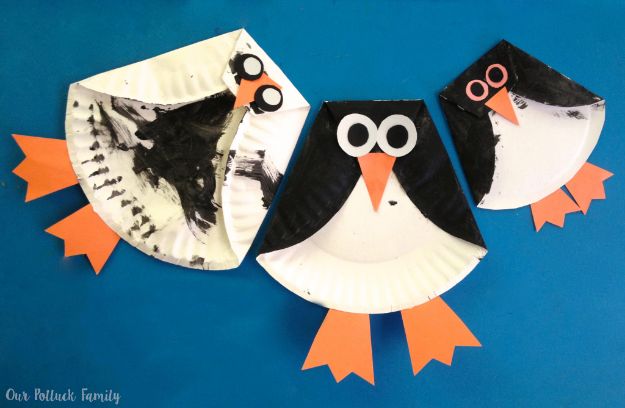
Fold the sides of a paper plate in, fold the top down, glue it there and you have a penguin’s body with the wings already built in. Paint the folded sections black and let it dry, then cut a beak and two feet from orange scraps and eyes from black and white paper. Our Potluck Family made these with a two year old and a four year old alongside an adult version, and the two year old’s turned out just fine. Total cost is one paper plate. Do a whole colony.
Get the full tutorial at Our Potluck Family.
21. Soda Bottle Snowflake Stamp Craft
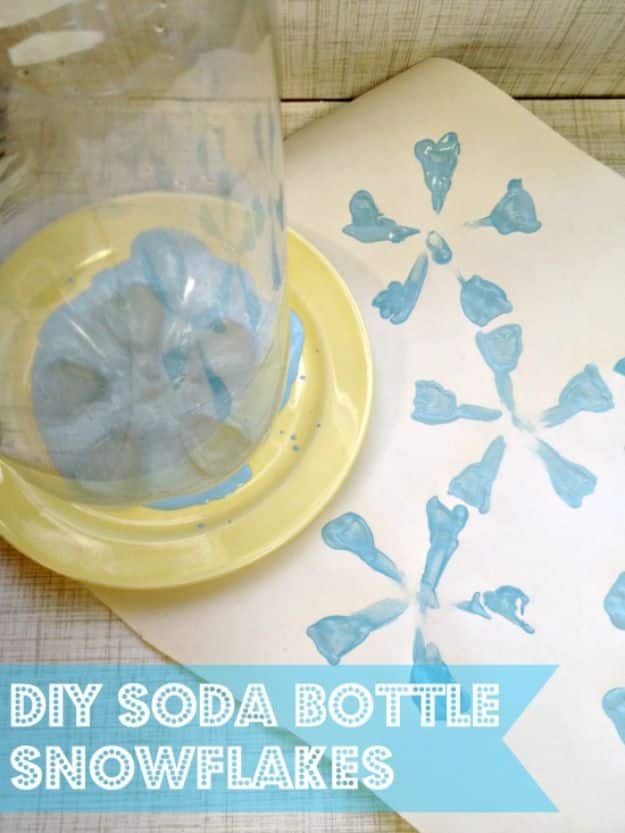
The bottom of an empty two liter bottle is a snowflake stamp and nobody notices until they are told. Pour craft paint onto a plate, press the base of the bottle firmly into it so the whole shape picks up colour, then stamp it down hard on paper. Surviving a Teacher’s Salary connects the printed dabs together with a fingertip to finish the snowflake shape, which is the bit that makes it look intentional. Save bottles through the week so every child gets one. Cut the dried prints out for a garland.
Get the full tutorial at Surviving a Teacher's Salary.
22. Ice Volcanoes
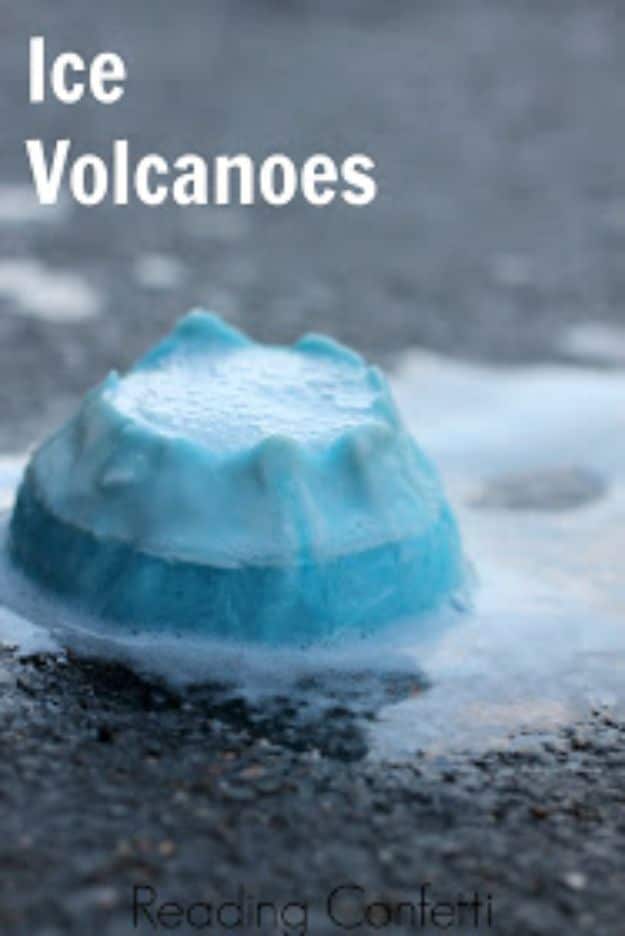
Mess, and worth it. Line small bowls with plastic wrap, drop a golf ball or anything that sinks into each one, then fill with water mixed to roughly a third baking soda plus food coloring, making sure the liquid covers the ball or you end up with a hole through the middle. Freeze, thaw a little, peel the wrap off and pry the ball out with a butter knife. Then squirt vinegar in and stand back. A thirteen year old will stay as interested as the preschoolers.
Get the full tutorial at Reading Confetti.
23. Frozen Olaf Cup Craft for Kids
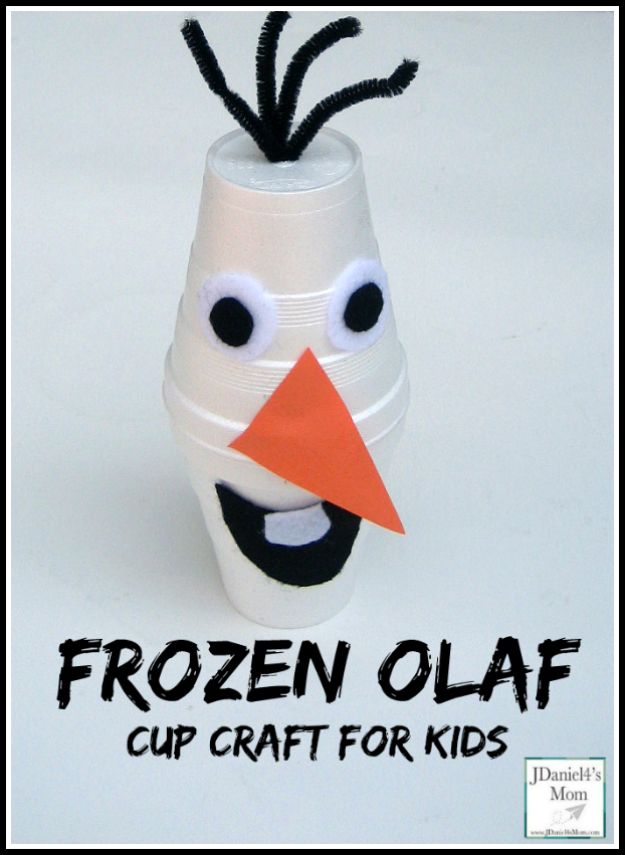
Two Styrofoam cups, one upright and one upside down, and the proportions land almost by accident. The mouth is a black felt pocket shape with a white felt tooth, glued just below the rim of the upright cup, and the eyes go halfway down the upside down one so they sit close to the nose. A black pipe cleaner cut into fourths pokes through a hole in the cup bottom for hair. Glue only the top half of the orange nose and the whole snowman comes apart and stacks flat for storage.
Get the full tutorial at JDaniel4's Mom.
24. Popsicle Stick Reindeer
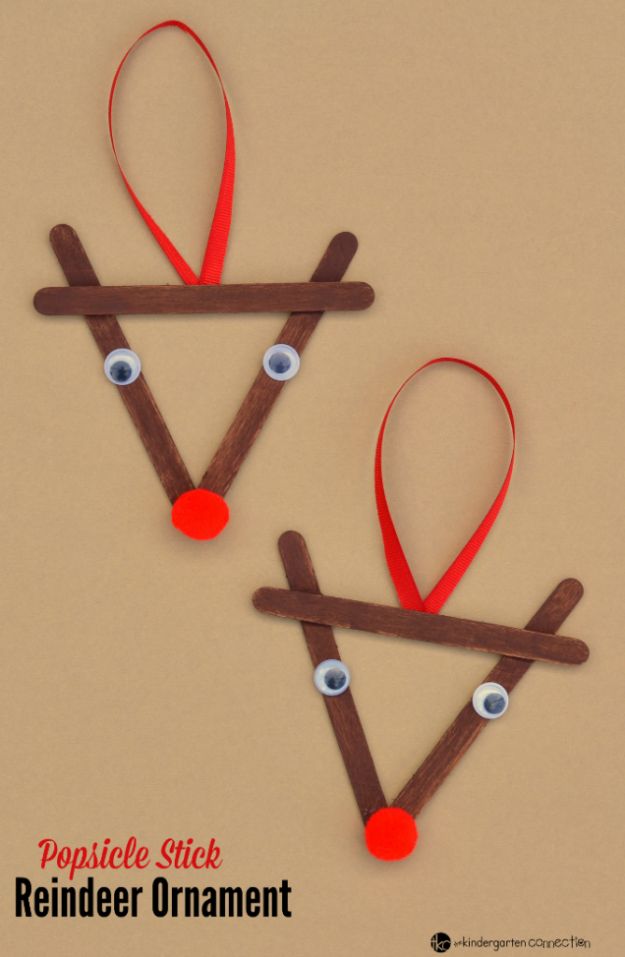
Three craft sticks glued into a reindeer face, painted brown, with a red pom pom nose where the sticks meet at the point and two googly eyes either side. A loop of red ribbon hot glued on the back and it is ready to hang. The Kindergarten Connection pairs it with reading Rudolph and talking about a time you did not feel like you fit in, which is a good conversation to have while glue dries. The prep is an adult job, the decorating is not. Three sticks and a pom pom per child.
Get the full tutorial at The Kindergarten Connection.
25. Colored Ice Ornaments
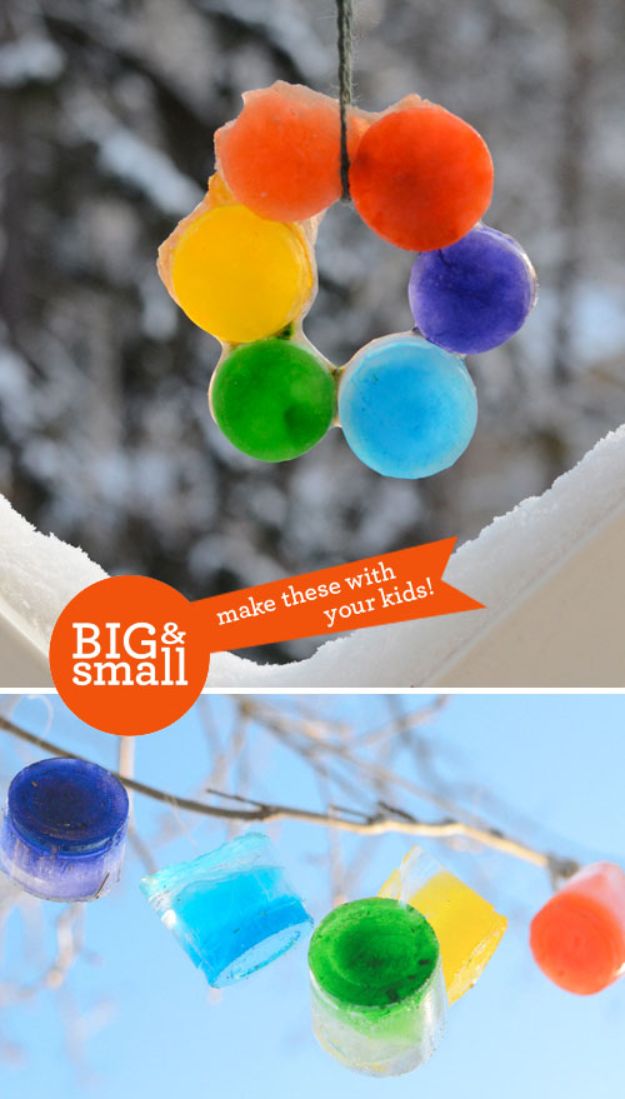
Fill plastic cups with half to three quarters of an inch of colored water, freeze them solid, then warm each cup in your hand to release the disc. Arrange the discs in a circle in a cake pan so they are all touching, pour about an eighth of an inch of water over the top to fuse them, and freeze again. Chip away the extra ice and thread a cord through the middle. Design Mom also gives a small hands version where a cord freezes into each single cup. Outdoor project, obviously.
Get the full tutorial at Design Mom.
26. Winter Sky Art for Kids
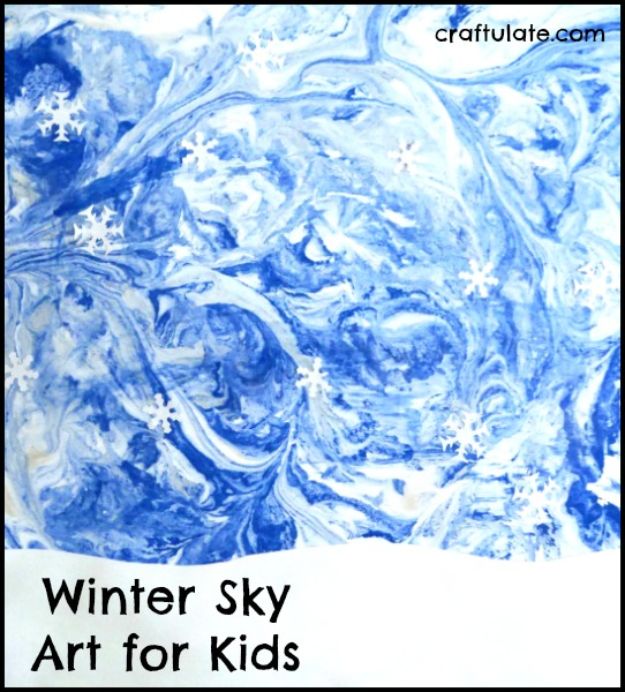
Shaving cream marbling gives a stormy winter sky in about a minute, and the result is genuinely striking. Squirt standard dollar-store shaving cream into a baking pan so it covers the base, add plenty of blue acrylic and a touch of silver, and let them swirl it with a chopstick. Press white card in, peel it off and scrape the cream away. Craftulate warns the cards may curl, so book press them flat. Punched paper snowflakes glued on afterward are a good fine motor workout and finish the picture.
Get the full tutorial at Craftulate.
27. Frosty Pinecone Craft
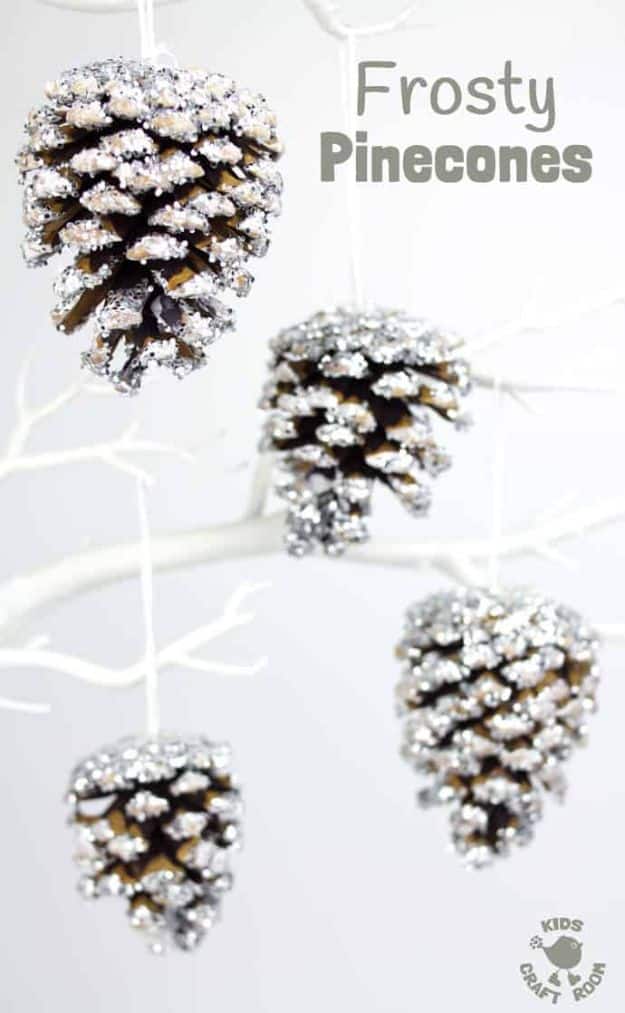
Pinecones the kids collected on a walk, frosted white and hung from a bare branch, and the whole display cost you a cold afternoon outdoors. It is the gentlest craft on this list and it suits the child who does not want to sit still, because half of it happens outside. Hang them on a branch in a vase, along a mantel or straight onto the tree. Gather more pinecones than you think you need, because some always turn out better than others.
Get the full tutorial at Kids Craft Room.
28. Winter In A Bag
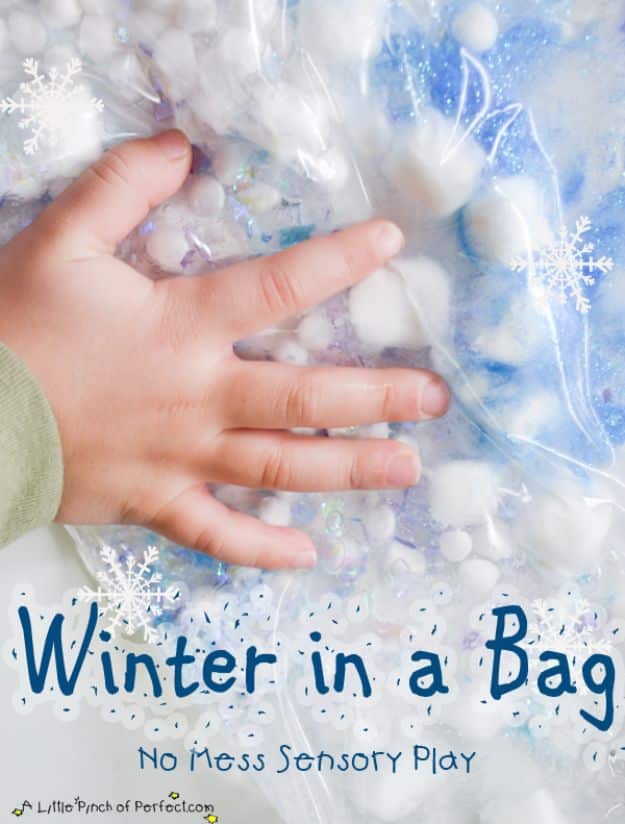
Sensory play with zero cleanup, which is the whole selling point. Cheap clear hair gel goes into a plastic bag with glitter, glitter cellophane and a handful of marshmallows, then the top gets sealed shut with packing tape. Uncooked tapioca pearls are optional and add a lot. A Little Pinch of Perfect keeps theirs in the fridge between plays so they come out cool, which suits a winter theme and does not freeze small hands. Kids squish, pop and draw in it with a finger. No aprons, no hosing anybody down.
Get the full tutorial at A Little Pinch of Perfect.
29. Snow Storm In A Jar
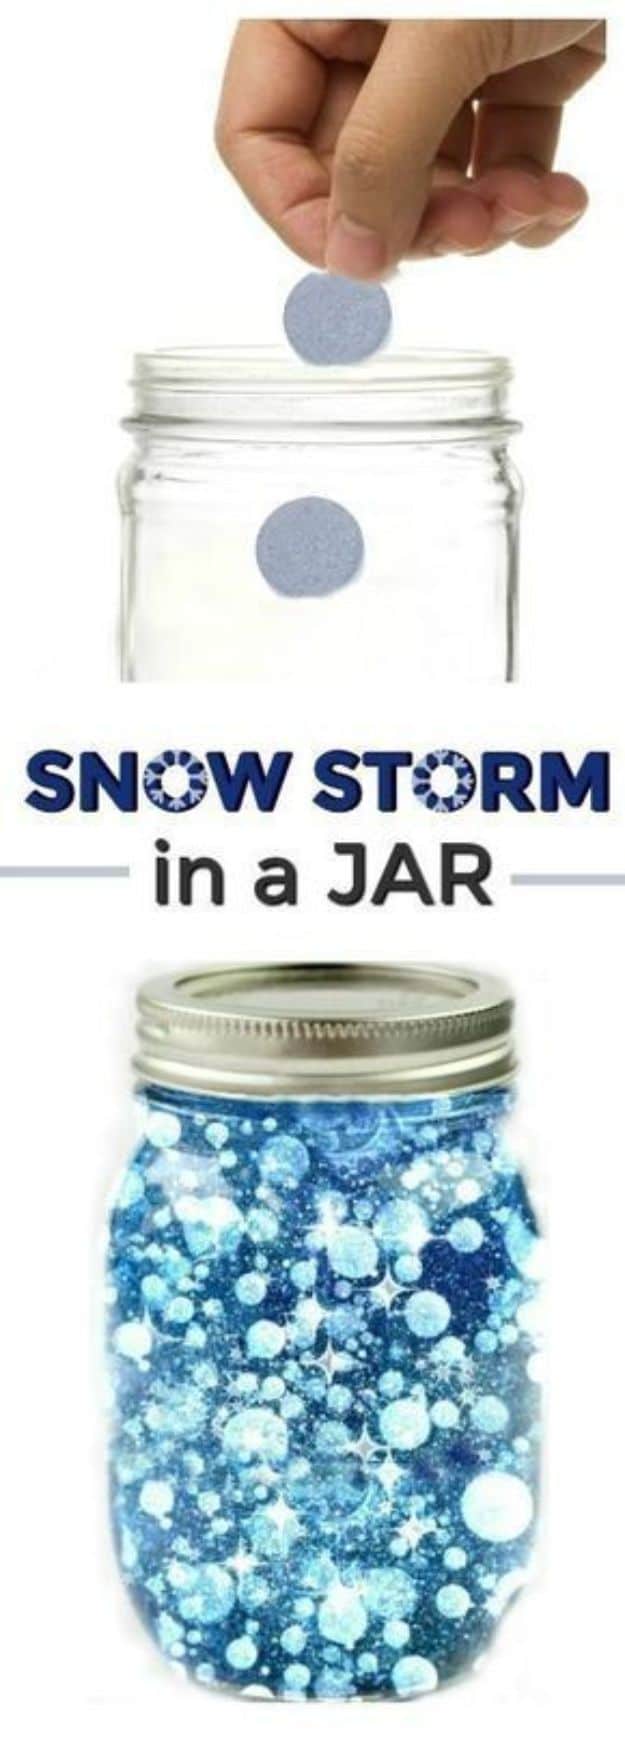
Fill a jar three quarters full of baby oil and set it aside. Dissolve one teaspoon of white paint into one cup of very warm water, stir until it disappears, then pour that in, leaving a little room at the top. Glitter and blue food coloring are optional but make it. Wait for everything to settle to the bottom, then break an Alka-Seltzer tablet into pieces and drop them in. The water immediately swirls and bubbles up through the oil. Buy plenty of tablets, because they will want it again.
Get the full tutorial at Growing a Jeweled Rose.
30. Construction Paper Gingerbread Man Mosaic
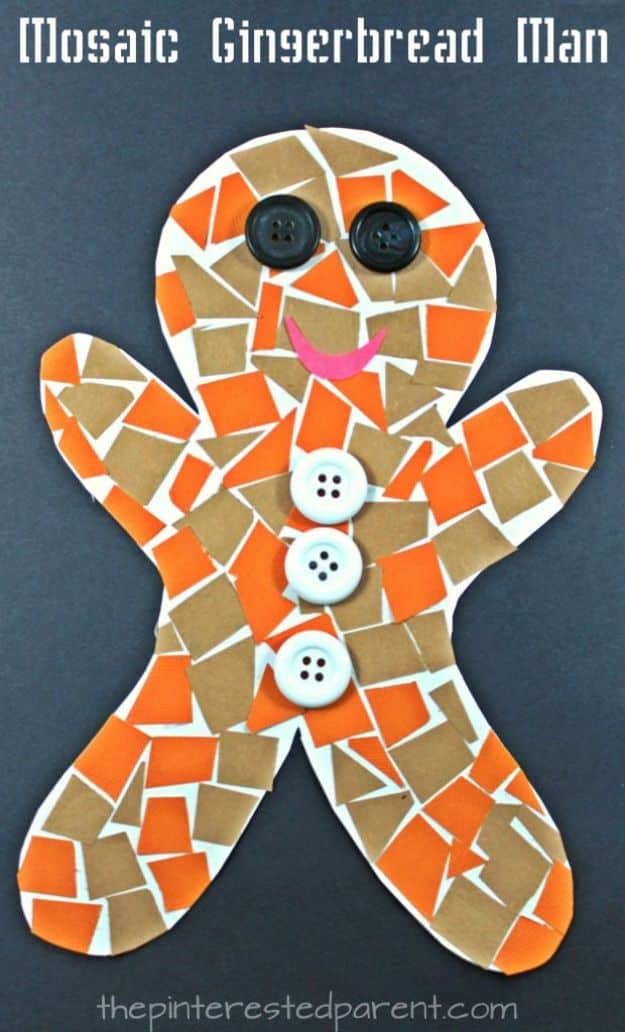
This is what a craft room clear-out is for. Cut a gingerbread shape out of white paper, then snip a pile of scrap paper into small bits in brown and orangey brown and let the kids glue them on with a glue stick until the whole shape is filled. Buttons finish it. The Pinterested Parent’s daughter cut yellow hair out of construction paper because she wanted hers to be a girl, which is exactly the kind of decision this project leaves room for. It is a genuinely useful way to spend the scraps you keep meaning to sort.
Get the full tutorial at The Pinterested Parent.
31. Winter Mitten Craft for Preschoolers
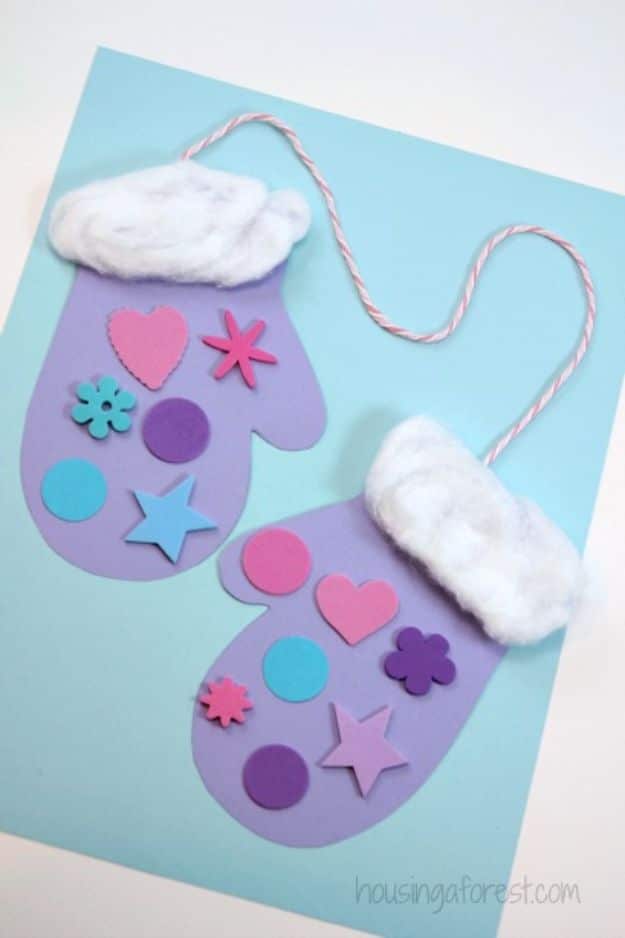
Print the mitten template onto colorful paper, let the kids cut them out and glue them to a coordinating sheet, then stretch cotton balls out thin for the fluffy cuff. That stretching step is what separates a good one from a lumpy one. Foam stickers, sequins and craft jewels do the decorating, and yarn connects the pair. Housing a Forest reads The Mitten by Jan Brett while they dry, and it is a good pairing because the illustrations are worth sitting through. Cheap, quick and a solid cutting practice session.
Get the full tutorial at Housing a Forest.
32. Snowman Sensory Bottle
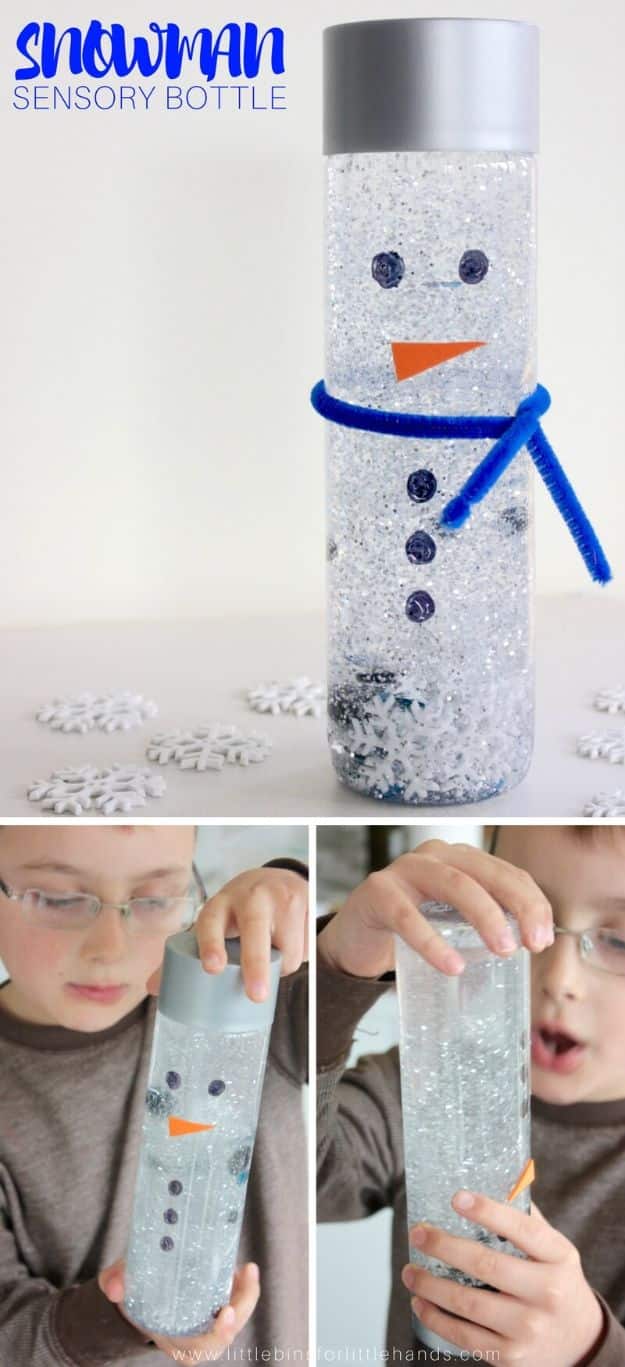
Empty a bottle of clear glue into a plastic water bottle, fill the rest with room temperature water, then add glitter, snowflake confetti and sequins. The glue is not decoration, it is the thing that slows the settling, so more glue means a longer, better snowfall. Little Bins for Little Hands draws the snowman’s face and buttons straight onto the bottle with a Sharpie, which comes off with rubbing alcohol if it goes wrong. Orange foam makes the nose, a pipe cleaner or fabric scrap makes the scarf. Leave the lid unglued so you can reuse it.
Get the full tutorial at Little Bins for Little Hands.
33. Q-Tip Painted Snowflake
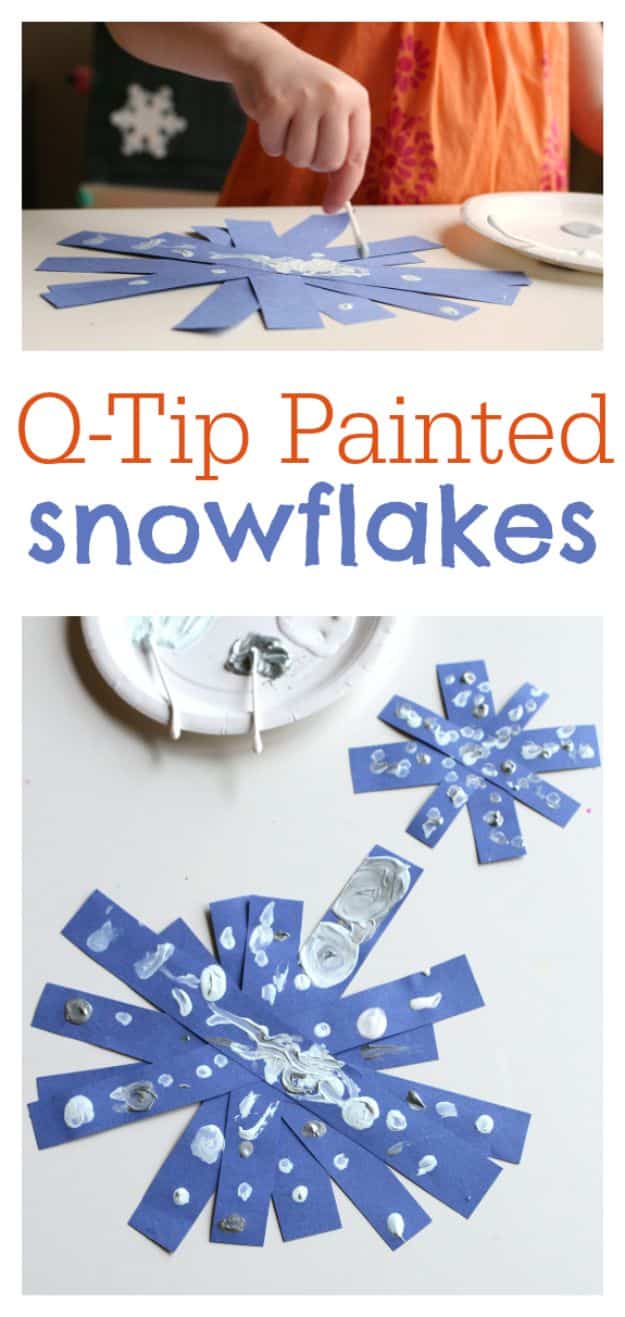
Cut blue construction paper into strips, glue them into a snowflake shape with a glue stick, then paint dots along every arm with q-tips in silver, white and light blue. Handling a skinny little q-tip is harder than it looks, which is the point, because the fine motor work is real. No Time For Flash Cards planned this for two and three year olds and glued the strips down in advance for them, while an older child can do the gluing themselves. One good piece of advice from there: make your own alongside them rather than fixing theirs.
Get the full tutorial at No Time For Flash Cards.
34. Snowman Paper Plate Masks
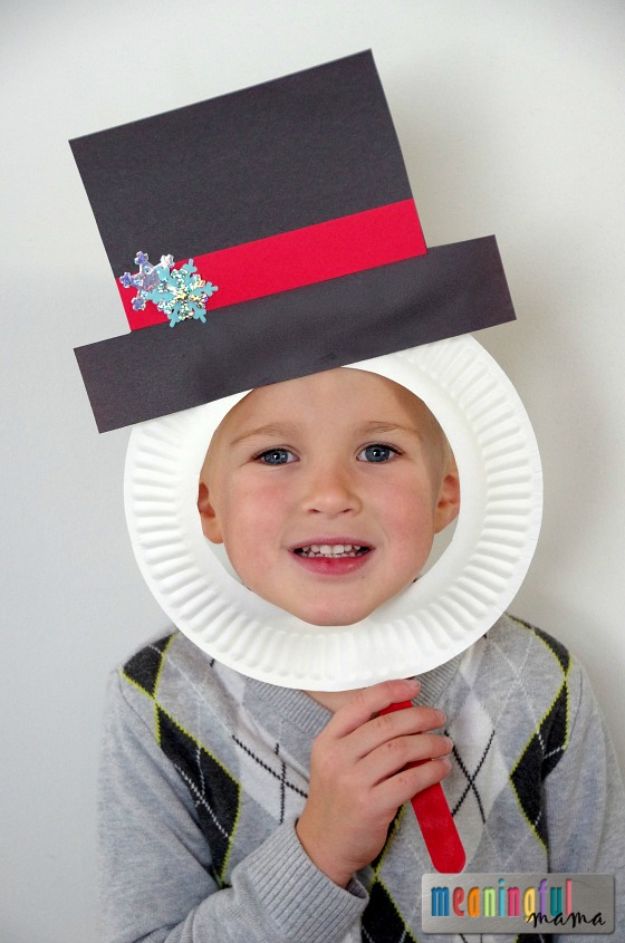
Cut the center circle out of a paper plate and hot glue a jumbo craft stick to the bottom, and a child’s own face becomes the snowman. Meaningful Mama does those two steps in advance, then the kids trace and cut a hat from black card stock, which she specifies over construction paper because construction paper is too flimsy to hold its shape. Red paper strips and snowflake stickers decorate the hat band. Glitter glue or ribbon works too. Have a camera ready, because the reveal is the entire payoff here.
Get the full tutorial at Meaningful Mama.
35. Snow Paint
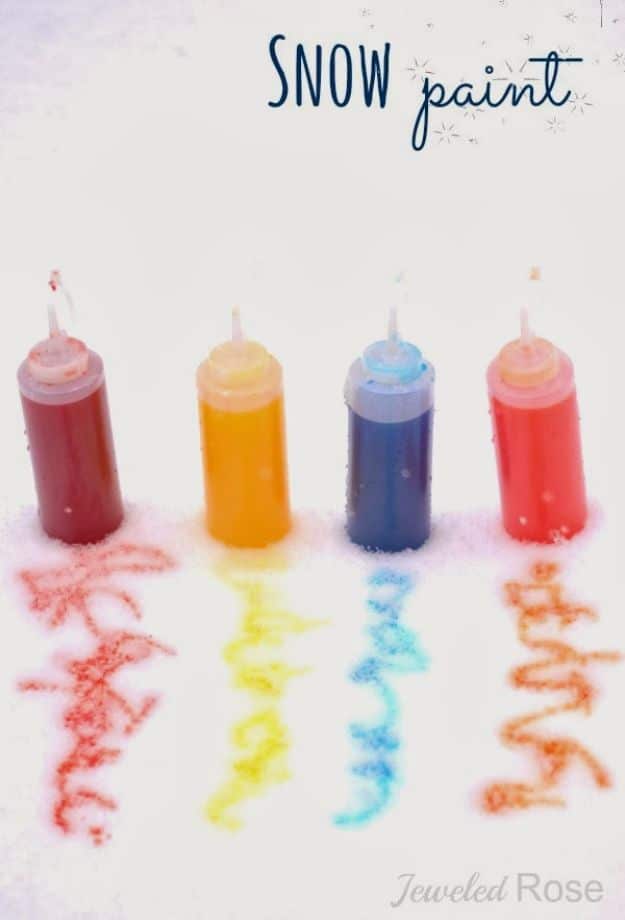
Two ingredients and the whole yard is the canvas. Food coloring and cold water in squirt bottles, one bottle per colour, and that is the entire recipe. Growing a Jeweled Rose recommends neon food coloring for the most vivid results, and the better tip: use Kool-Aid packets instead of food coloring and the snow paint is scented. Kids paint the snow, paint their snowmen, and every bit of the mess stays outside where it melts. Fill the bottles before coats and boots go on, because they will ask for refills.
Get the full tutorial at Growing a Jeweled Rose.