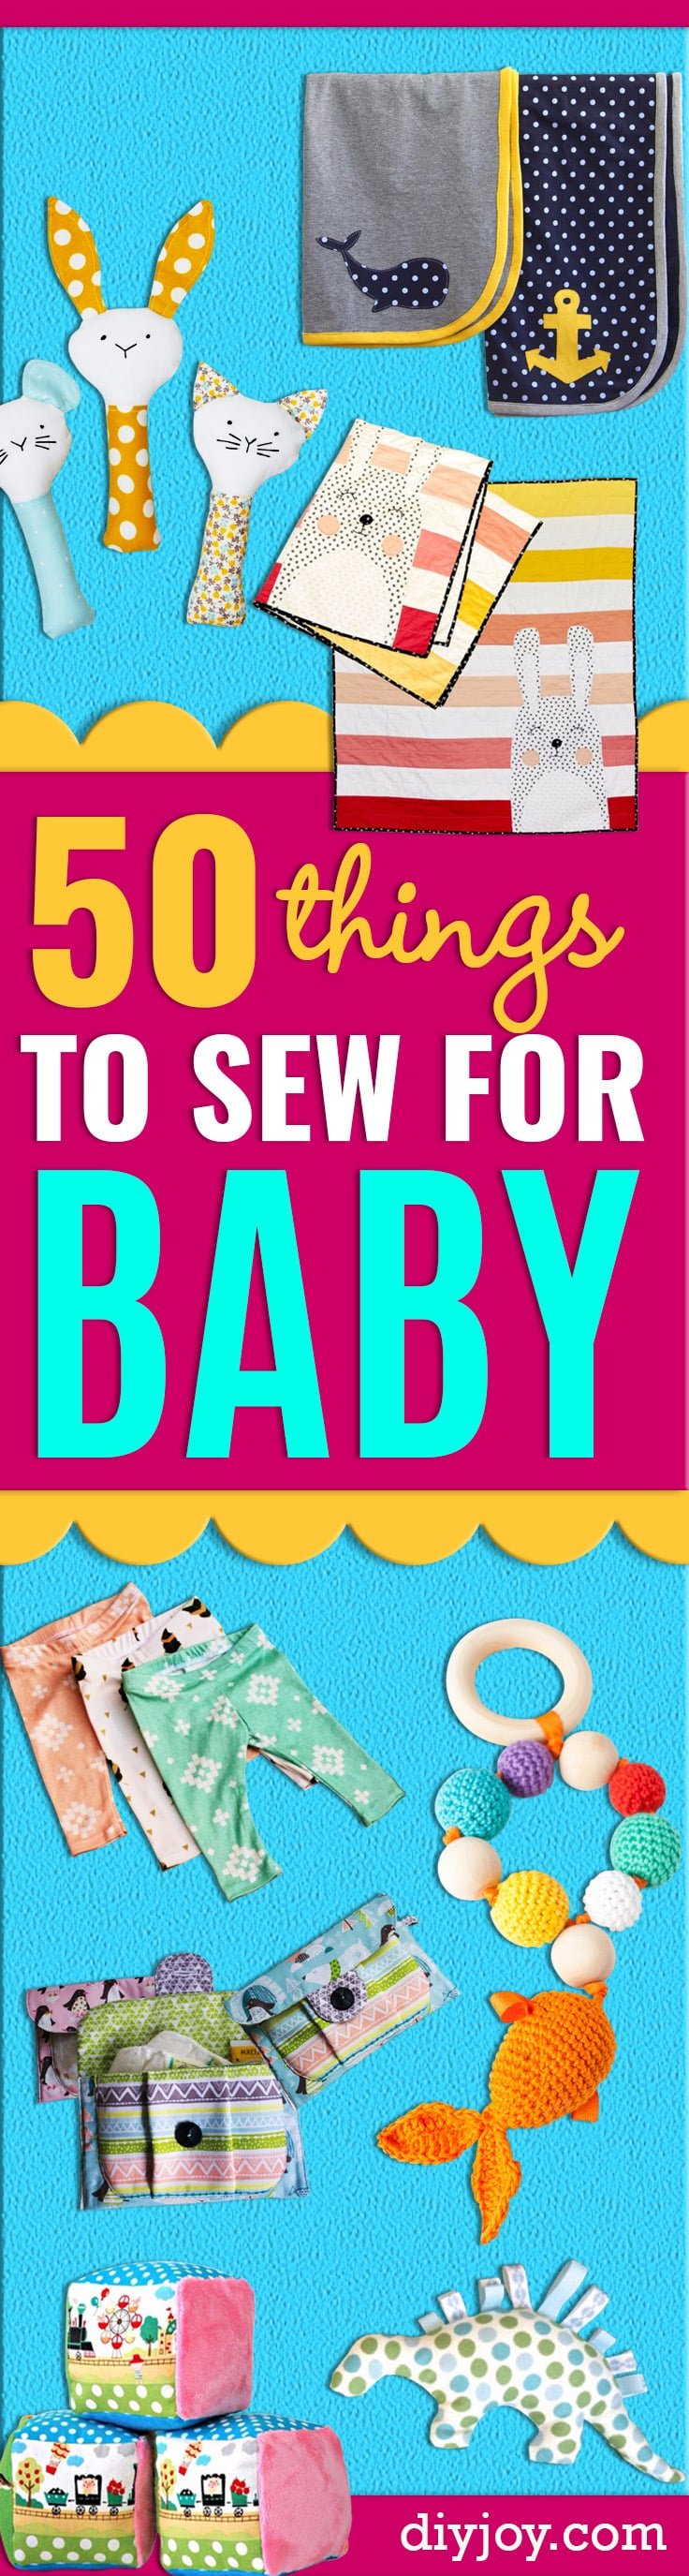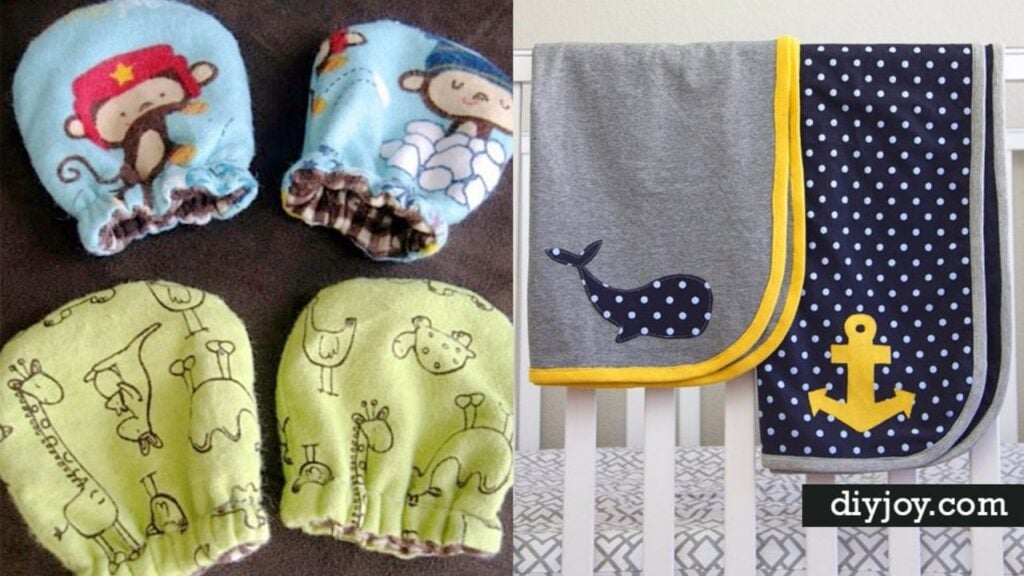
Newborn clothes are the only garments in the world that cost real money and get worn nine times, which is exactly why sewing for a baby pays off. These things to sew for baby start at ten minutes and half a yard: burp rags cut at ten by eighteen, a knit swaddle finished about forty inches square with a zigzag round the edge, knot bow headbands out of a five by twenty-four strip. Then there are the projects worth an afternoon, a bapron that ties at the back so it cannot be pulled off, an ombre quilt, a ruffled bonnet. Plenty of these come with a free PDF pattern, and the knits all want a ballpoint needle.
1. Modern Ombre Baby Quilt
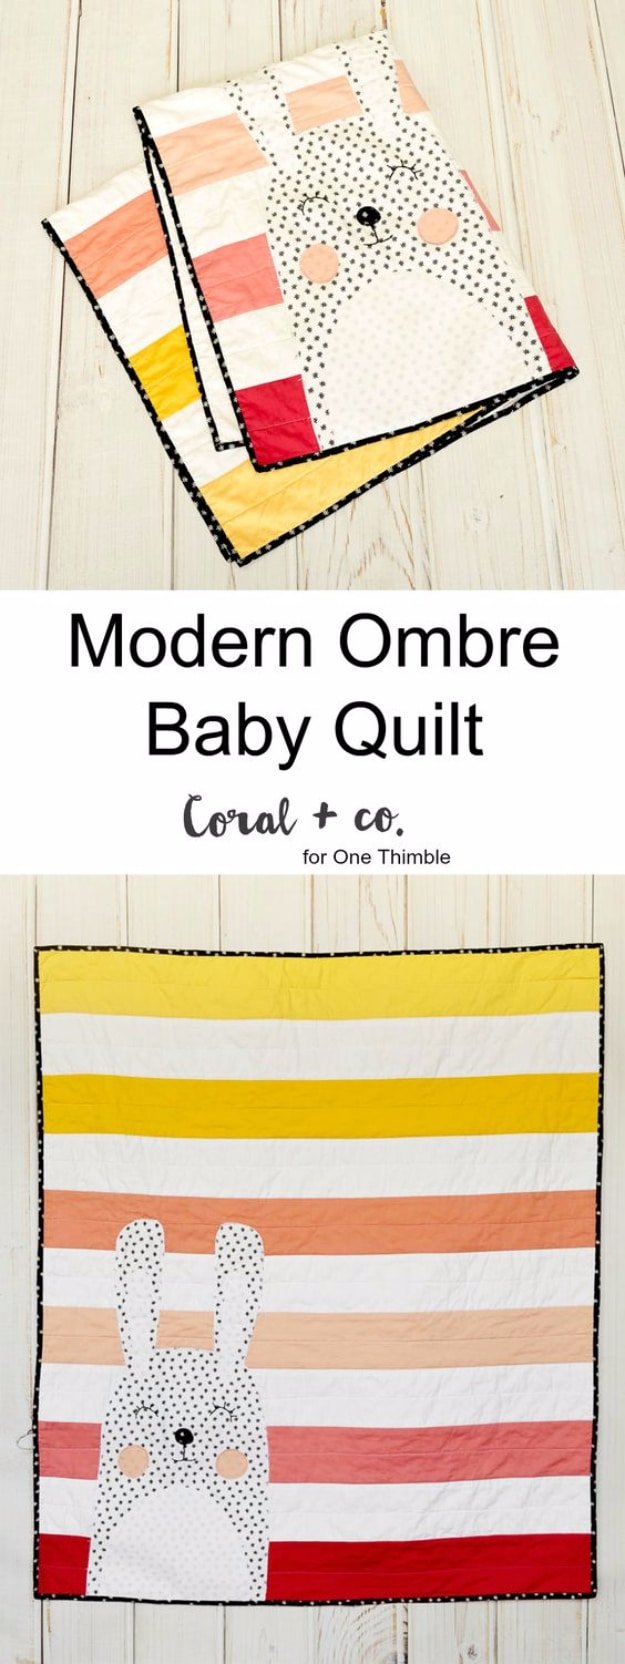
Horizontal stripes graduating from yellow through peach to red, with a bunny appliqued across the lower half in a black star print, embroidered eyelashes and two pink cheeks. Kona cotton solids do the ombre and a black and white hashtag print binds it, backed in white with 100 percent cotton batting, which is what gives the finished quilt that crinkled look after its first wash. The quilting is topstitched in the ditch and again through the middle of each stripe, so there is no free motion work anywhere. The pattern comes with four different animals, not just the bunny.
Get the full tutorial at Shelly at Coral and Co.
2. Baby Burp Cloths Made From Vintage Handkerchiefs
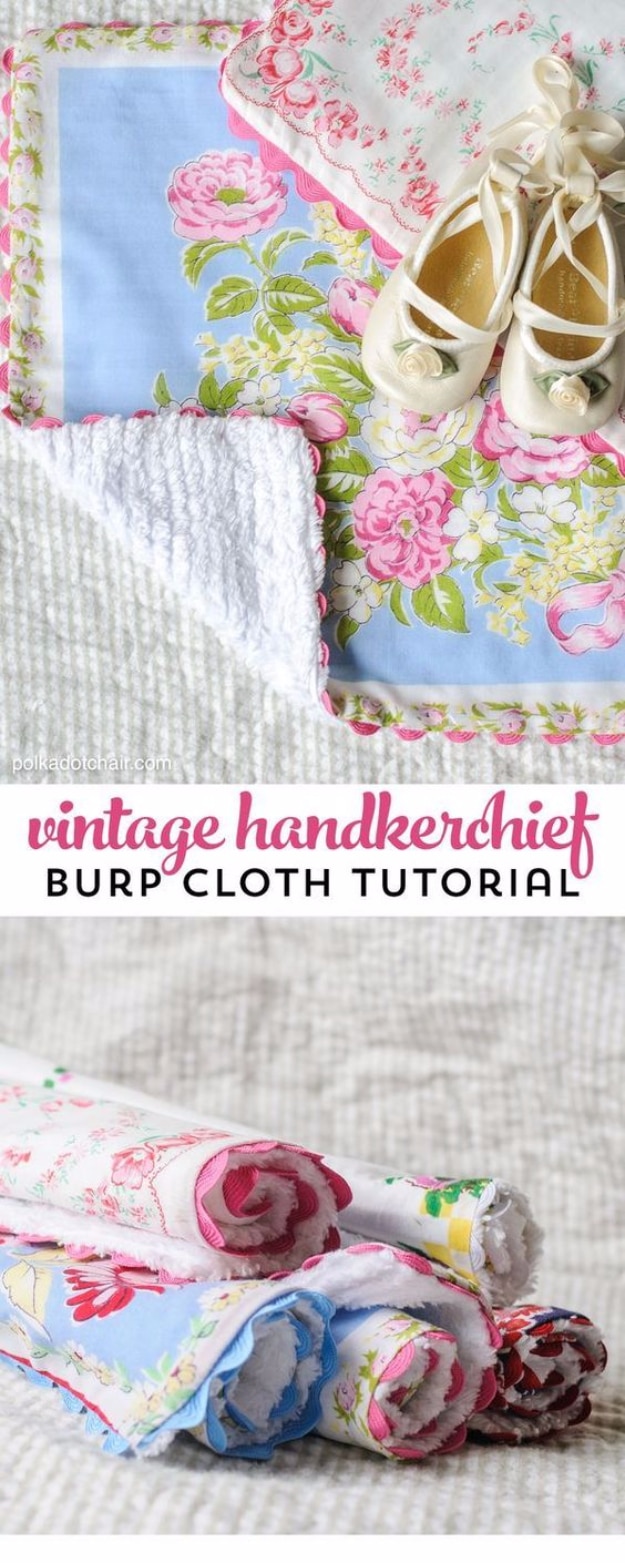
A floral hankie backed with white chenille and trimmed in pink ric rac, which is a far better use for a drawer of inherited handkerchiefs than the drawer. Prewash both, including a run through the dryer, because chenille shrinks and a hankie that has sat folded for fifty years needs it. Cut the chenille to match the hankie, baste the ric rac along the right side edge first, then lay the two right sides together and sew on the ric rac line leaving two inches open. Clip the corners, turn, press and close the gap by hand.
Get the full tutorial at Melissa Mortenson at The Polka Dot Chair.
3. DIY Baby Bibs
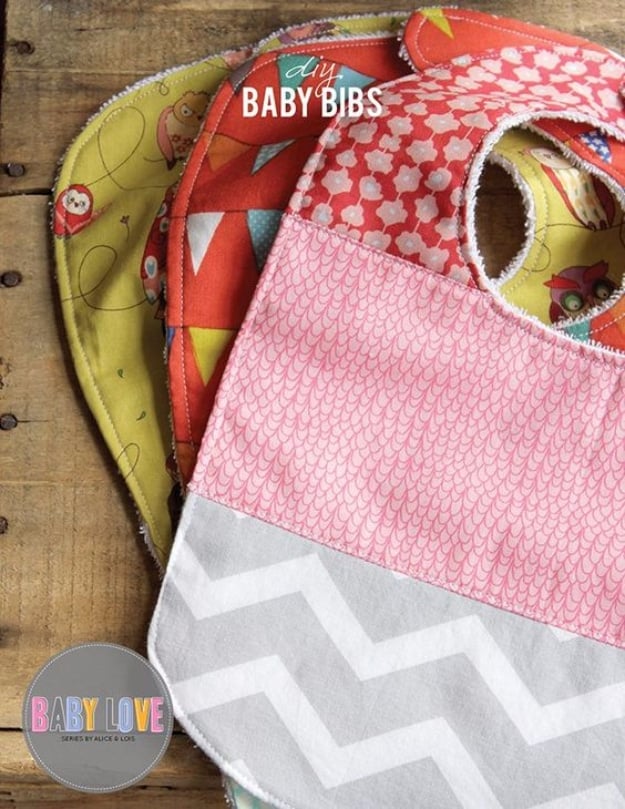
Fifteen by eleven inches of printed cotton, the same in white terry cloth, and iron on velcro at the neck. Cotton on the front and terry on the back is the pairing that matters, because a bib made of two cotton layers just moves the mess around. Sew the two right sides together with a quarter inch seam, leave two inches open at the bottom, turn it through, press and topstitch right round, which closes the gap as it goes. The pattern prints over several pages and tapes together. Old towels work as well as bought terry.
Get the full tutorial at Sara Albers at Alice and Lois.
4. DIY Stretchy Car Seat Cover
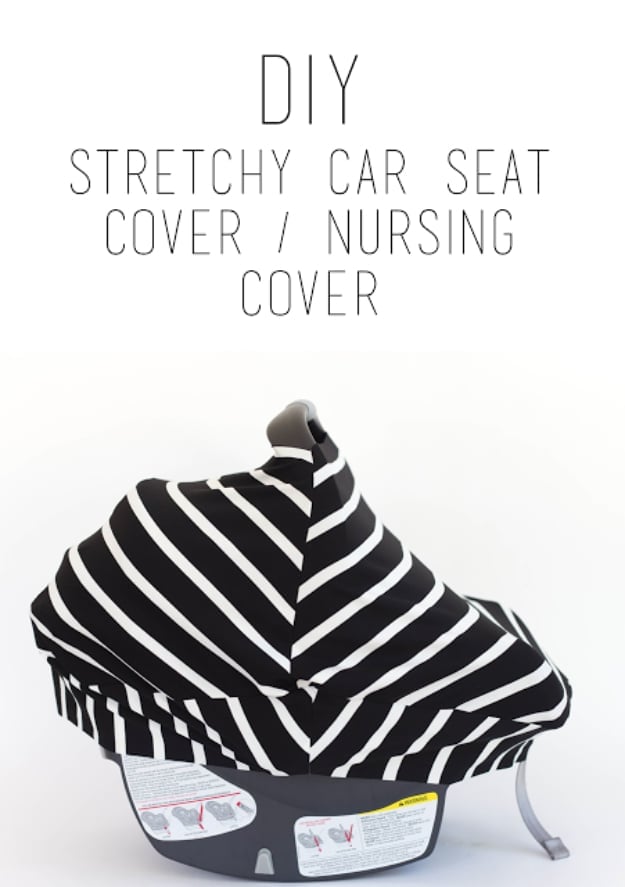
One yard of four way stretch knit, and the fabric choice is the entire project: it has to stretch in every direction to pull over a car seat handle, it has to breathe, and because knit does not fray there is no hemming anywhere. Two pieces, a big trapezoid cut 6.5 inches from the fold by 13 inches long with 45 degree angles, and a band 36 by 5 with a four inch triangle taken out of each end. The top opening finishes around 25 inches. Her own note is that it took several goes to get right, which is fair warning.
Get the full tutorial at Steph at Do It Yourself Divas.
5. DIY Baby Hat
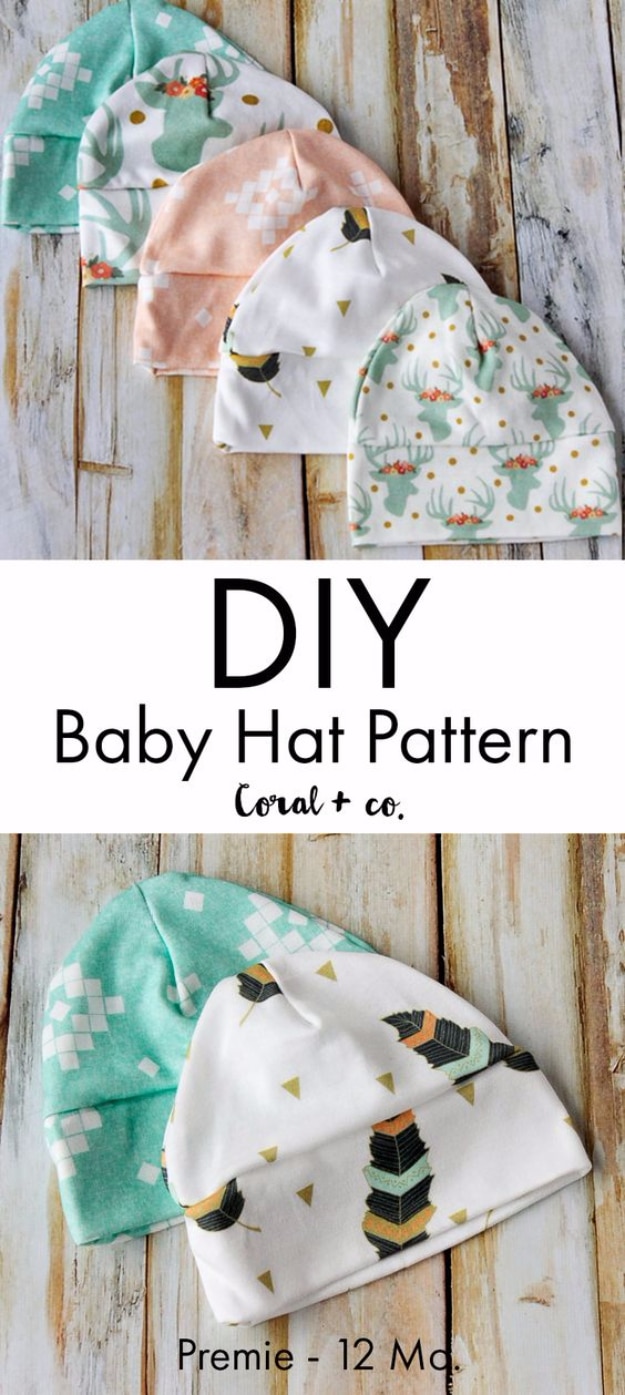
Five hats in mint, blush and white knits with deer, arrows and feathers, and the PDF is free. The sizes run preemie, nought to three, three to six, six to twelve and twelve to twenty-four months, so one download covers a baby right through to a toddler. A quarter yard or a fat quarter makes one, and it wants jersey, interlock or rib with at least 50 percent stretch. The construction is a dart at the crown, a seam, then a cuff attached with a quarter inch seam, and the cuff rolls up for the small sizes. Her sewing notes matter more than the pattern does: a walking foot, stretch thread and a ballpoint needle, or you will get skipped stitches and popped seams.
Get the full tutorial at Shelly at Coral and Co.
6. Changing Pad And Diaper Caddy
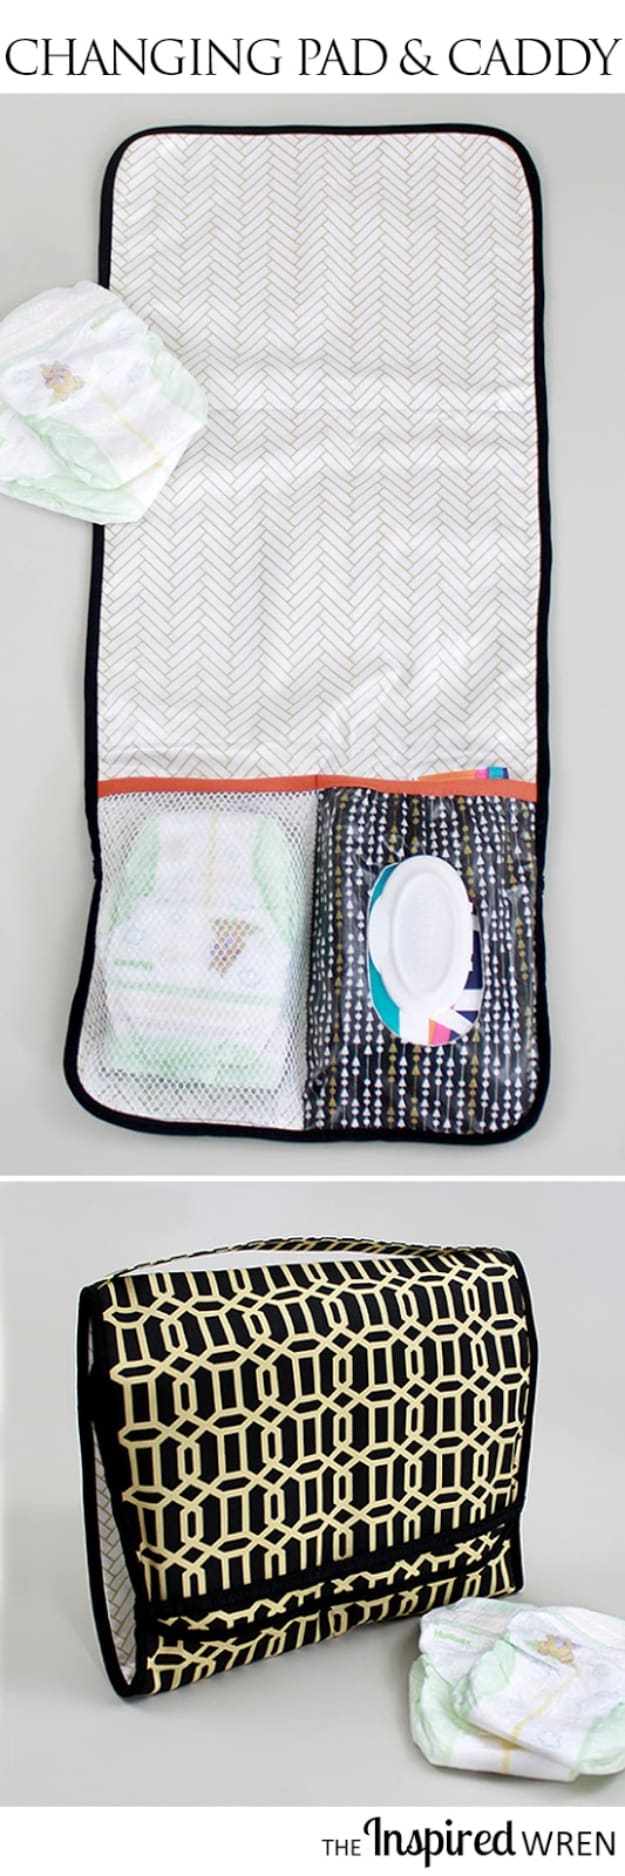
Twelve and a half by thirty-one and a half inches, folding into a clutch with the diapers and wipes stored inside it, so the whole changing kit is one thing you grab. The lining is laminated fabric, which is the point: it wipes down with a disinfectant wipe instead of going in the wash after every accident. Half a yard each of indoor outdoor fabric, laminate and cotton batting, a scrap of utility mesh for the see-through pocket, and about eighty-eight inches of half inch double fold bias tape around the outside.
Get the full tutorial at Ren Murphy at The Inspired Wren.
7. Pillowcase Dress Tutorial
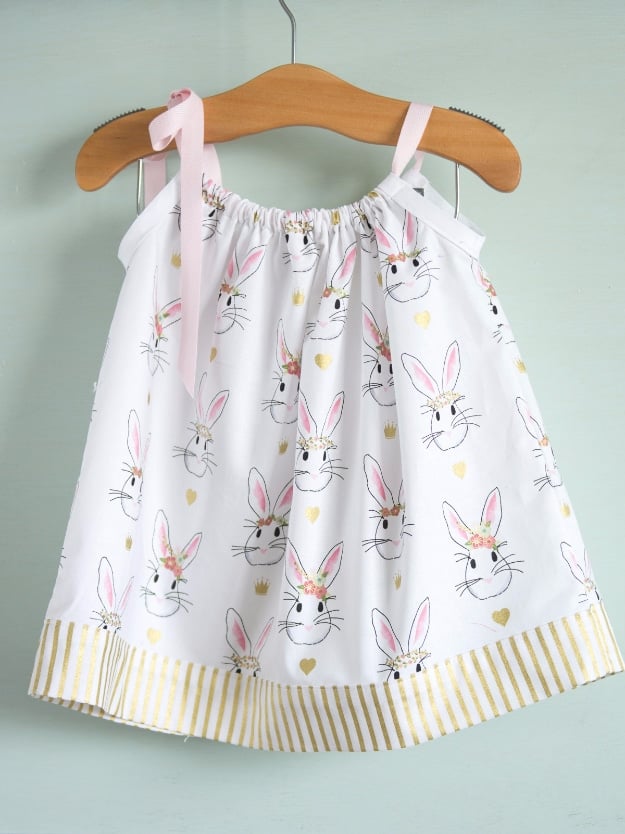
A bunny print dress with a gold striped band at the hem, hanging on a wooden hanger with pink ribbon ties over the shoulders. It is two rectangles and a band, with the armholes cut as a J curve between two and four inches deep depending on size. The neckline is a casing: press the top edge under a quarter inch, fold down three quarters of an inch, press again and thread ribbon through. Her safety point is the one to keep, which is to stitch through the centre back so the ribbon cannot be pulled out by a small person wearing it.
Get the full tutorial at Melissa Mortenson at The Polka Dot Chair.
8. DIY Bandana Bibs
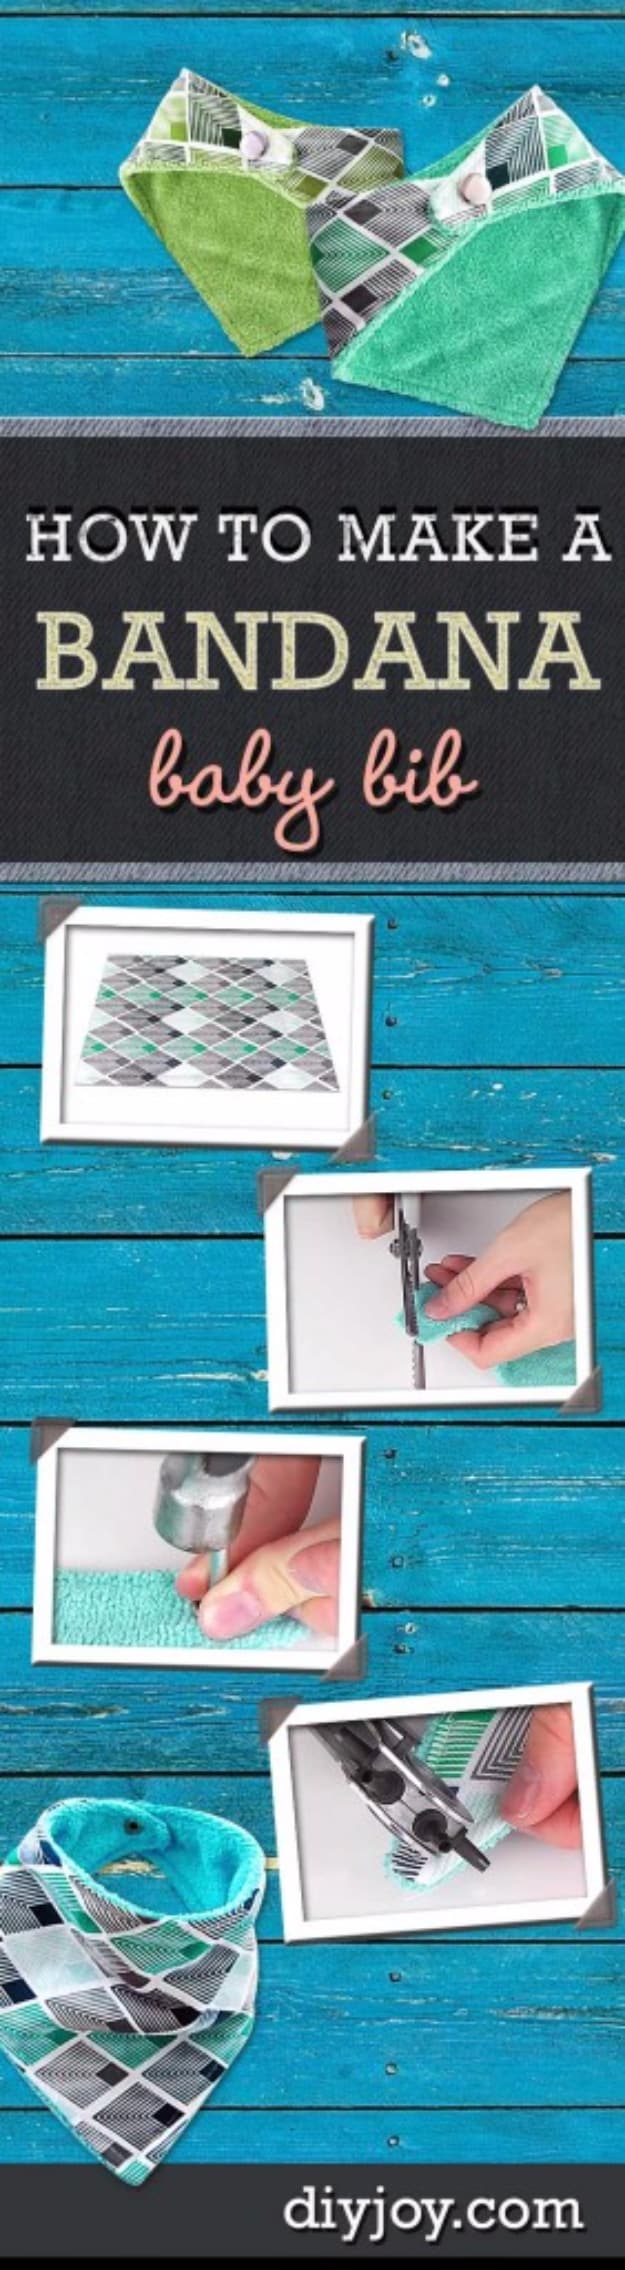
Two fabrics, one for the front and one absorbent for the back, cut as a triangle and closed with a snap, and the one in the photographs uses towelling on the reverse in green and mint. Sew the two right sides together leaving a gap, turn it through so the print faces out, then stitch the gap shut. The snap goes in last with a punch or a hammer, following the packet. Bandana bibs work where a round bib does not because a teething baby soaks the front of every outfit and this one looks deliberate rather than apologetic.
Get the full tutorial at DIY JOY.
9. Boho Baby Romper
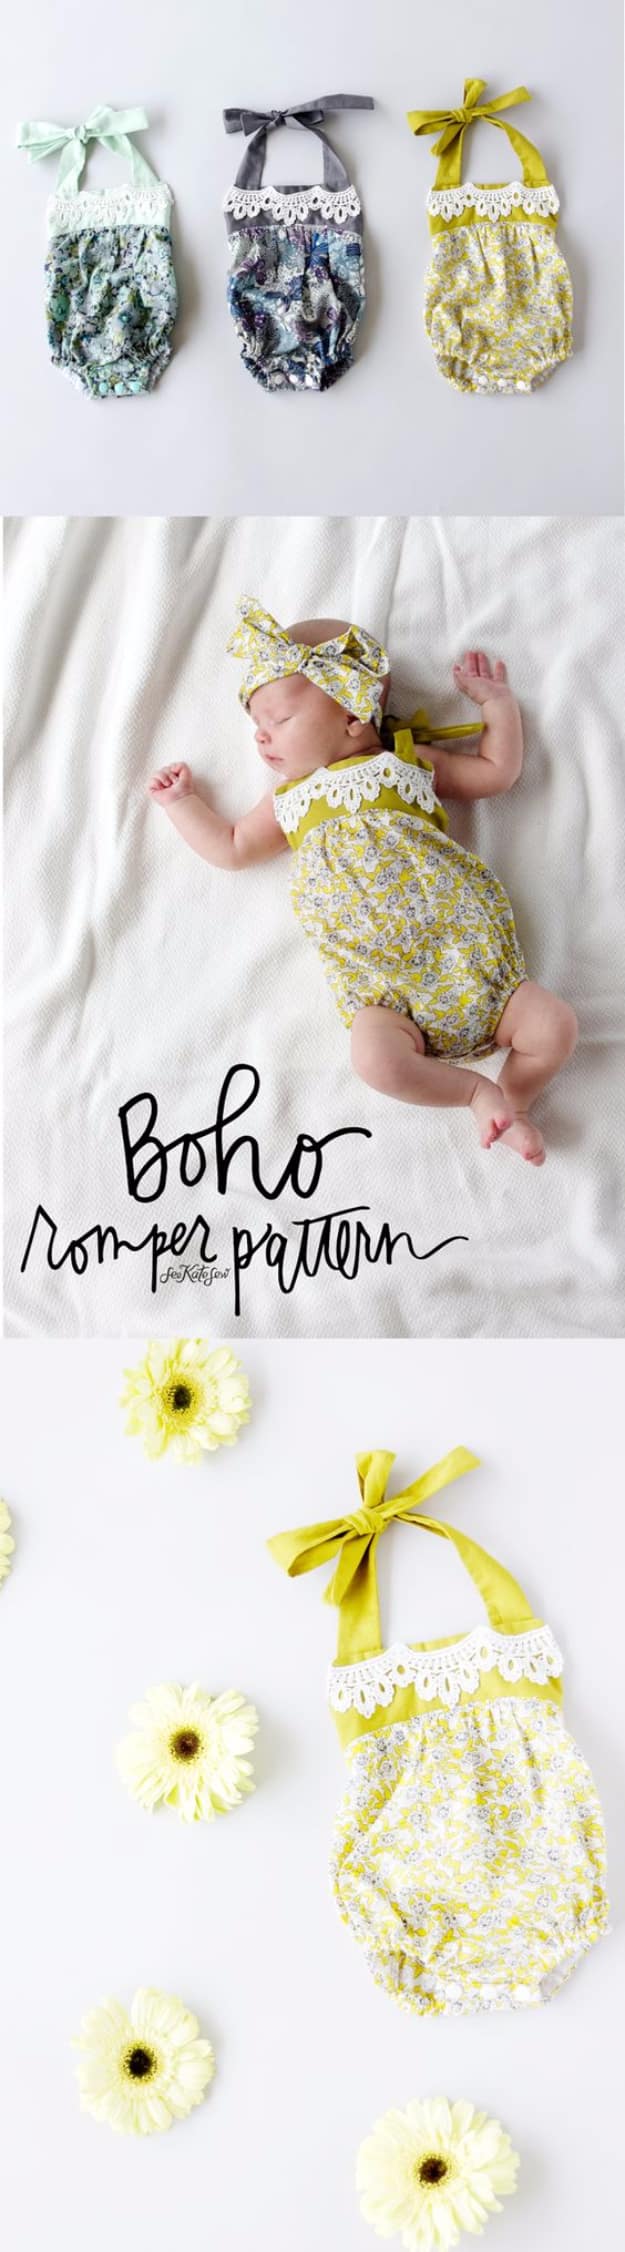
A newborn romper with a lace yoke, a gathered front and back, a halter tie at the neck and snaps at the crotch, made in Liberty lawn with Cotton and Steel solids. Half a yard of main fabric, a quarter yard of contrast, quarter inch elastic, bias tape, three snaps, two and a quarter inch lace and lightweight fusible interfacing. The snap placket is the part worth the effort, because a romper without one has to come off over the head for every nappy change. Elastic finishes the leg openings. The free pattern covers 0 to 3 months only.
Get the full tutorial at Kate at See Kate Sew.
10. Baby Dino Pattern
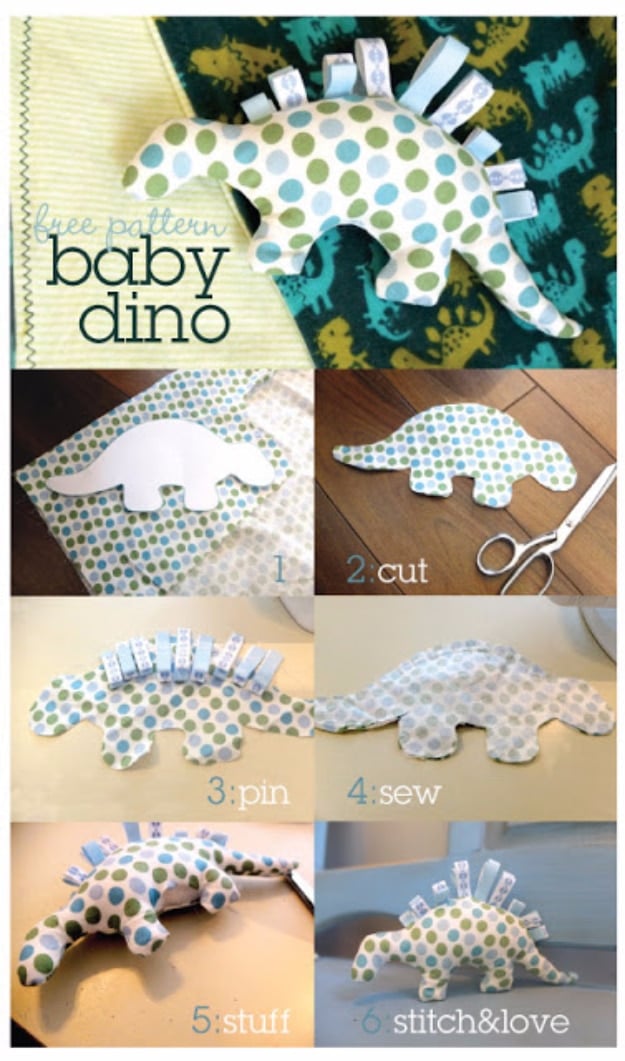
A stuffed stegosaurus in green and blue spots with ribbon tags sewn along its back instead of plates, shown in a six step grid: trace, cut, pin the tags facing inward, sew, stuff, close. Tags are the whole reason a baby loves this kind of toy, and the plates along a dino’s spine are the neatest excuse to fit a row of them anywhere. Fold each ribbon into a loop and pin it pointing inward between the layers before you sew. Commenters suggest sealing the ribbon ends and keeping the loops short so small fingers cannot catch.
Get the full tutorial at Kristen at First Day of Mae.
11. DIY Bedside Pom Pom Rug
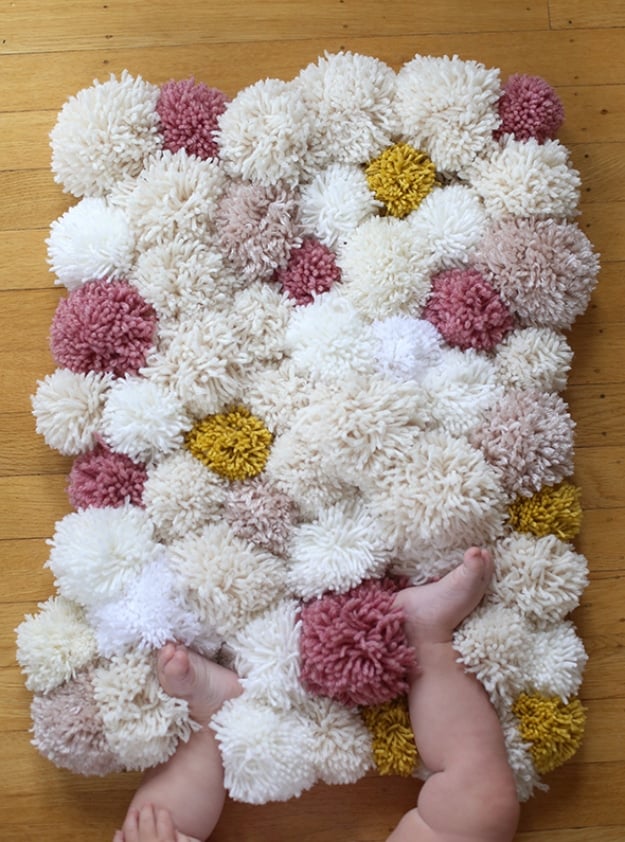
Around sixty yarn pom poms in cream, dusty rose, blush and mustard, packed edge to edge and stitched onto a backing into a rectangle about the size of a bath mat, photographed with a baby standing on it. Pack them tighter than feels necessary, because the gaps show the moment anybody stands on it and the whole charm is that it looks like a cloud. Use a sturdy non slip backing rather than fabric, and stitch each pom through the backing rather than gluing, since glue lets go the first time it gets washed.
Get the full tutorial at Say Yes.
12. Baby Apron Tutorial
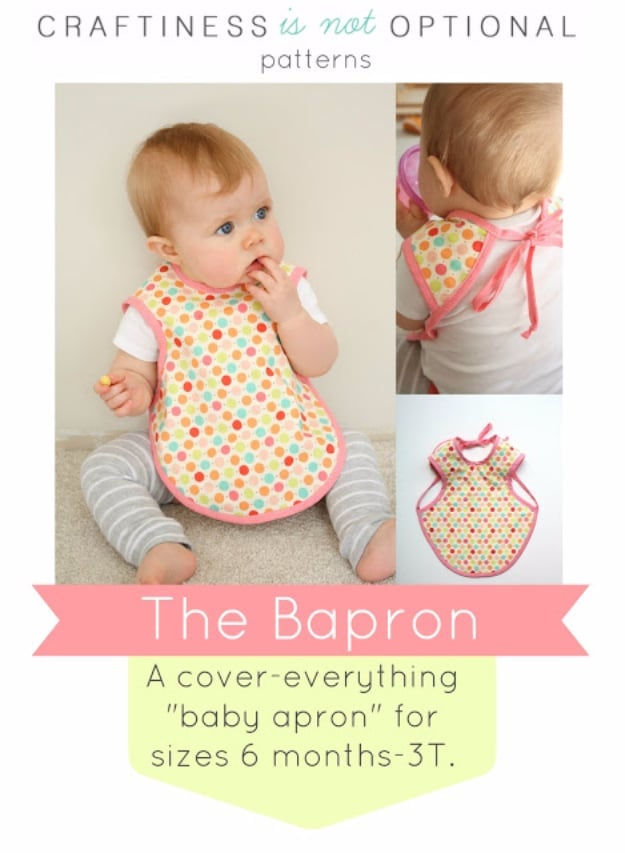
A bapron is a bib with the coverage of an apron, and the reason it beats a velcro bib is that it ties at the back of the neck where a baby cannot reach it. Cotton on the front, flannel on the back, bias tape binding every edge and forming the ties. It is sized from six months to 3T, which covers the entire eating-everything-with-both-hands era. A bias tape maker turns it into a half hour job. Laminated cotton, terry or a PUL backing all work if you want it wipeable rather than washable.
Get the full tutorial at Jess at Craftiness Is Not Optional.
13. Knot Bow Headband
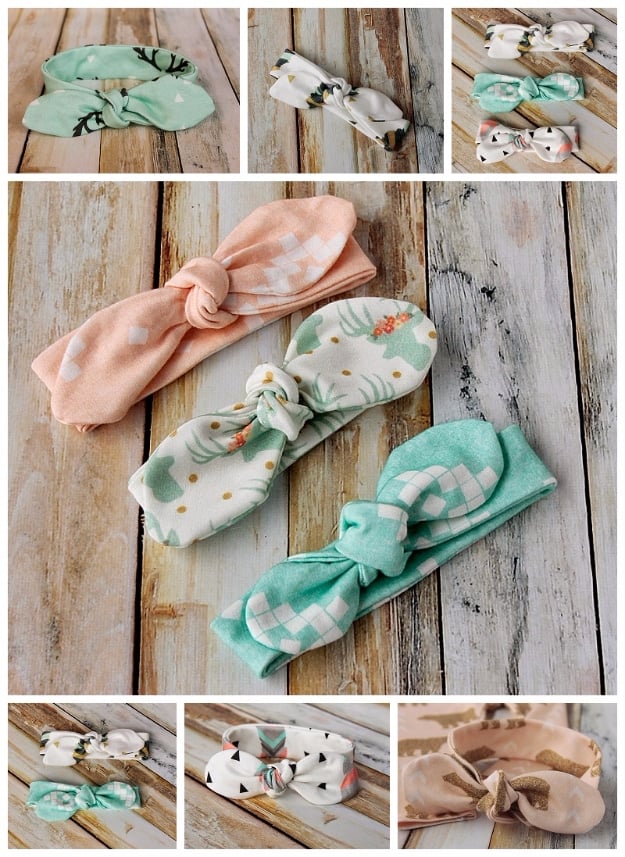
A five by twenty-four inch strip of jersey with at least 50 percent stretch makes one, and the free PDF covers eight sizes from 0 to 3 months right up to adult, in narrow and wide. Fold right sides together, pin the pattern piece, sew round with a quarter inch seam leaving an inch open, trim the bulk, turn it out and slip stitch the gap. Fifteen minutes. A stretch stitch is the detail that matters, because an ordinary straight seam snaps the first time the band is pulled over a head.
Get the full tutorial at Shelly at Coral and Co.
14. Soft Rattle Blocks For Babies
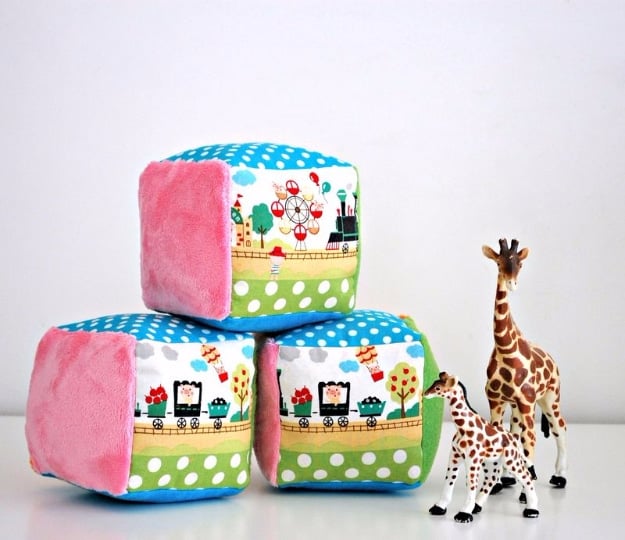
Three fat cubes with pink minky on two faces and a fairground print band around the middle, photographed with a pair of toy giraffes for scale, so they are roughly a hand span each. A rattle block is the toy a baby reaches for first because it makes a noise when it moves and it is soft enough to be waved about. Put the rattle insert in a sealed container inside the stuffing rather than loose, and top stitch the closing seam properly, since this is a toy that will be chewed along every edge.
Get the full tutorial at While She Naps.
15. Baby Snuggler And Burper
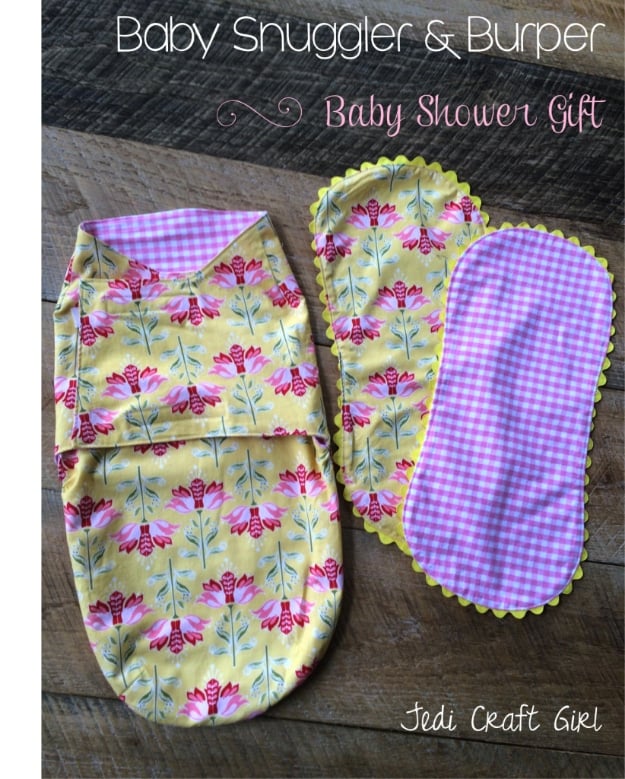
A velcro swaddler with a foot pouch and two matching burp cloths trimmed in yellow ric rac, from one yard of outer fabric and one yard of minky. A swaddler with velcro rather than a wrapped blanket is the version that survives a baby who kicks, and the foot pouch is what stops the whole thing unravelling at the bottom. Her warning is about the pattern rather than the sewing: it prints across several pages and taping them up accurately is the fiddly part. Top stitch everything, and use the leftovers for the burpers.
Get the full tutorial at Amanda at Jedi Craft Girl.
16. Baby Hat With Teddy Bear Ears
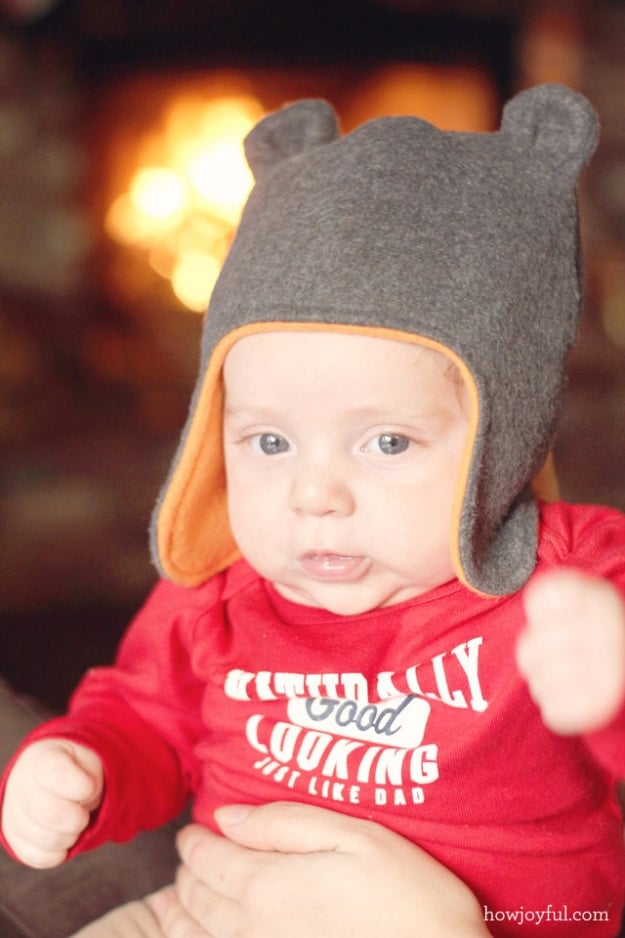
Half a yard of fleece, a pair of ears and sixteen steps, with a low cut back that covers the neck and ear flaps that come down over the sides. Fleece is the right material because it does not fray and it holds the ear shape without any interfacing. She sized it by measuring her own baby’s head rather than trusting a chart, and recommends adding a quarter to half an inch across the pattern for growing room. The ears are sewn right sides together, turned, then caught between the outer and lining layers before the two are joined.
Get the full tutorial at Joy Kelley at How Joyful.
17. Ruffle Bonnet Tutorial
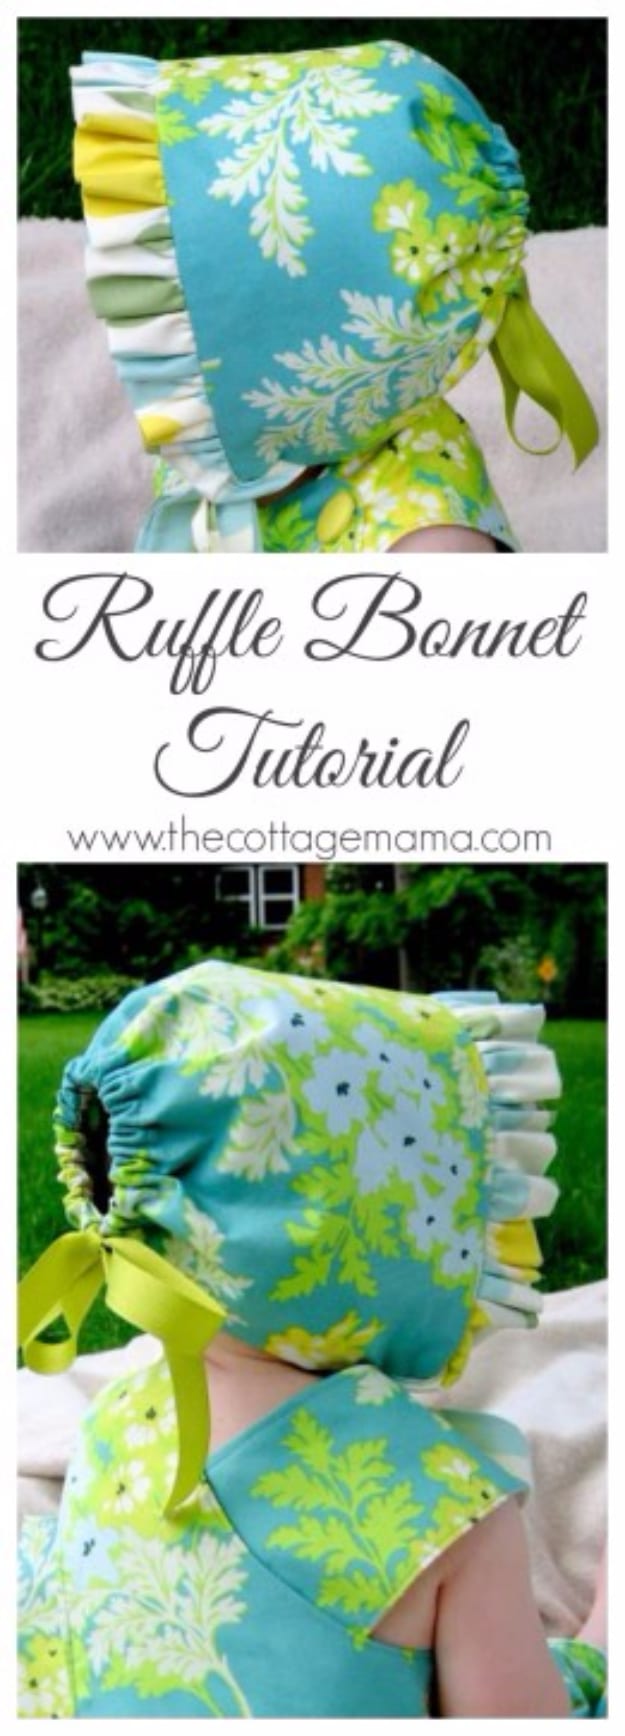
Two rectangles at seventeen and a half by seven inches for the outside and lining, the same again in lightweight interfacing, a forty-three by three inch strip folded and gathered down to seventeen and a half for the ruffle, and two nineteen by two inch strips for the ties. One size fits six months to three years because a ribbon through a bias tape casing at the back cinches it to the head it is on. Made in two coordinating prints it is reversible, which is two bonnets for the work of one.
Get the full tutorial at Lindsay Wilkes at The Cottage Mama.
18. Easy DIY Baby Swaddle Blanket
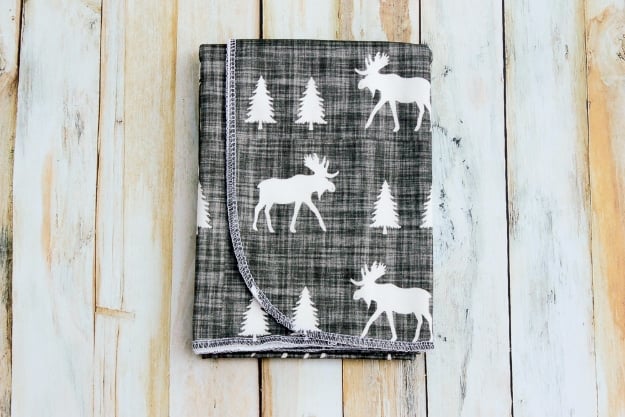
One yard of jersey or interlock knit, zigzagged round all four edges, finished about forty by forty inches, and she times it at ten minutes. Knit rather than woven cotton is the point of it: it has a little give, so a wrap stays snug without being tight, and it breathes, which matters for a baby who cannot kick a blanket off. The zigzag stitch replaces hemming entirely because knit does not fray. Use a ballpoint needle or you will get skipped stitches all the way round. Oversized on purpose so it still works at six months.
Get the full tutorial at Shelly at Coral and Co.
19. DIY Hooded Bath Towel
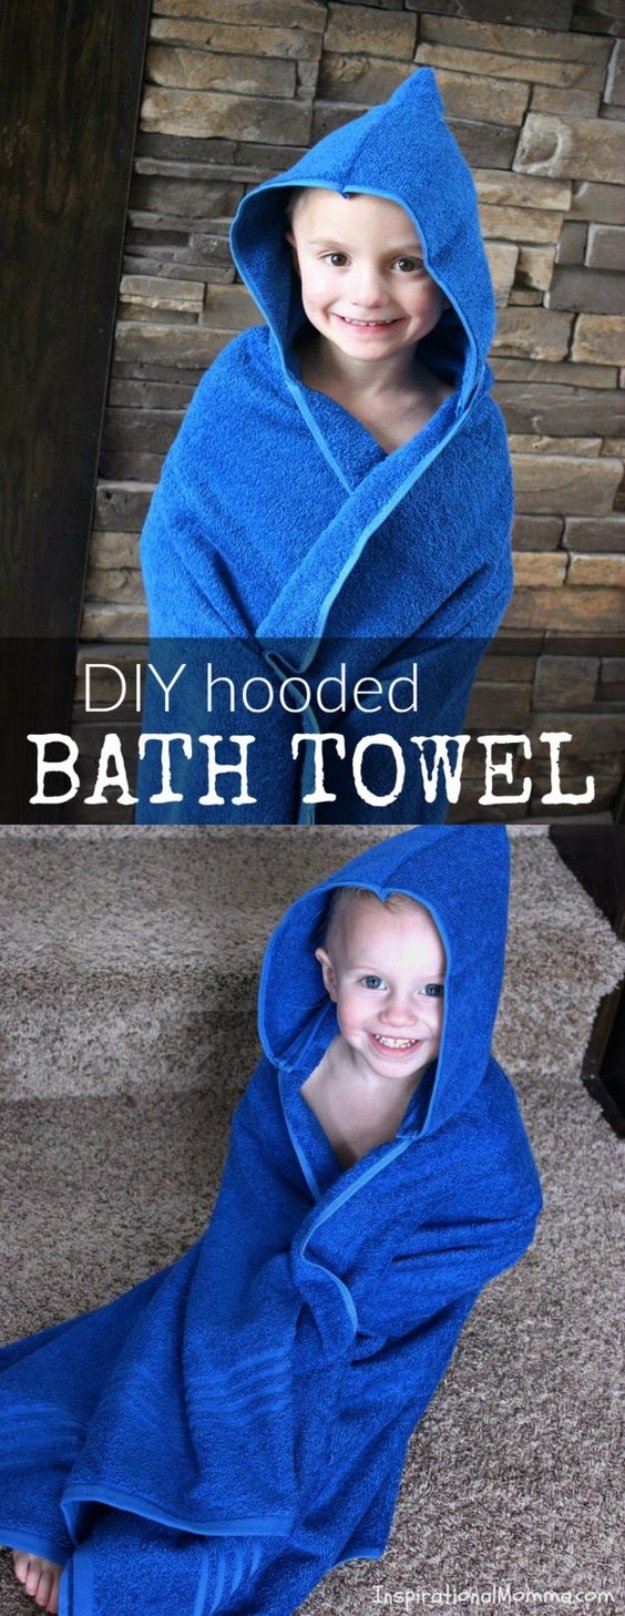
Two bath towels and one hand towel make two hooded towels, and the hood is half the hand towel folded lengthwise with about two inches trimmed off so it is not comically large. Sew the folded edge to close the top of the hood, turn it out, then pin it centred on one short edge of the bath towel and sew that seam. Two seams, and it is done. A bath towel is the right size for a toddler rather than a newborn, and a full size one is what the child will still want at five.
Get the full tutorial at Tanille at Inspirational Momma.
20. Crossover Baby Bib

Four pieces of fabric at nine inches tall by eight wide make one reversible bib finishing around seven and three quarter by eight and a half, plus about two yards of bias tape. The crossover is the whole design: two front pieces overlap at the top and the bias tape binding round the curve continues out into twelve inch neck ties, so there is no velcro, no snap and nothing to go through a washing machine badly. Because you cut all four layers at once, a bib can use four different prints and still take one pass of cutting.
Get the full tutorial at So Sew Easy.
21. Baby Hat With Chin Strap
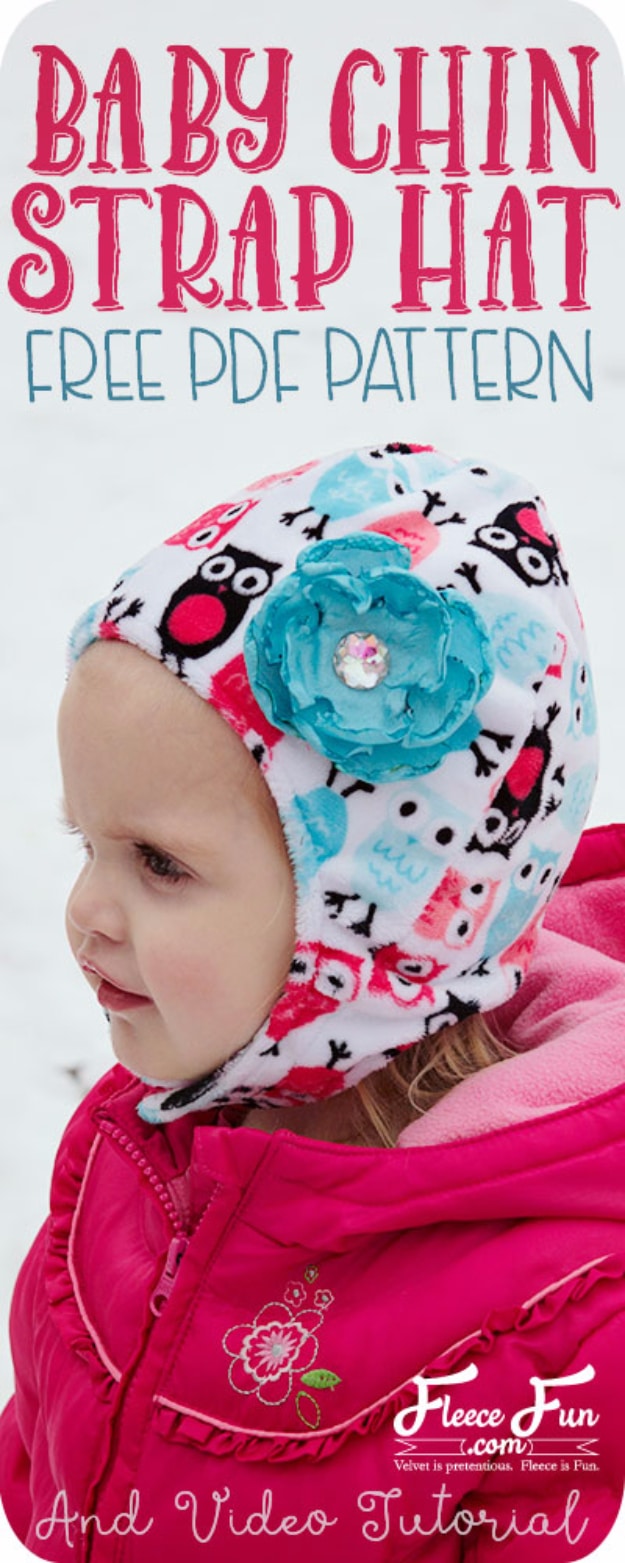
Half a yard of cuddle fleece, two to three inches of sew-on velcro and a free PDF in four sizes from three months to three years. The chin strap is the whole reason to make this one rather than a beanie, because a hat a baby cannot pull off is a hat that is still on when you get home. It is reversible, so two fleeces give you two hats. Use a 90 jersey ballpoint needle for the curved seams and keep a lint roller next to the machine, because cuddle fleece sheds everywhere while you cut it.
Get the full tutorial at Angel Hickman Peterson at Fleece Fun.
22. Easiest Burp Rags To Sew
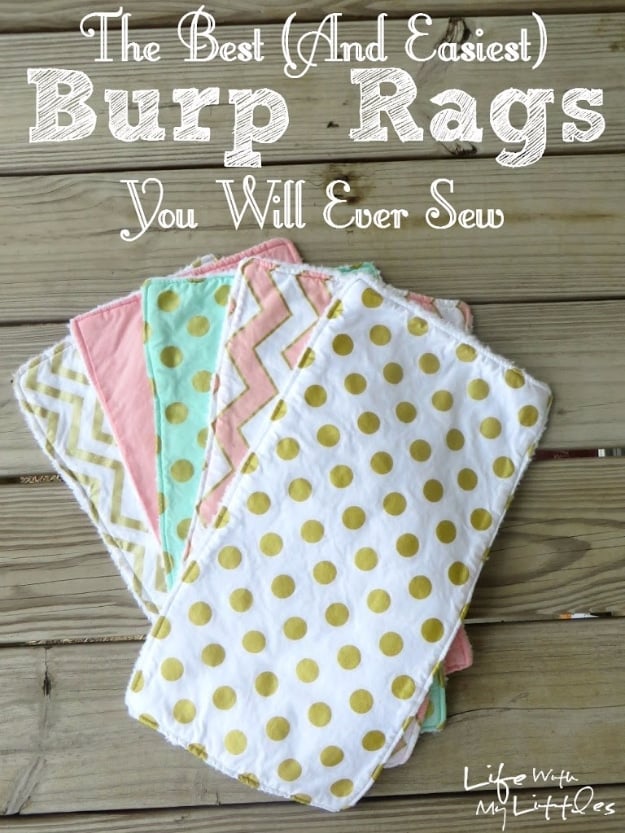
Ten by eighteen inch rectangles, one in minky and one in cotton, sewn right sides together with a half inch seam leaving an inch open, turned and topstitched right round, which closes the gap as it goes. Ten minutes each and a third of a yard of each fabric makes two. Prewash both, since minky and cotton shrink at different rates and a cloth that ripples after its first wash is a cloth nobody reaches for. Hers went through eight months of one baby and then came back out four years later for the next one.
Get the full tutorial at Chelsea Johnson at Life With My Littles.
23. Hooded Baby Towel
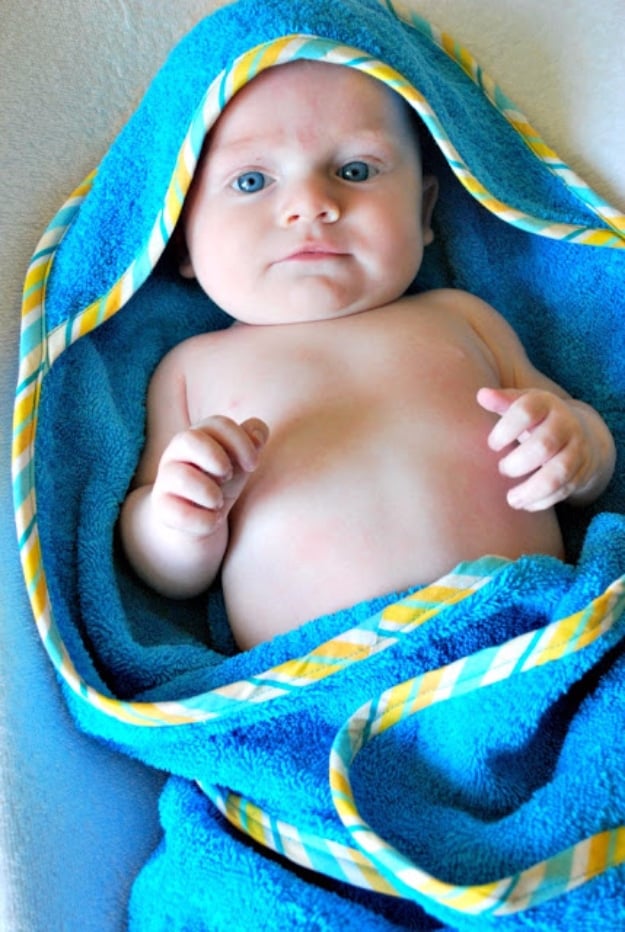
A teal towel with a striped yellow and blue binding running round the hood opening and the outer edge, wrapped around a newborn. One bath towel makes one hooded towel, which is the neat part of it. Fold the towel lengthwise, cut both ends off, and the longer offcut becomes the hood. Her main piece runs twenty-nine inches and the hood finishes about six and a half inches deep, with the corners rounded off round a plate. Bias tape binds the hood edge first, then runs right round the towel, tucking the hood binding in as it passes.
Get the full tutorial at Larissa at Just Another Day in Paradise.
24. No Scratch Baby Mittens
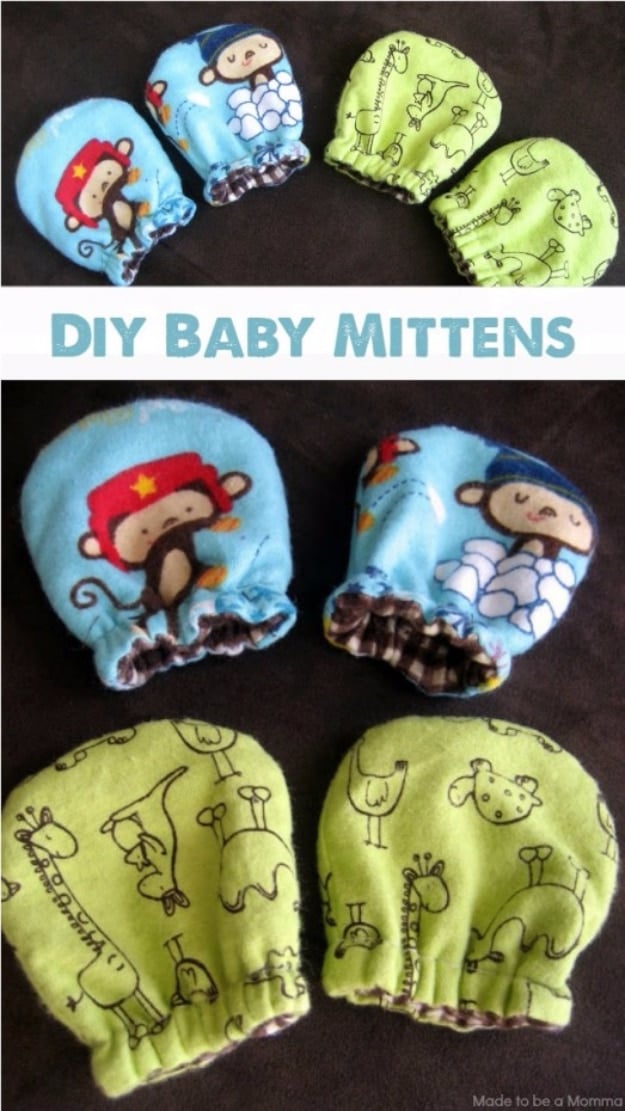
Four mittens in monkey print flannel and green giraffe flannel, each with a contrast cuff gathered on quarter inch elastic so it grips a wrist without leaving a mark. One fat quarter of main fabric and one of lining make several pairs, with two four inch lengths of elastic to a pair, so this is a project for the flannel left over from something else. Read her sizing note before you cut, because these fit best from about six months and a newborn pair wants the whole mitten an inch smaller all round.
Get the full tutorial at Katie at Made To Be A Momma.
25. Tiered Pillowcase Dress
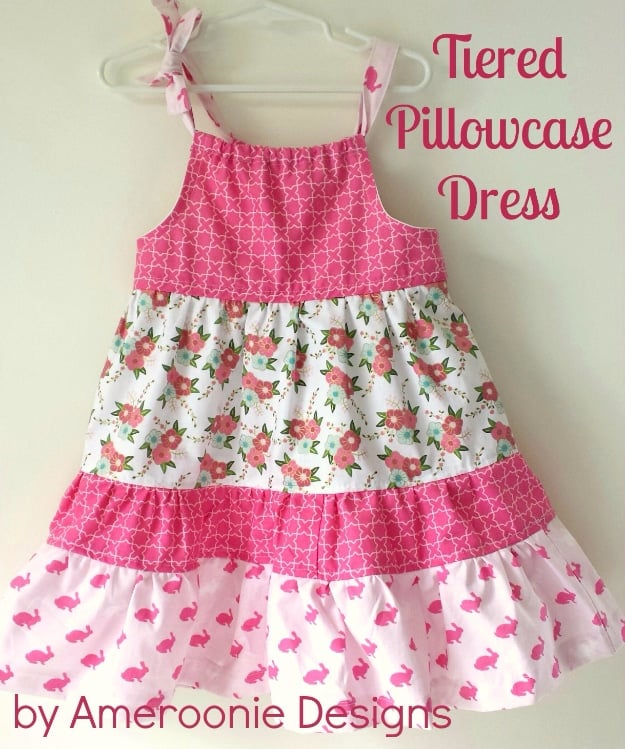
Three gathered tiers, pink quatrefoil at the top, a floral middle and a bunny print hem, with tie shoulder straps. The proportion rule is the thing worth stealing: each tier is one and a half times the width of the one above it, so a size eight runs fourteen inches, then twenty-one, then thirty-two. Tier heights on that size are nine, eleven and eleven. Gather only the top edge of each tier with two rows of stitching, pull the threads and pin it to the tier above. Bias tape finishes the armholes and a sash goes through a casing.
Get the full tutorial at Amy of Ameroonie Designs, guest posting at The Polka Dot Chair.
26. Baby Changing Mat
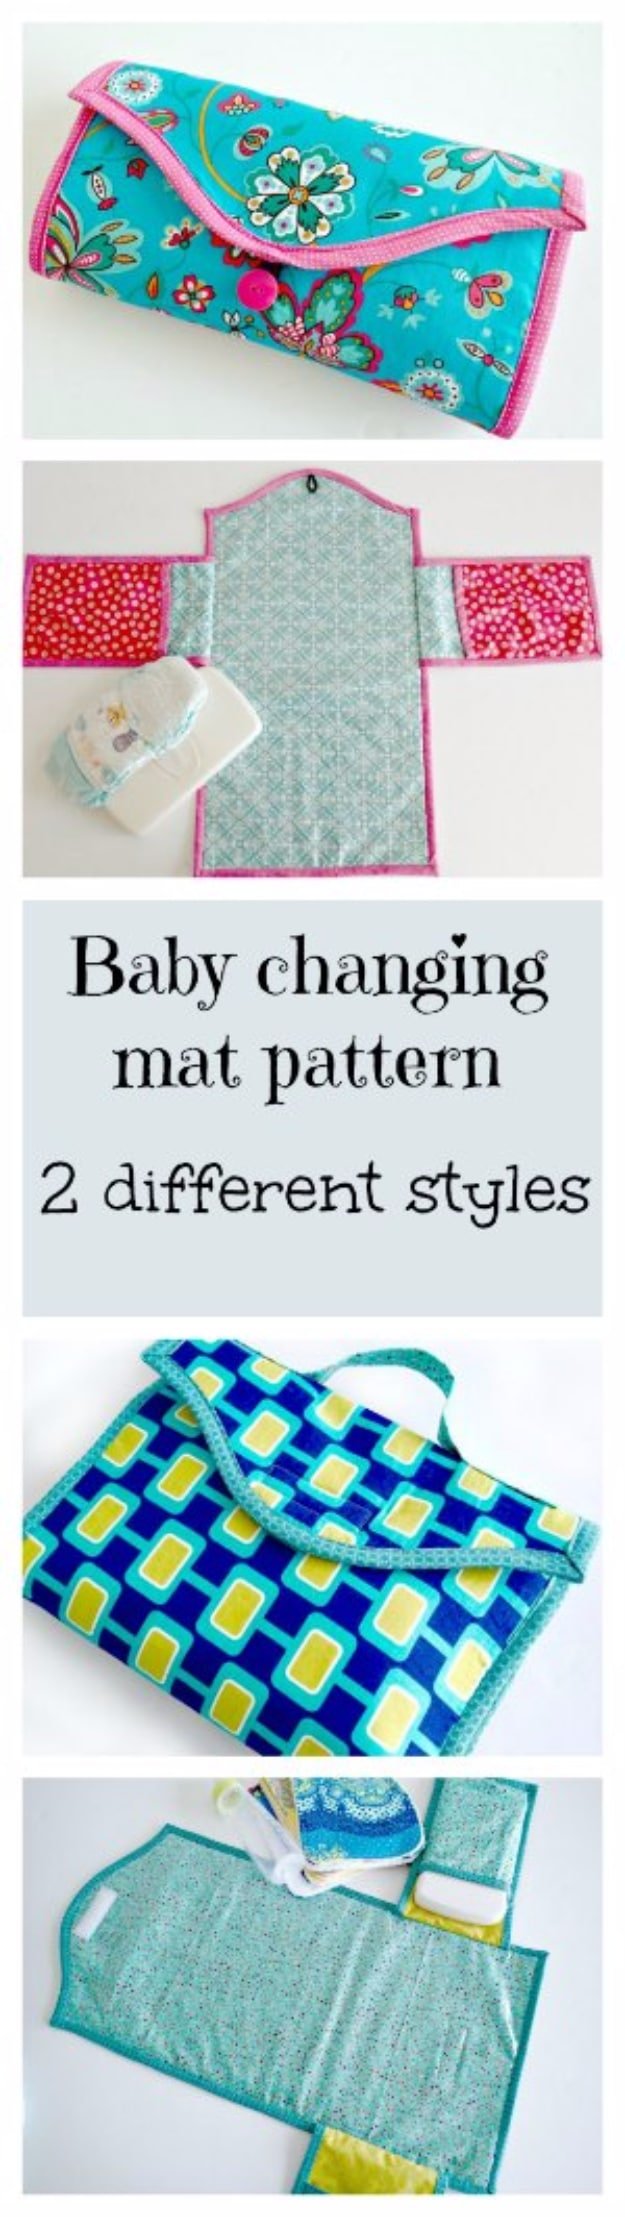
Twelve by twenty-four inches before shaping, one yard of fabric total, and a free PDF with two versions: a satchel with a carrying handle and pockets two inches up from the bottom, or a clutch with the pockets three inches down from the top corners. The optional twelve by twenty-four inch piece of vinyl is what makes it wipeable, and low loft batting or fusible fleece gives it enough padding to use on a hard surface. About four yards of bias tape goes round it, or one fat quarter if you make your own.
Get the full tutorial at Mayra at So Sew Easy.
27. Mermaid Baby Gown
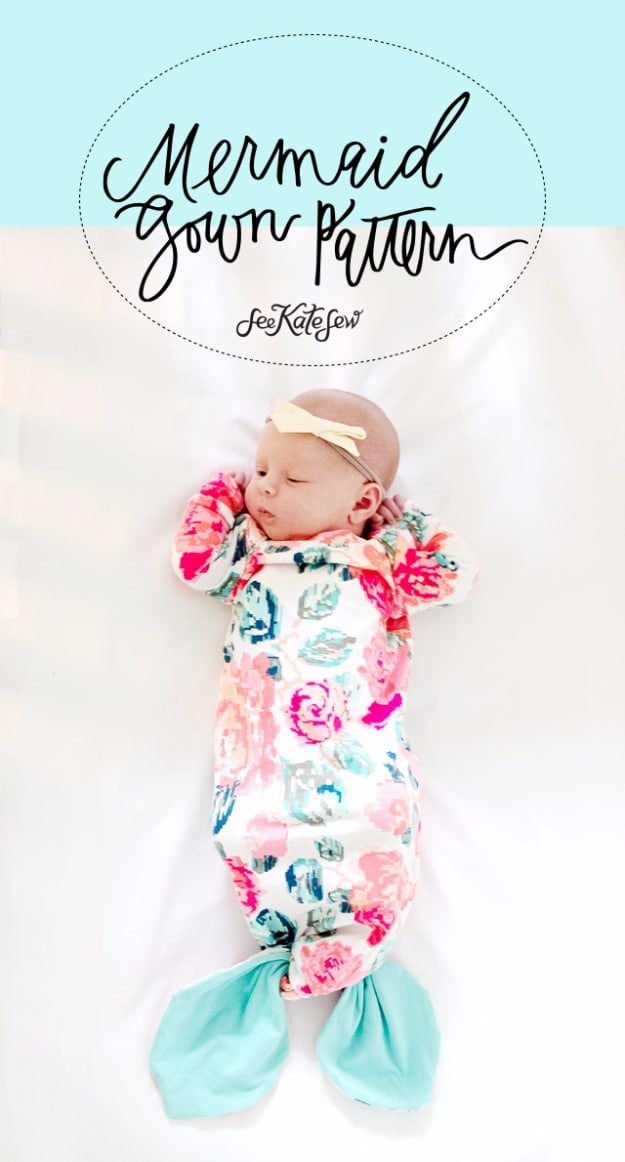
A knit gown with a floral bodice and a contrast aqua tail knotted at the bottom, sized newborn to 18 months. One yard of knit plus a quarter yard of contrast for the tail, sixteen inches of half inch elastic if you make the plain gown version instead. A gown rather than a sleepsuit is the sensible newborn choice because there are no poppers to line up in the dark. Three eighths inch seam allowance, a stretch or zigzag stitch throughout, pinking shears on the seam finishes, and press the tail lining well after turning it.
Get the full tutorial at Kate at See Kate Sew.
28. Free Footed Baby Pants

Footed pants for a six to ten pound newborn from a free PDF, in four way stretch knit with at least 50 percent stretch, French terry being the suggested fabric. Half a yard makes several pairs. Six steps: foot pieces onto the leg fronts, front and back seams, the crotch, the soles, then a one inch elastic waistband cut at fourteen inches. The ankle curve has to stretch to meet the foot piece, which is the step people get wrong. Three eighths inch seam allowances, a serger or a long zigzag, and a ballpoint needle throughout.
Get the full tutorial at Abby at Sew Much Ado.
29. Baby Changing Pad
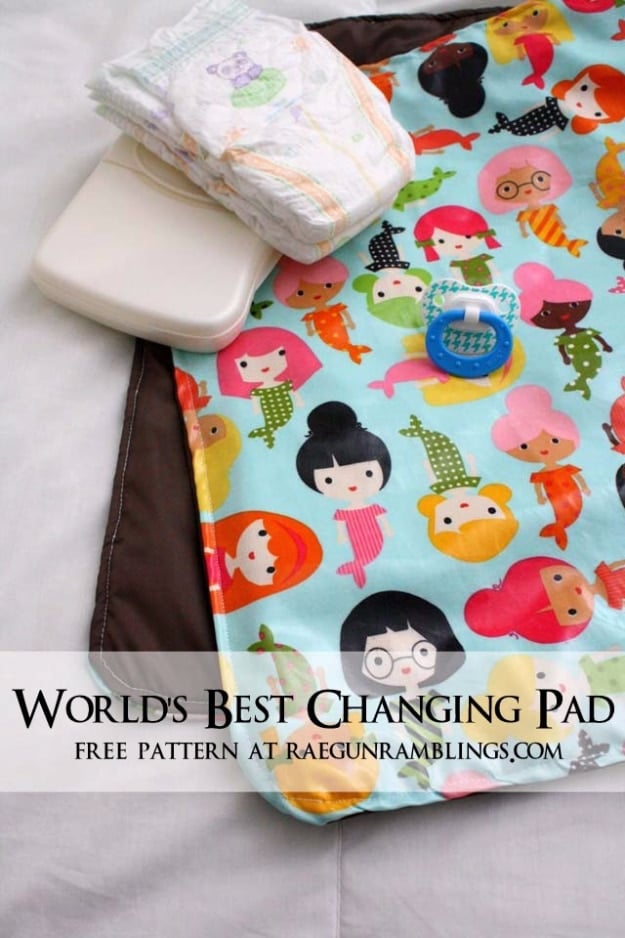
Four layers at twenty-eight by twenty inches each: laminate on the back, two of ripstop in the middle and thin terry on top, with rounded corners traced round a plate. Stack them with both ripstop pieces at the bottom, the laminate face down and the terry on top, sew right round leaving four inches open, turn it out, press on medium heat and topstitch a quarter inch from the edge to close the gap. Worth knowing before you buy: ripstop is water resistant and PUL is genuinely waterproof, and the difference shows up at the worst moment.
Get the full tutorial at Marissa at Rae Gun Ramblings.
30. Super Absorbent Homemade Bibs

Three layers, and the reasoning behind each one is the whole tutorial: jersey knit on the front absorbs fast, microfiber terry in the middle holds the volume, and cotton on the back keeps the shirt underneath dry for a while at least. Snaps rather than velcro. Trace a template from a bib you already own and like, folded in half so it comes out symmetrical. Leave the turning gap at the neck rather than the bottom edge, which is the tip worth keeping, because a closed seam at the neck is hidden under a chin.
Get the full tutorial at Kelli at The Willow Market.