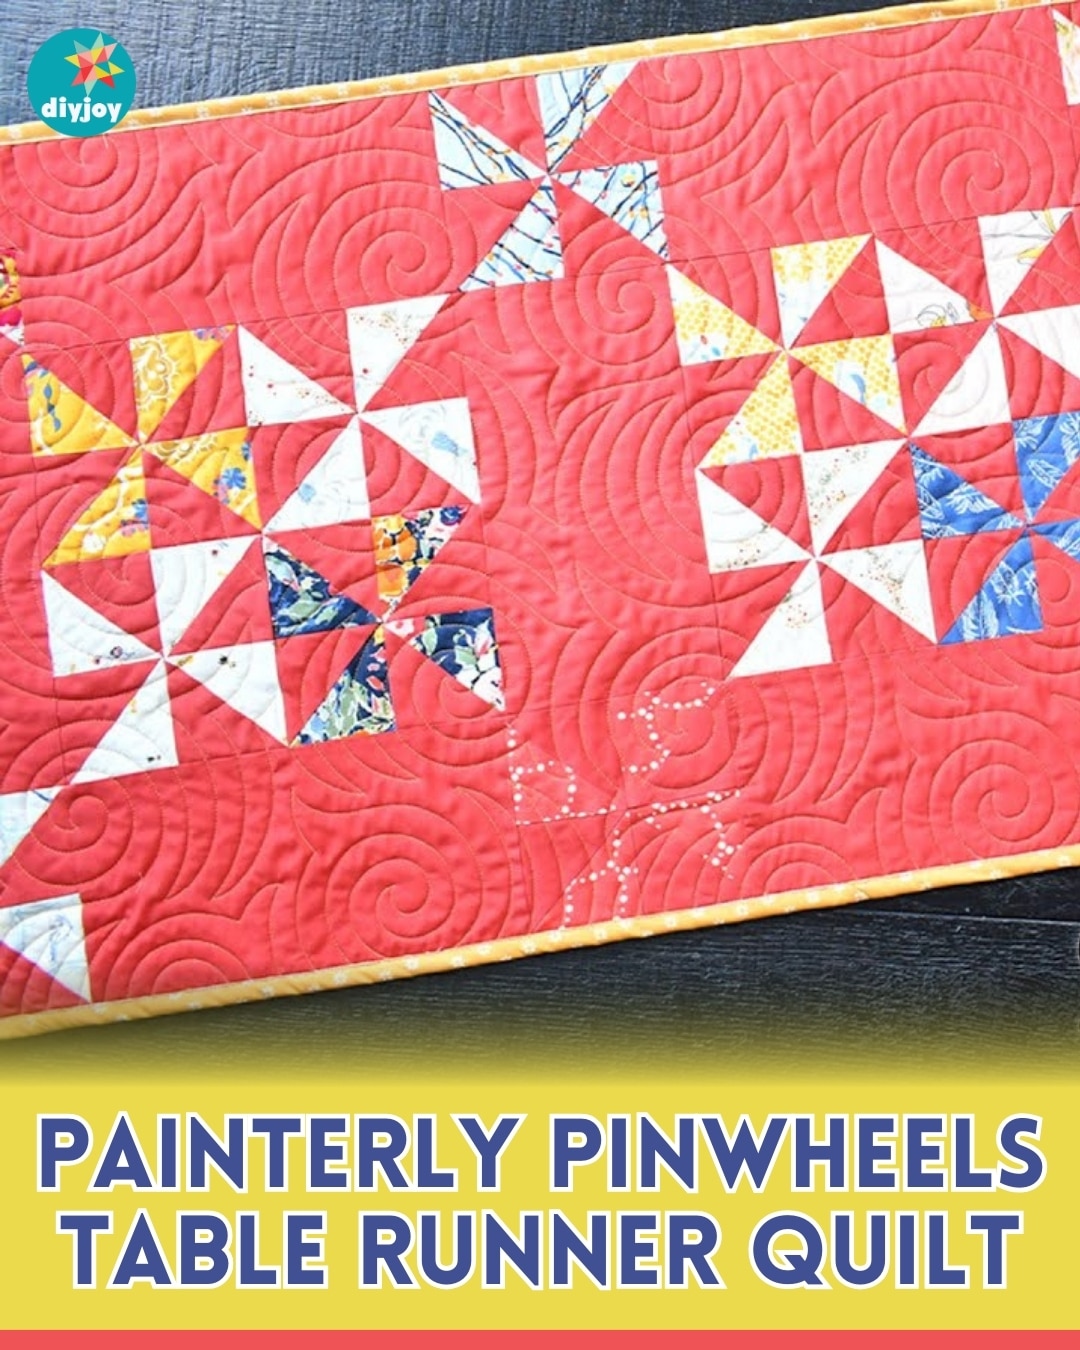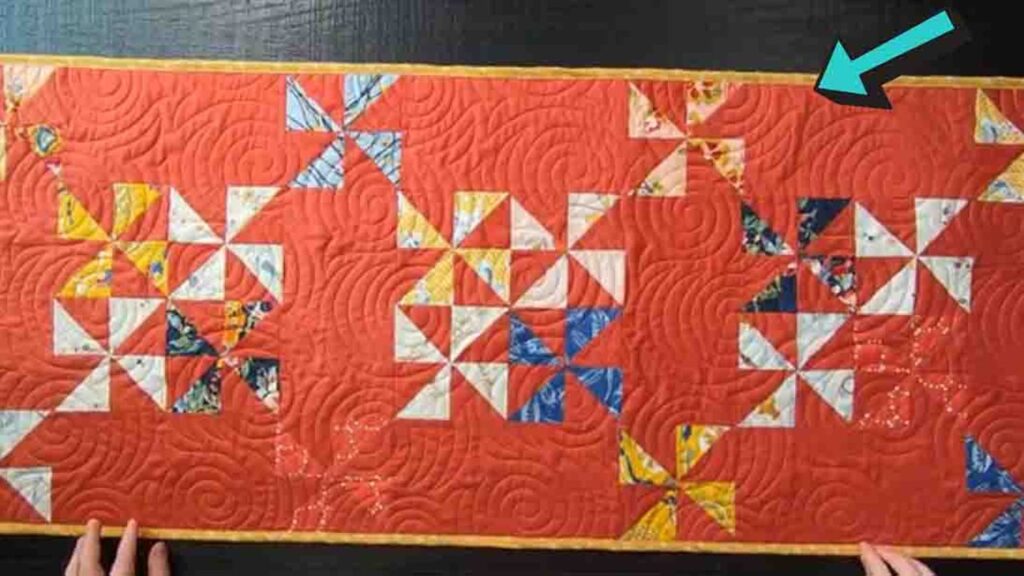
Are you looking for your next quilt project? I highly recommend this painterly pinwheel table runner from Moonkin Stitchery on YouTube. It’s a classic pattern that looked great whether on lap quilts or table runners, like this one. It’s easy to make, I bet you can finish it in just a day.
RELATED: Disappearing Pinwheel Quilt With Jenny Doan
In this step by step instructions, Moonkin Stitchery will teach you how to make this gorgeous table runner using only a charm pack and a background yardage. It’s pretty quick and easy, and perfect if you’re saving a stash of beautiful patterns of charm packs. Watch the video tutorial below to learn how to make it.
Materials:
- charm pack
- 3/4 of a yard (background)
- ruler
- rotary cutter
- cutting mat
- sewing machine
Directions:
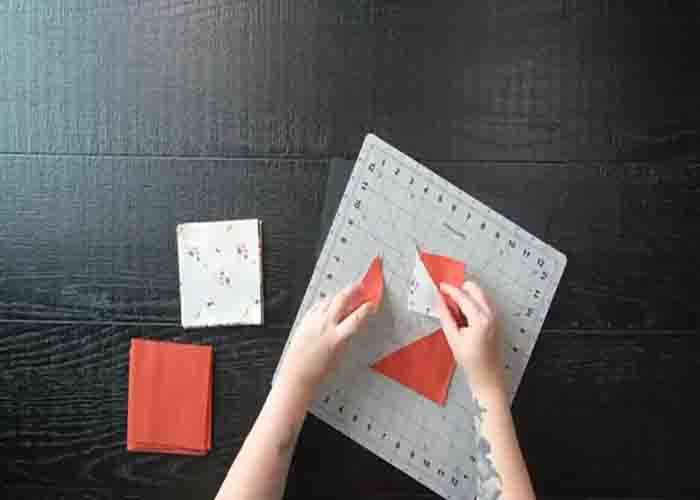
Step 1
To start, choose twenty 5″ squares from your charm pack, then take your background yardage and cut twenty 5″ squares. Next, place them right sides together, the printed square at the bottom, then sew all around the edge with a 1/4″ seam allowance. After this, take your ruler and cut a 45-degree line twice in opposite directions, creating four half-square triangles. With those half-square triangles; create a pinwheel block. Sew the blocks together to form rows, then sew those rows together to complete your pinwheel block (should measure 5 1/2″). Repeat these steps for all twenty print and background squares until you have twenty pinwheels.
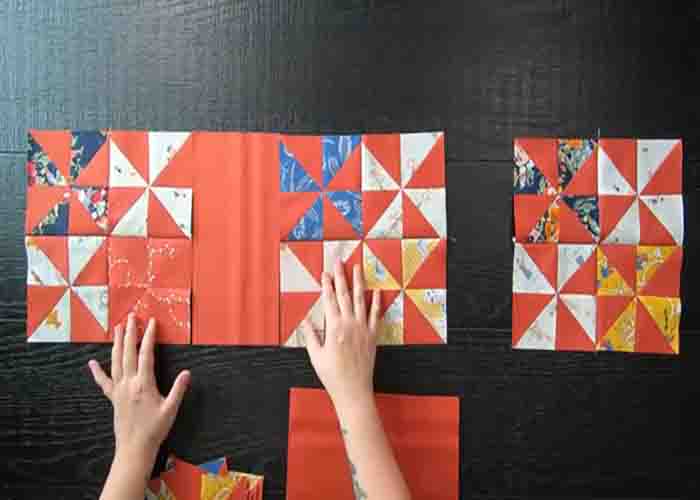
Step 2
Once done, take four pinwheels and make a large block. Sew those together to complete a 10 1/2″ square. Repeat this step until you have made three larger quilt blocks. Lastly, with the remaining background yardage, cut ten 5 1/2″ x 10 1/2″ rectangles. Now, it’s time to lay the table runner. With those larger rectangles; place them in between the larger pinwheels as sashing. Then, use it again like a sashing, all around the table runner. Use your smaller pinwheels, and use them like cornerstones. Sew all the blocks together to form rows, then sew those rows together to complete the table runner.
Painterly Pinwheels Table Runner Quilt Tutorial