No sewing machine? No problem. These 25 no sew fashion ideas use scissors, fabric glue, a hot glue gun and a few clever knots to make real clothes and accessories. Old t-shirts do a lot of the work here: they turn into a kimono, a five minute skirt, an infinity scarf, a criss cross back tee and a bow back tank. A cozy blanket becomes a belted cape, a maxi skirt becomes a slip dress and a thrifted sweater becomes a slouchy beanie. For accessories there are wire headbands, rose petal headbands, giant fabric bows, a leather hair tie and a clutch made from a round placemat. A DIY JOY original with a video tutorial joins in too: a woven hair tie headband. Grab an old tee and start cutting.
1. DIY Kimono From A Shirt

An oversized t-shirt turns into a breezy kimono in about an hour, plus glue drying time. Cut straight up the center of the front layer only, collar included, then sketch a curved neckline and trim the collar away. Stretch the cut edges hard and the jersey rolls itself, so there is no hem to sew. Fabric trim, from tassels to ruffles, goes on along the bottom with permanent fabric glue, and fray stopper keeps a raw trim neat. Buying everything new runs about $15.
Get the full tutorial at Celia Agnes.
2. DIY No-Sew Wire Headband

Long fabric scraps too pretty to toss become a bendable wire headband, perfect for messy hair days. Cut a 6 by 32 inch strip, angle both ends, fold the edges in about half an inch and press them with an iron. Fold it lengthwise and fabric glue the seam closed, leaving the short ends open. A 36 inch length of 18 gauge wire gets a loop bent into each end, then wrapped in scrap fabric for padding before sliding inside. Twist it into a knot and it stays put.
Get the full tutorial at Sarah Hearts – Notions and Gifts for All Makers.
3. DIY Woven Hair Tie Headband
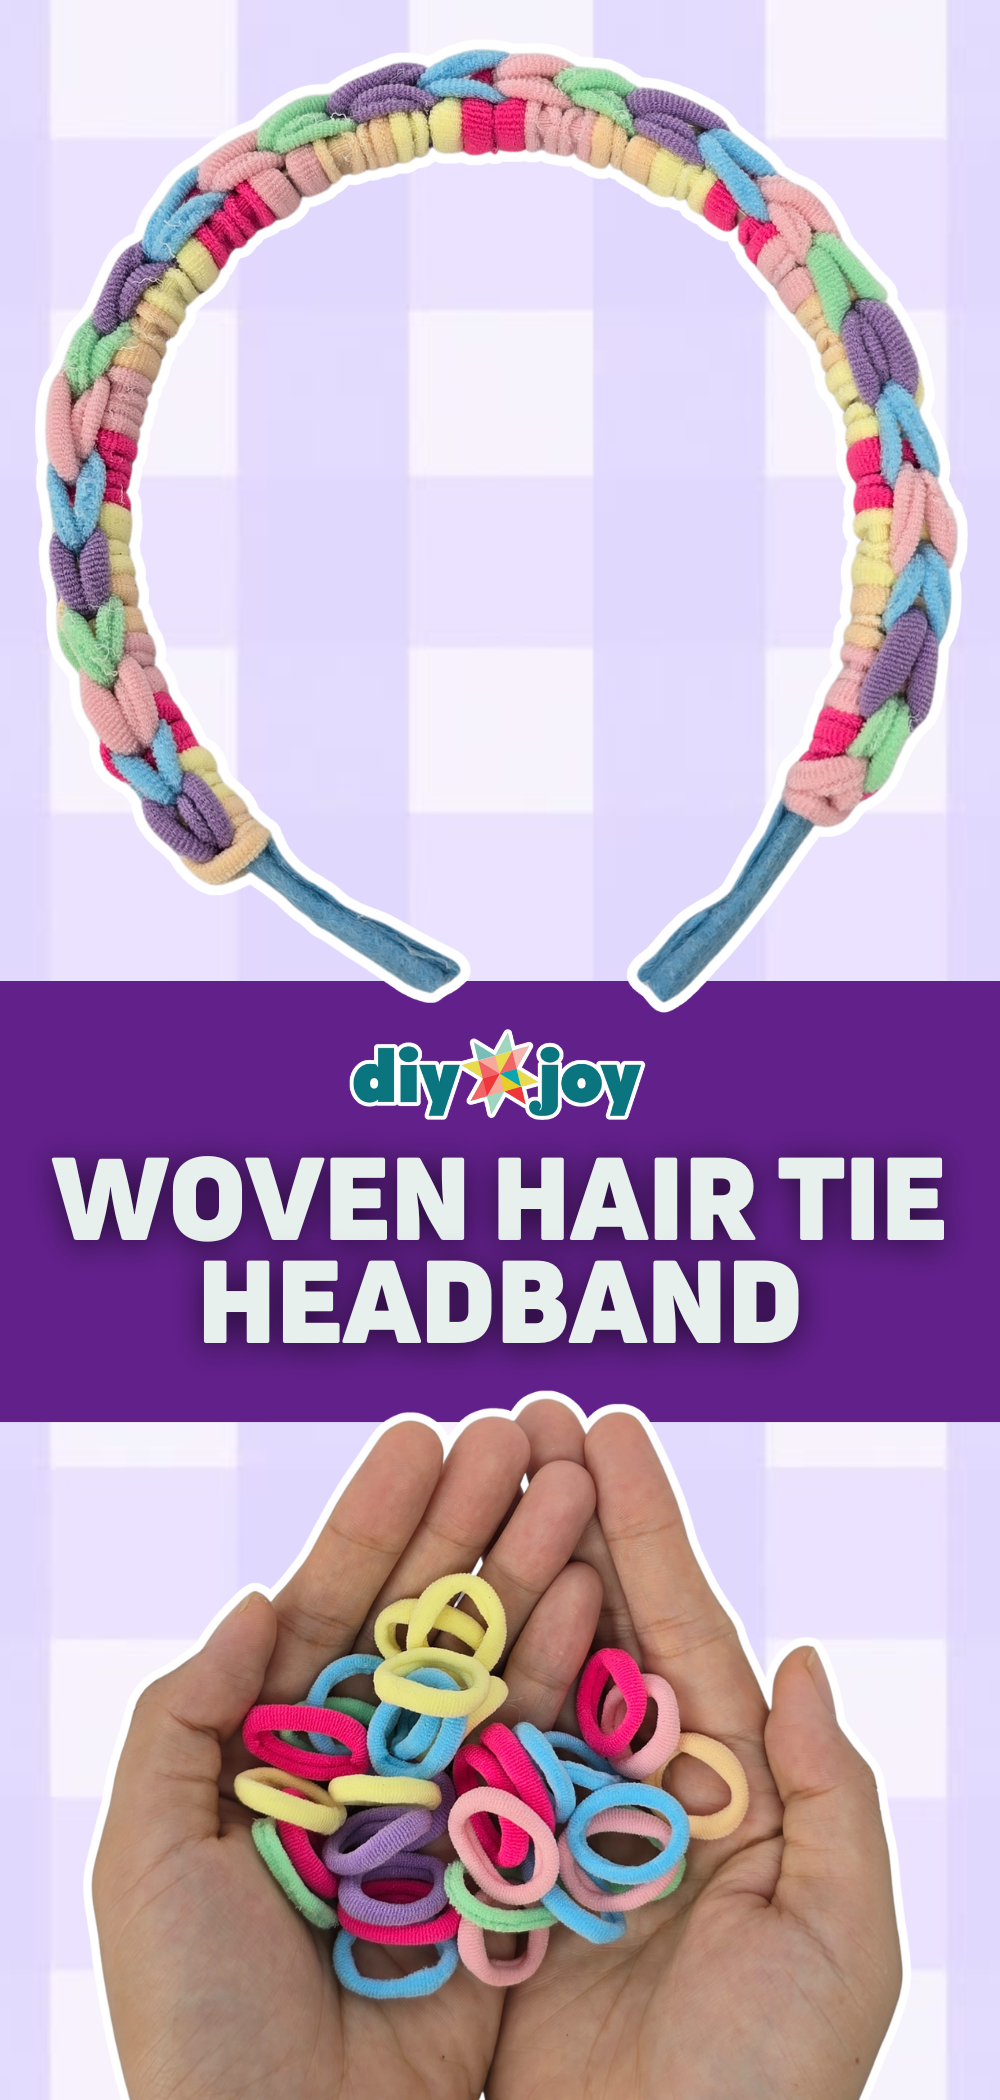
A drawer full of stray hair ties becomes a stretchy, colorful headband with no sewing and no special tools. Start about an inch from the end of a plain headband, set one hair tie on top and one underneath, then loop the bottom one over the top one to lock it. Keep adding pairs to the other end, then weave the loops back over each other to tighten. Felt squares glued over the ends finish it neatly. Pastels look sweet, and brights look playful.
Get the full tutorial at DIY Joy.
4. DIY No-Sew Blanket Cape

A blanket cape is basically permission to wear a blanket in public, and it takes nothing but scissors. Start with about 3.3 yards of a thick cotton or jersey blanket fabric. Cut a 2 inch strip off one edge to use as the belt, fold the rest in half and cut along the fold about halfway for the front opening. Put it on, mark the waist and cut a slit 12 inches out from the center on each side. Thread the belt through the slits and tie.
Get the full tutorial at Geneva Vanderzeil.
5. No-Sew DIY Slip Dress

A maxi skirt that never quite fit gets a second life as a flowy slip dress. Cut off the waistband, then lay a tank top or sports bra on top as a guide and trim triangles off the corners for armholes. Triangles sit better than half moons, which can stick out like wings under the arm. Shape the neckline and back, leaving the straps long enough to knot together at the shoulders. Wear it loose, or reuse the old elastic waistband as a belt.
Get the full tutorial at Kier Couture.
6. DIY No-Sew Open Back Top

A thrifted dress that never gets worn can become a floaty top with a completely open back, using only scissors. Look for a jersey knit or poly blend that will not fray or unravel without a hem. Try the dress on, decide on the new length and mark it with a pin, starting around the hips and shortening from there. Fold it in half and cut away the skirt in a rounded line so the top dips in front and back. A strappy bralette layers nicely underneath.
Get the full tutorial at …love, Maegan.
7. No-Sew Girls Fabric Hair Bows

These fabric hair bows skip both the sewing machine and the hot glue, so they are easy to make on a road trip. Cut a 5 inch square, fold it in half and crease the center. A 5 by 1/2 inch strip of peel and stick fabric fuse tape goes over the crease on the wrong side, then each edge folds into the middle and presses down. Turn and fold again to form the bow, wrap the center with embroidery floss and attach a small hair clip.
Get the full tutorial at Sweet Red Poppy.
8. No-Sew Giant DIY Bow

One square of fabric, a hot glue gun and a hair clip are all it takes to make a giant statement bow. A vintage napkin from the thrift store is the perfect size. Fold each edge in about half an inch and tack it with a few drops of hot glue. Fold up the bottom, fold the top edge down half an inch, then lap the top over the bottom and glue every fold. Tie the long rectangle into a big bow and glue the clip to the back.
Get the full tutorial at DIY Candy.
9. DIY No-Sew Beanie From A Sweater

An old sweater, even one from the kids section at the thrift store, can become a slouchy beanie with a glue gun instead of a needle. Tie a scarf snugly around the head and knot it in back, then lay it on the bottom of the sweater to measure the width. Working from the bottom edge means the sweater’s finished hem becomes the band. Mark the height, around 12 inches for a very floppy fit or 9 to 10 for a snug one, cut the shape and glue the seams. Fabric glue sticks flex and wash best.
Get the full tutorial at Wonder Forest.
10. No-Sew DIY Bow-Back Tank Top

A slightly loose V-neck tee becomes a drapey bow back tank with scissors and a dab of E6000. Lay it face down and cut a half circle about 4 inches deep from the back neckline. Measure 6 inches down each side seam from the armpit and cut straight across the back between the marks, staying just inside the seams so the slit cannot keep growing. Pinch the band between the two cuts into a bow, wrap and glue it. The lower the half circle, the lower the bow.
Get the full tutorial at Creating Laura.
11. Fringed Tie Dye Shirt

A plain white cotton tee becomes a fringed tank with a pretty knotted net pattern, and the cutting takes no stitches at all. Cut off the sleeves, the neckline and about 2 inches from the hem. Snip strips about 8 inches up on the front and back, then knot each front strip to its back partner. An inch below, tie each strand to the neighbor from the next pair to make a diamond net. A strip from a sleeve ties the shoulders. Dye it first for color.
Get the full tutorial at Rachel Teodoro.
12. 5 Minute No-Sew DIY T-Shirt Skirt

Scissors, a safety pin and a t-shirt make a skirt in under five minutes. Pick a tee that runs straight from the sleeves to the hem, since it gets worn upside down. Cut straight across just under the sleeves and save the top for another project. Snip two small holes at the center of the old hem, which becomes the new waistband. Cut a 1 inch strip from the cut edge, stretch it into a cord and thread it through the hem with the safety pin.
Get the full tutorial at Little Mager House.
13. No-Sew Criss Cross Back T-Shirt DIY

A large basic tee turns into a criss cross back top with chalk, scissors and a few knots. Turn it over, chalk a line straight down the center of the back and cut the back layer only. Trim off the corners, then cut open both shoulder seams so the back pieces become straps. Cross the straps over each other and tie them back onto the front shoulders. It works as a beach cover up, with jeans or layered over another shirt in winter.
Get the full tutorial at WobiSobi.
14. Leather Hair Tie
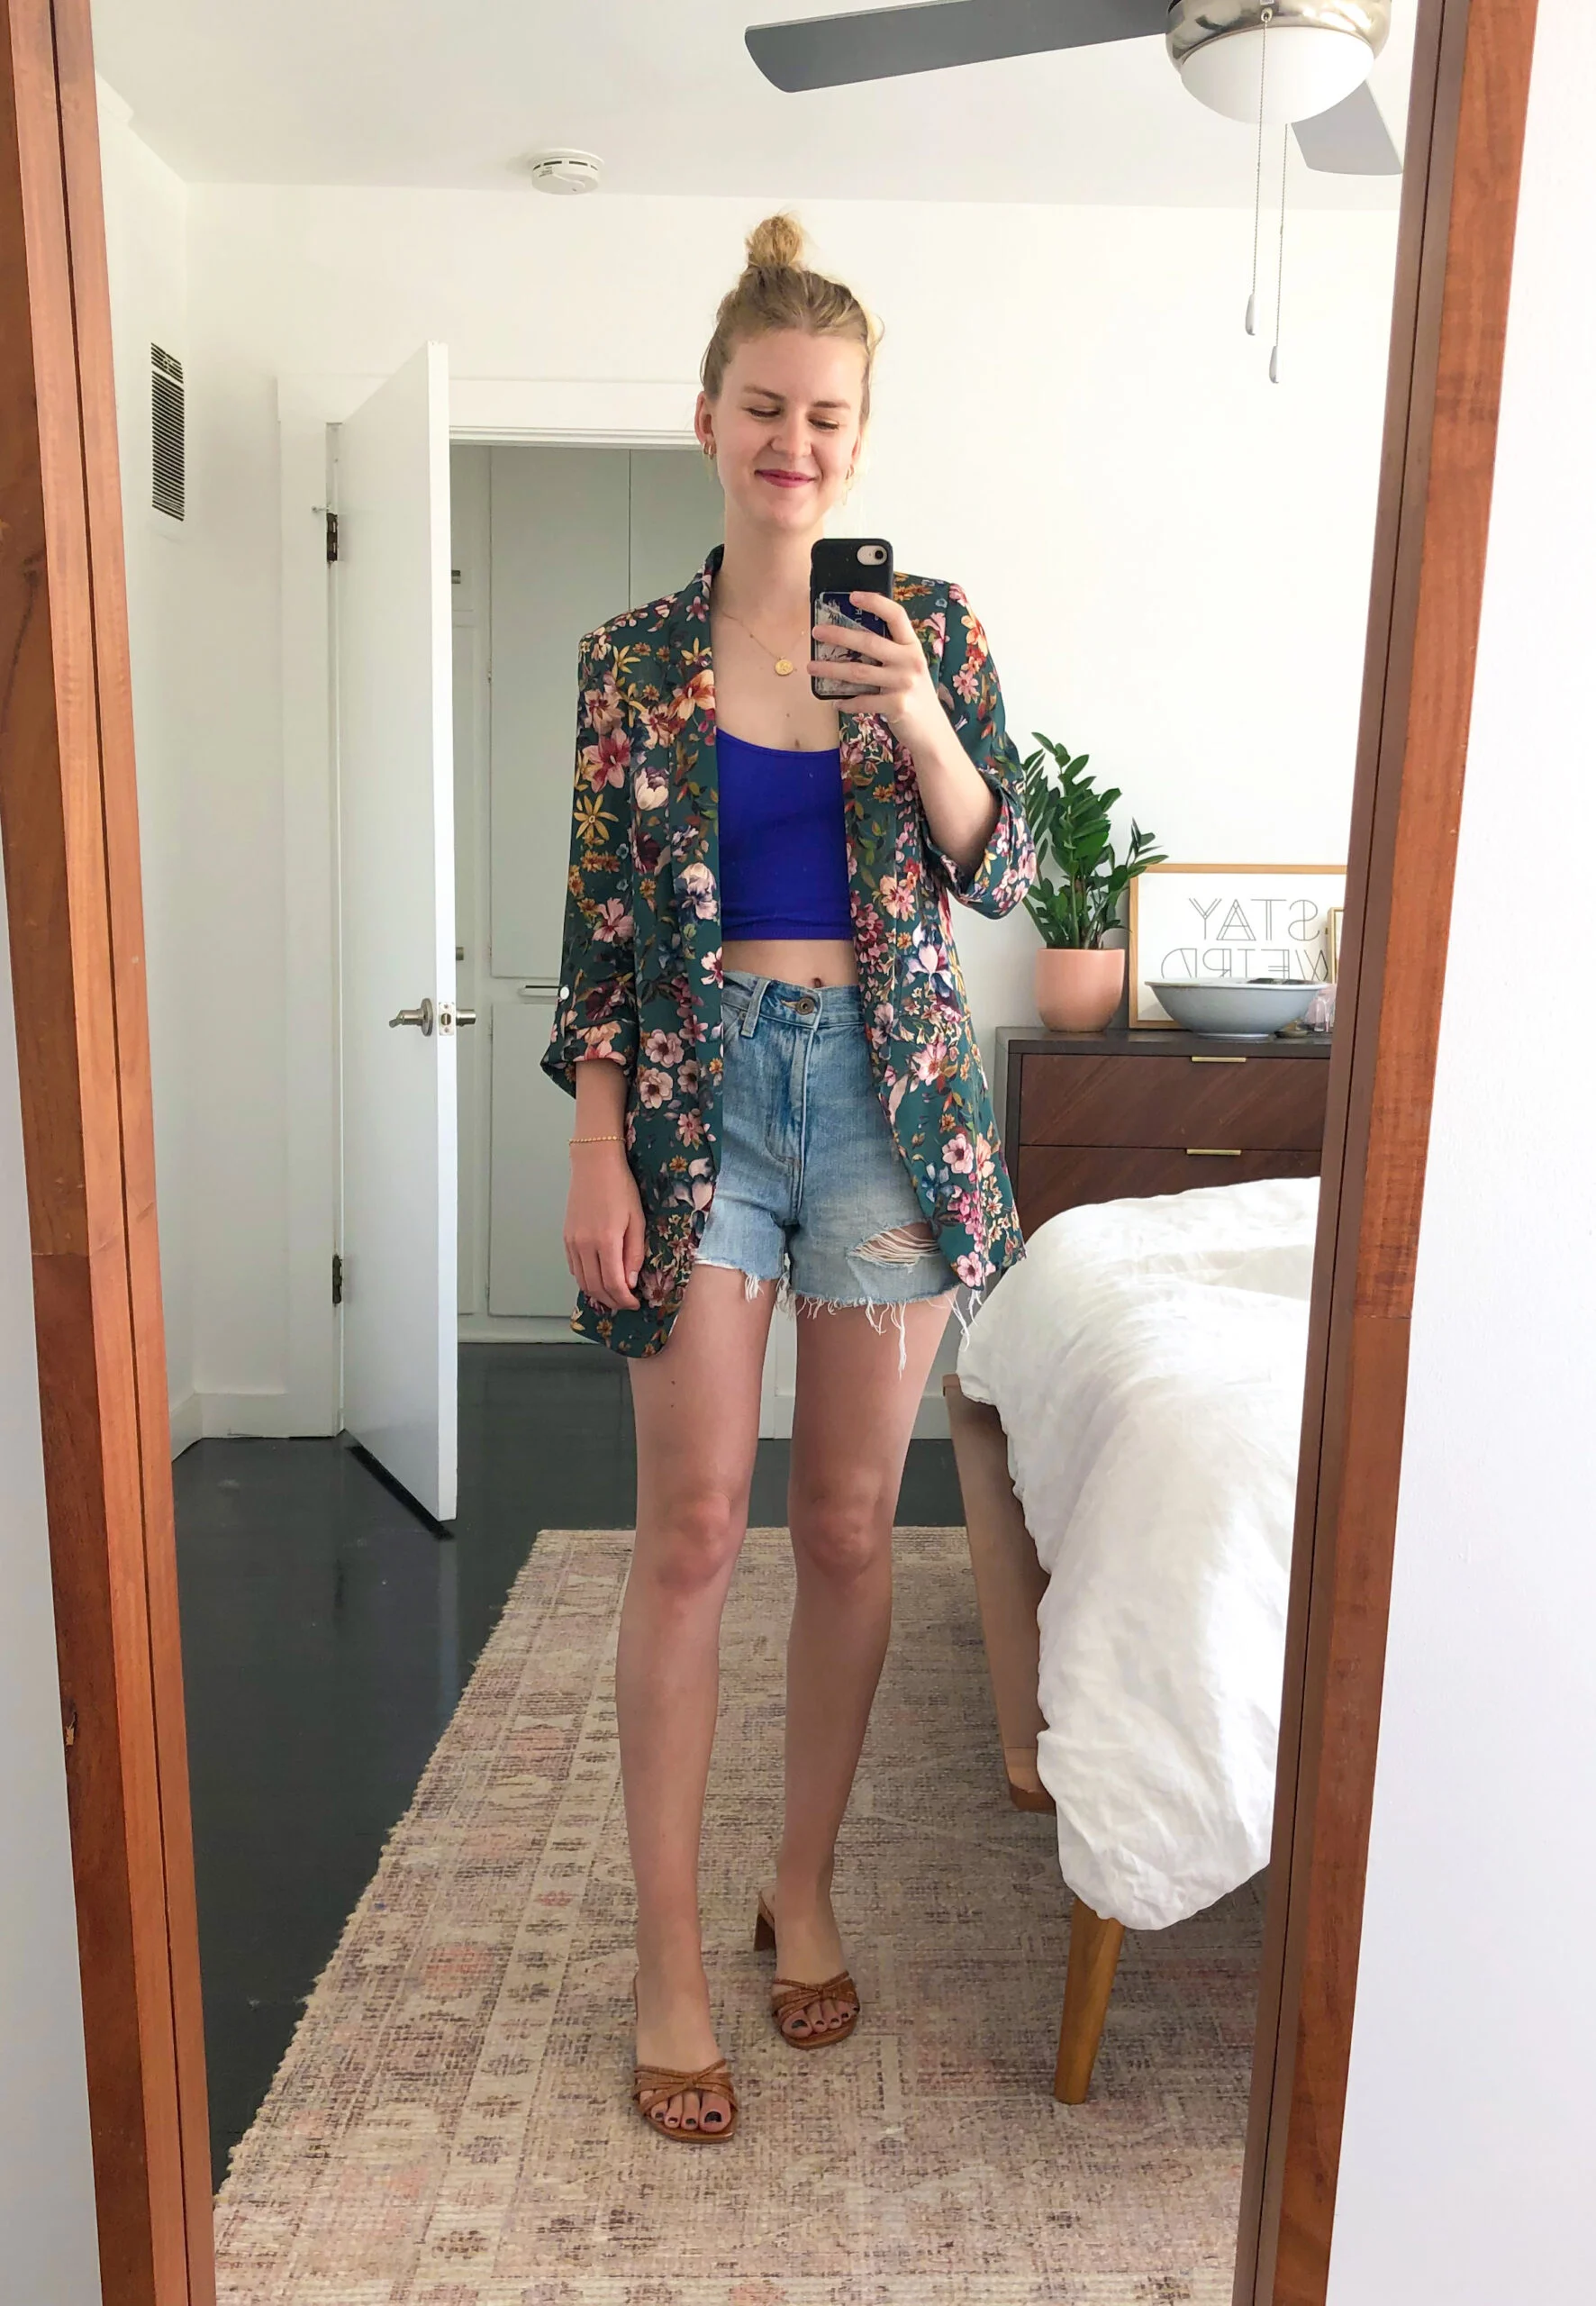
A strip of leather wrapped over a plain elastic dresses up a ponytail, and the leather moves to a new elastic when the old one snaps. Cut a strip 15 inches long and 1/2 inch wide, as even as possible, and trim both ends to a gradual point. Center it over a hair band and hold them together with a twist tie. Put the hair up with the twist tie on top, then knot the leather ends over it to hide it. Any fabric scrap works the same way.
Get the full tutorial at Cupcakes & Cashmere.
15. No-Sew Kimono Cover-Ups

One length of chiffon, about 33 by 13 inches, ties into four different kimono style cover-ups with no sewing. A dupatta works perfectly. The simplest folds the fabric in half lengthwise and double knots the meeting corners, leaving two armholes. Another folds the top layer to about two thirds and ties small knots for a drapey effect under the arms. The third pins a center line, cuts the front flap only and ties the corners. Throw any of them over cutoffs or a maxi skirt.
Get the full tutorial at p e t i t e p i e c e s.
16. DIY No-Sew Tote Bag

A striped canvas tote with faux leather handles comes together without a sewing machine, thanks to fabric adhesive and rivets. Cut two canvas pieces 18 by 21 inches, fold the long edges over half an inch, iron them and glue them down with Unique Stitch. Use a generous amount so it soaks through both layers. Paint the stripes with a pouncer and 1/8 inch tape, using a paint that needs no fabric medium. Join the pieces and rivet on handles that come with holes.
Get the full tutorial at Homey Oh My – Modern home and lifestyle.
17. Peter Pan Collar DIY

A detachable Peter Pan collar adds a vintage touch to a plain blouse or sweater, and this one started life as a sofa seat cushion. It follows a free downloadable collar pattern and a simple no sew method: trace one half, flip the pattern for the other side and cut, using pinking shears for the rounded outer edge and plain scissors for the inner curve. Punch a small hole at each center tip, join the halves with a jump ring and add a clasp at the back. The muted color goes with nearly everything.
Get the full tutorial at L A N A R E D S T U D I O.
18. DIY No-Sew Infinity Scarf

The easiest infinity scarf in the world is hiding in an old t-shirt. Any size works, though a bigger shirt makes a bigger scarf. Draw a line straight across just under the armpits, eyeballing it is fine, and cut along it with fabric scissors. The bottom half is now a tube, and that tube is the scarf. Shape it with your hands, loop it around the neck and it is done. Light cotton jersey is the perfect weight for summer scarves.
Get the full tutorial at The Stylish Intellectual.
19. Braided Headbands

Braided fabric headbands are the fix for every bad hair day, and old shirts make great material. Start with a blank headband or an old one worth covering. Cut thin stretchy jersey into strips a little longer than the headband and braid them. Wrap the headband in a strip of the same fabric with craft glue or hot glue, then glue the braid along the top. Lace, ribbon or fiber can be mixed into the braid. Fabric from a shirt headed for donation works nicely.
Get the full tutorial at alisaburke.
20. Rose Petal Headband

Twelve fabric circles fold into a full rose for a sweet stretchy headband, no sewing skills needed. Trace circles about 2 inches across onto inexpensive cotton fabric and cut them out. Fold each one in half and then into a triangle, hot glue the sides and start building the rose from the center out. A button glued in the middle finishes the flower. Glue fold over elastic to the back, about 18 inches for a toddler and longer for an adult. It photographs beautifully too.
Get the full tutorial at Little Inspiration.
21. DIY Long Sleeve Wrap Top

This long sleeve wrap top is the follow up to a five minute wrapped crop top made from a simple stretch singlet, a project that became the most popular one on its blog. The new version adds long sleeves and still needs no sewing at all, and the whole method is shown step by step in the video on the source page. The finished top runs a little busty, so it pairs best with high waisted trousers or a skirt for a clean, streamlined look. It also makes an easy ballet top or ballerina costume.
Get the full tutorial at Geneva Vanderzeil.
22. 10-Minute Cowl Neck Top, No Sew DIY
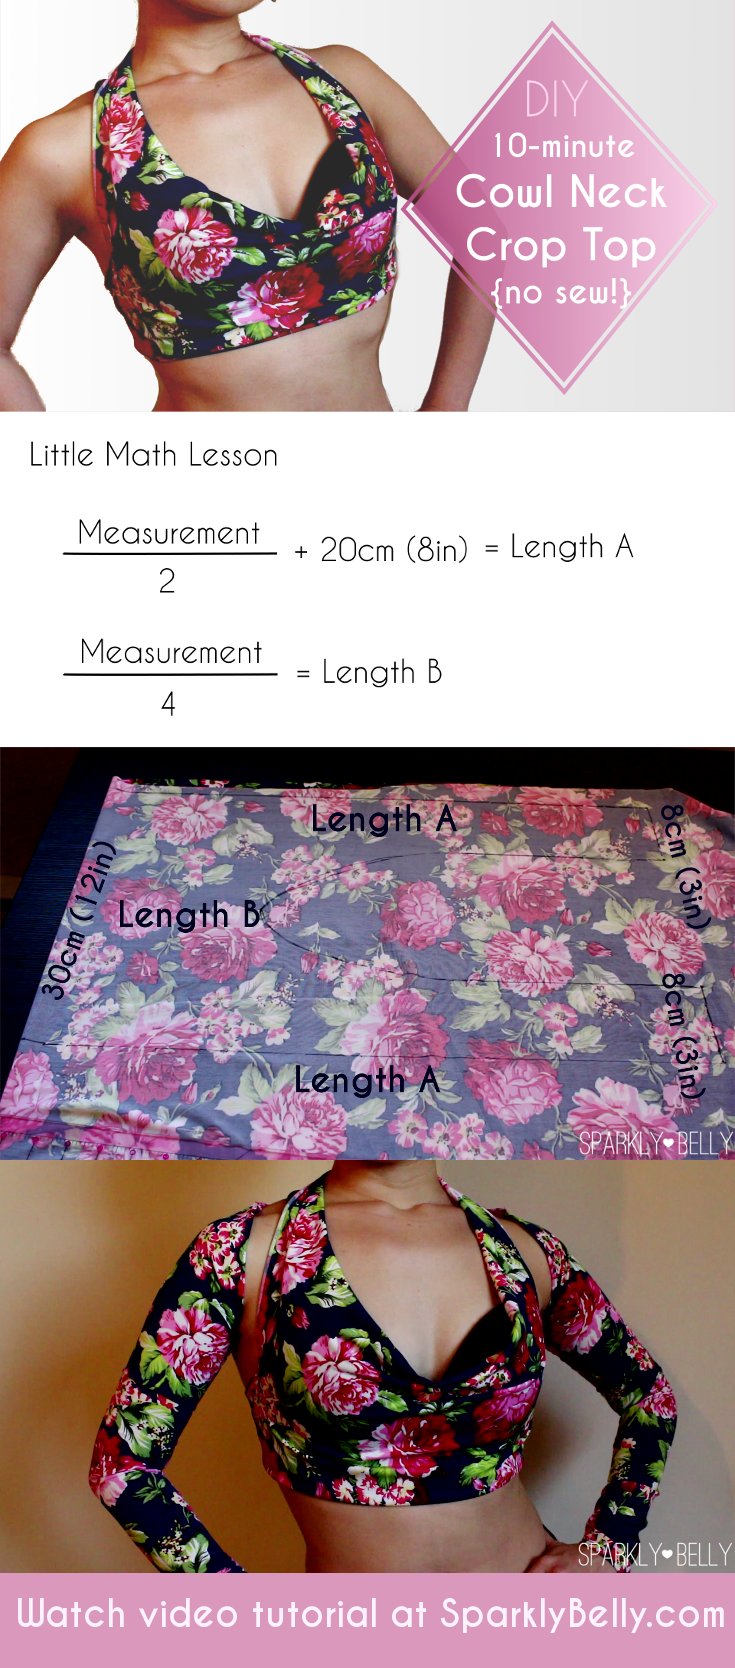
Half a meter of soft drapey knit makes a cowl neck top in about ten minutes, as a practice top or the base of a dance costume. Measure the underbust, fold the fabric across the stretch and do a little math: half the underbust plus 8 inches is the long line, a quarter of the underbust is the neck depth. Draw the lines, connect them with a smooth curve and cut. Tie the two bottom ends behind the back, then the top two.
Get the full tutorial at SPARKLY BELLY.
23. No-Sew DIY Placemat Clutch

A round placemat, magnetic snaps, a few bull clips and a hot glue gun make a clutch for about ten dollars. Fold in the sides and clip them, glue them down, then fold up the bottom and glue that too, using the clips to hold everything while it dries. Push the magnetic snap through the placemat and pinch it in place. A dab of glue in the top corners keeps the shape. Fringe and trims glued on dress it up for a night out.
Get the full tutorial at Damask Love.
24. DIY Braided Back No-Sew Tee

A three dollar tee becomes a braided back workout top that adjusts to fit. Chalk and cut off the sleeves, cut the front where marked, cut straight across the back and cut around the collar. Snip nine small slits down the back. Cut three 1 inch strips from the leftover fabric, stretch them and attach them to the top of the collar, then braid and tie off. Split the strands three per side, weave them through the slits, then gather and tie.
Get the full tutorial at WobiSobi.
25. DIY No-Sew Hand-Stamped 4th of July Tank Top

A white tee one size too big becomes a stamped Fourth of July tank in about half an hour. Cut off the sleeves and neckline, cutting the back neck deeper than the front and bringing the armholes in for thinner straps. Flip it over and tie the straps together in back with red or blue ribbon. For the design, fold wax paper and cut half a heart for a symmetrical stencil, then fill it with mini heart stamps in red and blue fabric paint.
Get the full tutorial at Creating Laura.