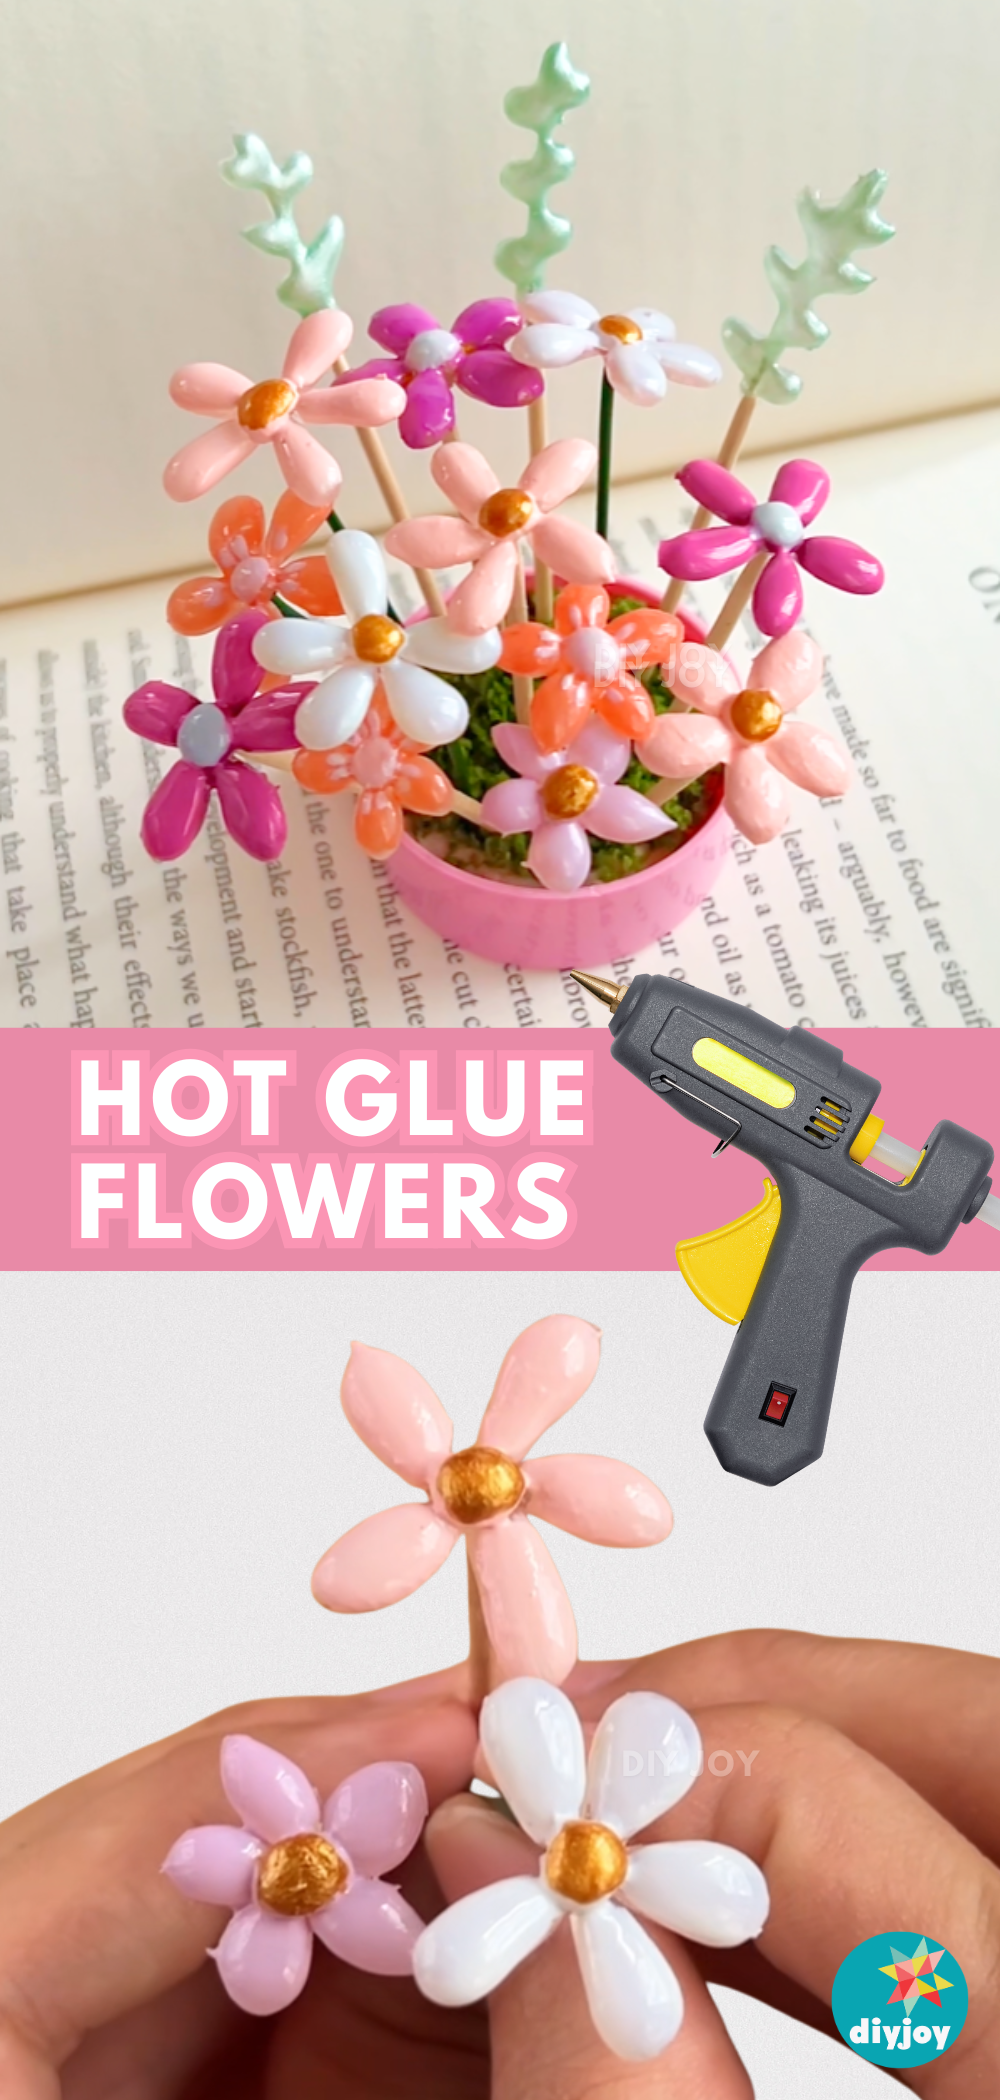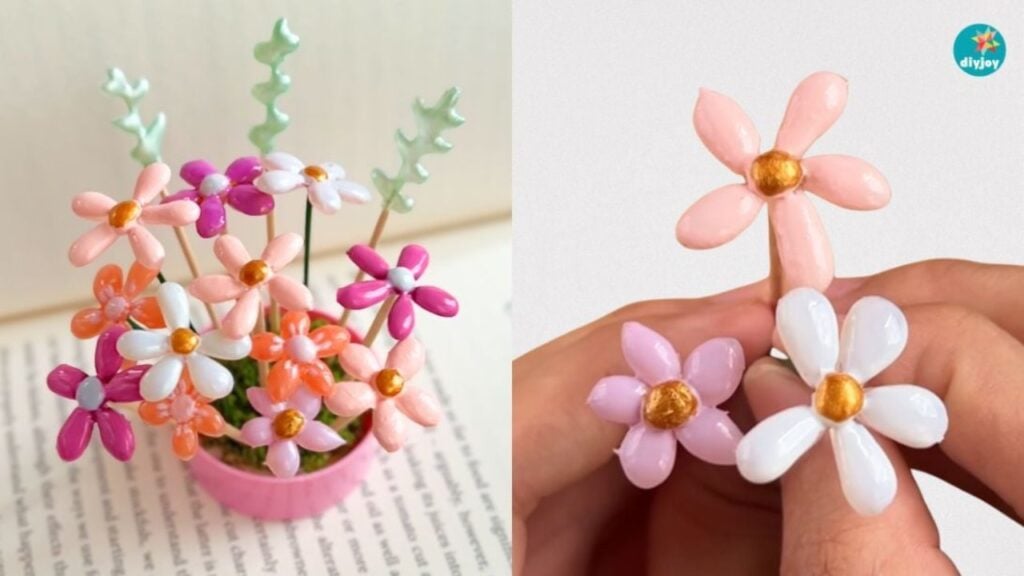
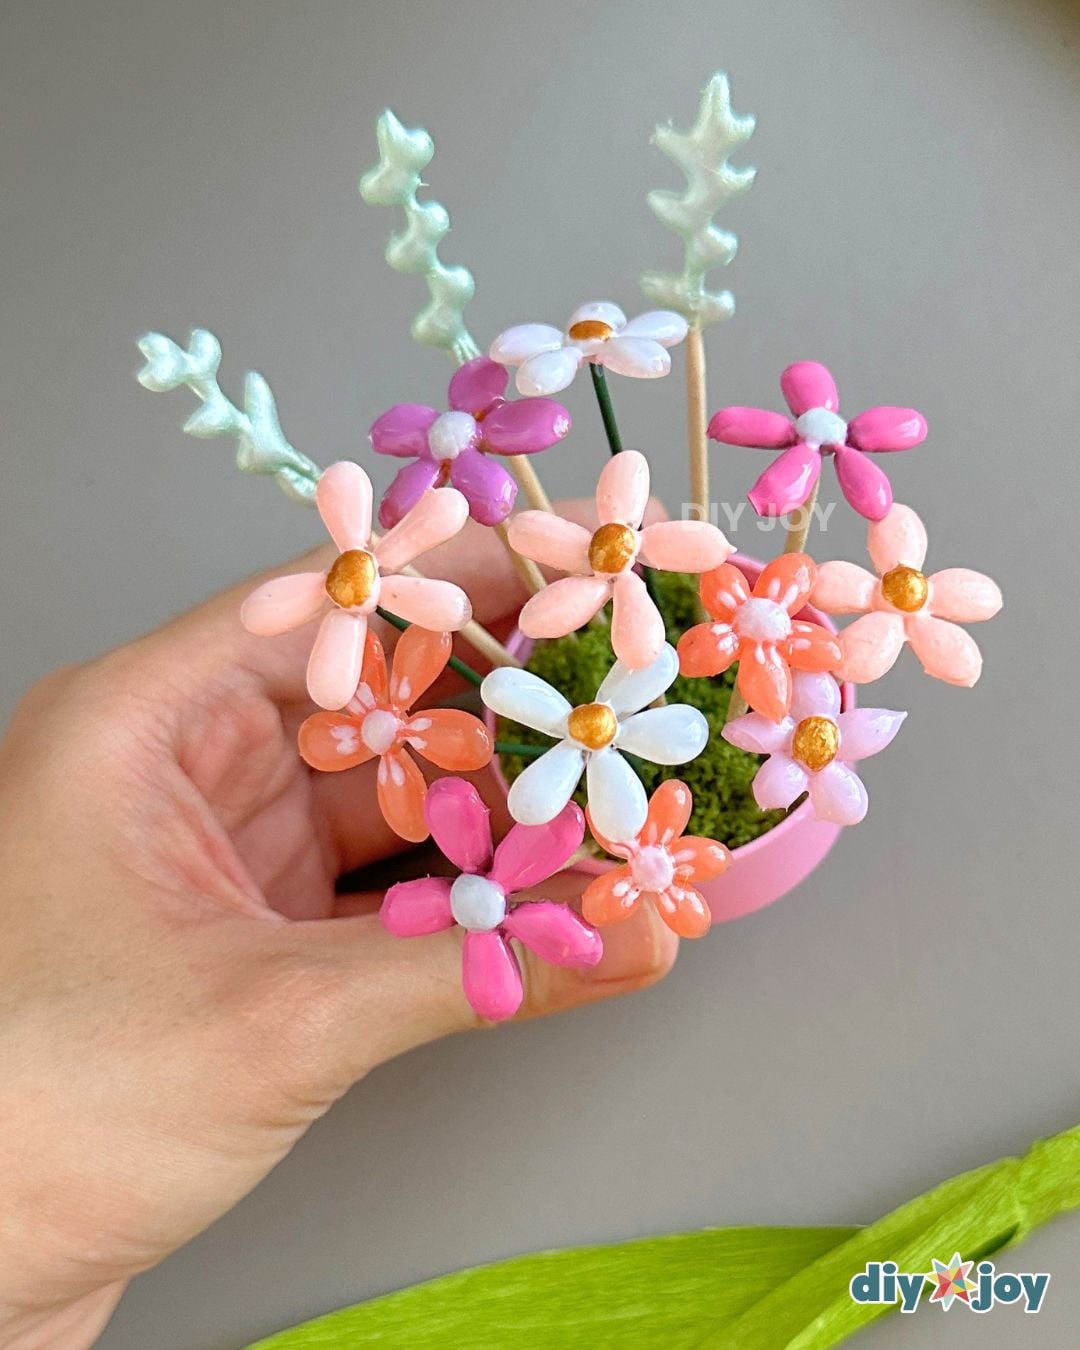
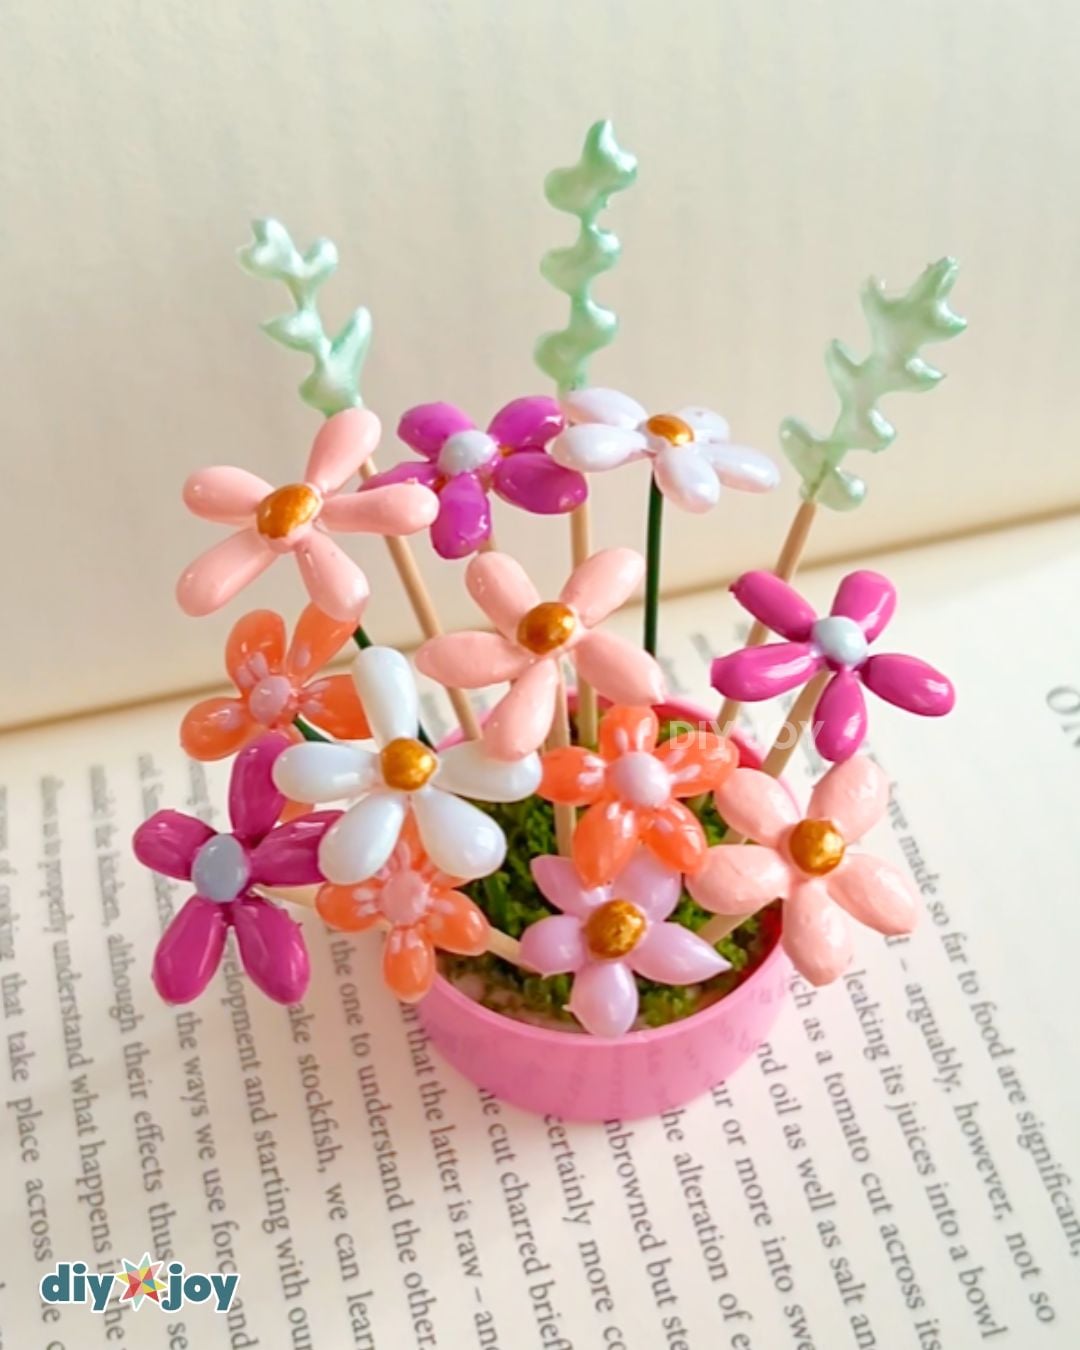
Did you know you could make flowers using hot glue? Yes, you can, and they are not only beautiful but also easy and fun to make. If you are looking for glue gun crafts, give these hot glue flowers a try! I bet you’ll enjoy creating them.
Here’s another easy craft idea:
Mini Photo Frame Magnets Using Glue Gun
![]()
Have you seen our TikTok & Instagram yet?
Our viral videos are super popular and fun to watch. Here’s the hot glue flowers Tiktok, but the YouTube video is also at the bottom of this post so you can watch the full tutorial. Links below for all our socials. Follow and be the first to see our latest crafts. ⬇️
As we all know, a glue gun is primarily for bonding materials like cardboard, plastic, wood, fabric, or paper. It is commonly used in crafts as it creates a quick and strong bond, compared to other types of glue. But did you know that there are a ton of hot glue crafts that you can easily try at home? You could make textured vases, 3D canvas art, hot glue snowflakes, or these glue gun flowers. Hot glue is the perfect material for these gel-like flowers since it is moldable when hot and fully hardens as it cools. We will be creating the petals one by one, gluing them together to make the flower, and then painting them with nail polish for that glossy look. Follow the step-by-step tutorial below to learn how to make flowers with a hot glue gun.
List of Supplies for the Hot Glue Flowers
These products are all listed on our DIY JOY Amazon store, so you can order and know exactly what you will get, and when. We do earn a small commission on these links and very much appreciate your support ❤️
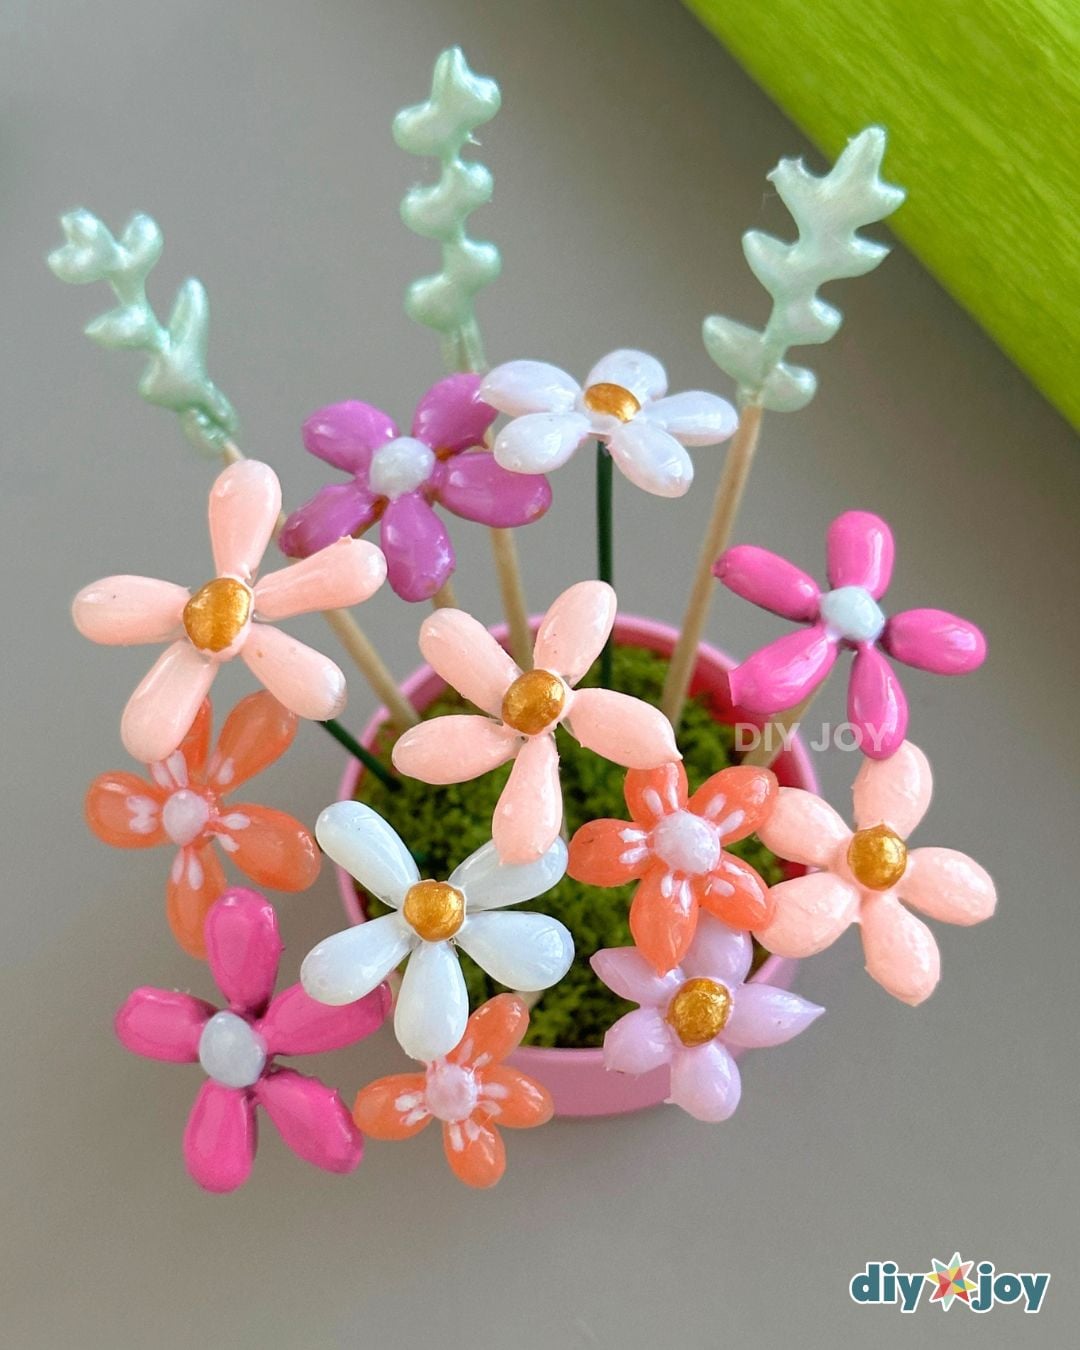
Glue Gun Flowers
Learn how to make flowers using hot glue with this step-by-step guide.
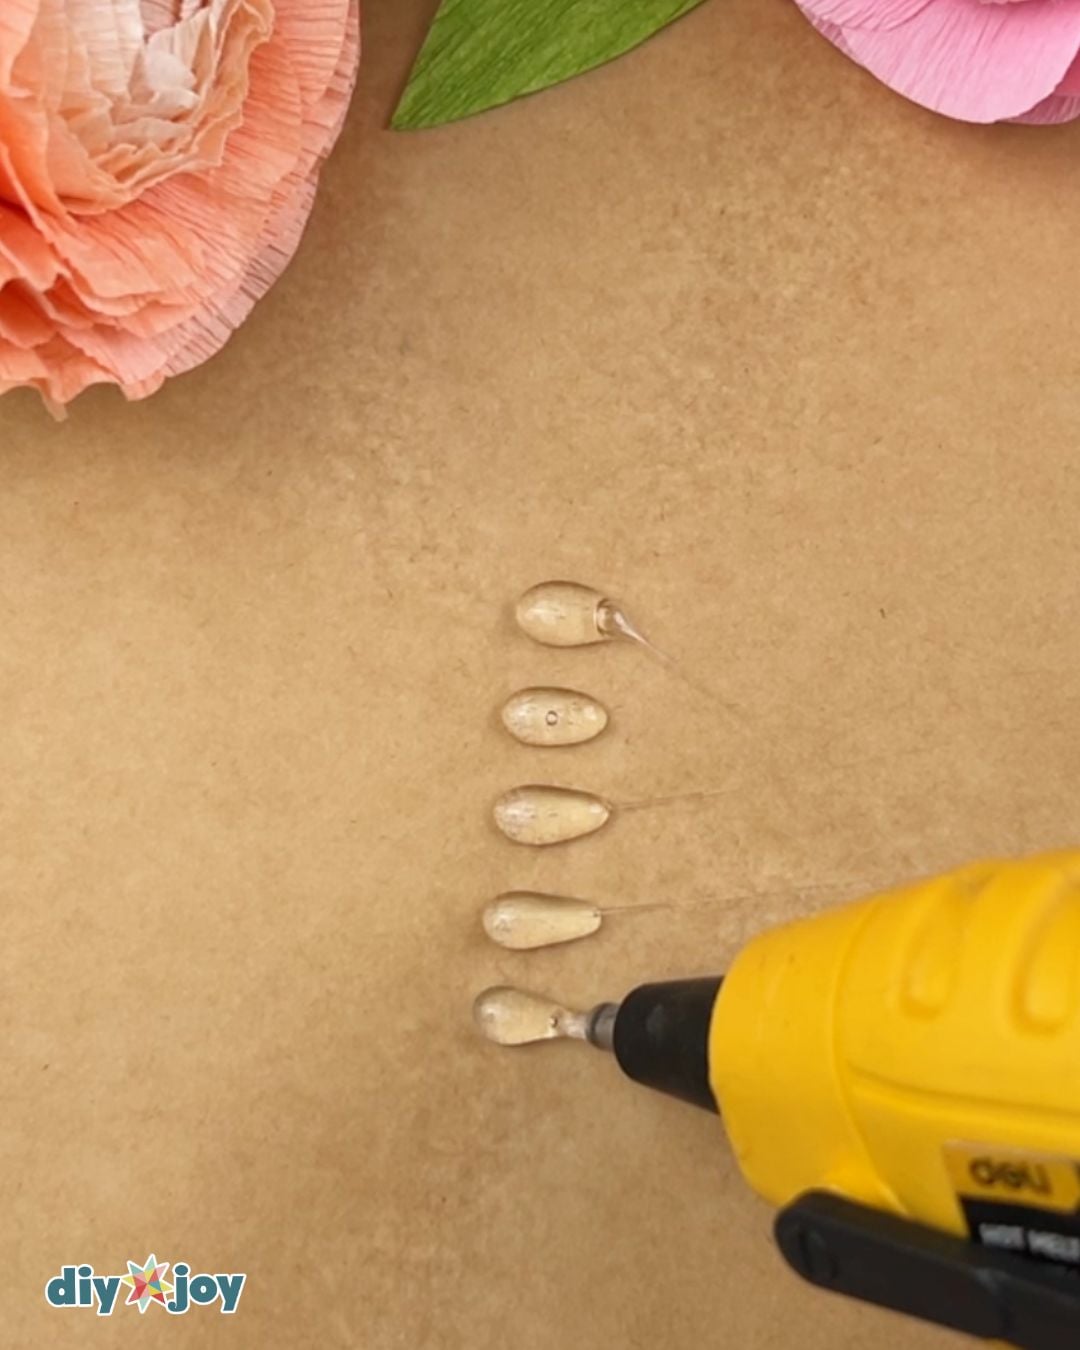
Prepare your work surface
Place a sheet of parchment paper on a flat surface and tape the corners to keep it from moving. Pre-heat your glue gun.
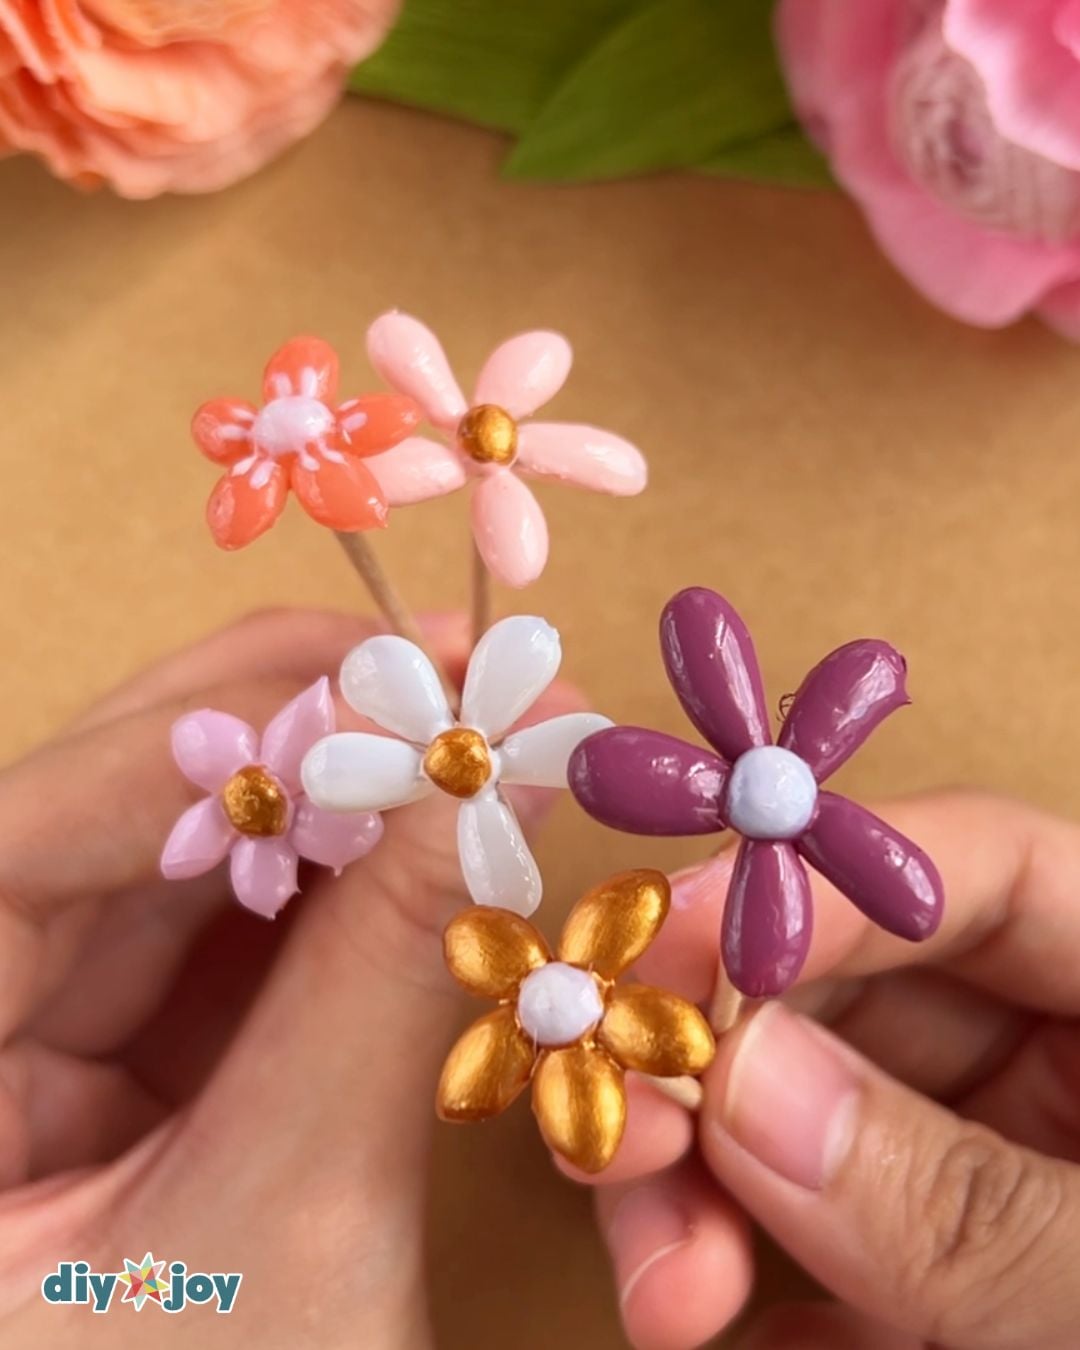
Forming the petals
Once the glue gun is hot, squeeze a small amount of glue and carefully drag the nozzle to the right to form a teardrop shape. Repeat this five times. Let them dry for a few minutes.
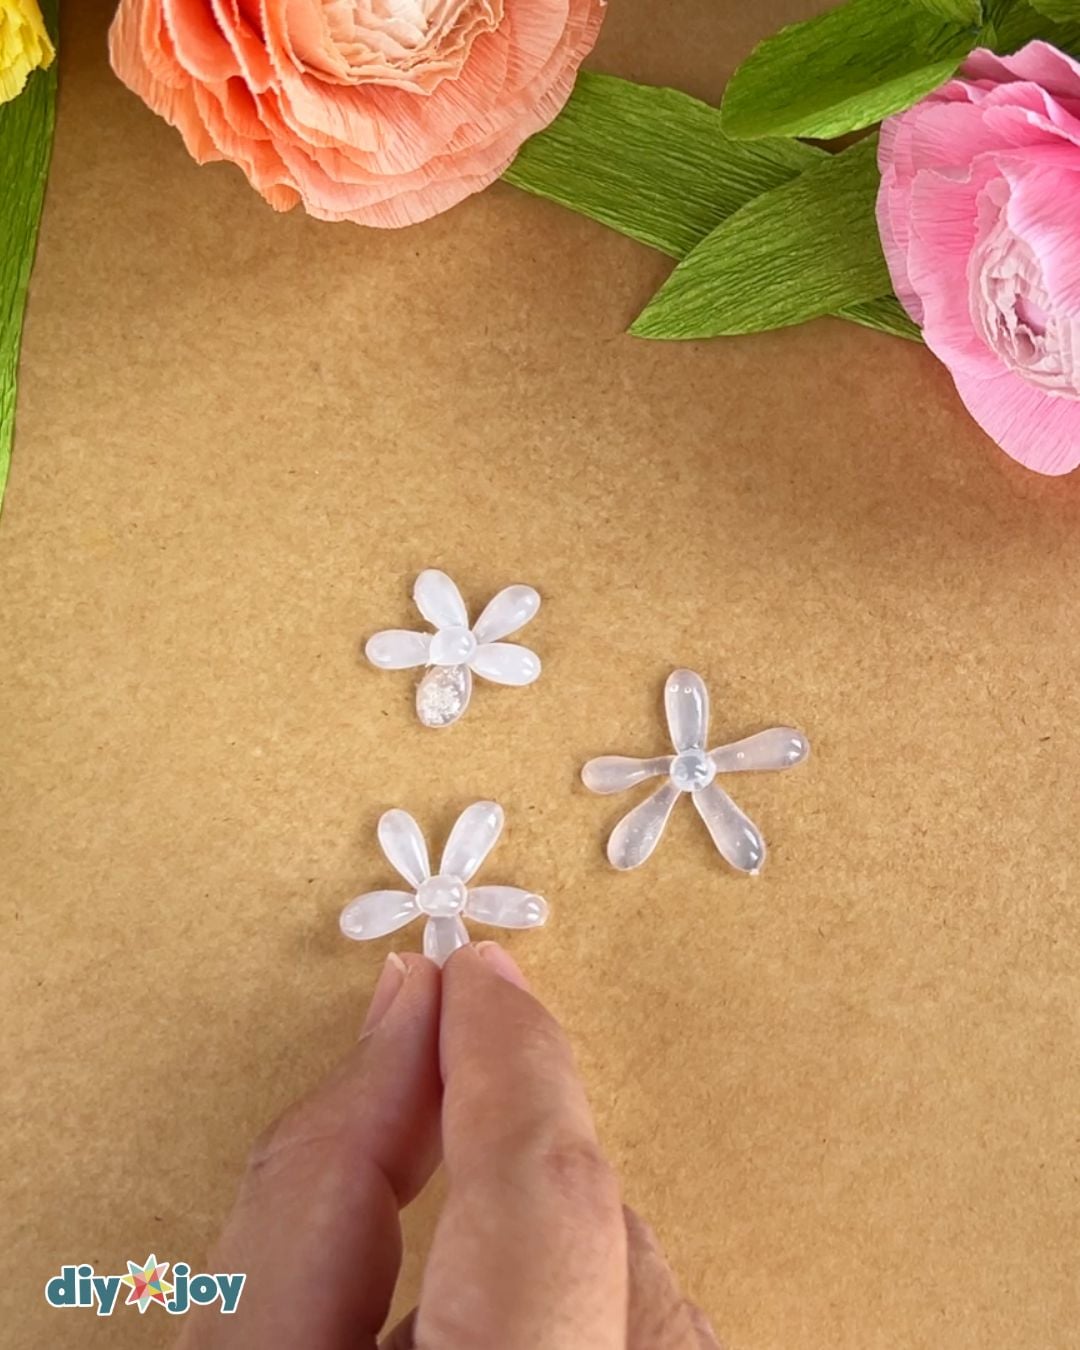
Adding the center
Once the petals are dry, carefully peel them off the parchment paper and remove any glue strings. Arrange them into a flower, leaving a little space in the middle, then fill the center space with hot glue. Let it dry completely.
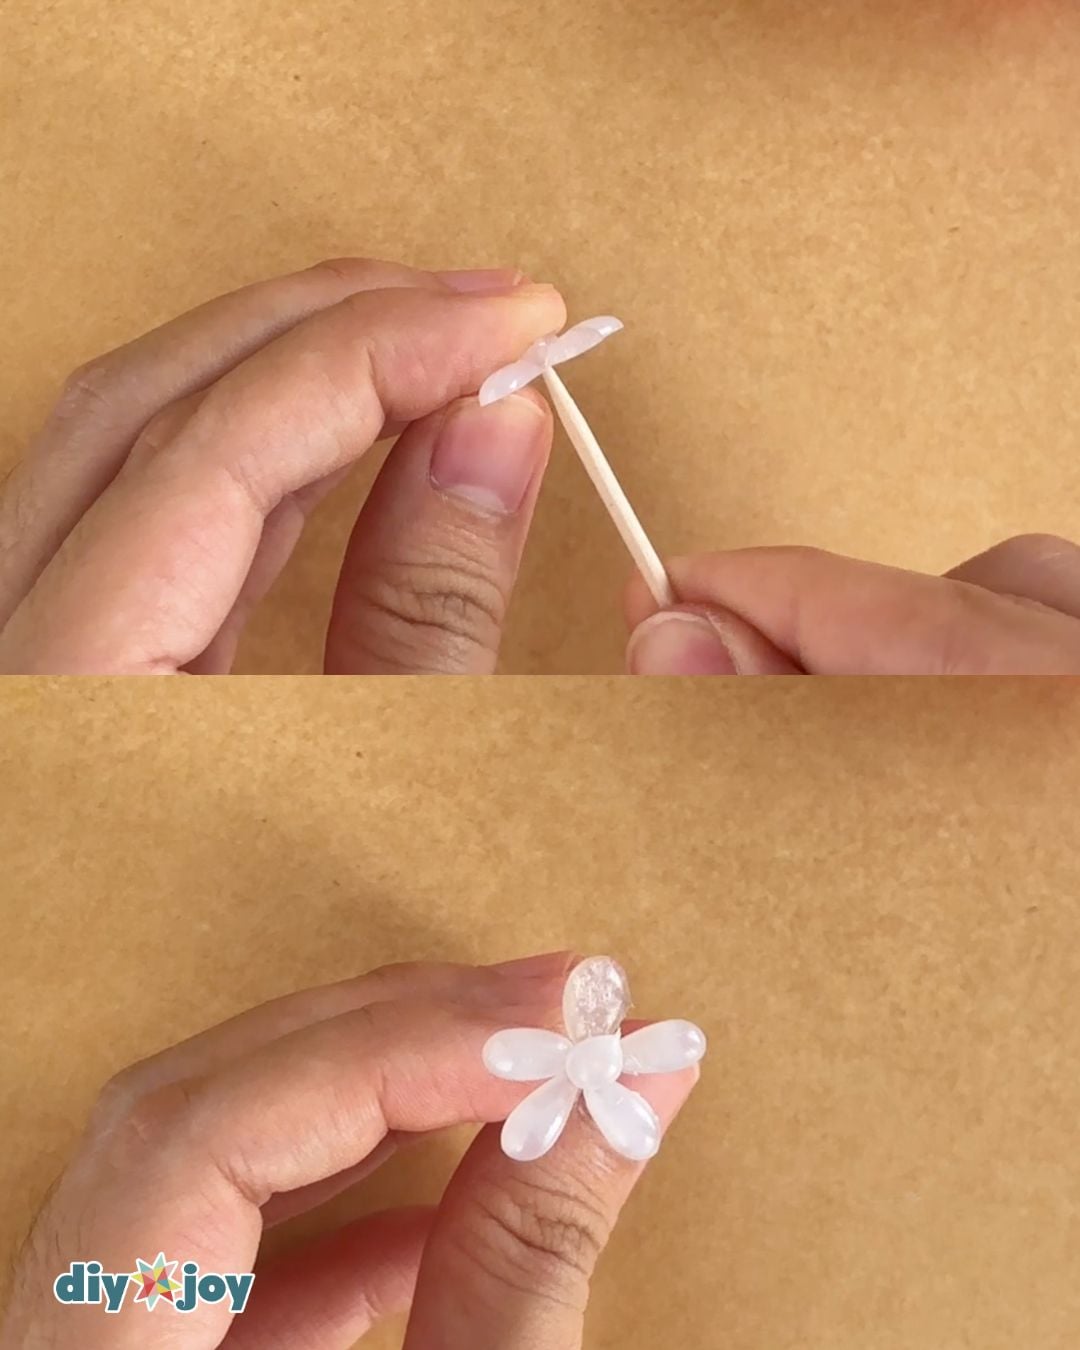
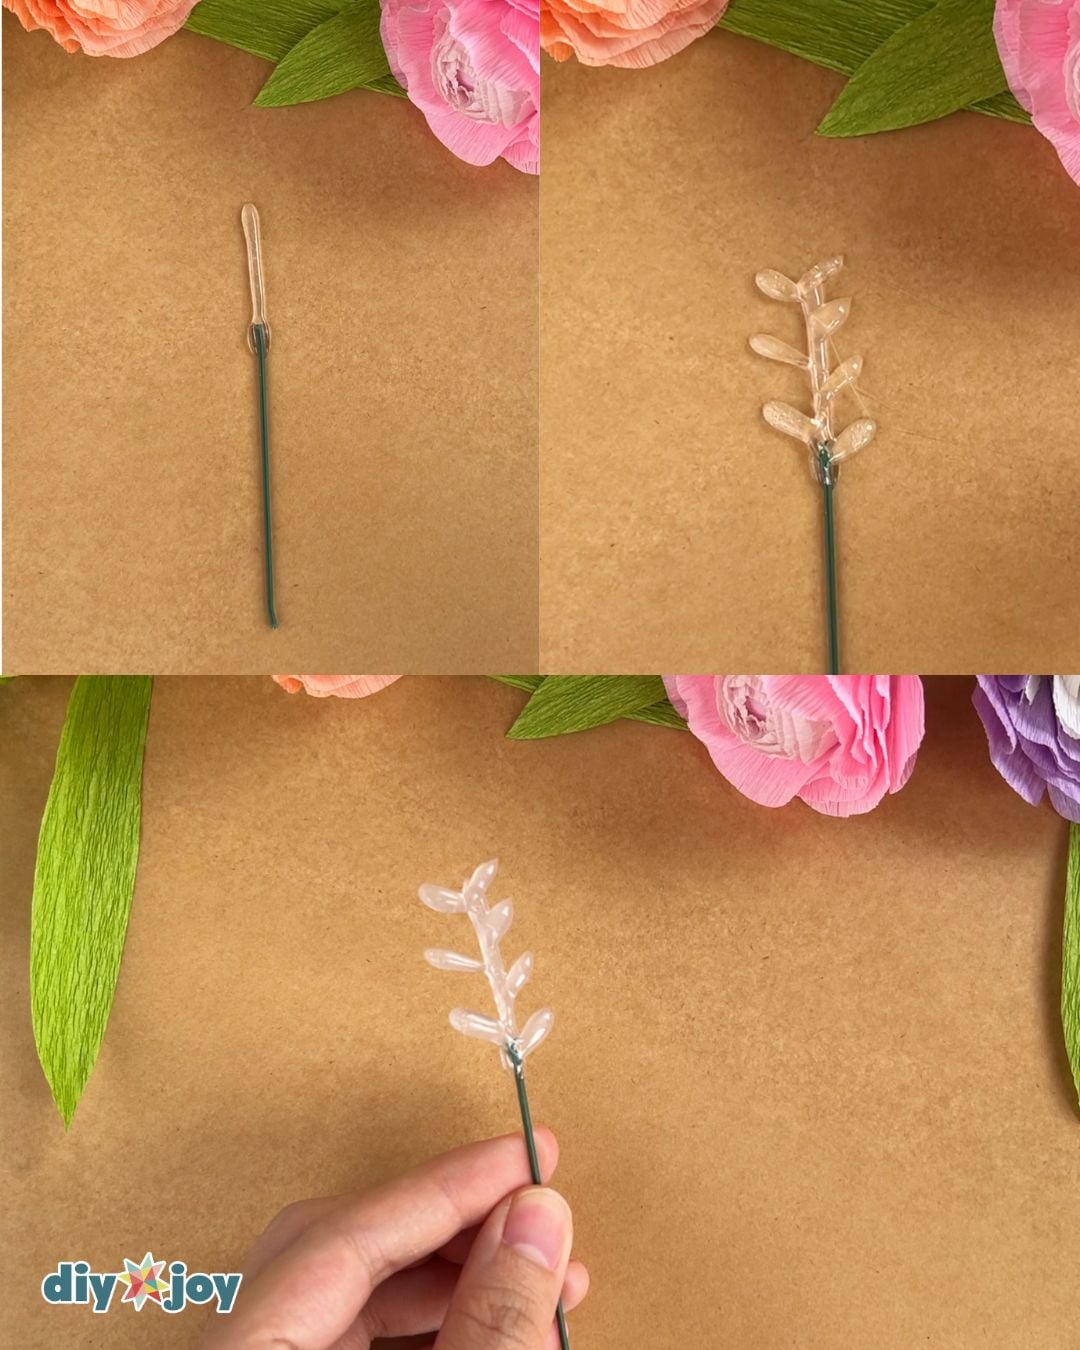
Adding the stem
Carefully remove the flower from the parchment paper and insert the toothpick into the back of the flower.
Make leaves
Apply a strip of hot glue on your parchment paper, place the wire or toothpick at the end, and then add the leaves.
Painting the flowers and leaves
Paint the flowers in your preferred colors and the leaves green. Some nail polishes may require several coats. Let them dry completely after each layer. Drying time will depend on the polish you’re using.
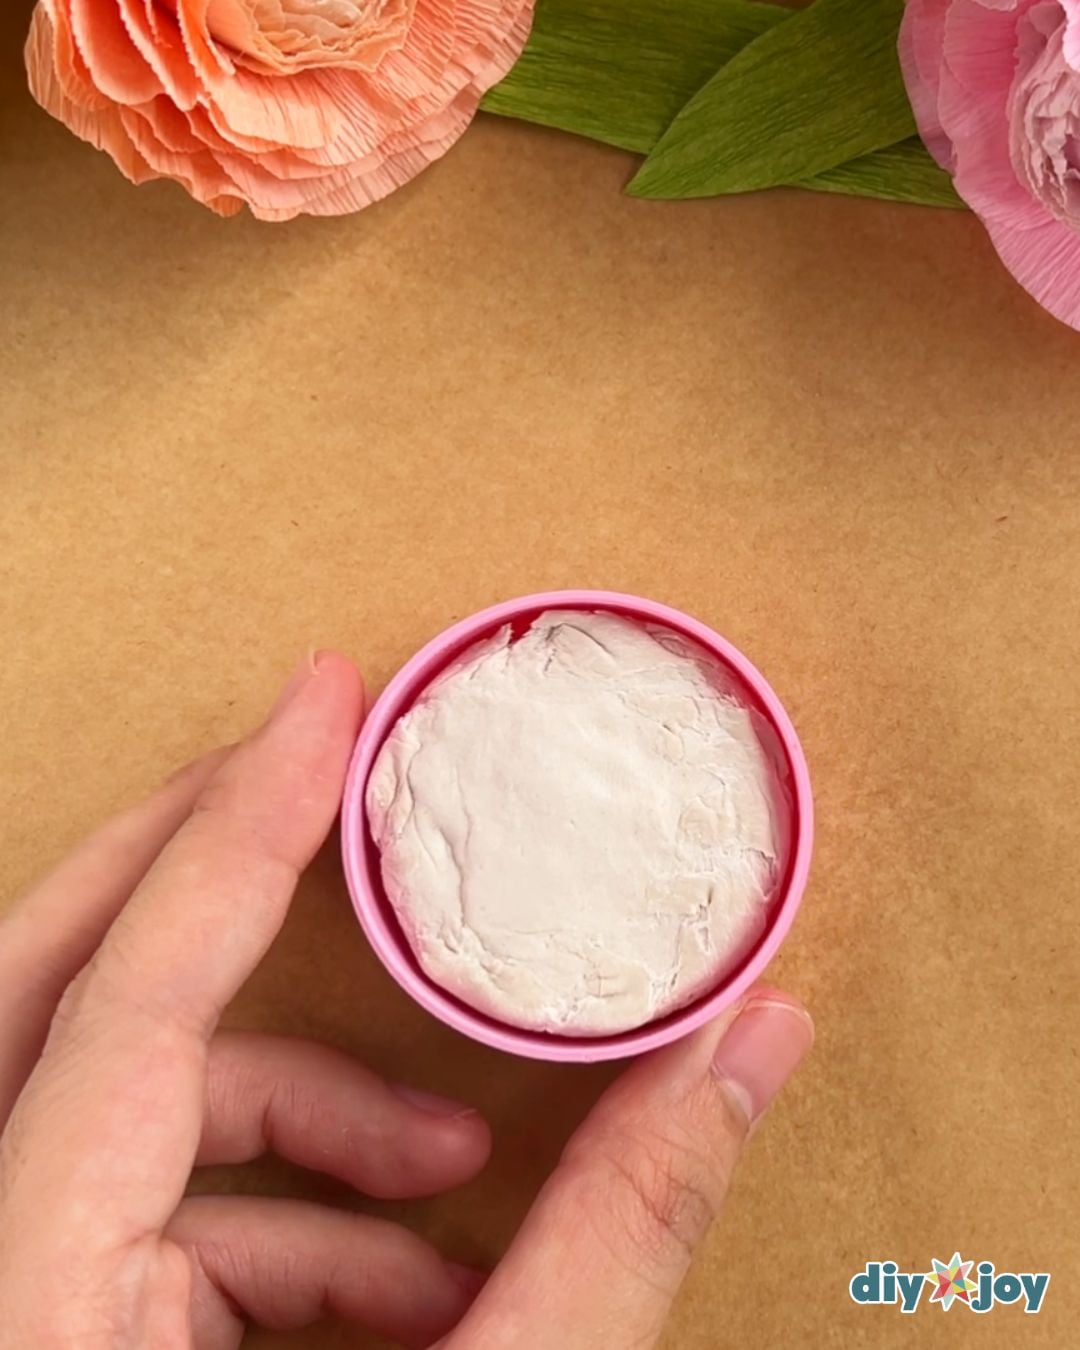
Make the flower pot
Take a small plastic cap and fill it with air dry clay.
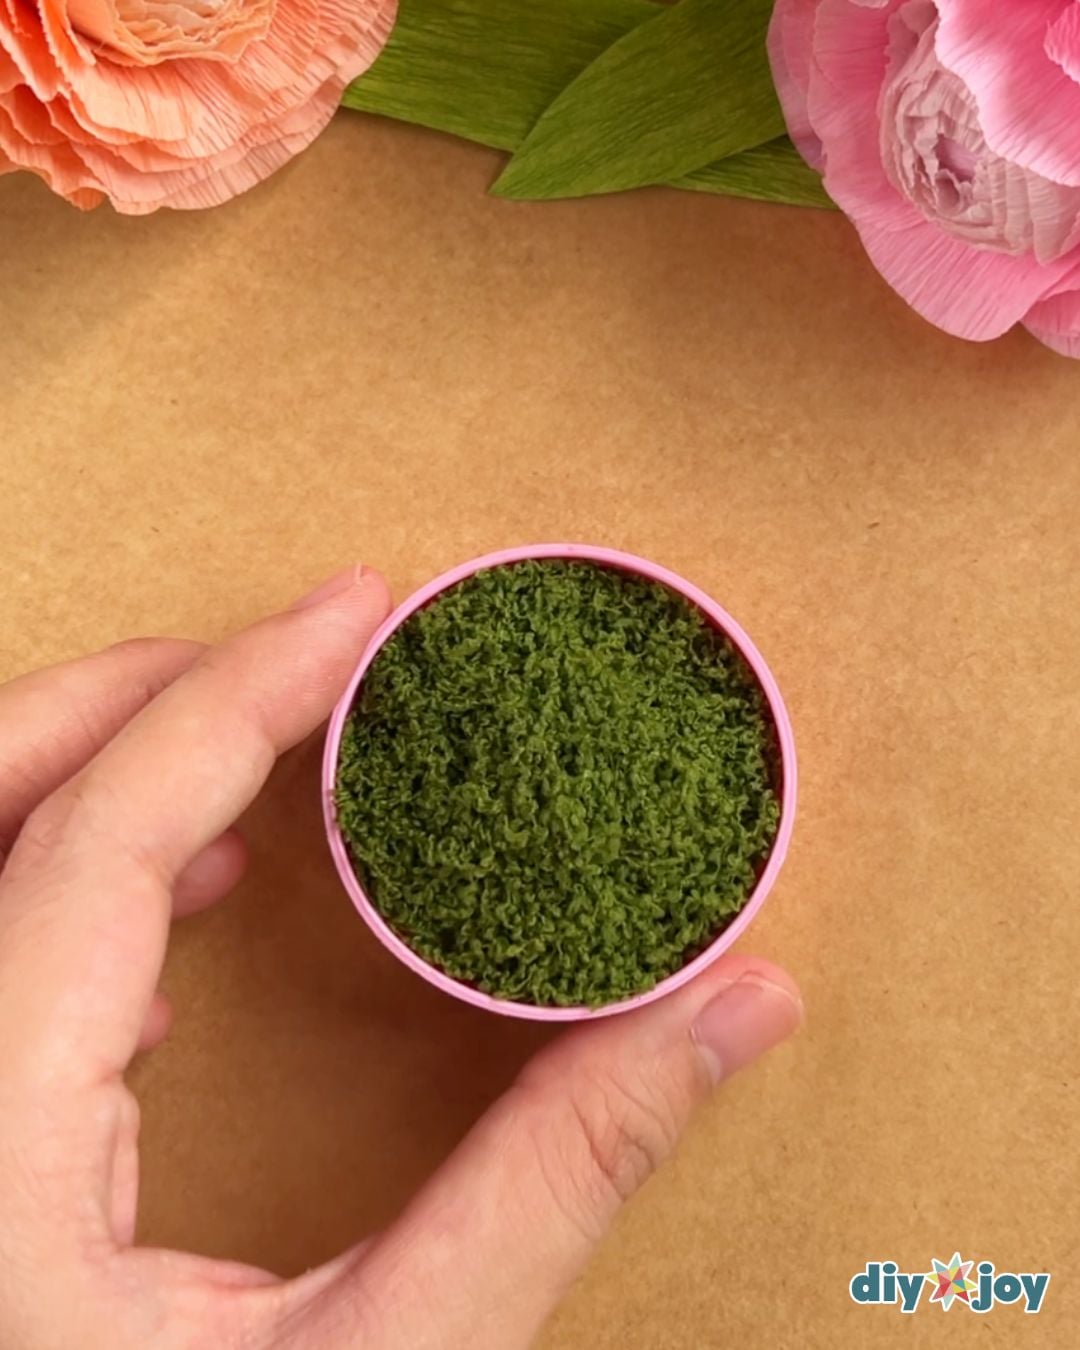
Cover the top
Cover the clay with fake moss.
Add the flowers
Arrange the flowers however you like.
![]()
Crafting Tip
To quickly cure gel nail polish, use a UV nail lamp. For regular polsih, apply quick-dry drops or use a cool fan.
Creative Ideas and Variations
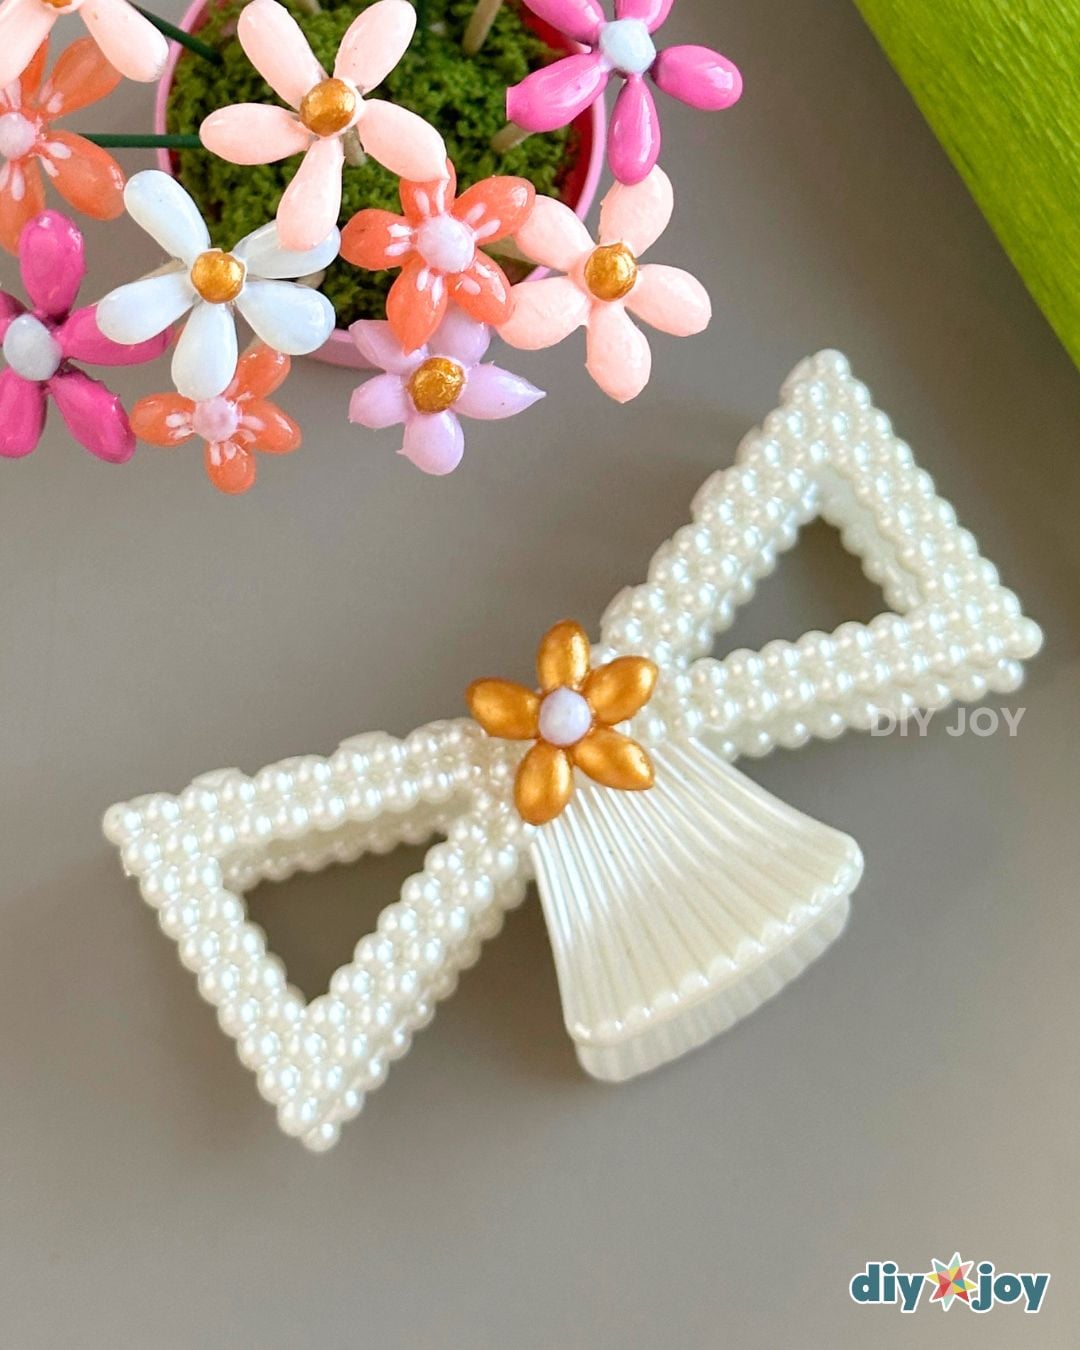
You can make these DIY hot glue flowers in different sizes and design them however you like. You can even add glitters or beads. They can be used as a desk decor or embellishment for hair clips, bags, phones, mirrors, and so much more.
More Hot Glue Crafts

How to Make Hot Glue Flowers | Video Tutorial