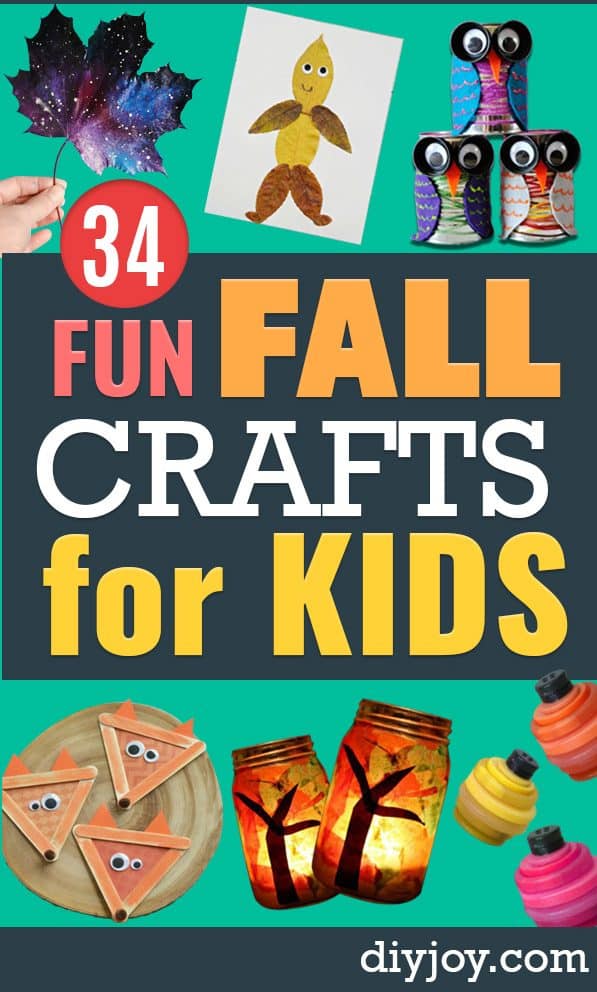
A bag of pinecones off the driveway, a stack of paper plates and the crayon stubs nobody wants: that is the entire supply list for about half of these fall crafts for kids. The rest ask for one thing you probably already own, like a cookie sheet, an iron or a jar from the recycling. There are leaves painted like the night sky, acorns baked at 170 degrees so the bugs do not come indoors with them, a haunted house the kids build on a sticky wall and take apart again, and gummy candy they can actually eat. Some are ten-minute rescues for a rainy Tuesday and some will fill a whole afternoon. Perfect for toddlers, a preschool table, a classroom party or a grandparent who needs a project ready when the kids arrive.
32 Fun Fall Crafts for Kids
1. Paint Space Leaves

Leaves are free canvases, which is most of the appeal here, and a maple leaf is the one to reach for because the broad surface gives you room to work. Red maple especially. Adventure in a Box sponges acrylic paint over the whole leaf, then flicks on white specks so the finished thing looks like it blew in on a cosmic wind. Collect them on a walk, keep a few spares because some will crack, and let the leaf’s own veins show through the paint instead of covering them.
Get the full tutorial at Adventure in a Box.
2. Beautiful Pinecone Mobiles for Kids to Make
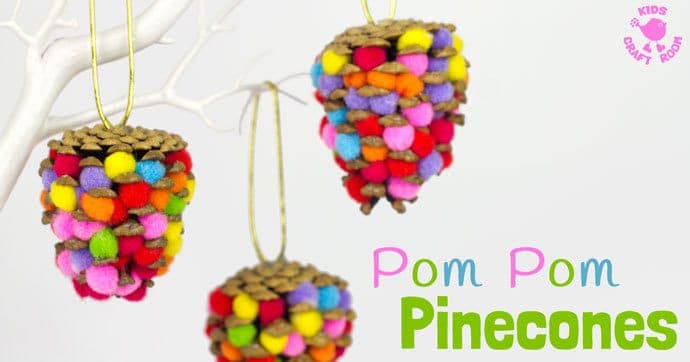
Pinecones packed full of mini pom poms in every color, tied with gold twine and hung from a bare branch. It is one of the tidiest ways to use a bag of pinecones, because the pom poms wedge between the scales rather than needing glue everywhere. Mini is the operative word: standard pom poms will not sit down in the gaps. Hang a few at different lengths from a branch for a mobile, or leave the twine off and set them in a bowl.
Get the full tutorial at Kids Craft Room.
3. Pinecone Turkey Craft for Kids
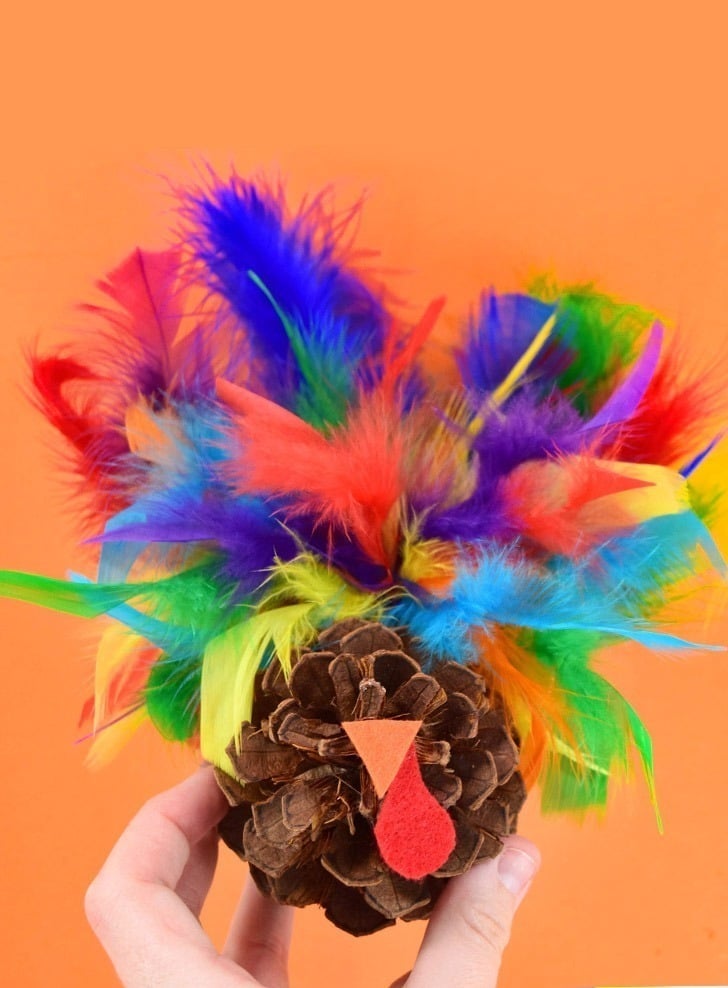
Colorful craft feathers glued into the back of a pinecone, a felt beak and wattle on the front, and you have a table full of turkeys. Dream a Little Bigger makes hers with acrylic craft felt, feathers, scissors and glue, and points out the thing nobody warns you about: pinecones are surprisingly expensive to buy for crafting, so gather them from a yard if you have the option. They are simple enough that kids can help you get the Thanksgiving table dolled up.
Get the full tutorial at Dream a Little Bigger.
4. Fun Corn Cob Craft Painting for Kids
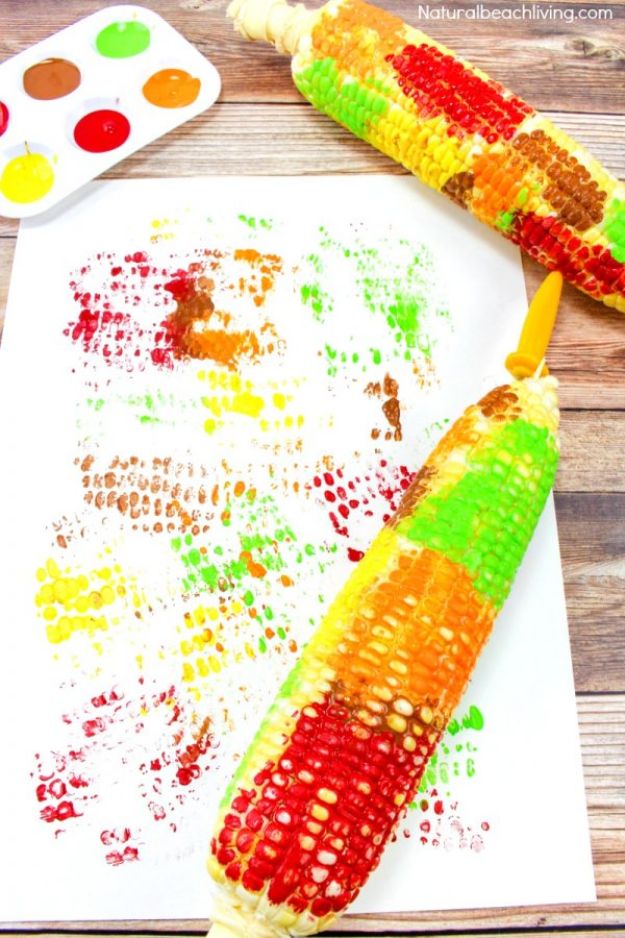
Corn on the cob makes a printing block, and the texture it leaves on paper is the whole point. Natural Beach Living shucks the ears first, which is a real job a child can do, then paints several colors straight onto the cob and rolls it across the paper to leave rows of dimpled pattern. Corn holders in the ends keep small hands a good deal cleaner, though it works without them. Three supplies total: corn, paint and paper.
Get the full tutorial at Natural Beach Living.
5. Acorn Painting Craft
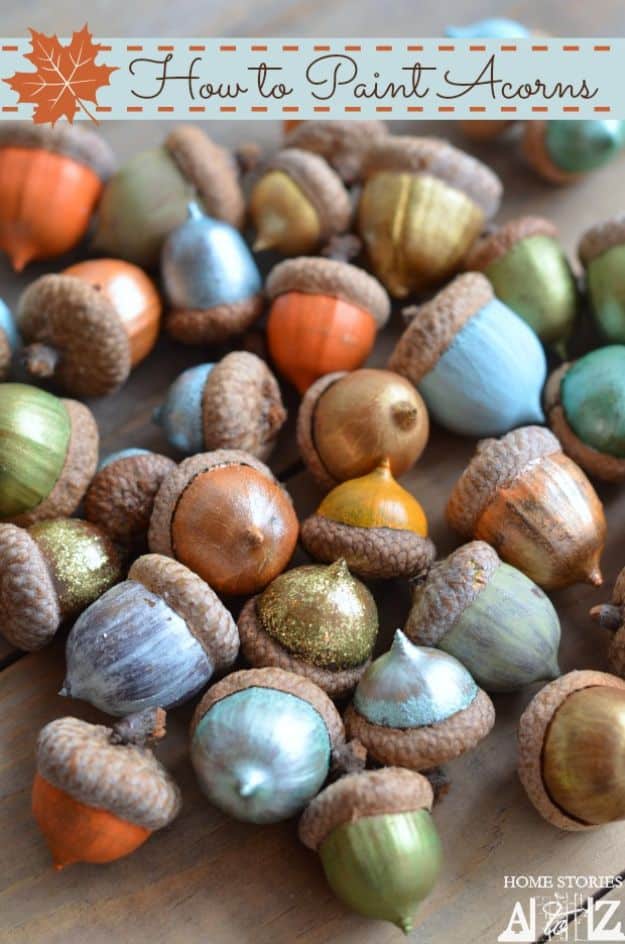
Bake your acorns before you do anything else. Home Stories A to Z spreads them on a foil-lined sheet at 170 degrees for about two hours, which kills whatever is living inside, and she learned that the hard way after watching a bug walk up the inside of her lamp. Then paint them with acrylic craft paint, brushing with the grain of the nut, because the brush strokes show. Leave the caps on, they make the acorns far easier to hold, and hot glue back any that have come loose.
Get the full tutorial at Home Stories A to Z.
6. Caramel Apple Popsicle Craft
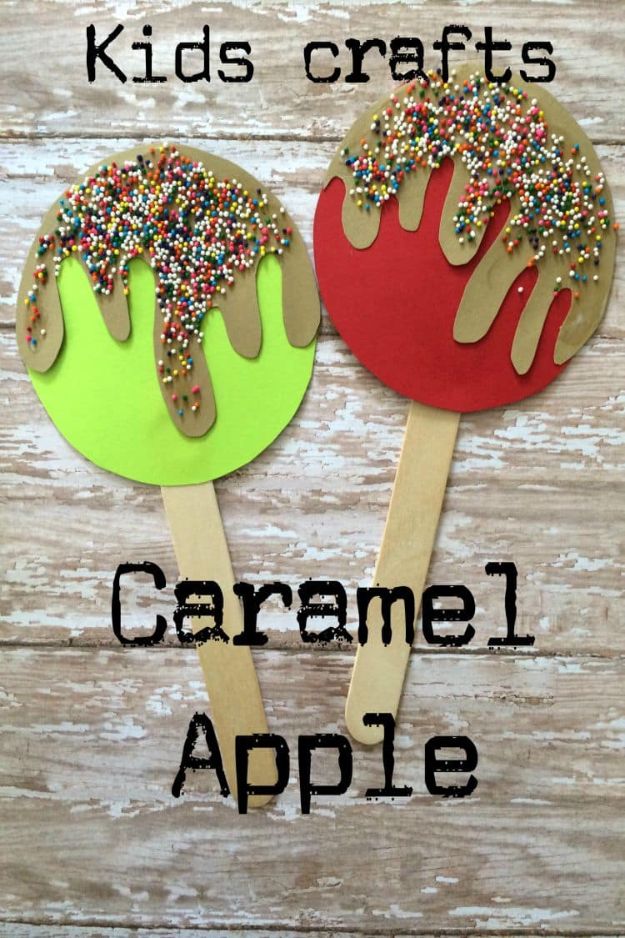
A paper caramel apple on a stick, and the cut is cleverer than it looks. The Classy Chapter traces a large glass onto green paper, red paper and twice onto brown, draws a wavy line across each brown circle, cuts along it and glues the top half over the apple so the caramel looks like it is running down. A craft stick goes on the back. Sprinkles instead of glitter, which is the detail that makes this one worth doing indoors.
Get the full tutorial at The Classy Chapter.
7. Contact Paper Sticky Wall Haunted House
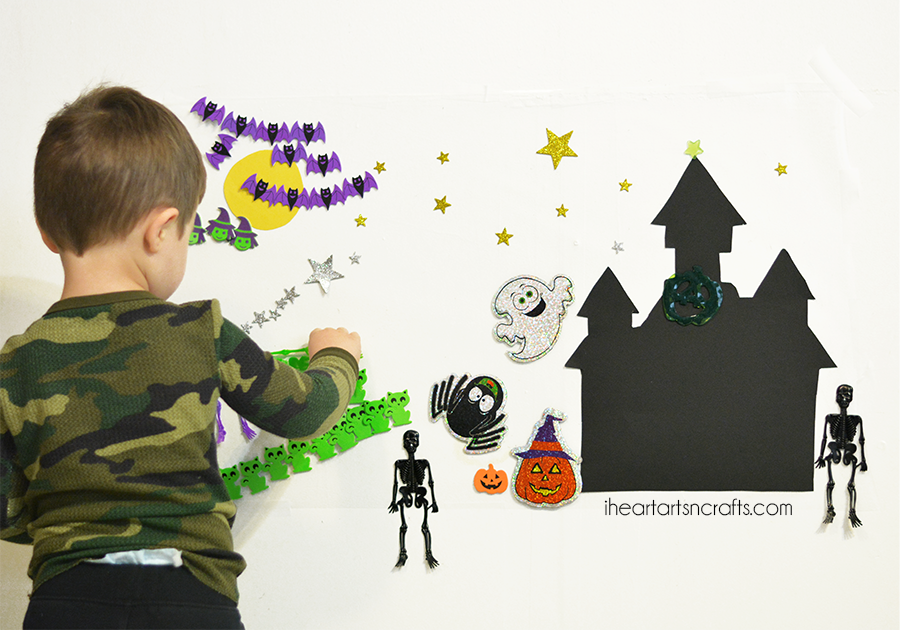
Tape a sheet of clear contact paper to the wall sticky side out, add a black paper haunted house and a yellow paper moon, and hand over a tray of star stickers, foam shapes and any small plastic Halloween toys from the dollar store. I Heart Arts n Crafts reports an hour of solid play from it. Everything peels off at the end, though you will need a fresh sheet of contact paper the next time. Every child fills it differently, which is the best part.
Get the full tutorial at I Heart Arts n Crafts.
8. Leaf People Craft
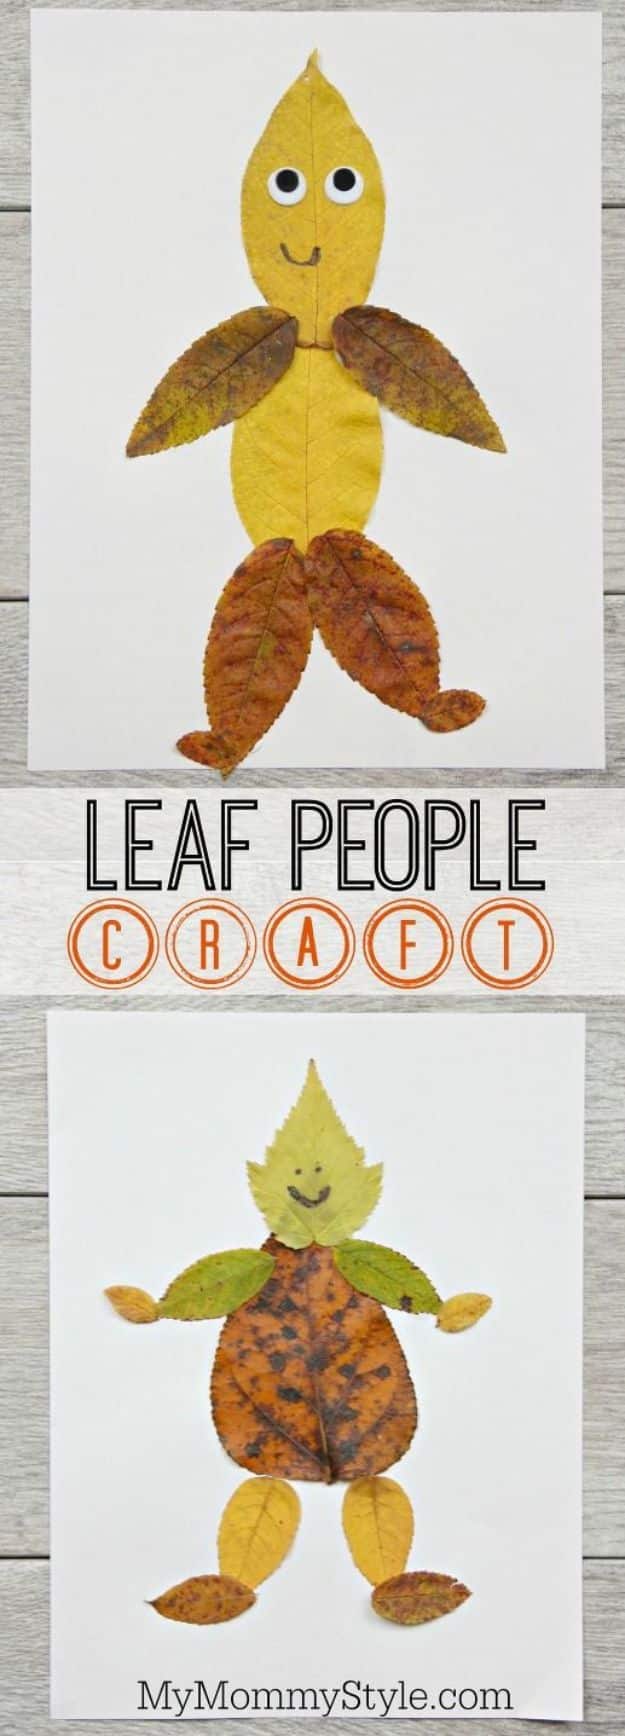
Gather leaves in every shape and size you can find, then glue them onto white paper as people. My Mommy Style adds googly eyes and a marker face at the end, and is clear that there is no right or wrong way to arrange them. Her tip is the one that saves the craft: leaves keep drying out and go crunchy, so laminate them if you can. If you cannot, glue every leaf down thoroughly or the edges will curl away from the page within a week.
Get the full tutorial at My Mommy Style.
9. Popsicle Stick Fox
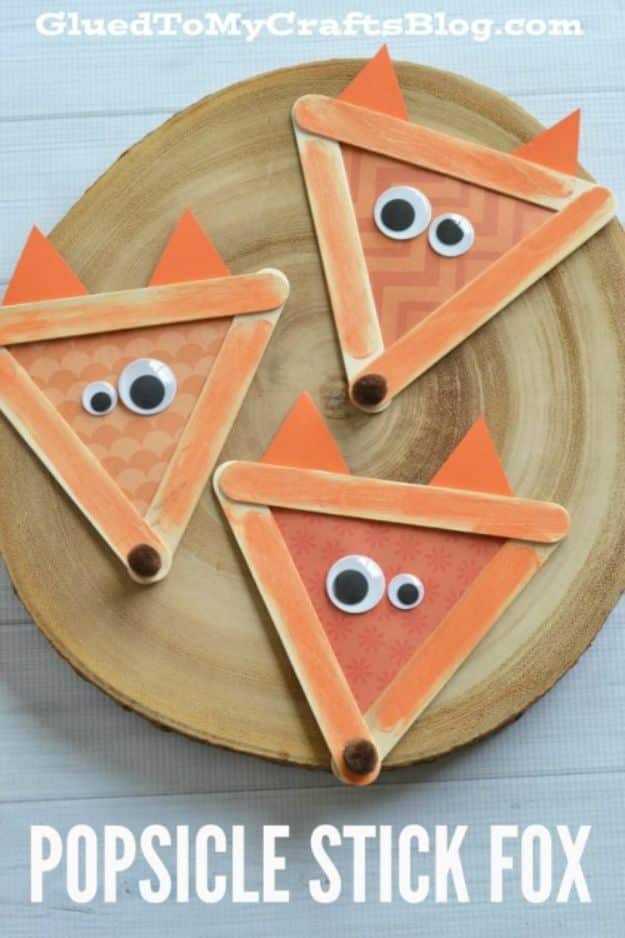
Three jumbo popsicle sticks glued into a triangle, and everything after that is paper. Glued To My Crafts cuts a triangle of patterned scrapbook paper to sit inside the frame as the face, two smaller triangles for the ears and a circle for the nose, then the children paint the sticks orange and glue the pieces on with wiggle eyes. A brown pom pom makes a rounder nose if you have one. Ribbon on the back turns it into an ornament and a magnet puts it on the fridge.
Get the full tutorial at Glued To My Crafts.
10. Handprint Acorns
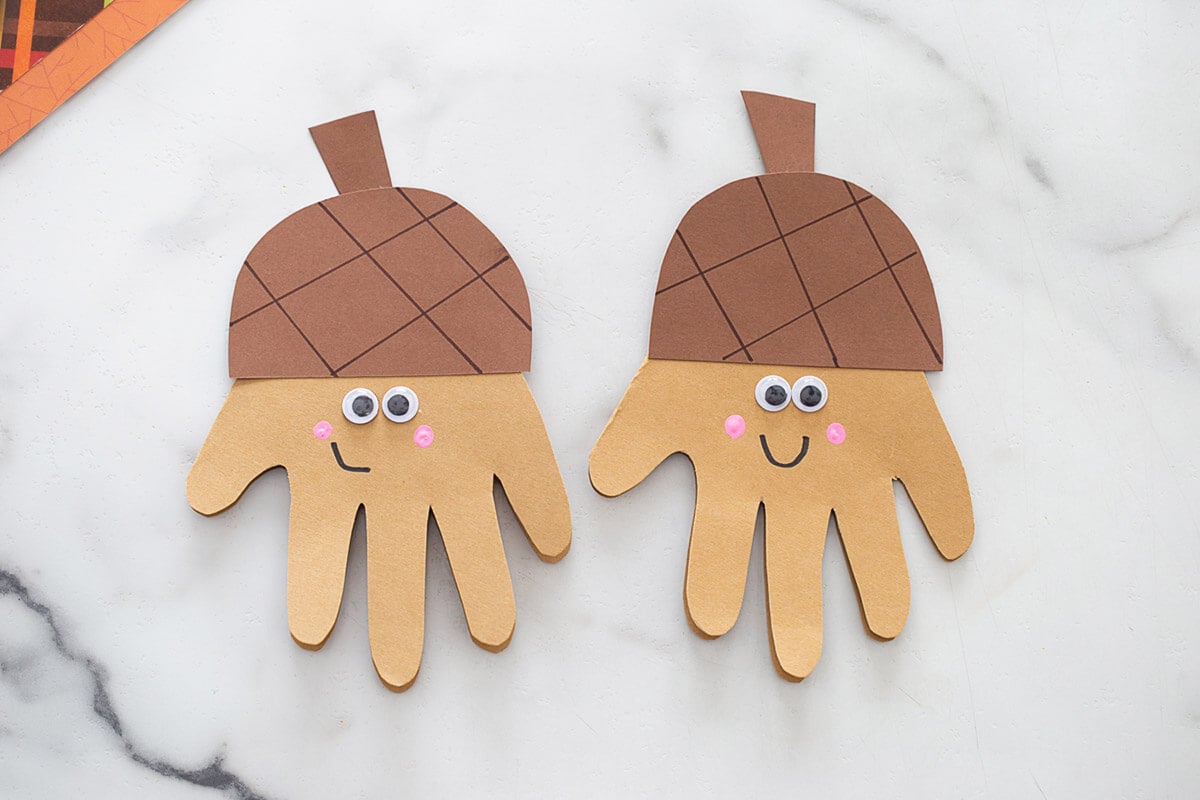
Fold a piece of light brown cardstock, trace your child’s hand with the thumb along the fold and cut it out, and it opens like a card. The Best Ideas for Kids then glues on an acorn top cut from darker brown cardstock, slightly larger than the handprint, with diagonal marker lines ruled across it and a stem glued behind. Googly eyes, a marker smile, and pink cheeks dabbed on with the back of a pencil. Write a message inside and it becomes a keepsake rather than another piece of paper.
Get the full tutorial at The Best Ideas for Kids.
11. Mason Jar Fall Luminaries Craft
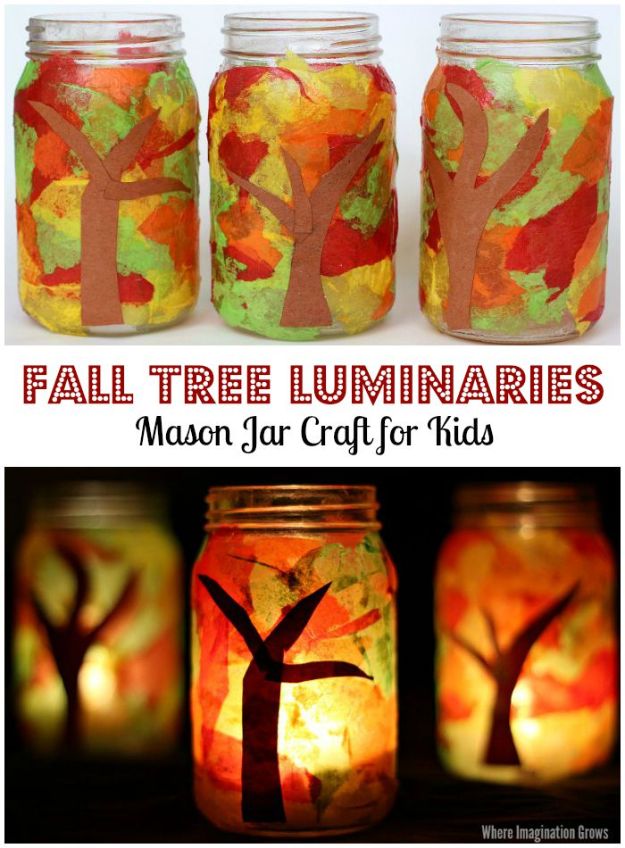
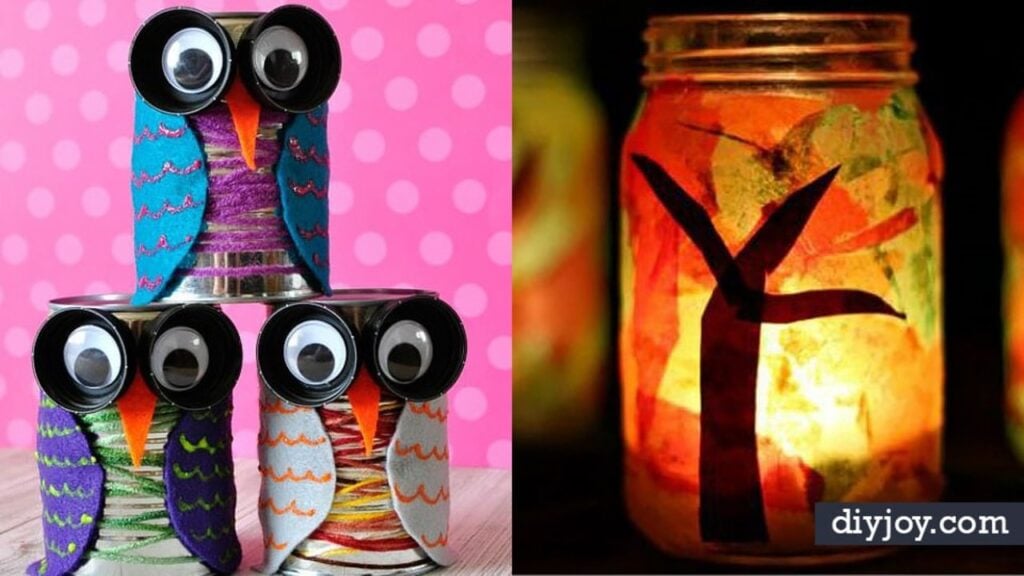
Tissue paper in fall colors, torn into pieces and mod podged around a jar, with a brown paper tree stuck on the front so it shows in silhouette when a candle goes inside. Where Imagination Grows uses dollar store 16 ounce jars and works one small area at a time so the Mod Podge does not skin over before the paper lands on it. Go back over every loose edge with a top coat at the end. About ten to fifteen minutes a jar, and keep a wet wipe on the table.
Get the full tutorial at Where Imagination Grows.
12. Styrofoam Cup Spiders
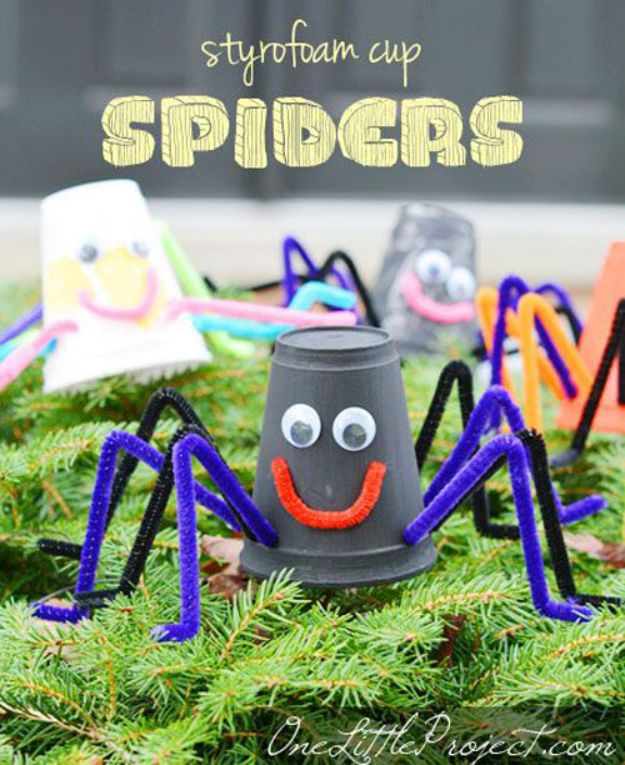
A styrofoam cup upside down is a spider body, and One Little Project’s build is worth copying exactly. Three coats of black acrylic paint to cover the foam properly, then pipe cleaners cut in half for the legs: fold about half an inch up at one end to make an L-shaped foot, then fold the whole thing in half again for a knee. Eight of those and some googly eyes and it is done. Dollar store paint and pipe cleaners keep the whole thing under a couple of dollars.
Get the full tutorial at One Little Project.
13. Candy Corn Flowers
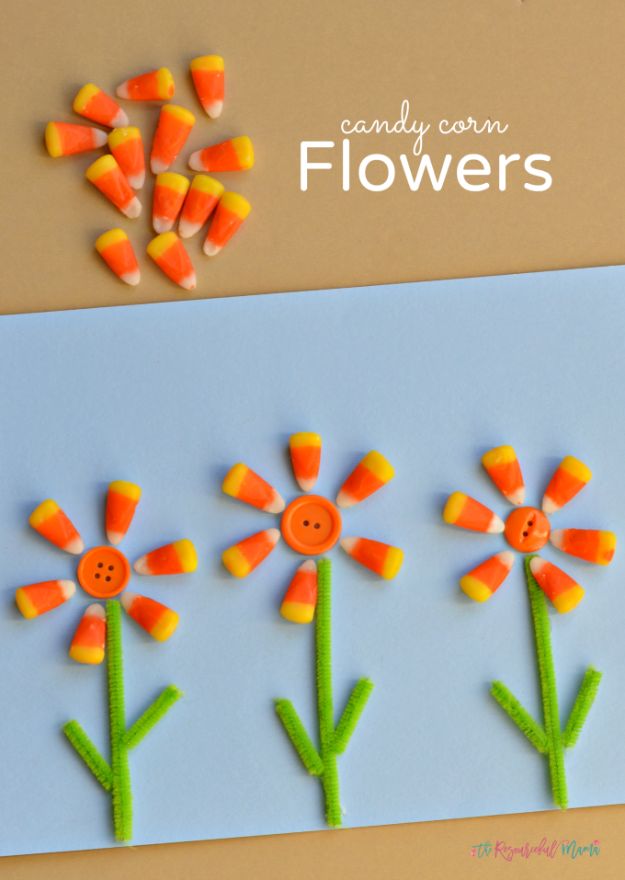
Candy corn turns out to make a very good flower petal, which is not something you work out on your own. The Resourceful Mama glues an orange button down as the center, rings it with six candy corns and adds a green pipe cleaner stem with two shorter pieces as leaves. Pom poms work instead of buttons, and ribbon, washi tape or a drawn line will do for the stem. A low temperature glue gun makes this one a kid can actually run themselves.
Get the full tutorial at The Resourceful Mama.
14. Tin Can Pumpkins
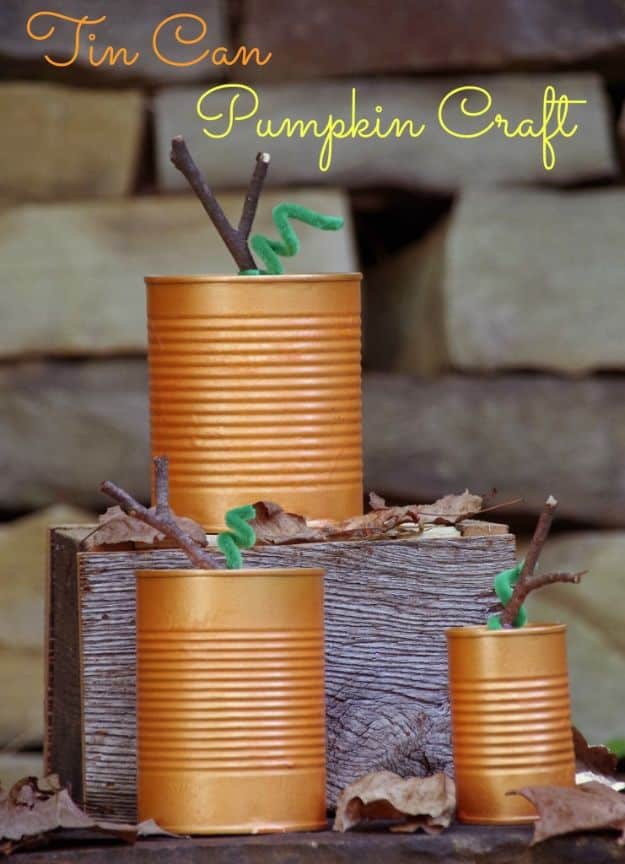
Tin cans out of the recycling, sprayed orange and finished with a twig and a curl of green, standing in a group on the table. Suburbia Unwrapped used Martha Stewart’s glass painting system on hers, in thin coats with a couple of hours of drying between them, and says there was very little actual work involved. A three inch length of green pipe cleaner wrapped around a pinky makes the vine, and a small twig hot glued beside it makes the stem. Vary the can sizes so the group has some height to it.
Get the full tutorial at Suburbia Unwrapped.
15. Paper Plate Owl
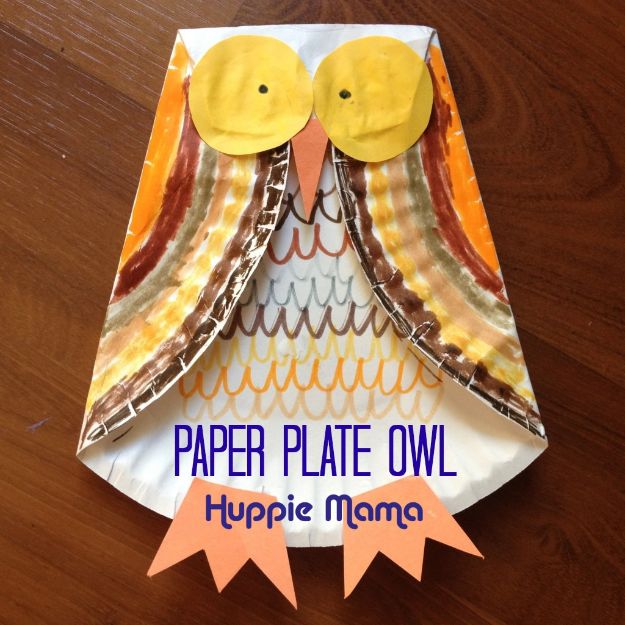
One white paper plate, folded three times, becomes an owl. Our Potluck Family colors the concave inside as the chest, folds both sides in to make wings and folds the top down for the head, then glues on two feet, two eyes and a beak cut from construction paper. The folding is genuinely useful fine motor practice for a preschooler, with a bit of hand-over-hand help. Brown and grey read as owl, but a rainbow one is nobody’s business but the child’s.
Get the full tutorial at Our Potluck Family.
16. Cupcake Liner Scarecrow
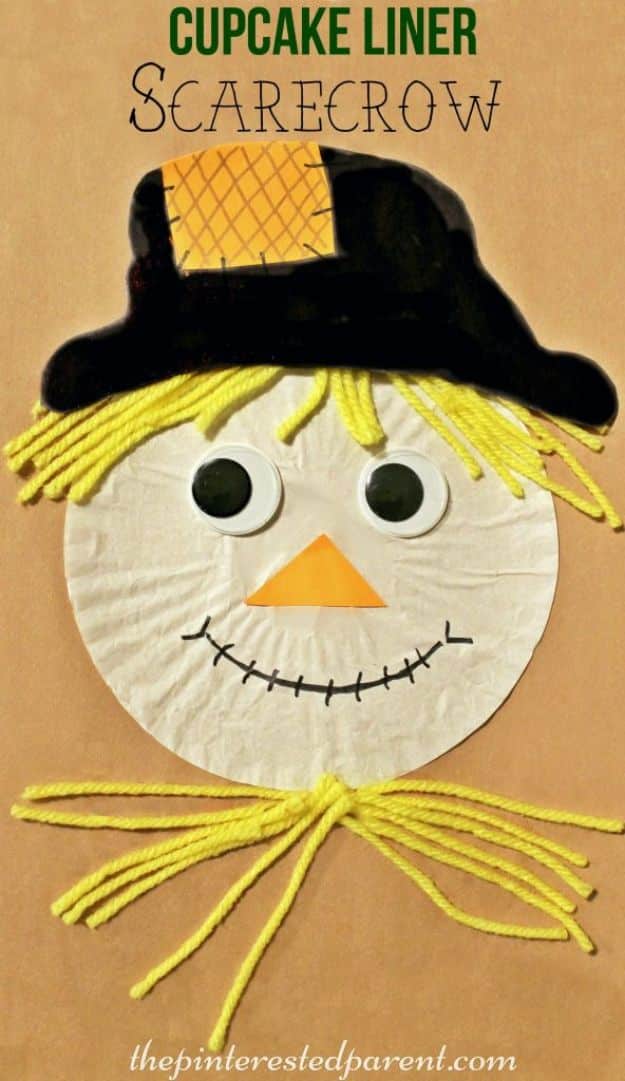
A flattened white cupcake liner glued to a sheet of construction paper is the scarecrow’s face, and the fluted edge does all the work. The Pinterested Parent glues strands of yellow yarn above and below the liner so the straw hair sticks out in every direction, adds a paper hat with a hash-marked patch, a triangle nose and googly eyes, then draws the mouth on. Longer yarn makes a girl scarecrow, which is the sort of thing a child will insist on.
Get the full tutorial at The Pinterested Parent.
17. Owl Pinecone Craft
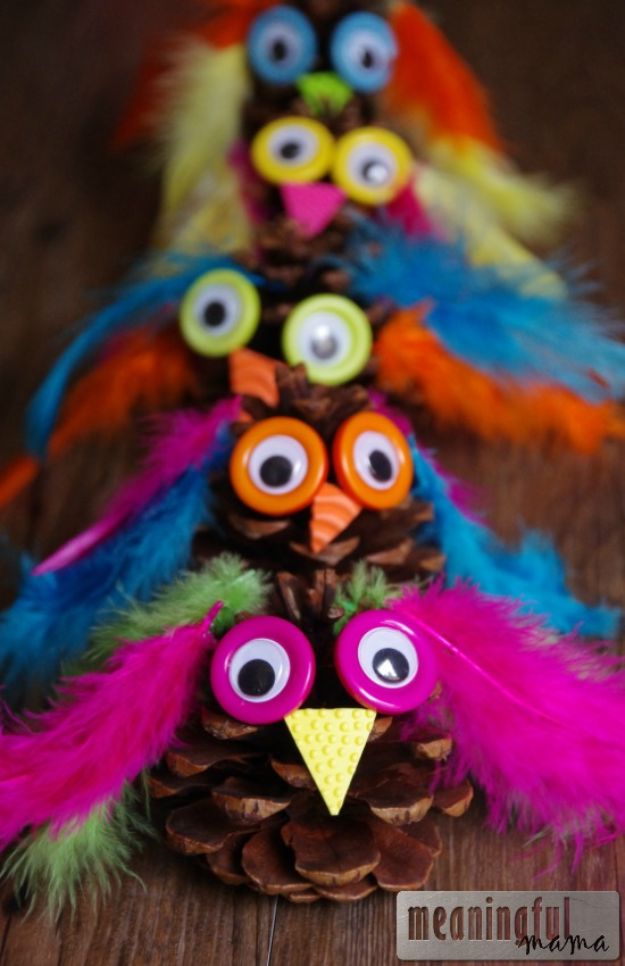
The good trick here is the eyes. Meaningful Mama sits a googly eye inside the rim of a button so it fits like a socket, which gives the owl a face with actual depth instead of two dots stuck on. Glue dots hold everything, which matters because kids can use those and they cannot really help with hot glue. A foam triangle for the nose, feathers down each side, and a large pinecone underneath. She picked up her pinecones in a bag at the grocery store.
Get the full tutorial at Meaningful Mama.
18. Tissue Paper Leaves
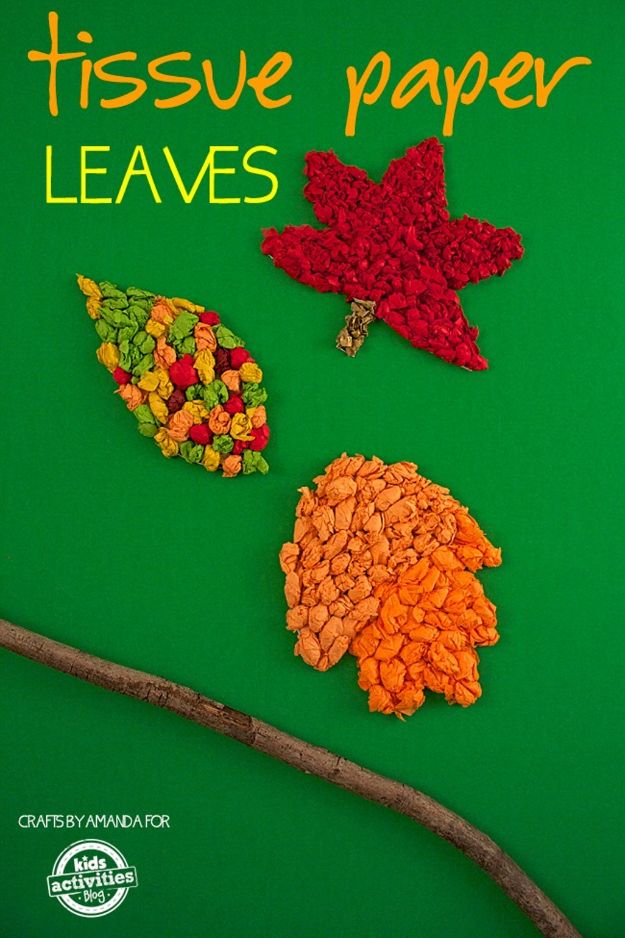
Tissue paper squares crumpled into little balls and glued inside a leaf outline, so the finished leaf has real texture rather than a flat wash of color. Kids Activities Blog offers a free leaf template, though leaves collected on a walk make a better outline. Cut or tear the tissue roughly, because none of it has to match once it is crumpled, and brush the glue on a small area at a time so it does not dry ahead of you. A stick from the yard finishes it as a branch.
Get the full tutorial at Kids Activities Blog.
19. Kool-Aid Pumpkins
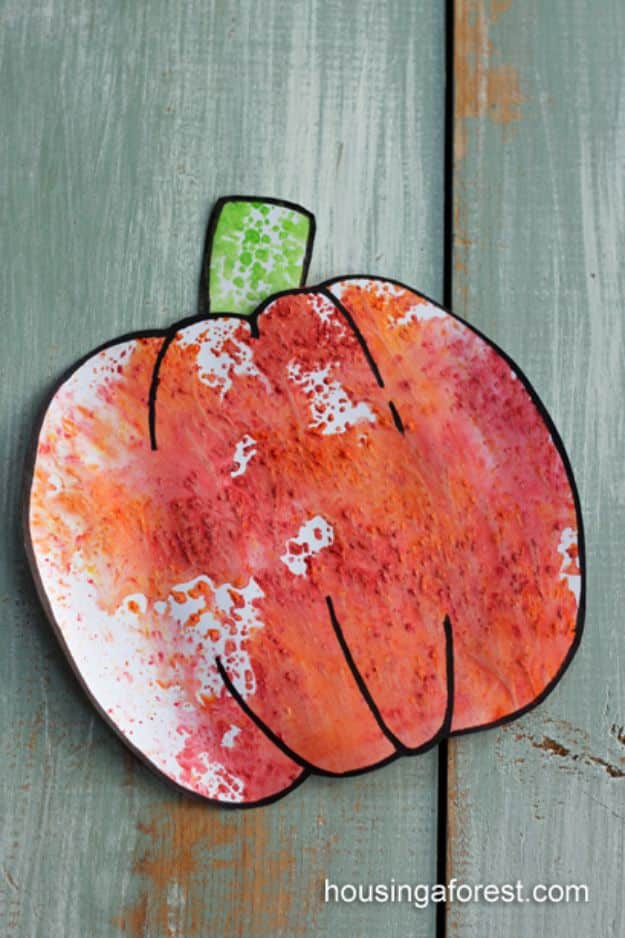
This one is a printing technique and it smells extraordinary. Housing a Forest tapes a plastic report cover down, sprays it generously with laundry spray starch, sprinkles unsweetened Kool-Aid over it from an old salt shaker, then lays heavy card stock on top and rubs to lift the print. Orange and cherry for the pumpkin, lemon-lime for the stem, and skip lemon because it is too pale to show. Let it dry fully before you draw the pumpkin outline on with a Sharpie and cut.
Get the full tutorial at Housing a Forest.
20. Pine Cone Bird Feeder
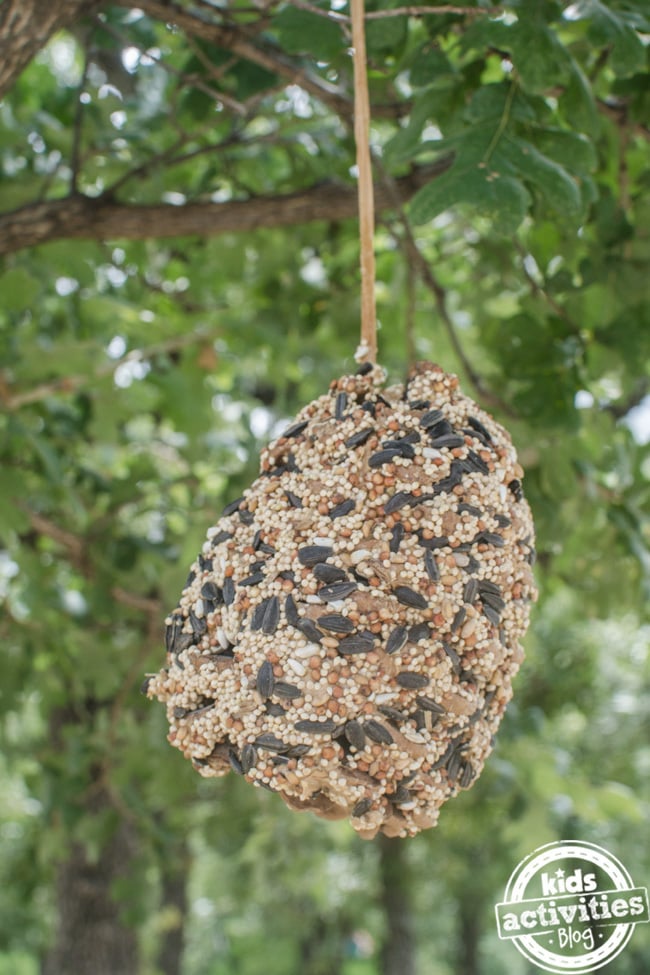
A pinecone hung from a branch, coated in peanut butter and rolled in birdseed. It is the first outdoor project most kids do, and the reason it endures is that they can run almost the whole thing themselves while you stand there holding the seed dish. Tie the string on before the peanut butter goes anywhere near it, or you will be knotting twine with sticky fingers. Hang it where you can see it from a window, because watching who turns up is half the payoff.
Get the full tutorial at Kids Activities Blog.
21. Paper Bag Fall Tree
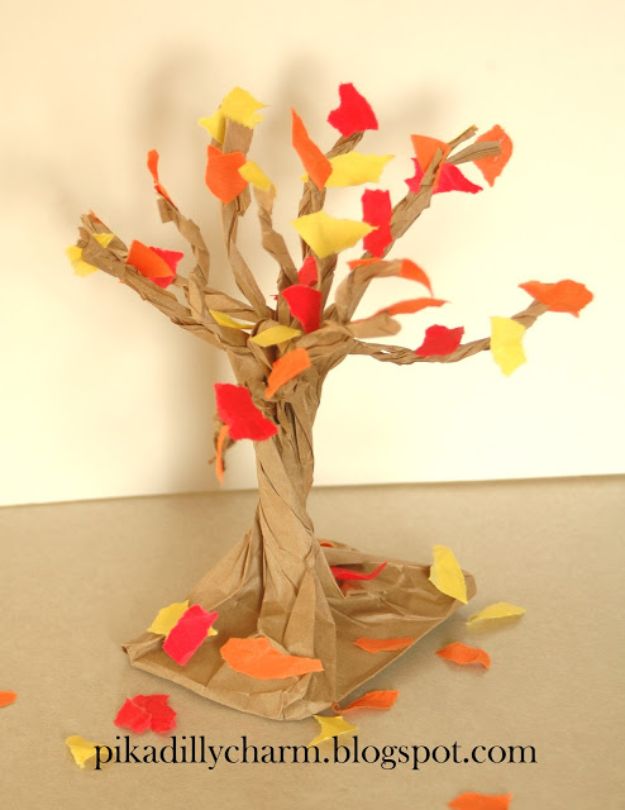
A brown paper lunch bag becomes a tree, and it is all in the twisting. Pikadilly Charm cuts the bag into half inch strips from the opening down to about halfway, stands it up, holds the base and twists the middle to form a trunk, then twists pairs of strips together into branches. Tear colored paper into tiny pieces and glue them all over the branches for leaves. Four supplies, no template, and it stands up on a table on its own.
Get the full tutorial at Pikadilly Charm.
22. Lion Leaf Craft
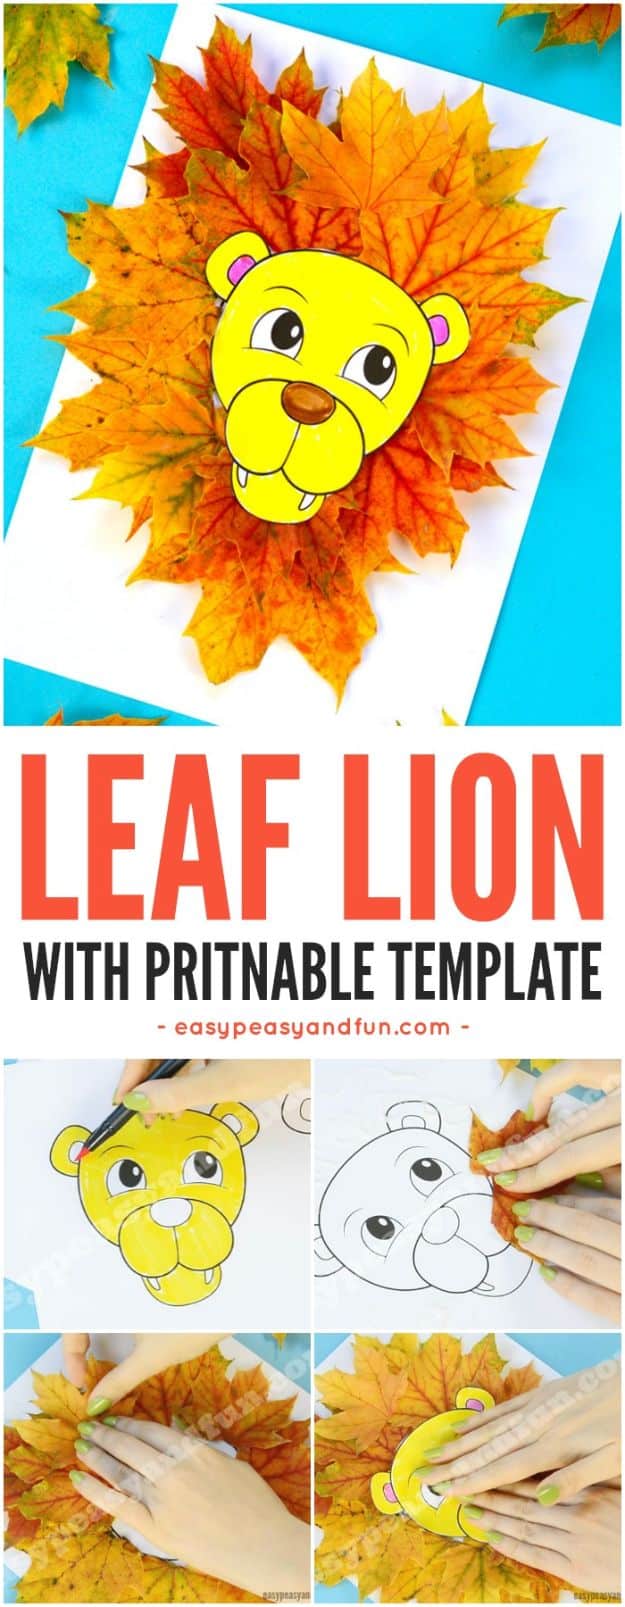
A lion’s mane made of real leaves, which is one of those ideas that seems obvious the second you see it. Easy Peasy and Fun provides a free printable template for the face, so the only work left is gathering leaves on a walk and gluing them in a ring around it. She designed it for older toddlers through kindergarten, and the gluing is deliberate fine and gross motor practice. The printable also makes it workable for a whole classroom table at once.
Get the full tutorial at Easy Peasy and Fun.
23. Pumpkin Moon Sand
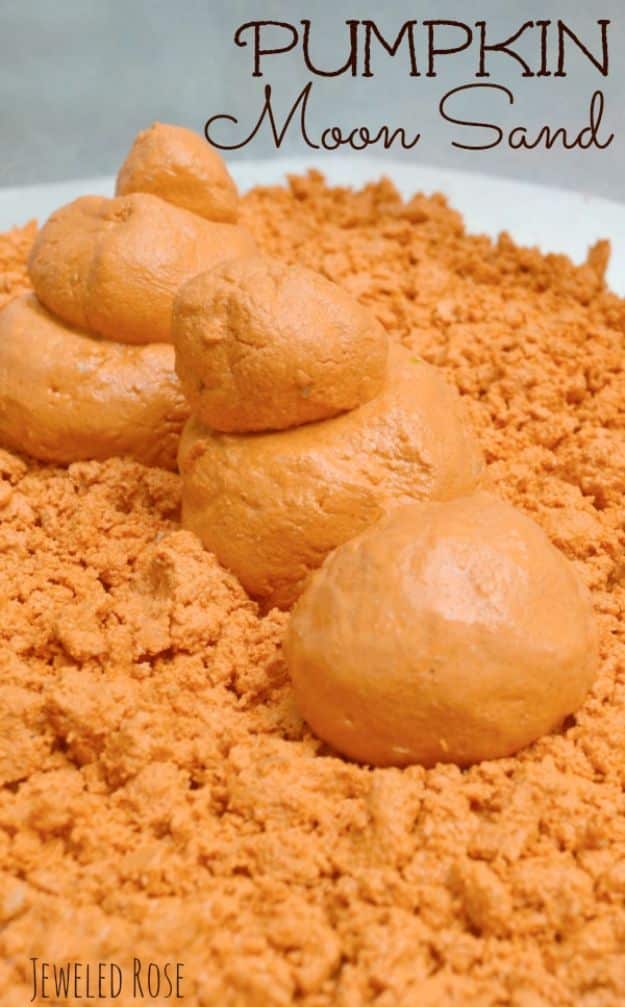
Not a craft that gets hung on the fridge, a craft that gets played with for an hour. Growing a Jeweled Rose mixes two parts play sand with one part cornstarch, stirs in pumpkin pie spice and a little powdered tempera for color, then adds water slowly until it holds a shape when squeezed and still crumbles when pulled apart. Packed into a cup and turned out, it stands up like a tiny tower, and that moldability is what separates moon sand from an ordinary sensory bin.
Get the full tutorial at Growing a Jeweled Rose.
24. Spider Web Q Tip Craft
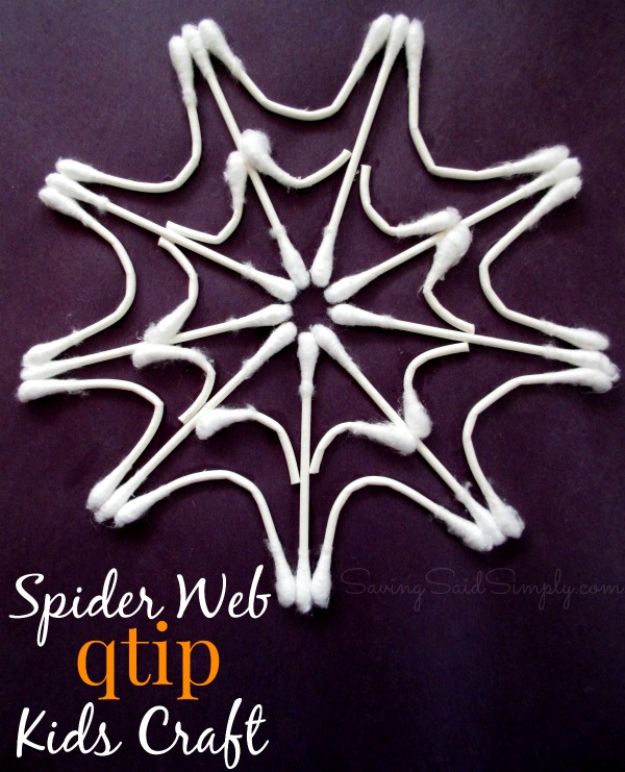
Q-tips on black construction paper, and the one instruction that matters comes before any glue: lay the whole web out dry first. Raising Whasians bends a handful of Q-tips into a U by curving them around a finger, arranges the straight ones like the spokes of a wheel, then fits the curved ones between the spokes with the bend facing the center. Shuffle and re-bend until the circle looks right, and only then glue. Budget at least 15 Q-tips.
Get the full tutorial at Raising Whasians.
25. Colorful Tin Can Owl Craft
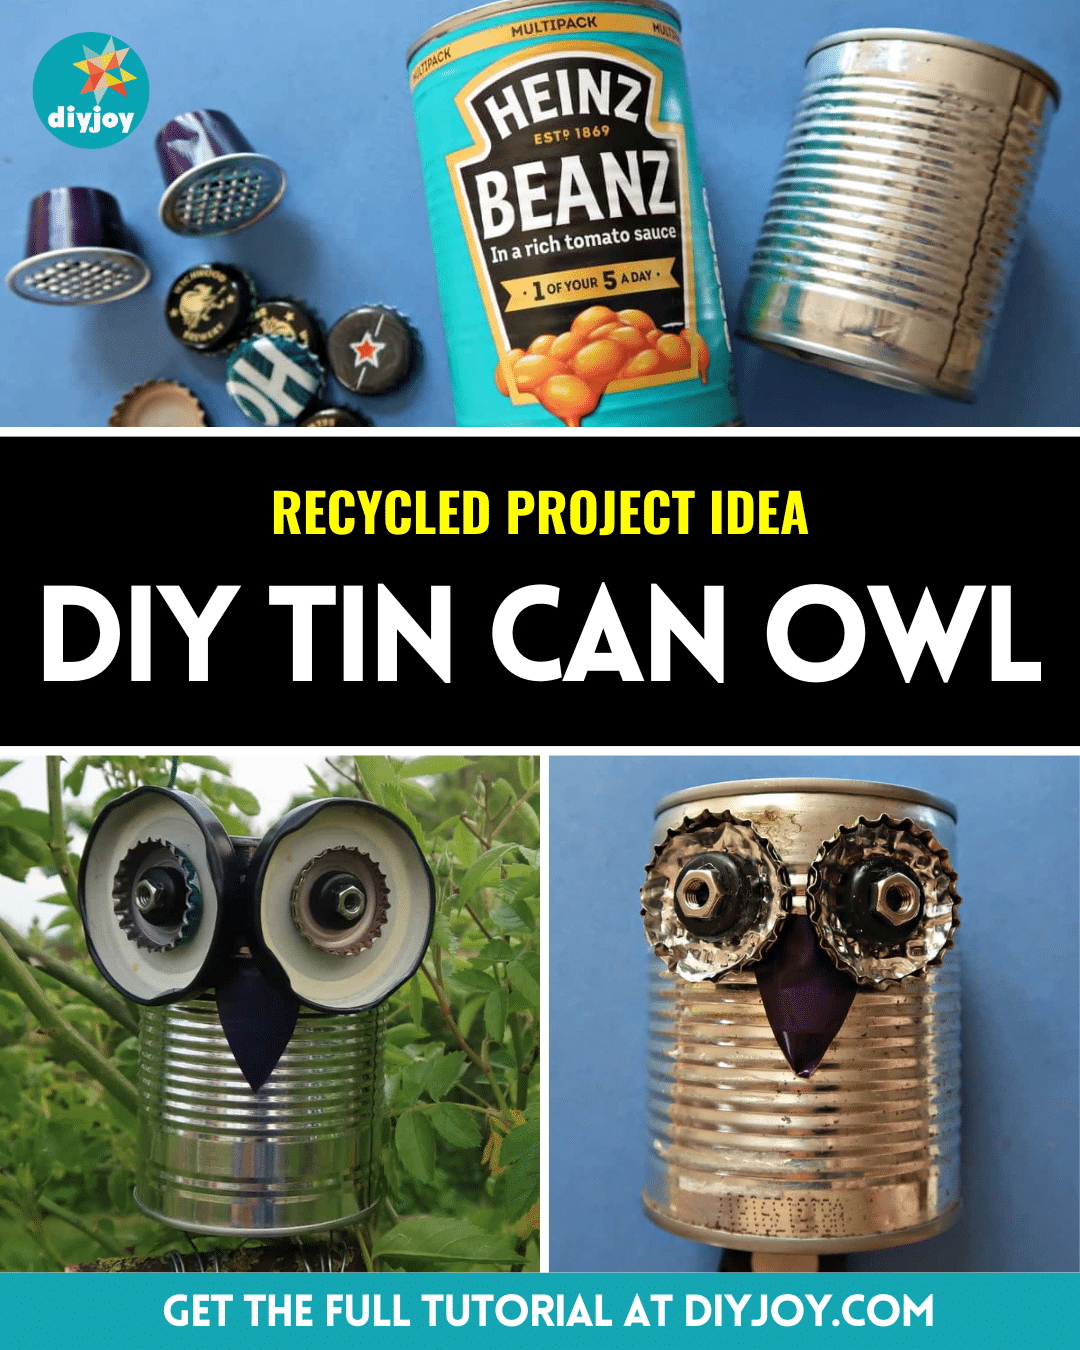
An owl assembled entirely from metal and rubbish: empty tin cans with the labels off, bottle caps, washers, metal nuts, used coffee pods, wire and a stick, held together with E6000 or another adhesive rated for metal. The eyes are the clever part, with the mesh top of a coffee pod lining each bottle cap and a washer and nut set into it. Waiting for the glue to dry takes longer than the build. They live outdoors happily, or work as a small planter.
Get the full tutorial at DIY Joy.
26. Craft Stick Scarecrow
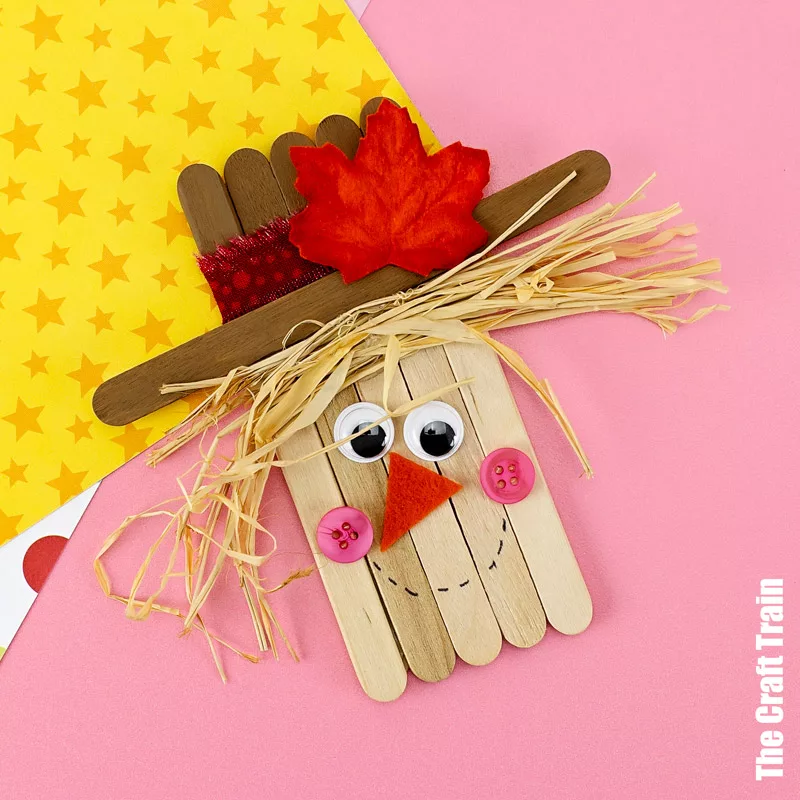
Six standard popsicle sticks and two mini ones make the whole scarecrow. The Craft Train glues the two minis crossways behind a row of five to hold the face together, angles one more stick across the top for a hat brim, paints it yellow or light brown and tucks raffia underneath for hair. A felt triangle nose, two pink buttons as cheeks joined by a dashed Sharpie smile, and a mini leaf on the hat. Written for ages six and up, and a magnet on the back turns it into a fridge magnet.
Get the full tutorial at The Craft Train.
27. Apple Footprints
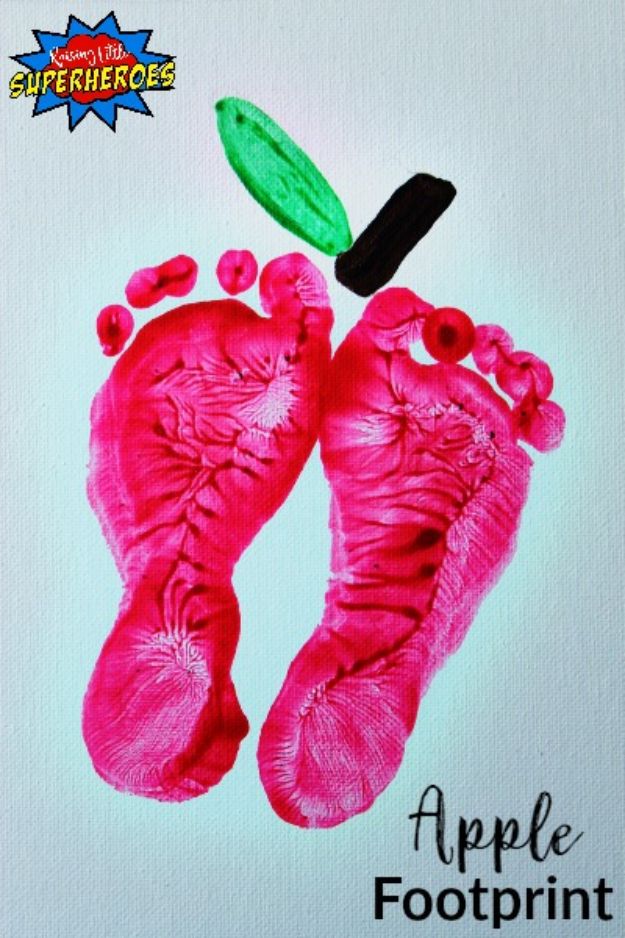
Paint the bottom of each foot and press them side by side, and the two prints together make an apple. Raising Little Superheroes paints on an 8 by 10 canvas rather than cardstock, because the paint smudges less and it hangs on a wall afterward. Cover the whole sole so there are no white gaps, then add a stem and a leaf once the red is dry. Better still, have your child press a brown fingerprint for the stem so their hand is in it as well as their foot.
Get the full tutorial at Raising Little Superheroes.
28. Melted Crayon Leaf Suncatchers
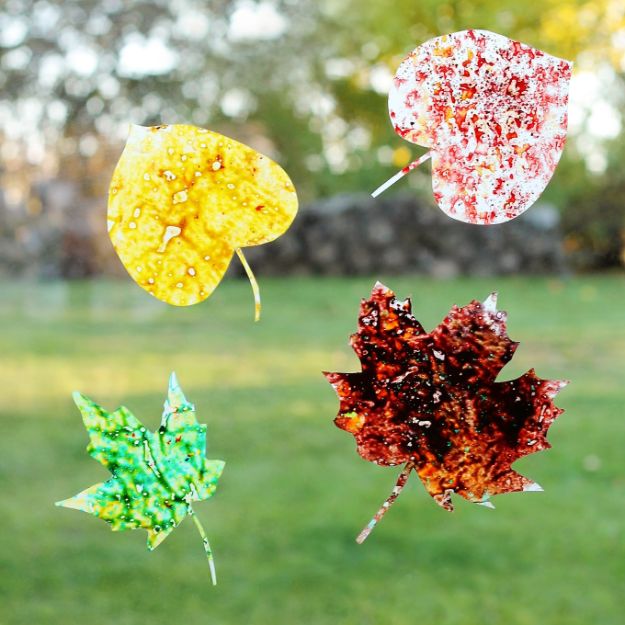
Collect the leaves first and let them decide the shape and the colors, which is Fireflies and Mudpies’ actual advice and the part most people skip. Then it is grated crayon between two sheets of wax paper, melted with an iron over an old towel. A mini grater is the tool that makes it work, since crayon shavings melt evenly and lumps do not. Hang them in a window and they are genuinely beautiful in the afternoon, for the price of the broken crayons in the bottom of the box.
Get the full tutorial at Fireflies and Mudpies.
29. Button Pumpkins
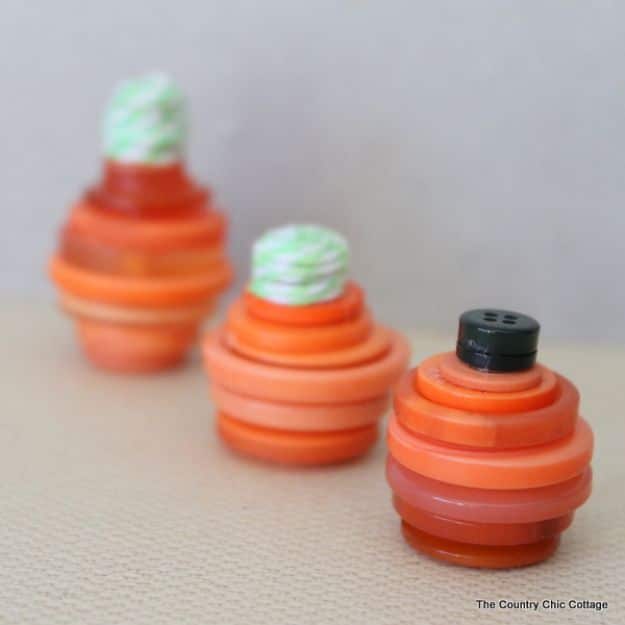
Stack buttons on a length of twine, smallest at the top, and you have a mini pumpkin. The Country Chic Cottage makes hers with vintage buttons, hot glue and twine, and the reason they look good is that mismatched oranges from the bottom of the jar read as one pumpkin once stacked. They take minutes each. Make a small crowd of them in different heights for a windowsill, and use a dark button at the top of one as a stem if you run out of green.
Get the full tutorial at The Country Chic Cottage.
30. Apple Wall Hanging
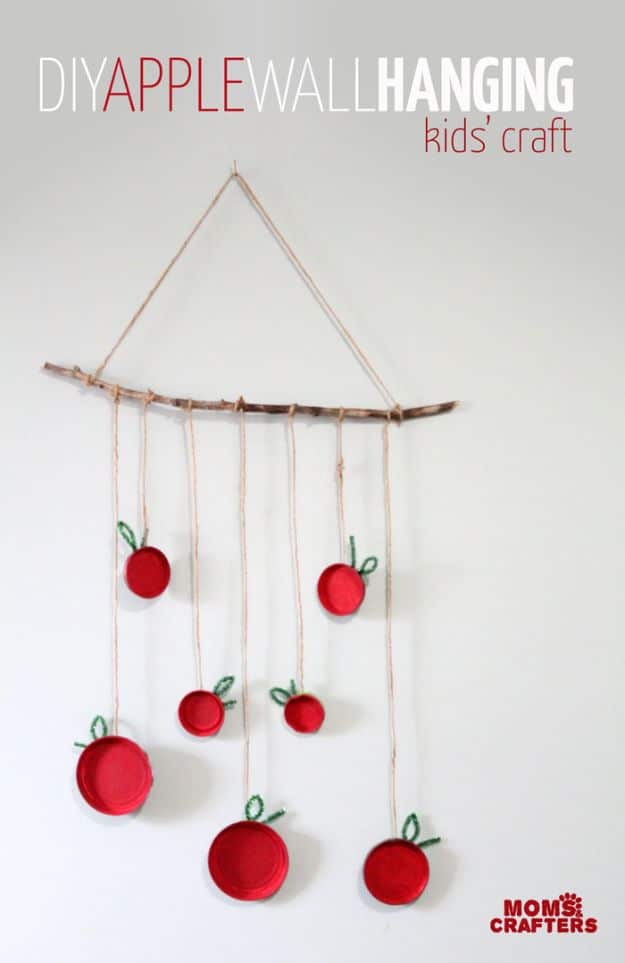
Seven metal jar lids painted red, hung at different lengths from a stick, and it looks far more finished than the supply list suggests. Moms and Crafters saves lids from baby food, capers and pasta sauce jars so the apples come in several sizes, paints two coats for a rich color, then bends a green pipe cleaner into a leaf and a stem and tapes it behind each lid. Twine ties the lids to the stick. Silk leaves, a dowel or ribbon all substitute happily.
Get the full tutorial at Moms and Crafters.
31. Homemade Gummy Fall Candy
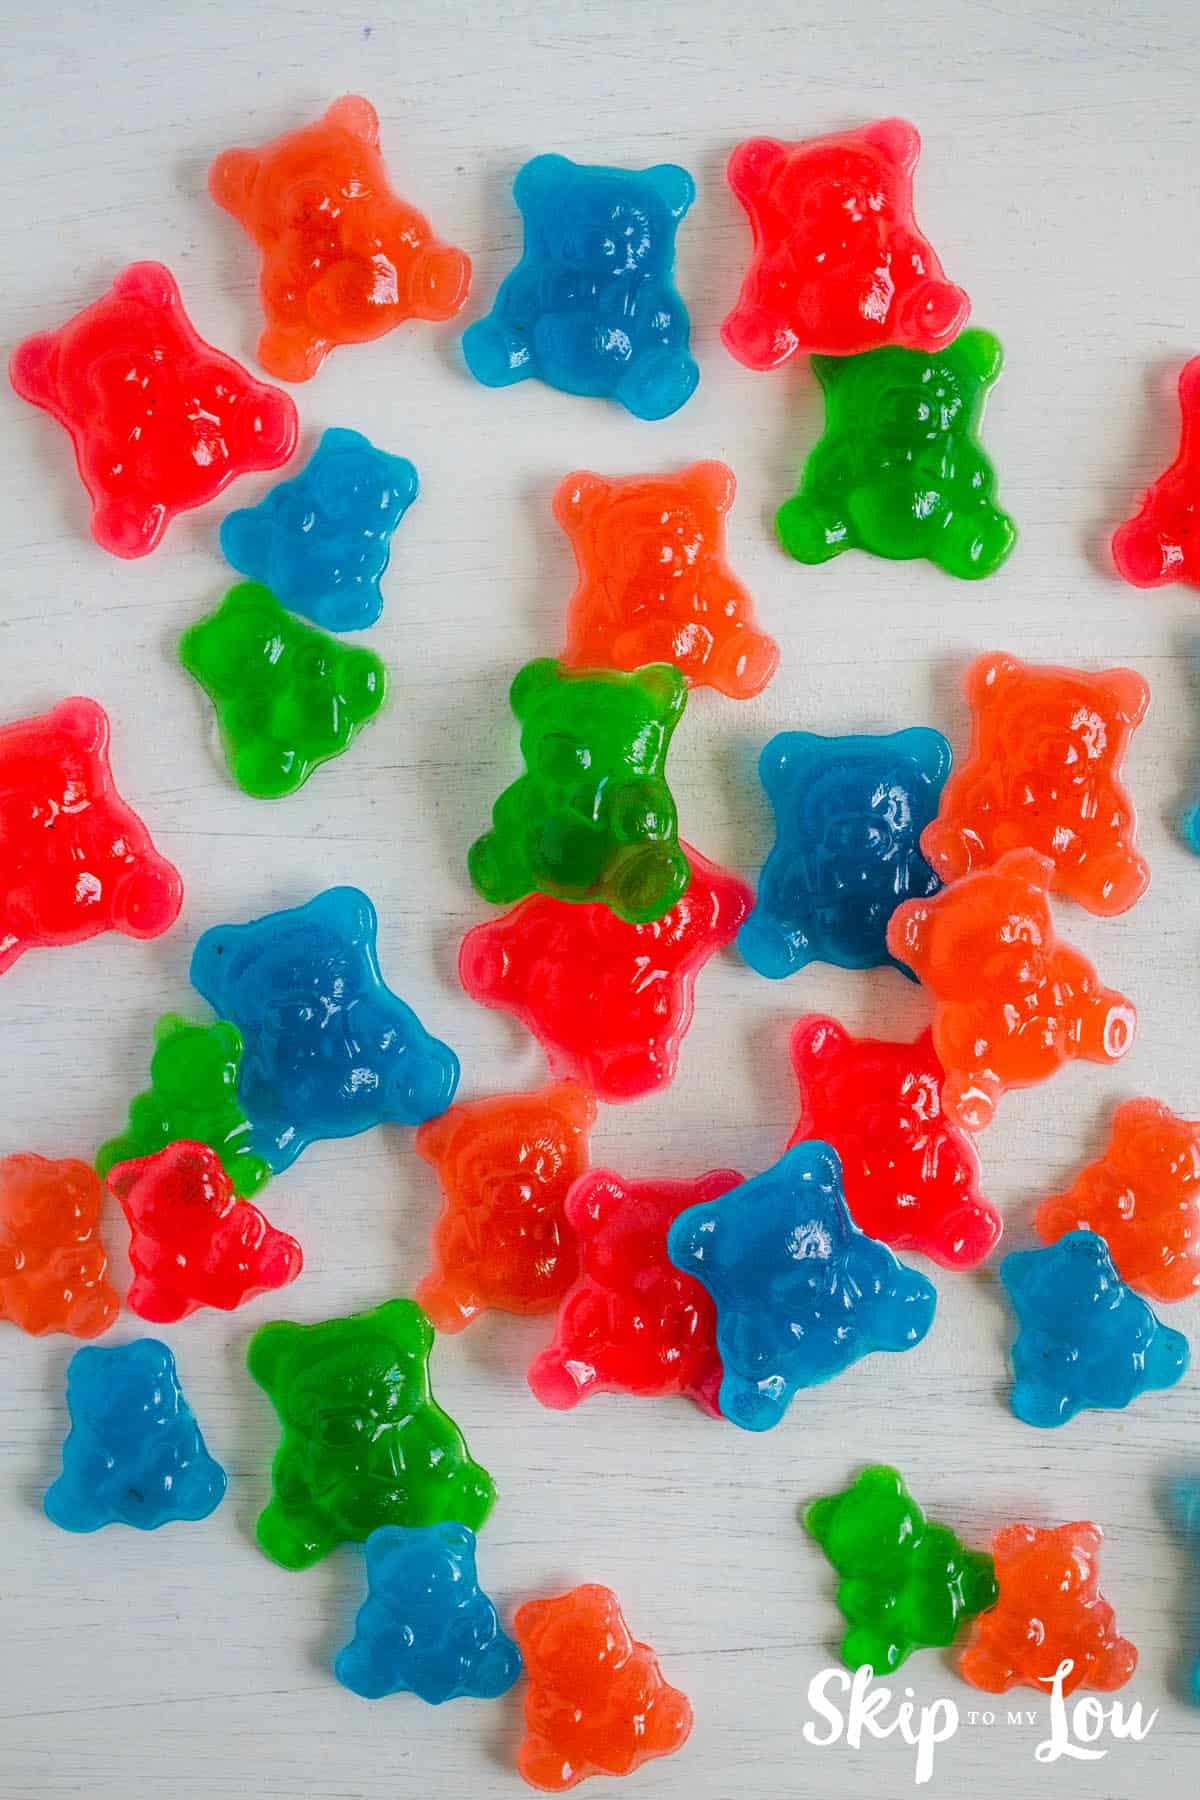
Gelatin candy is a good deal easier than it sounds. Skip To My Lou sprinkles one 3 ounce box of flavored gelatin and two quarter-ounce packets of unflavored gelatin over a third of a cup of water, lets it sit five to ten minutes to bloom, then warms it over medium-low heat for two to five minutes until it is completely dissolved and pours it into candy molds. Add a third packet of unflavored gelatin if you want them chewier. Droppers make filling the molds a job for the kids.
Get the full tutorial at Skip To My Lou.
32. Candy Corn Banner Kids Craft
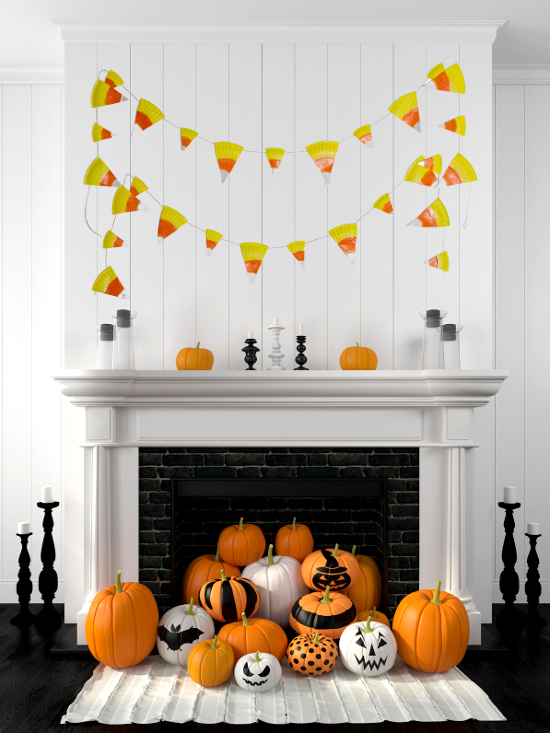
Each paper plate cuts down into about eight candy corn triangles, which is why this banner costs almost nothing. The Gracious Wife’s one warning is the important one: do not buy wax coated plates, because the paint will not stick to them. Paint the wide end orange and the middle yellow, add white tips if you like sparkle, then punch a hole in each and string them on twine. Mixing two plate sizes gives the finished banner a better rhythm than uniform pieces.
Get the full tutorial at The Gracious Wife.