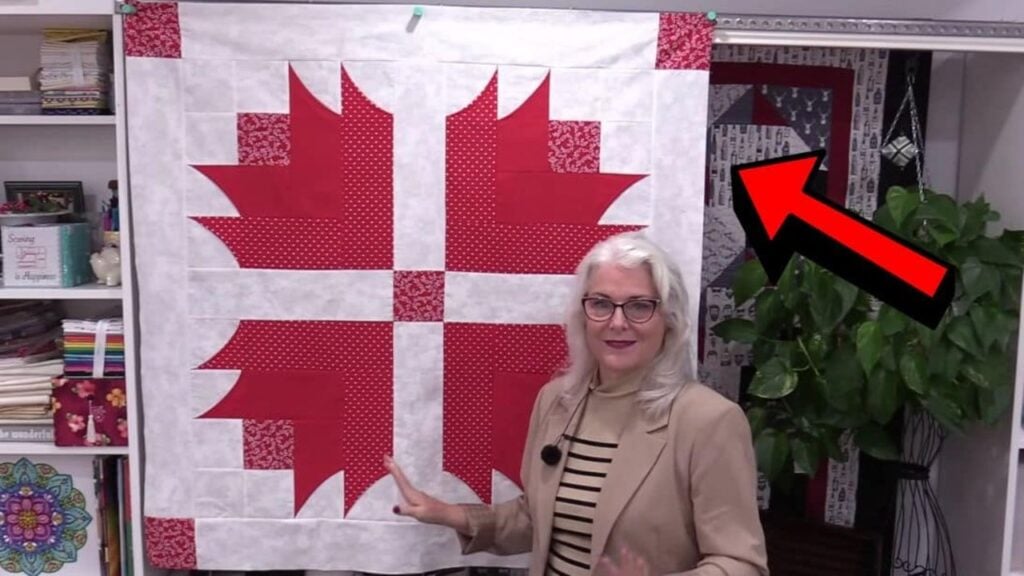
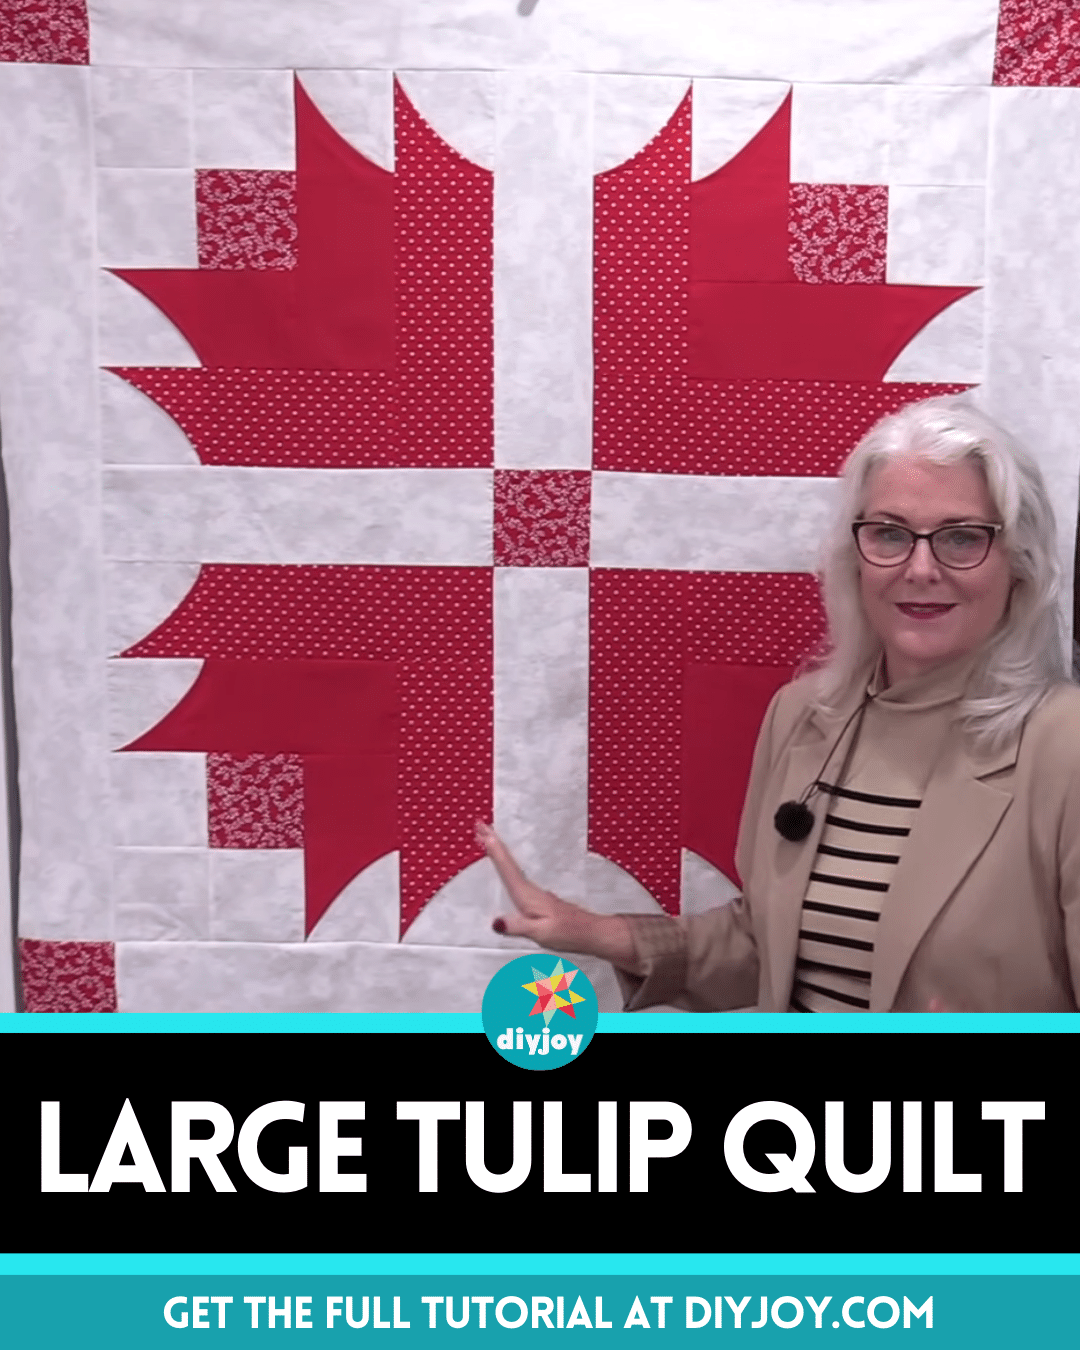
Out of all the quilt blocks that I’ve tried, this one by SewVeryEasy on YouTube is one of my current favorites, I’ve made a different tulip quilt block before, but this one stood out to me the most. I love that it’s large and the details and perfect curve of each tulip are a wonderful touch, and although this looks difficult to make, it’s super easy.
RELATED: How To Sew Fabric Tulip Flowers
I bet that even if you’re a beginner or it’s your first time quilting, you can do this perfectly. The steps are already made easy to follow and will guarantee that you won’t fail this project. Proceed to read down below now to learn how to make this large quilt and be sure to watch the video tutorial as well for more details.
Materials for Large Tulip Quilt:
- Red fabric, print
- Red fabric, different print
- Red fabric, solid
- Background fabric
- Marking pen, pencil, or chalk
- Ruler
- Glue stick
- Scissors or rotary cutter and a cutting mat
- Fabric pins
- Needle and thread
- Iron, for pressing
- Sewing machine
How to Make a Large Tulip Quilt:
Step 1
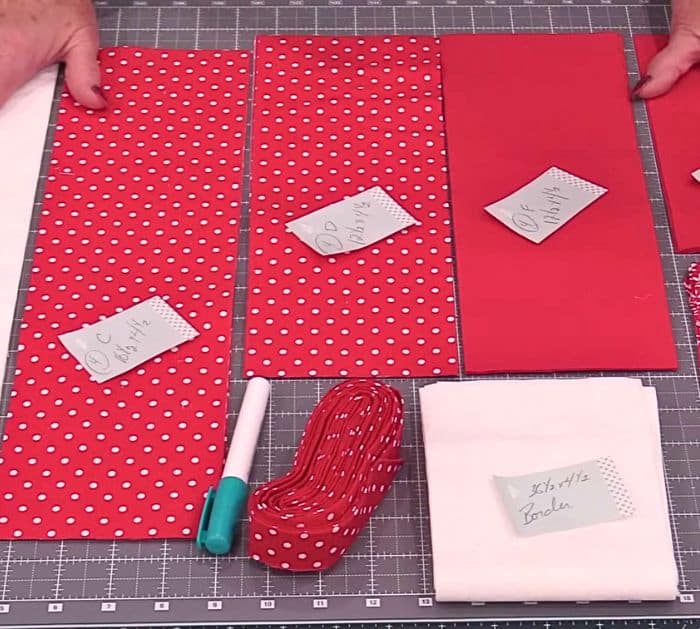
Cut the fabrics according to size as instructed in the video and label them so you don’t get confused later. Lay out the fabric pieces as shown in the video, then grab the outermost red fabric strip, and flip it over so that the wrong side is up. Fold the edge over matching the sides nicely, then apply some glue, and press it down nicely.
Step 2
Place a white square fabric above it matching the edges, then apply some glue, and press it down again. Do the same for the remaining red fabric strips making sure that the direction of the fold are opposite from each other, and refer to the video tutorial for accuracy.
Step 3
Rearrange the fabric pieces into a block, then stitch the 4 squares at the lower corner to make a 4-patch block, and then stitch the outer strips one at a time pressing the seams as you go.
Step 4
Make 3 more of this block to make a total of 4, then arrange them together, and stitch the blocks to each other making sure to add a sashing at the center and an outer border as well. For the final step, curve the edges of the tulips, then pin them in place, and carefully topstitch over the curved edges.

*All image credit belongs to SewVeryEasy via YouTube. Follow and subscribe to her channel for more!
Easy Large Tulip Quilt Tutorial for Beginners


