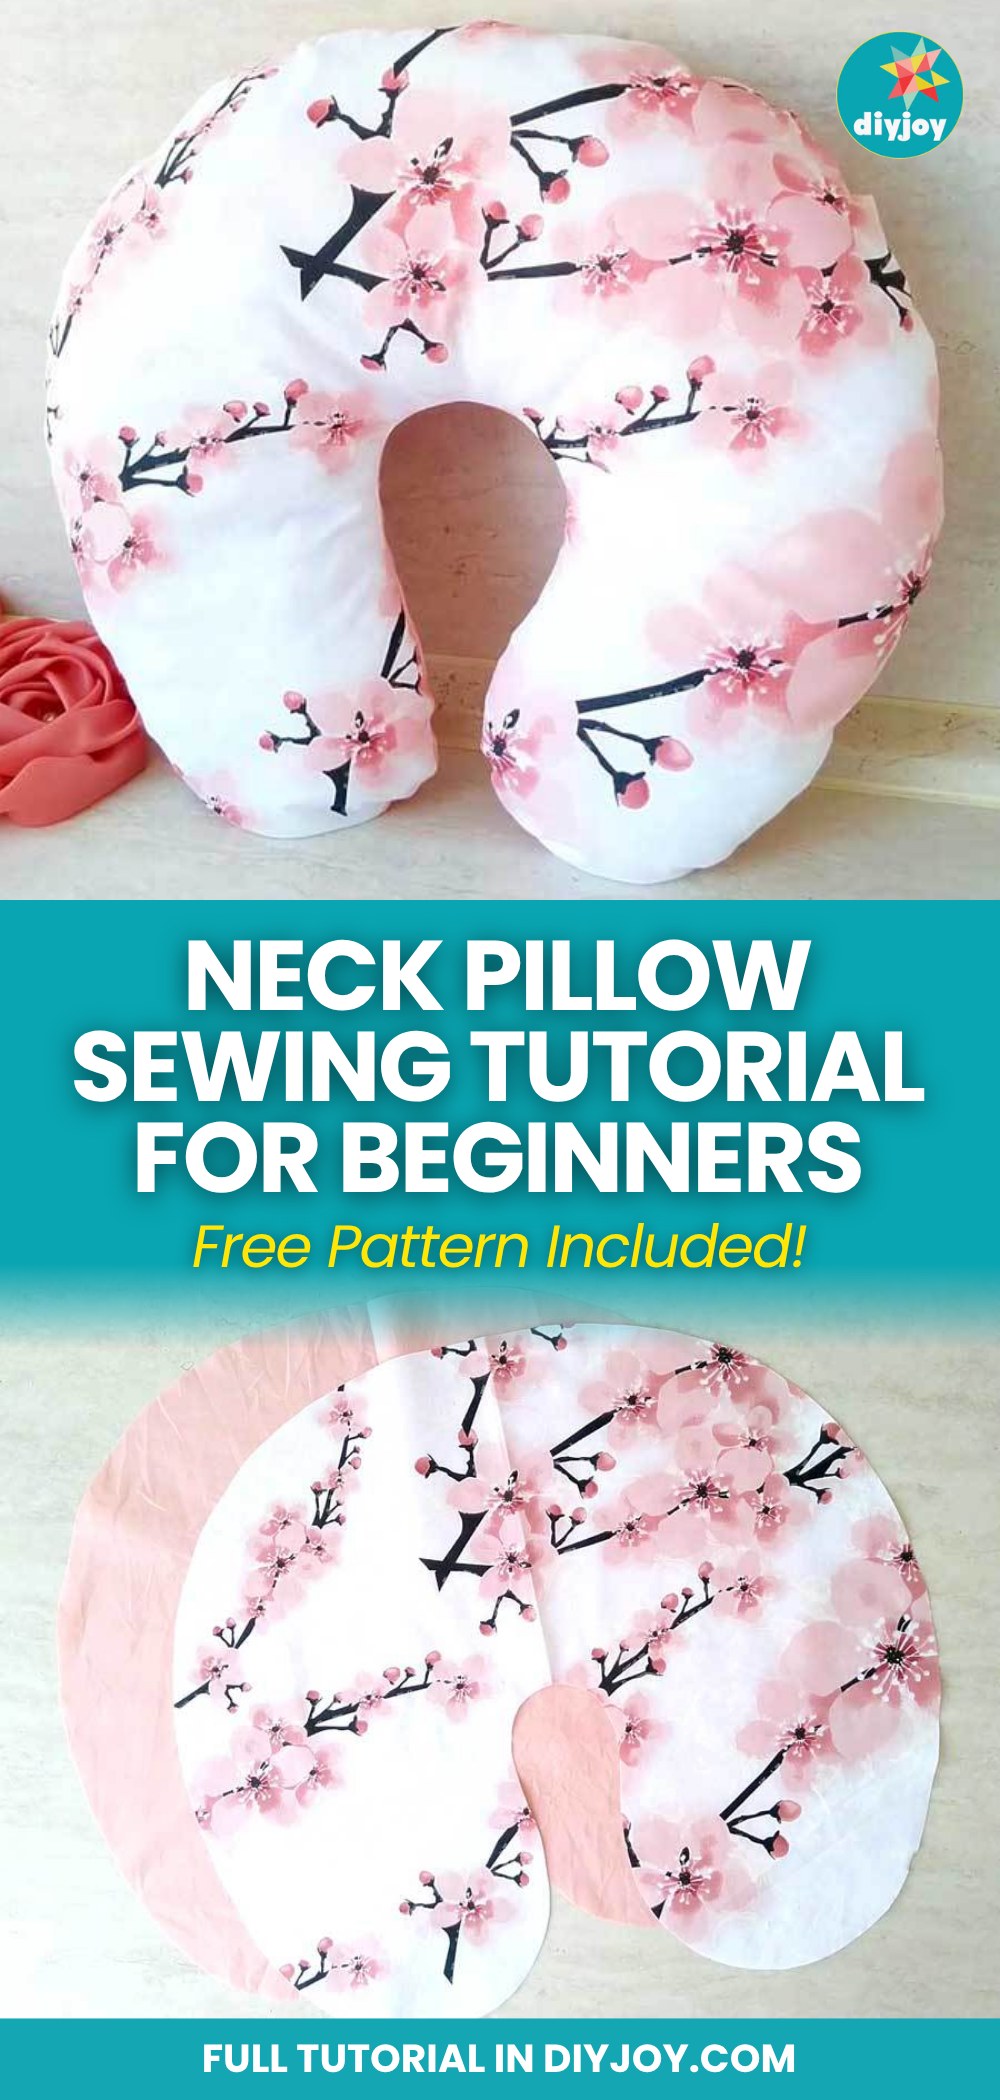
Have you ever bought a neck pillow and felt uncomfortable using it? I do, most of the time! That’s why I became more reluctant in buying from stores, either I find them too stiff or too thin. That’s why I decided to put my sewing hobby to use, I used this tutorial by Hello Sewing on YouTube to make a DIY neck pillow. I loved it more than store-bought ones, it’s comfier and way cheaper, especially since I used an old fabric that I haven’t been using and had cute prints in it.
Materials:
- Fabric, ½ yard (18 inches) cotton fabric or 2 1/4 yard (9 inches) (if you are using two fabrics)
- Stuffing, polyester or any
- Matching thread
- Needle
- Scissors (or rotary cutter and a cutting mat)
- Pins or clips
- Sewing machine, optional
- Iron
- Pattern, click on it to download the pattern
Directions:
Step 1
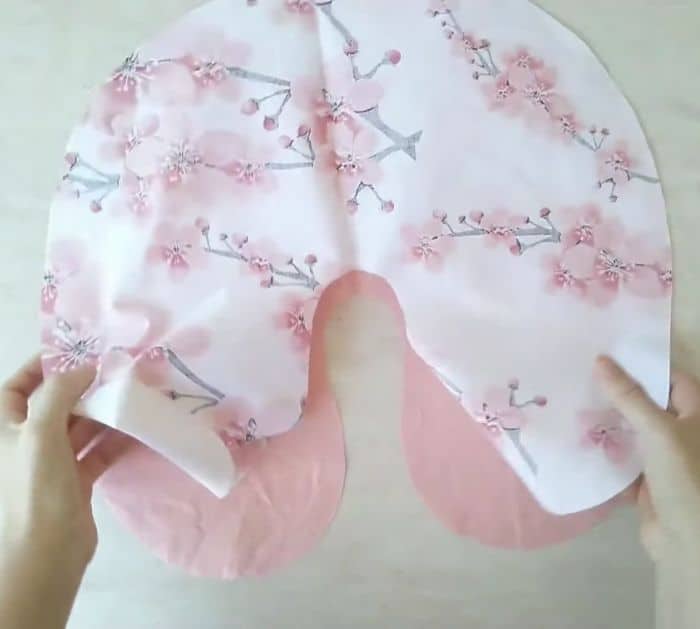
Print out the pattern by clicking on it above, then cut it out and tape it together (Make sure you print it as 100% (no scaling) on either a US letter or A4 paper). If you don’t have a printer, then simply draw a pattern on a piece of paper. Draw one half of the travel pillow shape, just like a bean, then cut it out. Fold your fabric in half and align the edges, then place the pattern on top of the folded fabric. Pin it in place and cut through both layers, repeat and cut out another piece of fabric. Unfold both fabrics, then stack them together with their right sides facing each other. Make sure that the edges are aligned, then pin them in place and leave an opening for turning the fabric later.
[social_warfare]
Step 2
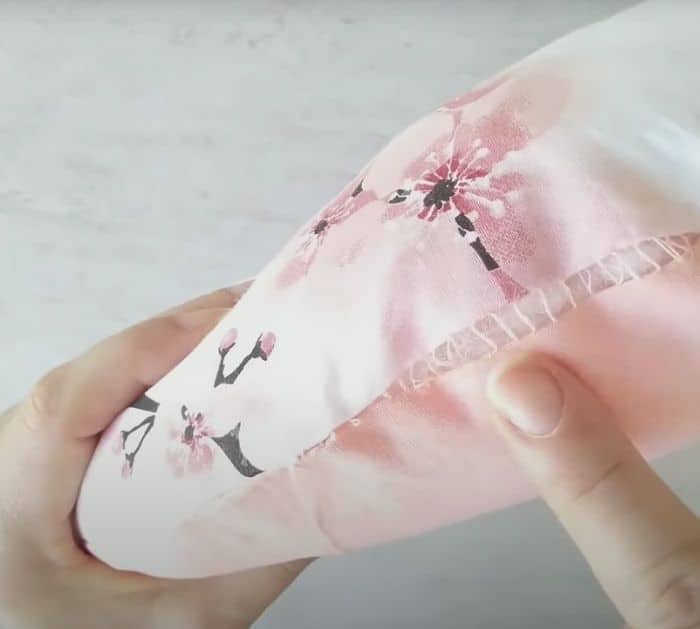
Stitch all around the edges of the fabric either with a machine or by hand, use a 3/8 inch seam allowance. Leave a gap of about 2 inches unstitched for turning. Make small triangular notches all around the outer edges of the fabric except the gap/opening, make sure they’re about 1 inch apart from each other. Turn the fabric inside out through the gap/opening, then poke the edges. Make sure that the seam allowance of the gap is tucked in before pressing it with an iron. Once pressed, fill in the stuffing of your choice, its volume depends on your liking too, so stuff it as much as you want. Close up the opening by hand stitching it with a ladder stitch.
*All these images are credited to Hello Sewing via YouTube. Give her channel a visit and subscribe for more!
Easy DIY Neck Pillow Sewing Tutorial