Just recently, I fell in love with taking care of plants and gardening as a whole. It started out with just one small plant that I found really cute at the store, which then grew into two plants, and now I own a couple of pots of herbs—which, if you ask me, is pretty much every gardener or plant enthusiast’s origin story!
Taking care of plants or starting a garden is not only visually pleasing and relaxing, but it’s also very healthy and beneficial, especially if you’re growing plants that you are going to use in your kitchen or cooking.
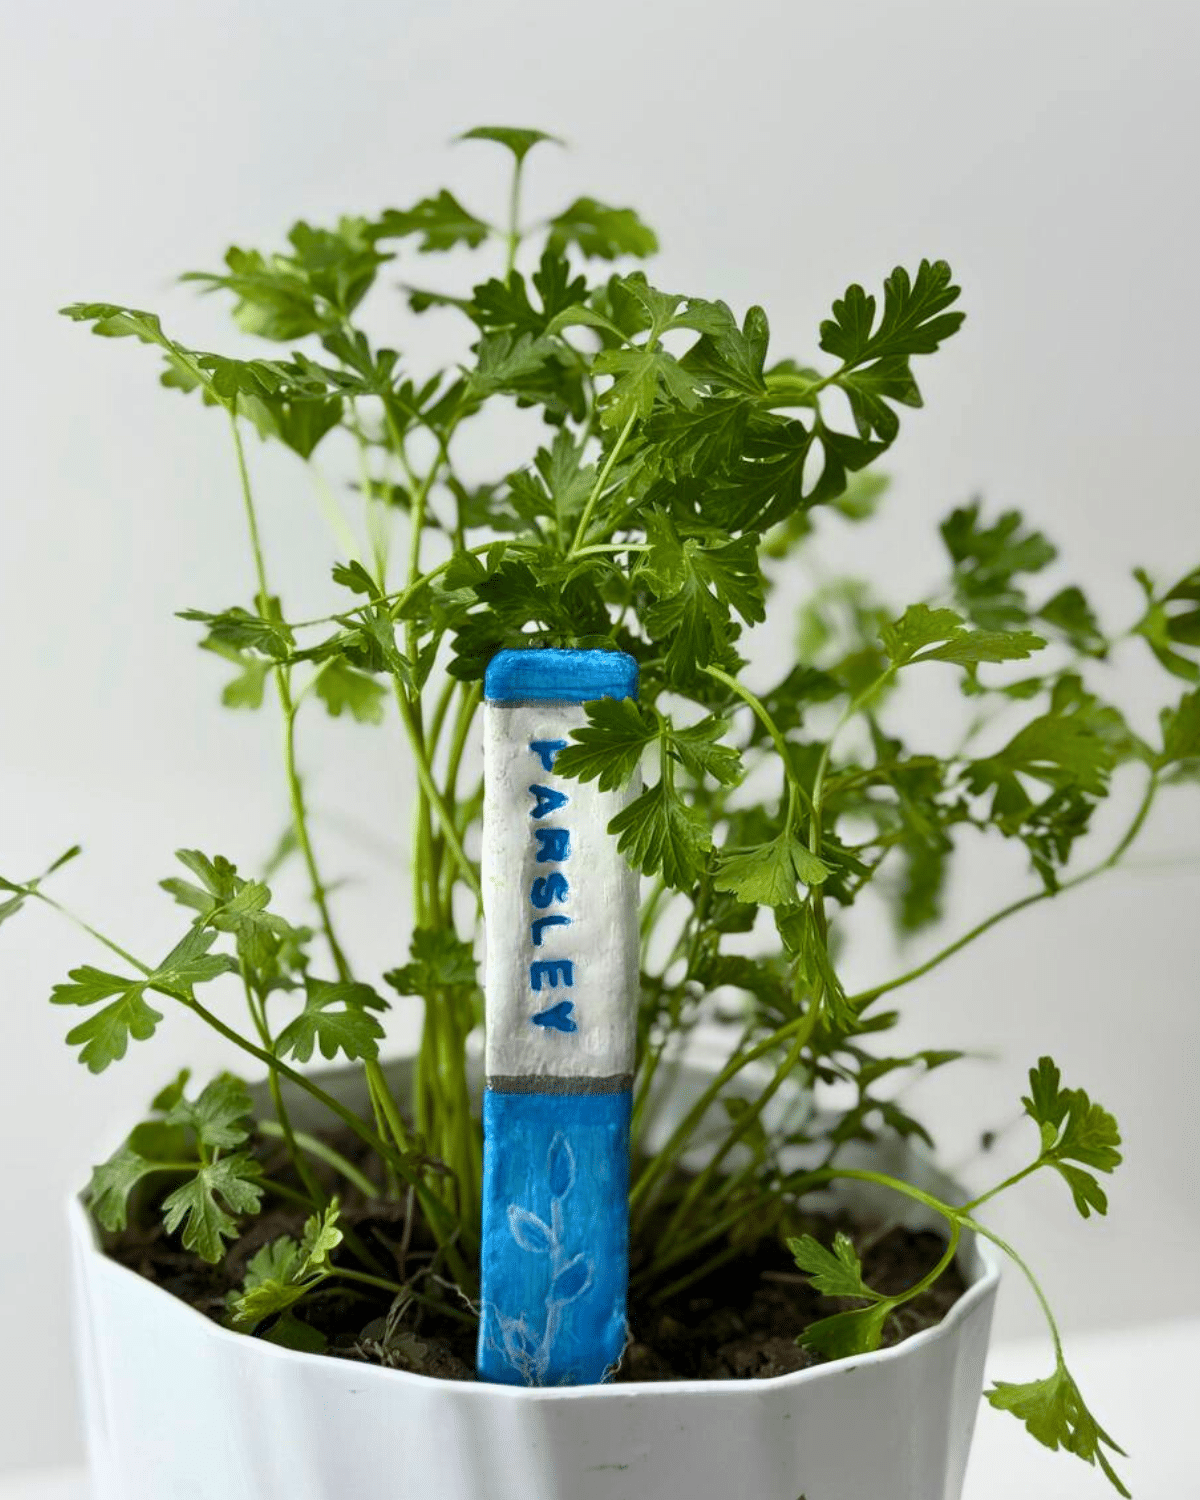
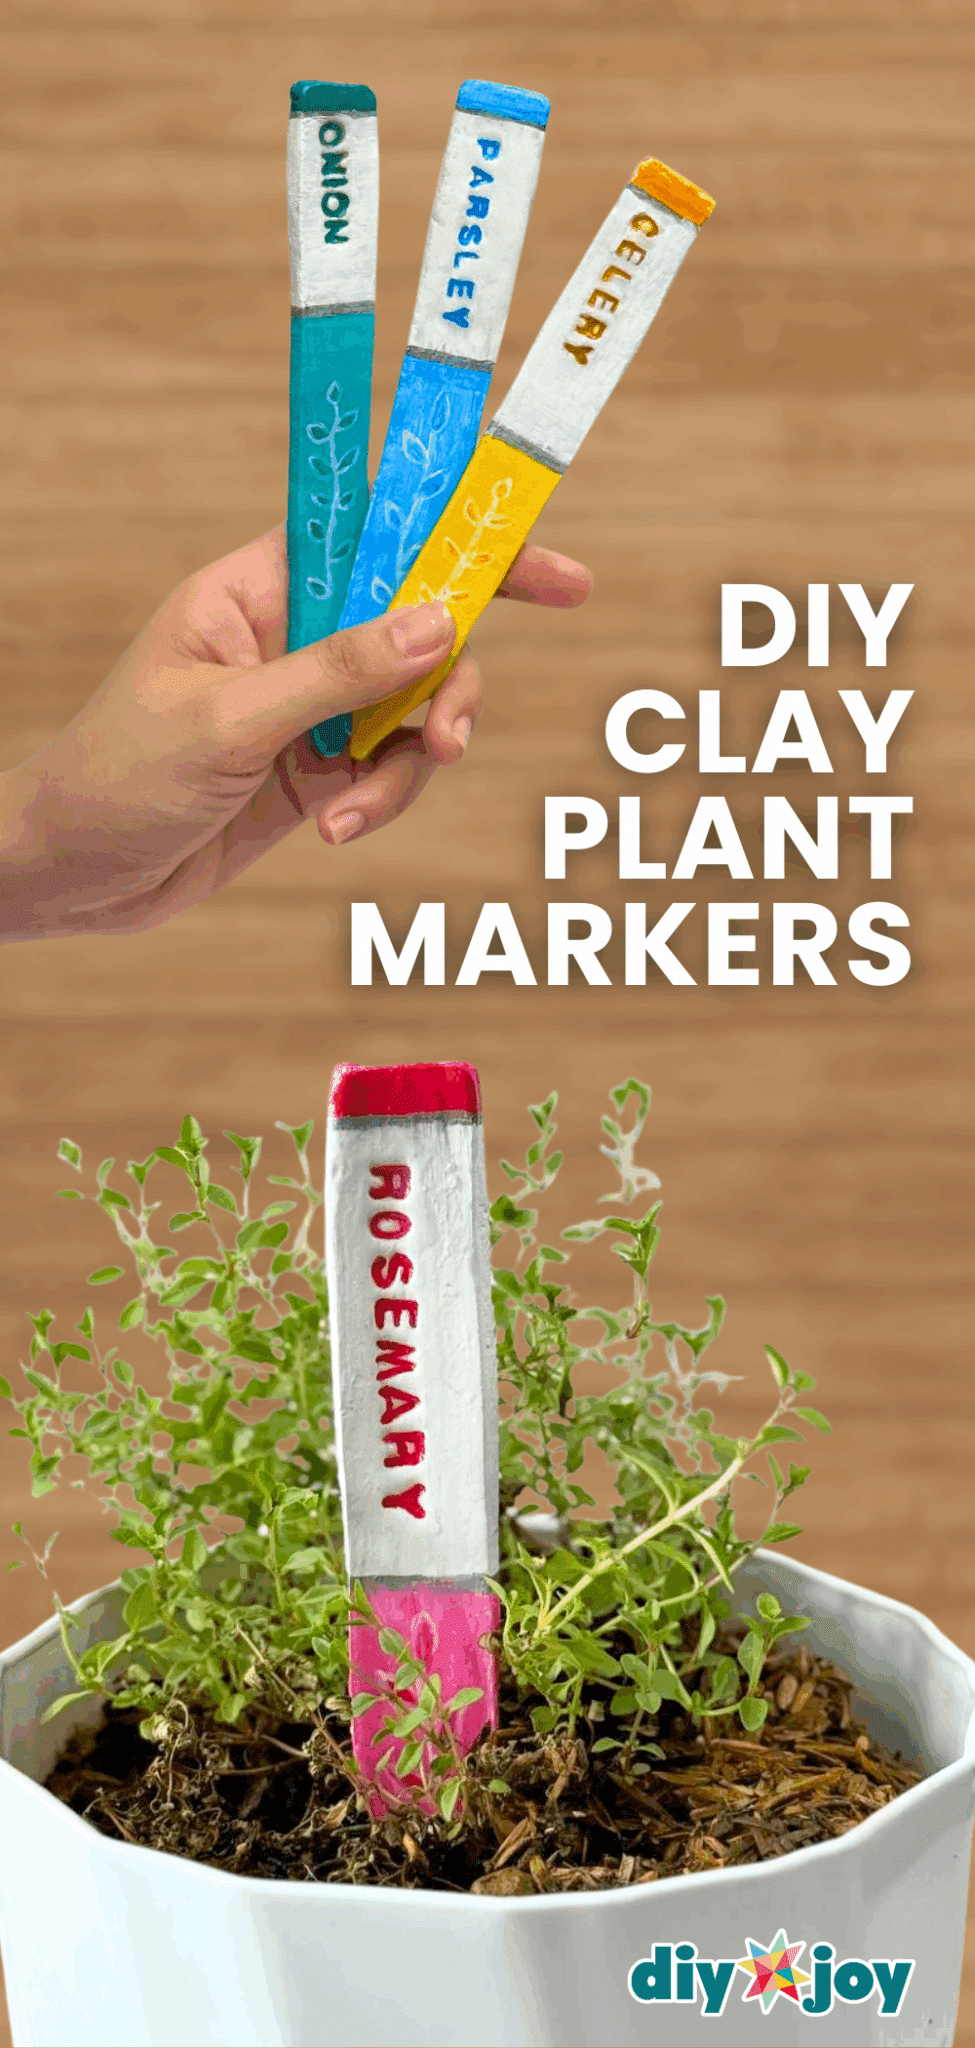
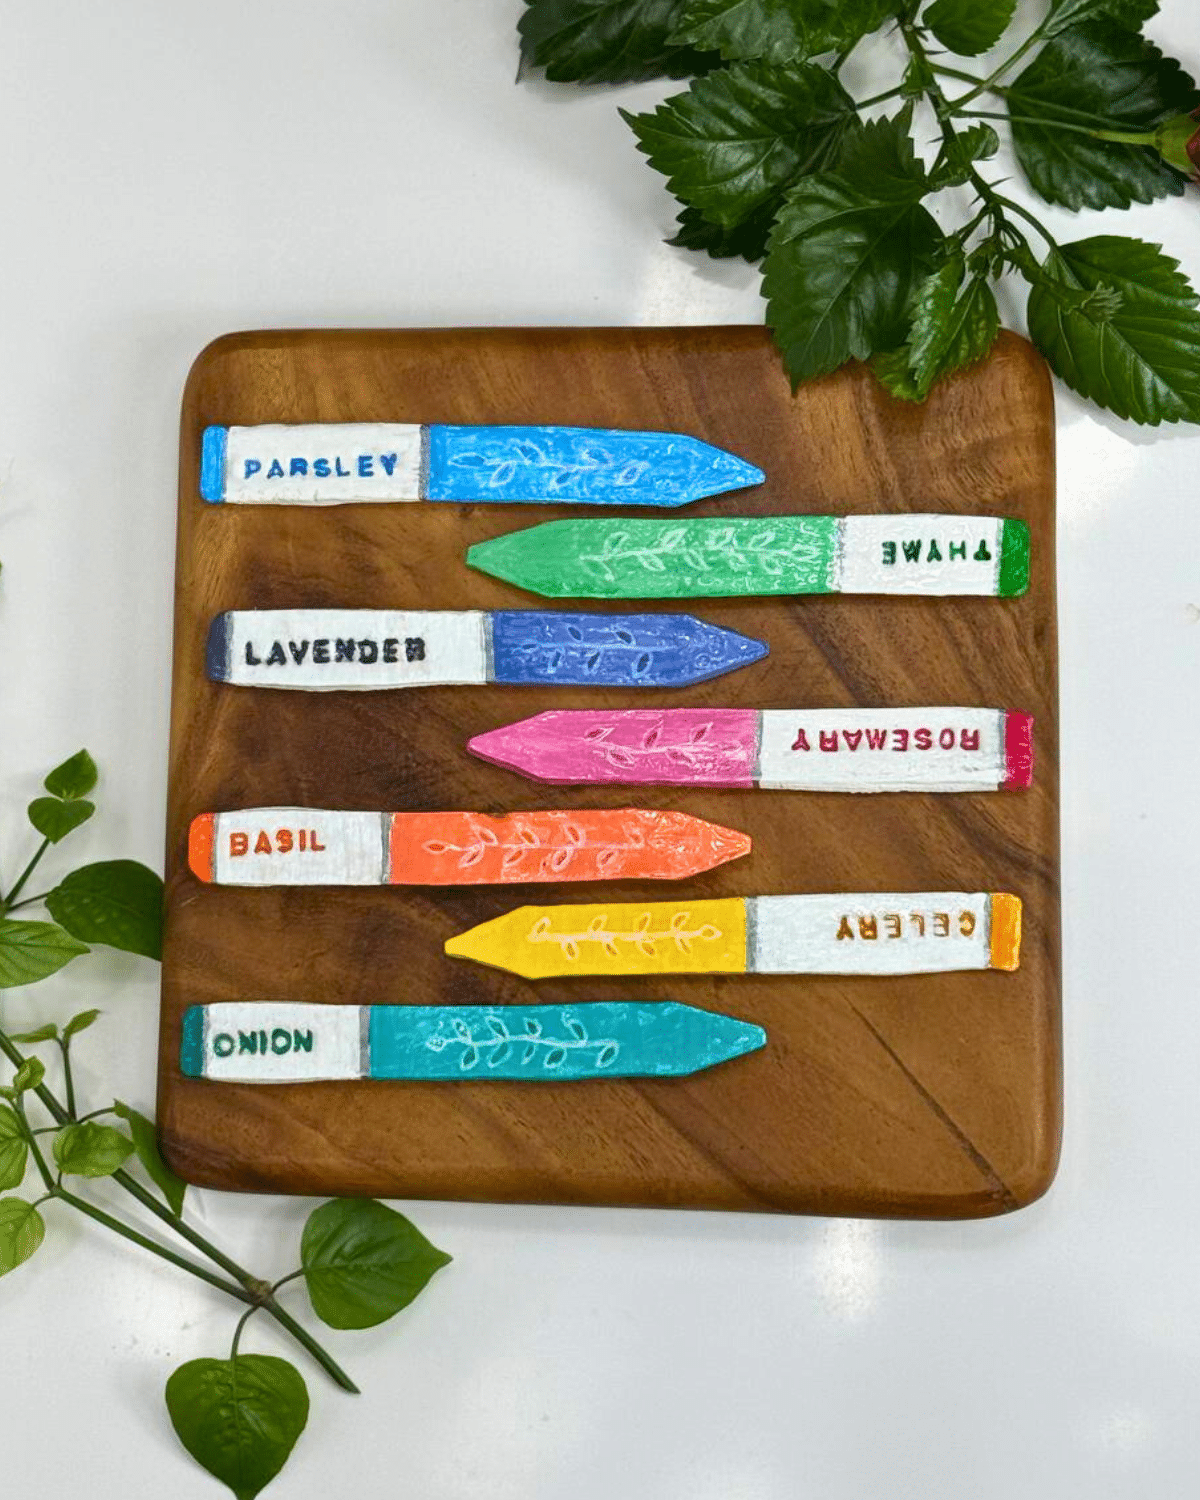
By the time I realized that I now have an entire garden, I have too many pots of plants that I can’t even figure out which is which and where is where. That’s when I found a brilliant idea online, and that is to make my own clay plant markers using air-dry clay!
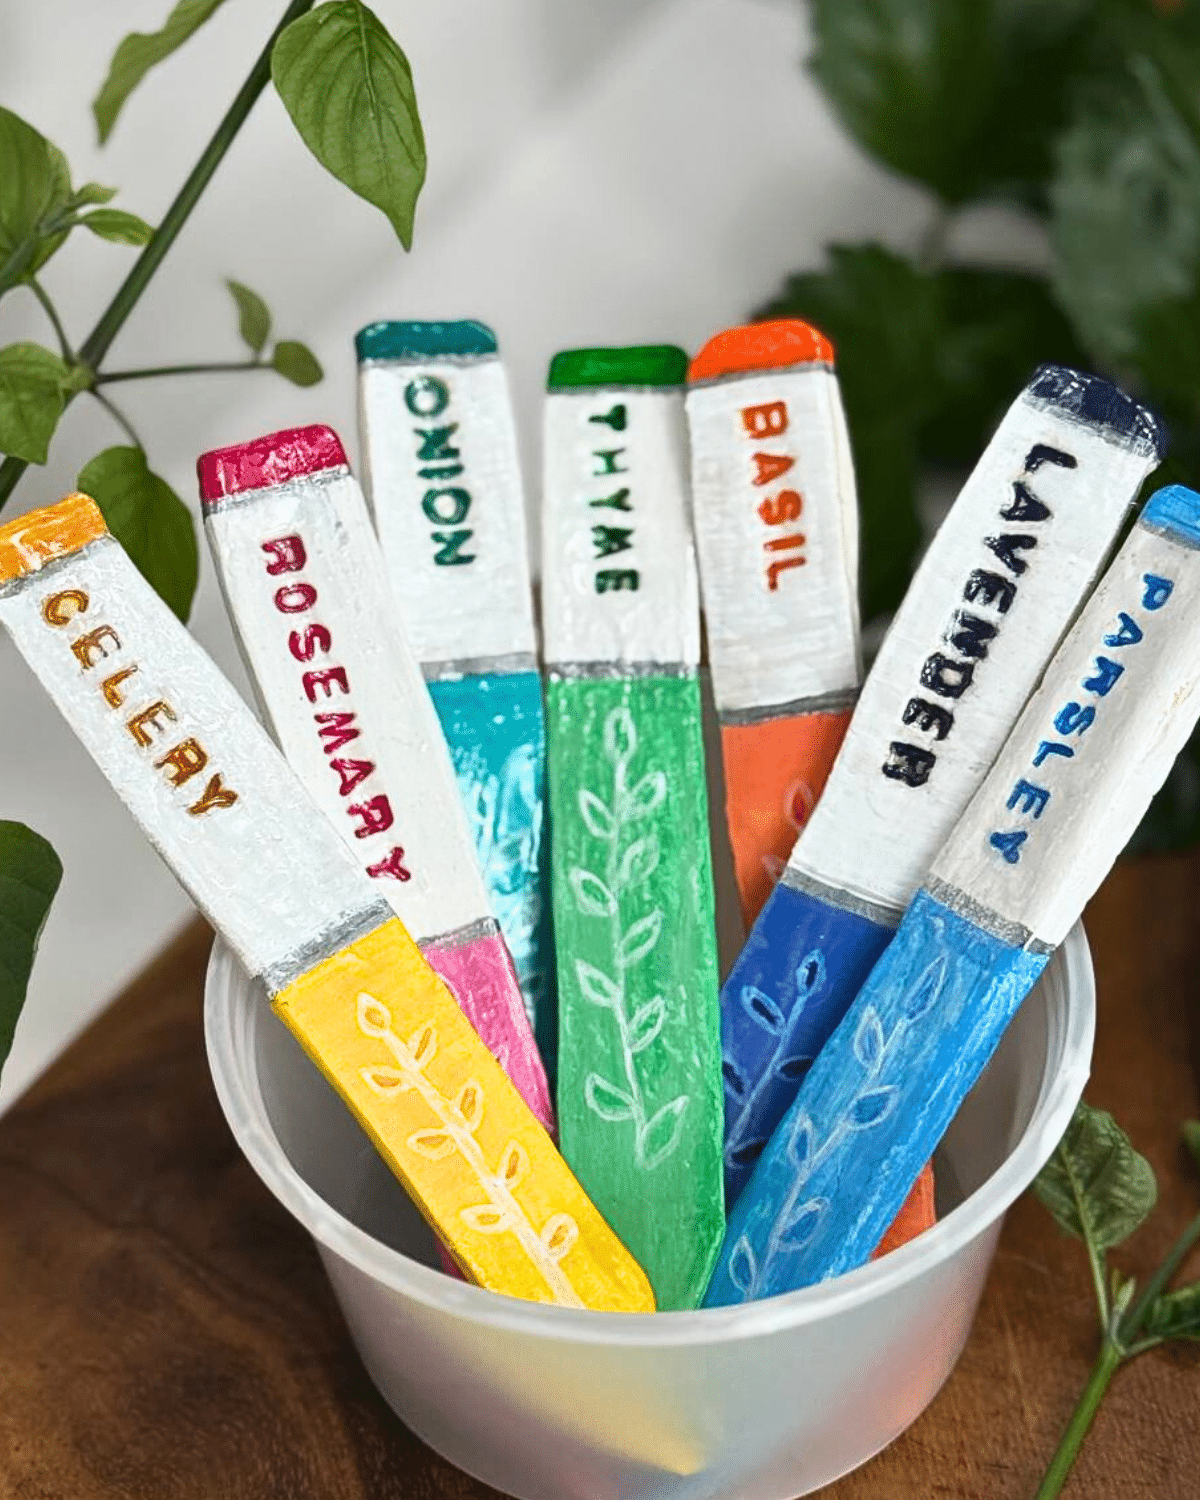
This is such a functional project and a fun way to label your plants, plus, it’s easily customizable and perfect for beginners, it’s not super hard to learn and to make, and even the mistakes will add to the handmade beauty of the craft. Whether you’re organizing herbs, veggies, or houseplants, these DIY garden labels double as both decor and practical tools.
With just a few materials and minimal mess, you’ll have beautiful handmade plant tags in no time. If you’re searching for plant label ideas, love air-dry clay crafts, or simply want a creative new garden DIY project, these custom DIY plant markers are a must-try.
Table of Contents
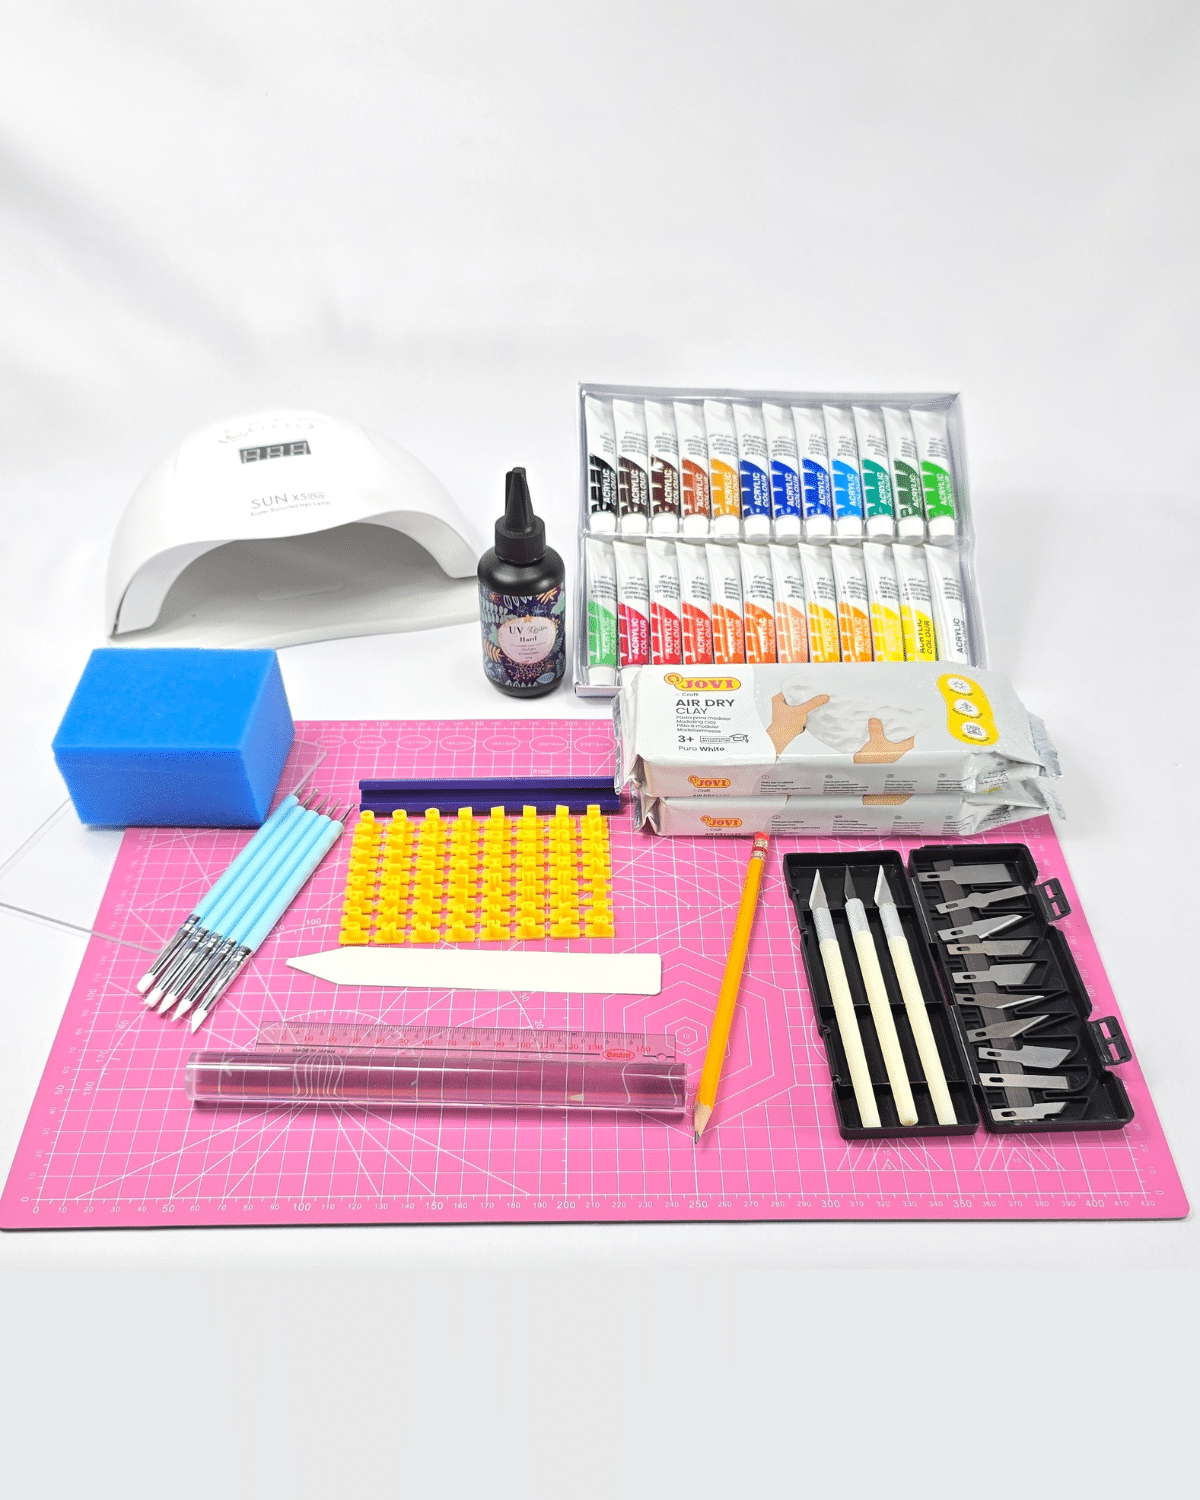
What You’ll Need for a Clay Plant Marker
- Air-Dry Clay
- Pencil
- Ruler
- Template
- UV Resin
- UV Lamp
- Sponge
- Sculpting Tools
- Cutting Tools
- Acrylic Paint
- Paintbrushes
- Primer Paint
- Stamping Tool
How to Make a Clay Plant Marker
An easy step-by-step guide to making plant markers with photos
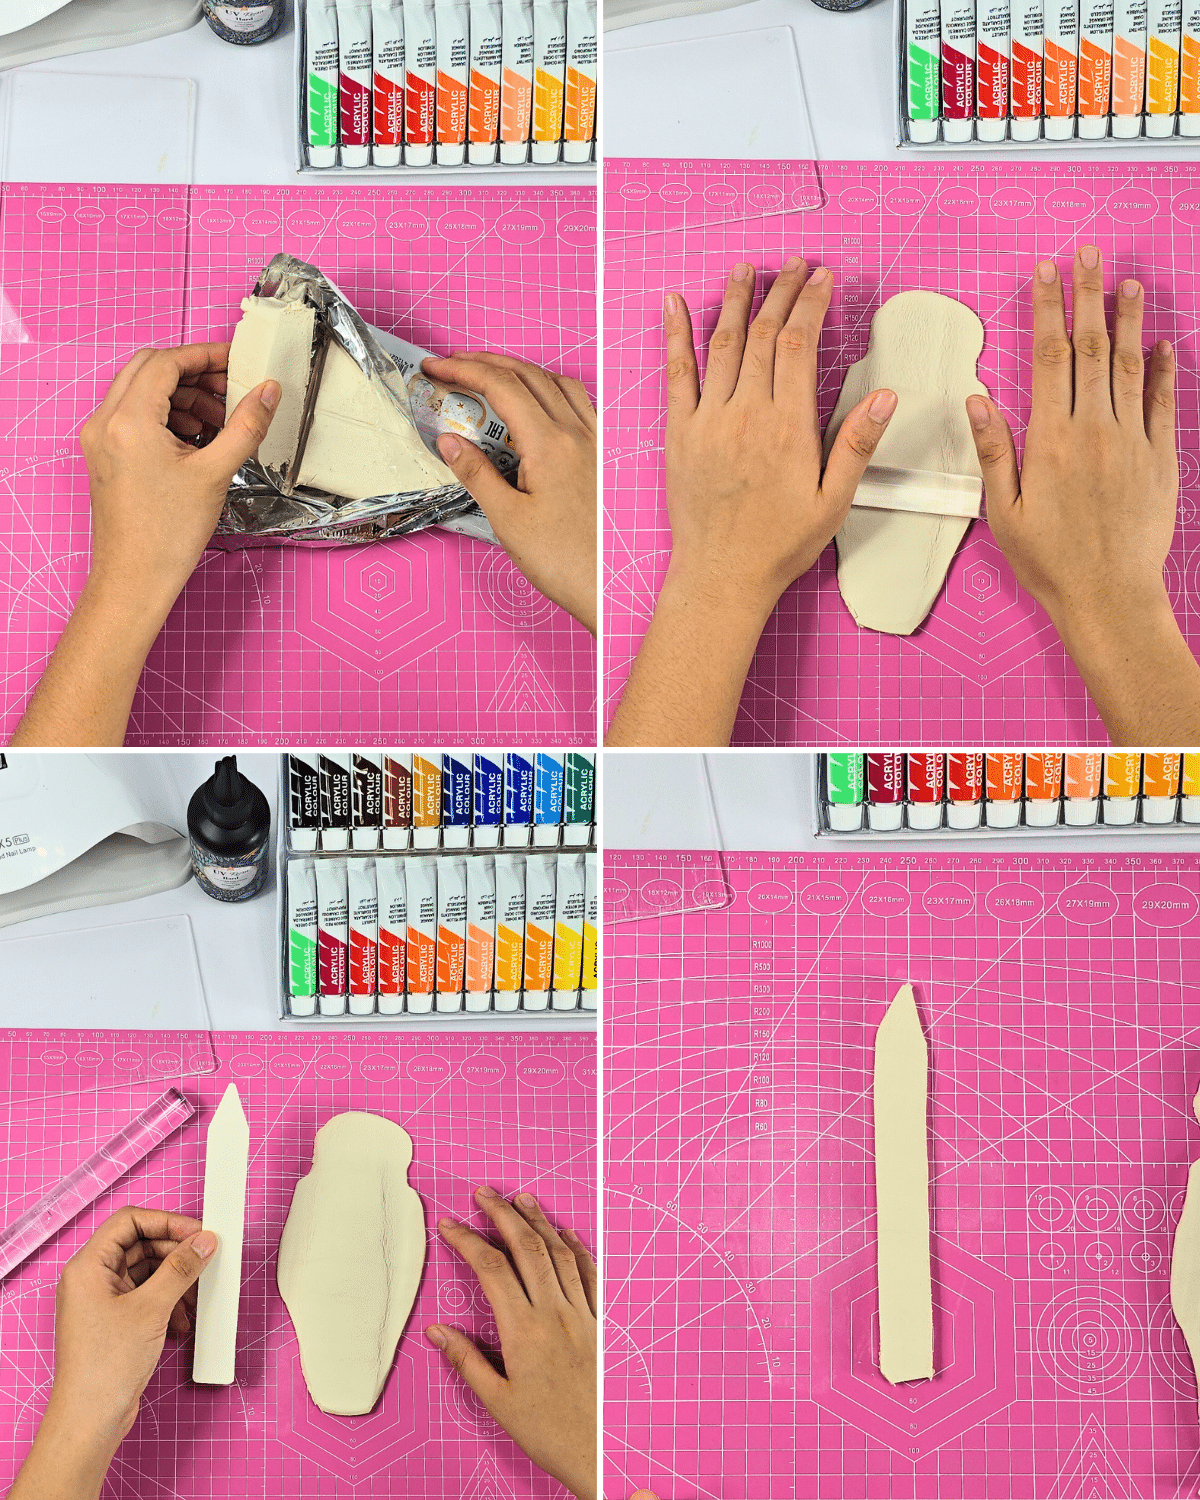
Step 1: Shaping the Clay

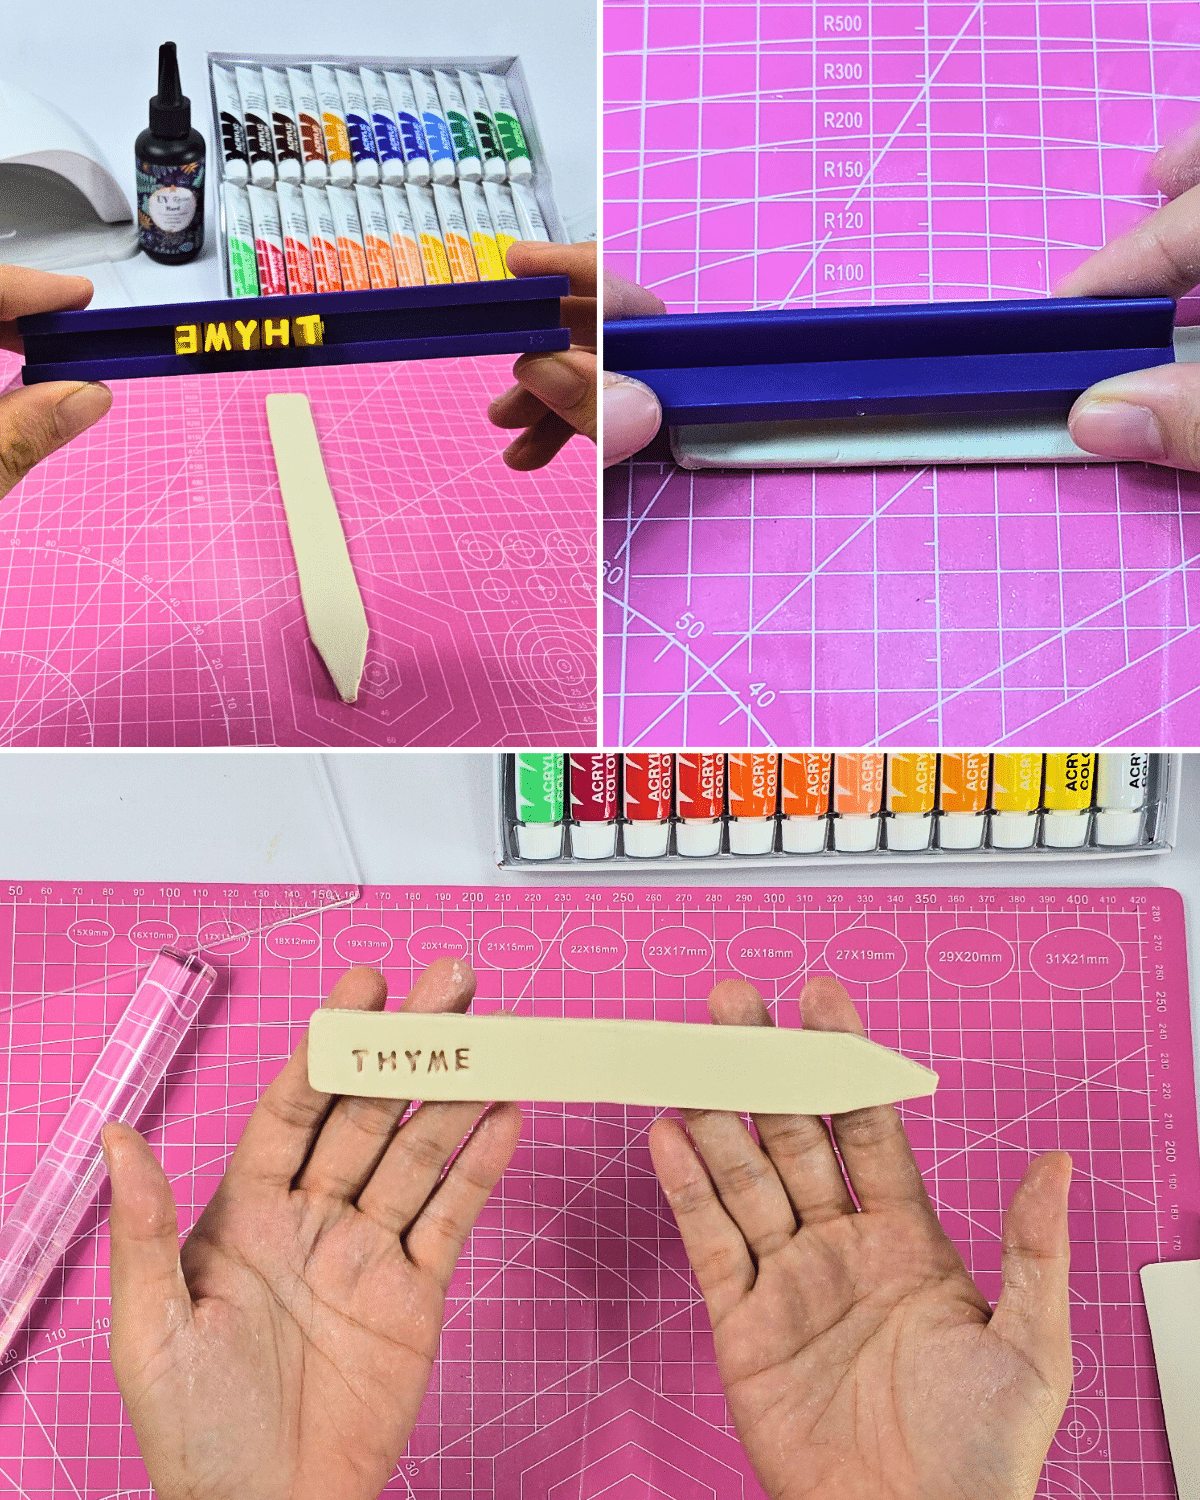
Get a chunk of clay, making sure it’s enough to cover your entire template while also keeping in mind the thickness that you want for your markers. Next, roll the clay until it’s smooth and round or an oval shape, then flatten it with a rolling pin until the desired thickness. Grab your paper template, then carefully cut the shape out.Step 2: Stamping the Clay Markers
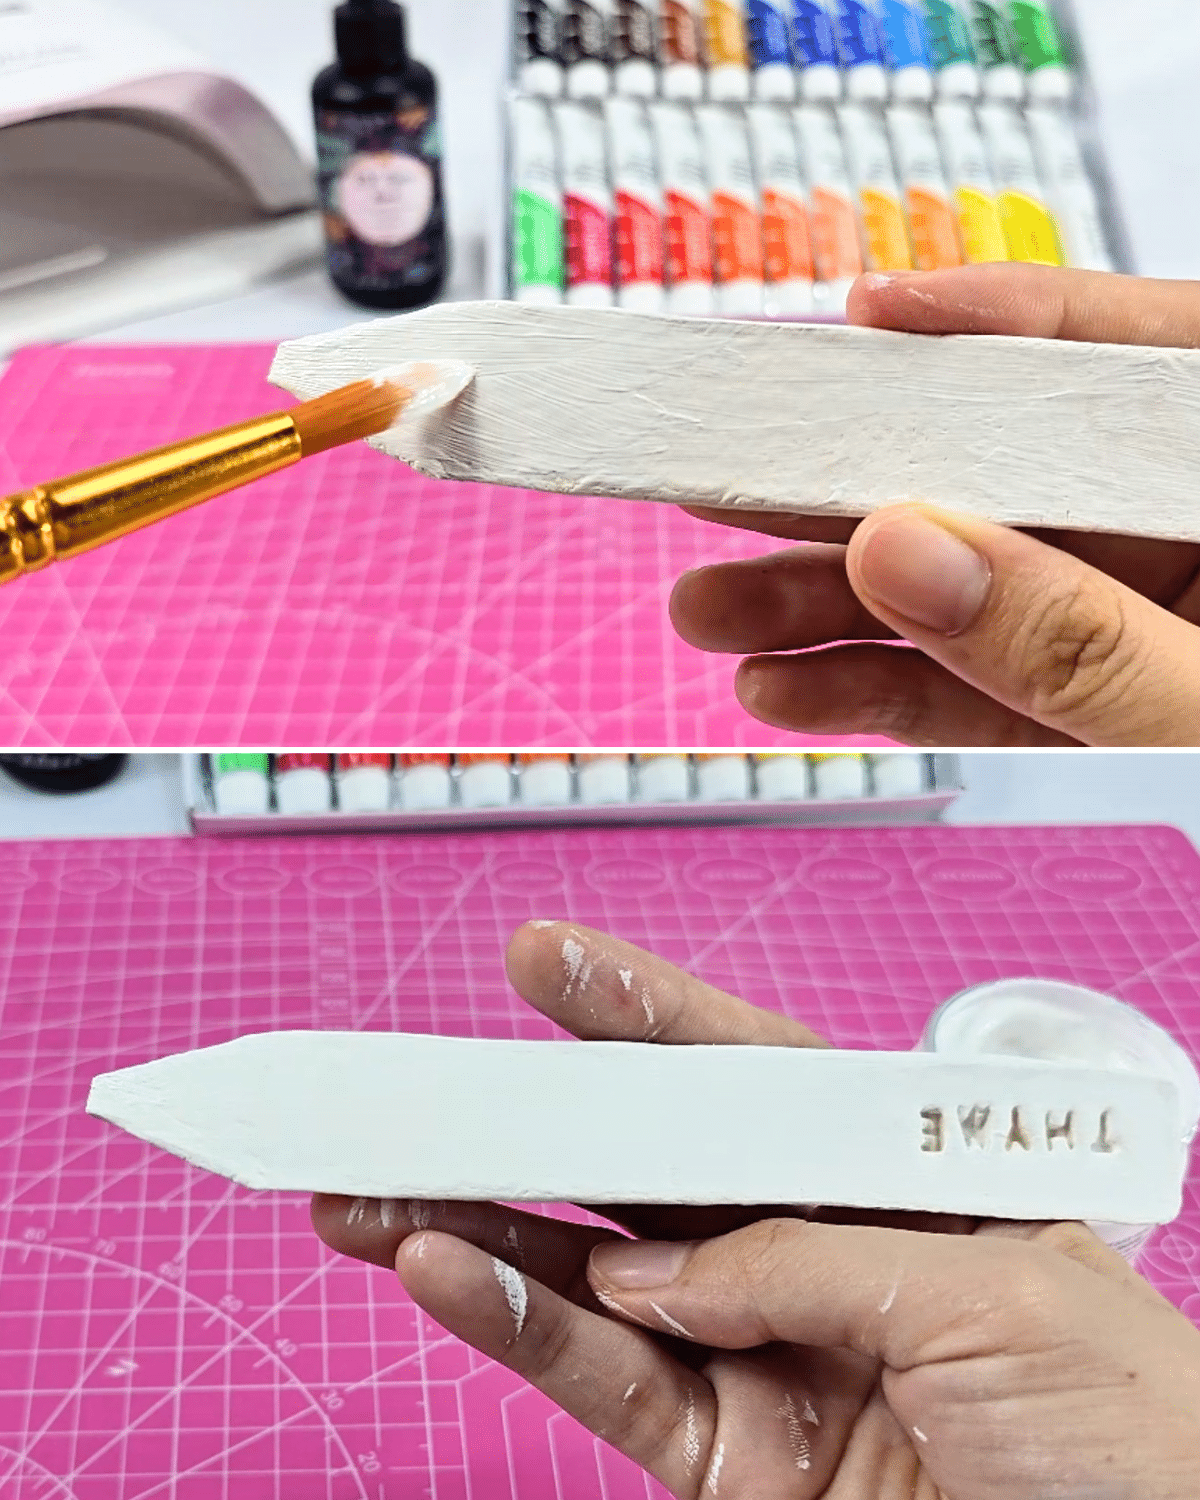
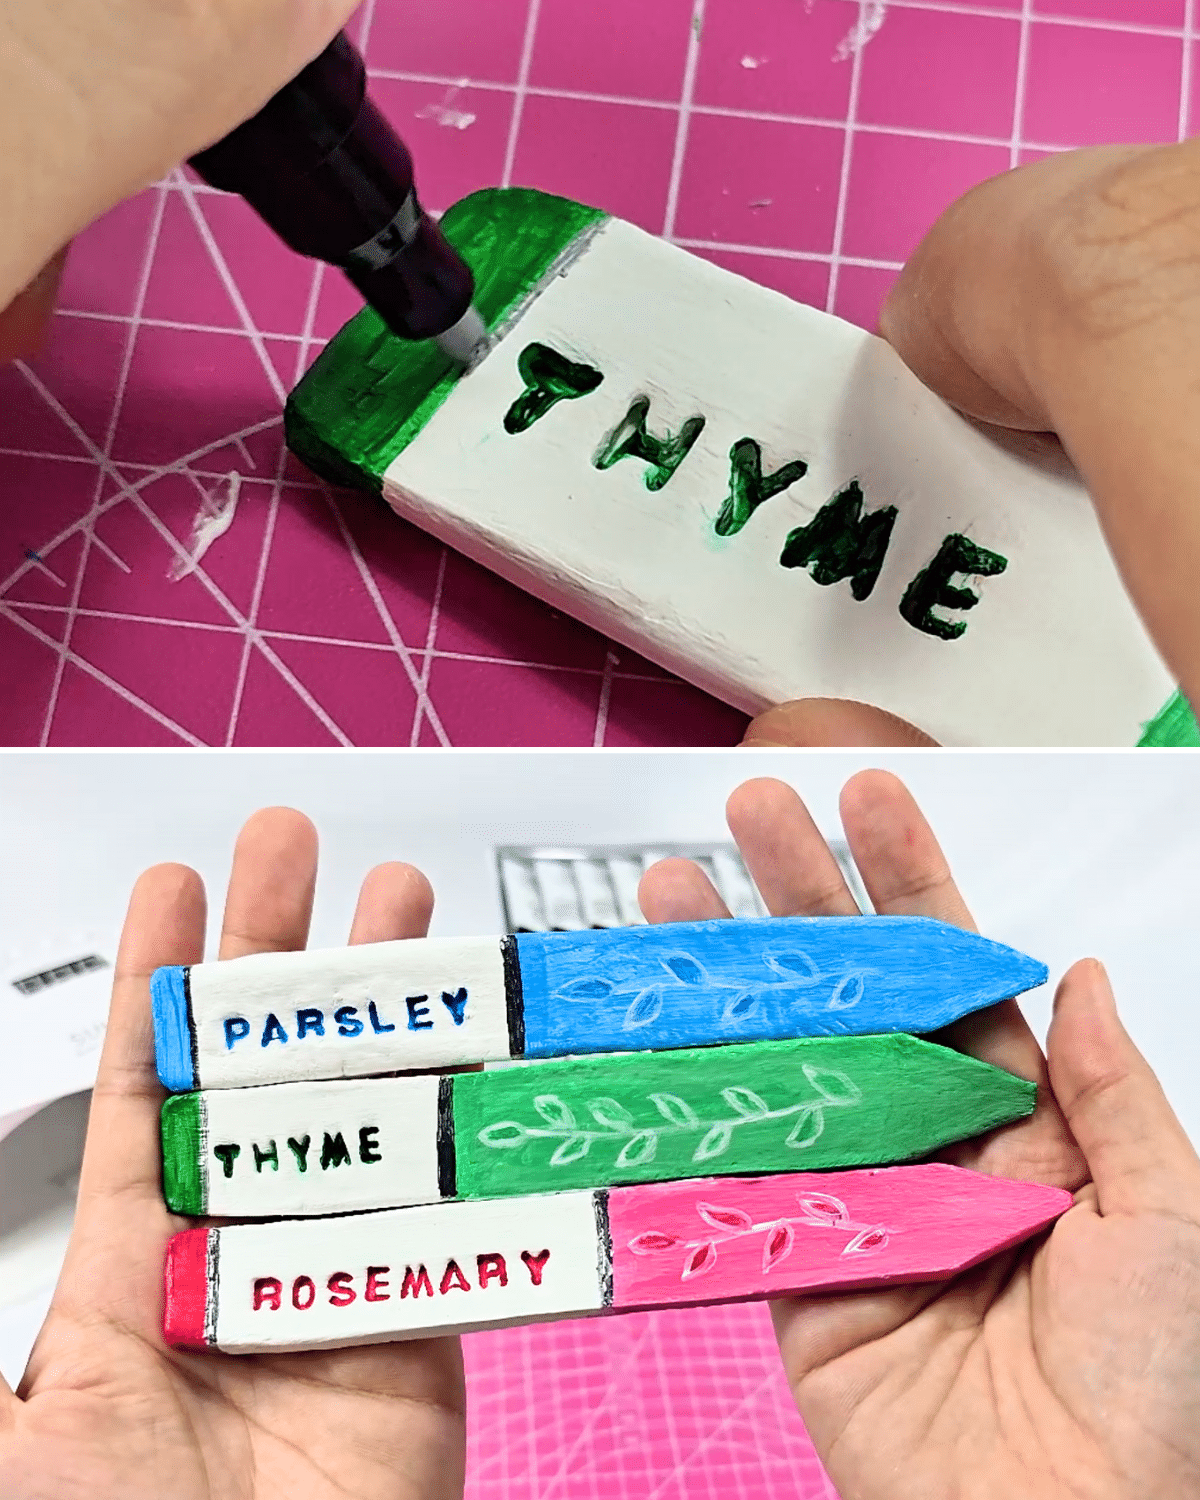
Get your stamp tool and make sure that the letters are inverted, just like what I did here. It’s also best to test stamp it on a scrap of clay first, just to make sure you’ve got the right spelling and you’re in the right direction. Stamp it opposite the pointed end of your clay, then set it aside to air-dry completely.Step 3: Applying the Primer
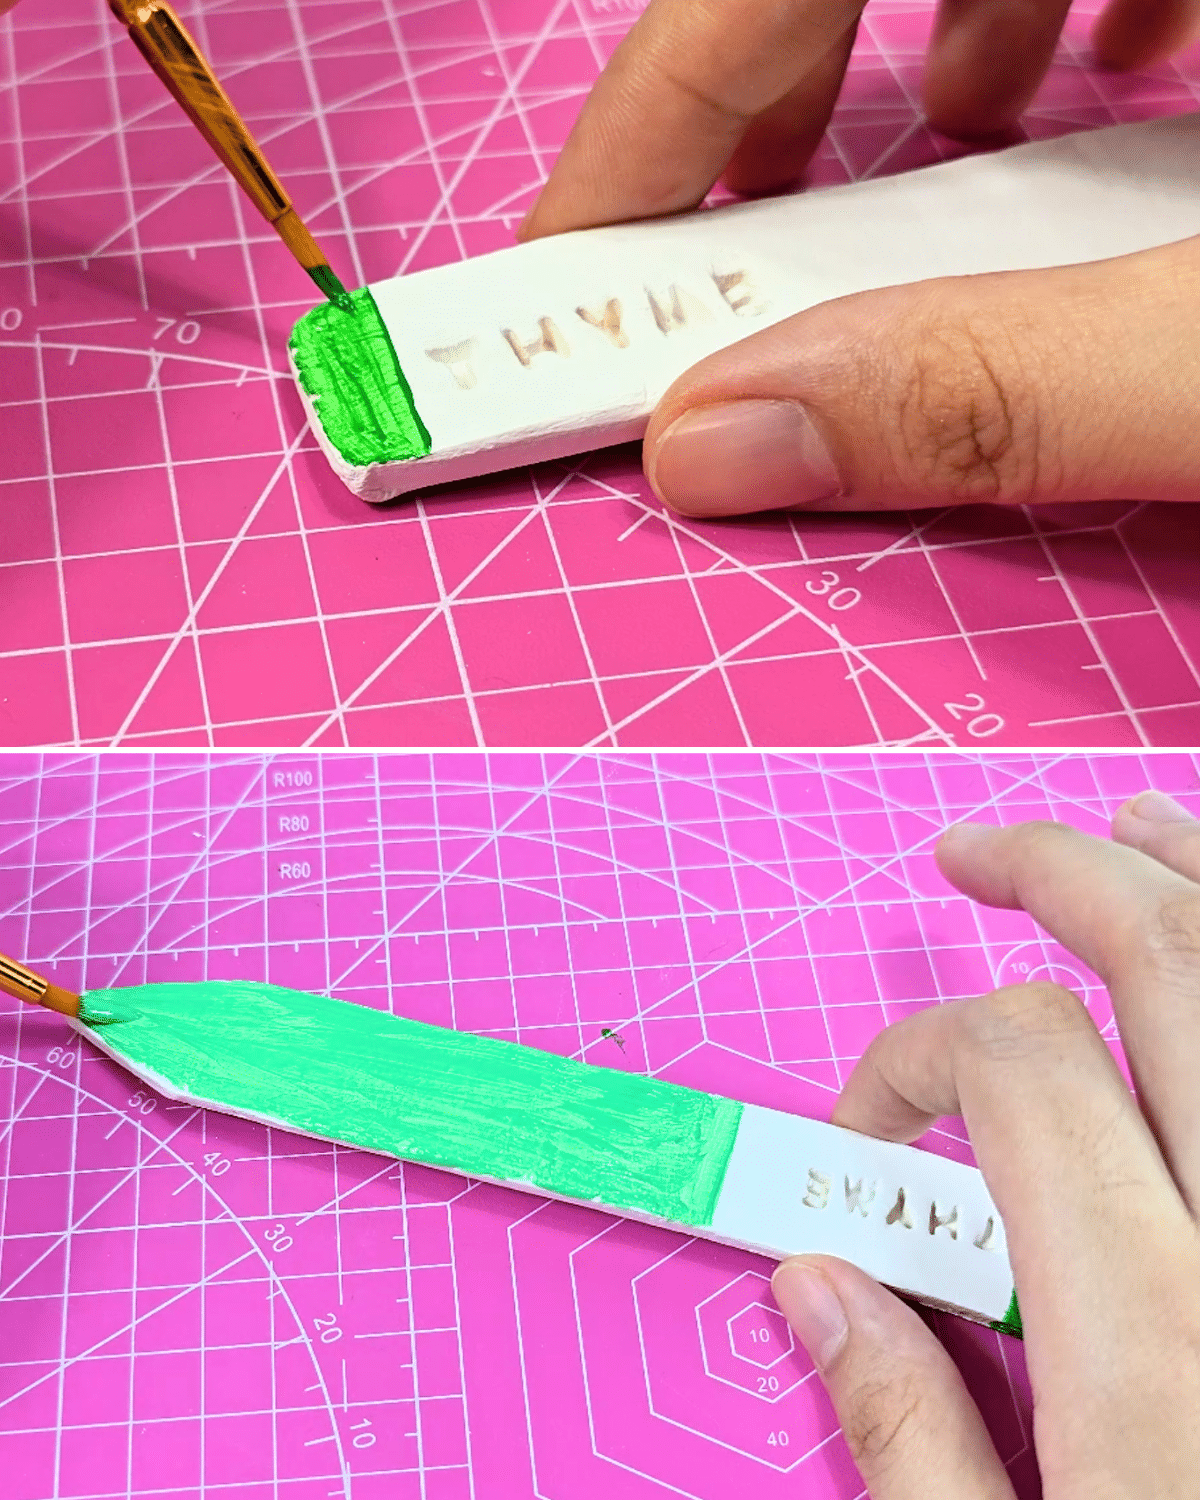
Once the clay has dried completely, it is now ready for your primer. Apply a thin coat first, then let it dry a bit—which should not take too long, and then apply another coating as needed.Step 4: Painting the Clay Plant Markers
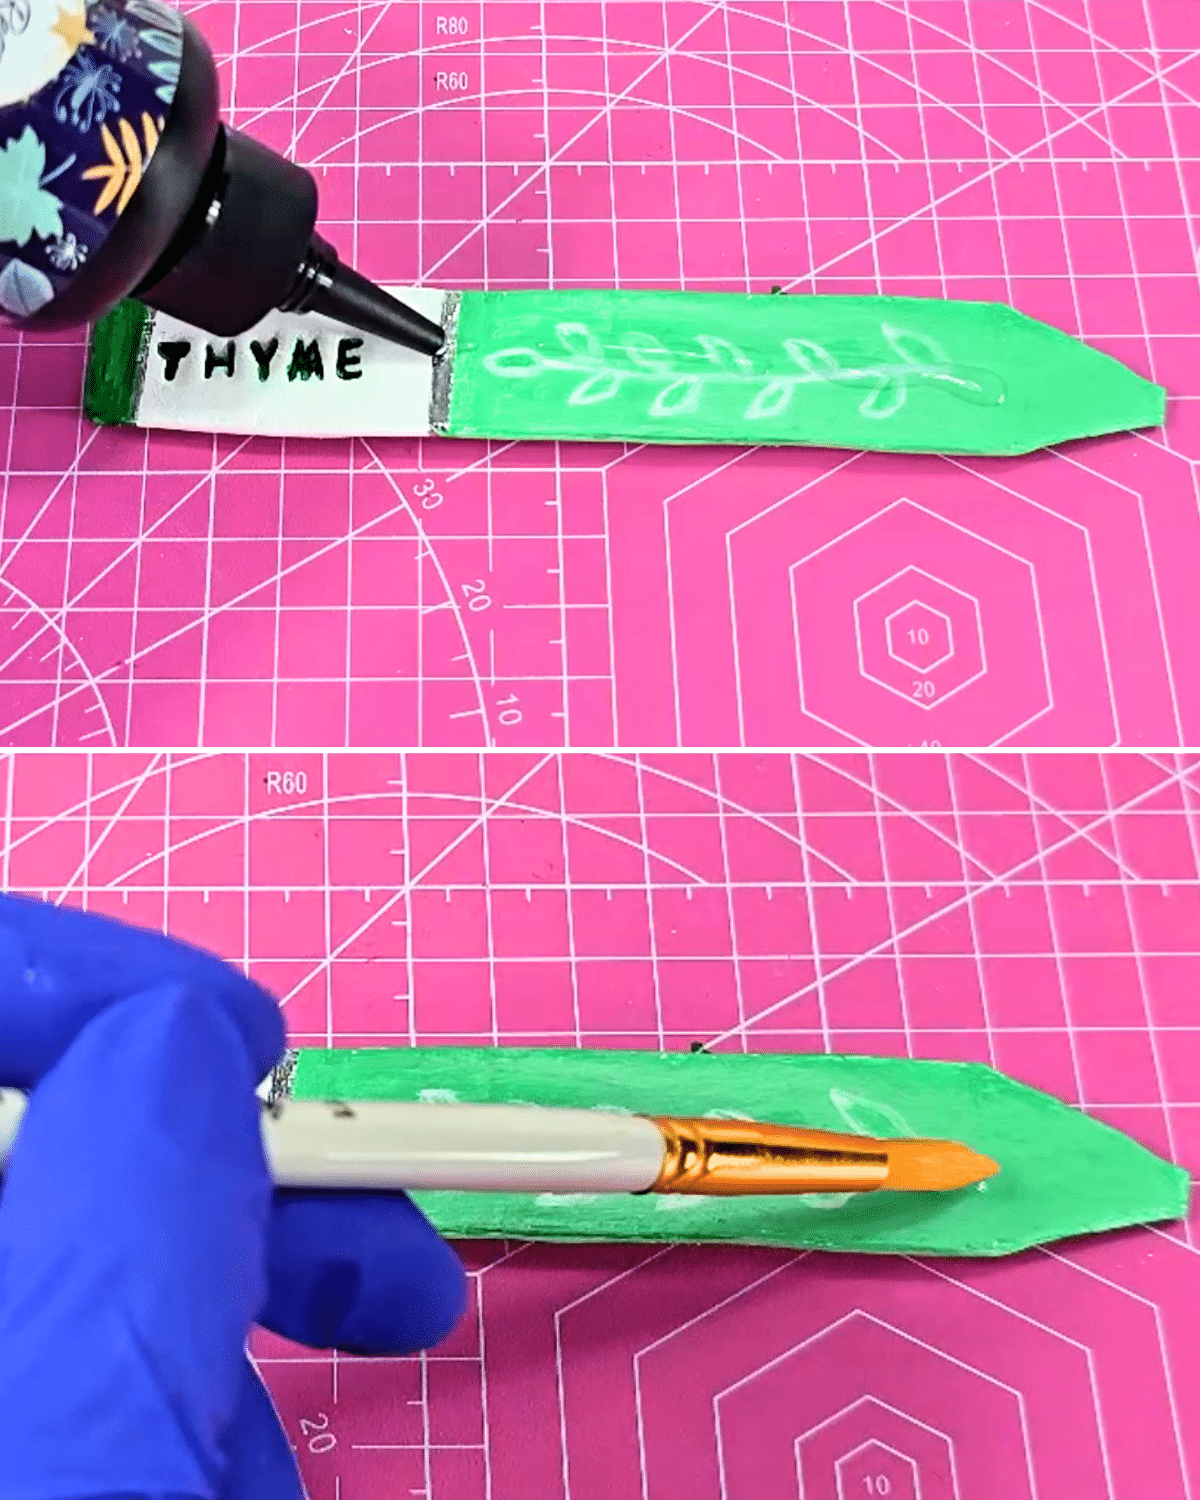
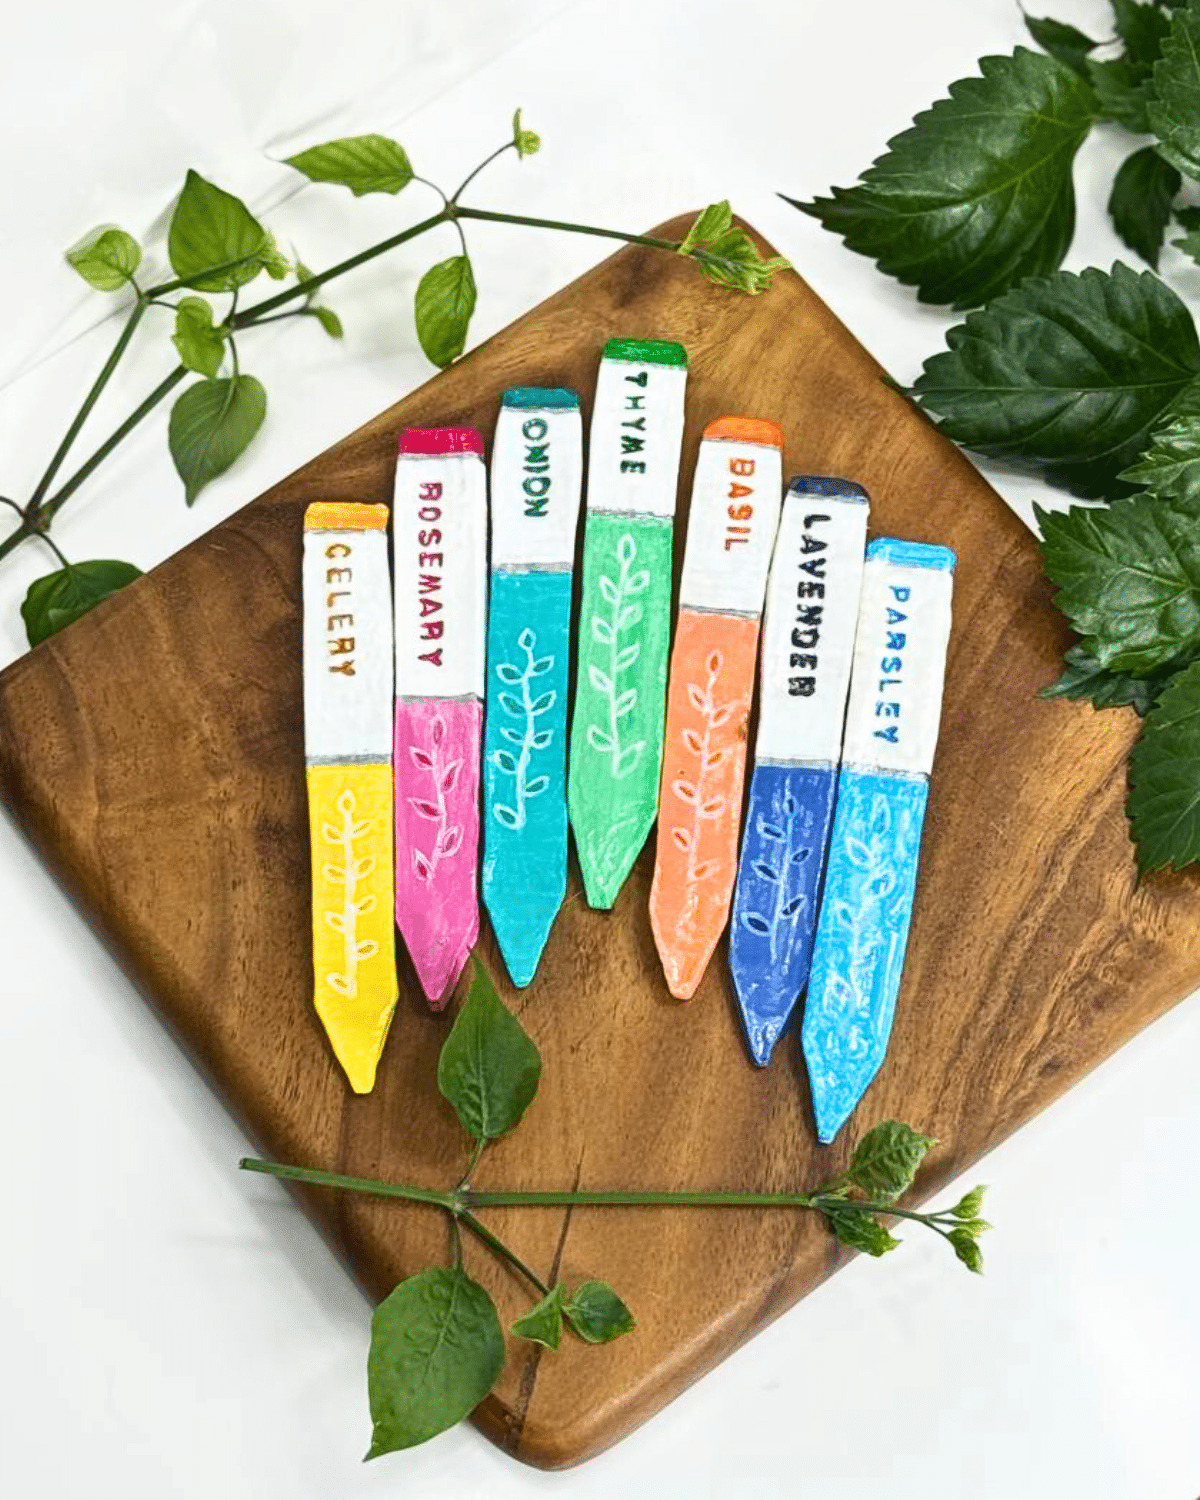
Once the primer has dried and set completely, feel free to paint the clay marker however you want. You can also draw some designs over it and paint each marker or assign a different color per piece.Step 5: Adding More Details (optional)
This step is completely optional, but if you want to add more details to your clay markers, you can outline the edges of your paint with metallic marker pens. You can use either silver or gold.Step 6: Applying the UV Resin
Note: Make sure to wear Nitrile Gloves when working with resin for maximum protection. Don’t let any resin touch your skin.
Once the paint and the marker have set and dried, apply a thin layer of UV resin and make sure to distribute it evenly over the entire clay. Pick up any spillage or overapplication off the piece and transfer it to the other clay you want to cover with the UV resin.Step 7: Curing the UV Resin
When you’re clay is ready and nicely coated with the UV resin, transfer the piece over to your UV lamp, then set it to a total of 2 to 3 minutes until it’s fully set and not sticky anymore. It may take a few sets or rounds until you can get to the perfect cured state of the resin.

Tools
- Stamping tool
- Clay sculpting tool
- UV lamp
Materials
- Air-dry clay
- Pencil
- Ruler
- Template
- UV resin
- Sponge
- Acrylic paint
- Paintbrushes
- Primer paint
![]()
Pro Tip
Every time your clay cracks or becomes too hard to shape, just keep it moisturized with some water. This trick can also help when smoothing out edges and filling in gaps.
Our Popular Projects

Paper Flowers

Crafts

Paper Flowers

Crafts
*If you love this craft, then visit our official website, follow our Facebook page, and subscribe to our YouTube channel for more!
Easy Clay Craft – Plant Markers