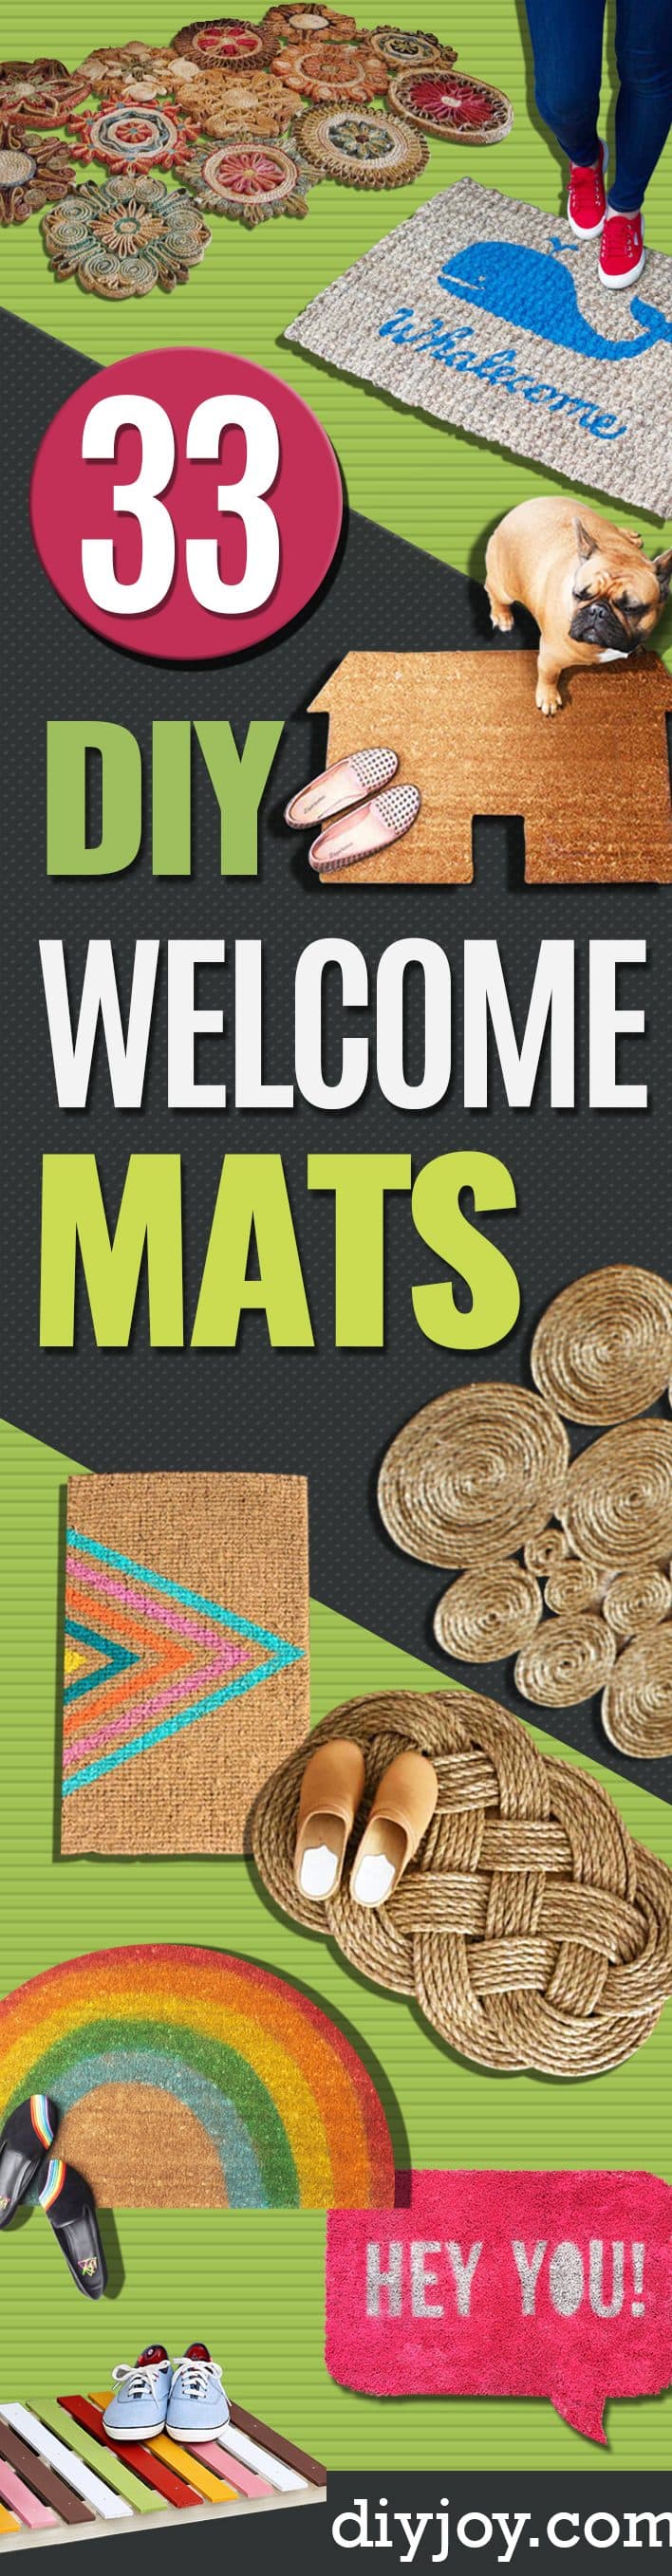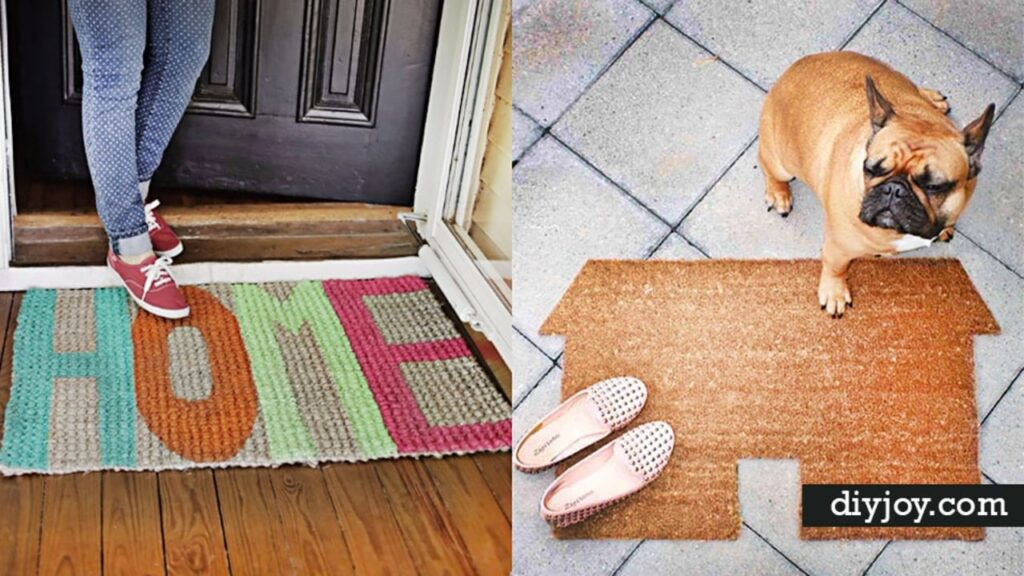
Your welcome mat is the first thing guests see, so why settle for a plain brown rectangle? These 11 DIY welcome mats start with a basic coir doormat and a little paint, or skip the store mat completely for wooden planks, coiled garden hose, straw trivets and even tile mosaic. You’ll find a rainbow, a watermelon, a row of little houses and a few sayings that’ll make the mail carrier smile. Most take an afternoon plus drying time. One tip that saves a lot of frustration: dab or stamp the paint straight down into the bristles instead of brushing across them, and use porch or outdoor paint so the design survives muddy boots and rainy seasons.
1. Easy DIY Rainbow Doormat
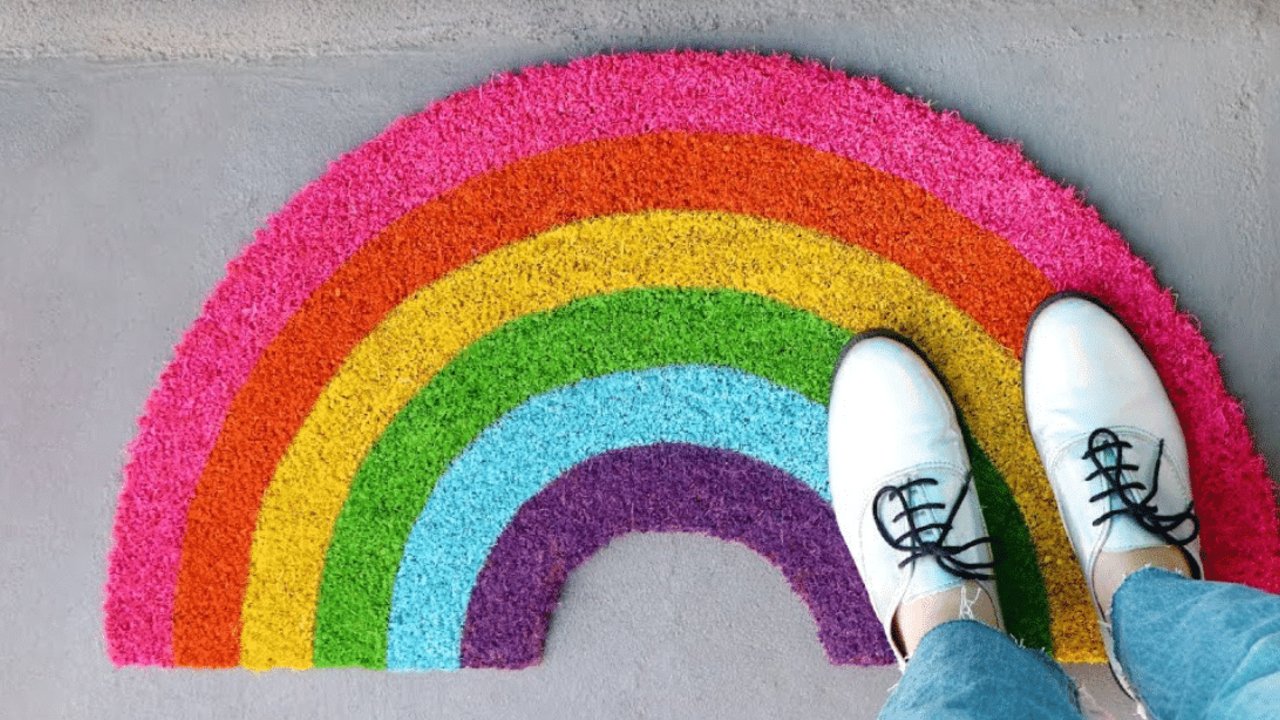
A rainbow doormat starts as a plain rectangle and gets cut into an arch. Print the free pattern, tape the pages together and trace the outline onto the mat with a permanent marker. Pin the template pieces in place, cut the mat to shape with a carpet cutter, then lift out every other band. Paint the open bands, let them dry, swap the pieces and paint the rest. Touch up the edges and it’s done. It’s cheaper than buying one, and you can size it to any door.
Get the full tutorial at DIY JOY.
2. DIY Painted House Doormat
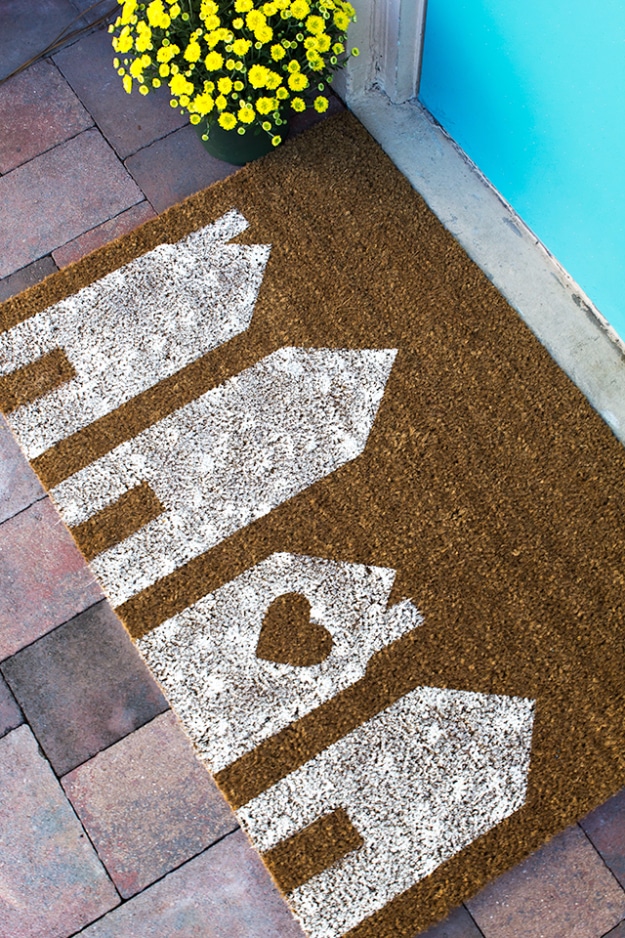
A painted house doormat with a row of little homes takes less than 30 minutes, and you really don’t need to be an artist. Tape off simple house shapes with painter’s tape on a plain sisal or coir mat, peaked roofs and all. Stick a small heart cut from adhesive vinyl inside one house. Load a big brush with craft paint or a house paint sample and dab it straight down into the fibers. Peel the tape while the paint’s still a little wet. Your neighbors will want one too.
Get the full tutorial at Sarah Hearts.
3. Bright Watermelon Door Mat
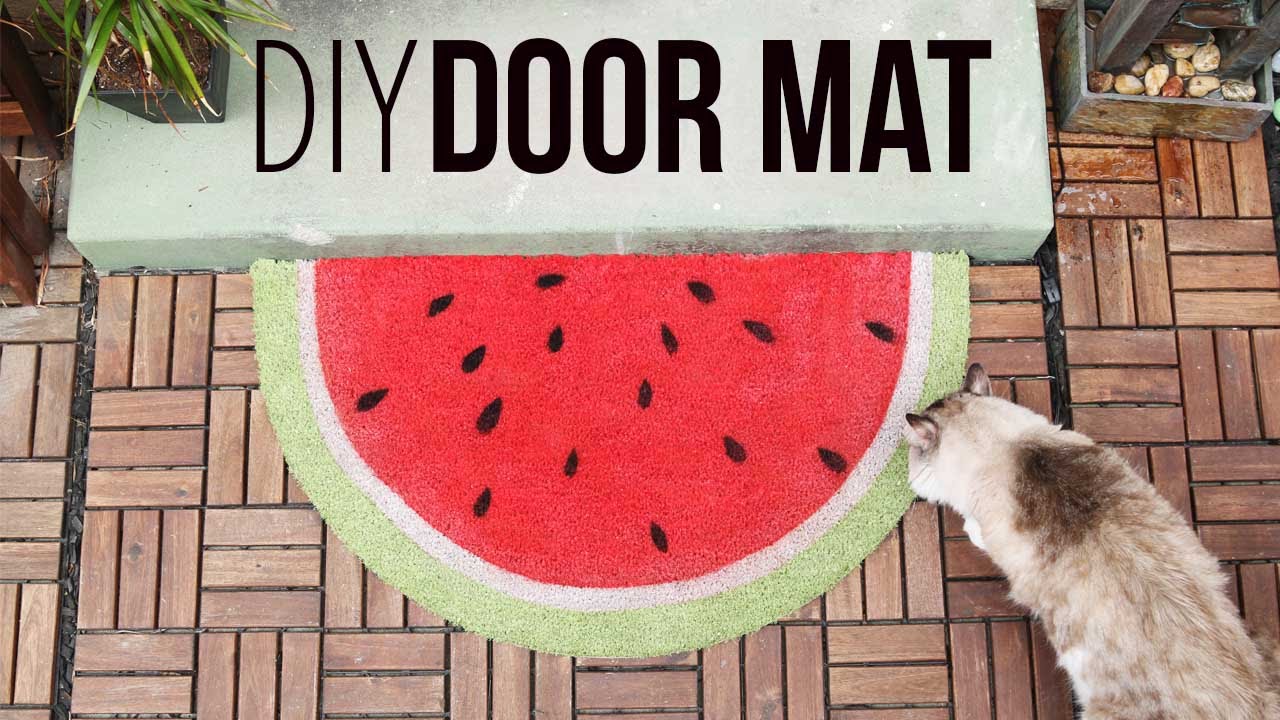
A bright watermelon door mat brings summer right to the doorstep. Cut a coir mat into a half circle so it’s shaped like a slice, then paint a green rind around the curve, a thin pale band inside it and the rest a juicy pinkish red. Once it’s dry, dot on black seeds in a loose scatter. It’s cheerful at the front door, the back door or even in the kitchen, and it makes an easy housewarming gift. Expect it to start conversations.
Get the full tutorial at DIY JOY.
4. Wood Plank Doormat
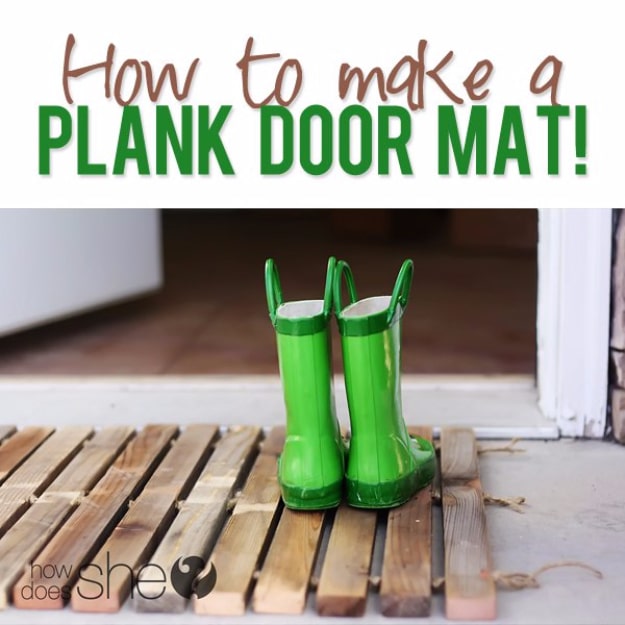
A wood plank doormat is a smart way to use scrap boards, and it lets puddle water drip right through. Trim the planks to about 22 inches, pull every nail and staple, and sand off the splinters. Stain them now if you want color. Stand the planks on edge and drill three quarter inch holes through each one, one in the center and two about 3 inches from the ends. Thread taped twine through all three rows, knotting between planks so there’s a little gap, then double knot the ends.
Get the full tutorial at How Does She.
5. Custom Text Doormat
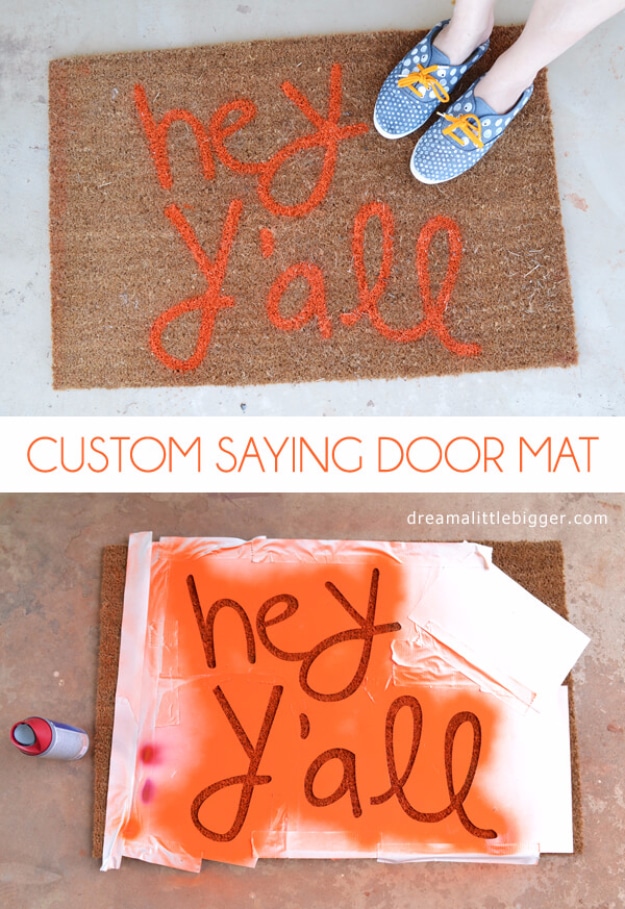
A custom text doormat lets you put your own catchphrase on the porch. Start with a cheap plain coir mat. Cut your word or phrase from poster board with a cutting machine or a craft knife and a printed template, keeping the last couple of inches of the mat free since the board isn’t as long. Peel away the letters so you’re left with a stencil, lay it on the mat and spray a light or bright color through it. Hey y’all, hello, or your last name all work.
Get the full tutorial at Dream a Little Bigger.
6. Colorful Geometric Welcome Mat
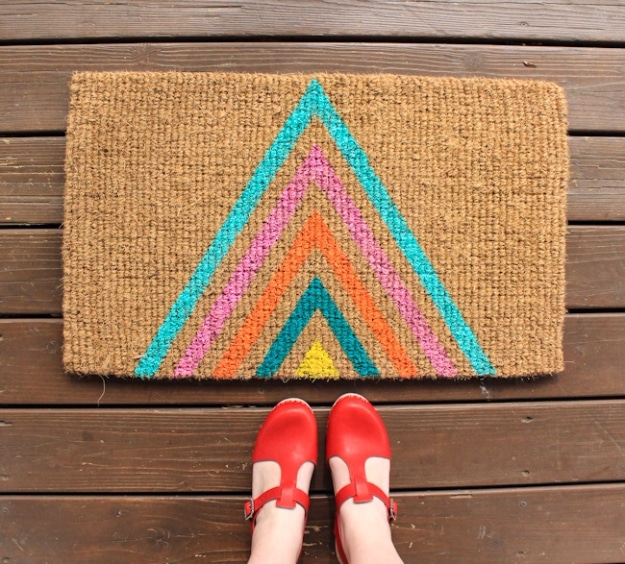
A colorful geometric welcome mat needs nothing more than a coir mat, painter’s tape and paint. Tape off nested triangles, starting with the biggest outline and working inward, and use a ruler for the first placement so the point lands centered. Paint each band a different color. The trick is to stamp the paint down into the fibers instead of brushing across them, so the color really sinks in. Once dry, peel off the tape and set it out on the porch.
Get the full tutorial at Curbly.
7. DIY Wooden Doormat
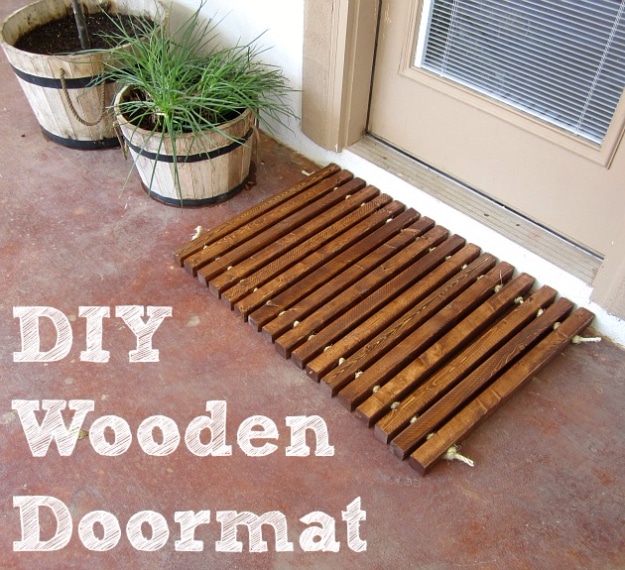
A DIY wooden doormat is a lot like a slatted spa mat for the porch. Cut 2 by 2 boards into short pieces, then drill a hole about 3 inches in from each end of every plank. Don’t worry if the holes don’t come out perfectly even; the rope is flexible. Stain and seal the slats with a heavy coat of polyurethane to help them stand up to weather. Lace the planks together with rope, tying a knot between each one. Cedar or mahogany lasts longest, though pine works on a budget.
Get the full tutorial at Wildfire Interiors.
8. Garden Hose Doormat
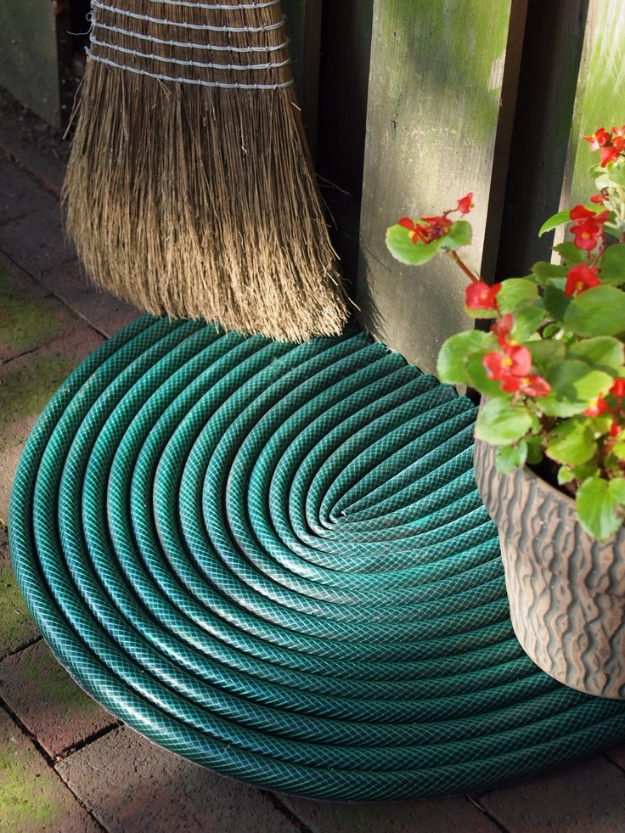
A garden hose doormat is the best use for that leaky old hose the trash collectors won’t take. Start with a cheap square doormat. Cut the hose into lengths with garden pruners and glue them down in half circles from the outside in, using plenty of E6000. Weigh each section with heavy pots overnight before adding the next. Once the mat is filled, trim the overhanging ends and the mat itself, then plug every cut hose end with a small cork. Expect to use about three tubes of glue.
Get the full tutorial at Mark Kintzel Design.
9. Tile Mosaic Doormat
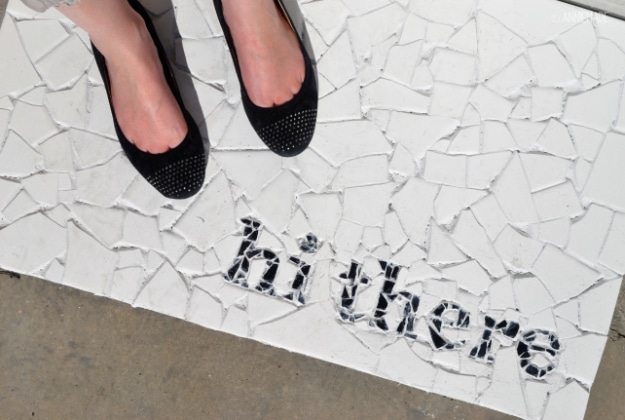
A tile mosaic doormat is heavy, sturdy and genuinely one of a kind. Have a piece of tile backerboard cut to about 20 by 30 inches. Transfer a printed greeting by coloring the back of the paper with dark crayon, taping it down and tracing hard over the letters. Smash black and white ceramic tiles inside a box lid, then set the black pieces along the letters and the white around them. Grout with unsanded and sanded grout, sponge it clean and seal it. Budget about $30.
Get the full tutorial at Annie Franceschi.
10. Cute Personalized Doormat
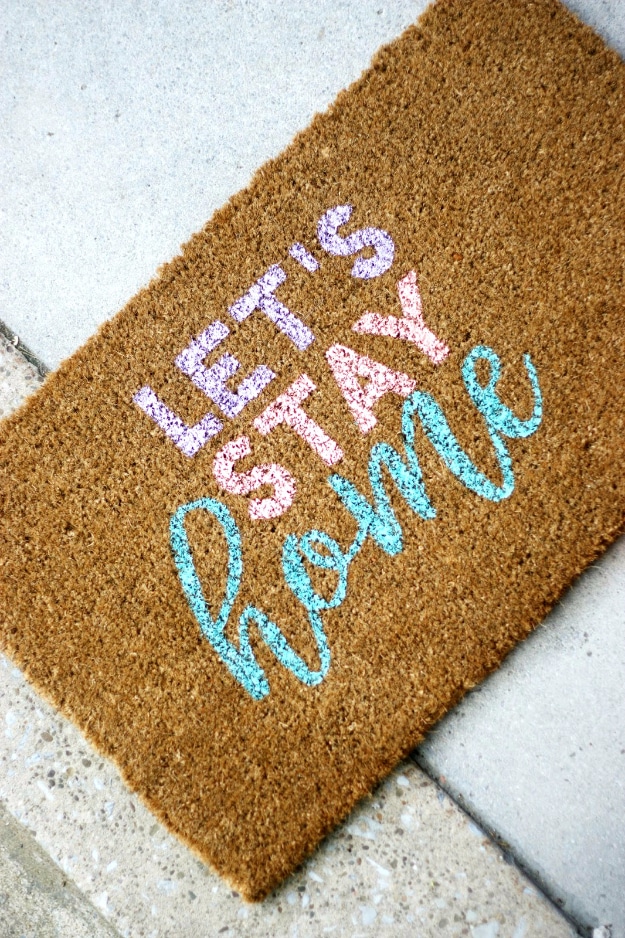
A cute personalized doormat comes together in three easy steps: stencil, paint, seal. Make an adhesive stencil from sticker paper with a craft cutter, hand cut one or buy a ready-made saying. Press it firmly onto a plain doormat so the edges don’t lift. Dab acrylic paint into the openings with a stencil brush, working the color down into the bristles, which takes more effort than painting a flat surface. Peel the stencil, let it dry and add a clear sealer if the mat sits out in the weather.
Get the full tutorial at DIY Candy.
11. Straw Trivet Doormat
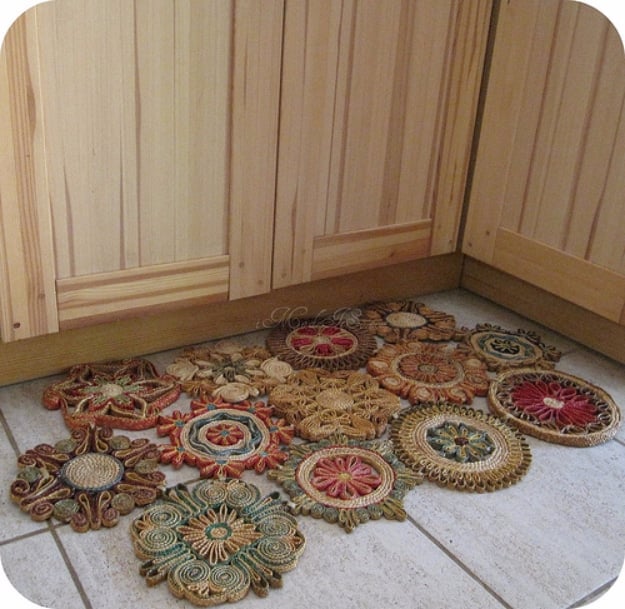
A straw trivet doormat is a clever puzzle of a project. Gather a bag of old woven straw trivets, the round swirly kind, from a thrift store. Lay them out on the floor and shift them around until every trivet touches its neighbors in at least one spot, keeping the gaps small. Cut raffia into roughly 5 inch strips and tie the trivets together right where they touch. Natural raffia keeps it looking earthy. The colors and swirls make a pretty, one-of-a-kind mat for a bath or an entry.
Get the full tutorial at I Made It So.