Your DIY wedding centerpieces show up in nearly every photo taken at the reception, so they’re worth getting right. These 14 go modern and classic, with a glass bead vase, an easy terrarium and an elegant dollar store centerpiece. Flowers show up in plenty of forms: paper ranunculus, crepe paper blooms, a paper towel bouquet, a cupcake liner bouquet, a quick floral arrangement, a $4 grocery store bouquet stretched into a full centerpiece and a minimalist ikebana dish that uses only a handful of stems. Fewer stems, smaller florist bill. That’s math I like. For a soft glow, there are pressed flower mason jar lights and fairy jar lanterns, plus a vase folded from an old book. Perfect for receptions big and small. Planning more? See my outdoor wedding ideas, cheap wedding decorations, Dollar Tree wedding decorations and DIY wedding flowers.
Table of Contents
- 1. Paper Ranunculus
- 2. Crepe Paper Flowers
- 3. DIY Easy Wedding Centerpiece
- 4. Quick Floral DIY Wedding Centerpieces
- 5. Easy Terrarium Centerpiece
- 6. DIY Elegant Dollar Store Centerpiece
- 7. Paper Towel Flower Bouquet
- 8. Glass Bead Vase
- 9. Cupcake Liner Flower Bouquet
- 10. Fairy Jar Lanterns
- 11. Pressed Flower Mason Jar Lights
- 12. Folded Book Page Vase
- 13. $4 Grocery Store Flower Centerpiece
- 14. Minimalist Ikebana Centerpiece
1. Paper Ranunculus

Paper ranunculus look like they were just picked from the garden, and they’ll still look that fresh long after the wedding is over. The technique is simple and made for beginners, which matters a lot when you need dozens of blooms for bouquets, centerpieces and a cake table. Make a few at a time over a couple of evenings and you’ll have a whole bucket of them before you know it. The full how-to is on the DIY JOY post.
Get the full tutorial at DIY JOY.
2. Crepe Paper Flowers

Crepe paper flowers are everywhere right now, from feeds to store displays, and it’s easy to see why. They bring a soft, romantic look to a reception table and they stretch just like real petals, so you can shape each one. Best part? You can make them months ahead and tuck them away, which takes real pressure off the last few weeks before the wedding. The full how-to is on the DIY JOY post.
Get the full tutorial at DIY JOY.
3. DIY Easy Wedding Centerpiece

If budget plays a role in your upcoming wedding, consider cutting costs with these centerpiece styling tips. Best of all, these gorgeous arrangements look anything but cheap, so go ahead and save big – without sacrificing style. These tall and abundant arrangements are as simple as they are beautiful. Clear glass, candles and a little bling can create a huge sensation for an evening wedding.
Get the full tutorial at diyjoy.
4. Quick Floral DIY Wedding Centerpieces

This straightforward tutorial walks you through creating budget-friendly wedding centerpieces in just minutes. Each piece requires a clear 6-inch glass bubble bowl, a bag of craft sand, and three to four faux flowers. Simply wash and dry the bowl, layer in the sand, and trim and arrange the artificial blossoms for a clean, customizable look. It’s fast, affordable (around $10 per centerpiece), and easy enough for any skill level – plus, you can reuse the elements after the event or adapt the color scheme to match your wedding palette.
Get the full tutorial at diycandy.
5. Easy Terrarium Centerpiece

Inspired by a “midnight forest” theme, this centerpiece layers gold terrarium containers with wood block bases, smooth river rocks, moss, and realistic faux succulents. Israeli ruscus greenery, repurposed from a ceremonial garland, adds fresh texture and depth. All materials were sourced from common retailers like Target, Jo-Ann’s, and Amazon, making it an accessible yet high-impact option for wedding tables.
Get the full tutorial at womangettingmarried.
6. DIY Elegant Dollar Store Centerpiece

Create an upscale look on a budget using just a glass candlestick, a round glass vase, a bag of river rocks, and two bunches of flowers – all from the dollar store for about $5. The candlestick is glued to the vase base, the rocks are poured inside, and branches with baby’s breath are anchored in the center. Floral bunches are placed on either side, with eucalyptus filling out the arrangement. The result is a natural, high-end centerpiece that comes together in minutes and can be customized for any season.
Get the full tutorial at creativelifeofaglamwife.
7. Paper Towel Flower Bouquet

Would you believe this bouquet is made from paper towels? It’s true, and nobody at the reception will guess. It’s unbelievably budget friendly, the technique is one anyone can manage and you probably already have the main supply sitting in your kitchen. Make a few to test your colors, then turn out a full set for the tables or the bridal party. The full how-to is on the DIY JOY post.
Get the full tutorial at DIY JOY.
8. Glass Bead Vase

For about $2 and 20 minutes you can make a candle holder that glows like a jewel box on the reception tables. Grab a small oval glass container and a bag of glass beads, both from the dollar store (the glue gun is the only thing that isn’t). Dab glue on the back of each bead and press it along the top rim, then work row by row down until the glass is covered. Little gaps are totally fine, the candlelight sneaks through and looks even prettier. Pick bead colors that match your wedding and make one for every table, plus a few extras to send home as favors.
Get the full tutorial at momluck.
9. Cupcake Liner Flower Bouquet

Cupcake liners bloom into full, fluffy flowers, and it’s a lovely surprise the first time you see one come together. This is an easy craft for absolute beginners, and the results are sweet enough to sit right on a reception table. Liners come in every color, so matching your wedding palette is simple and cheap. Gather a handful into a bouquet or scatter them down the tables. The full how-to is on the DIY JOY post.
Get the full tutorial at DIY JOY.
10. Fairy Jar Lanterns
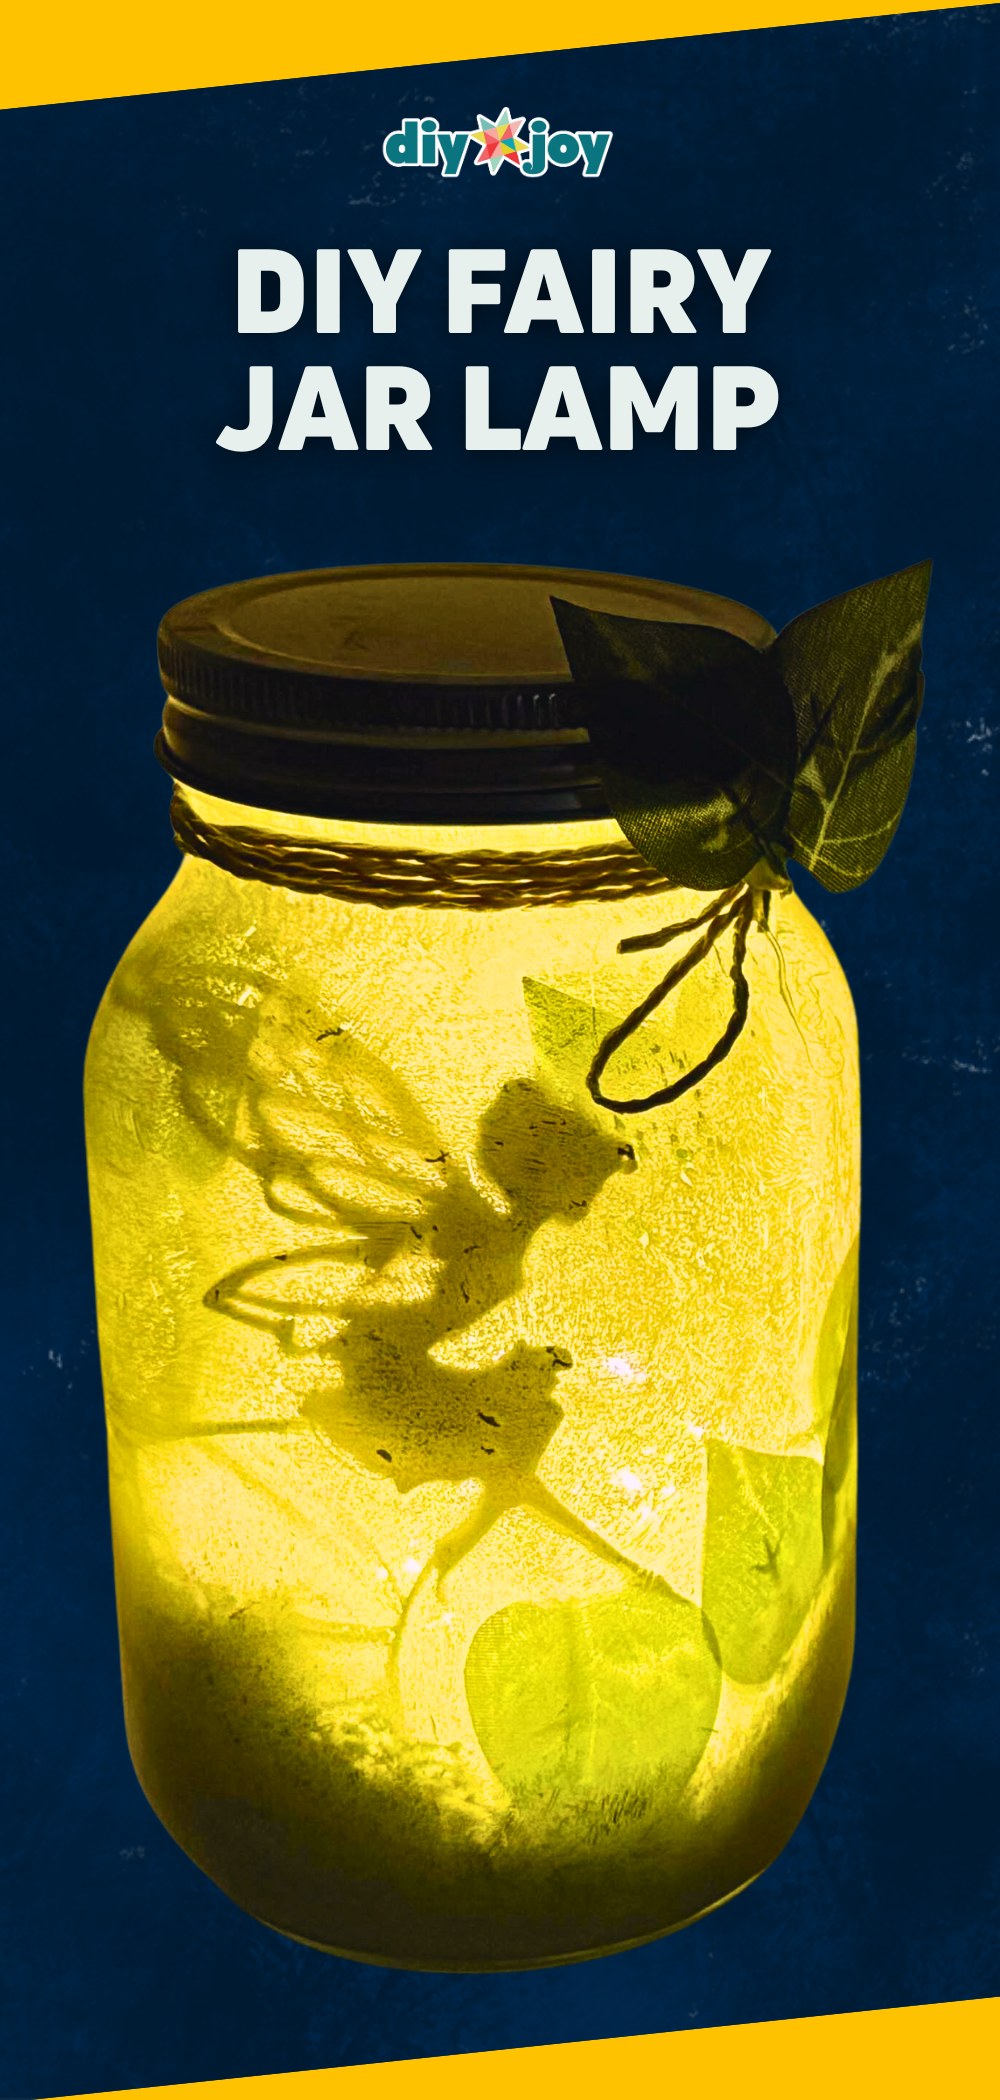
Want a dreamy glow on every table? Fairy jar lanterns start with any glass jar (pickle jars work great). Paint the inside with white acrylic or primer, keeping the coat thin enough for light to shine through. Glue a paper silhouette inside, tuck moss in the bottom and add a few leaves for extra shadows. Pop in a tea light or fairy lights, then tie twine around the neck with a bow. Swap the fairy for trees, mushrooms or a little house and they turn into enchanting garden wedding centerpieces.
Get the full tutorial at DIY JOY.
11. Pressed Flower Mason Jar Lights
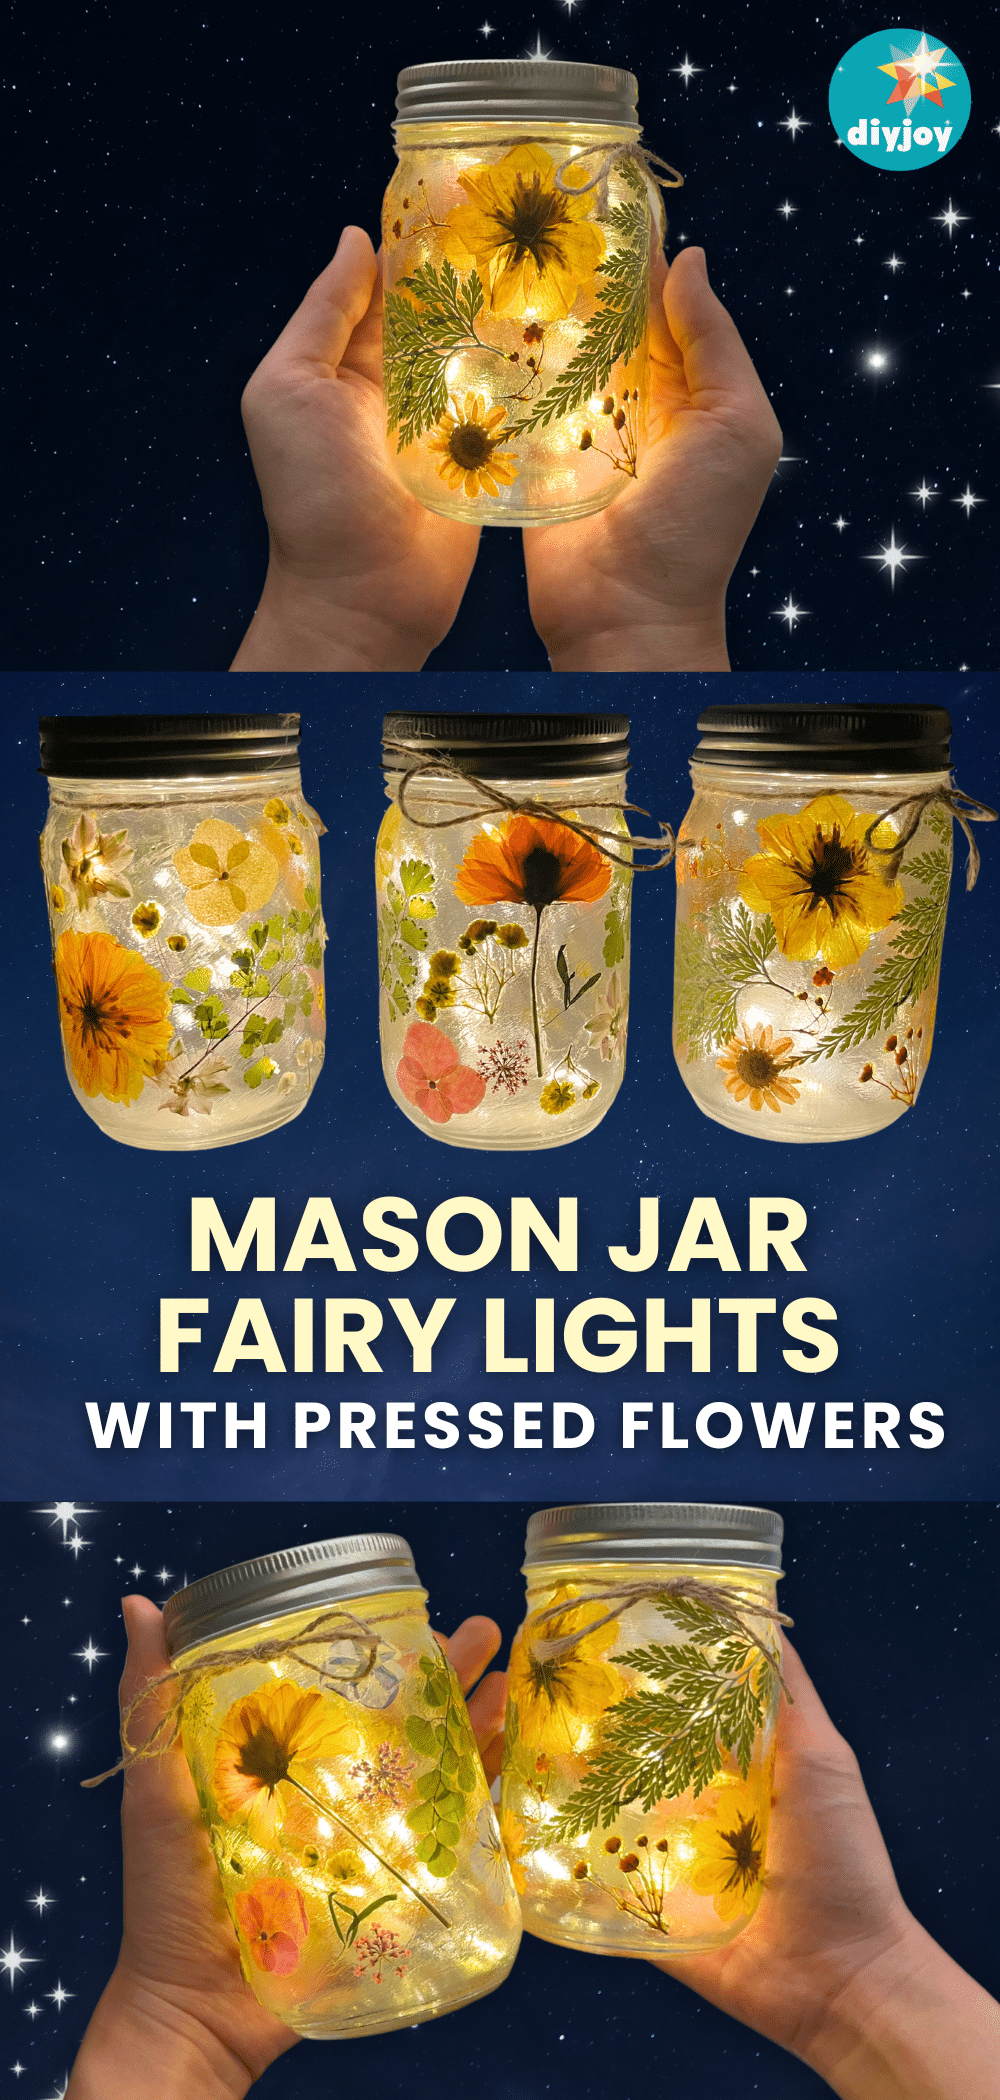
Pressed flowers and fairy lights are such a pretty pair for a wedding table. Clean a mason jar well, brush on a thin layer of Mod Podge, press flowers and leaves into place and brush more over the top. Work in small sections so the glue doesn’t dry before you get there, then add a second coat to seal it all in. Thin, delicate flowers let the most light through. Drop in a string of fairy lights, tie on jute twine and you’ve got a glowing centerpiece. Use the couple’s favorite blooms for a personal touch!
Get the full tutorial at DIY JOY.
12. Folded Book Page Vase

Book lovers, this one’s for you. An old book becomes a vase when you cut the top section of its pages along a line, then tape the pages together in groups of three and fold them toward the center until the whole thing fans into a rounded shape. A craft knife, ruler and double-sided tape are all you need. Fill it with dried lavender, faux stems or paper flowers (it won’t hold water). Stand one on each guest table, or group a few on the dessert table for a library or vintage-inspired wedding.
Get the full tutorial at DIY JOY.
13. $4 Grocery Store Flower Centerpiece
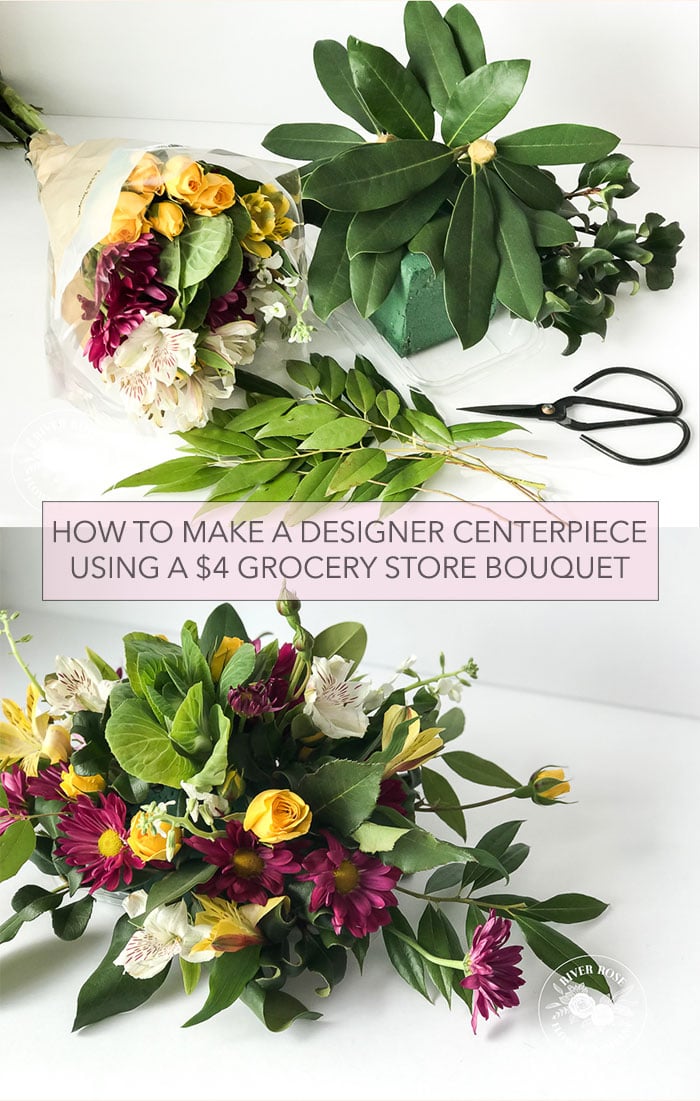
A florist shows how to turn one small $4 grocery store bouquet and a few garden scraps into a real centerpiece. Soak a third of a floral foam brick and set it in a recycled container. Add three kinds of greens (a feathery leaf, a large leaf and a small leaf) angled down to hide the container. Then sort your flowers into base, accent and filler, and build from the bottom up, saving the filler for the gaps. Don’t toss the buds, they add great texture on top. It’s a smart way to stretch a small budget across lots of tables.
Get the full tutorial at Jen Woodhouse.
14. Minimalist Ikebana Centerpiece
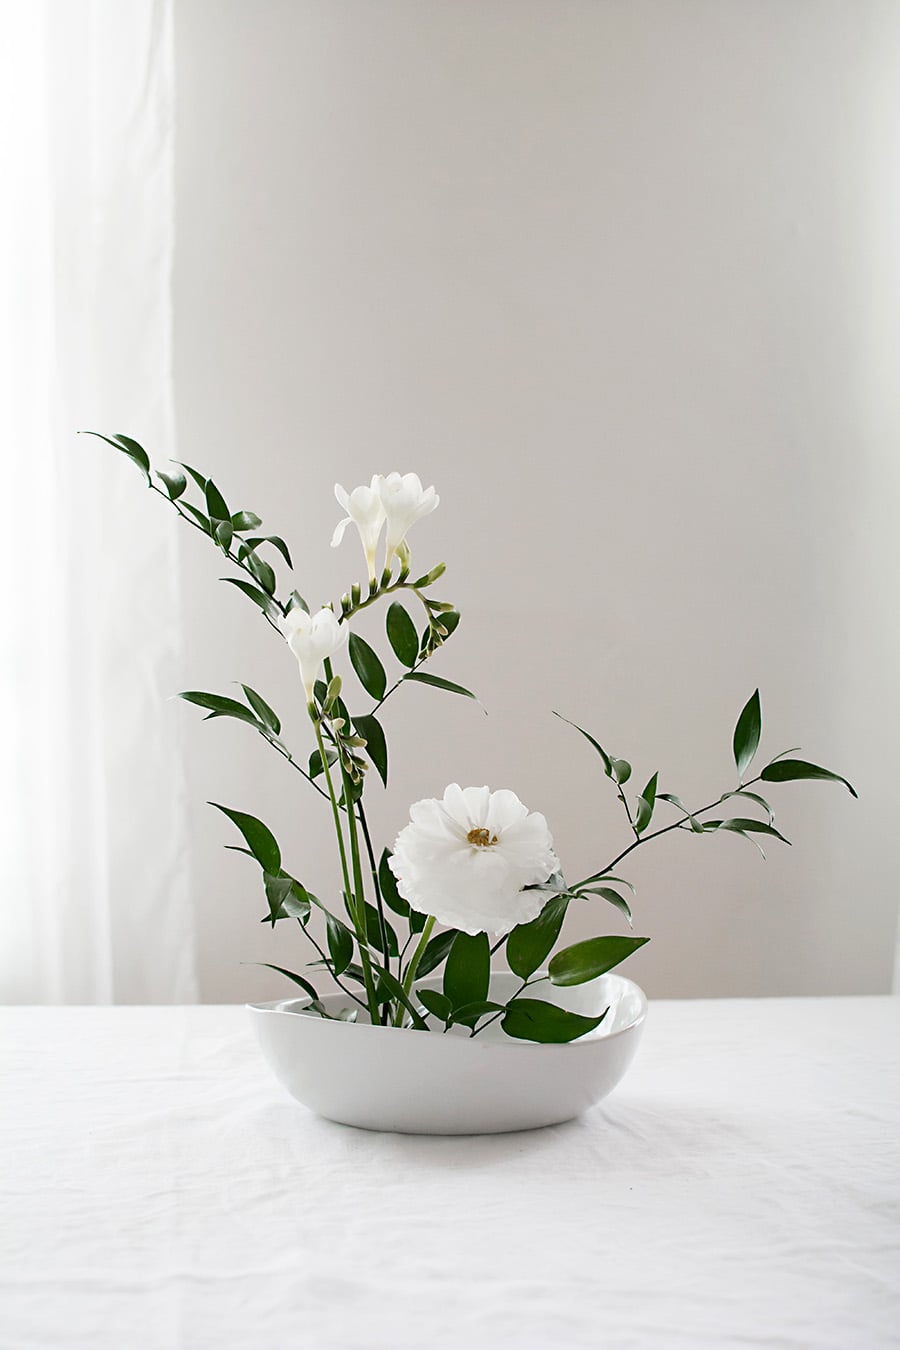
For a modern wedding, an ikebana-style arrangement says a lot with just a few stems. You set a flower frog (called a kenzan) in a shallow dish and add water until it just covers the spikes. The tallest stem, about twice the width of the dish, leans back at roughly 20 degrees. A second stem about a third of its length leans toward you at 45 degrees as the focal point, and a few fillers finish it. Ranunculus, freesia and ruscus look lovely together. Fewer flowers, smaller bill, and it looks like art!
Get the full tutorial at Homey Oh My.