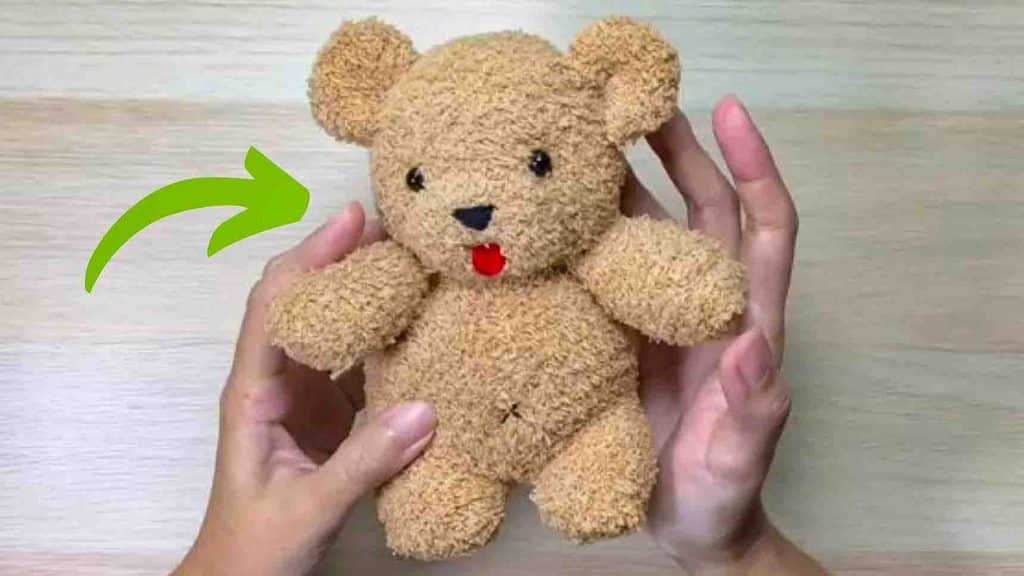
My kids love plushies, so when I came across this DIY teddy bear using old socks from Oktocrafts on Youtube, I knew I had to make one for my kids. I love this DIY project so much! The plushie I made turned out great, and my kids love it! What’s more, I was able to use the old socks I have for this DIY project. Super fun and easy! Watch the video tutorial below to learn the step-by-step instructions.
Materials:
- old socks
- pen
- scissors
- needle and thread
- stuffing
- pins
- beads
Directions:
Step 1
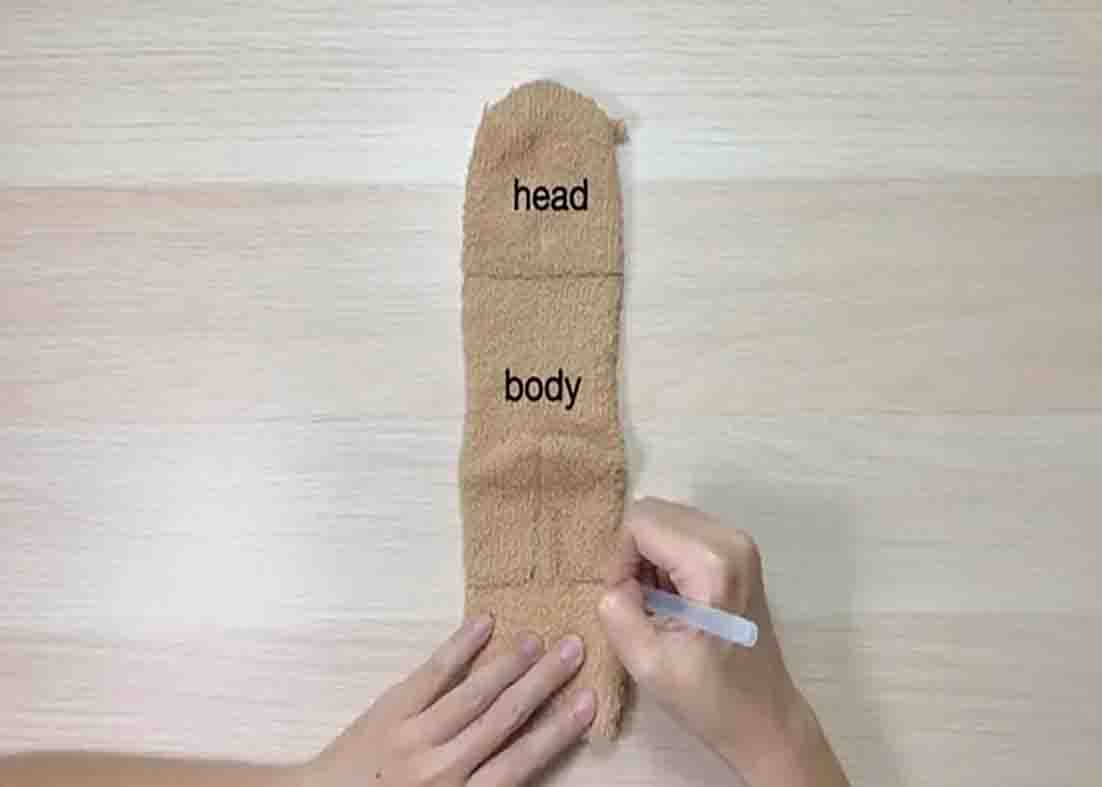
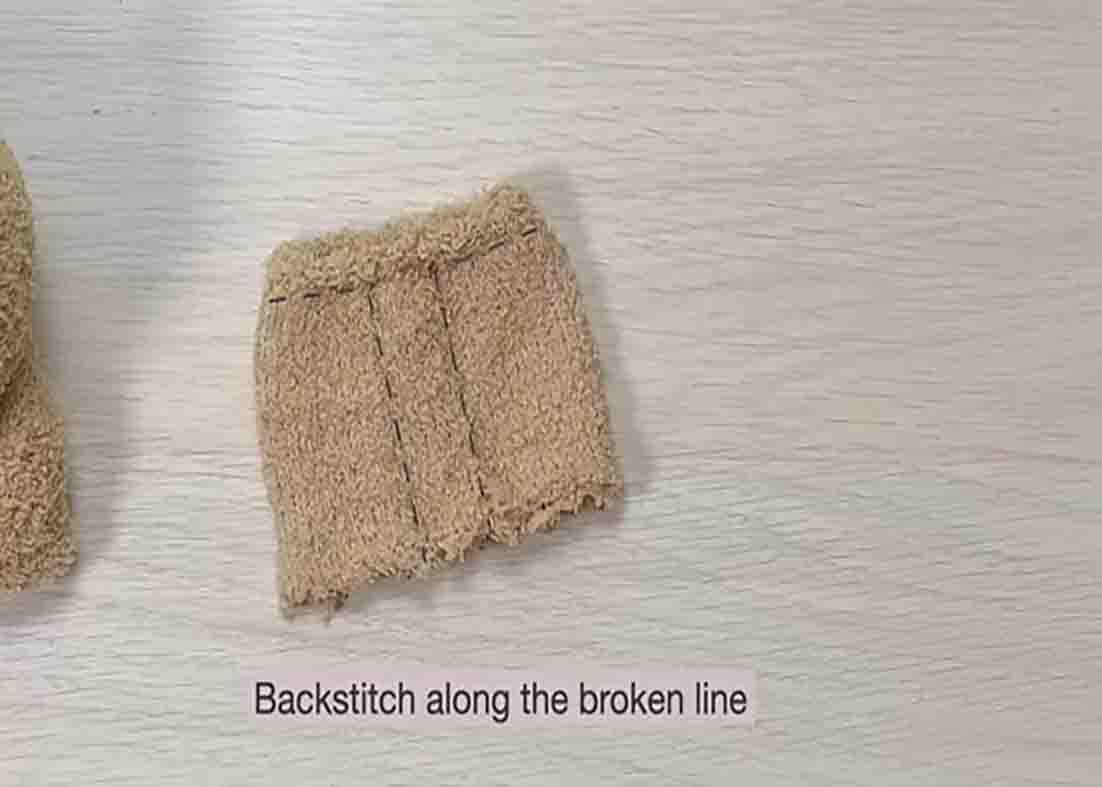
To start, flip the sock inside out. Next, lay it out with the heel facing up, then grab a pen and draw lines to divide the body parts of the teddy bear. After this, cut the top part and do a backstitch on the bottom line you drew (see picture below). After sewing, snip the excess part, then cut the middle to form the legs (set the excess part aside for the arms). Flip it inside out, then fill it with stuffing as well as the head. After this, do a running stitch on the head part, and once you reach the end, gather the stitches and push the edges inward to close it. Sew it again to tightly secure it. Next, grab the other sock, flip it inside out, and draw a horizontal line at the bottom for the bear’s snout. Then, get a small half-circle template and trace a pair on the sock (this will be the ears.) Cut the snout first, then do a backstitch along the ears’ line. Cut them off afterward. Now you have the head, ears, and snout pieces.
[social_warfare]
Step 2
Now, cut a small section on the ears’ base to turn them right side out, then do a ladder stitch to close the opening. Next, attach the ears to the head, pin them in place, then do a ladder stitch. Sew on the eye part to add dimension to the face, then attach the beads. After this, pin the snout and stitch around the edges. Leave a gap to fill the snout with stuffing, then continue stitching to close it. Cut a small red felt for the tongue and attach it to the bear’s mouth area. The head is now done. Back to the body, do a running stitch, and gather the stitches to close the opening. Next, grab the excess fabric, draw two identical lines on the center, then do a backstitch. Cut it, turn it right sides out, stuff, then sew them on both sides of the bear. After this, cut a small circle on the sock, do a running stitch, fill it with stuffing, then continue stitching to close it. Attach it to the back bottom of the bear; this will be the tail. Finally, attach the head to the body.
DIY Teddy Bear Plushie Using Old Socks