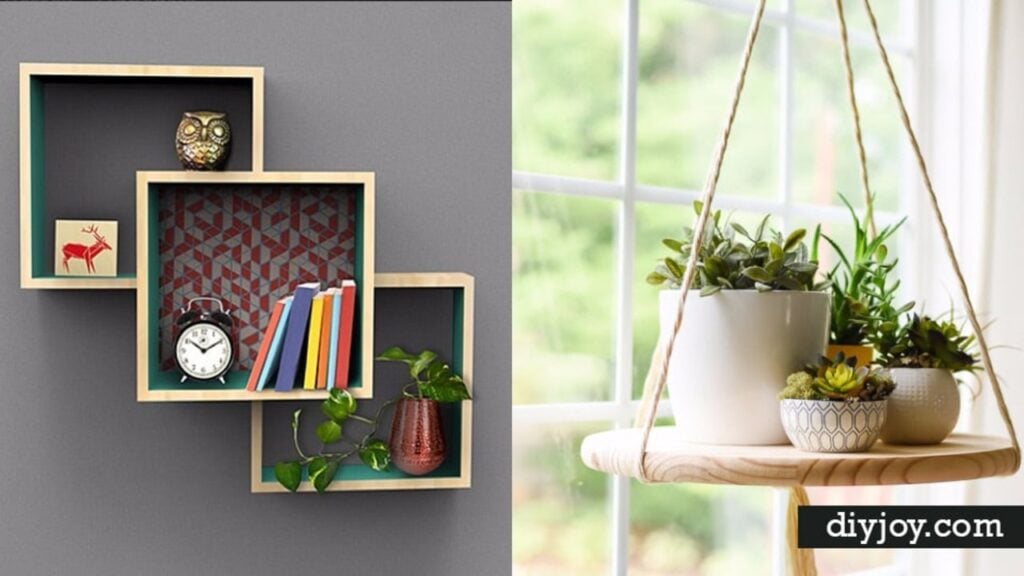
There’s always room for one more shelf, and these 18 brilliantly creative DIY shelving ideas find it in kitchens, bathrooms, kids’ rooms and that awkward corner nobody knows what to do with. DIY shelving is any shelf you build or hang yourself, from floating shelves and industrial pipe shelves to hanging shelves on rope or leather straps. Plenty need little more than a board, two straps and a pair of wall hooks. Others, like honeycomb shelves or a corner shelf cut from an old door, are a full weekend with a saw. Black iron pipe shows up again and again because it’s cheap, strong and looks great against rough wood. One rule before you hang anything heavy: find the studs. A shelf full of books weighs far more than it looks, and drywall on its own won’t hold it for long.
1. Modern Industrial Wood Slice Shelf
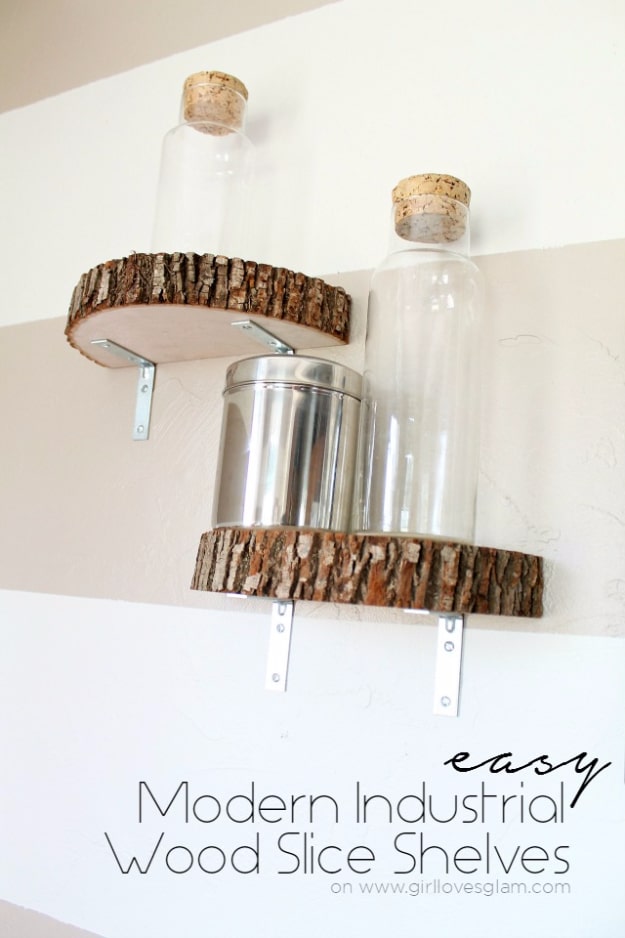
A modern industrial wood slice shelf is about as easy as shelving gets. Start with a 14 inch wood slice from the craft store, find the center and cut it in half to make two half moon shelves. Screw 4 inch L brackets to the underside, lined up with the flat back edge, then screw the brackets into the wall. Six inch brackets turned out too big, so stick with the smaller size. The whole project takes less than an hour, and the bark edge keeps it from looking like every other pipe shelf.
Get the full tutorial at Girl Loves Glam.
2. Easy Leather Strap Hanging Shelf
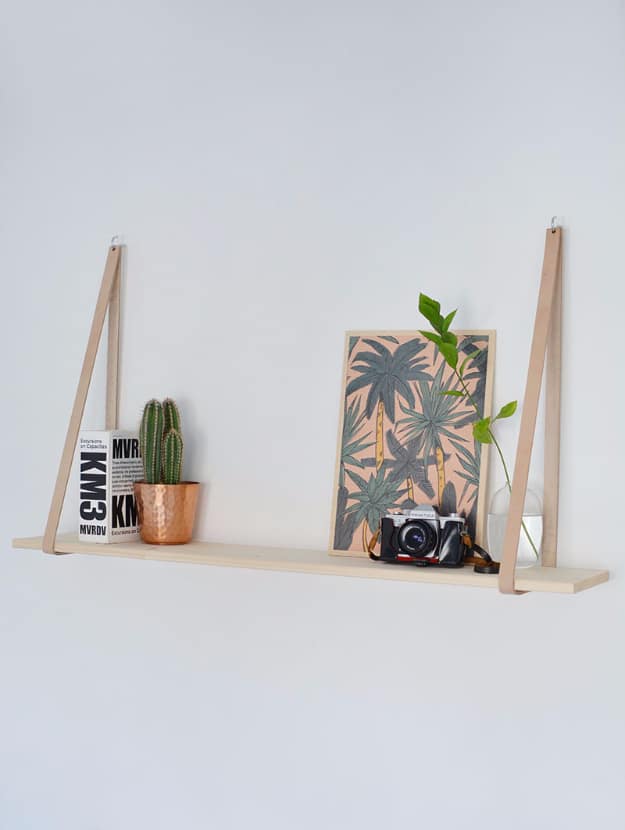
An easy leather strap hanging shelf takes just minutes to put up once the hardware is in. You’ll need two 50 inch leather straps (about 1 inch wide), a leather hole punch, a length of wood around 120 cm and two large screw hooks with wall plugs. Punch a hole at each end of each strap, making sure it’s big enough to slip over the hook. Drill two deep holes, plug them and twist in the hooks. Hang each strap as a loop and slide the board into the slings. Old belts would work too.
Get the full tutorial at Burkatron.
3. DIY Honeycomb Shelves
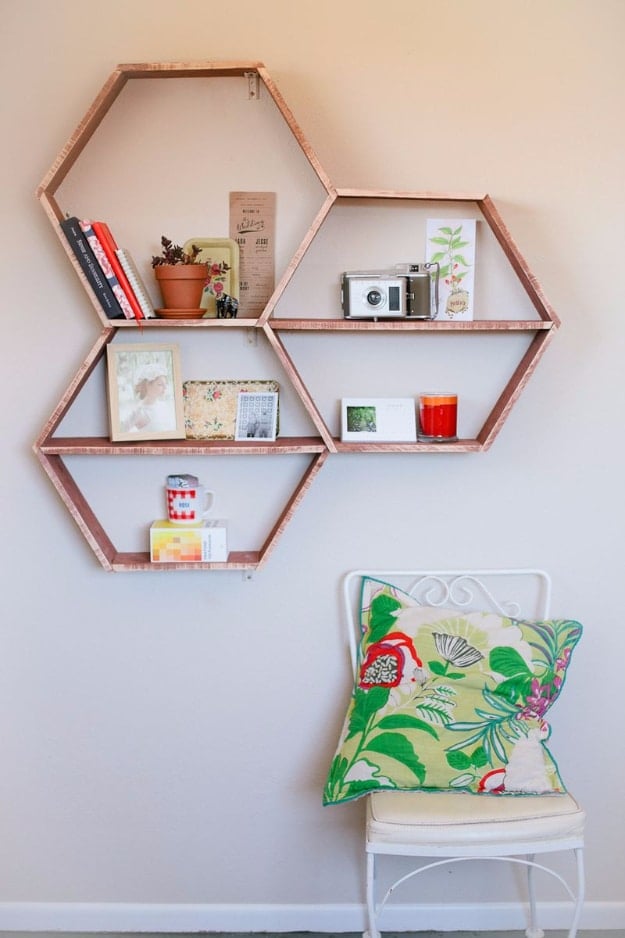
DIY honeycomb shelves are made from three fence planks and a miter saw set to 30 degrees for the entire build. Chop off the decorative end of each plank, then cut 15 identical pieces with a 12 inch long edge and both ends angled inward. Count them and check they really match. Stand six pieces up to form the first hexagon, working one joint at a time with wood glue and screws, then build the next combs off the first. Choose straight, unwarped planks at the store, sand the edges and hang them on brackets.
Get the full tutorial at A Beautiful Mess.
4. DIY Gold And Marble Shelves

DIY gold and marble shelves give a basic metal and glass bookcase a glam makeover for under $100. Lay down a plastic drop cloth or big piece of cardboard and give the frame three cans of gold spray paint (they’re cheaper at the hardware store). Cover the shelves with natural marble contact paper, about two 18 by 9 rolls. If you want light from above to shine down through the unit, keep the very top shelf glass. Once one thing is painted gold, it’s hard to stop.
Get the full tutorial at Stylish Petite.
5. DIY Hanging Shelves

DIY hanging shelves double as wall art, with small boards hanging from rope cord on metal rings. Cut a 24 inch board in half and drill a hole at each end of both pieces. For each shelf, cut two 40 inch lengths of cord, fold them in half and fix them to a metal ring with a lark’s head knot. Feed two strands through each drill hole, adjust the height until the shelf hangs where you want it, then knot the ends underneath and trim. They’re perfect for trinkets, tiny plants and small ceramics.
Get the full tutorial at Why Don't You Make Me?.
6. Wall Mounted Display Shelves

These wall mounted display shelves pair two outer boxes with a deeper center box for a staggered, built in look. The outer boxes come from a 1×6 board and the center box from a 1×12, all straight 90 degree cuts on a miter saw. Drill pocket holes for 3/4 inch material, sand, then assemble with 1 1/4 inch pocket screws, using fine thread for hardwoods and coarse thread for softwoods. A cleat and a picture hanging system mount it. Paint or wallpaper inside the boxes for extra color.
Get the full tutorial at Kreg Tool.
7. DIY Barn Wood Shelves

DIY barn wood shelves use old planks from a flea market and plumbing parts from the hardware store. Each bracket is a 6 inch black pipe nipple with an iron cap on the end, screwed into a floor flange that’s screwed to the wall. Hit a stud with every flange so the shelves stay put over a bed. The planks rest on the pipe arms. The fittings cost about $35 and the barn wood about $10, so the whole wall came in under $50. It’s quick, sturdy and full of character.
Get the full tutorial at Chatfield Court.
8. Toilet Paper Holder Shelf

A toilet paper holder shelf adds a little landing spot in a small bathroom for a phone, a candle or a tiny plant. Cut a piece of scrap 1×6 about 10 inches long, then sand and clean it. Stain it, wipe away the excess and seal with two coats. Mount an oil rubbed bronze holder to the underside, leaving enough room for the roll to spin freely. Add corner brackets on the back edge, then level it and screw it to the wall with anchors where it won’t bump anyone’s knees.
Get the full tutorial at DIY Show Off.
9. Industrial Shelves DIY

These industrial shelves cover a whole bedroom wall with black iron pipe and thick wood. Sketch the wall first so you know which fittings to buy, then lay all the pipes out on the floor to check you have every piece before anything goes up. Three-quarter inch black pipe is the size used here, and galvanized flanges can be sprayed black to match. Two inch thick boards give the chunky look. Sand each board before staining. Guitar hooks and storage bins worked into the layout make it a full room system.
Get the full tutorial at Beneath My Heart.
10. DIY Corner Door Shelf

A DIY corner door shelf turns an old door into a statement piece of furniture. Cut the door in half lengthwise with a circular saw (measure twice), clamp the halves at a 90 degree angle and join them with five metal L brackets on the back. Cut four particle board shelves to fit, rounding the outer edges if you like, and set each on two brackets. Sand rough edges, swap in a vintage knob and paint. Put the knob on one side only so the shelf sits flush in the corner.
Get the full tutorial at Craftaholics Anonymous.
11. Cute Wooden Shelf

This cute wooden shelf has a row of mountain peaks along the back. Draw mountains in pencil on one board, clamp it to a table and cut along the lines with a jigsaw, then sand everything smooth. Nail the mountain board along the back edge of a second board that forms the shelf, spacing small nails about every 10 cm. Fix two wooden brackets underneath and screw it to the wall. Leftover scraps from the cutouts become little houses to line up along the shelf.
Get the full tutorial at Carnets Parisiens.
12. Chunky Wood Bathroom Shelves

Chunky wood bathroom shelves fill the dead space above a toilet and look far more solid than they are. Measure the width of the space so the shelves appear to run wall to wall. A base frame built from studs gets wrapped with 1×6 and 1×10 boards, which make the thick fronts and tops. Wider boards may need two passes on a smaller miter saw. Sand all the exposed faces and corners, apply wood conditioner and let it dry about 15 minutes, then stain. Wear safety glasses and a mask while cutting.
Get the full tutorial at Bower Power.
13. Popsicle Stick Hexagon Shelf

A popsicle stick hexagon shelf looks like mid-century wall art but costs next to nothing. You’ll need about 100 popsicle sticks, tacky glue and a wood stain such as English Chestnut, plus a picture hanger if you want one. A printable template keeps the angles of each layer true, which is the hard part of most geometric shelf tutorials. Glue the sticks in stacked layers to build the six sides, let it dry, then stain. It holds a tiny cactus or trinket and adds warm texture to a gallery wall.
Get the full tutorial at Make & Do Crew.
14. Live Edge Floating Shelves

Live edge floating shelves replaced an upper cabinet in this kitchen and made the whole room feel brighter. The wood is live edge alder, finished by a salvage lumber shop, hung on hidden floating shelf brackets, three per shelf, all screwed into studs. The tricky part is drilling deep, exact holes into both the wall and the shelves for the bracket rods. A strong corded drill helps, and clearing out the shavings often keeps the motor from overheating. Open shelves like these are perfect for everyday dishes and plants.
Get the full tutorial at DIY in PDX.
15. Industrial Pipe and Wood Bookshelves

Industrial pipe and wood bookshelves are built from black iron pipe fittings and spare lumber, wall mounted on floor flanges and heavy duty drywall anchors. Every shelf follows the same steps: assemble, mark, disassemble, install, then reassemble. Two different widths, 46 and 20 inches, fill a 62 inch wall without crowding it. The shelves stick out 8 inches from the wall, so distress and sand the fresh cut corners to soften them. Pick lumber with knots and grain you like.
Get the full tutorial at The Reaganskopp Homestead.
16. Scandinavian Inspired Swing Shelf

A Scandinavian inspired swing shelf hangs two solid oak boards on rope, and the supplies cost about 22 euros. Drill a hole in each corner of both 80 by 20 cm planks, then thread about 5 meters of rope through, starting under the bottom board and adding a few wooden beads along the way. Tie loose knots under each board and hang the two ropes from hooks screwed into the wall. Leveling is the fiddly part, so slide the knots until both shelves sit straight. A second pair of hands helps.
Get the full tutorial at Tête d'ange.
17. Skateboard Shelves DIY
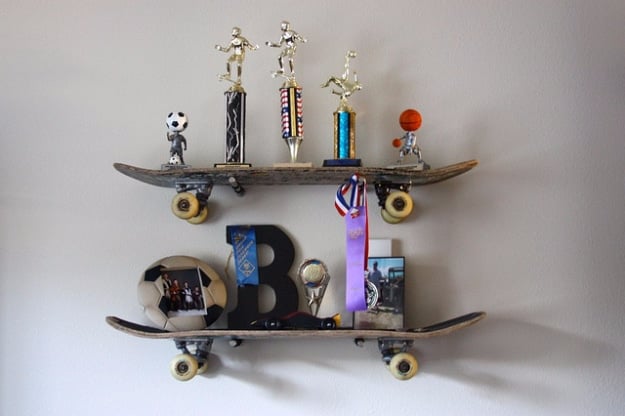
Skateboard shelves are a perfect first step toward a skate themed bedroom, especially if a few retired boards are already sitting in the garage. Leave the decks scuffed and authentic, with the trucks and wheels still on. Mount each board on a pair of simple shelf brackets from the hardware store (about $5 each), which tuck out of sight underneath. That’s it. They make a great spot to show off trophies, medals and other prized treasures, and a skater will actually want to use them.
Get the full tutorial at BeingBrook.
18. Wood Pallet Bookshelf
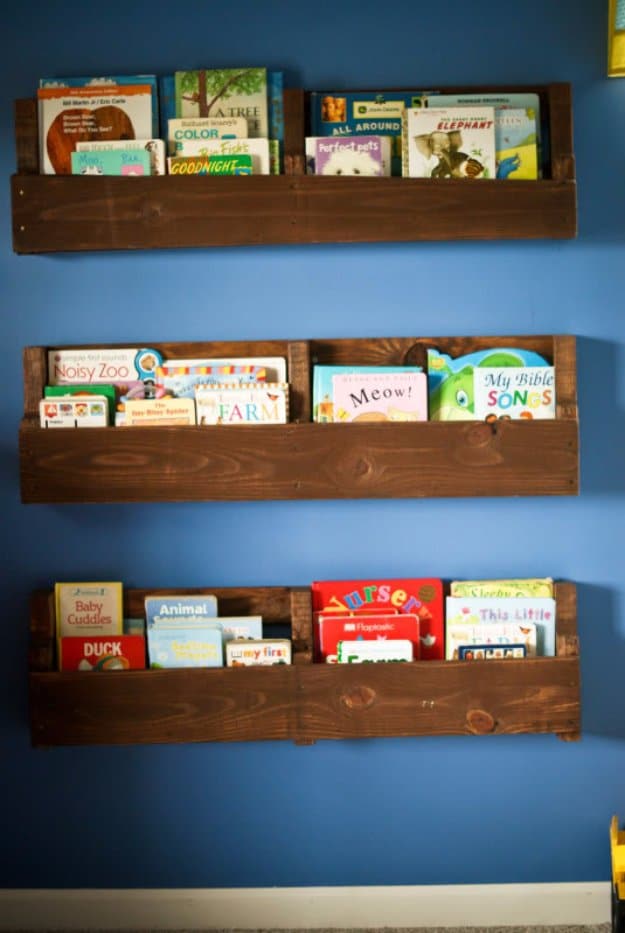
A wood pallet bookshelf holds picture books face out, so little readers can spot their favorites. One pallet makes about four shelves. Cut the pallet into sections, then measure the inside bottom of each and screw in a cut 2×4 so books can’t fall through. Sand the edges and corners smooth, distress newer wood with a hammer and nails if you want a more weathered look, then brush on one coat of stain. It’s a basic woodworking project that needs only a saw and a drill.
Get the full tutorial at Me and Madeline.