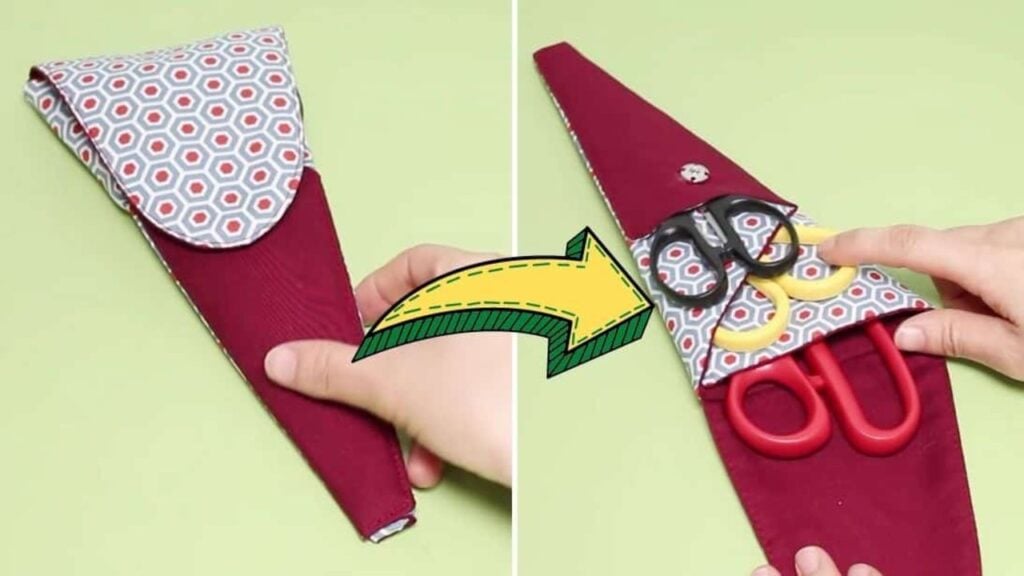
Are you tired of constantly losing your scissors and can’t find them when you need them the most? Well, this sewing project by sewingtimes on YouTube might just be the answer you need. This adorable scissor holder can keep up to 3 pieces of scissors safe and all organized.
Materials:
Main fabric
- 1 piece of 9⅛ * 12½ inches
- 1 piece of 5¾ * 6¾ inches
Lining fabric
- 1 piece of 9⅛ * 12½ inches
- 1 piece of 5¾ * 6¾ inches
Fusible fleece
- 1 piece of 8⅜ * 11¾ inches
- 1 piece of 5*6 inches
Other supplies
- A4 paper
- Marking pen
- Scissors
- Pins
- Button snap
- Sewing machine
Directions:
Step 1
Fold your A4 paper’s lower right corner toward the left until the edges match, then crease it. Spread it open, then fold the lower right corner again but this time the edges should match the crease line. Fold the left area of the paper toward the lower right to meet the edges of the folded paper, then crease. Lastly, fold them according to their center edges and crease, and cut the wider and upper edges straight. Mark 2″ from the pointed bottom, then fold and cut. Place the paper pattern on top of the fusible fleece, trace, and cut. Fold the paper pattern again, then place it on top of the smaller piece of fleece with the wider edges matching. Trace the shape, remove the pattern, then curve the edges of the traced shape, then cut. Trace the fleece pieces of fabric on top of the main layer, and press them well. Grab the small lining fabric and match it with the outer fabric with their right sides facing each other, then sew with a ⅜ seam allowance or along with the shape of the fusible fleece.

[social_warfare]
Step 2
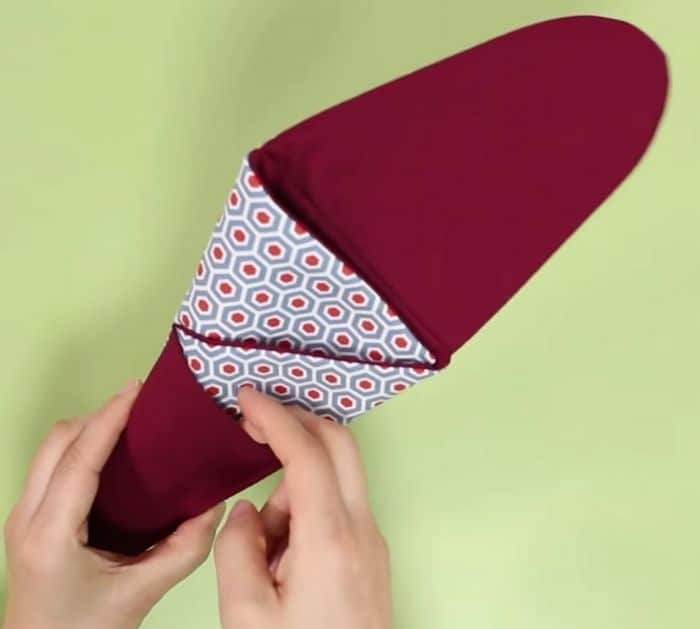
Cut along the excess fabric leaving only about ⅜ seam allowance, make notches, especially on the curved area, then turn it right side out. Stitch along the edges again except the bottom, place the outer fabric on top of the larger lining fabric, then cut the shape accordingly. Lay the outer fabric at the bottom, place the small piece of fabric on top, with its slanted edges matching and their right sides facing, then place the lining on top with its right side facing the right side of the main fabric. sew it around with a ⅜ inch seam allowance, leaving a gap at the straight side of the fabric, cut the pointed corners of the fabric, make notches, then turn it right side out. Press with an iron, then stitch according to the fold of your paper pattern, making sure that the outermost flap is folded on its opposite side showing the lining fabric out. Attach the button snap and you’re all done.
*All these images are credited to sewingtimes via YouTube. Give her channel a visit and subscribe for more!
DIY Scissor Holder Sewing Tutorial


