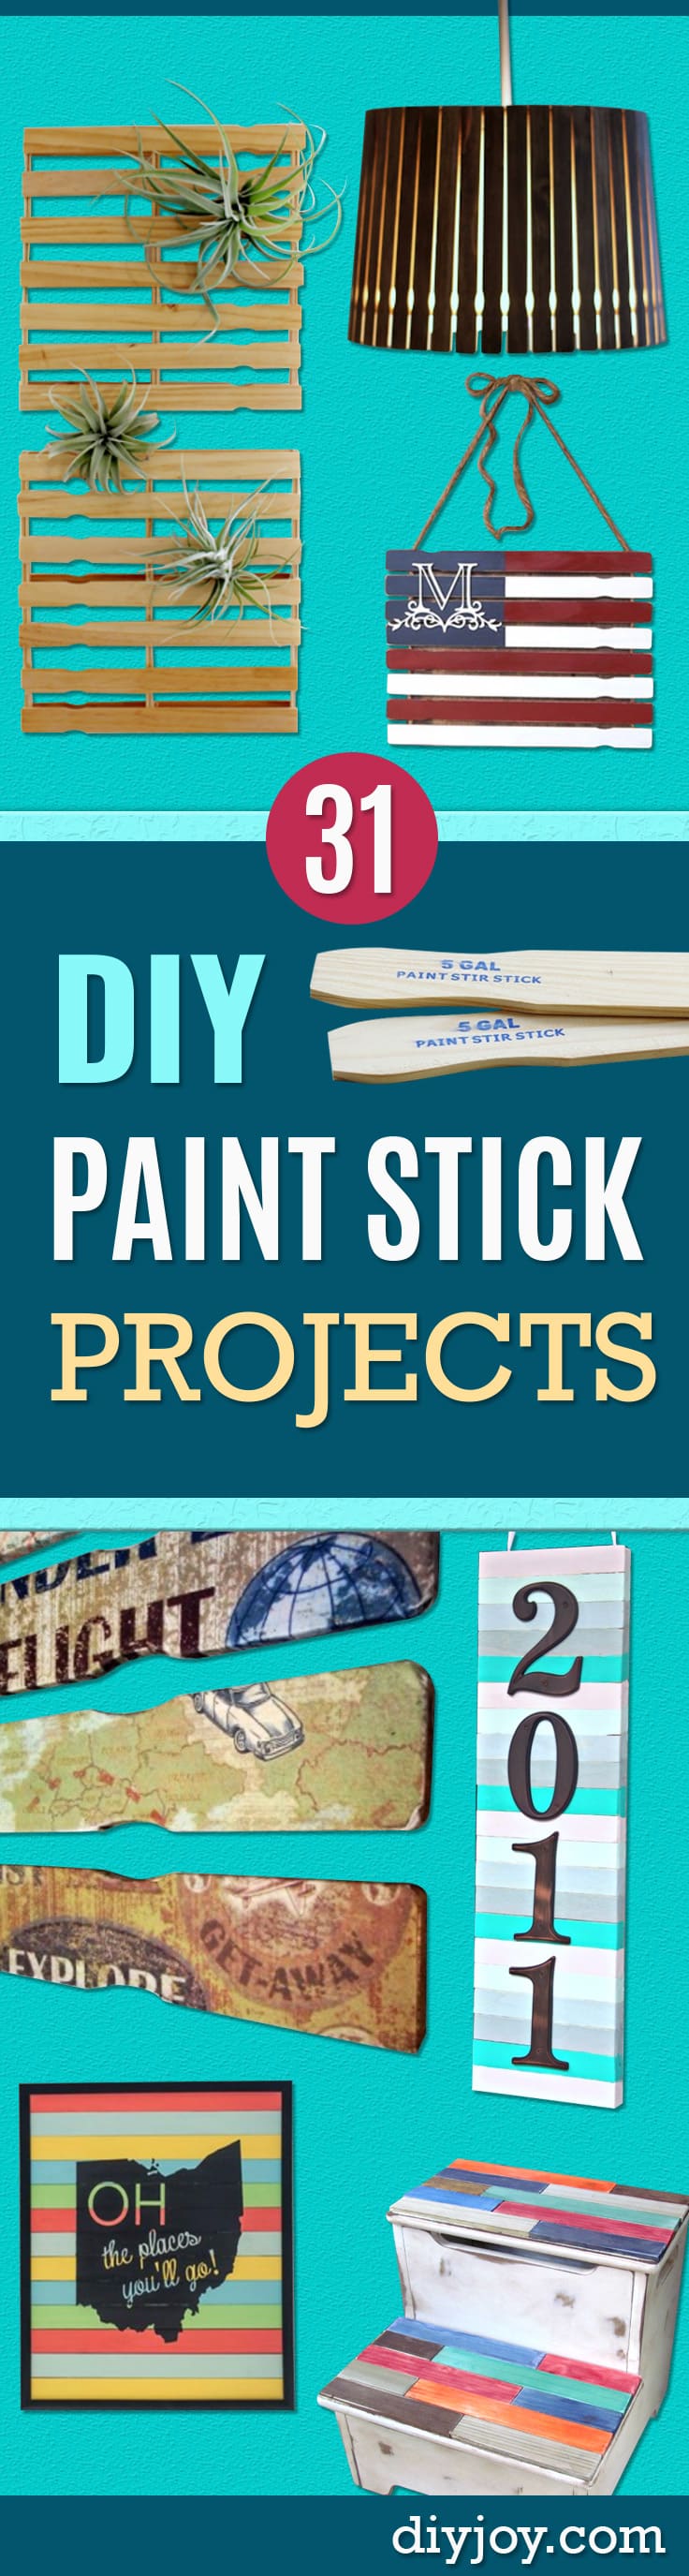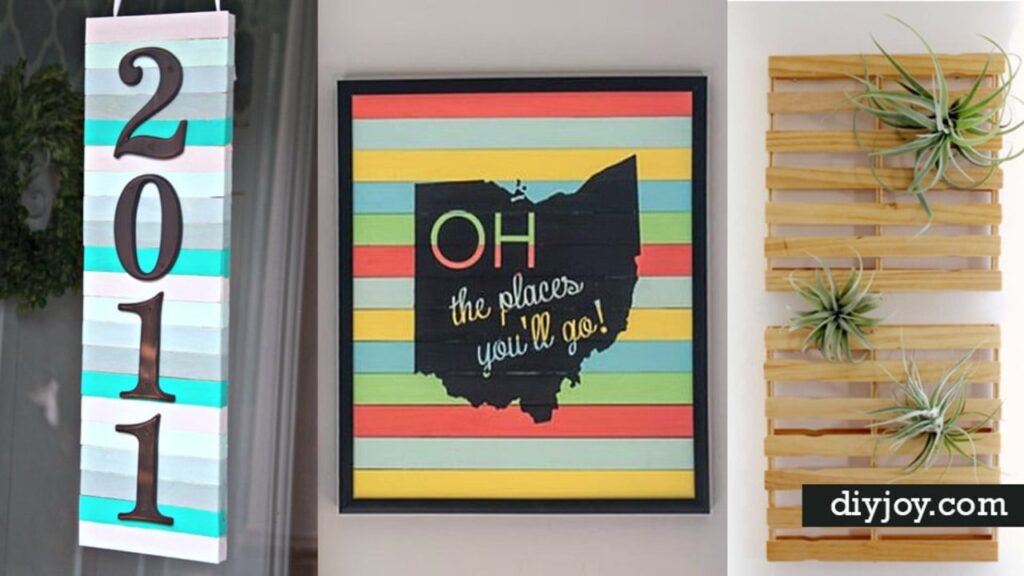
Those free wooden stir sticks from the paint counter are about to become your favorite craft supply. Paint stick projects turn plain stir sticks into rustic home decor, gifts and even furniture makeovers, usually with nothing more than a saw, wood glue, stain and paint. This list of 20 DIY paint stick projects has something for every skill level: quick decoupage magnets for beginners, wood slat signs and address plaques for the porch, and bigger builds like a table top, a step stool makeover and a pendant light. Grab the long five gallon sticks for anything that needs strength and save the small ones for detail work. One tip worth repeating: buy a pack or ask nicely at the paint desk, because the folks there definitely notice when someone walks off with fifty. Your weekend to do list just got a lot more fun.
1. Paint Stir Stick Table Runner
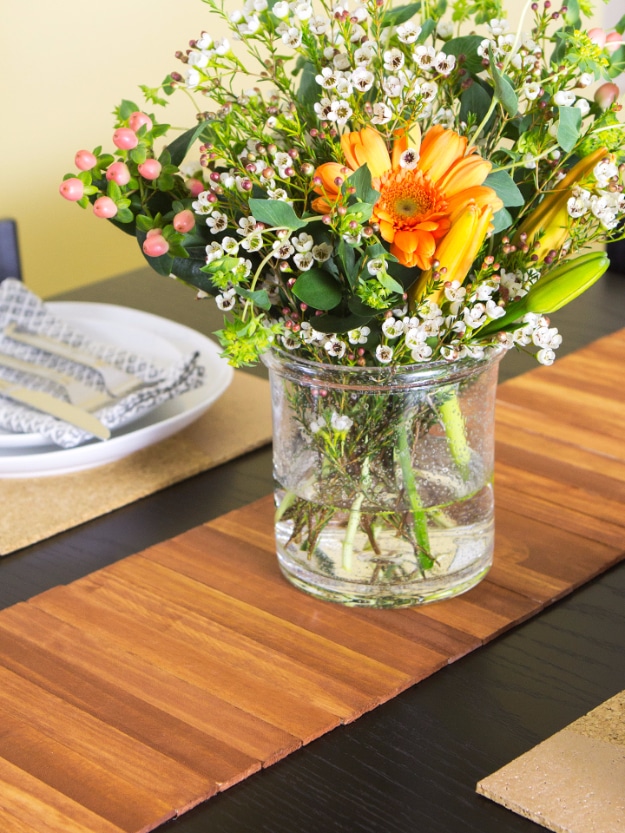
A paint stir stick table runner looks like a high end wood piece and costs a couple of dollars. Gather a big stack of paint stir sticks (9 or 14 inch ones can also be ordered online), trim the ends square with a miter saw if you like a clean edge, and stain them with a foam brush, wiping the excess with paper towels. A fast drying stain keeps the project to an afternoon. The sticks line up side by side and hot glue onto a length of wide ribbon underneath, which lets the runner flex along the table. The full steps are in the video on the page.
Get the full tutorial at Sarah Hearts.
2. Paint Stick Dominoes

Paint stick dominoes are a handmade game set for under $2.50. Use four of the larger, thicker paint sticks sold at big box stores for well under a dollar each. Cut each stick into 2 1/2 inch pieces with a miter box and saw, which gives seven dominoes per stick and 28 for a full set. Sand the rough edges, paint both sides black with craft paint, then add the dots and center lines with a white paint pen following a standard domino set. A coat of polyurethane protects them, and a sewn burlap ribbon pouch holds them.
Get the full tutorial at Thistlewood Farm.
3. Paint Stick Address Plaque

A paint stick address plaque is an easy front door upgrade and a great housewarming gift. Cut a 1/2 or 3/4 inch board to size (7 by 24 inches here), then chop about 21 paint sticks into 7 inch pieces and attach them across the board with wood glue and clamps. Once dry, paint each stick a different shade, and sample pots or leftover wall paint work perfectly. Position the house numbers, drill and screw them on, then add D-ring hangers on the back. A ribbon through the D-rings lets it hang from the door.
Get the full tutorial at Home Stories A to Z.
4. DIY Paint Stick Wood Slat Sign

A DIY paint stick wood slat sign gives the reclaimed wood look without hunting down pallets. Six large paint sticks (the kind used for gallon buckets) cut to size make a sign, and a miter saw, scroll saw or plain hand saw all work since the sticks are thin. Paint the tops white, then sand the edges for a distressed finish. Glue leftover scraps across the back, with a dot of hot glue at each end to hold them while the wood glue dries. Tape a printed quote on top, trace hard with a pen to dent the wood, then paint the letters.
Get the full tutorial at Creations by Kara.
5. DIY Wooden Arrows From Paint Sticks

DIY wooden arrows from paint sticks use the long, thick sticks that come with 5 gallon paint pails, three per arrow. Set one aside as the shaft, then measure and mark six parallelograms (slanted rectangles) on the others to make the arrowhead and the fletching. Numbering the pieces helps keep matching parts together. Cut along the lines for nine pieces per arrow, lay them out to check the pattern and paint one side, here a chalky antique white. Once dry, glue the pieces to the shaft two at a time with wood glue. Three make a nice set.
Get the full tutorial at Tauni Everett.
6. Paint Stick Basket

A paint stick basket costs about $3 and takes about 15 minutes. The cut list calls for twenty paint stir sticks: eight short sides at 7 inches, eight long sides at 12 inches and four floor slats at 11 3/4 inches, plus six pieces of 1/2 inch square dowel at 5 1/4 inches for the corner posts. Stain everything first, then color the staples with a paint pen so they disappear. Overlap each stick 1/8 inch past the dowels, alternating corners for a lapped look, and attach every piece with a dot of wood glue and a 3/8 inch staple.
Get the full tutorial at Build Basic.
7. DIY Paint Stick Table Top

A DIY paint stick table top is how a curbside side table got a colorful second life. Sand the table with medium grit paper, wipe away the dust and paint it with three coats of chalk paint, letting each coat dry about an hour. Cut leftover paint stirrers to random lengths with a scroll saw and arrange them like tiles, keeping them flush on one side. Trim the pieces that hang over the far edge, then glue them down with a strong craft glue. Stack heavy books on top overnight, then seal everything with matte Mod Podge.
Get the full tutorial at Saved By Love Creations.
8. Paint Stick Pendant Light
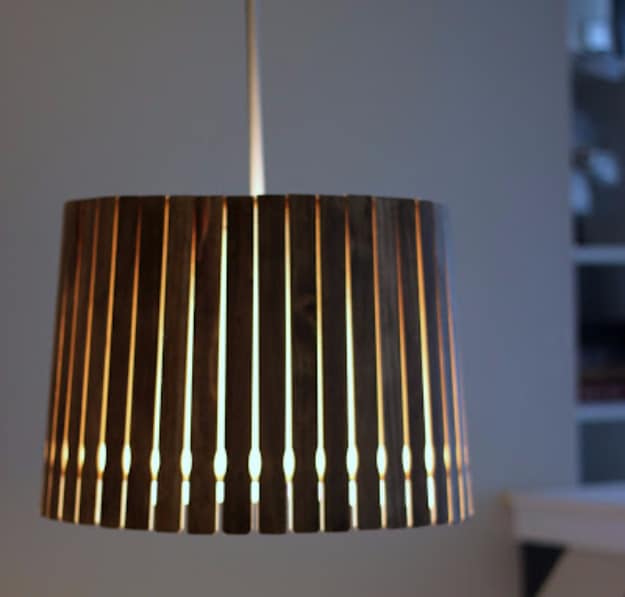
A paint stick pendant light starts with a $2 thrift store lampshade and about 42 stir sticks. Leave the shade frame intact and hot glue the sticks around the outside, adjusting each one so it stands straight. Leave a small gap between sticks, because packing them tight makes them start to slant and the bottom edge goes uneven. Once the sticks are on, stain the outside, and prime and paint the underside so the printed store logos disappear. The finished shade hangs from a new or existing fixture, so plan the wiring before you start.
Get the full tutorial at Enjoying the Simple Things.
9. Paint Stick Beach Flag

A paint stick beach flag is a coastal take on stars and stripes, about 12 inches wide. Line up seven paint sticks, gently bending any warped ones straight with your hands. Paint two sea glass green, two turquoise and three cool white, then dry brush white over the colored sticks for a weathered look. Paint mini starfish white, then add a layer of oyster beige. Sand the edges and faces of the sticks and the starfish, hot glue the sticks together from the back, glue on a twine hanger, then flip it over and glue the starfish in place.
Get the full tutorial at Crafts by Amanda.
10. Paint Stick Magnets

Decoupage paint stick magnets are one of the easiest decoupage projects around. Lay a paint stick on the back of a map, scrapbook or wrapping paper and measure 1/4 to 1/2 inch all around; with 12 by 12 inch scrapbook paper only the sides need cutting, since most sticks are 12 inches long. Brush decoupage on the stick and the paper and center the stick. Snip the corners and cut slits at the divot and the ends, then wrap the paper around the back. Seal with more decoupage and hot glue heavy duty round magnets on the back.
Get the full tutorial at Stow&TellU.
11. Decorative Letters From Paint Sticks

Decorative letters from paint sticks look industrial and cost very little. Plan on two or three paint sticks per letter. Snip off the indented part of each stick with tin snips, lay the pieces out in your letter and cut the rest to fit. Drill a hole at every point where two pieces cross, then spray paint the pieces and distress them with a sanding block if you like. Join each crossing with a machine screw and a nut, nut side facing out. Round letters are tricky, so a small grapevine wreath makes a perfect O.
Get the full tutorial at Diva of DIY.
12. Spool Of Thread Wall Art

Spool of thread wall art is a giant faux spool for a craft or sewing room. Cut a rectangle of foam board for the middle, then hot glue paint stir sticks across the top and bottom so they look like the wooden ends of a spool. A thin layer of batting on the front is optional and gives it a softer, fuller look. Glue the start of the yarn to the back and keep wrapping until the board is covered. Twisted metal wire around the stir sticks makes the hanger. A row of them in different colors would be adorable.
Get the full tutorial at TaylorMade.
13. Monogrammed Paint Stick Flag

A monogrammed paint stick flag needs eight paint sticks, a wooden monogram (6 inches here), red, white and blue craft paint, sandpaper, masking tape, hot glue and twine. Paint four sticks red and four white, and coat the monogram white. Lay two white and two red sticks together and tape off about 6 1/2 inches from the left edge, then paint that section blue for crisp lines. Sand all the edges for a rustic finish. Flip the sticks over spaced about 1/4 inch apart, hot glue on two 30 inch lengths of twine, then glue the monogram on the blue.
Get the full tutorial at CraftCuts.
14. DIY Paint Stick Wood Sign

This DIY paint stick wood sign uses eleven 5 gallon paint sticks for a 13 by 17 inch board. Saw off the handles and cut nine sticks to just over 17 inches and two to 13 inches for the back braces. Glue the long pieces across the braces, using nickels as spacers so the gaps stay even, and let it dry overnight. Sand, prime and paint the front, then sand lightly again so the vinyl sticks. A cut vinyl quote finishes it. Can’t get free sticks? Quarter inch stock from the lumber aisle runs about a dollar for two feet.
Get the full tutorial at Infarrantly Creative.
15. Pottery Barn Inspired Paint Stick Flower Shelf

This Pottery Barn inspired paint stick flower shelf started as a catalog planter and a stack of leftover paint sticks. Cut the sticks to size with a miter saw, paint them with whatever leftover wall paint is on hand, then sand and brush on a little antiquing glaze for an aged finish. Gorilla Glue attaches them all around the sides of a plain wooden divided caddy. Small votives filled with backyard flowers sit in the compartments, but it works just as well for pens and pencils in a work room.
Get the full tutorial at Cheltenham Road.
16. DIY Paint Stir Stick Shelf

A DIY paint stir stick shelf takes seven stir sticks, a wooden dowel and a charcoal color stain. Stain the sticks and dowel first. Cut the dowel into two 5 1/2 inch pieces and two 3 1/4 inch pieces with a miter box. Glue four sticks evenly across the longer dowels and staple them in place to make the back. Trim three more sticks to 11 inches and glue and staple them onto the short dowels for the shelf itself. Join the two parts with industrial glue and a few nails hammered through the sticks into the dowels.
Get the full tutorial at A Little Craft In Your Day.
17. Paint Stick Word Ladder

A paint stick word ladder is a hands on reading tool for a beginning reader. Cover a paint stick in chalkboard paint so it can be wiped and reused with new letter sets. While it dries, write a word family such as at, op or am on a wooden clothespin with a marker. Chalk a column of single letters down the stick, like b, t, m, l, s, p and r. Slide the clothespin down the ladder and have your child blend each letter with the word family to read a new word. Swap in beginning blends as skills grow.
Get the full tutorial at School Time Snippets.
18. DIY Paint Stick Cage Chandelier

A DIY paint stick cage chandelier remakes an old brass and glass fixture. Take the chandelier apart and remove the glass panels. Cut nine 5 gallon paint sticks into 18 pieces the same length as the glass, and use the glass as a template to drill two holes in each. Condition the pine, then stain it; layering a gray stain with a walnut one gives a reclaimed lumber look. Drill matching holes in the cage, then sand, prime and spray paint the metal oil rubbed bronze. Bolt the wood pieces in place and touch up any spots with a brush.
Get the full tutorial at Infarrantly Creative.
19. Paint Stick Step Stool Makeover

A paint stick step stool makeover rescues a weathered kids’ step stool. Sand down the peeling paint and rough spots with an electric sander, then wipe on a dark stain to darken and distress the composite wood. Measure and cut paint sticks to fit the steps, leaving the ends a little rough. Instead of paint, dye the sticks with Rit Dye, which keeps the natural wood grain showing; tangerine, cherry red, kelly green, denim blue and royal blue make a bright mix. Arrange the colors, then glue them down with Gorilla Glue.
Get the full tutorial at Ribbons & Glue.
20. Clothespin Sunflower Craft

A clothespin sunflower craft uses a paint stir stick for the stem, ten old fashioned flat clothespins for the petals and a canning jar lid for the center. Paint both sides of the clothespins yellow, the stir stick green and the lid brown, adding coats until the color is solid, and let everything dry. Arrange the clothespins in a circle, dab glue on top of each and set the lid painted side up on the glue. Once dry, glue the stem to the back and cover the lid with sunflower seeds. Peanut butter instead of glue turns it into a bird feeder.
Get the full tutorial at About Family Crafts.