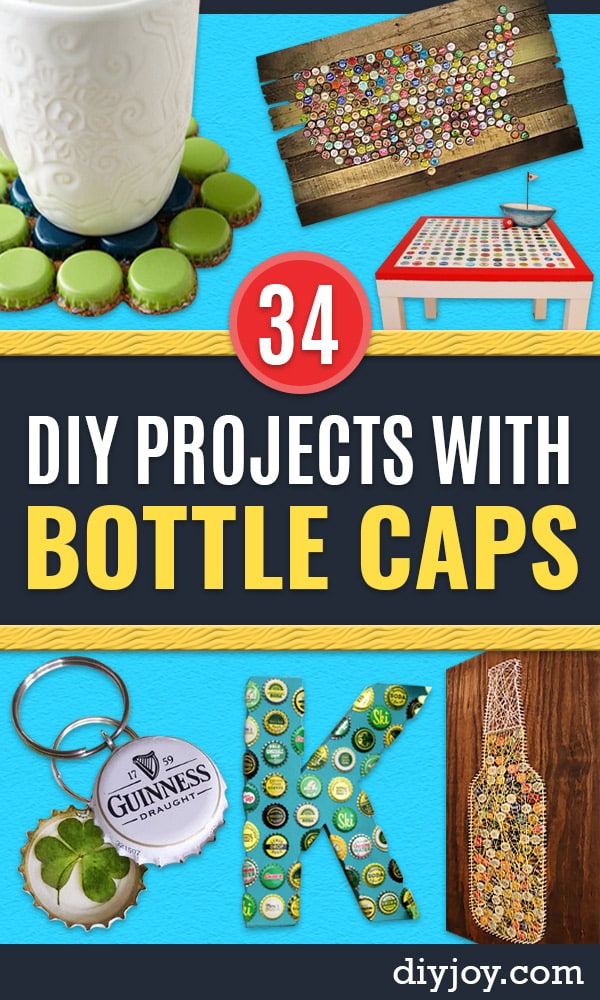
That pile of caps in the kitchen drawer is a craft stash in disguise. These 25 DIY crafts made with bottle caps turn soda and beer caps into jewelry, magnets, garden art, home decor and gifts. Make bookish quote necklaces, lady bug magnets, a neon statement necklace and beaded key chains. Fill a giant letter, a state outline or a map of the USA for the wall, grout a serving tray or an IKEA side table and pour tiny crayon candles. There are garden flowers, a jingly wind chime, turkey napkin rings for Thanksgiving and a beer cap clock for dad, too. Start saving caps today, and ask friends to save theirs.
1. Lemony Snicket Quotes DIY Bottle Cap Necklaces
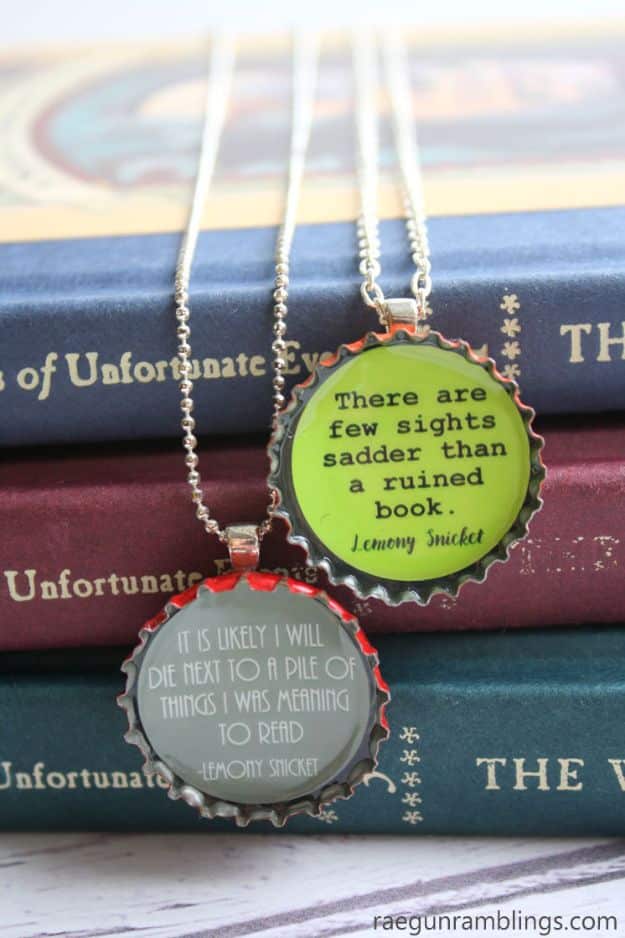
Book lovers, this one is for you. Print a favorite Lemony Snicket line from a free template, punch it out to fit the cap and glue it inside. Give it an hour to dry, then add a thick layer of dimensional magic and leave it at least three hours so it sets clear and domed. Finish with a necklace bail or a pin back. There’s no resin to mix, so you can make just one at a time, and the same printables come in Harry Potter and Hunger Games versions.
Get the full tutorial at Rae Gun Ramblings.
2. Bottle Cap Magnet Lady Bugs
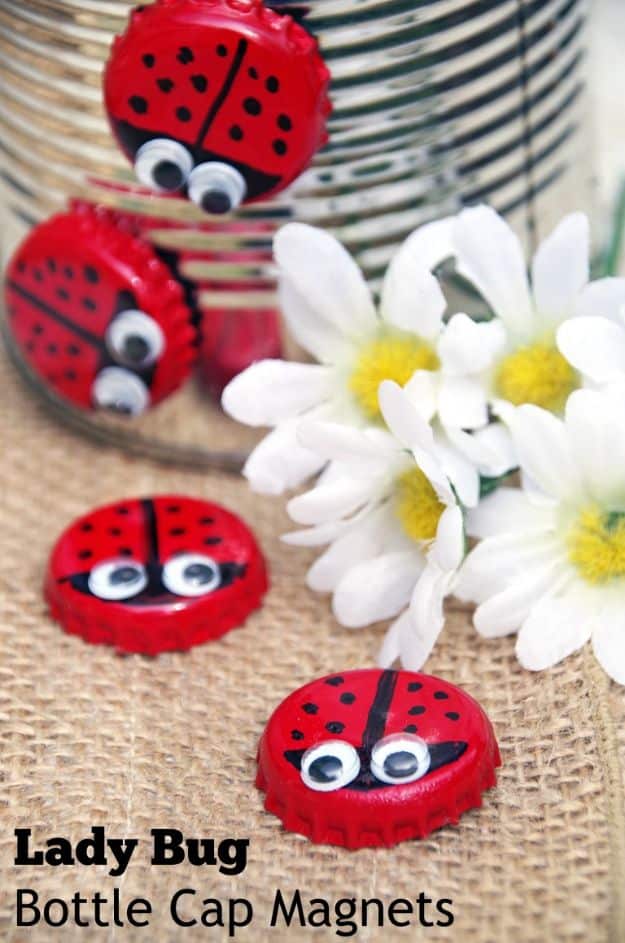
Bottle cap magnet lady bugs are a sweet spring craft and a smart way to use up a bag of tiny round magnets. Pry the caps off gently so the tops stay flat, then spray paint them red. Two coats usually covers the grooves better than brush-on craft paint. Let the paint dry completely before drawing spots and wings with a fine black paint pen or marker, since the tip will scratch tacky paint. Finish with two googly eyes and a half inch magnet on the back.
Get the full tutorial at Suburbia Unwrapped.
3. Bottle Cap Chime

This bottle cap wind chime is loud in the best way, with more than 150 colorful caps clinking together. Punch a hole in two edges of each cap with an awl and a small hammer over a scrap of wood, then link them into long chains with pliers and jump rings. Thicker rings hold better, because caps tend to slip off thin ones. For the top, punch holes in a vintage coffee tin, an old colander or any fun container and hang the chains from it.
Get the full tutorial at Kelli Nina Perkins.
4. DIY Vintage Bottle Cap Giant Letter
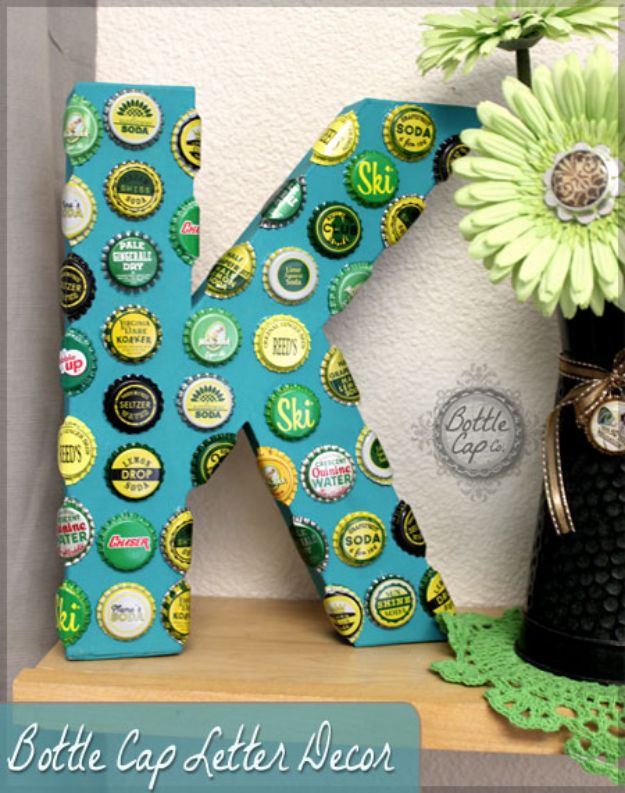
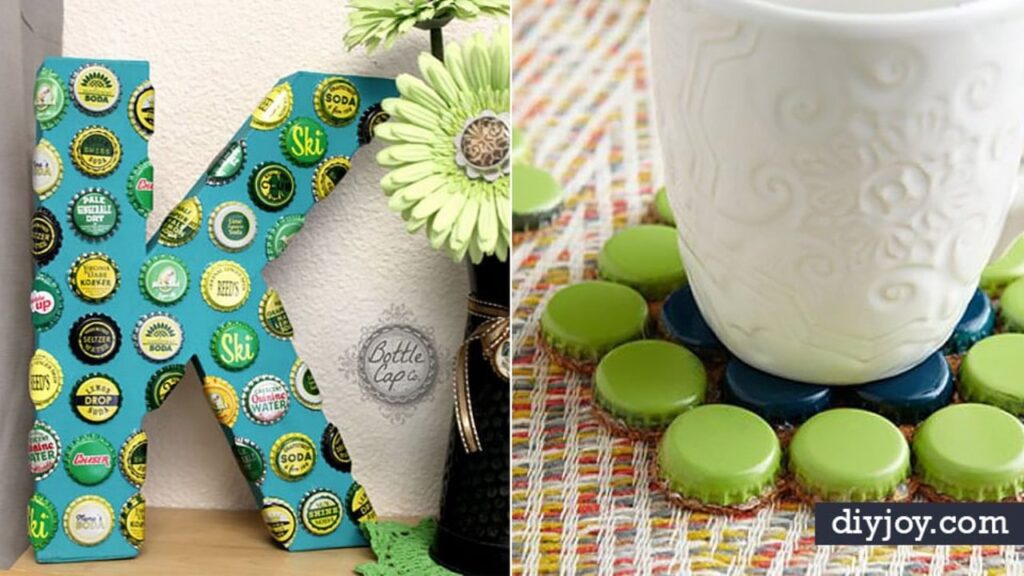
A giant bottle cap letter is an easy monogram for a kid’s room, a shelf or a gallery wall. Paint a large craft letter with at least two coats so the base doesn’t show through. Lay the caps out first to see how many you need, and bend a few to wrap neatly around the edges. Then glue each one down, running the glue around the rim of the cap, and keep paper towels close for any that oozes out. A coordinating color set looks especially polished.
Get the full tutorial at Bottle Cap Co.
5. Bottle Cap Photo Frame Magnets
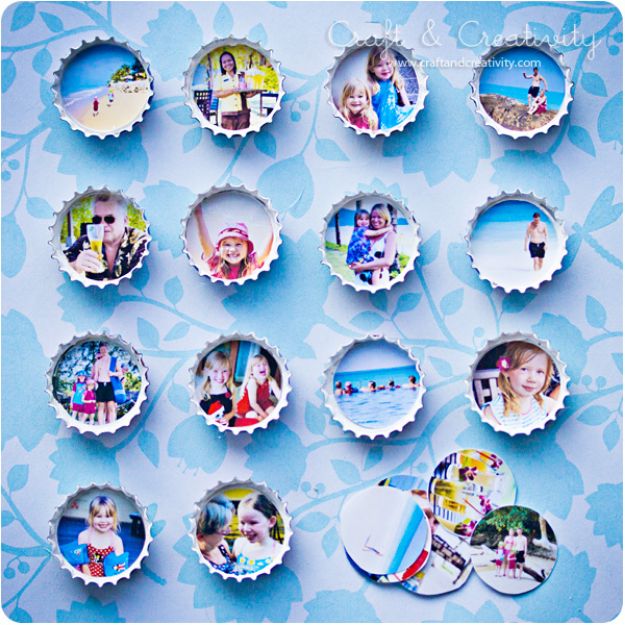
Tiny bottle cap photo frames are a cute way to show off vacation snaps on the fridge. Paint the inside of each cap with two coats of white craft paint. Measure the inside, about 2.5 cm (1 inch) across, and cut your printed photos into circles to match. Once the paint dries, add a drop of glue in the middle and press a photo in place. Glue a magnet to the back, or swap in a thumbtack to pin them to a bulletin board instead.
Get the full tutorial at Craft & Creativity.
6. Bottle Cap Party Garland
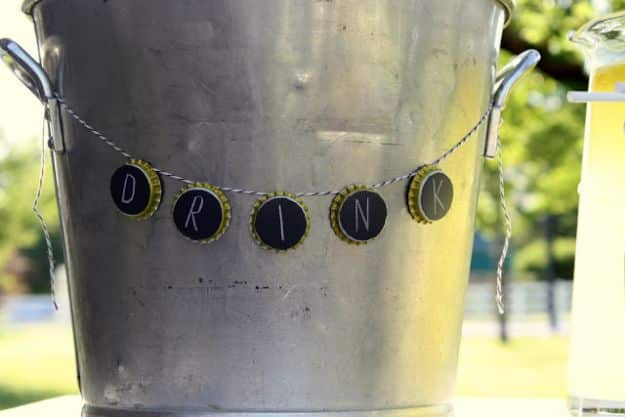
This bottle cap party garland adds a small, clever detail to a birthday table. Cut chalkboard vinyl to fit the tops of the caps, stick it on and write a letter on each with a chalkboard pencil. Then hot glue the caps along a length of twine. For a softer version, trim decorative stickers to fit the caps and add little paper flags. A box of thrifted caps works great, and the finished garland can move to a nursery after the party.
Get the full tutorial at sei lifestyle.
7. DIY Vintage Bottlecap Tray
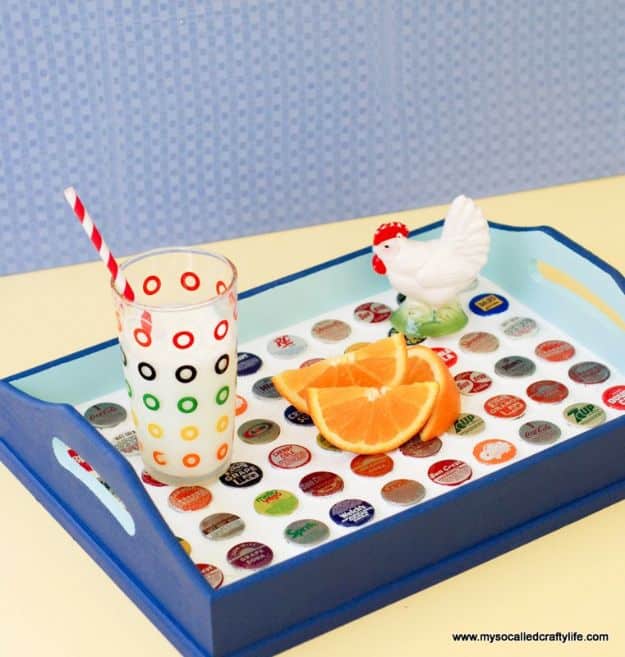
A grouted bottle cap tray makes a great Father’s Day gift, sturdy enough for breakfast in bed or to corral things on a coffee table. Paint the tray first, then press caps onto generous drops of liquid nails spaced a little over an inch apart, row by row. Let them cure for a day. Tape off the painted edges, spread grout into all the gaps with a float or sponge, then wipe the cap tops clean with soft, even strokes. Touch up any paint once it dries.
Get the full tutorial at My So Called Crafty Life.
8. Upcycled Neon Necklace
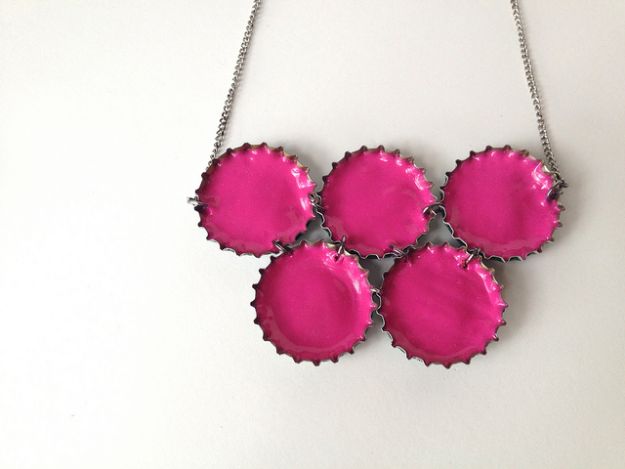
Bright fabric paint turns plain bottle caps into a bold neon statement necklace. Arrange the caps the way you want them to sit, then mark every point where they touch plus one spot on each end for the chain. Drill the marks with a 1/16 inch bit over scrap wood, holding each cap with pliers and wearing goggles. Fill each cap generously with dimensional fabric paint, let it dry, then link the caps with jump rings and attach a thrifted chain.
Get the full tutorial at Maker Mama.
9. DIY Cheap and Chic Bottlecap Table
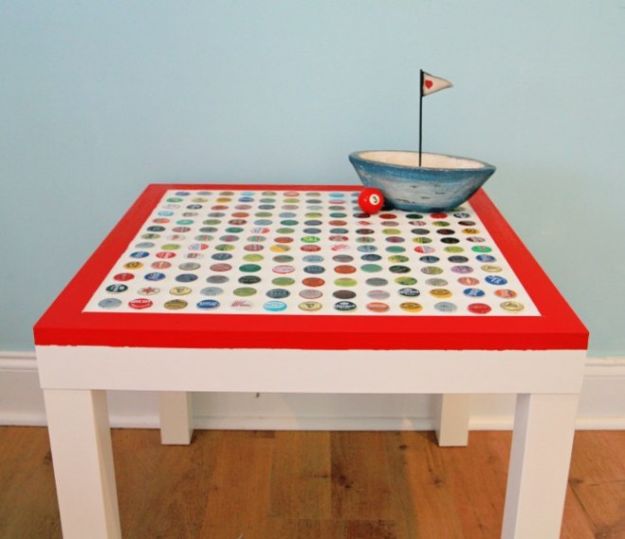
This IKEA Lack table makeover gives a basic side table a funky bottle cap top. Remove the legs, then cut plywood backer board to fit inside a band of 1.5 inch pine trim. On a 22 inch top that works out to about 18 7/8 inches square, and the hardware store can make the cut for you. Glue the board down with heavy duty construction adhesive, add the pine border and lay in your caps. It takes some time, but the supplies beyond the table come in under $30.
Get the full tutorial at My So Called Crafty Life.
10. Miniature Pies with Kids
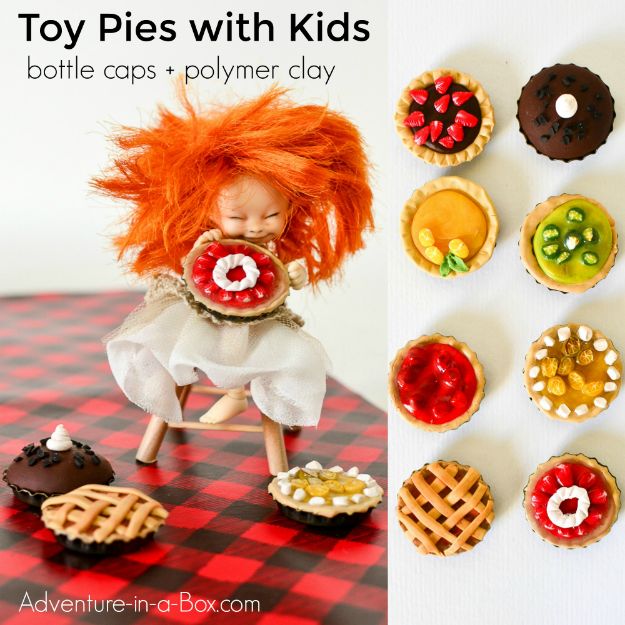
Bottle caps make perfect little pie plates for polymer clay miniatures. Knead about a square inch of beige clay to warm it, then roll it out and cut a circle with a 1 inch cutter to line the cap. Fill it with colored clay fruit and finish with a lattice or a glossy gel top made from liquid polymer clay. A small rolling pin and household tools like darning needles work fine for sculpting. Bake the clay following the package directions, then stock a dollhouse bakery.
Get the full tutorial at Adventure in a Box.
11. Bottle Cap State Art
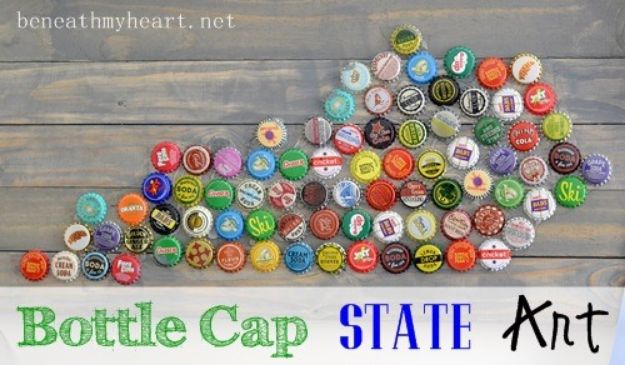
Show off your home state with bottle cap state art on a rustic wood background. Join a few 1×3 boards with a wood stick glued across the back, then stain them; weathered gray looks great. Trace your state’s outline onto the wood with a projector or a printed template, and hot glue bottle caps inside the line. Gorilla Glue works too. Add sawtooth hangers to the back and it’s ready for a boy’s room, a den or a sports fan’s wall.
Get the full tutorial at Beneath My Heart.
12. Bottle Cap Garden Art
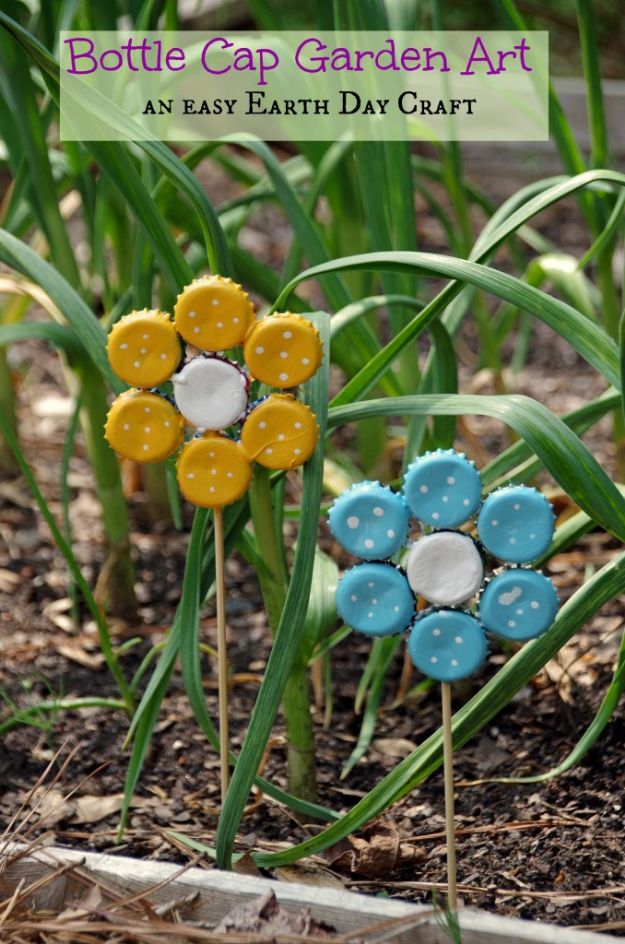
These bottle cap garden flowers add a splash of color to a yard or a potted plant. Each flower takes seven metal caps, one in the center and six around it, set upside down on newspaper and hot glued together. Glue twice for strength, then attach a wooden skewer to the back. Flip the flower and paint it, two to three coats to hide the cap, and add polka dots if you like. A light coat of Mod Podge seals it.
Get the full tutorial at Suburbia Unwrapped.
13. Bottle Cap Flowers
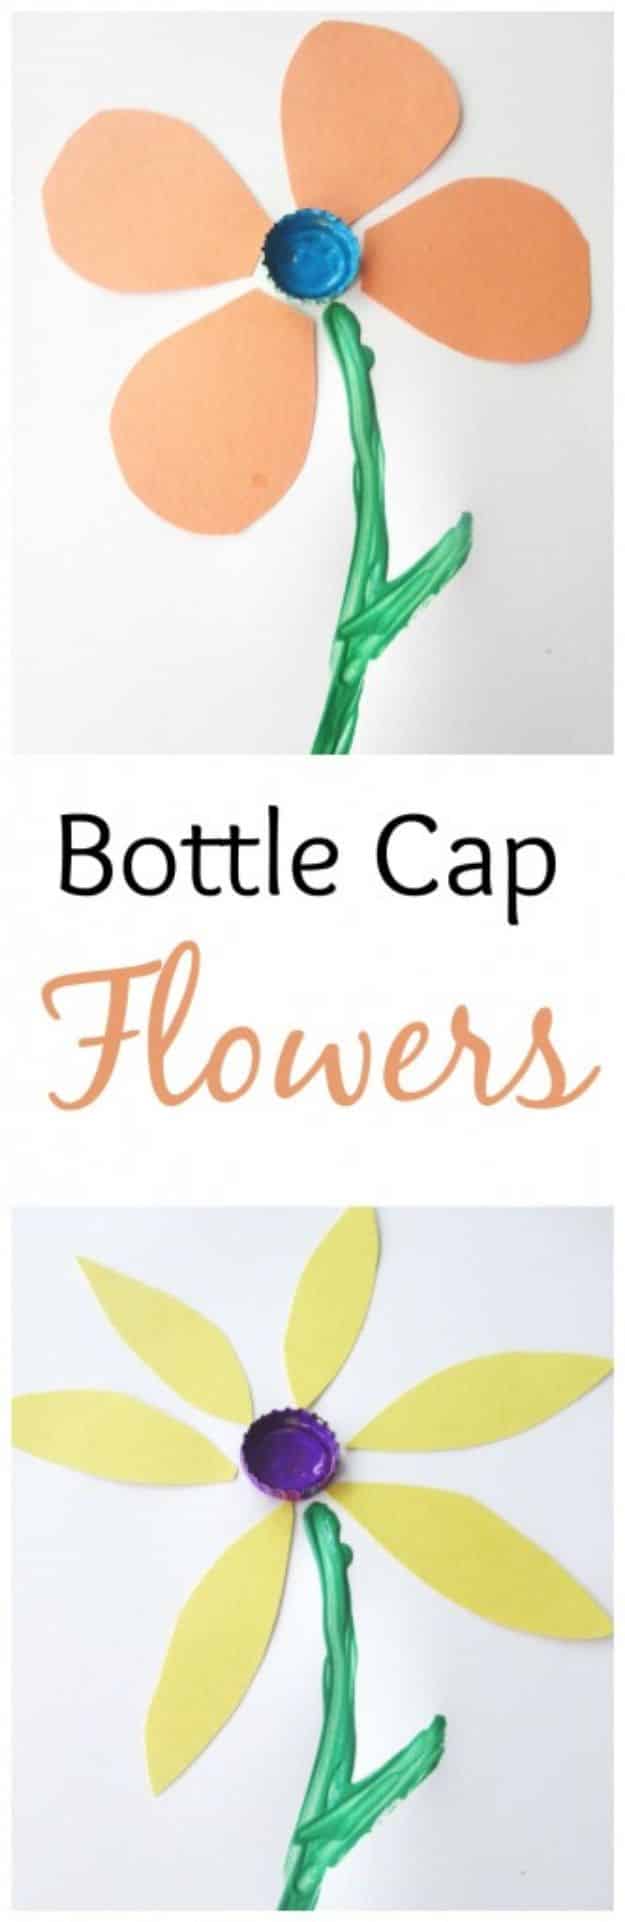
Bottle cap flowers are a quick spring craft for little ones and a smart use for drink caps you’ve been saving. Cut petals from colored construction paper, an easy scissor job for older kids. Paint the bottle cap with a cotton swab, paint a stem on the paper and glue the petals and the cap in place so it becomes the flower’s center. It’s simple, colorful and ready to hang on the fridge in a few minutes.
Get the full tutorial at My Mundane and Miraculous Life.
14. Bottle Cap Flower Photo Magnets
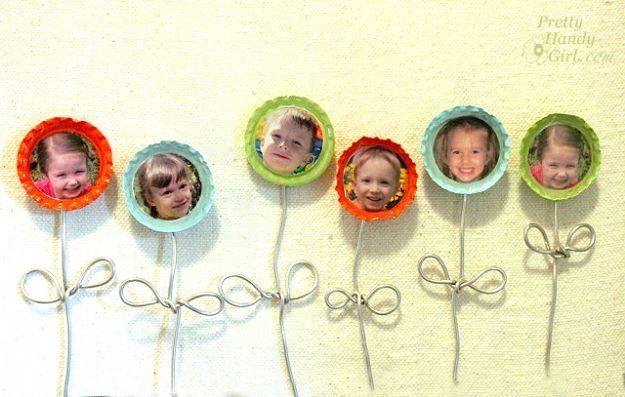
Bottle cap flower magnets with smiling family photos make a heartfelt handmade gift. Clean the caps, flare the edges with pliers and tap the bottoms smooth with a hammer, leaving a slight dip to hold resin. Prime and spray paint them, glue in 1 inch photo circles with E-6000 and coat the paper with Elmer’s glue so it won’t darken. Pour EnviroTex Lite resin, pop bubbles with a lighter and let it cure overnight. Bend 7 inch armature wire into stems.
Get the full tutorial at Positively Splendid.
15. Bottle Cap Mosaic
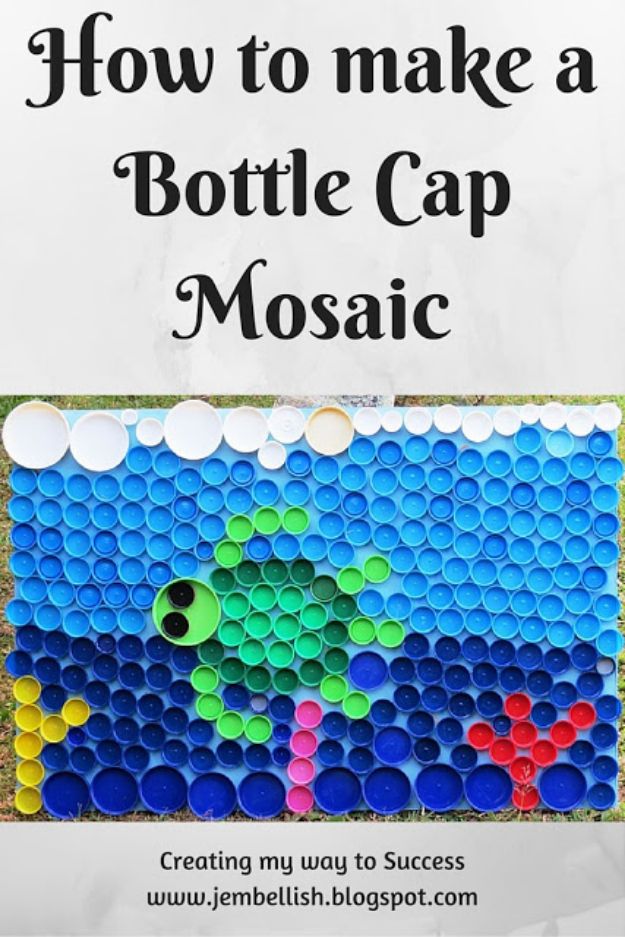
A plastic bottle cap mosaic keeps caps that can’t be recycled out of the landfill. Lay the caps out in a rough design first to figure out the board size. Paint a piece of MDF on both sides with outdoor paint so it won’t warp in the rain, and pick a color that works as a background. Wash and dry the caps, then glue them down with liquid nails, starting with the main shape and working out. A caulking gun tube is far less messy.
Get the full tutorial at Creating my way to Success.
16. Beautiful Backsplash DIY
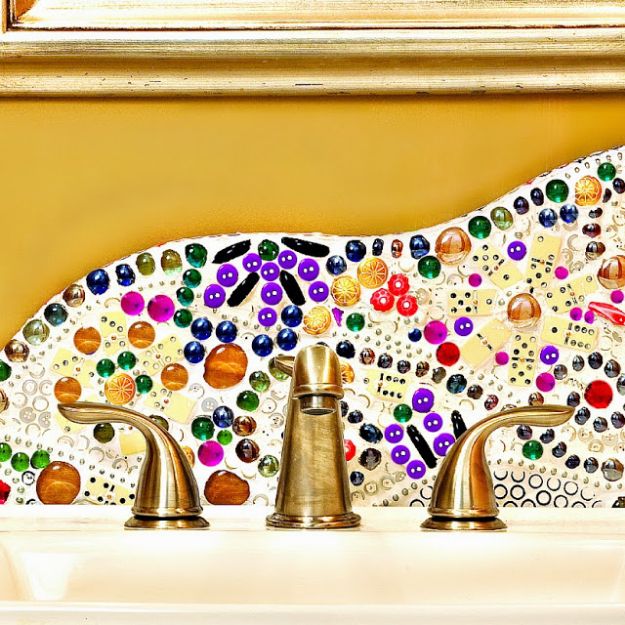
This funky mosaic backsplash uses everything in the junk drawer, including bottle caps, beads, dominoes, gems, tiles, small mirrors and seashells. Cut the backsplash shape from 1/4 inch plywood and sand the edges. Arrange your doodads, glue them in place with E-6000 and let it dry overnight. Spread grout over the whole piece, then wipe it back with a damp sponge to expose everything. Clean the pieces well before the grout dries. Plaster of Paris works in place of grout.
Get the full tutorial at Mark Montano.
17. Beaded Bottle Cap Key Chains
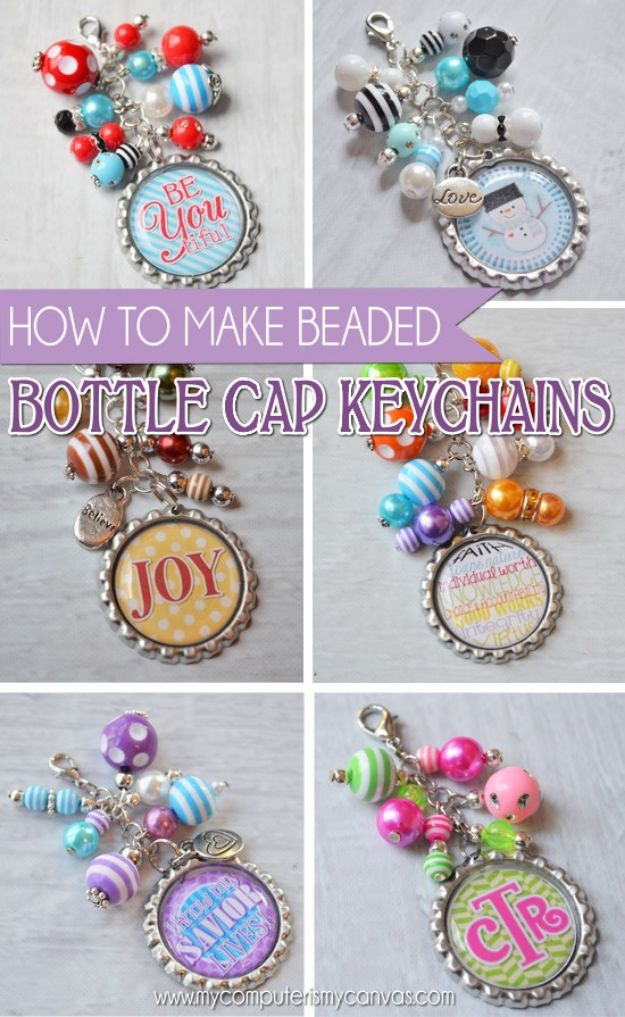
Beaded bottle cap key chains look store bought but are easy once you know a few basic jewelry moves. Start with flattened caps, 1 inch printable designs and clear epoxy stickers to seal them. You’ll need chain nose, round nose and bent nose pliers, wire cutters and a bead mat or a felt square to stop beads from rolling. Then gather silver spacers, 6mm jump rings, daisy spacers, 2 inch headpins and a flat zipper pull to build the bead dangles.
Get the full tutorial at My Computer is My Canvas.
18. Bottle Cap Bookmarks
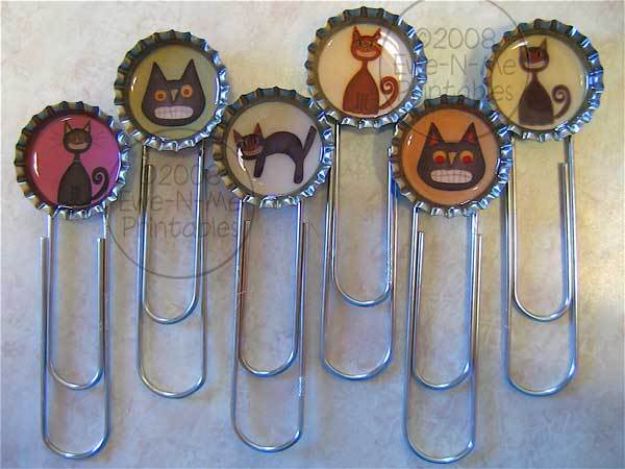
Bottle cap bookmarks are a clever gift for readers and quick to make once the caps are decorated. Finish the front of each cap and let it dry completely. Glue a jumbo paper clip, about 3 inches long, to the back with E-6000. Then cover the messy back with a couple of layers of 1 inch scrapbook paper circles and white glue. A coat of Mod Podge over the paper adds extra protection, though the bare paper holds up fine.
Get the full tutorial at By Your Hands.
19. DIY Bottle Cap Turkey Napkin Rings
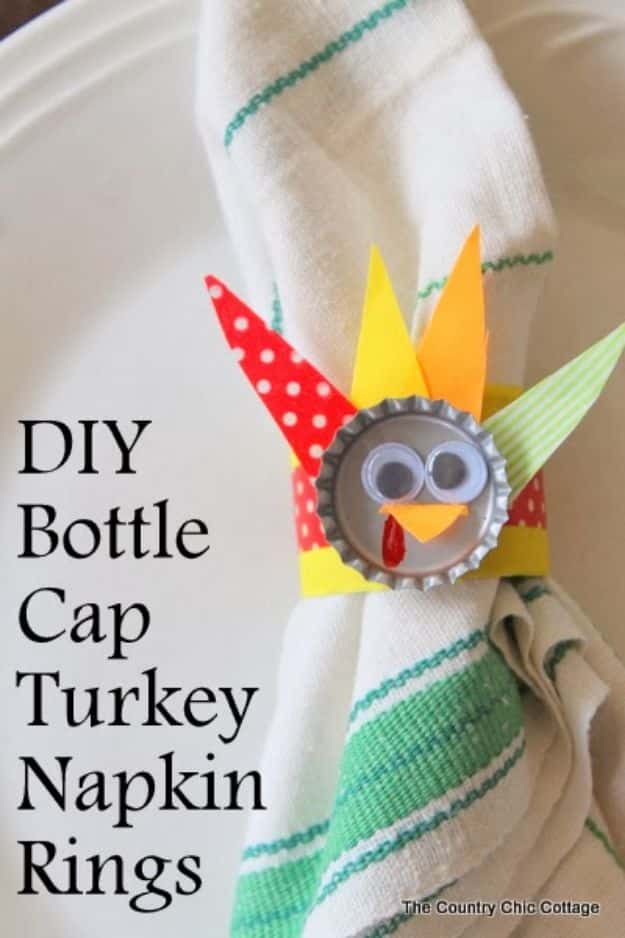
Bottle cap turkey napkin rings give the Thanksgiving kids’ table its own fun detail. Cut a paper towel roll into rings and wrap each with three strips of fall washi tape. Fold more tape over on itself and cut it into feather shapes, then glue the feathers to the back of a bottle cap. Add googly eyes, a folded tape beak and a red marker wattle on the front. Glue the turkey over the tape seam and slip in a napkin. An adult should handle the hot glue.
Get the full tutorial at Angie Holden The Country Chic Cottage.
20. Beer Cap Clock
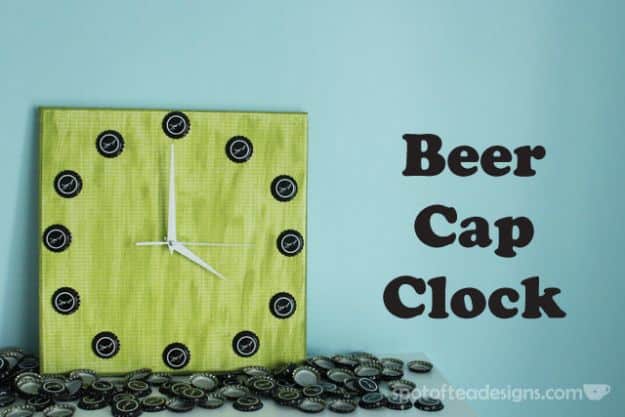
A beer cap clock is a great Father’s Day gift for a craft beer fan. Paint the edges of a canvas, then decoupage paper over the front with Mod Podge, coating both the back and the top of the paper. Dry brushing hides any wrinkles. Find the center with a ruler, make a hole and hot glue an inexpensive clock kit in place so it doesn’t spin. Glue beer caps in a circle at each hour, add a battery and hang it up.
Get the full tutorial at Spot of Tea Designs.
21. Bottle Cap Animal Bust
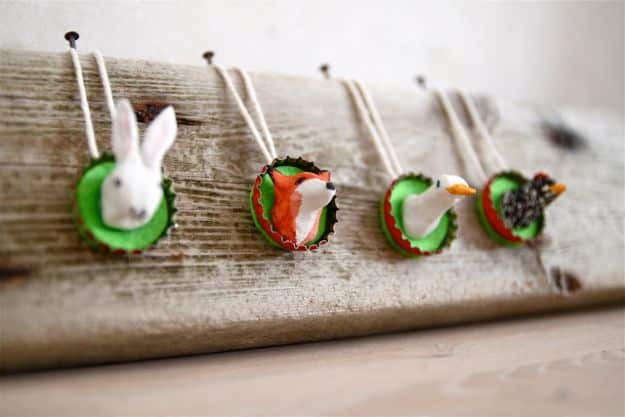
These spring animal ornaments use a bottle cap as a tiny frame for a paper clay head. Sculpt small heads, a fox, a hen, a duck and a hare, from paper clay and paint them with watercolors. Hot glue a cotton string to the back of an old cap for hanging, then line the inside and back with green felt. Glue the head inside the cap. Hang them on an Easter branch or a piece of driftwood for a sweet seasonal display.
Get the full tutorial at Rebeccas DIY.
22. Bottle Cap Bunting
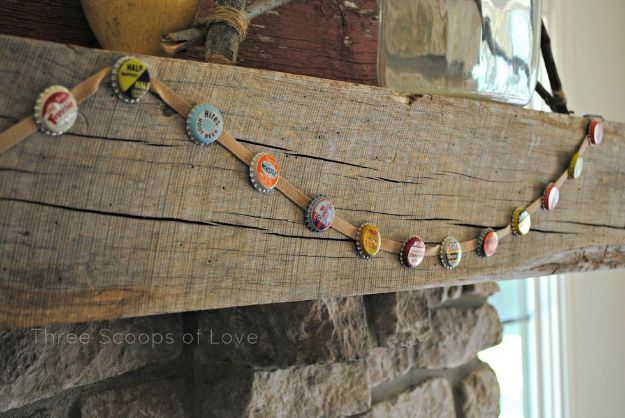
Vintage soda caps make a colorful little bunting for a Fourth of July mantel. Look for unused caps with fun colors and typography, often sold by collectors online. Then hot glue them along a length of twill tape from the fabric store. That’s the whole project. Change the caps to change the theme, like brands that were popular when a birthday guest was young, or a favorite beer for a grown-up party.
Get the full tutorial at Three Scoops of Love.
23. DIY Bottle Cap String Art
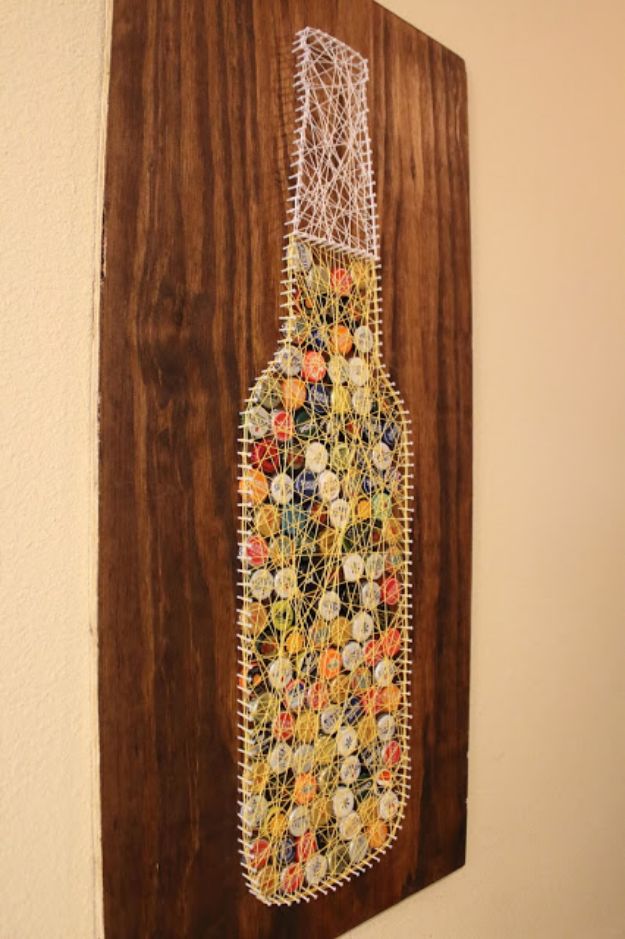
This beer bottle string art fills the bottom of the bottle with real caps. Sand and stain a board about 3 feet tall and 1.5 feet wide, let it dry overnight, then tape a printed template on top. Hammer in 1 inch nails along the outline, using the hammer’s claw as a spacer and working away from your holding hand. Tear off the paper, pack the caps in tightly and wrap string from nail to nail, running it snugly across the caps to hold them.
Get the full tutorial at Sam Rhymes with Ham.
24. Bottle Cap Candles
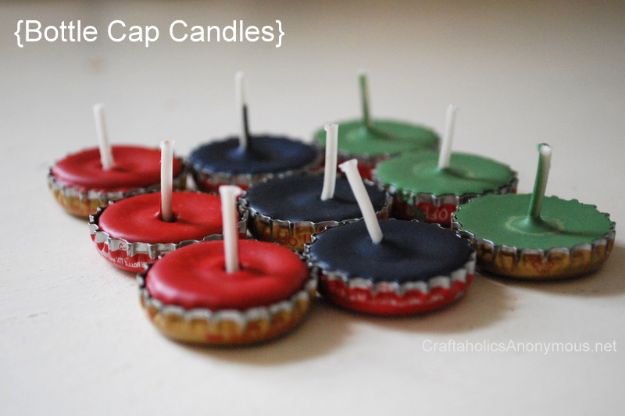
Bottle cap candles are tiny, colorful and made almost entirely from things that usually get tossed. Peel broken crayons and drop them into a clean soup can. Set pre-waxed wicks inside bottle caps on wax paper. Stand the can in a pan with a couple inches of boiling water and the crayons melt quickly. Pour the wax into the caps, let them cool one to two hours and trim the wicks. Crayon wax doesn’t smell great burning, so add scent if you’ll light them.
Get the full tutorial at Craftaholics Anonymous®.
25. Make All-American Bottle Cap Wall Art
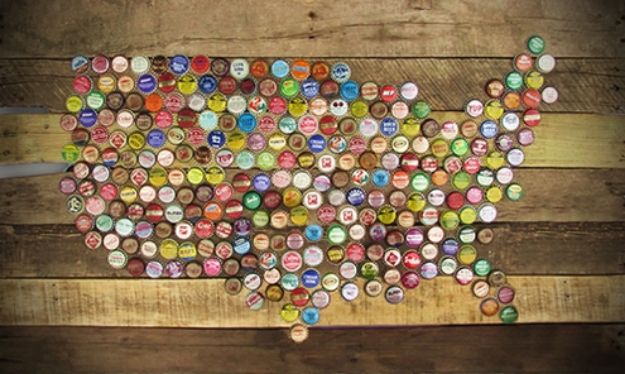
This all-American bottle cap wall art turns colorful caps into a map of the United States on recycled shipping pallets. Start saving caps now, ask friends and family to pitch in and make friends with a bartender if you need more. The caps attach securely to the pallet boards inside the outline of the country, so every state gets its own patch of color and the whole piece reads as one big map.
Get the full tutorial at ManMadeDIY.