
Getting a nursery ready is one of the sweetest projects there is, and a few handmade pieces make the room feel truly yours. These 33 DIY nursery decor ideas range from free printables you can frame tonight to weekend builds like a wooden growth chart, an upholstered rocking chair and layered mountain art. You’ll find soft boho yarn and macrame wall hangings, a rainbow cloud, a moon phase hanging, painted animal signs and a polka dot initial canvas, plus felt whale baskets for diapers and wipes. Perfect for a boy, girl or gender neutral room! One tip for every project: hang anything heavy with proper anchors and keep garlands, beads and small parts well away from the crib.
1. Textured Heart Canvas Art
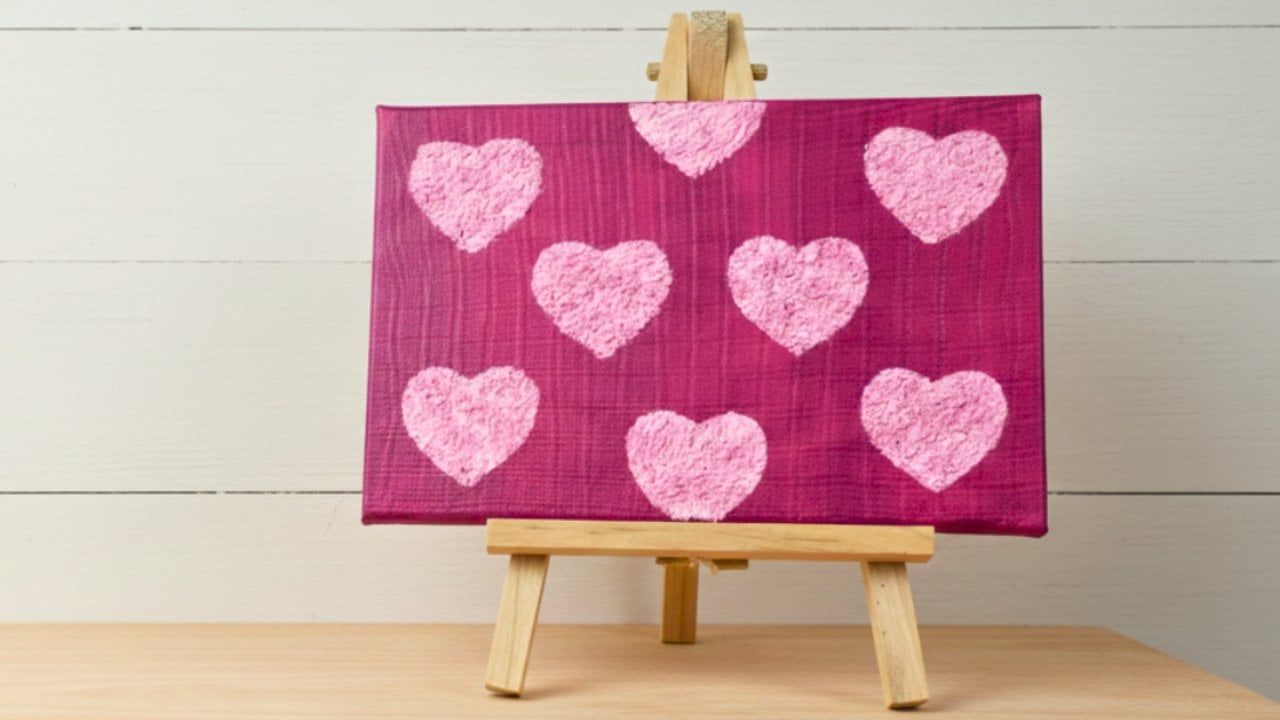
Textured heart canvas art uses a simple paper mache trick for raised, embossed shapes. Paint a canvas in your chosen color, let it dry, then lightly sketch hearts, letters or other shapes. Tear tissue paper into small bits, soak it, squeeze out the water and tear it even smaller. Mix in glue and paint until it’s evenly colored, then pack the mixture into each shape, spreading it to hide the pencil lines. Smaller, even pieces give a smoother texture. Let it dry completely before hanging.
Get the full tutorial at DIY JOY.
2. Heart Garland From Empty Rolls

A heart garland from empty toilet paper rolls is a nearly free nursery decoration. Flatten a roll, lay a heart template on top, trace it and cut out the shape. Paint both sides white first so the cardboard doesn’t show through, let it dry, then paint each heart in soft pastels or any colors you like. Poke a small hole near the top with a pointed tool and thread the hearts onto twine or string. Add glitter, beads or sequins if you want a little sparkle, and hang it high on the wall.
Get the full tutorial at DIY JOY.
3. DIY Paper Heart Wreath

A paper heart wreath gets its depth from 3D folded hearts. Punch six hearts from each of three colors of cardstock with a 3 inch heart punch. Fold one heart in half, run a thin line of glue along the fold and stick it to the center of a flat heart of the same color, so it stands up. Repeat until you have a full set, then glue the hearts and green paper leaves around a wooden hoop and finish with a ribbon bow. Pinks and purples look especially soft in a baby’s room.
Get the full tutorial at DIY JOY.
4. Yarn-Wrapped Ombre Monogrammed Letter

A yarn-wrapped ombre letter adds soft color and texture to a nursery wall or shelf. Start with a wooden letter from the craft store and yarn in three shades of one color, light, medium and dark. Dot hot glue at the bottom and wrap the darkest shade tightly, keeping the rows close so no wood peeks through, then switch to the middle shade and finish with the lightest at the top. Glue a few felt or paper flowers in a corner. It’s a quick, low-cost project.
Get the full tutorial at Catch My Party.
5. Wooden Growth Chart

A wooden growth chart costs under five dollars and about 30 minutes of work. A fence post board from the hardware store is the perfect size. Paint it gray, let it dry, then dry brush dark brown over it for an aged look. Run a tape measure up the side, starting the bottom at the 6 inch mark so the board can hang above the baseboard. Mark each foot and inch with a black marker and a ruler, then paint the foot numbers in a pop of color.
Get the full tutorial at The Pinning Mama.
6. Easy Paper Flowers With Cupcake Liners
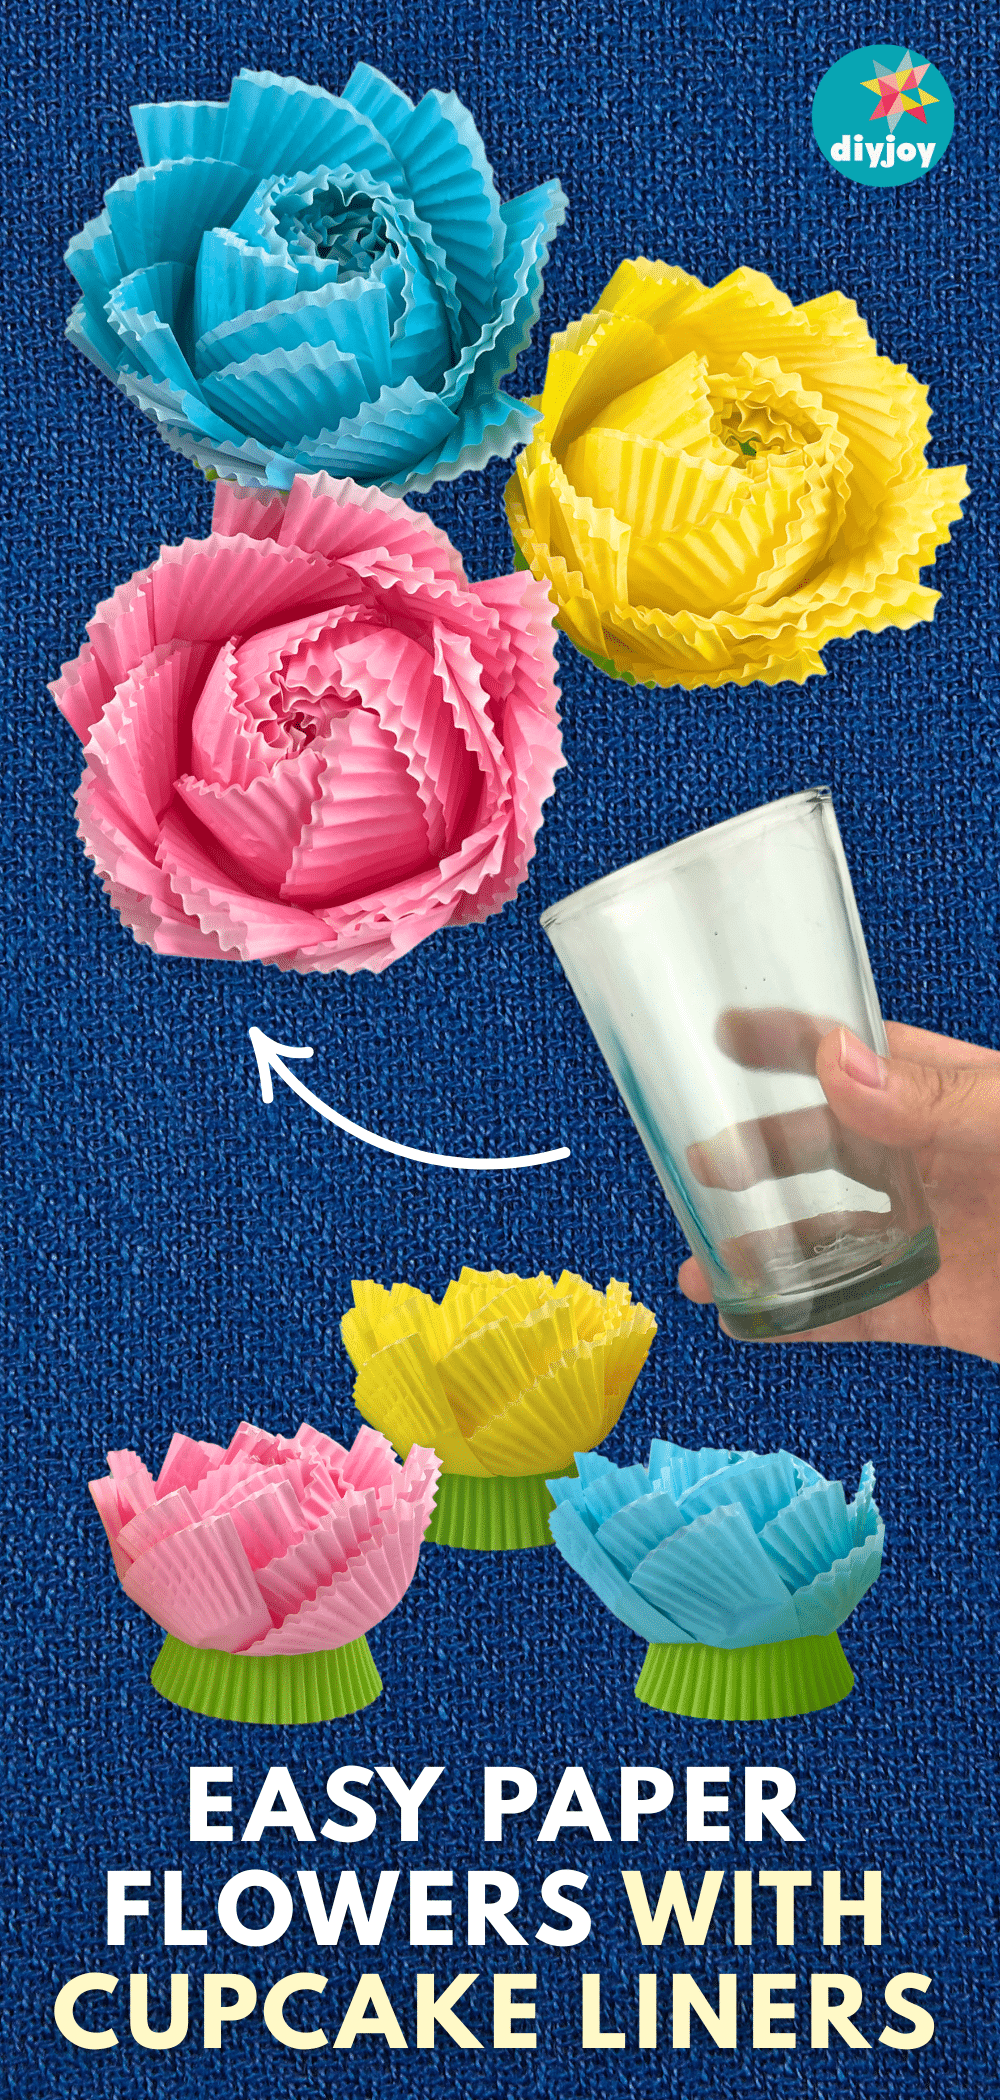
Cupcake liner paper flowers come together over an ordinary drinking glass. Gently flatten about 12 liners per flower and fold each into quarters. Set one folded liner over the rim of the glass so the sides hang loose, glue the crimped point, and overlap the next one beside it. Keep going all the way around, then tuck the next layer in between the first. Turn the glass over and slide the finished bloom off. Color the liners with markers or watercolor first for a custom shade.
Get the full tutorial at DIY JOY.
7. Patterned Dot Wall

A patterned dot wall gives a nursery that gold confetti look in an orderly grid. Cut 1.5 inch dots from gold adhesive vinyl with a cutting machine, or buy them precut. Measure the wall and work out the spacing from how many dots you have; about 8 feet of vinyl spaced the dots 6.5 inches apart. A cheap laser level is the must-have tool for straight rows, plus a cardstock spacer, a ruler and a pencil. Start at the top, because the first two rows set the whole pattern.
Get the full tutorial at TaylorMade.
8. Alphabet Wall

An alphabet wall of paper covered letters turns a whole wall into colorful art. Pick up a full set of paper mache letters, waiting for a half off sale. Paint the sides of each letter to match the background color of its patterned paper, carrying a little paint onto the front edges. Trace each letter onto the back of its paper, cut it out and glue it on with a foam brush. Trim the edges with a craft knife, sand them for a soft worn look and hang with poster putty.
Get the full tutorial at JBS Inspiration.
9. Woodland Alphabet Free Printables

Woodland alphabet printables make nursery art as easy as print and frame. Each initial sits on a chalkboard background, wrapped in whimsical woodland leaves and blooms, and all 26 letters plus an ampersand are free to download. Save the letters you want and send them to a photo printer on matte cardstock or glossy photo paper; they print best at 8 by 10. Frame a single initial over the crib, spell a short word, or build a gallery wall in white, flat, matted frames.
Get the full tutorial at All Crafty Things.
10. DIY Elephant Garland

An elephant garland made from scrapbook paper is a simple, cheerful nursery wall hanging. Draw an elephant template about 15 centimeters wide and 10 tall, or any size you like, then trace and cut a herd from patterned scrapbook papers. Cut a length of string long enough to fit them all with a loop at the top. Run a line of hot glue or white glue down the back of each elephant, press the string in, and hang the strands vertically or swag them like bunting.
Get the full tutorial at That Urban Foxx.
11. Floral Alphabet Printable Art

Floral alphabet printables are a fast way to add color to a baby girl’s room. Each letter is built from flowers in pink, coral, peach, green and aqua, and they’re free to download one initial at a time. Save the letters you want and send them to a photo printer on matte cardstock or glossy photo paper. Frame a single initial, make a monogram, or spell out a name or favorite word across a shelf. They also make sweet baby shower decor and easy gifts.
Get the full tutorial at Burlap + Blue.
12. DIY Upholstered Rocking Chair

An upholstered rocking chair makes those late night feedings a lot cozier. Start with a secondhand wooden rocker and a few cans of spray paint. Lay out extra large paper to sketch and test the cushion shape, then trace the template onto foam and cut it with an electric knife or a big chef’s knife. Wrap each foam piece in batting a little wider than the foam, then cut fabric with about 1.5 inches extra all around, sew it inside out, add a zipper and tie it on with grosgrain ribbon.
Get the full tutorial at DIY Decor Mom.
13. DIY Poster Project

This DIY poster project turns a favorite photo into a bold black and white portrait, even if you’re sure you can’t draw. Convert the photo to black and white and run a cutout style filter so it breaks into simple shapes. Print it on letter size paper and draw a 1 inch grid over it. Draw a matching grid of 2.5 inch squares lightly on a 20 by 24 inch sheet, then copy each square one at a time. Fill in with black ink or paint and erase the grid.
Get the full tutorial at Patent Pending Projects.
14. DIY Modern Bunny Decor

Modern bunny decor made from popsicle sticks looks far harder than it is. Print the bunny template and tape it together so the sticks line up. Lay a first row of full size sticks over the template, alternating, then glue a second layer into the gaps. Keep stacking and gluing until it’s about 16 sticks deep, using roughly 120 full size and 310 mini sticks. Add a stick tail or a yarn pom pom, then stain or paint. Stand it on a dresser or hang it as a little shelf.
Get the full tutorial at Make & Do Crew.
15. Hand Painted Animal Nursery Art
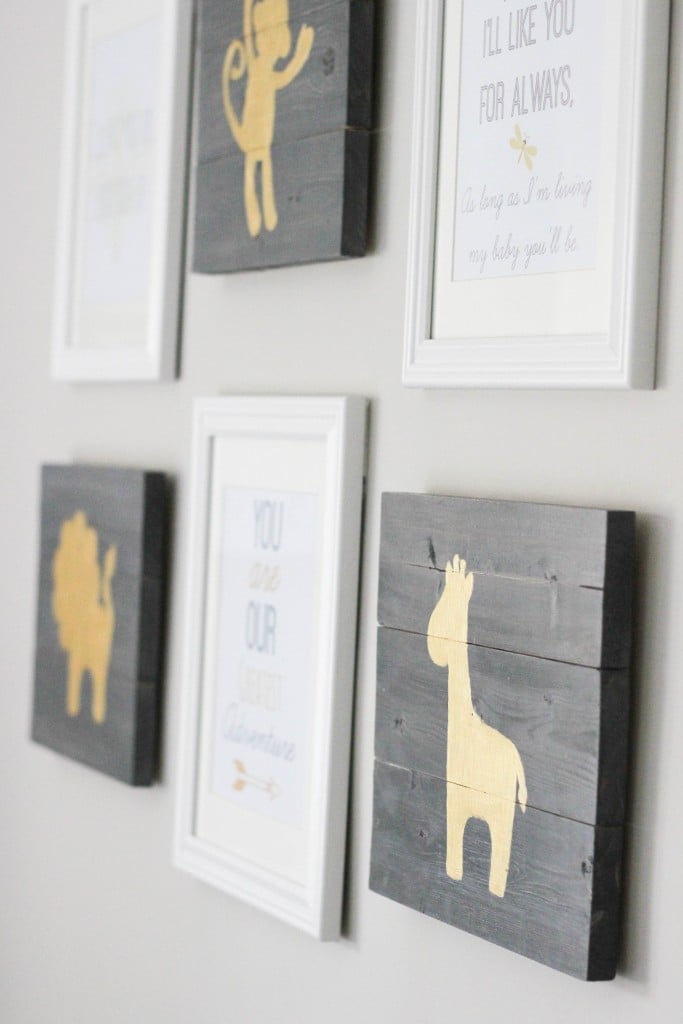
You don’t have to be an artist to make this nursery art! Pine 1×4 boards get cut into short lengths, joined into mini pallets with yardstick strips on the back and stained gray. Then trace a baby animal silhouette onto each one and fill it in with metallic gold acrylic paint. An overhead projector makes tracing easy, but a printed template cut out and traced works just as well. Hang a monkey, lion and giraffe between framed quotes for a sweet gallery wall.
Get the full tutorial at Erin Spain.
16. Fabric Nursery Wall Hanging
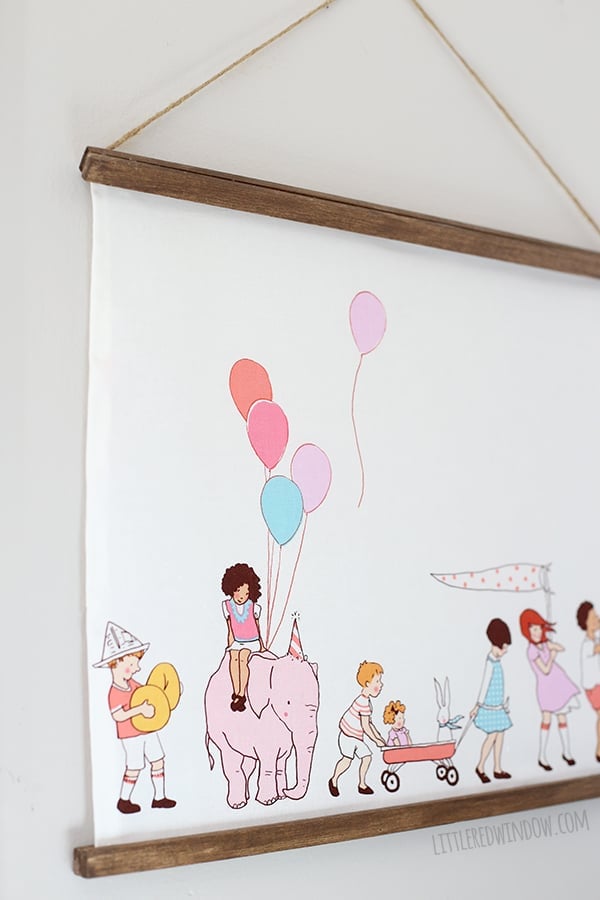
Fall in love with a fabric that’s too sweet to keep in a drawer? Turn it into a wall hanging! Cut a section of the print to fit your wall, fold and glue the side edges so they don’t fray, then sandwich the top and bottom between strips of balsa wood stained walnut. A length of twine hot glued on the back makes the hanger. It’s so lightweight that hot glue holds it all. It’s quick, budget friendly and perfect for showing off a favorite quilting cotton.
Get the full tutorial at Little Red Window.
17. Scroll Saw Mountain Art
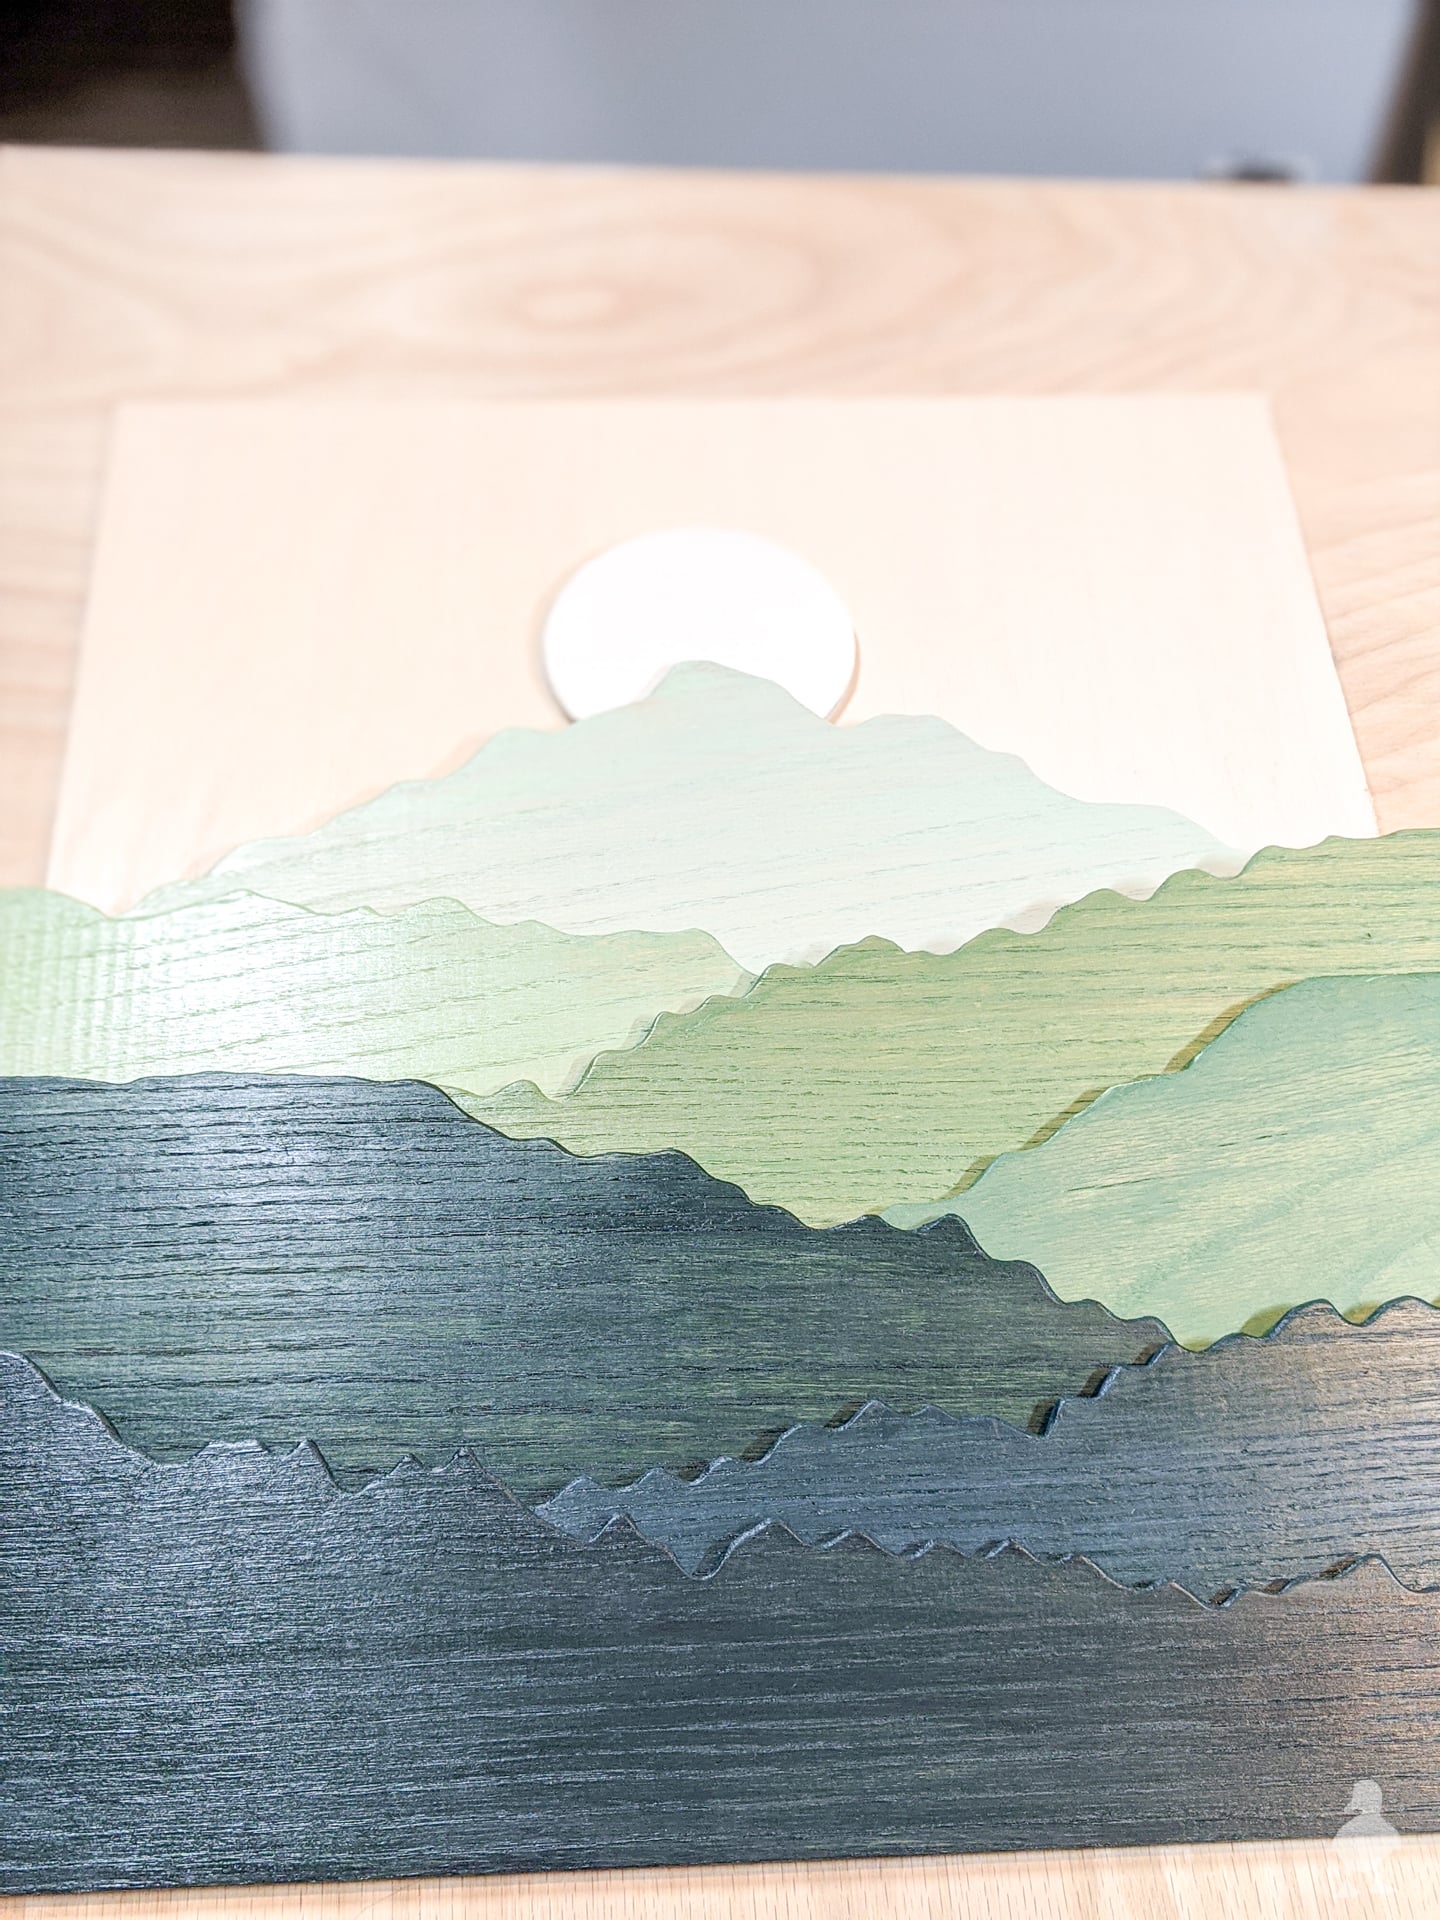
Inspired by vintage national park posters, this layered mountain art makes a calm, nature-loving nursery. Each ridge is cut from thin oak plywood on a scroll saw, then stained a different shade of green, peach or white with water-based solid color stain that goes on almost like paint. Stack the layers inside a simple poplar frame, add a round sun and hang it with sturdy wall hooks. It’s a great first scroll saw project, and there’s a video to watch along with the written steps.
Get the full tutorial at Ugly Duckling House.
18. Headband Monogram Letter
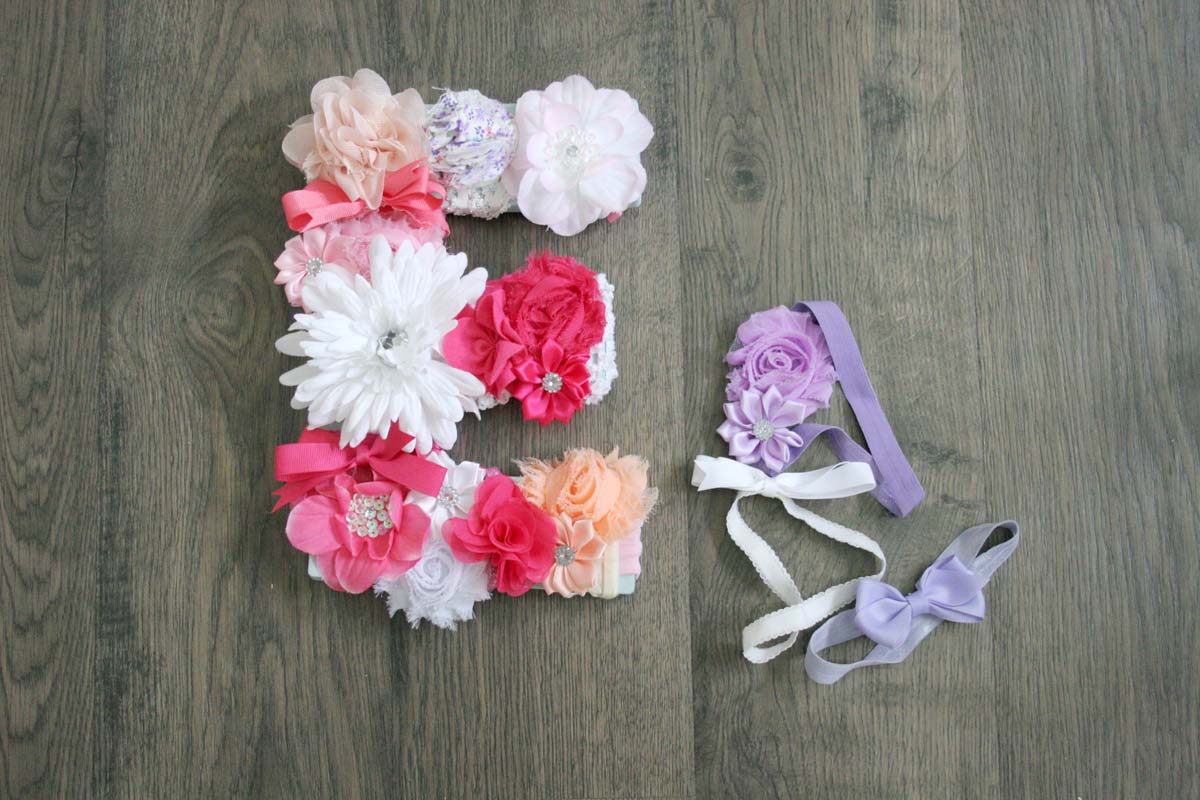
Not ready to part with those tiny baby headbands? Turn them into wall decor! Paint a wooden letter if you like, then wrap the biggest floral headbands around it first. Balance them with medium flowers on the other side, doubling each band like a ponytail so it stays put, and fill the gaps with small flowers and bows. It’s a five minute project once the paint dries, and the headbands aren’t damaged, so they can still be worn. Such a sweet keepsake for a little girl’s room!
Get the full tutorial at Craftivity Designs.
19. Rainbow Cloud Yarn Wall Art
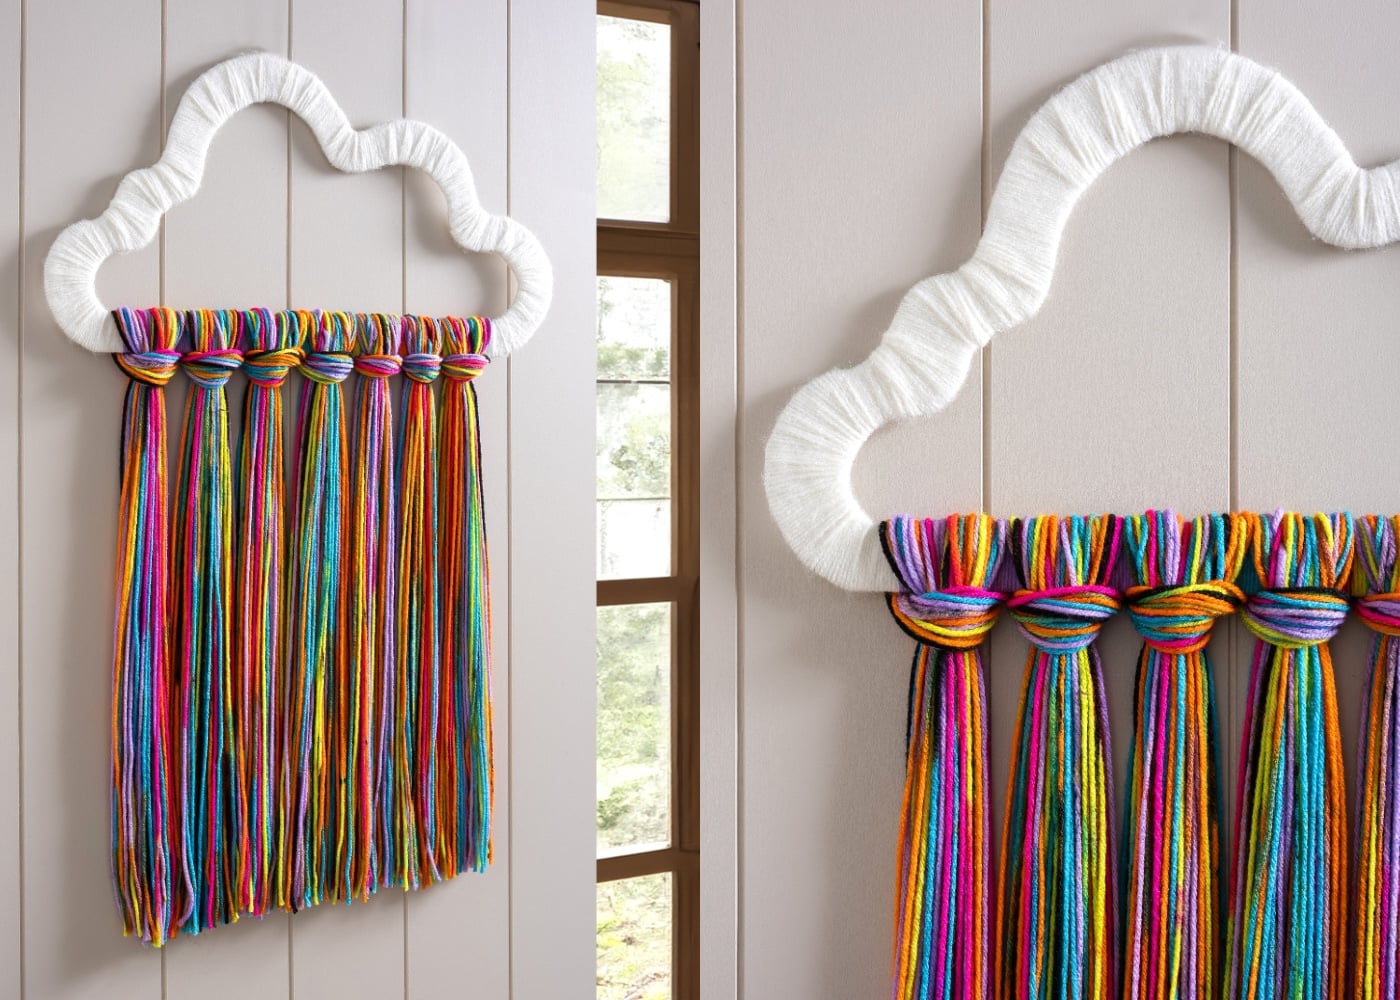
Got two skeins of yarn and some cardboard? You’re ready to make this happy little wall hanging! Draw a cloud on sturdy cardboard with smooth, rounded curves, cut it out with a craft knife and wrap it snugly in white yarn until it’s fluffy and covered. Then knot lengths of rainbow yarn along the bottom so the colors rain down. There’s no glue gun and no sewing, and the free cloud pattern makes it even easier. Perfect for a nursery, a playroom or any spot that needs color!
Get the full tutorial at DIY Candy.
20. Moon Phase Wall Hanging
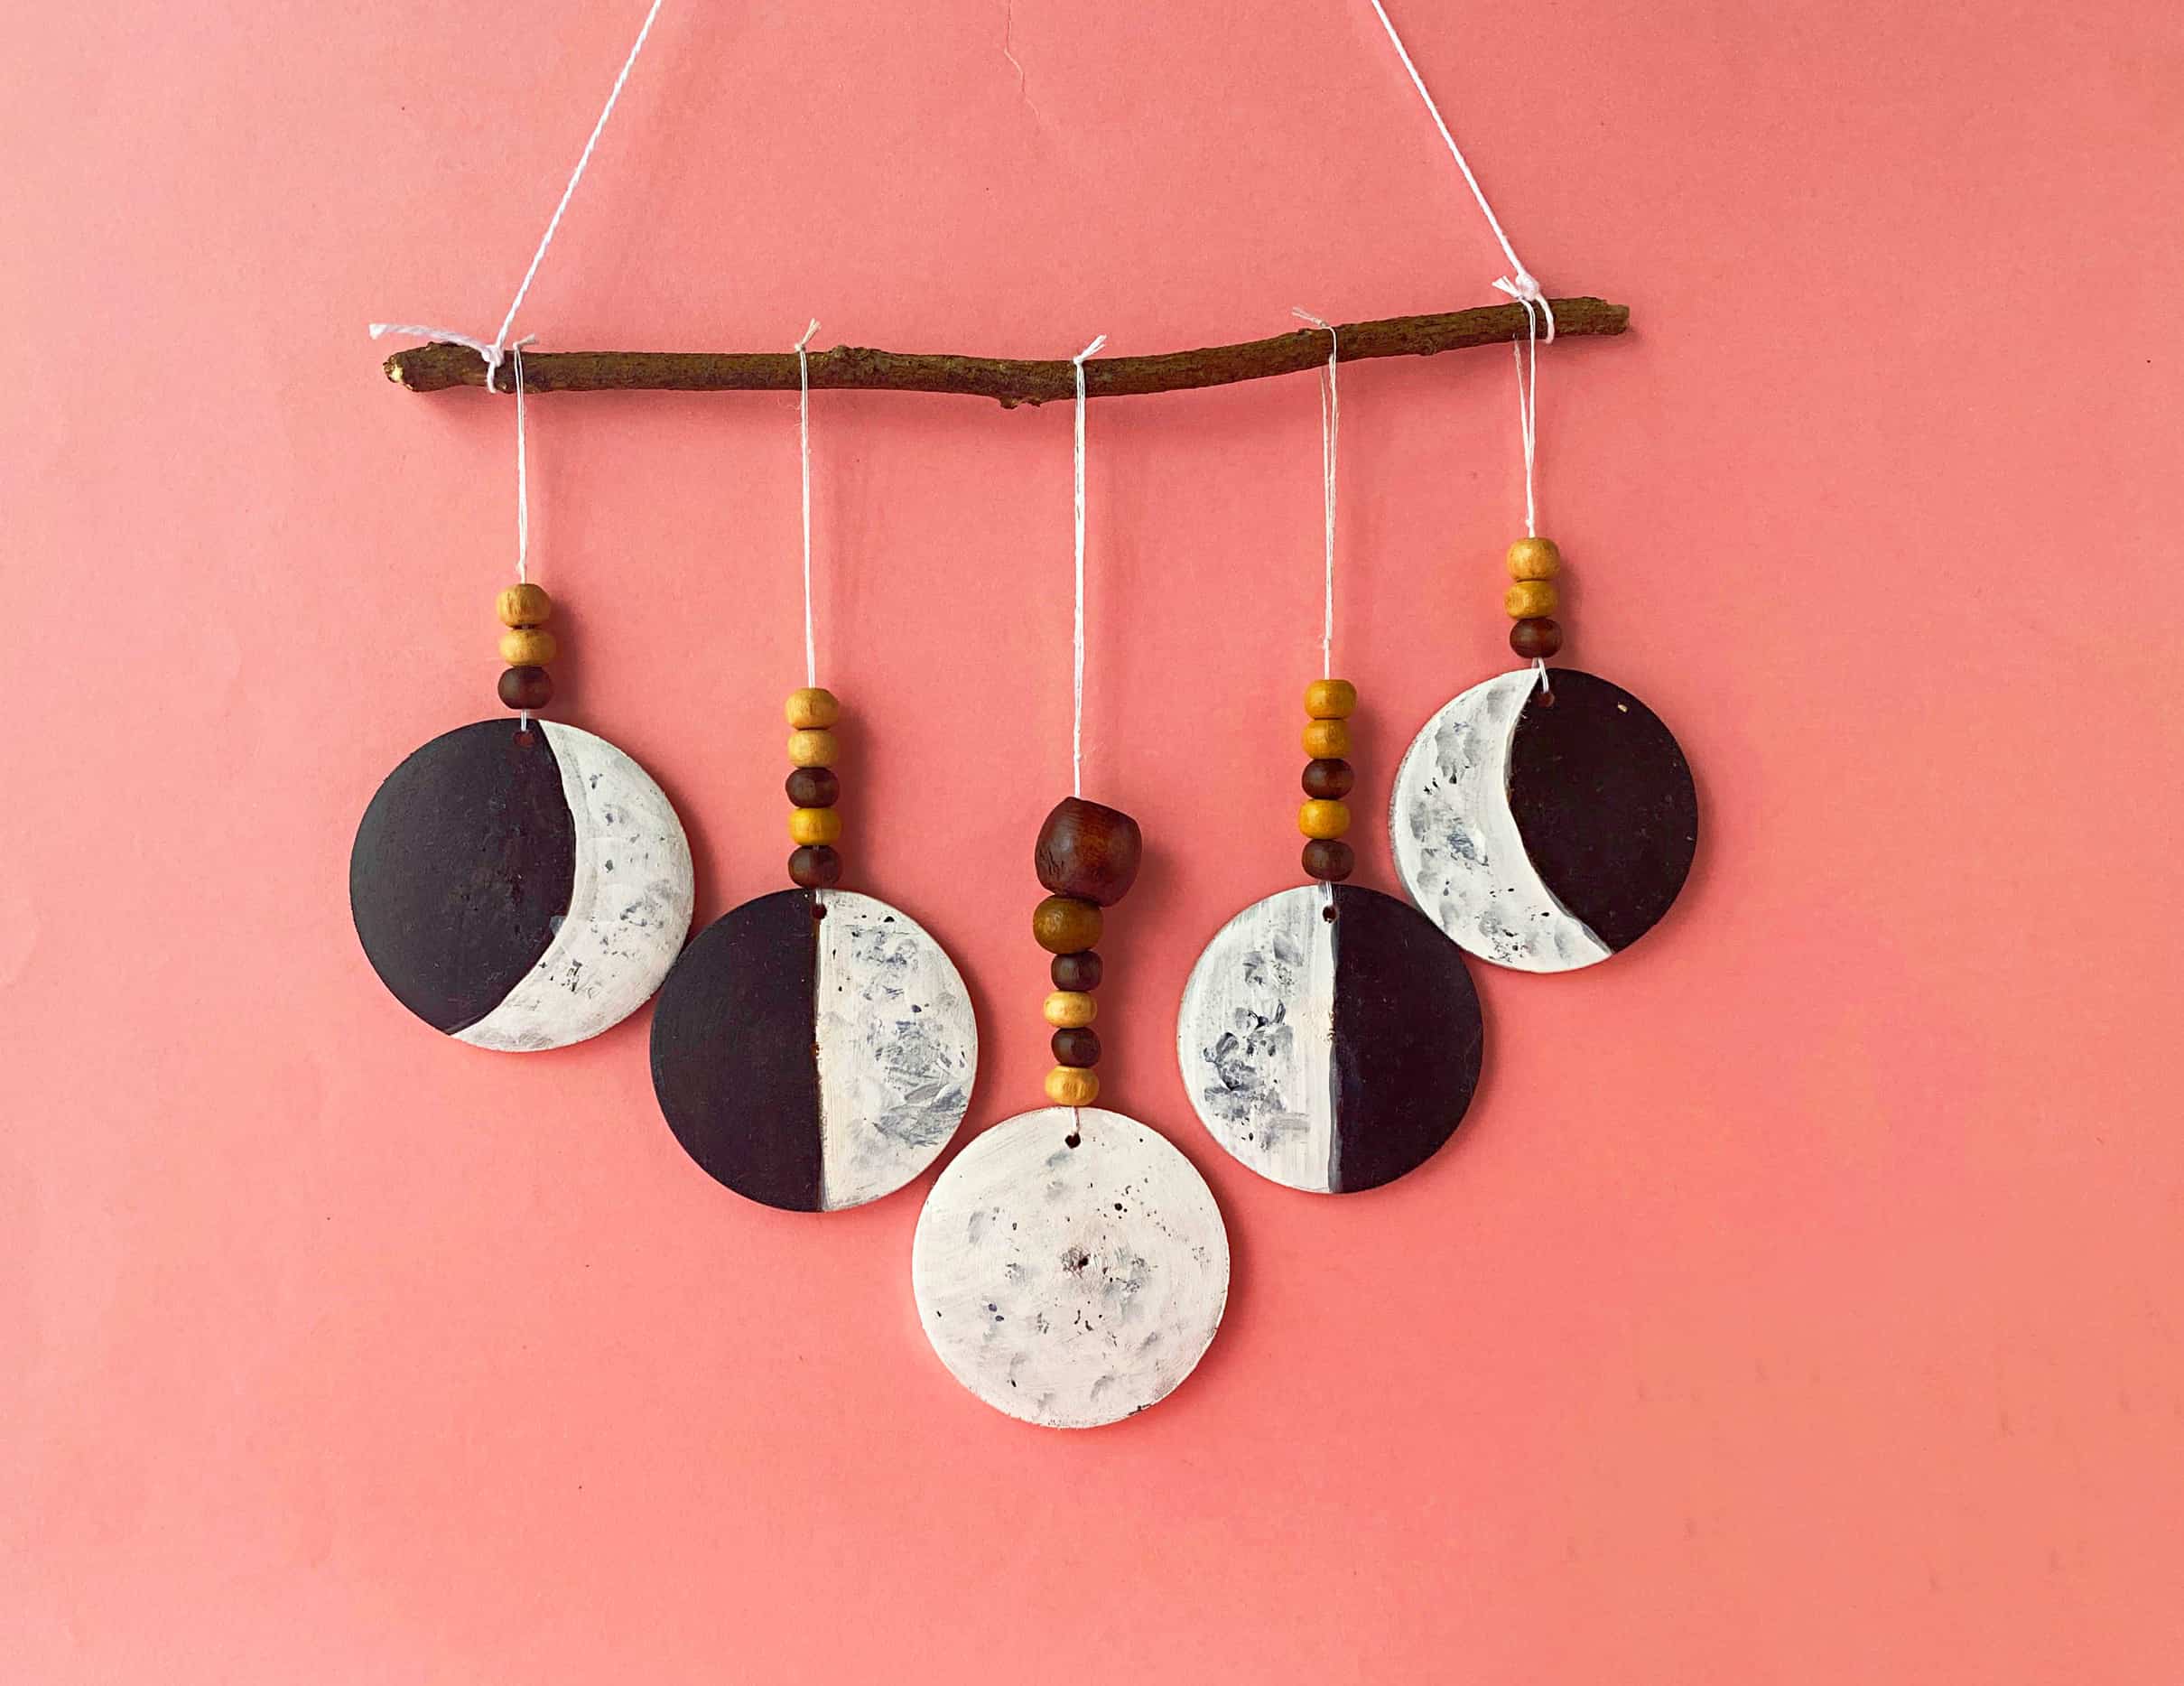
This moon phase wall hanging takes an hour or less, and it’s so pretty in a celestial nursery! Draw half moons and crescents on five predrilled wooden discs, paint them black and white, and dab on a little gray with a cotton swab to make craters. Thread wooden beads onto string through each disc, then tie them along a twig so the full moon hangs lowest in the middle. Add a string hanger at each end. Simple supplies, big impact!
Get the full tutorial at Single Girl's DIY.
21. 10 Minute Woven Wall Hanging
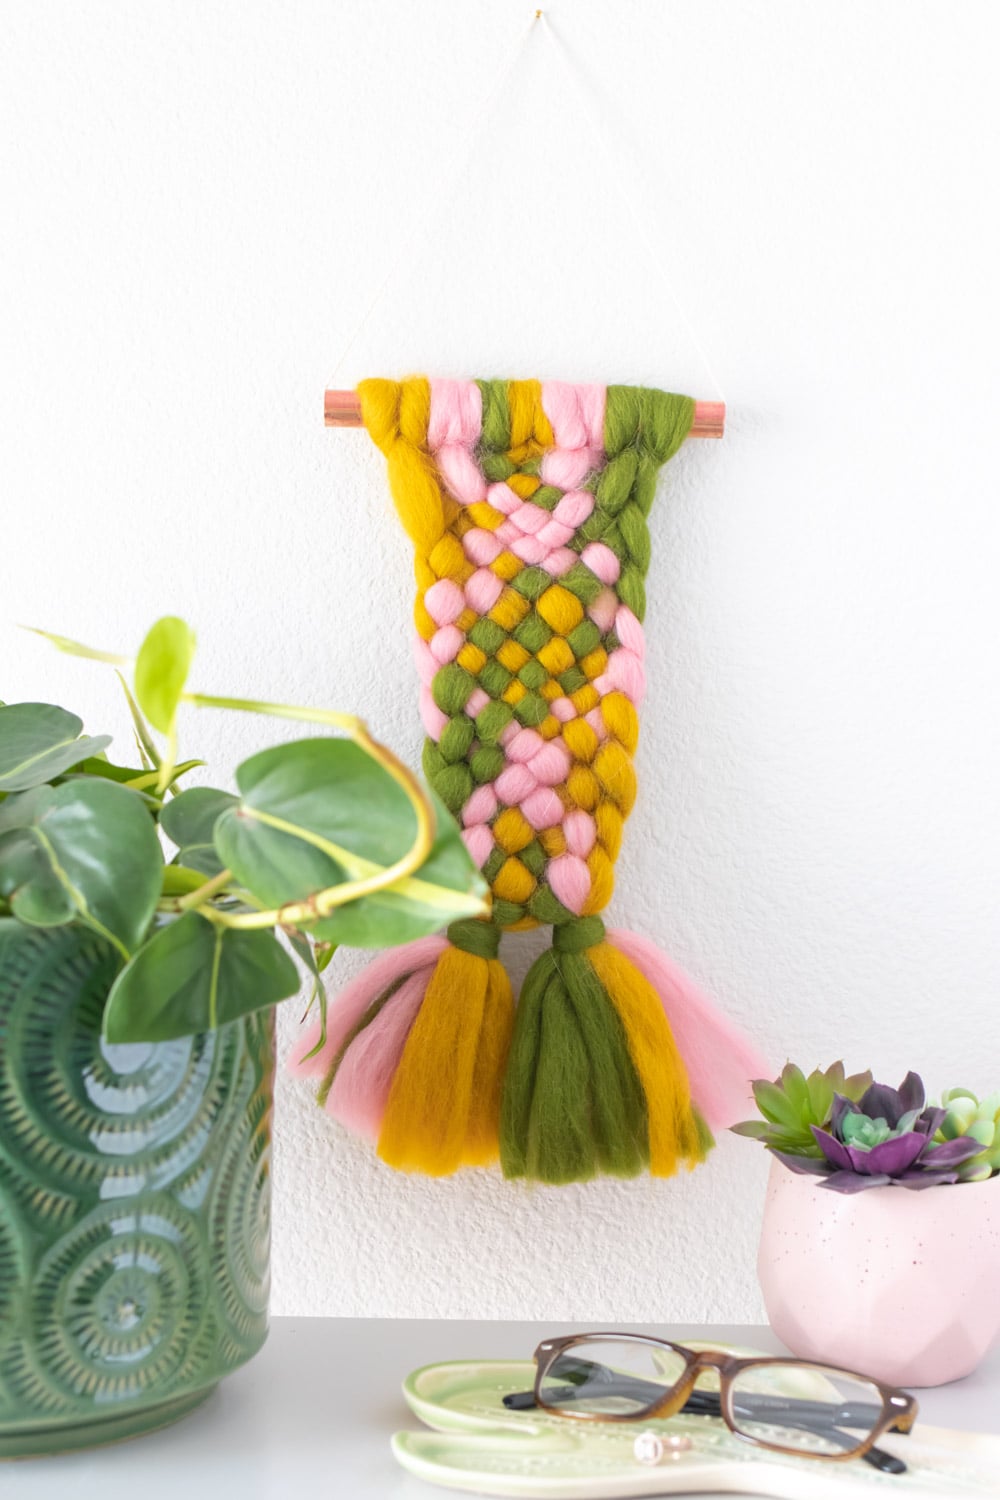
Want to try weaving without a loom? This wall hanging takes just ten minutes! Cut six thick strands of roving in three colors, thread a string through a short copper pipe or dowel for hanging, and attach each strand with a lark’s head knot. Then weave the center strands over and under across each side and finish with two knots of fringe at the bottom. The chunky roving makes a simple pattern look fancy. A sweet pop of color for a nursery shelf wall!
Get the full tutorial at Club Crafted.
22. Leftover Yarn Wall Hanging
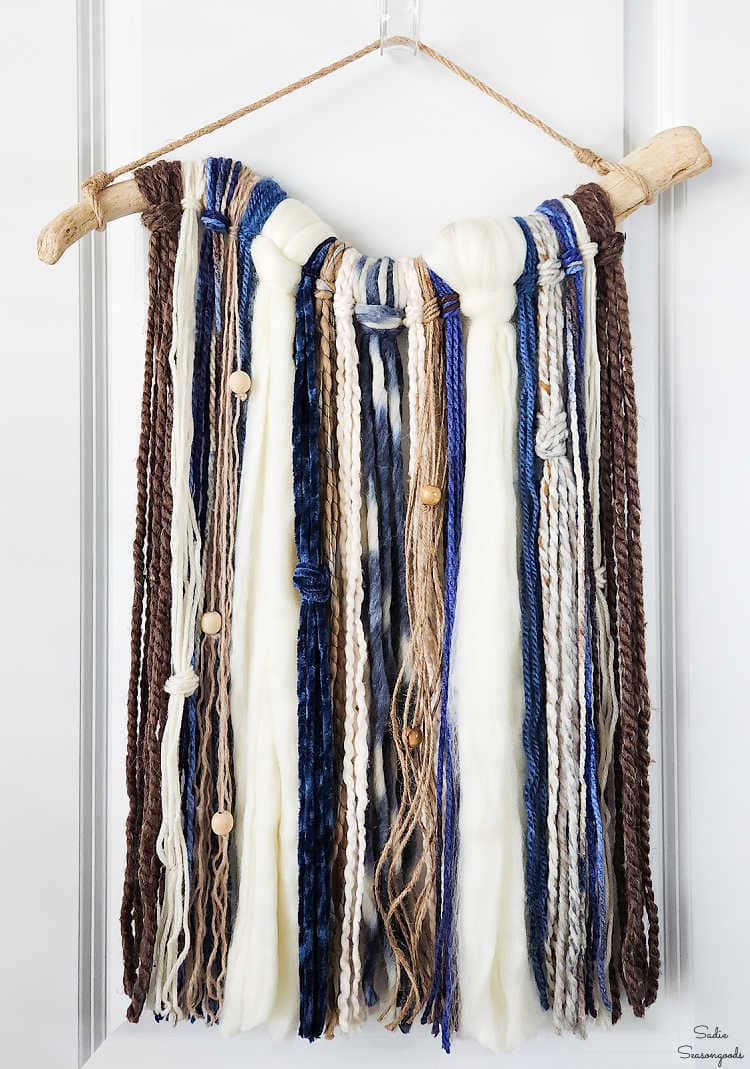
Have a stash of leftover yarn? Here’s a calm, boho way to use it! Tie a jute hanger to a piece of driftwood or a stick, then attach bunches of yarn with cow’s hitch knots, starting in the center and working outward. Keep it loosely symmetrical by using the same yarn on both sides, add a few wooden beads to single strands and knot a bunch here and there for texture. Cut your strands longer than you think you need! Blues and creams look so soft in a nursery.
Get the full tutorial at Sadie Seasongoods.
23. Mini Macrame Wall Hanging
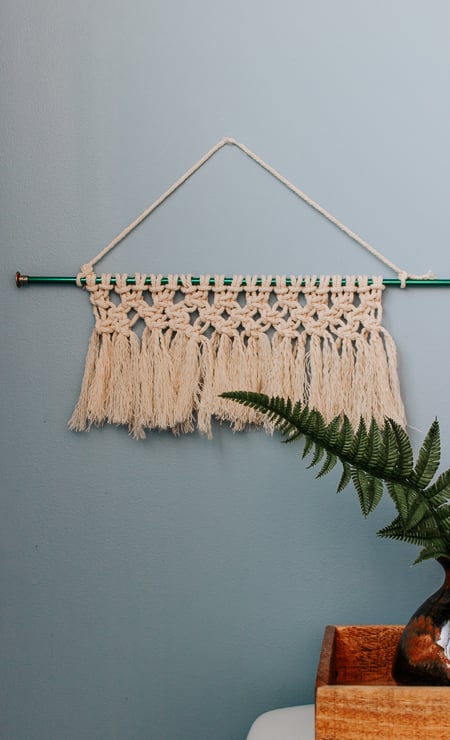
Curious about macrame but a little nervous? Start with this mini wall hanging! You’ll need just 20 cords cut 20 inches long and a dowel or stick. Attach every cord with a lark’s head knot, then work rows of square knots and alternating square knots, and brush out the ends for a soft fringe. It takes about 30 minutes, and the step by step photos make each knot easy to follow. Hang it in a nursery or group it with framed prints on a gallery wall.
Get the full tutorial at Pretty Handy Girl.
24. Felt Whale Storage Baskets
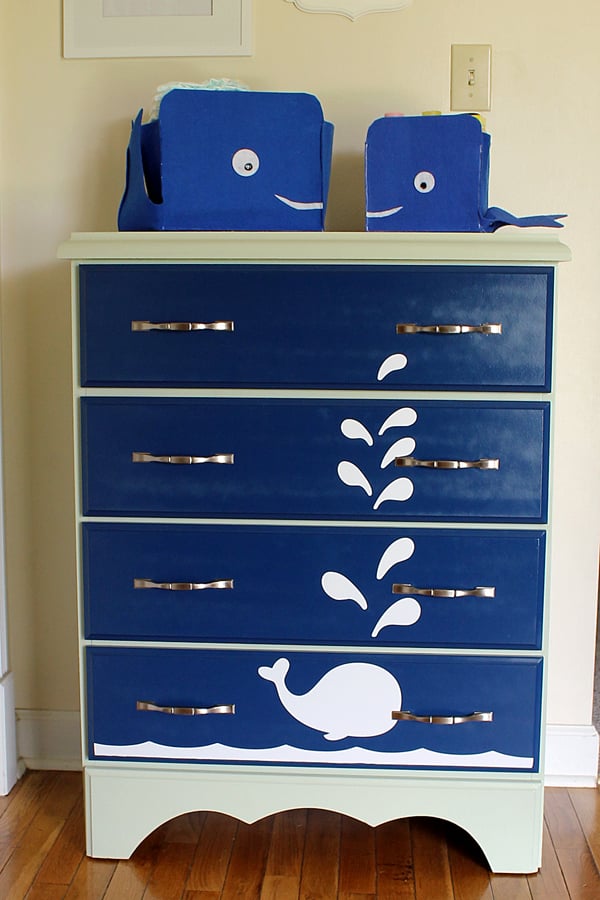
How cute are these whale baskets? They’re sewn from stiff felt, so they stand up on their own and hold diapers, wipes and lotions right by the changing table. Cut two whale shapes and a strip for the base, stitch them together on a sewing machine, then glue on a white felt mouth and eyes with black dimensional fabric paint pupils. The large basket takes three felt sheets, and a smaller version uses two. Perfect for a nautical nursery or a baby shower gift!
Get the full tutorial at Angie Holden The Country Chic Cottage.
25. Pom Pom Pennant Banner
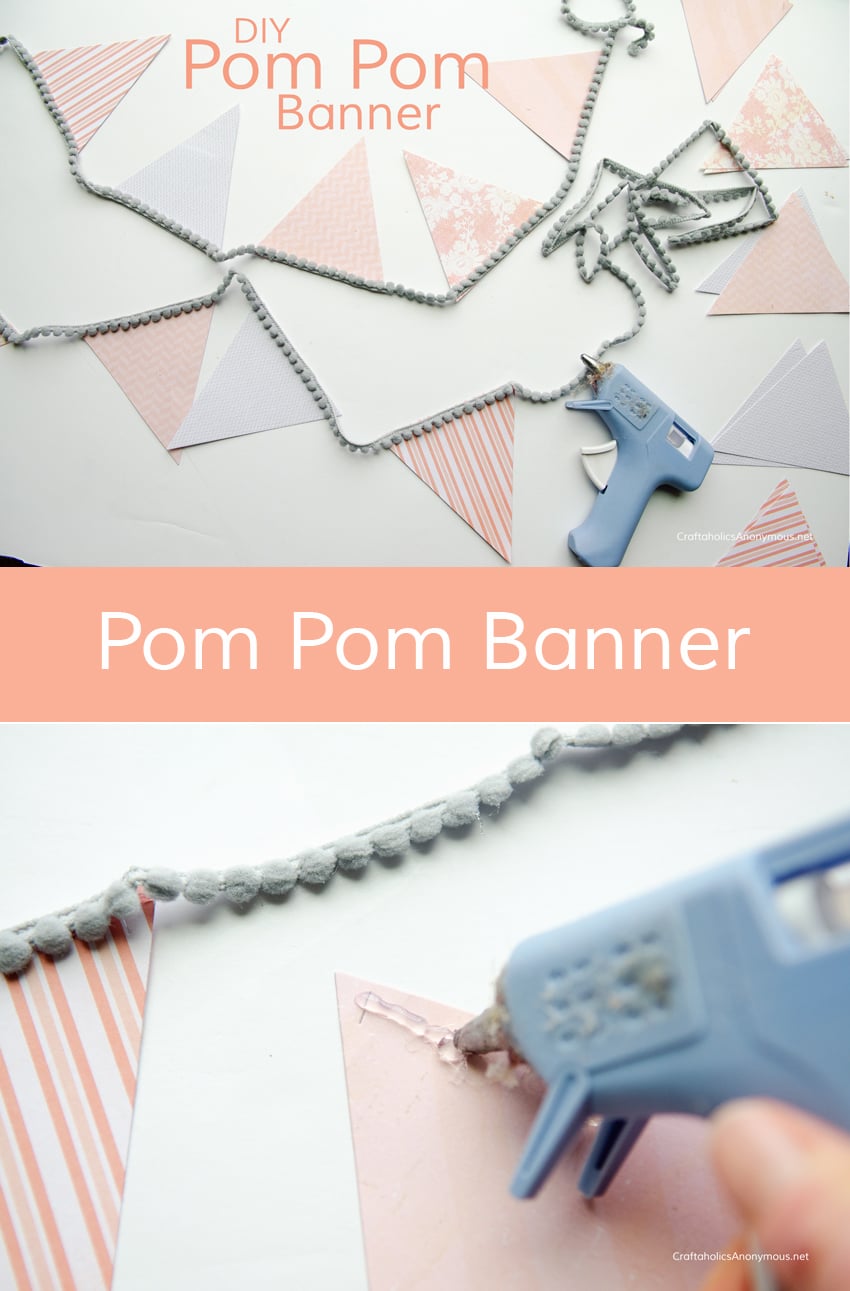
Want a banner that’s done in minutes? Cut seventeen 4 inch pennants from scrapbook paper, run a thin line of hot glue along the top edge of each one and press mini pom pom trim over it, spacing them about 1.5 inches apart. Five coordinating papers in soft pinks and grays look so sweet. It was made for a baby shower, and afterward it moves right into the nursery as wall decor. Hang it on a wall or shelf, never over the crib.
Get the full tutorial at Craftaholics Anonymous.
26. Easy Boho Yarn Wall Hanging
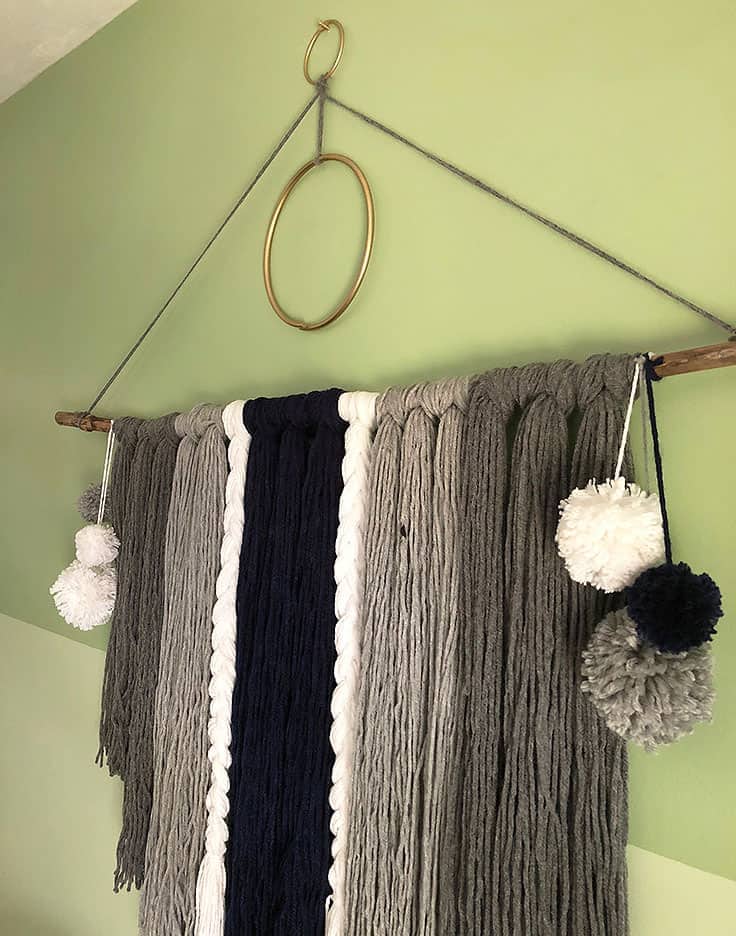
Don’t know how to macrame? You can still make a gorgeous boho wall hanging! Wrap yarn around a picture frame or a piece of cardboard about 20 times to make big loops, then drape each bundle over a sanded stick from the yard and cut the ends. Mix grays, black and white, braid a few strands for texture and add small pom poms at the ends. A pair of macrame rings at the top gives it a little glam. It’s inexpensive and adds texture to any room.
Get the full tutorial at Kenarry: Ideas for the Home.
27. Fabric Flag Bunting
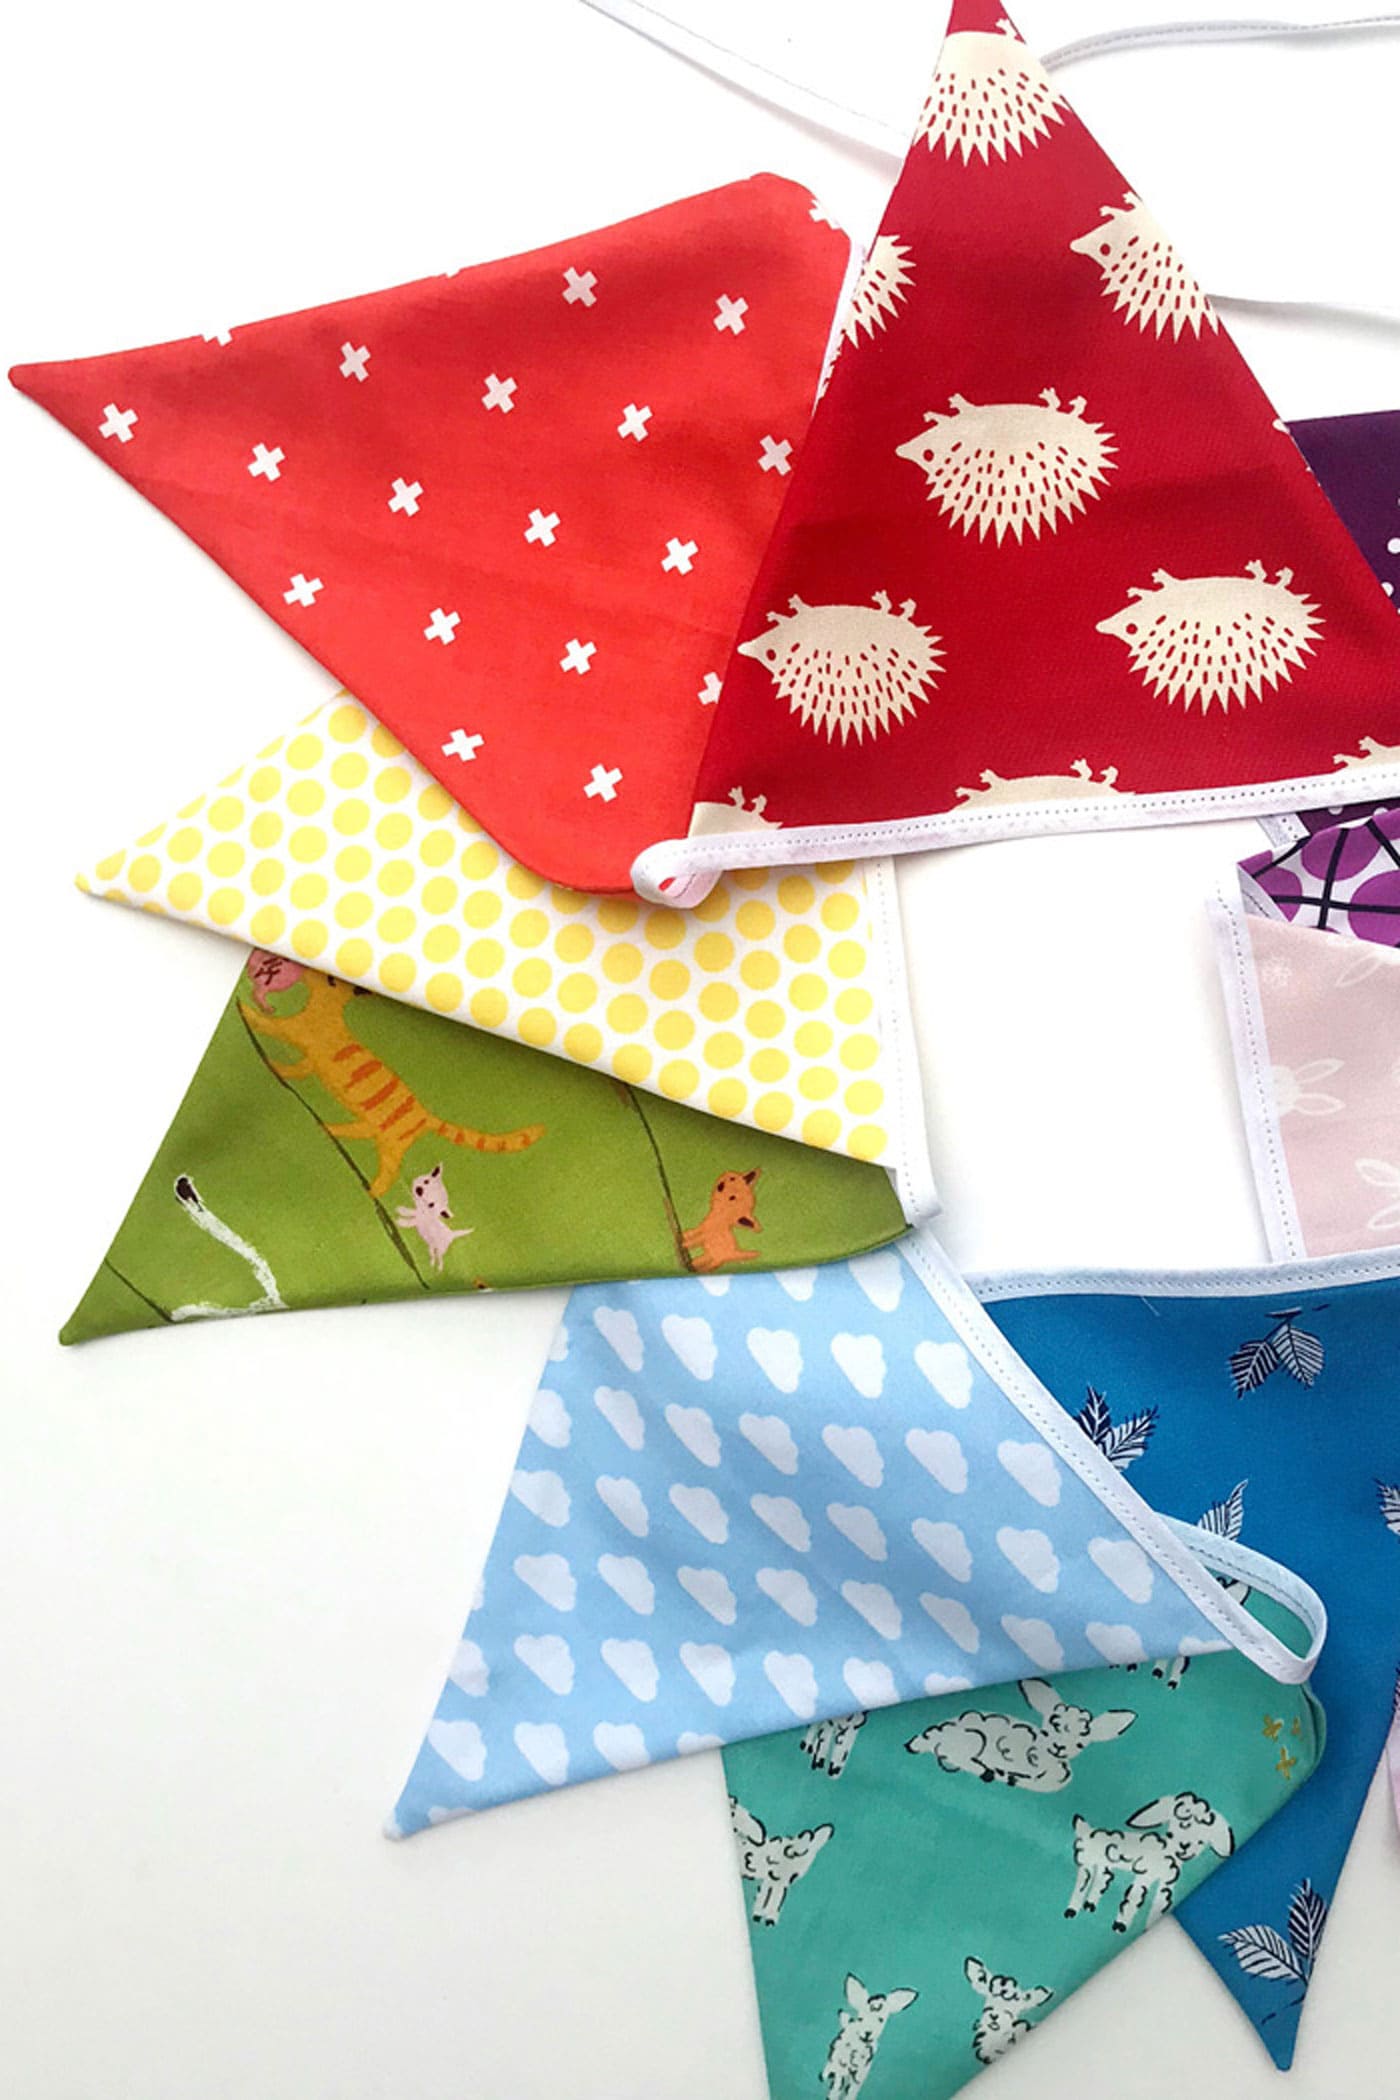
Bunting is a happy, classic touch in a nursery, and this version is made to last. Trace a triangle template onto fabric, sew each pair of flags right sides together, then turn them out and press so the points are crisp. Instead of leaving the top edges raw, slip every flag into folded bias binding and stitch along its length. Animal prints from your stash look adorable. The free template comes by email, and the full steps are on the page. Hang it on a wall, never above the crib!
Get the full tutorial at The Polka Dot Chair.
28. Cloud and Raindrops Pillow
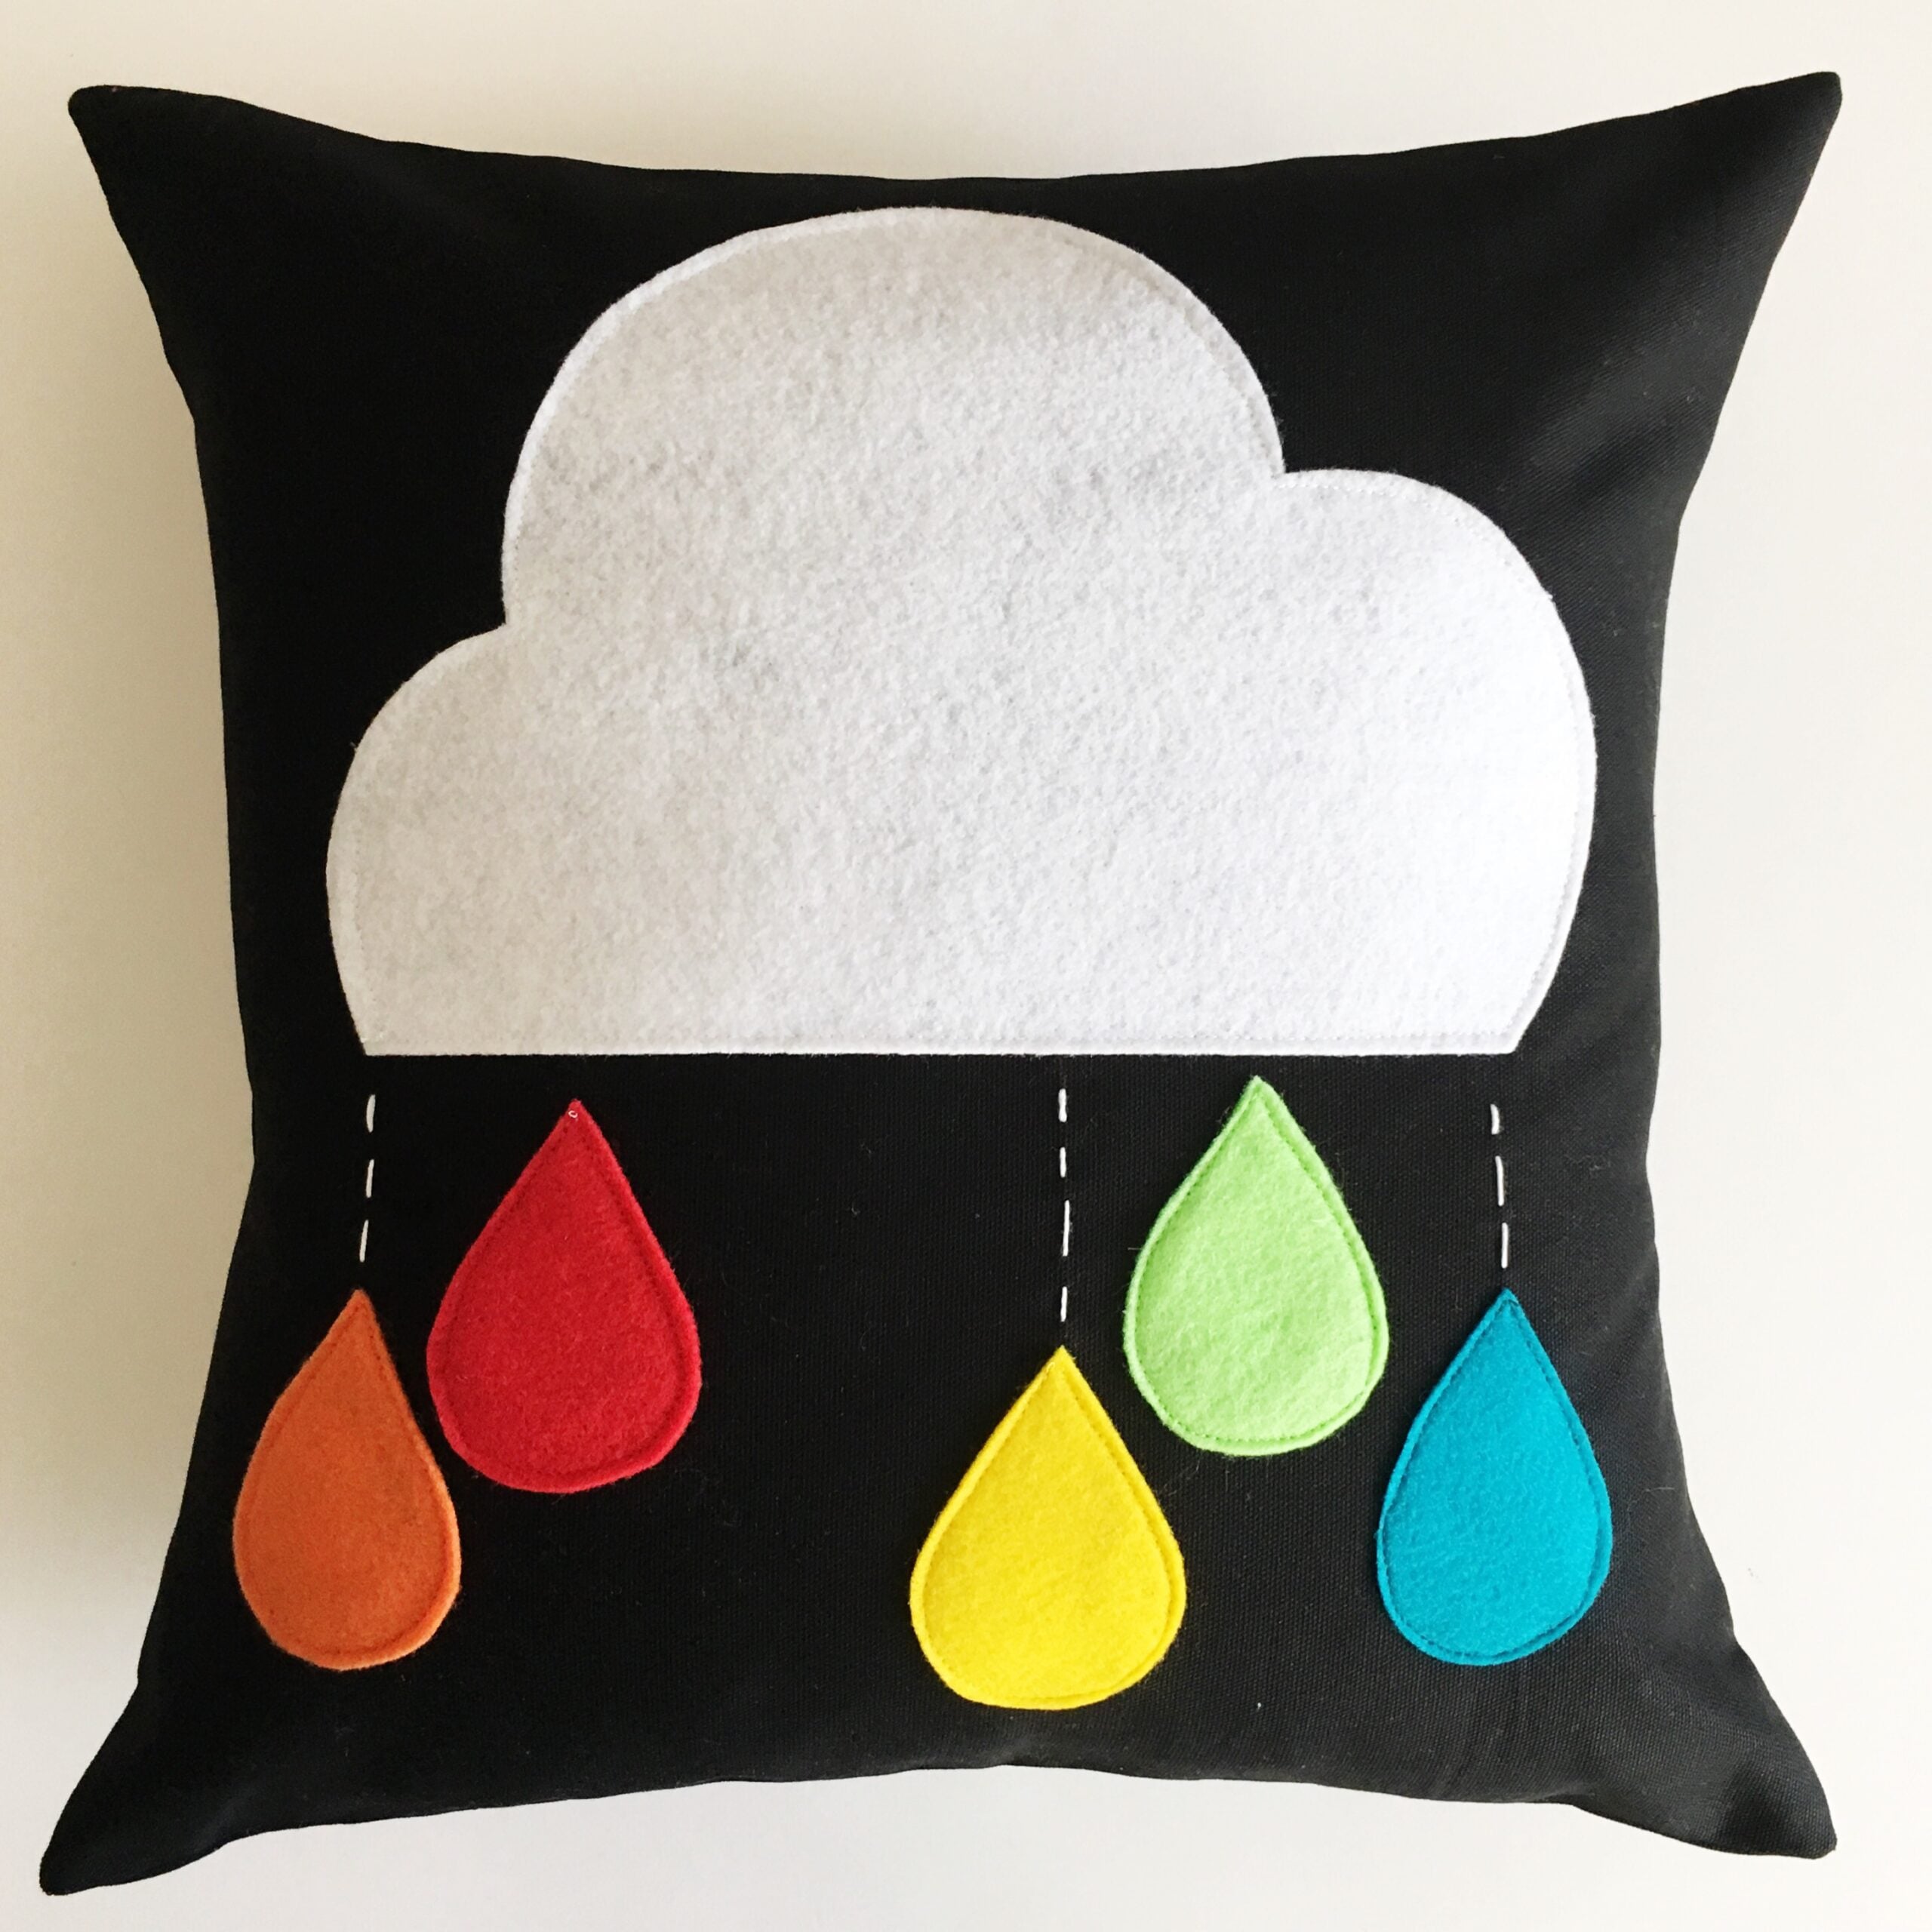
Brighten up a reading chair with this cloud and raindrops pillow! Cut one white felt cloud and five rainbow felt raindrops from the free printable templates, then arrange them on a black pillow front and hold them in place with a swipe of glue stick. Stitch around each shape with matching thread, add a few straight stitches in white floss to make rain, and finish the cover. It fits a 16 inch pillow form. A fun way to use felt scraps! Keep it on the rocker, not in the crib.
Get the full tutorial at Simple Simon and Company.
29. Painted Initial Canvas
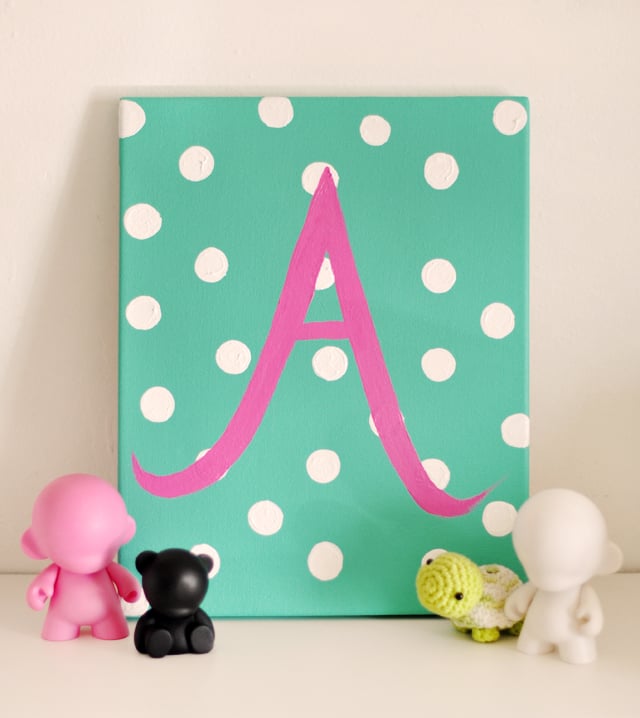
Looking for a handmade baby shower gift? Paint an initial canvas! Brush a stretched canvas, edges and all, in a color you love, then stamp polka dots with a wine cork and touch them up. Sketch the baby’s first initial with a white colored pencil, or use a stencil if you’d rather not freehand, and fill it in with a pretty pink. Add a second coat once it’s dry, since acrylics dry a little darker. It’s a keepsake that can hang in a little one’s room for years!
Get the full tutorial at …love, Maegan.
30. Rainbow Stamp Art Print
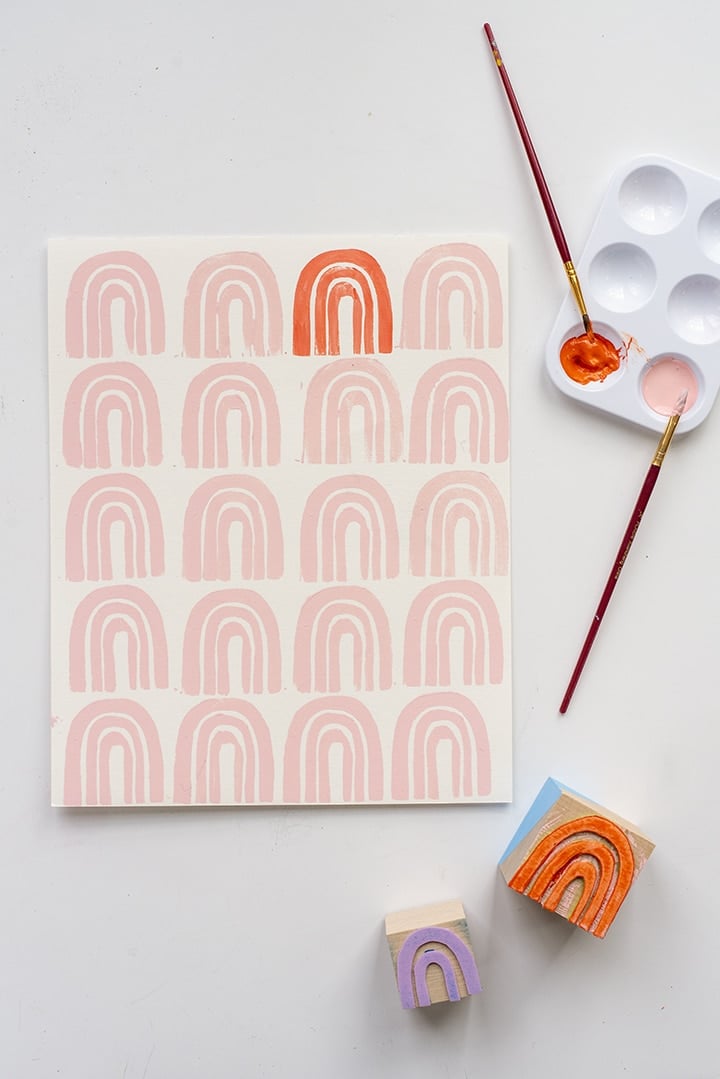
Make your own art print with a homemade stamp! Draw a rainbow on an adhesive foam sheet, cut it out and stick it to a small wood block. Brush or roll acrylic paint onto the stamp, then print rows of rainbows on watercolor paper, adding fresh paint between each one. Use one soft color with a pop of a brighter one for a modern pattern. Frame it with a mat for a high end look, or cut it into squares for a grid. Clouds and circles work too!
Get the full tutorial at Alice and Lois.
31. Animal Applique Nursery Pillow
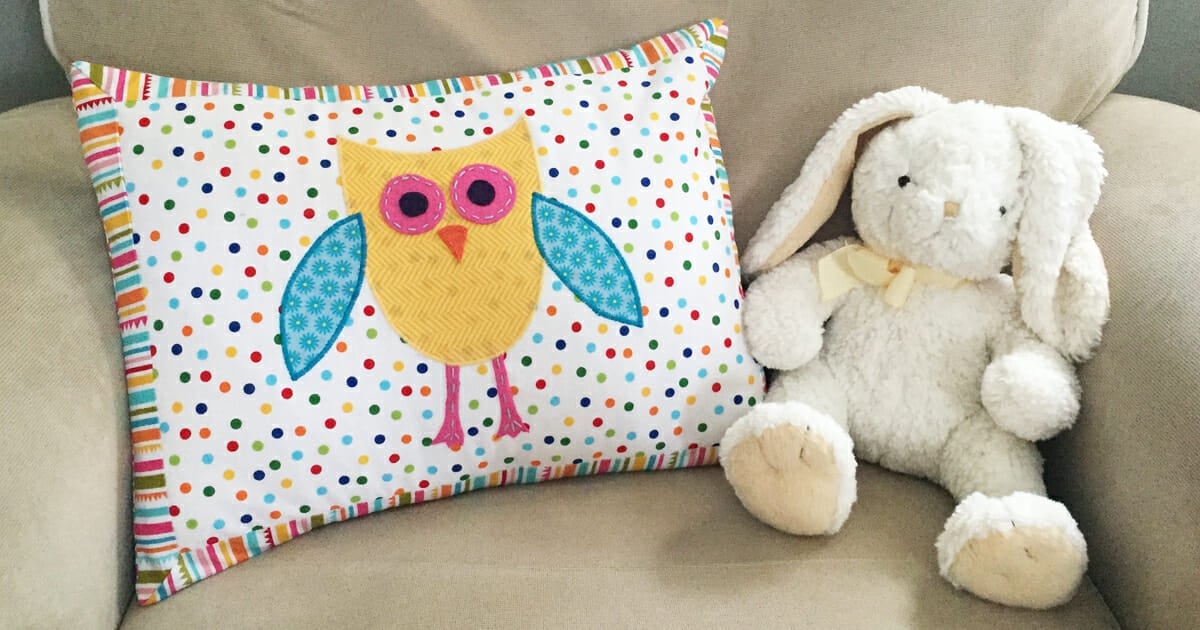
Add a pop of color to the rocking chair with a sweet animal pillow! You’ll trace a free owl, elephant or lion pattern onto fusible web, iron the pieces onto polka dot fabric and stitch around them with a tight zig zag. Felt eyes, a beak and little legs are stitched on by hand, then a striped border with mitered corners frames it all. An envelope back makes it easy to finish. It’s decor for the chair or shelf, so keep it out of the crib!
Get the full tutorial at Crafting Cheerfully.
32. Family Tree Nursery Printable
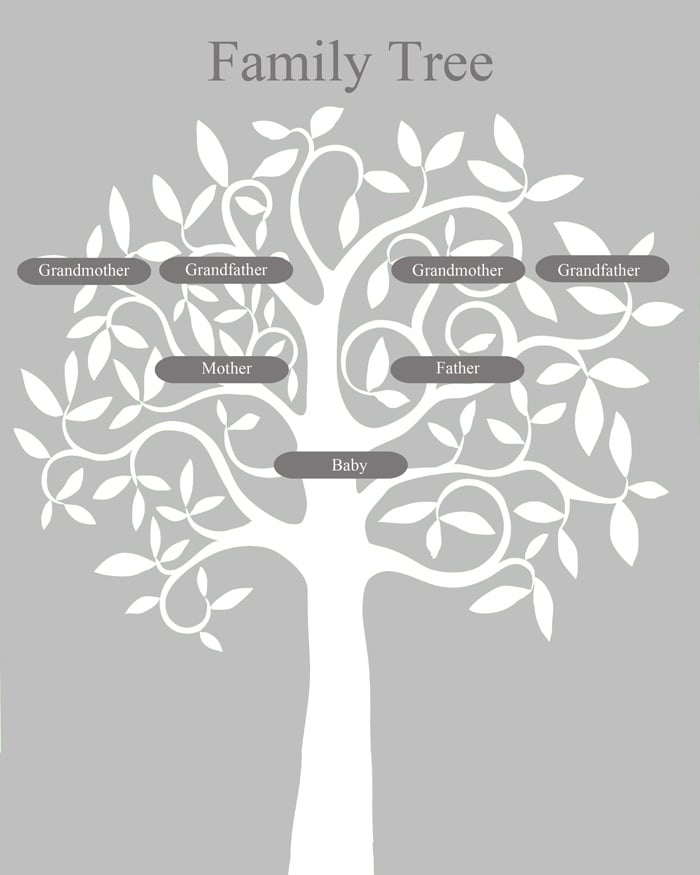
Looking for a quick nursery project or a budget friendly baby gift? This free family tree printable features a white tree on a soft gray background with little labels for the grandparents, parents and baby. Just download the graphic, type the family names into the gray rectangles, print it on glossy card stock or photo paper and trim it to fit a white 8×10 frame. It works with almost any nursery color scheme and adds such a personal touch!
Get the full tutorial at EPC Crafts.
33. Woodland Nursery Monogram
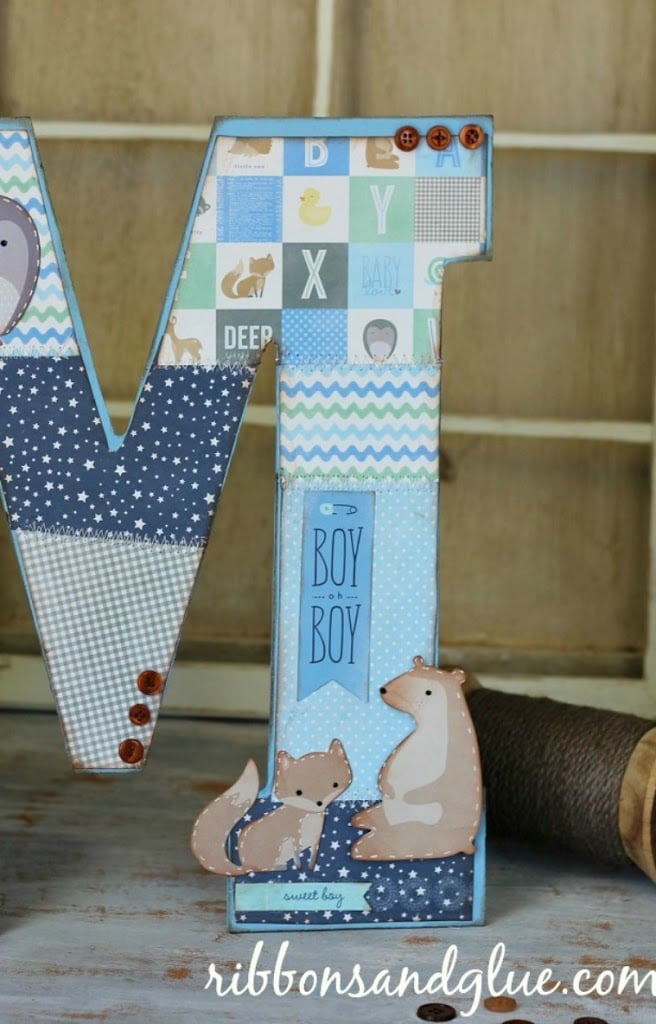
Make a big initial letter for a woodland nursery! This one starts with an MDF letter covered in blue patterned scrapbook papers, stitched together with a zig zag stitch and sealed down with Mod Podge. Then the fun part: add buttons, stickers and die cut critters like owls, foxes, bears and deer. Swap in any letter and any paper collection to match your theme. Set it on a dresser or shelf, or hang it on the wall well away from the crib!
Get the full tutorial at Ribbons & Glue.






