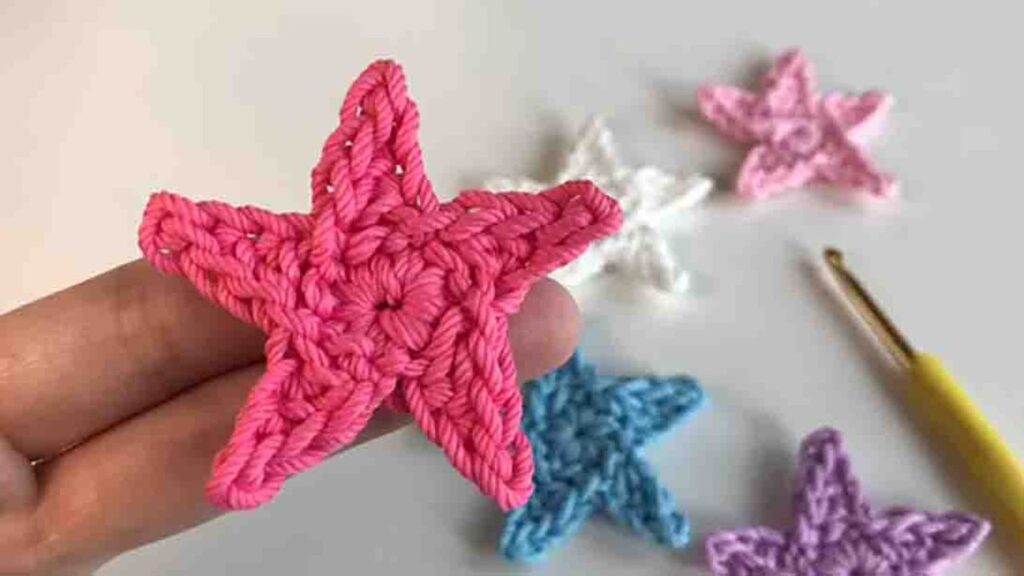
I’ve been learning to crochet these past few days, and one of my favorite projects is this little star crochet from GratiaProject on Youtube. It’s a beginner-friendly project that you will surely have fun doing when you’re just starting out. I’ve made plenty of these in different colors and enjoy sewing them on my self-made clothes. It’s really fun, and designing is endless. It’s also a good weekend project to do with your friends. Make this today and see for yourself! Watch the video tutorial below to learn the step by step instructions.
Materials:
- worsted-weight yarn
- 7/0 – 4.0mm (G) crochet hook
- tapestry needle
- scissors
- glue
- (click here for the free pattern)
Directions:
Step 1
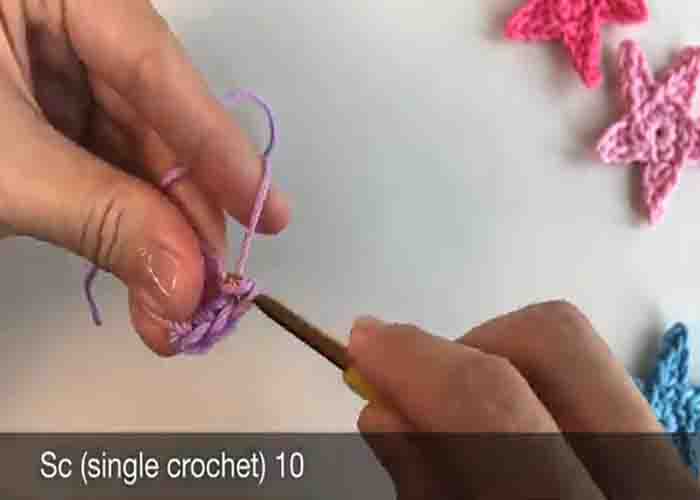
To start, make a magic ring. Do one chain, then ten single crochet. After this, pull the tail. Next, do four chains, then slip stitch in the second stitch from the hook. Single crochet in the next stitch, then half double crochet in the next stitch. After this, slip stitch in the second stitch from the first single crochet in the first step.
[social_warfare]
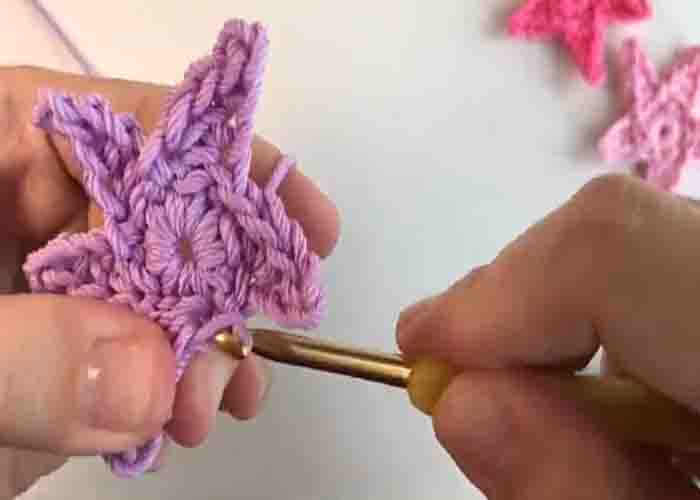
Step 2
Repeat the pattern four times to make the star. Once done, cut the yarn, pull the tails tightly, then tie one knot to secure. Cut the excess afterward. Your DIY little star crochet is now finished!
DIY Little Star Crochet Tutorial


