Buying for a sports fan is the same three gift ideas on a loop, and every one of them has their team’s logo printed on it. These 21 DIY ideas for the sports fan go at it from the other direction. A few are decor that lives in a room all year, a baseball wreath on the front door, curtain rod ends made from two real balls and a drill, hockey sticks turned into wall art. Most of the rest are game day, and cheap: artificial turf off the roll becomes a football field tablecloth, ten cups of popcorn become team colors for about three dollars, and free printable labels dress a table in twenty minutes. Sort by which one you need, a present or a party.
DIY Gift Ideas for The Sports Fan
1. Cubs Baseball Uniform Mason Jar

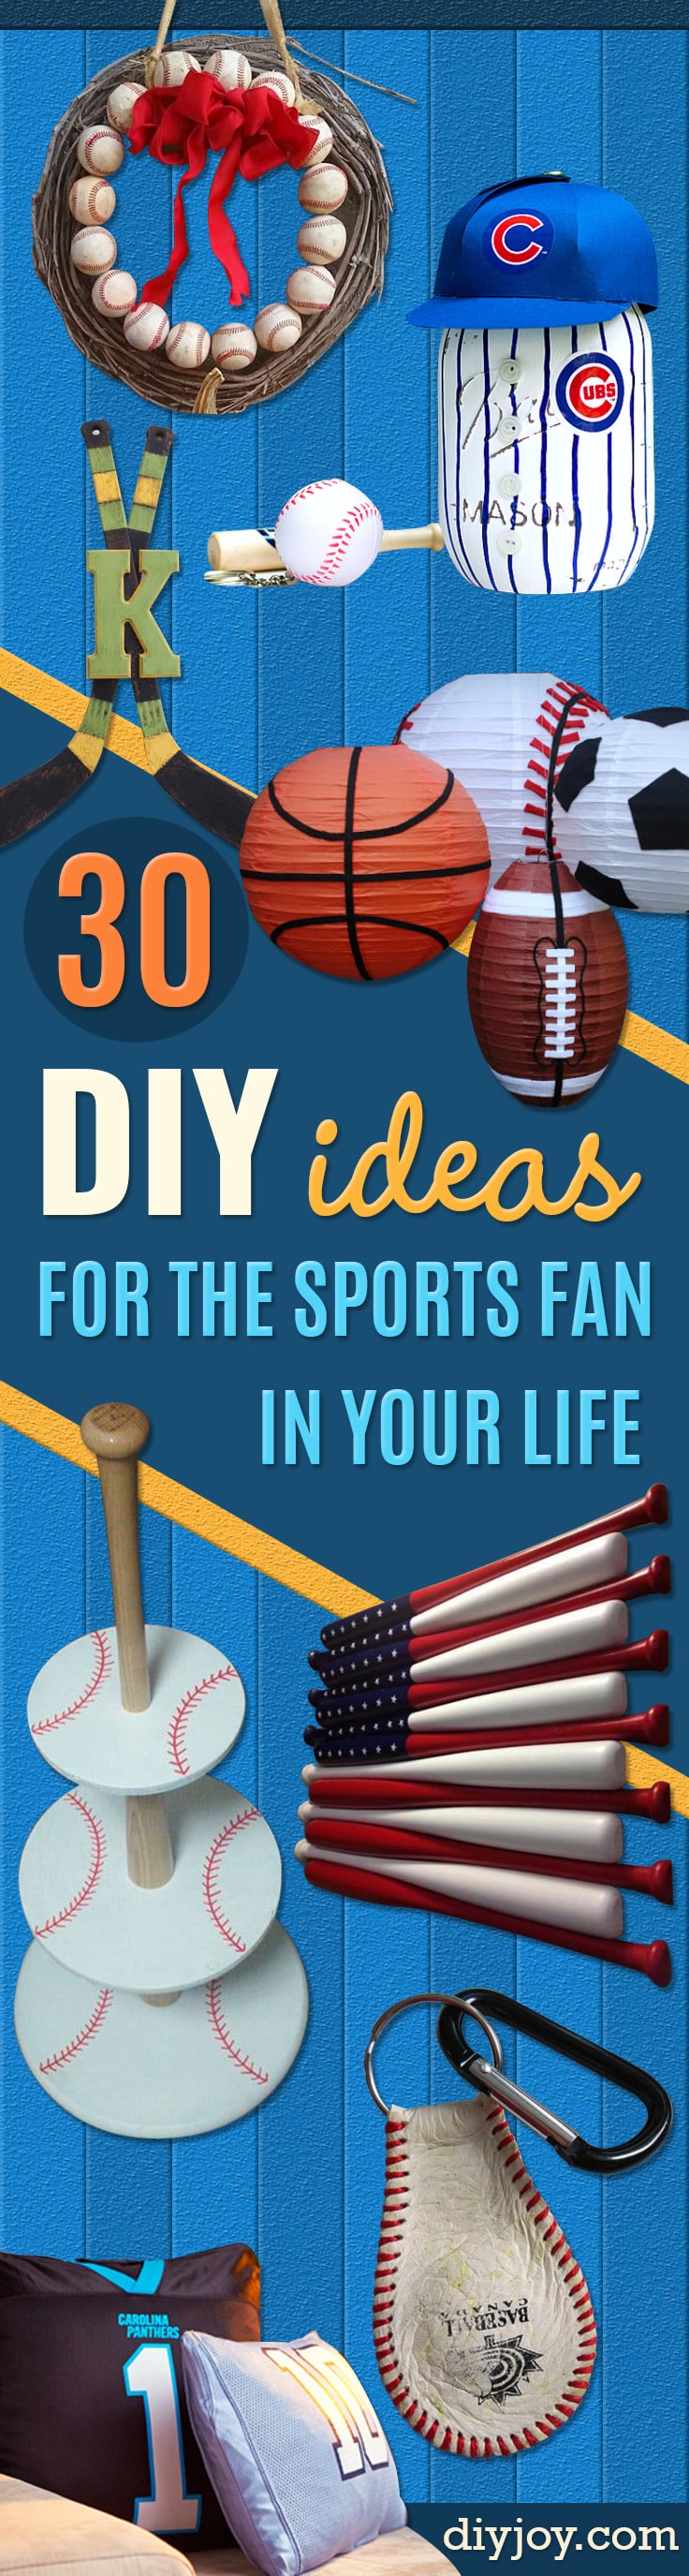
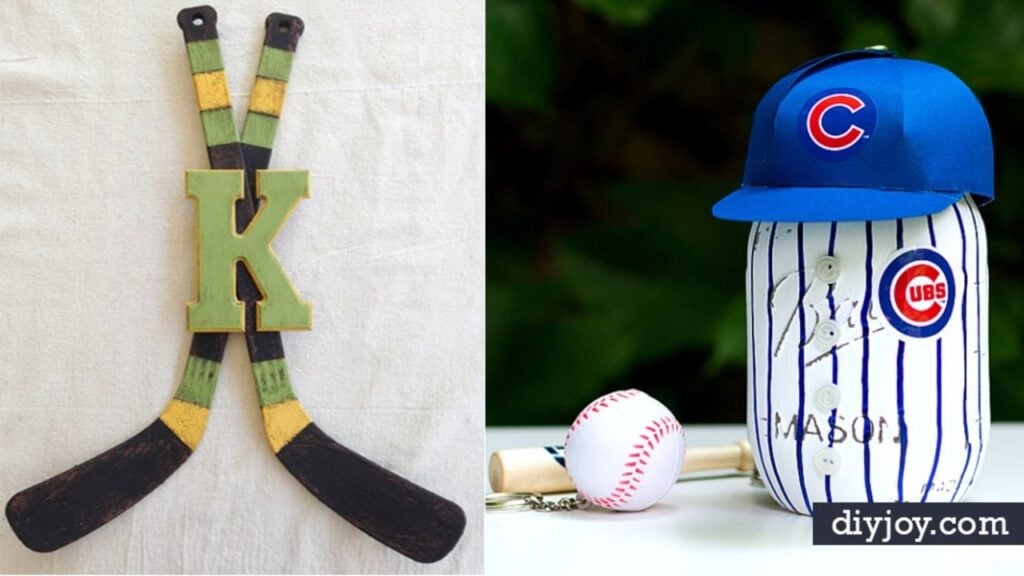
Two coats of white chalk paint or plain acrylic, left a full twenty-four hours, then distressed with 80 grit sandpaper, concentrating on the raised lettering so the word Mason comes through the paint. A paint pen draws the line under the threads for the collar and then the vertical pinstripes, freehand, all the way round. Four small buttons glued down the front make the placket, and stickers supply the team logos. The cap is card stock, folded from a separate tutorial the maker links. Not a drinking glass: the paint is water soluble and she says so plainly.
Get the full tutorial at Linda at Mason Jar Crafts Love.
2. Football Water Bottle Labels
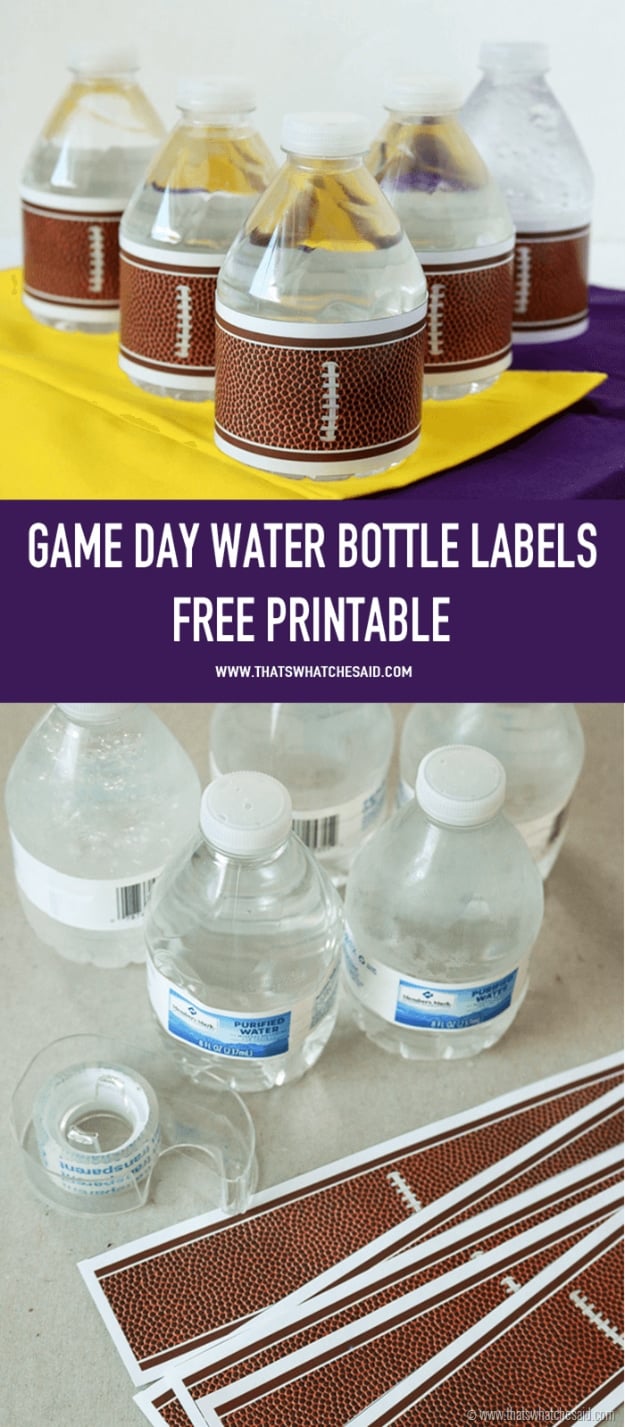
A free printable that turns a flat of supermarket water into something that looks planned. Print on bright white glossy text paper, which she specifies because it holds up to the condensation that turns ordinary paper soggy within the hour. Cut along the lines with scissors or a rotary cutter, then wrap each one straight over the existing label, no peeling required, and tape it closed. The same strips work as napkin rings, wrapped round mason jars, as gift bag bands, or linked into a paper chain. Free for personal use, and the download version arrives without the watermark.
Get the full tutorial at That's What Che Said.
3. Baseball Keychain
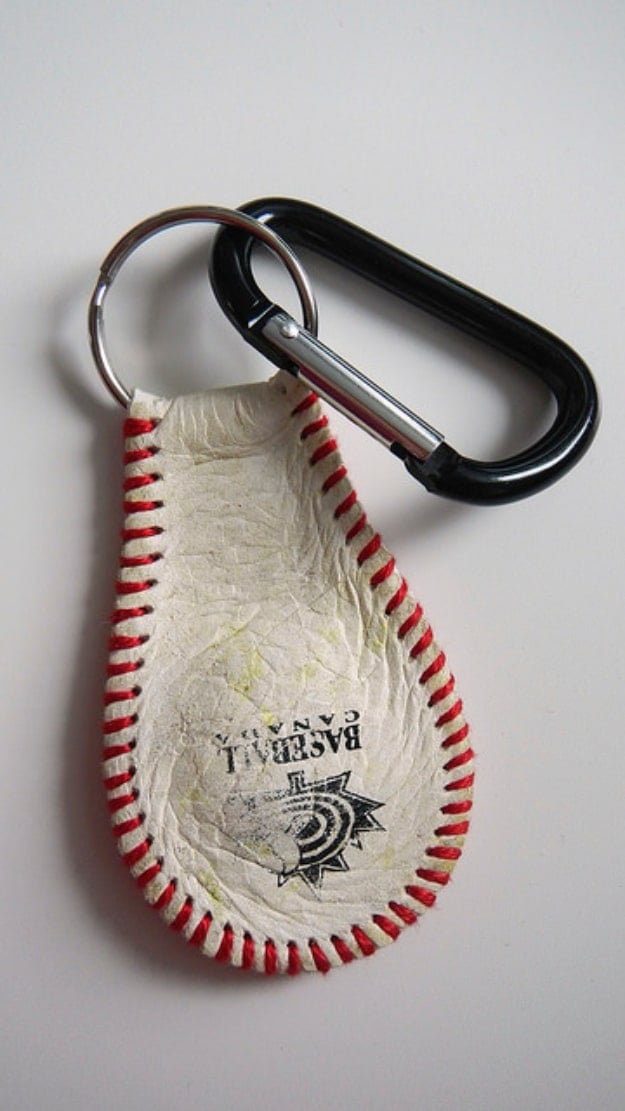
Cut a real leather baseball open along the seam with a craft knife, peel the two panels off the ball of twine inside and pull out the old stitching. Each panel is already a teardrop, and the leather is tacky enough that it sticks to itself when folded. Thread a jump ring on and slide it to the narrow end before you fold, then whip stitch the edges with doubled red embroidery floss, running the new stitches along the old grooves so they line up. Tie off and tuck the knot between the folds. A weathered ball looks far better than a new one.
Get the full tutorial at Ali Does It.
4. Sports Themed Sleeve Scrunchies
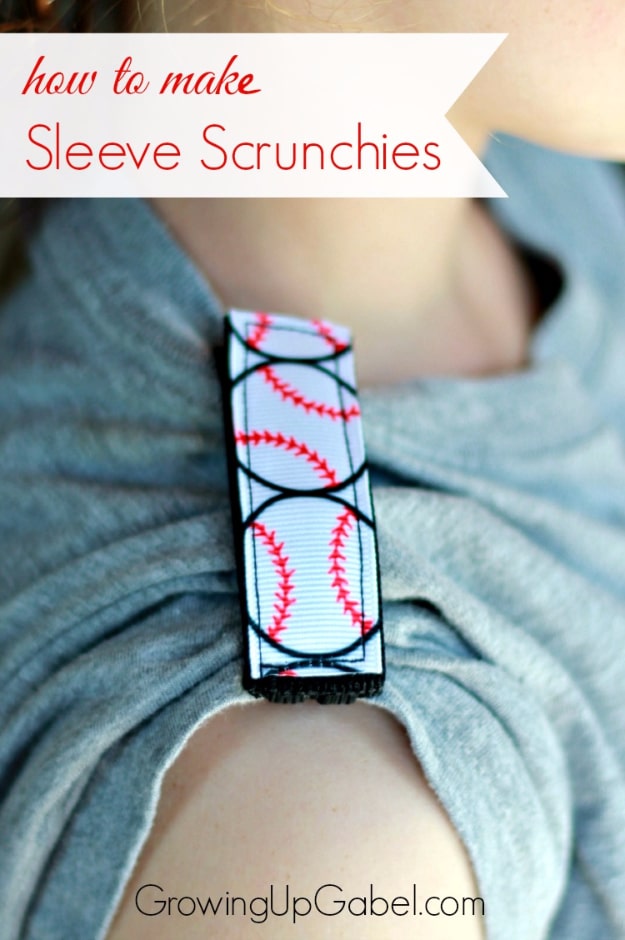
They hold a rolled-up short sleeve in place while a child plays, and the cut list is the whole project: 20 inches of quarter inch elastic cut into four 5 inch pieces, 12 inches of one inch nylon webbing cut into two 3 inch and two 2.5 inch pieces, 6 inches of Velcro and 6 inches of decorative ribbon, both cut in two. Burn the cut ends of the webbing and ribbon briefly with a lighter so they do not fray. Sandwich half an inch of elastic between webbing and Velcro and stitch round the Velcro, going over the elastic end twice.
Get the full tutorial at Alison, contributing at Growing Up Gabel.
5. Easy Football Field Tablecloth
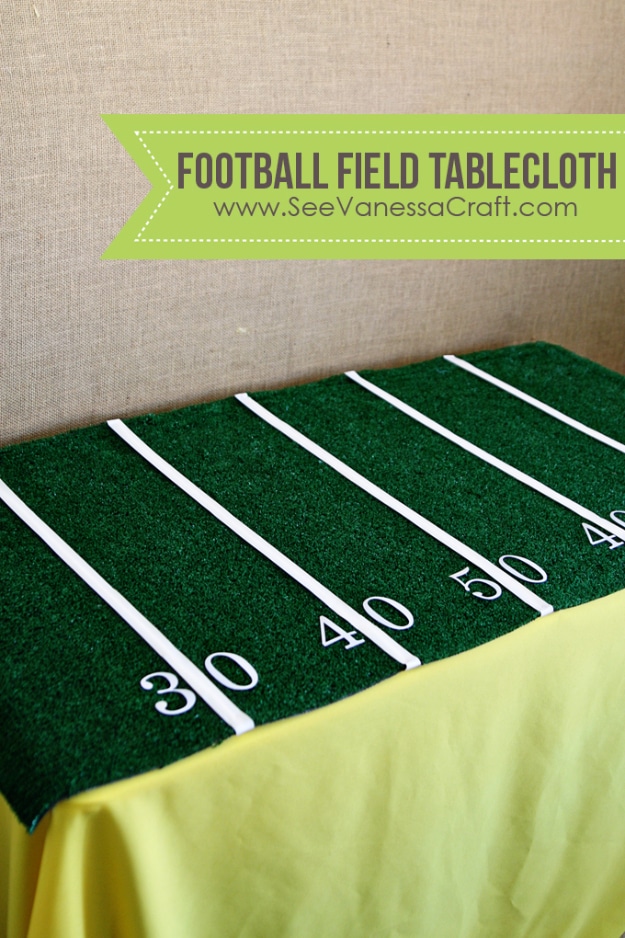
Artificial turf off the roll, which most hardware stores sell by the foot, cut to your table at the shop so you barely have to trim. Divide the length into six equal parts and lay thin white vinyl tape across each division for the yard lines. Then cut “30, 40, 50, 40, 30” from white adhesive vinyl on a cutting machine, in Helvetica, which she notes is the closest common font to real field lettering, and place them along the tape. Vinyl adhesive is not permanent, so glue everything down if it is coming out more than once. Use the scraps for bunting.
Get the full tutorial at Vanessa at See Vanessa Craft.
6. DIY Baseball Diamond Bulletin Board
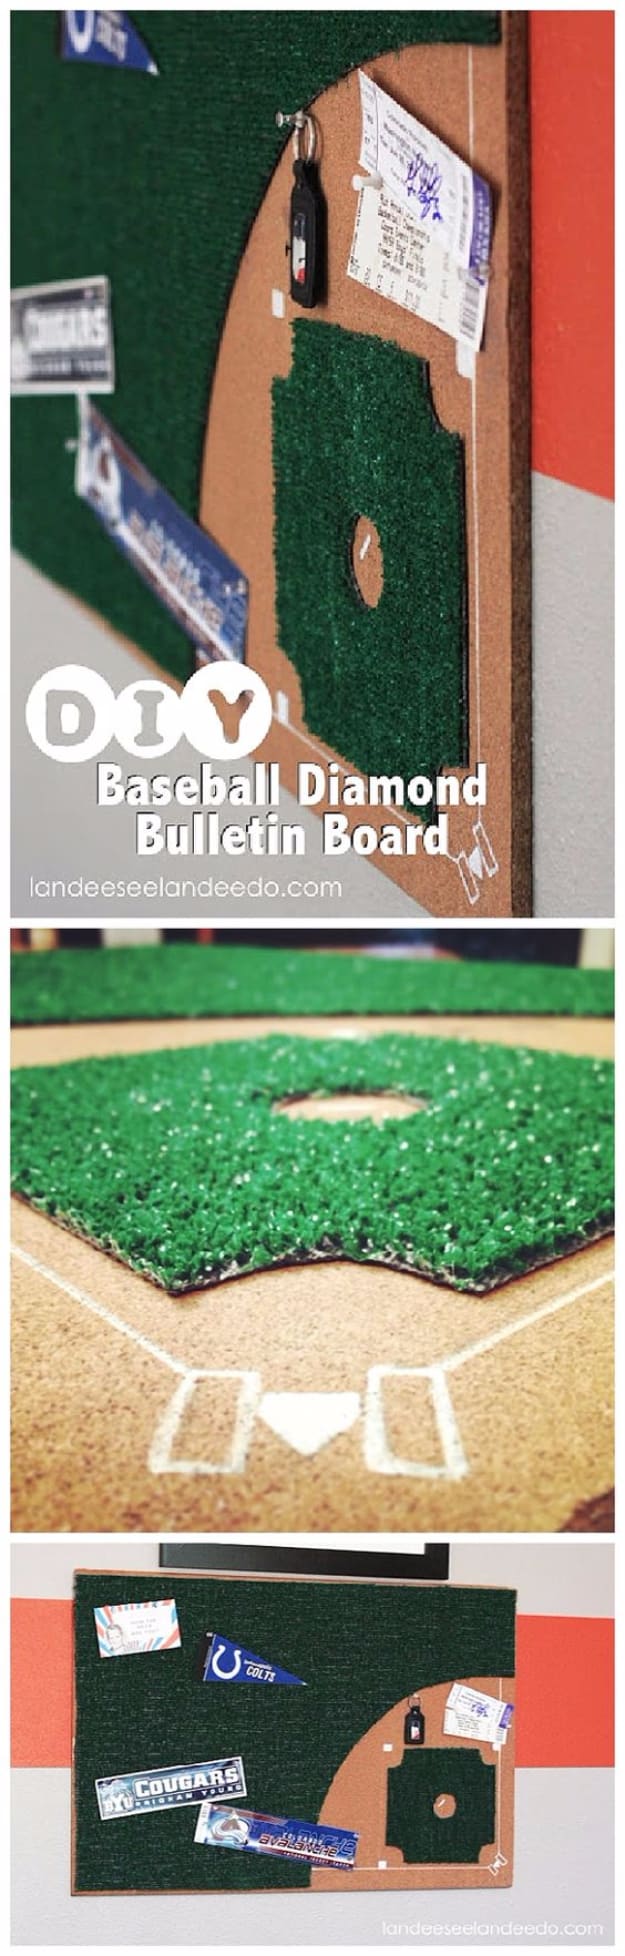
A cork board with the outfield cut from bright green artificial grass and glued straight on, the bare cork left showing as the infield, and the baselines, the bases and home plate painted on in white. The photographs show tickets, a signed stub, a set of keys and team pennants pinned across it, which is the point of the thing, because a sports bedroom fills up with ticket stubs and schedules and nowhere to put them. Artificial grass is sold by the linear foot in the carpet aisle, and a couple of feet covers a board, so the whole thing costs a few dollars.
Get the full tutorial at Landee See Landee Do.
7. Stress Free Football Party
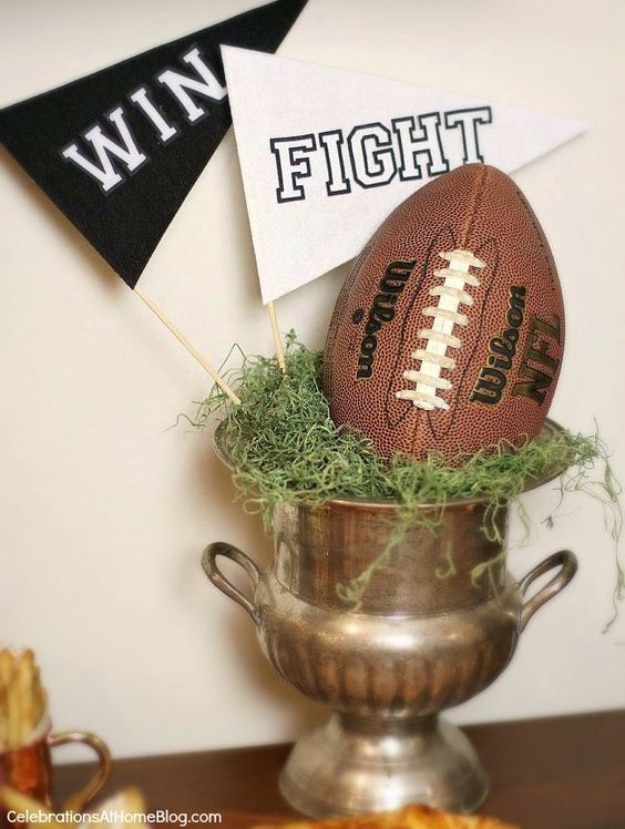
Eight tips rather than one project, and the useful ones are about staging. Put the food on a console or coffee table instead of a dining table so nobody misses a play fetching seconds. Serve something unexpected and small, mini hot dogs with a build-your-own topping bar. Serve food in the hand, chips in mule cups lined with parchment. Make a pizza into a football with thin strips of sliced cheese laid down the middle as the laces. And keep the decor neutral, black and white felt pennants read as referee rather than as a team, so the same set works every year.
Get the full tutorial at Celebrations at Home.
8. Baseball Door Hanging
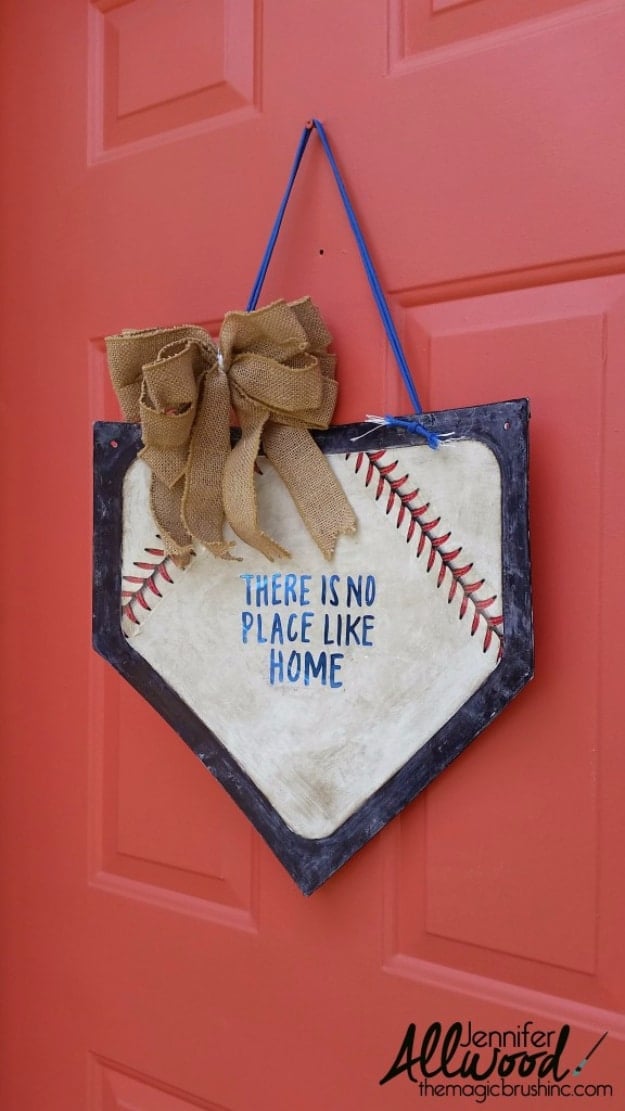
It starts as a rubber home plate out of a cheap lightweight base set, not a piece of wood. Rub on a dark walnut gel stain thinned with a little paint thinner so the plate looks played on rather than crisp white, and leave it overnight. The edges are gone over with an oversized Sharpie, because paint peels off rubber and marker soaks straight in. The red stitching is a clear backed stitch tape laid over the glaze rather than painted on, and the saying across the middle is a sticker set, super glued at the edges so it cannot roll.
Get the full tutorial at Jennifer Allwood, The Magic Brush.
9. Chip And Dip Station For Game Day
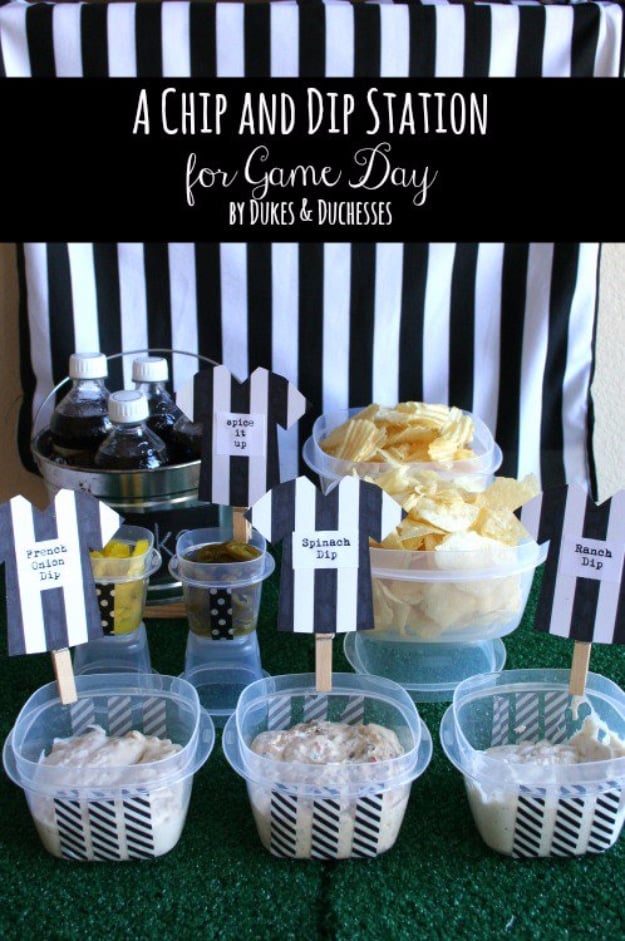
Referee stripes instead of team colors, which is the decision that makes the whole table reusable forever. Black and white striped fabric behind it, black washi tape striped onto clear storage containers, and food labels cut as little referee shirts from white card, ruled with a black marker and hot glued onto wooden clothespins so they clip straight onto the edge of a dish. Dips are mixed the day before and stay in their lidded containers all the way from the fridge to the table and back. Stack spare containers underneath to give the spread some height.
Get the full tutorial at Dukes and Duchesses.
10. DIY Hockey Stick Decor
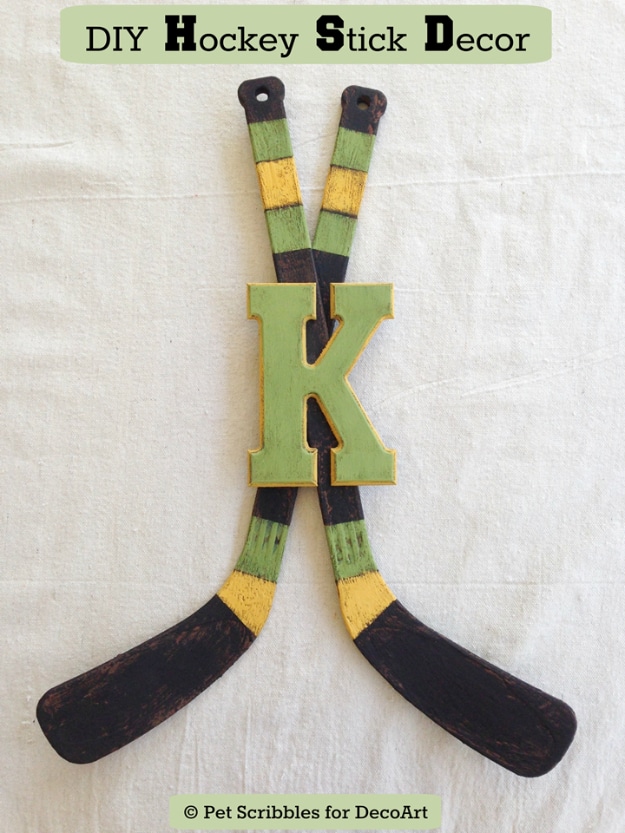
The two hockey sticks are plastic children’s toys, which is the part nobody guesses. She painted them to look like chipped old wood, greens and golds with the blades worn to black, and crossed them behind a plain unfinished wooden letter from the craft store painted to match. So this is a faux finish project rather than a woodworking one, and you can make it without owning a hockey stick or a saw. The monogram is what turns it from generic sports decor into something for a particular family, and it hangs on a bedroom wall or in a den.
Get the full tutorial at Laura at Pet Scribbles, project made for DecoArt.
11. Baseball Front Door Wreath
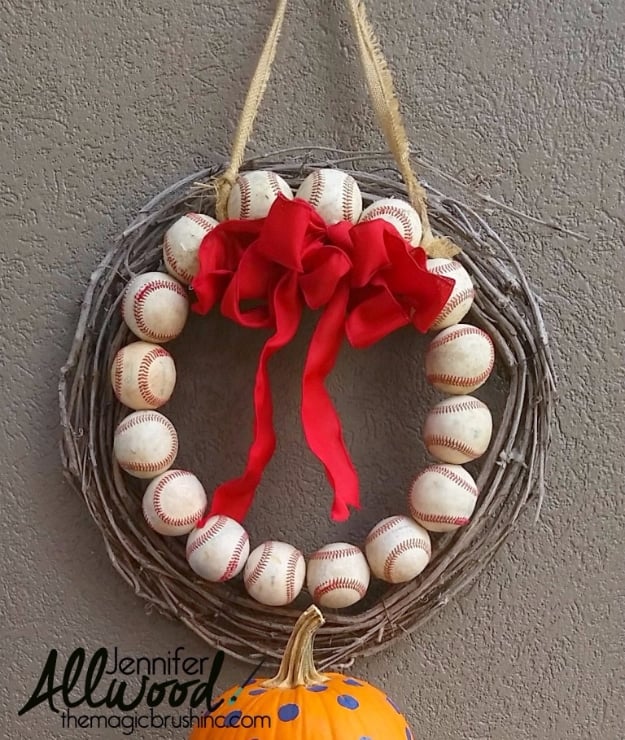
Sixteen real baseballs, drilled through, threaded onto a single ring clipped out of a craft store wreath frame and set inside a grapevine base. Real balls are heavy and that is the thing to plan for: feeding the two loose wire ends back through the nearest holes was not enough on its own, so glue went down into the holes of the bottom few balls and the whole wreath dried lying flat overnight. A burlap strip tied around the frame between two balls hangs it. The scuffed, grass stained ones from the garage look better than new. Under two hours, start to finish.
Get the full tutorial at Jennifer Allwood, The Magic Brush.
12. Upcycled Hand Painted Decoupage Sports Lovers Chair
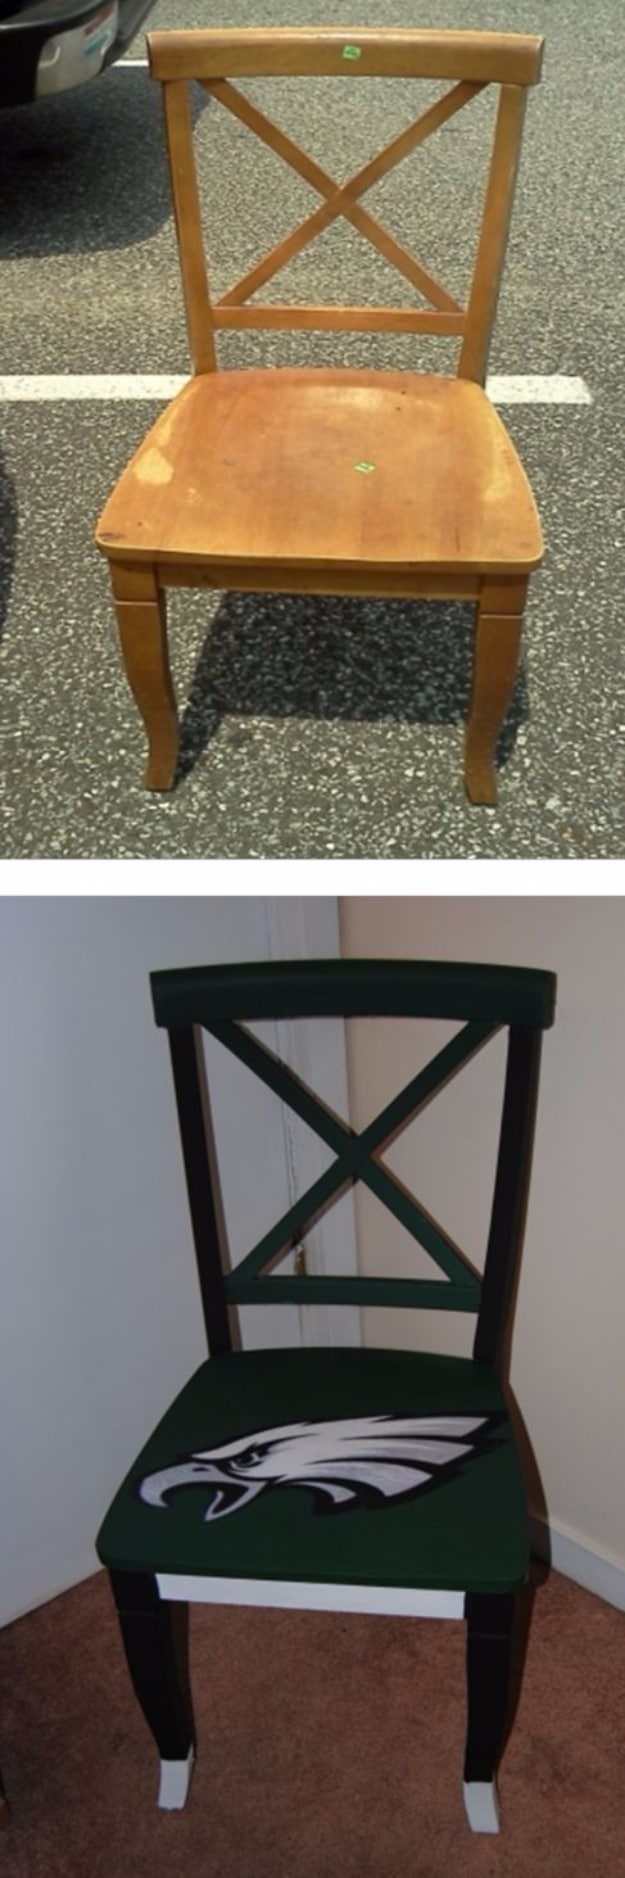
A six dollar thrift shop chair, cleaned and then given two coats of white latex primer, which is what lets paint grip a lacquered finish without sanding it first. The team logo is printed on paper, cut out and glued down with matte Mod Podge before any color goes on, then covered with a few more coats so stray paint wipes straight off it. Two coats of acrylic in the team’s two colors follow, and the whole chair is sealed with Mod Podge afterward, four coats on the seat where the wear happens. Nothing here needs a workshop.
Get the full tutorial at On The Upcycle.
13. DIY Baseball Curtain Rod Ends
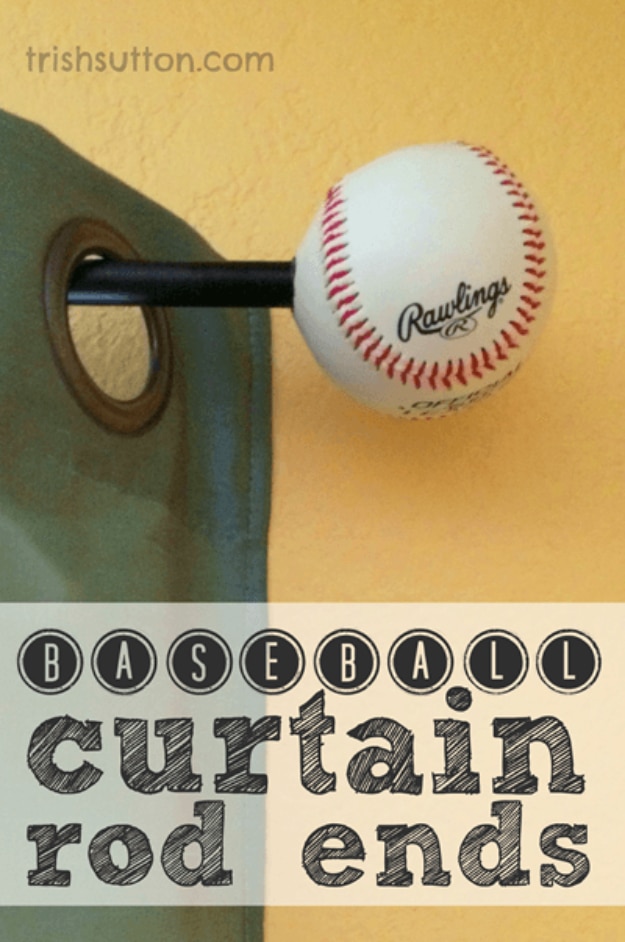
Buy a plain curtain rod, throw away the finials it comes with, and drill a hole into a new baseball for each end. The only real technique is in the drilling and her husband worked it out the sensible way: start with a small bit and go progressively bigger until the hole matches the rod, rather than going straight in at full size and splitting the leather. The ball then pushes on as the finial. It is a ten dollar change that quietly finishes a sports bedroom, and it works just as well in a playroom or a games room.
Get the full tutorial at Trish Sutton.
14. Easy Football Field Party Table
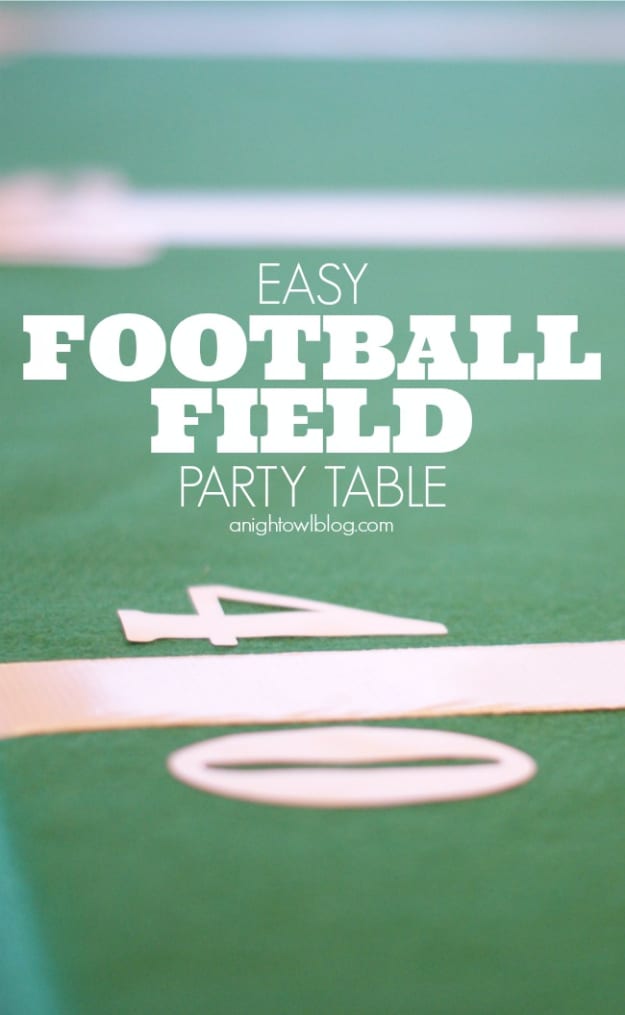
Green felt rather than turf, which makes this the indoor, cheaper, softer version of the turf tablecloth above. Buy enough felt to cover the table surface, tape it down underneath to hold it, then mark where the yard lines go and lay white duct tape along each one. Cut the numbers from white vinyl on a die cutting machine, or buy pre-cut numbers, or trace and cut them by hand if you have neither. Stick them down either side of the tape lines. She used a 40 percent off coupon on the felt, which is the correct way to buy felt for anything this size.
Get the full tutorial at Kimberly at A Night Owl Blog.
15. DIY Baseball Clock

A plain round wood blank and a set of brass clock parts, aged into something that looks like it came out of an attic. The brass hands and numbers are spray painted navy first, because brass was the wrong note. The face is painted white, then the aging is a mixed glaze, clear creme wax with a touch of dark brown and gold craft paint stirred in, rubbed on with a rag and wiped back in places so it looks worn unevenly. The stitching is traced round a paper plate in pencil, gone over in black Sharpie and then red for the stitches.
Get the full tutorial at Gillian at My Life From Home.
16. Clean Your Skateboard Properly
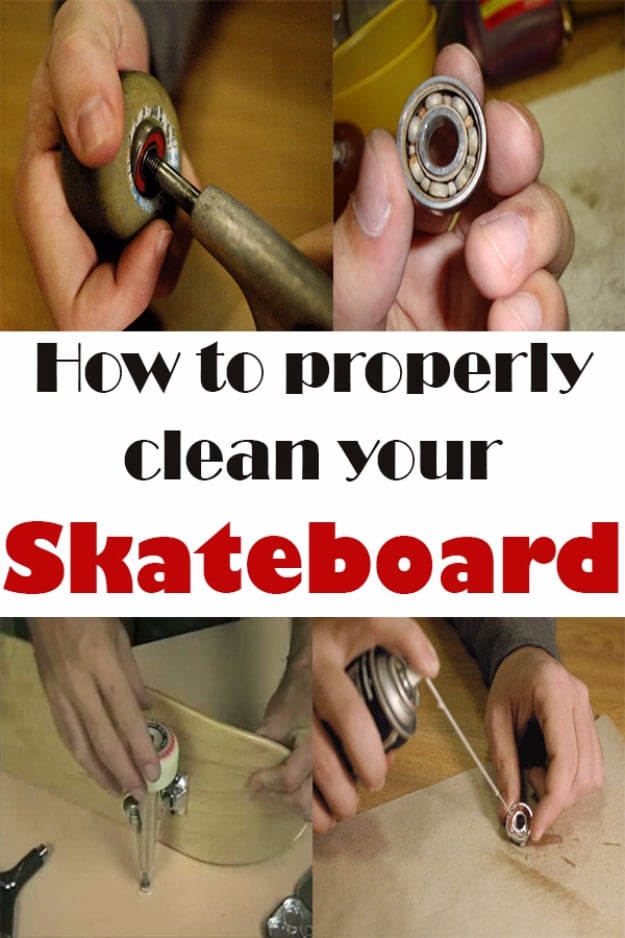
Maintenance rather than a craft, and it belongs here because a board that has never been stripped rides like it is dragging a brake. Take the wheels off with a wrench to get at the bearings, easing them out with a little oil around the edge. Submerge the bearings in a dish of cooking oil, sunflower or olive, then brush the grit off with an old makeup brush or cotton swabs. Never use water, because they rust. Wipe off the excess oil, reassemble, tighten anything loose, and finish by wiping the deck with a damp cloth and drying it immediately.
Get the full tutorial at Simple Tips for You.
17. Seattle Seahawks Popcorn
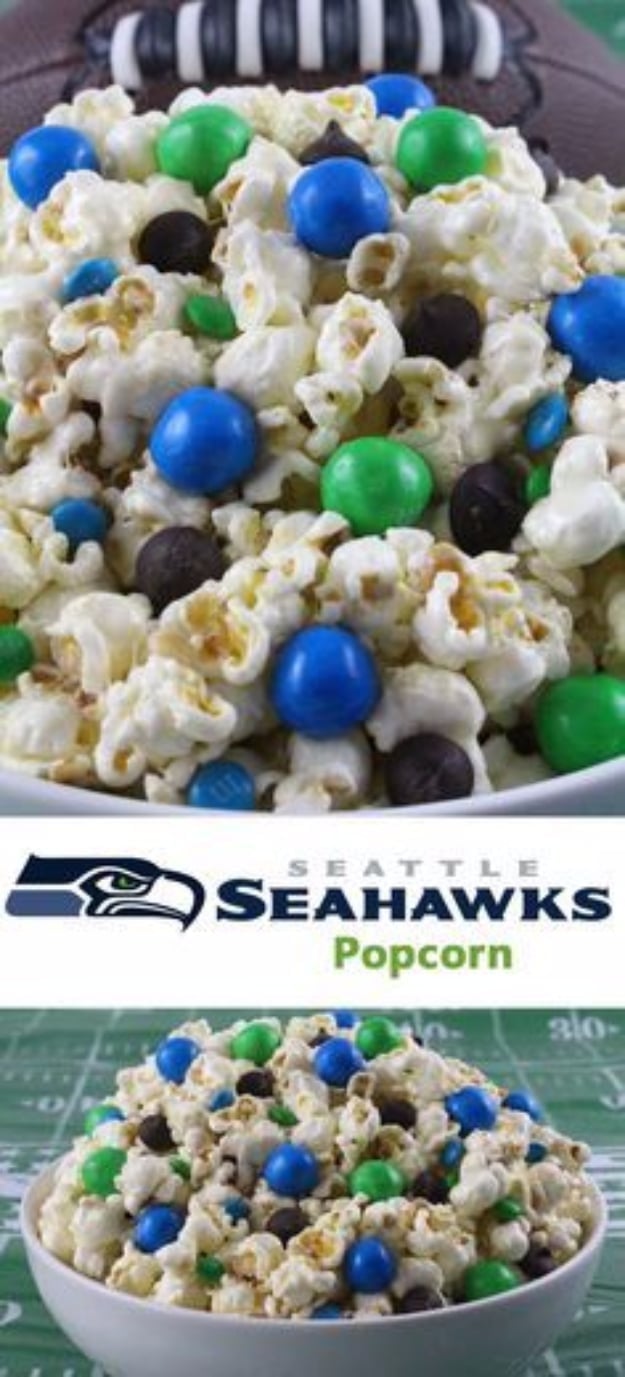
Start with about ten cups of popcorn and pick out every unpopped kernel first, which is a boring five minutes that saves a tooth. Salt it generously, because the salt against the marshmallow is the whole appeal. Melt three tablespoons of butter, add three cups of mini marshmallows, stir until the last one goes and take it straight off the heat. Fold the mixture through the popcorn a little at a time, tasting as you go, since more mixture means stickier. Spread it on a lined sheet and throw on candy in team colors while it is still tacky.
Get the full tutorial at Nancy at Two Sisters.
18. Baseball Food Labels
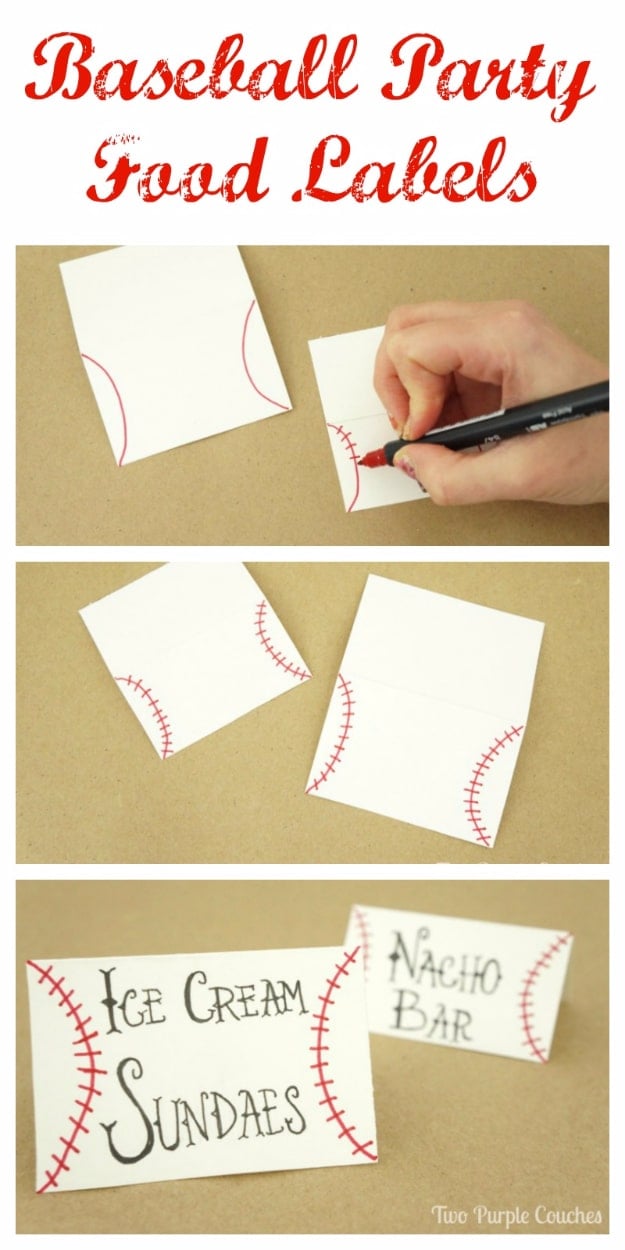
Card stock, a red marker and a black pigment liner, and that is the whole supply list. Trim the card to about three by four inches, or bigger if the words are longer, fold it width-wise down the middle so it stands as a tent card, then draw a curved red line down each side with small hash marks through it to make the stitching. The lettering is hand drawn in a vintage sports style with the black liner. Fold the card the other way and tape it round a skewer if you want labels on sticks instead, and there is a font version for anyone who would rather print.
Get the full tutorial at Two Purple Couches.
19. Sports Paper Lanterns
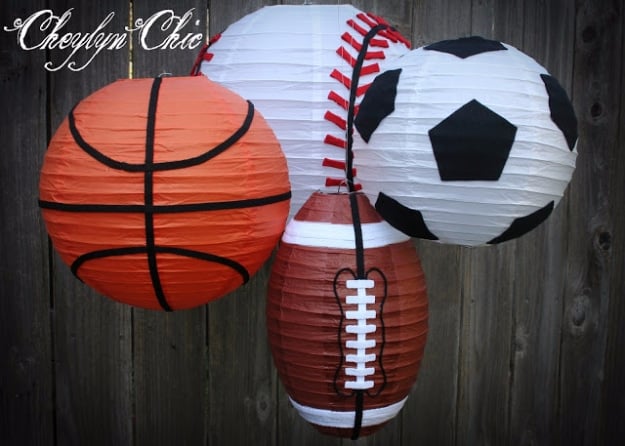
Four paper lanterns painted as a basketball, a baseball, a football and a soccer ball, hung together against a weathered fence. The football is the clever one, because a round lantern squashed and re-shaped reads as an oval, and the laces are painted on in white. Round paper lanterns cost a couple of dollars each in any party shop, and acrylic goes onto the paper fine if you work in thin coats rather than soaking it. Group them at different heights over a party table or a bed, which is where the effect comes from.
Get the full tutorial at Cheylyn Chic.
20. DIY Balloon Football Goal Post
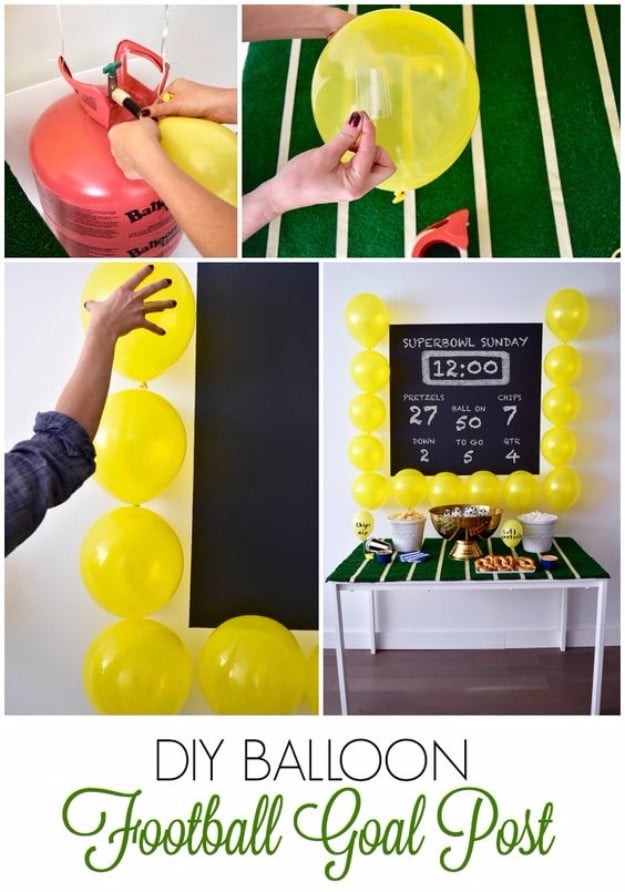
Fifteen standard eleven inch balloons, each with a piece of heavy duty packing tape stuck on the back, lined up on the wall in a U to make the uprights and the crossbar. The trick is not to over-inflate them: about three quarters full keeps them round, and round balloons make an even post. The table underneath is lined with a piece of astroturf from the hardware store with masking tape laid across it for the yard lines. The whole set up took under thirty minutes, and a white balloon with a helmet drawn on in Sharpie finishes it.
Get the full tutorial at Little Miss Party Planner.
21. Baseball Cupcake Holder
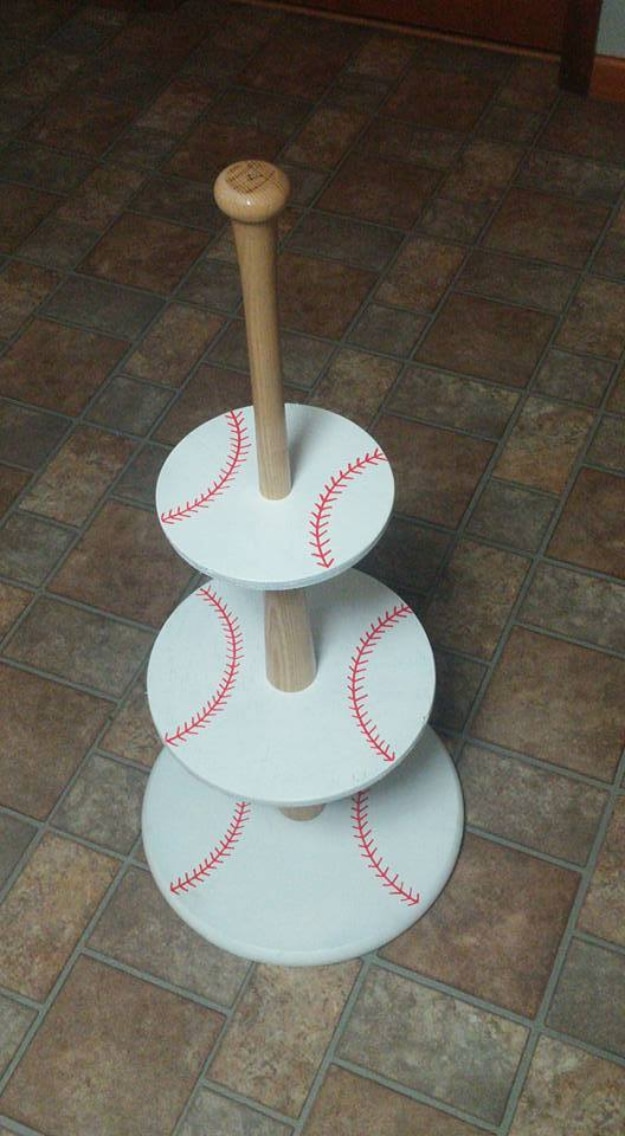
A maple softball bat rather than a regulation baseball bat, because regulation bats have black handles and that was the wrong look. The bat is cut into three roughly equal pieces, which is fiddly since it will not lie flat, so stack washers under it to level it and get a second person to steady it. Pilot holes in each cut end take double ended dowel screws. Three plywood circles in graduated sizes, the largest of them a ready made lazy susan, are painted white, and the red stitching is drawn on with a paint pen around the edge of a dinner plate.
Get the full tutorial at Finding My Yellow.