Nobody needs another mug with a paw on it. These DIY dog crafts are the ones worth the afternoon: plastic toy dogs painted hot pink and glued to corks for wine stoppers, a scroll saw silhouette cut straight out of pallet boards, a sock dachshund with a bell on its collar, and a pipe cleaner puppy that starts life as a single forty inch beige chenille stem. Several use nothing but your dog. A paw pressed into pet safe paint becomes a flower, a framed print, or a lump of clay that gets mailed off and comes back as cast glass. There are gifts here for the dog lover who has everything, and projects here for the dog who chews everything. Every tutorial links back to the maker who worked it out.
DIY Ideas With Dogs
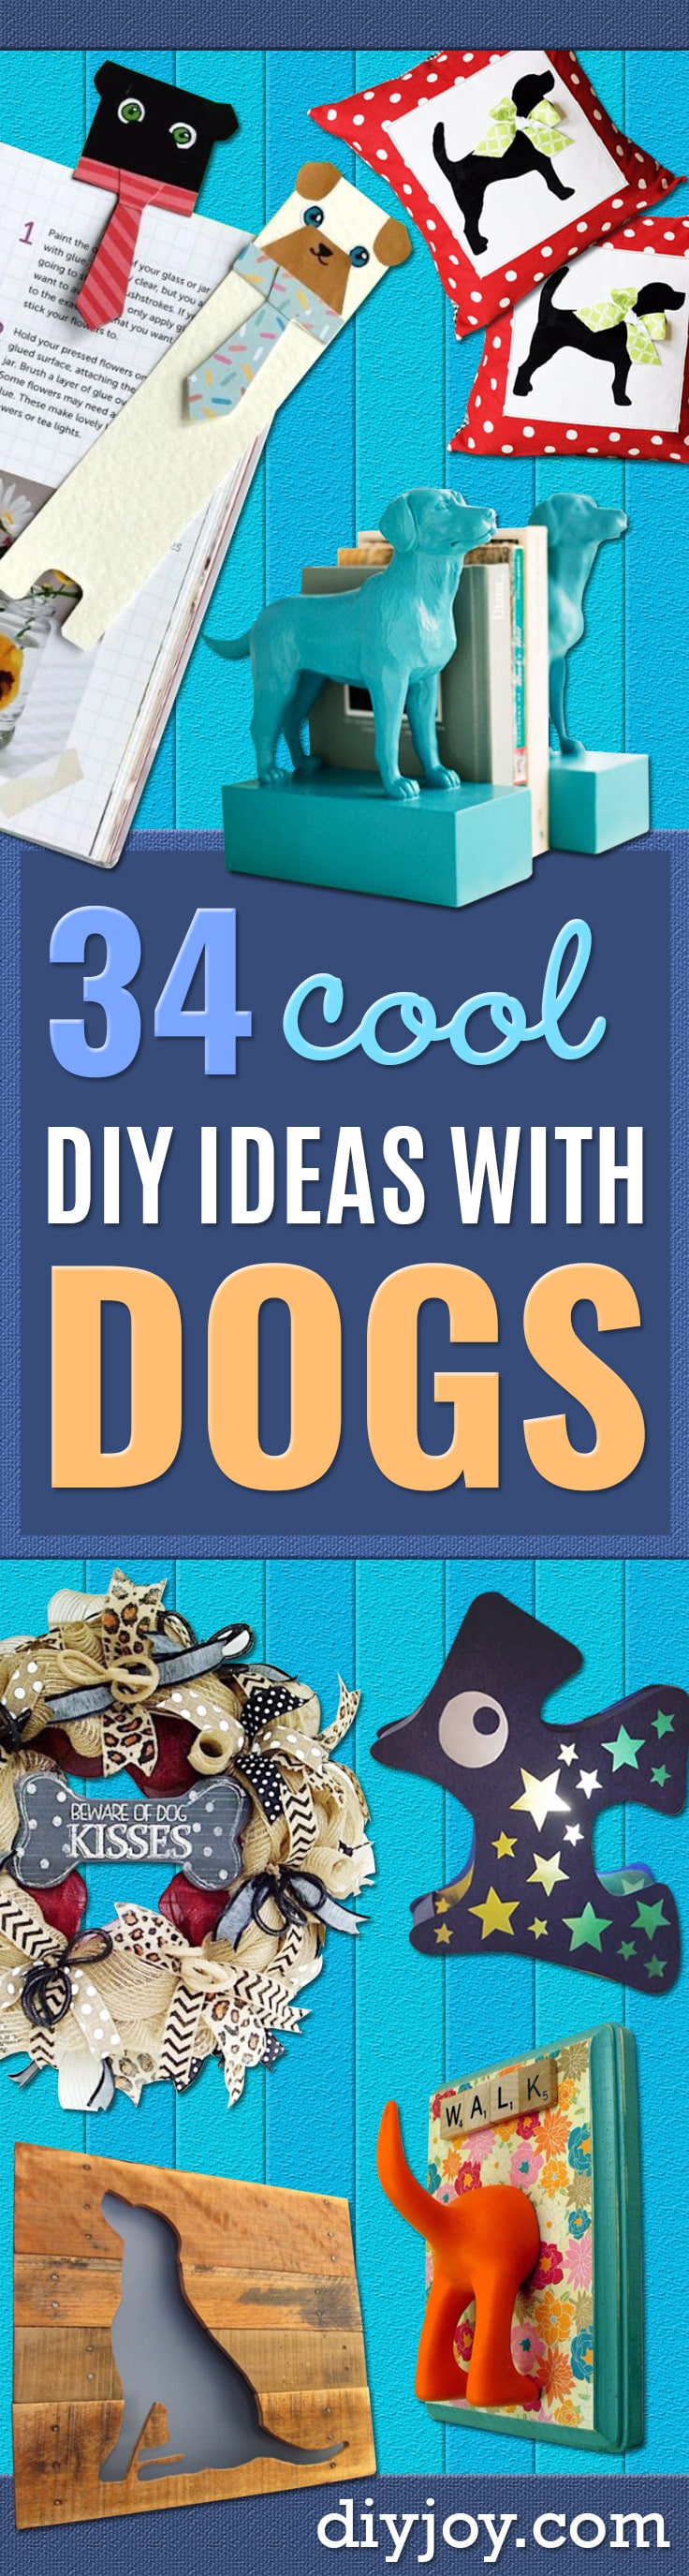
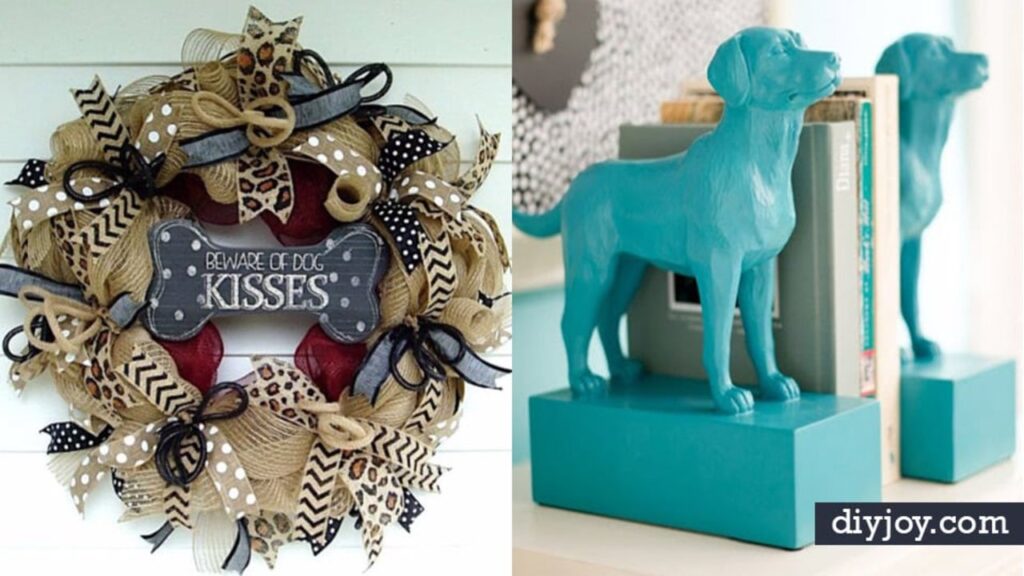
1. Pottery Barn Inspired DIY Dog Bookends

Two plastic dogs from the dollar store, two small wooden platforms at seventy nine cents each, super glue and a can of teal spray paint. Glue each dog down onto its platform first and let that set hard, then spray the whole assembly together, as many coats as it takes, and leave it overnight. Painting after assembly rather than before is what makes the pair read as one solid ceramic object instead of a toy stuck on a block. The maker’s version came to four dollars against forty nine for the catalog original.
Get the full tutorial at Irresistible Pets.
2. DIY Paw Print Wall Art

Paint or a non toxic stamp pad, a foam brush, paper, a frame, and a bucket of warm water waiting. Wash and dry the paw first, brush a light coat of paint onto the pads only, and press. Do a test print on scrap, because it takes several goes. Then wash every crevice of that paw properly and hand over a treat. The name is printed on a second sheet, the back of it shaded with the side of a pencil and traced through, so the lettering transfers cleanly. The maker’s frames were a dollar forty on clearance and got repainted.
Get the full tutorial at Decor by the Seashore.
3. Canine Wine Toppers

Plastic dog figurines, bottle corks and a dab of super glue on the paws. Two finishes are given and they behave differently. Painted ones take two coats of non toxic craft paint with a full dry in between, which is what stops the plastic showing through at the shoulders. Glittered ones get a full coat of Mod Podge, glitter poured over while it is wet, about an hour to set, then a thin clear topcoat to seal so the glitter stops migrating into everyone’s wine. Glue the figurine down only after the finish is completely dry.
Get the full tutorial at Pretty Fluffy.
4. Scottie Dog Quilt

Scottish terriers appliqued across a pale quilt top, each one pieced from a different print so no two dogs match, with a row of small buttons down the collar line and a green grass border underneath. Cutting the dog shapes is the slow part and the reason this reads as a heirloom rather than a weekend project. The payoff is that it eats scraps. Every leftover red plaid and grey tonal in your bin can become another terrier, and the mismatched result looks far better than a planned fabric pull ever would.
Get the full tutorial at DIY Joy.
5. Pipe Cleaner Dog

One beige pipe cleaner, six millimetres thick and about forty inches long, plus two three millimetre toy eyes and a four and a half millimetre bear nose. That is the entire materials list, and the whole dog comes off that single stem without cutting it. Head, ears, tail and all four one and a quarter inch legs are formed by bending and wrapping in sequence, then the torso gets a loose wrap at the end so the fur looks fluffy rather than tight. Pose the head to one side before you glue the face on.
Get the full tutorial at CraftFoxes.
6. Framed Paw Prints

Paint on a paper plate, the dog’s paw pressed onto cardstock, then framed with a mat wrapped in colored tissue paper so each print gets its own background shade. Do the whole thing outdoors. Spread the paint out with a brush first so the pad covers evenly, press gently on every pad, and expect to take more than one print, because the second usually comes out better than the first. Wipe the paw straight away and rinse with warm water before the dog goes back inside. The names go on afterward in Sharpie.
Get the full tutorial at So Not Donna Reed.
7. Reclaimed Wood Animal Friend Silhouettes

Pallet boards taken apart, laid up as a panel, and a sitting dog cut out of them as negative space with a scroll saw, so the wall color shows through the shape. A backing board roughly an inch thick is glued and nailed behind to give it depth. The finish is polyurethane followed by hand waxing, which is what gives the rough pallet grain its low sheen. Leave the old nail heads in where you can. They date the wood, and losing them is the fastest way to make reclaimed lumber look like new pine stained brown.
Get the full tutorial at Painted Therapy.
8. Pincushion Sock Dog

One pair of men’s large socks, ideally the original Rockford Red Heel kind, turned into a long bodied dog with button eyes and a collar. Regular crew socks are what you want here. Knee highs and ankle socks both throw the proportions out, and the downloadable pattern pieces for the ears, tail, mouth and front legs are cut to a large men’s sock, so any other size means redrawing them. It is all hand sewing, which is slow, and the assembly steps live only in the video rather than in any written list.
Get the full tutorial at Professor Pincushion.
9. Vintage Dog Badges

A downloadable sheet of scout style merit badges for dogs, printed on whichever sheet suits what you want to do with them. Sticky label sheets give you stickers for gift wrap and party favors. Iron on transfer sheets put them straight onto clothing. The third route is the best one: print onto iron on transfer, press that onto plain white cloth, cut the badges out and sew them onto a bandana, a backpack or a jacket, which is how they end up looking like real embroidered patches rather than printed paper.
Get the full tutorial at Modern Dog Magazine.
10. Burlap Deco Mesh Wreath

A twelve inch wire wreath frame, three to four rolls of burlap deco mesh and two patterned ribbons, wired on in loops and then fluffed until the frame disappears. Anchor the mesh at the center where the metal bars cross, fold it every twelve inches around the inner loop, repeat on the outer loop, then fluff. The pet part is the finish: plastic bones glued in among the ruffles, paw prints stamped in archival ink onto heart cutouts, and a bone shaped sign in the middle. It hangs indoors or out and is not seasonal.
Get the full tutorial at How To Make A Burlap Wreath.
11. DIY Pet Painting

Not a painting of your dog so much as a painting around your dog. The canvas gets sprayed white, then bold acrylic strokes in blues and blacks, blended with fingers and a paper towel rather than a brush. Meanwhile a profile photo is enlarged, printed on ordinary paper and cut out with a craft knife, then glued down with Mod Podge and sealed under more of it. Black outlines and shadow details go on last, over the paper, which is what stops it reading as a photo stuck to a canvas. About thirty minutes.
Get the full tutorial at First Home Love Life.
12. Puppy Mug Hug

A crocheted puppy face that slips around a mug, with floppy dark brown ears that hang over the sides and a cream muzzle. It works up in Red Heart Super Saver, a plain worsted acrylic, on a US size E hook, which is a small hook for that weight and gives the dense fabric a cozy needs. Finishing takes two nine millimetre buttons, one three quarter inch button and black embroidery floss for the face. Pattern level is intermediate, and the PDF is a free download with no sign up required.
Get the full tutorial at Red Heart, via Yarnspirations.
13. DIY Dog Treat Jar

A smooth sided mason jar with a dog silhouette cut from adhesive vinyl stuck on, then spray painted over and the vinyl peeled off, so the treats show through the dog shape. Two things decide whether it works. Clean the glass properly first, because body oils under the vinyl let paint bleed under the edges, and press those edges down hard. Then thin even coats rather than one heavy pass, several hours of drying, and a slow careful peel. A gold painted dog figurine glued to the lid finishes it.
Get the full tutorial at MyDogLikes.
14. Dog Paper Roll Pencil Holder

Cardboard tubes painted brown and glued in a row, with a printed dachshund head on one end, a tail on the other and cut paper legs along the bottom, so the whole desk tidy is one very long dog. Make it as long as you need, which is the best part, because it scales to however many pens you actually own. Clothespins clamped along the row while the glue sets are what keep it straight. If you use white school glue rather than a glue gun, leave it overnight and mount the finished row on a cardboard base.
Get the full tutorial at Easy Peasy and Fun.
15. DIY Paw Print Kit

Not a craft from scratch but a mail away keepsake, and worth knowing about. The kit arrives as a tin, a lump of non toxic clay like compound, a prepaid shipping label and instructions. Roll the compound into a ball, flatten it using the tin lid as your size guide, press the paw in firmly, and post it back. Weeks later a cast glass disc returns with the paw in three dimensions on one side. Big paws may need a few goes to fit inside the rim, and you can reroll and retry as often as you like.
Get the full tutorial at MyDogLikes.
16. Dog Food Wood Tray – DIY

One 1×4 and one 1×12 pine board, wood glue and five eighths inch brad nails. Two ends cut at twelve and a half inches, two sides at twenty three and three quarters, and a bottom the same length. Glue and nail the long sides to the bottom first, squaring as you go, then the ends, and you have a tray. Fill the nail holes, sand, and paint it with an indoor outdoor white so spilled water does not matter, then sand the paint back in patches for the worn look. Handles, felt pads underneath, matte sealer.
Get the full tutorial at Dream Design DIY.
17. Dog Photo Coaster

Four inch ceramic tiles, sixteen cents each, and four inch square photo prints, which is why this one is so easy: nothing has to be cropped or cut. Mod Podge under the photo to help it grab, the photo centered straight away, then more coats over the top with a full dry between each, or it goes gloopy. Felt glued on the back, eyeballed to size. Then several coats of clear gloss acrylic spray, drying between, which is the step that actually waterproofs it. About fifty cents a coaster.
Get the full tutorial at The Bloated Bride.
18. Posh Puppy Potty Bell

A three by five wood plaque painted in a soft satin color, a hook screwed on upside down at the top, and a two inch bell hung from it on a split ring, with a printed “ring bell for service” label on the board. Hang it with Command Strips beside the door at your dog’s nose height, which is the measurement that decides whether it ever gets used. The training that comes with the free printable is simple: ring the bell yourself every single time you let the dog out, and the association forms in about three to five days.
Get the full tutorial at Craft Your Happiness.
19. Paw Print Flowers

The paw print is the bloom. Press a painted paw onto paper or canvas, then paint a stem, leaves and a few stamen strokes around it, and the splayed pads turn into petals. Use pet safe paint and nothing else, wash it off immediately afterward, and give a treat. The source is firm on one point worth repeating: do not force a dog who does not want to participate. Some will happily give you a paw all afternoon and some will not give you one at all, and the second kind is not a project problem.
Get the full tutorial at Party Pinching.
20. How to Make a Yarn Dog
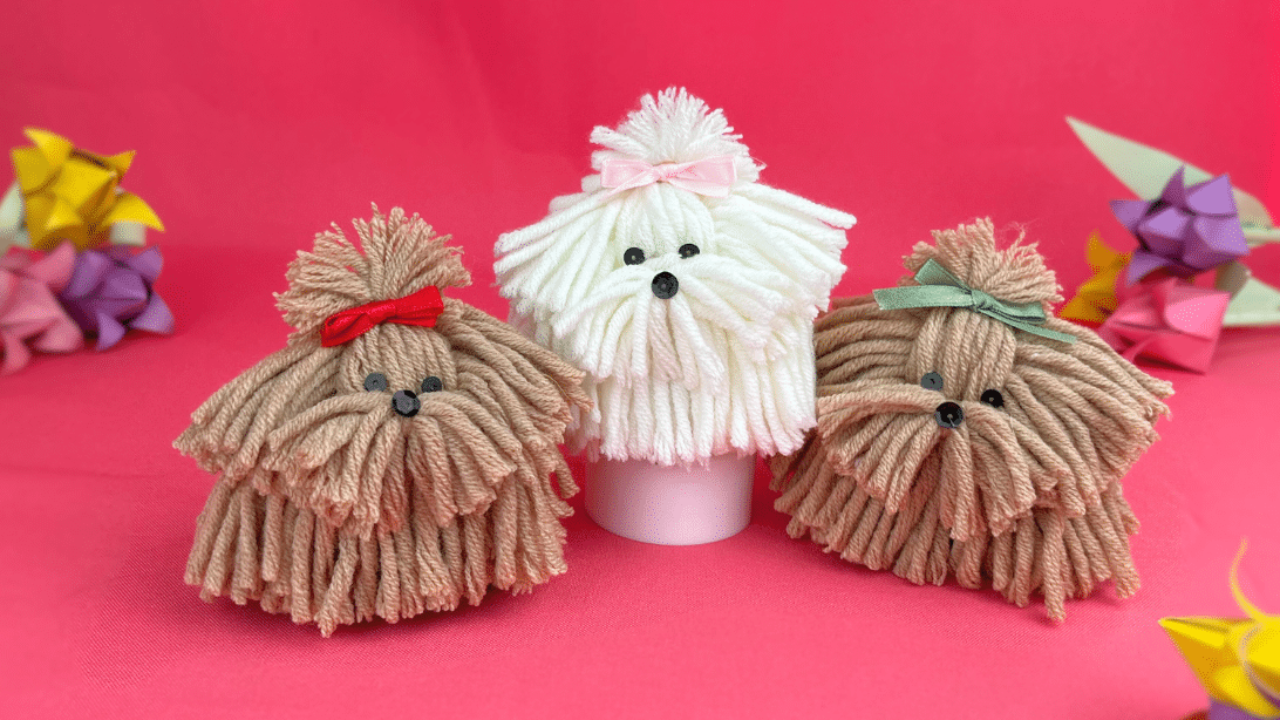
Pom poms and a cork, and nothing that needs a needle. Wrap yarn around three fingers ten times for each of nine small pom poms, then around four fingers ninety five times for the big one that becomes the body. Eight of the small poms glue around the top edge of a cork as the base, the big one sits centered on top, and the ninth becomes the head once a few strands front and back are pulled together with an elastic. A skewer fluffs the tied section out. Beads or sequins for eyes, a ribbon bow, done.
Get the full tutorial at DIY Joy.
21. How to Make a DIY Yarn Dog Keychain
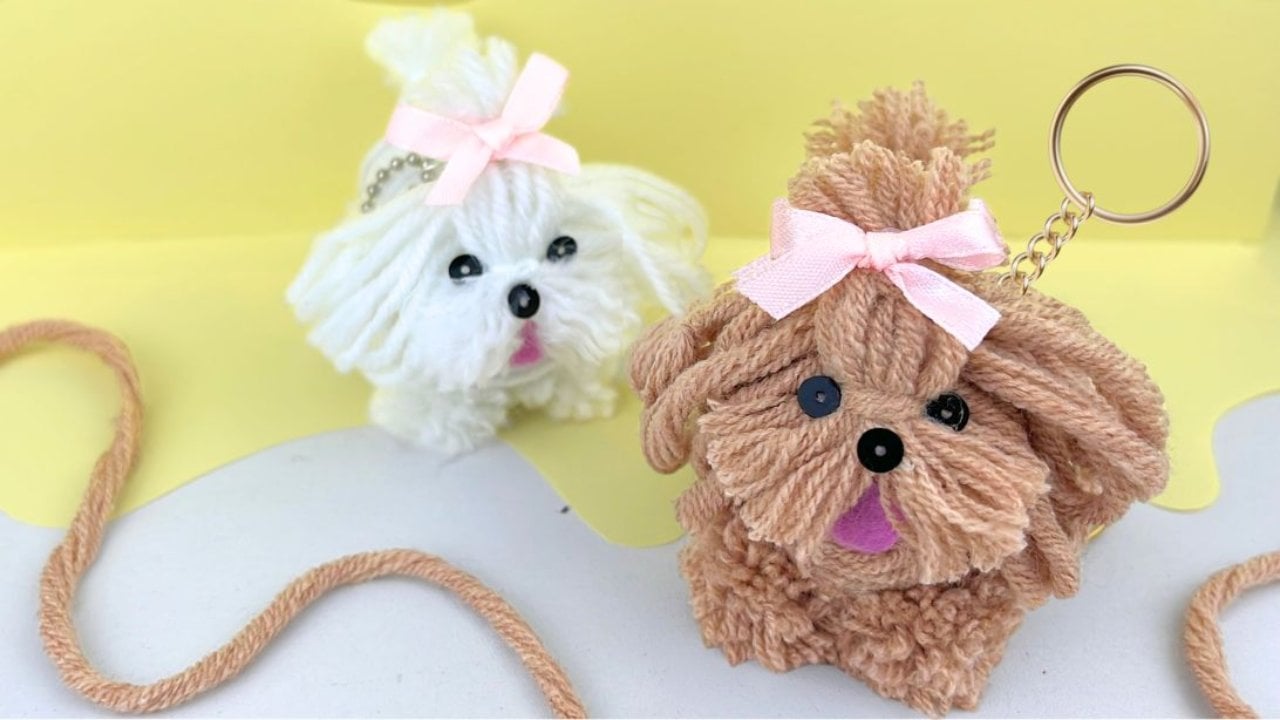
The keychain version swaps the cork for air dry clay: an oval body about one and seven eighths inches long by seven eighths wide, with an eye pin pushed in before it dries. Yarn gets wrapped around the dried body and glued, then small wrapped bundles become the parts. Ten wraps around two fingers for the feet, eight around one finger for the tail, seven around four fingers for the ears and five for the face. Sequins do the eyes, nose and mouth, and a metal ring clips onto the eye pin. Match the yarn to your own dog.
Get the full tutorial at DIY Joy.