There is a reason cat crafts are their own category and dog crafts are not: a cat reads as two triangles and a curve, so almost anything can be made to look like one. That is what holds these 18 DIY cat crafts together. Two felt triangles turn a tote into a face. A length of wire bent twice becomes a bookmark in ten minutes. A striped sock, cut and stitched, becomes a plush that sits up on its own. The rest are the real projects: a crocheted slouch hat with ears, a quilt built from freezer paper applique, a rope bowl bed your cat will sit in, and a no-sew pillow held together with fabric glue. Pick the one that matches what you own.
DIY Ideas With Cats
1. Black Cat Slouch Hat

Chunky ribbing with two ears worked straight into the crown, and the shape comes from the construction rather than from shaping stitches. You crochet a flat rectangle, half double crochet in back loops only, then seam it and gather one end so the corners stand up as ears. Size 6 super bulky yarn, about 150 yards, on an L hook, or hold two strands of worsted together instead. The foundation row wants to be around eleven inches for a slouch and only nine or ten for a beanie, and it shrinks about an inch as the rows build. There is a video if written patterns are not your thing.
Get the full tutorial at Persia Lou.
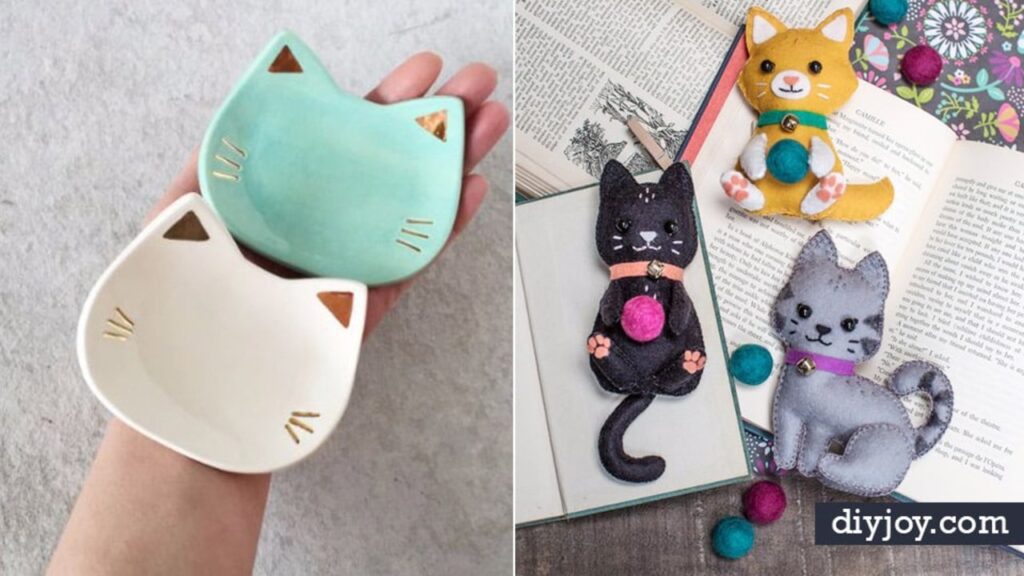
2. DIY Felt Craft Kittens
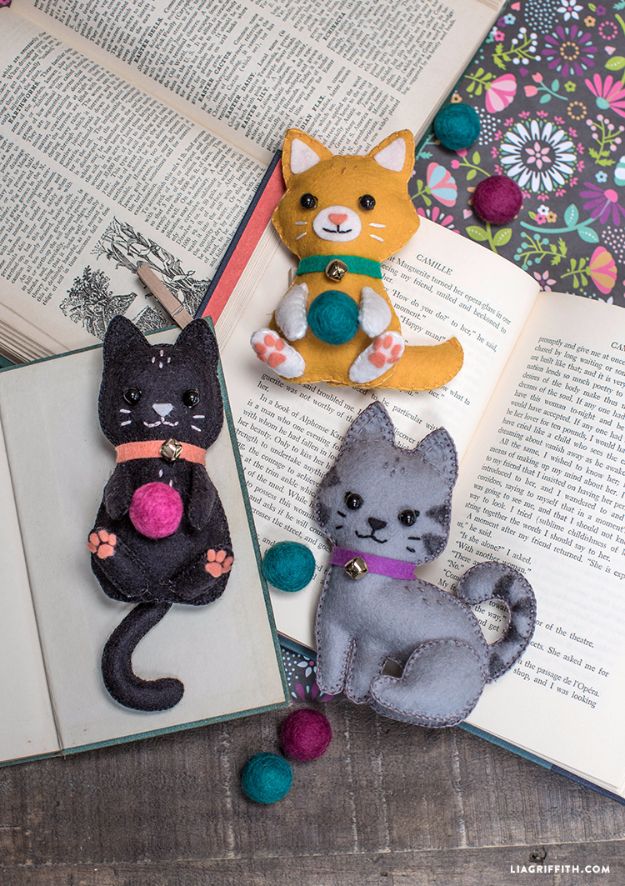
Small stitched felt kittens about four and a half inches tall, sized to sit in a coat pocket, and the whole build is cut, layer, stitch. Wool blend felt in seven colors does the bodies and the shapes are simple enough to cut by hand, though a cutting machine will do it if you own one. Embroidery floss handles the whiskers, the noses and the faces, which is where all the personality lands. A dab of tacky glue holds pieces still while you stitch, and that is the tip worth taking, because felt slides. Print the template larger or smaller and the same pattern gives you a different kitten.
Get the full tutorial at Lia Griffith.
3. DIY No-Sew Cat Pillow

A cat-shaped pillow held together with fabric glue instead of a seam, which is the whole point of it, and the maker says outright that she does not really sew. Print the seven page pattern, trace it onto two pieces of fabric with right sides facing, cut a quarter inch outside the line so you have something to follow, then run the glue along the traced line and leave a gap for stuffing. Dry overnight. Notch the outside curves and slit the inside ones before you turn it, or the shape will pucker. About three quarters of a yard per pillow, and a chopstick to push the ears out.
Get the full tutorial at Idle Hands Awake.
4. Rope Bowl Cat Bed
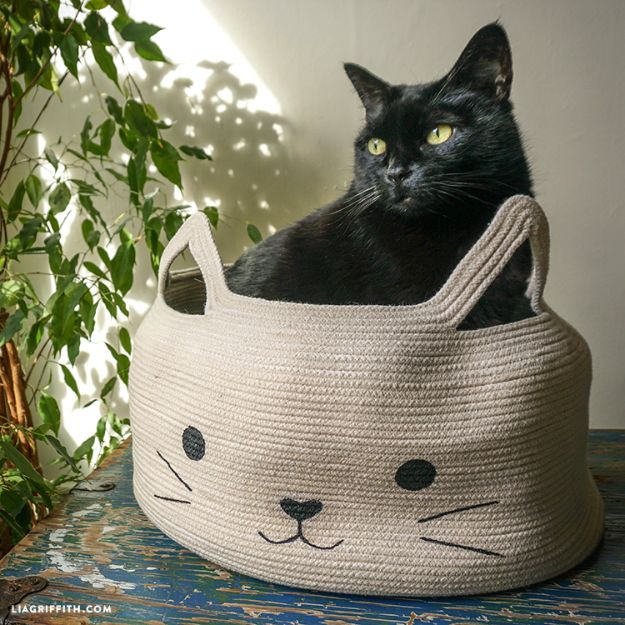
Cotton clothesline coiled and zigzagged on a sewing machine into a bowl with a sixteen inch base, then two loops left proud at the top as ears. The shaping is done with your hands as the line feeds through the machine, so there is no pattern to follow, just pressure. Running out mid-coil does not matter; you join a fresh length and keep going. The cushion inside is eight layers of batting zigzagged around the edge with a simple cover over it. A face goes on last, drawn with a water soluble fabric pen and then painted over in black acrylic, and the paint needs time to soak into the rope.
Get the full tutorial at Lia Griffith.
5. No Sew DIY Black Cat Pillow Cover
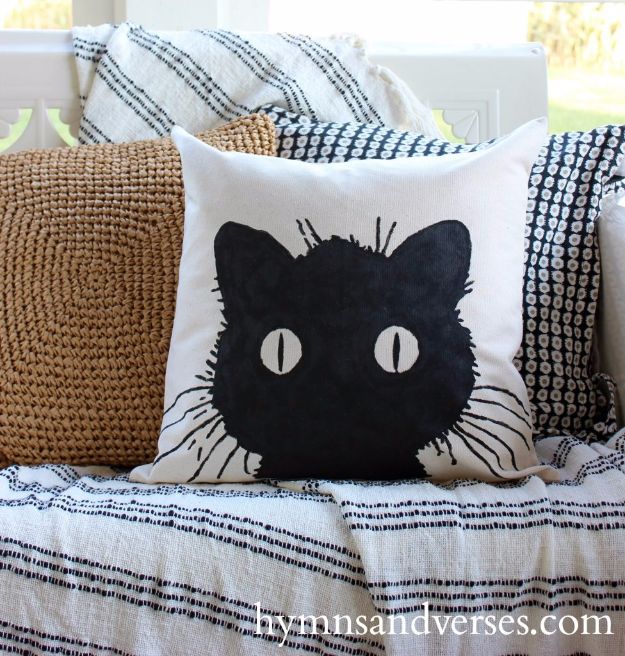
A ready-made canvas pillow cover, black craft paint and a brush. That is the entire supply list, and buying the cover is what makes it no-sew. The image is enlarged to fill the front, cut out, and used as a stencil: a cutting machine will do it in contact paper, but a copy shop will blow the image up onto card stock for you and a craft knife does the rest. Trace the outline, the whiskers and the eyes, paint the edges first and then fill in. Heat set it when it is dry, ten minutes in the dryer on high or an iron on the unpainted side.
Get the full tutorial at Hymns and Verses.
6. Kitty Cat Poncho

A hooded crochet poncho with ears on the hood and paw pads on the pockets, which is a costume that survives past October because it is just a poncho. The free written pattern and a video both live at the end of the source page, on the designer’s own site rather than this one, so click through twice. It is sized to customize easily, which matters on a poncho more than on a fitted garment, and it is worn over a coat for trick or treating without adding much bulk. The paw pads on the front pockets are the detail people notice; they are worked flat and sewn on.
Get the full tutorial at Cool Creativity.
7. Cat Bookmark

Ten minutes and one length of wire. The head is the only hard part: bend the left ear, down, back up for the right ear, round the side of the face, then in for the neck. After that it is one large spiral for the body and you are done. Flatten the whole thing on a steel block with a hammer if you want the hammered look, or leave it round. Make it slightly smaller, add a jump ring and it is a necklace instead. Basic wire working is the only skill listed, and the maker admits the step photos were impossible to take one-handed.
Get the full tutorial at Amy Latta Creations.
8. DIY Cat Tote

A canvas tote with a cat face on the front, a tail on the back and four paws hanging off the bottom edge, finished at roughly fourteen inches tall by fifteen wide by three deep, which is big enough for a laptop. The paws are the whole joke and they are made first: two pieces sewn wrong sides together, trimmed to a quarter inch, then stitched with lines to suggest toes and basted into the bottom seam. Use a fabric that will not fray for the face, so knit, vinyl or good felt, and fuse everything before topstitching. Grommets take the straps, which is easier than it sounds.
Get the full tutorial at Orange Bettie.
9. Hipster Cat Quilt

A single large cat in glasses and a bow tie on a plain ground, about forty four inches square, and the technique is the interesting part: freezer paper applique rather than paper piecing. You trace each shape onto freezer paper, iron it shiny side down onto the wrong side of the fabric, cut an inch wide, then fold the edges over the paper and press with a light spray starch so they hold their shape. Peel the paper off, arrange on the background, pin and edge stitch. Tracing this way mirrors the design, so the tail and glasses will land on the opposite side. Six hours start to finish.
Get the full tutorial at Shwin and Shwin.
10. 3D Paper Craft Cat Origami

A low-poly cat that mounts on a wall, assembled from flat printed panels rather than folded from one sheet, which is what the pdf template on the photograph is for. Projects like this are cut, scored and glued: every fold line gets scored with a bone folder before anything bends, and the tabs are glued one at a time working from the head backwards so the shape holds its own weight as it grows. Card of about 200 to 250gsm is the sweet spot, heavy enough to hold an edge and light enough to fold cleanly. The source is behind a security wall, so the template is what to go looking for.
Get the full tutorial at Unique Hunters.
11. Cat String Art DIY

A sitting cat in black thread on weathered blue board, outlined in pins with the tail curling up into a spiral. String art is worked in the negative: the nails go around the silhouette, not through it, and the thread is wound back and forth across the shape until the density does the drawing. Space the pins evenly at about half an inch, because uneven spacing shows far more than uneven winding. A curled tail like this one needs the pins closer together through the curve or the line will go flat. Dark thread on a pale, distressed board is the contrast that works.
Get the full tutorial at String Art DIY.
12. DIY Cat Planter

A plastic lemonade bottle cut into a wall planter with two ears and a sleeping face drawn on it. Choose a bottle with the five-footed base, because those feet are what the ears get centred between, and leave about eleven centimetres from the base to the ear tips. Spray it gloss white rather than matte, outdoors, with a stone inside so the pressure does not blow it over, and be patient between coats or it runs. Waterproof marker does the face. Punch a hole each side to hang it, and put a layer of gravel in the bottom before soil, because there is no drainage hole and roots rot without it.
Get the full tutorial at Bru DIY.
13. Witchy Cat Hat

A crocheted witch hat with a cat face on the brim, worked in four sizes so it fits a baby or an adult without redrafting anything. The eyes and nose are appliqued on separately and then embroidered, which is why the face reads from across a room: flat crochet detail disappears at distance and a stitched outline does not. It is worked in a plain worsted acrylic, so it takes a warm gentle machine wash, which matters on something a child will wear. The pattern is a free PDF with no signup. Make a gauge swatch first, because hat sizing is the one place tension actually bites.
Get the full tutorial at Red Heart.
14. DIY Cat Eye Mask
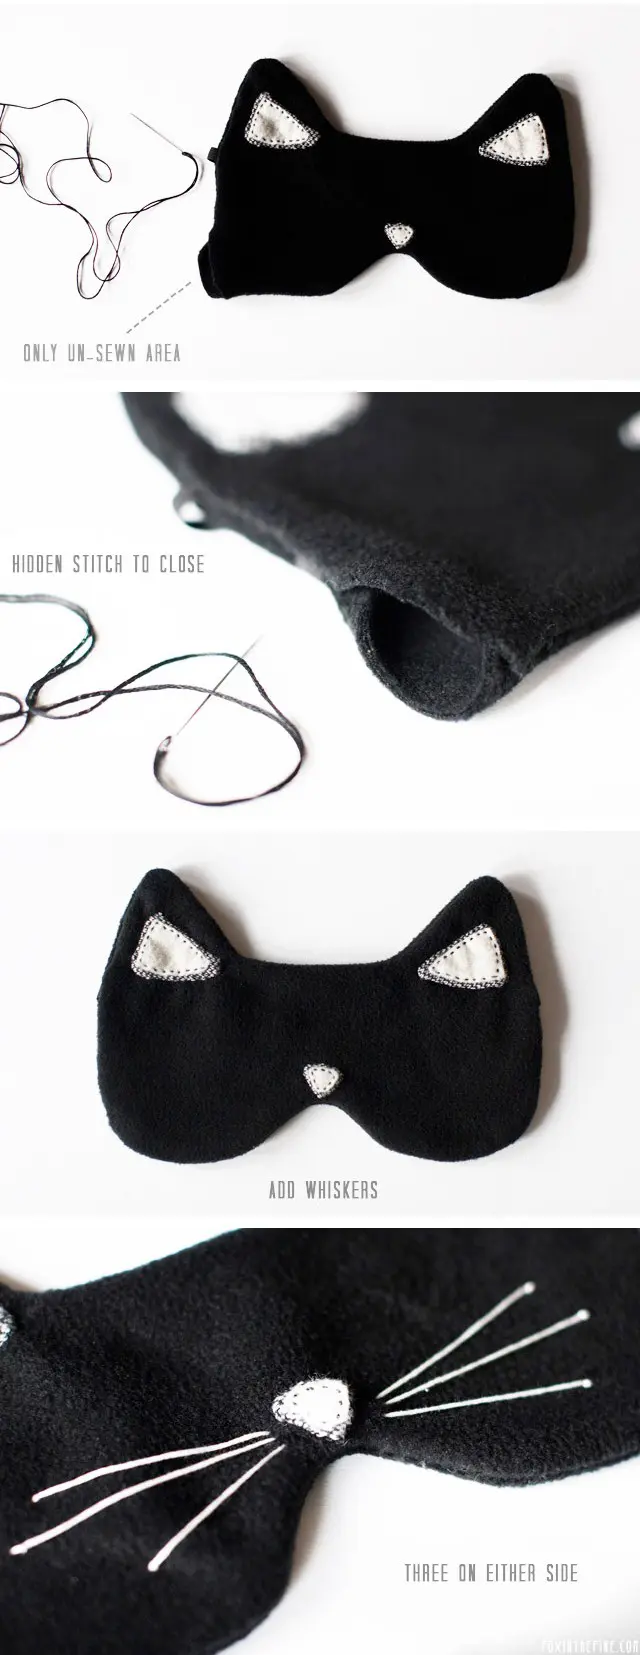
A sleep mask cut as a cat face, black fleece on the outside with off-white felt ears and a checkered fabric detail over the nose bridge. Fleece is the right choice here because it blocks light without a lining and it does not fray, so the two sides can simply be stitched together. Make the ear and nose pieces first and set them aside before you touch the mask itself; attaching them afterwards to a finished mask means stitching through both layers and losing the softness. Black elastic and black thread on black fleece hides every stitch you get slightly wrong.
Get the full tutorial at Shelterness.
15. Super Cute Cat Coasters

Felt cats lying on their backs with a stuffed head that stands upright, so the mug sits on the body and the face looks up at you. Each coaster is two body shapes stitched together, which is what gives it enough stiffness to stay flat under a hot drink, and two head shapes stuffed with wadding through a gap that is then closed. All the detail goes on one piece before the two are joined: pink ear linings, a white nose patch with a pink triangle centred on it, blue eyes with a white spot stitched over and over in the same place, and claws in black.
Get the full tutorial at Baker Ross.
16. Kitty Cat Crochet Granny Square

A cat face worked as a flat circle and then squared off, which is the neat bit: rounds one to five build the head in white and the ears are added in round five as two chain-6 spurs worked back down in graduated stitches, so the ears grow out of the head rather than being sewn on. The muzzle is a separate small circle in pink, sewn on with a long tail. Everything else is embroidery: a running stitch nose and smile, doubled French knots for the eyes, filled pink ears. Worsted weight on a 5mm H hook. One square takes an evening.
Get the full tutorial at Sewrella.
17. Easy DIY Yarn Kitten
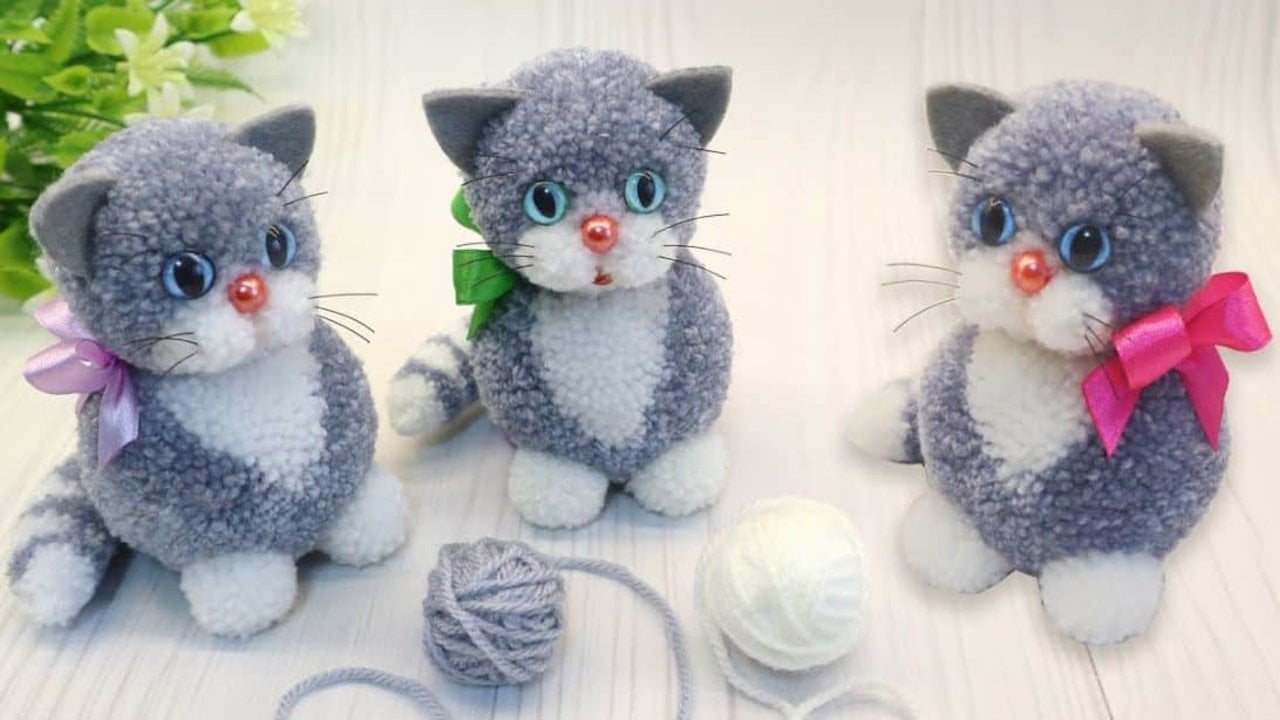
A kitten built entirely from yarn, with no sewing and no crochet hook anywhere in it. Wound bundles of grey and white are tied off tight at the middle and then trimmed into shape, which is the same principle as a pom-pom but cut asymmetrically so a head and a body appear. The trimming is the skill, not the winding: go slowly, turn it constantly, and stop before you think you should, because you cannot put yarn back. Change the colours and you have a different cat, and shrink it and it becomes a keychain. A few minutes each once you have the rhythm.
Get the full tutorial at DIY Joy.
18. Stuffed Kitten Made From Socks
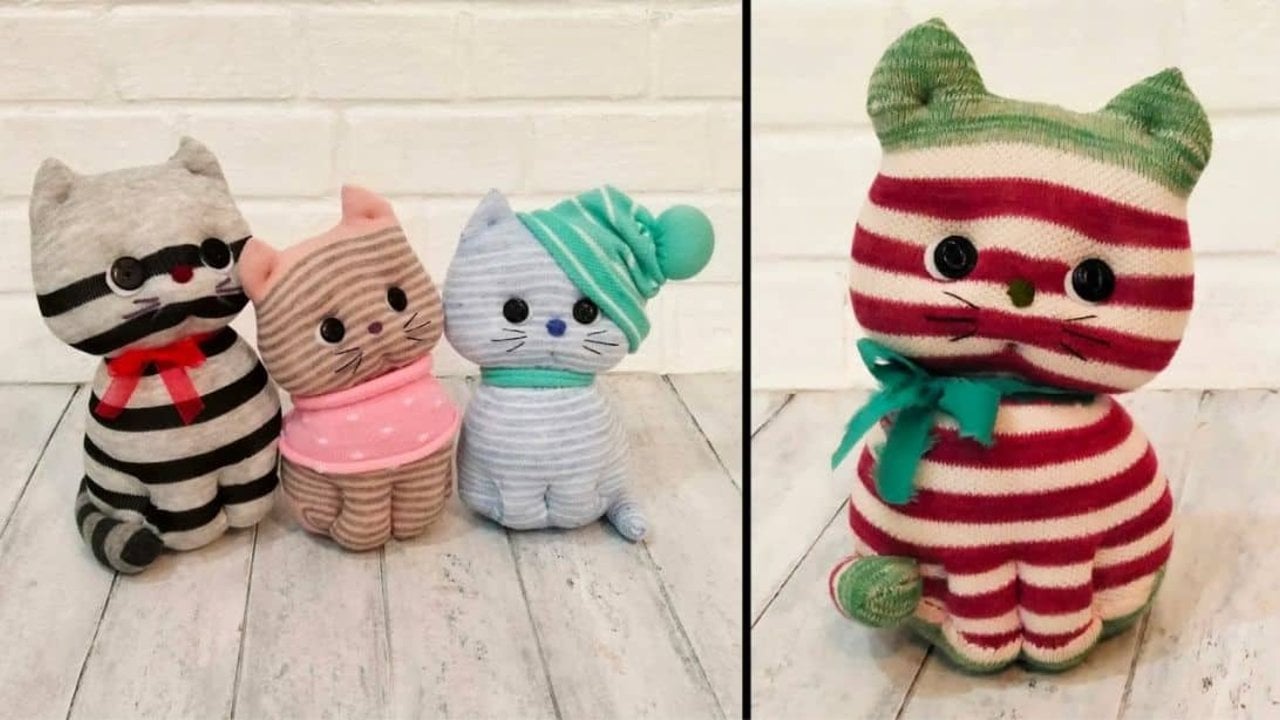
A striped sock turned into a standing kitten, and the cuts are what do the work. Flip the sock inside out, fold the heel flat toward the bottom and pin it, then draw a trapezoid on the toe and two horizontal lines above the heel. The toe becomes the head, the heel becomes the seat so the finished cat actually sits up, and the offcuts become the ears and tail. Two black beads make the eyes. No sewing skill is needed beyond a running stitch. A patterned sock gives you the markings free, which is why a striped one photographs better than a plain one.
Get the full tutorial at DIY Joy.