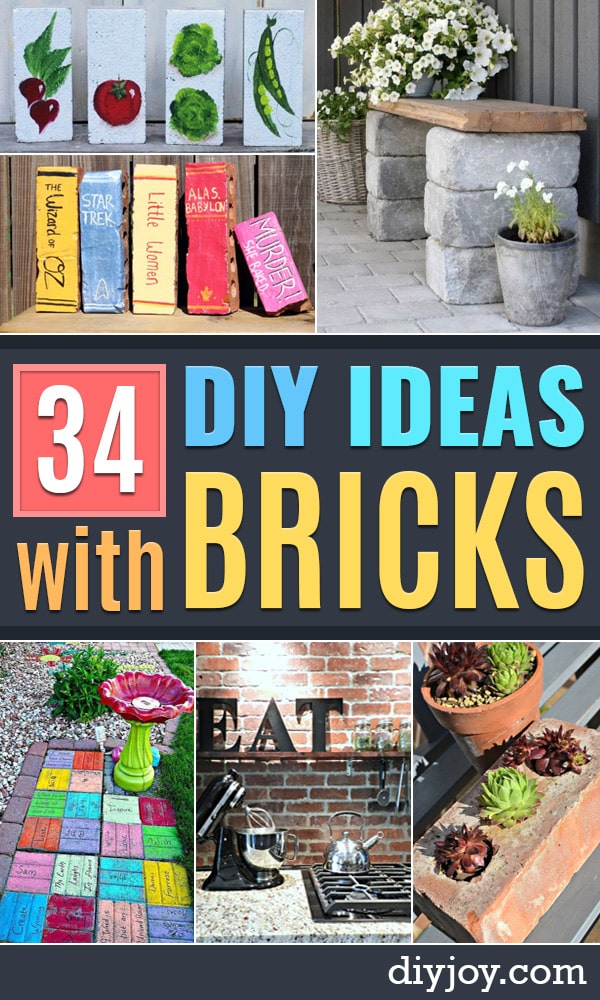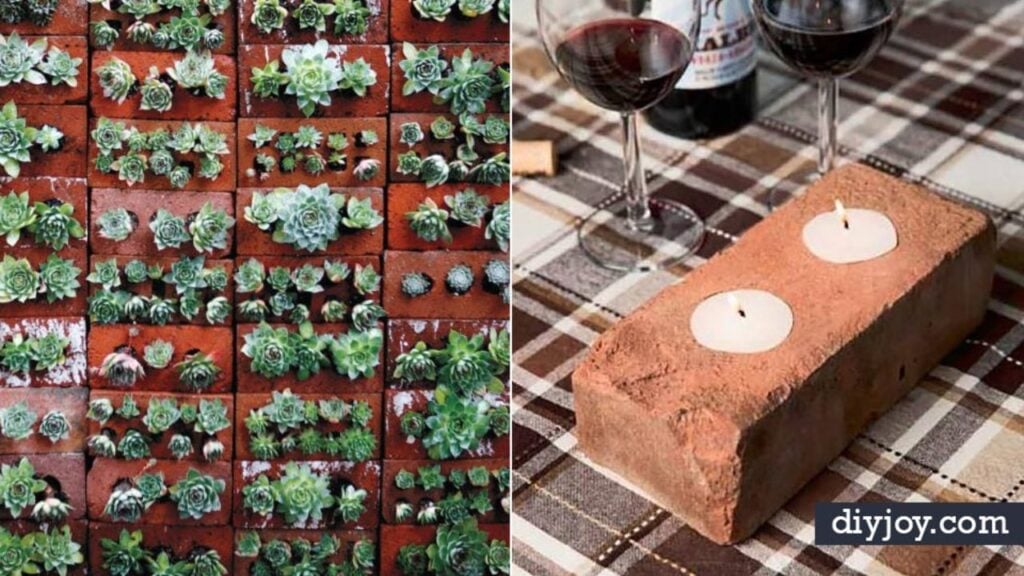
Everyone who has ever finished a building job has the same problem afterward: a pile of leftover bricks that is too heavy to move and too useful to throw away. These DIY ideas with bricks are what to do with that pile. Some are proper weekend builds, like a backyard fire pit, a corner waterfall or a temporary brick grill you can put together in about five minutes with twenty bricks and a cast iron grate. Others are an afternoon and a tin of paint: bricks lettered as herb markers, painted to look like a shelf of old books, striped like candy canes for Christmas, or turned into house numbers for the end of the drive. There is a rocket stove that boils a pot on a handful of twigs, and a dry-laid planter box that holds itself together without a scrap of mortar. Perfect for a yard that needs finishing and a pile that needs spending.
DIY Ideas With Bricks
Table of Contents
- DIY Ideas With Bricks
- 1. Paint A Candy Cane Brick
- 2. Mushroom Brick Planter
- 3. DIY Fence With Old Bricks
- 4. Brick Herb Markers
- 5. Brick Birdbath
- 6. Brick Waterfall
- 7. Build A Backyard Fire Pit
- 8. Book Painted Bricks DIY
- 9. DIY Brick Wall
- 10. Brick Grill
- 11. Build A Brick Rocket Stove
- 12. Handpainted Garden Markers
- 13. DIY House Numbers
- 14. DIY Upcycled Brick Planter Box
1. Paint A Candy Cane Brick
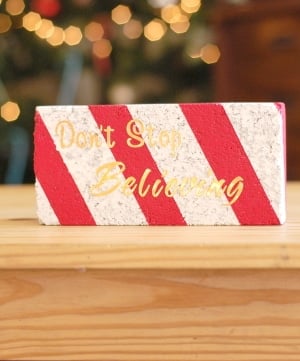
Painting neat stripes on a rough brick sounds impossible, and ordinarily it is, because paint creeps under ordinary tape on a pitted surface. The fix is textured surface tape, which grips the bumps. Spray the whole brick white first and let it dry, apply the tape, wait about 15 minutes, then put on two coats of red so the color is fully saturated. Leave the tape alone until the paint is completely dry, then pull it off slowly. The stripes come out clean.
Get the full tutorial at Whistle and Ivy.
2. Mushroom Brick Planter
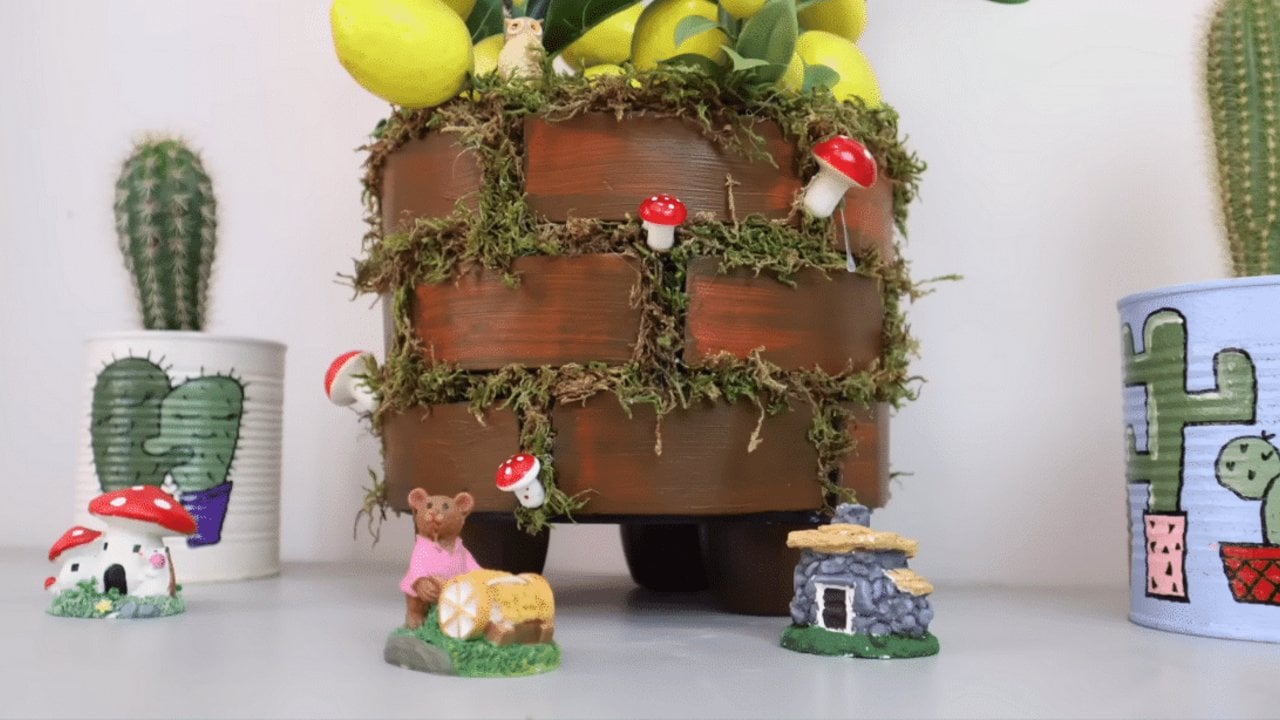
This one fakes the brick rather than using it, which is worth knowing before you start hunting in the yard. Rectangular strips cut from foam plates get glued around a plastic bucket, then painted with a mix of black, brown and orange to get an aged brick effect, with artificial moss glued into the gaps between the rows. Three small plastic cups become the feet. Tiny mushrooms and a plant finish it. The moss in the joints is what sells the illusion from a step away.
Get the full tutorial at DIY Joy.
3. DIY Fence With Old Bricks
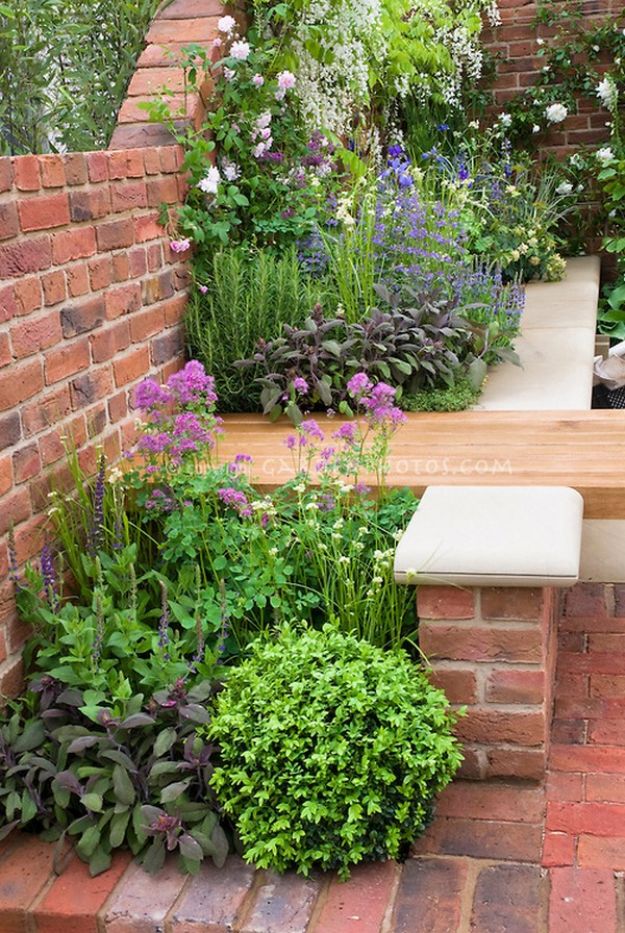
A low brick run is the most permanent way to stop a bed from sprawling, and old bricks suit it better than new ones because the color has already weathered. The source is a Hungarian garden feature rather than a step-by-step, so treat it as the look you are aiming at rather than a set of instructions. What the photographs show clearly is the thing that matters most: the run is low, it follows the curve of the planting, and the courses stay level the whole way along.
Get the full tutorial at Sokszinu Videk.
4. Brick Herb Markers
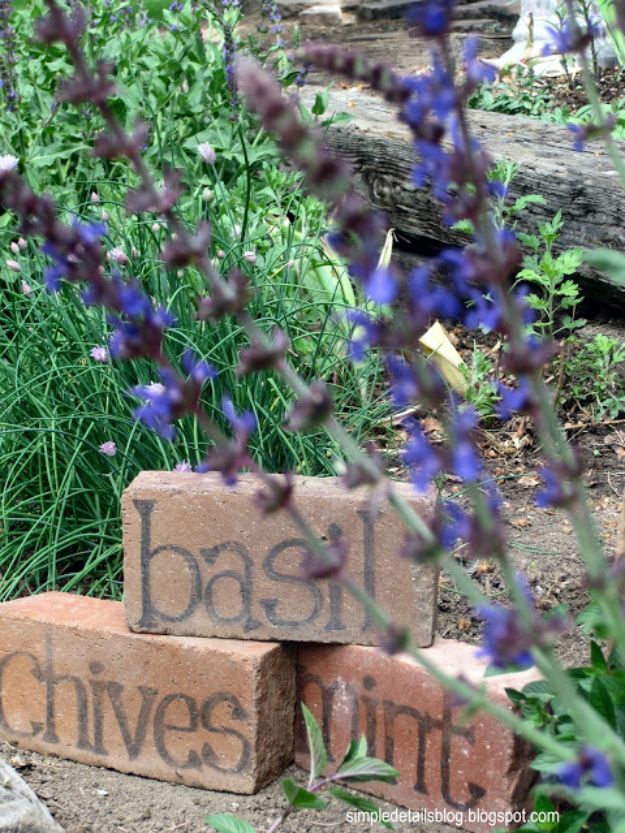
Write the herb name on a brick in pencil first, then go over the pencil with a permanent marker. That is the entire method, and the maker used no sealant at all: the markers had been out in the beds for years and had simply faded into the brick, which she preferred. Running fine grit sandpaper lightly over the writing pushes the aged look along if you are impatient. Set each one flat in the dirt beside its plant. They will not blow away and nothing needs replacing in spring.
Get the full tutorial at Simple Details.
5. Brick Birdbath
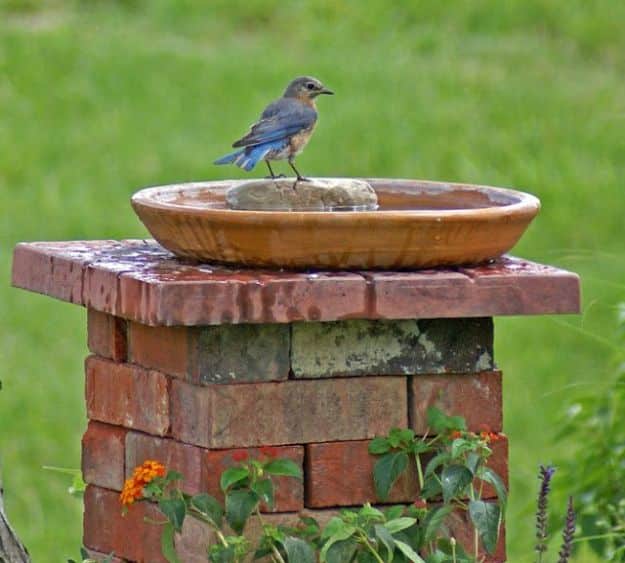
Bricks stacked into a short column with a clay saucer on top, and no mortar anywhere in it. The maker’s version had stood through five years of winters and storms unmortared, which is the detail that should reassure anyone worried about it toppling. Put a handful of rocks in the saucer. That is not decoration: birds want somewhere to stand, and the shallow saucer with stones gets used constantly while a deep concrete bath nearby gets ignored. Refill it every morning in summer.
Get the full tutorial at Robin's Nesting Place.
6. Brick Waterfall
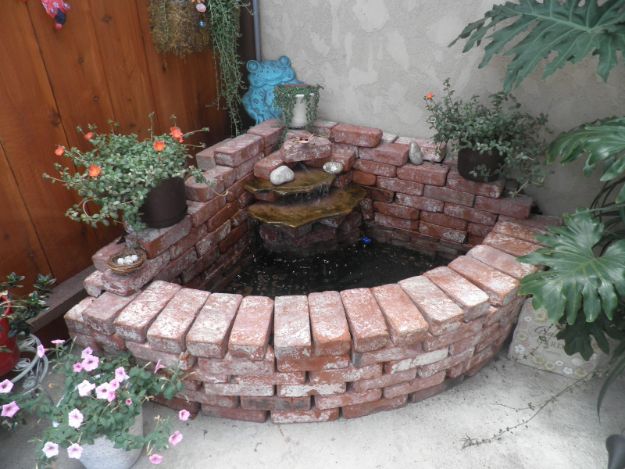
A corner water feature built from bricks that had been stacked in the yard for over ten years, which is why the whole thing cost almost nothing. The outer wall runs about a foot high at the front and rises to roughly three feet in the back corner. Slate goes over the top, weighted down with more bricks, and the maker used no glue or silicone anywhere. Bricks stacked around the pump hide it, and the wiring runs behind the brick along the fence. Wash old bricks before you lay them.
Get the full tutorial at StringBeadz Designs.
7. Build A Backyard Fire Pit
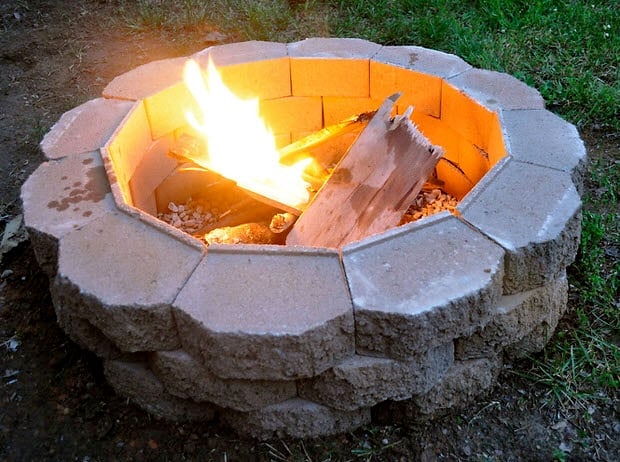
Mark the circle, dig the whole area out a few inches to clear anything flammable, then stack blocks around the perimeter until the wall stands at least 12 inches high, which usually means two or three courses. Fill the middle with sand or gravel so embers never sit on bare ground. Use retaining wall blocks whose sides are already cut at an angle and the circle closes itself. One real caution from the comments: ordinary concrete blocks can crack and spall under repeated high heat.
Get the full tutorial at The Garden Glove.
8. Book Painted Bricks DIY
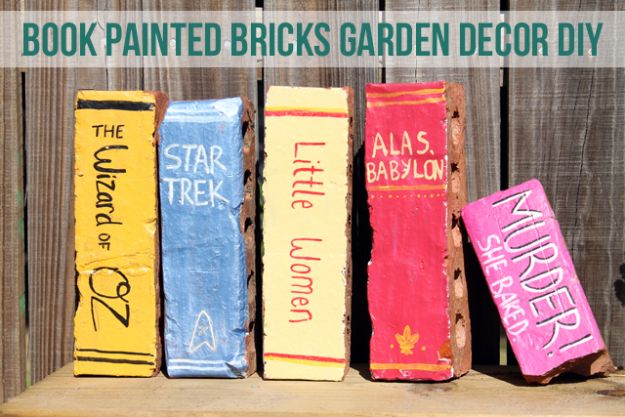
Wash the bricks first if they have been sitting outside, then paint each one a solid color. Acrylic works fine. The titles go on with either a fine brush or a paint pen, and the maker is blunt that the paint pen is far easier. A publisher’s logo painted along the bottom is the small touch that makes people look twice. Mod Podge over the top seals the lettering. No painting skill is needed anywhere, since the whole thing is flat color and words.
Get the full tutorial at Punk Projects.
9. DIY Brick Wall
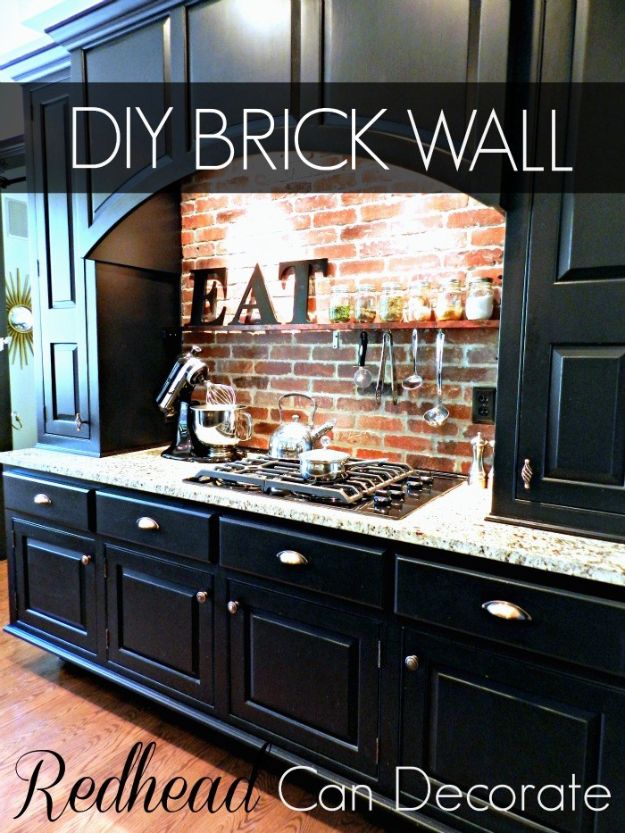
This is an interior thin brick installation, done as a kitchen backsplash rather than a wall in the garden. Thin brick gives you the look of real masonry on a surface that could never carry the weight of full bricks. Grout goes on with a grout bag rather than a float, which is how you get mortar into the joints without smearing it across every face. Seal it afterward, and know that both brick and mortar dry several shades lighter than they look while wet.
Get the full tutorial at Redhead Can Decorate.
10. Brick Grill

Twenty plain clay bricks and a cast iron grate, and that is genuinely the whole materials list. The bricks push together into a rectangular firebox sized to whatever grate you have, the grate sits on top, and charcoal goes underneath. It takes about five minutes to build. Nothing is mortared, so it comes apart and stacks back in the corner of the yard afterward. This is the answer for anyone who grills three times a summer and cannot justify buying a grill for it.
Get the full tutorial at DIY Joy.
11. Build A Brick Rocket Stove
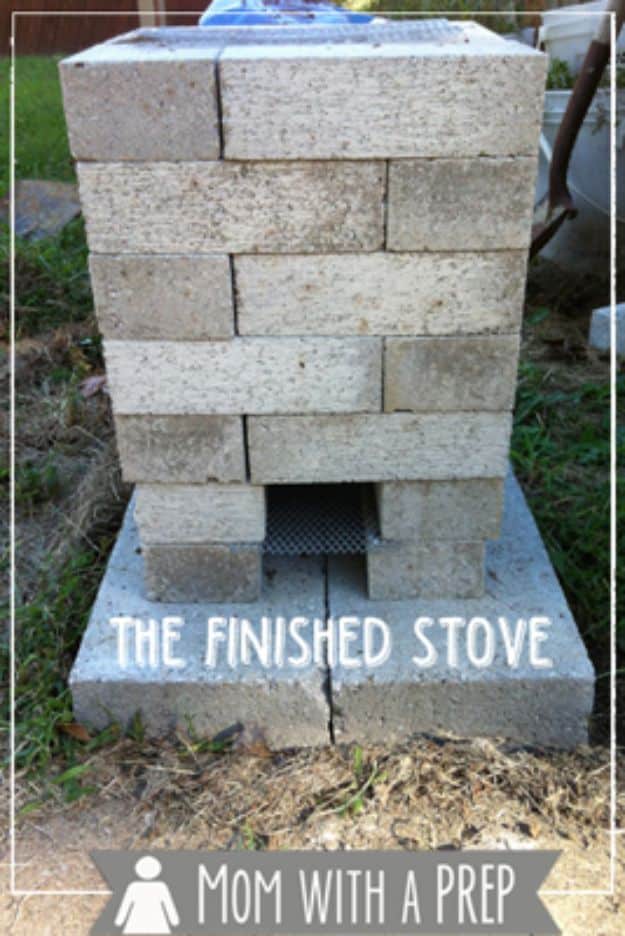
Twenty-seven concrete bricks stacked into the classic rocket stove shape, no mortar at all, so it comes apart again afterward. The J-shaped combustion channel is the whole design: it draws air so hard that a couple of handfuls of twigs gathered off the lawn produce serious cooking heat. Worth repeating the maker’s own warning: these are not fire bricks, and running a non-fire brick stove hot and often risks the brick cracking or spalling. Fine for occasional use, camping and power cuts.
Get the full tutorial at Mom with a Prep.
12. Handpainted Garden Markers
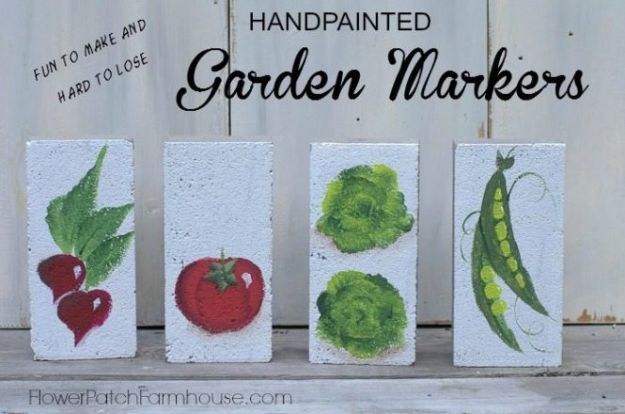
Standard gray concrete bricks, about 50 cents each from a building supply, painted with a base coat and then hand-painted with the crop they mark. The four shown are radishes, a tomato, lettuce and peas, and each one has its own painting lesson linked from the tutorial, which is what makes this achievable for someone who cannot draw. Multi-surface craft paint works as a base coat, as does leftover exterior paint. She seals the finished markers with an exterior water-based varnish rather than painting the edges.
Get the full tutorial at Flower Patch Farmhouse.
13. DIY House Numbers
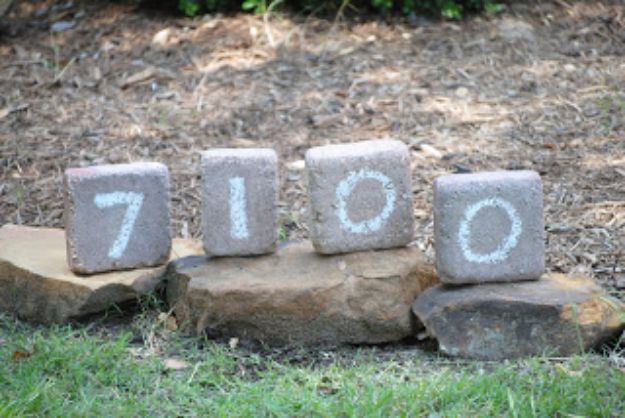
Landscape bricks from a pile in the yard, one digit painted on each, set on a low stone ledge beside the drive. Four bricks, four numbers, no post to sink and no fixings to buy. Paint the digits far larger than feels necessary, because they are being read from a moving car and not from the footpath. Seal them against the weather once the paint is dry. Set them at the entrance to the drive where a delivery driver actually looks rather than up by the door.
Get the full tutorial at Mommie Joys.
14. DIY Upcycled Brick Planter Box
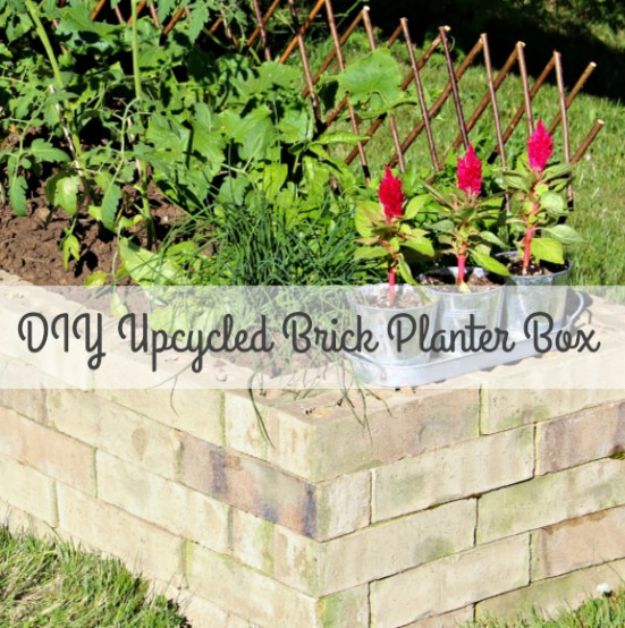
Bricks laid out in a rectangle and then built up course by course, with each row offset by half a brick from the one below, which is the pattern that locks a dry-laid wall together. Rebar driven down through the holes in the bricks and straight into the ground is what stops the whole thing spreading once it is full of wet soil. No mortar is needed. Fill it, plant it with herbs or annuals, and leave drainage at the base so it never waterlogs.
Get the full tutorial at The Project Pile.