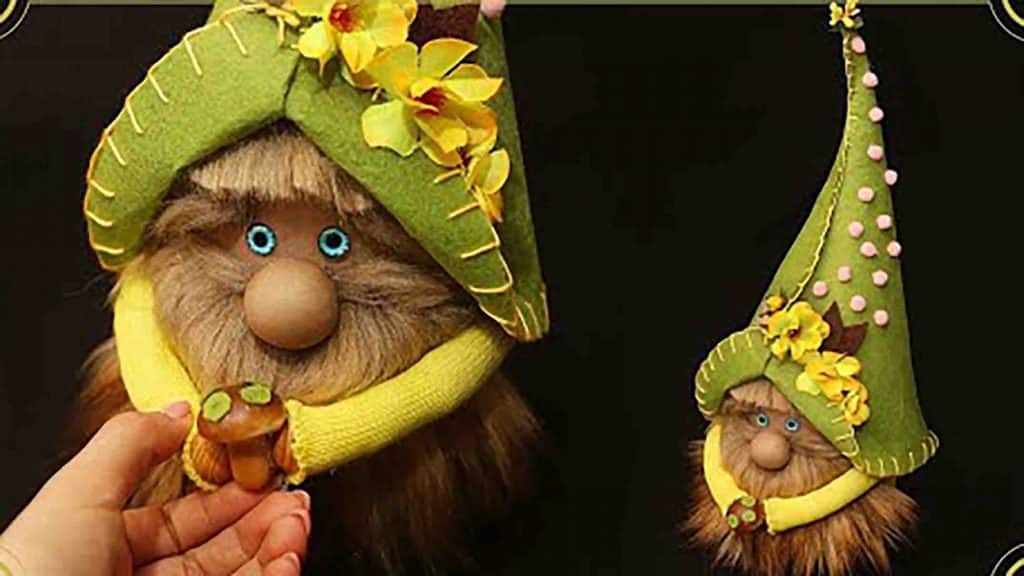
This cute gnome doll from Miarti – Creative ideas on Youtube screams Spring season, and with just socks and a handful of materials found around the house, you can make yours today! Make this a weekend project with friends or to bond with your family. Learn the step-by-step process by watching the video tutorial below.
Materials:
- socks
- felt paper
- embroidery thread
- plastic bottle (the bottom half only)
- rice in plastic (for the doll fill)
- 8cm round board
- polyester fiber
- glue and glue gun
- brown faux fur (long strands)
- sticker eyes
- 2 wooden beads
Directions:
Step 1
Cut a plastic bottle and get the bottom half, cover it with a sock. Next, fill it with rice in plastic. Get an 8cm round board, put glue around the edges, and place it on top, covering the plastic bottle with rice. After this, cut the top part of the sock, then knot it on top. Cut the excess. (This will be the main body of the gnome.) Get another sock, then place a bit of rectangle-shaped polyester fiber. Put glue and attach it horizontally on top of the main body. Cut the excess on both sides and glue it to the body. Cut a small part on another sock, fill it with a bit of polyester fiber, make a round shape, then sew it. Cut the excess part and glue it on the face part of the gnome. (This will be the nose of the gnome.) Next, get the faux fur (shape it in the gnome’s face already.) and put glue around the edges. Attach it to the lower part of the face of the gnome, this will be the beard part. Attach small faux fur on the upper side, making them the eyebrows. Attach sticker eyes, then attach another faux fur part on top of the eyebrows, making it the bangs/hair.

[social_warfare]
Step 2
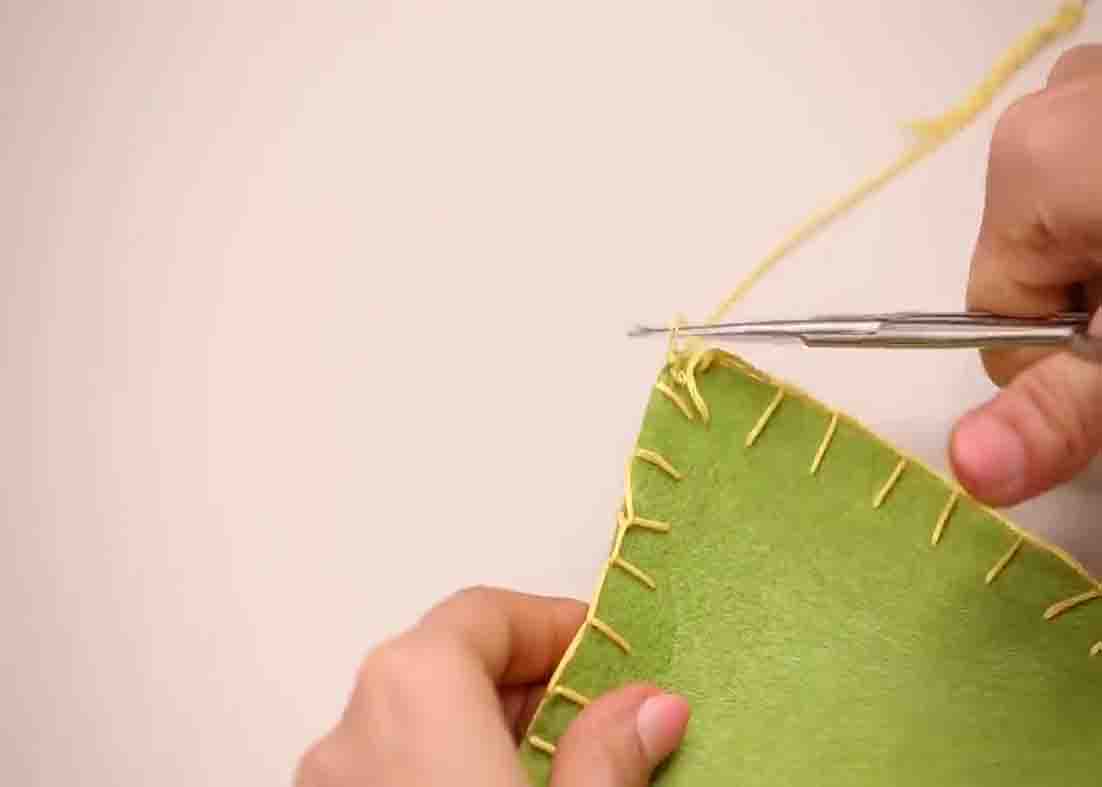
Get the felt paper, measure it on the head of the gnome, and cut it into a triangular shape. Stitch the edges using an embroidery thread. (See the pic below for the stitch design.) Fill the upper part of polyester fiber to make the hat stand. Glue it on the gnome’s head and fold the front part upward to make the face visible. Cut the partner of the sock used in the body vertically. Glue each to close, then fill them with polyester fiber. Glue a wooden bead on each end, then attach them to each side of the gnome. (This will be the arms of the gnome.) Lastly, attach a small toy mushroom to the hands, making it look like the gnome is holding it. (You can also attach faux flowers on the hat of the gnome.)
DIY Gnome Doll Using Socks Tutorial


