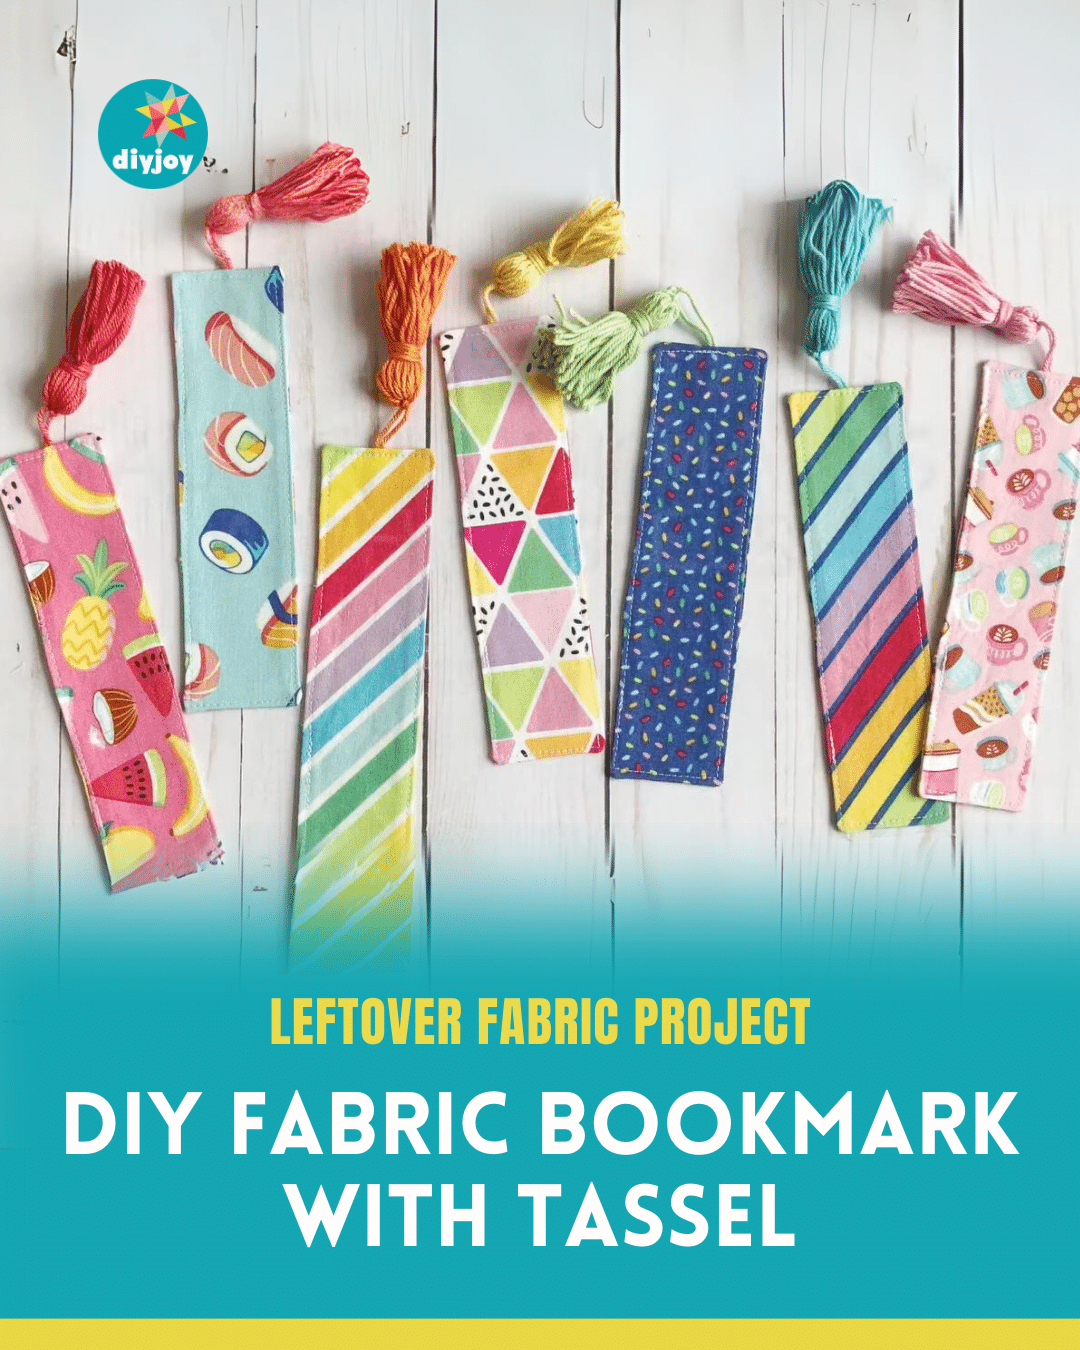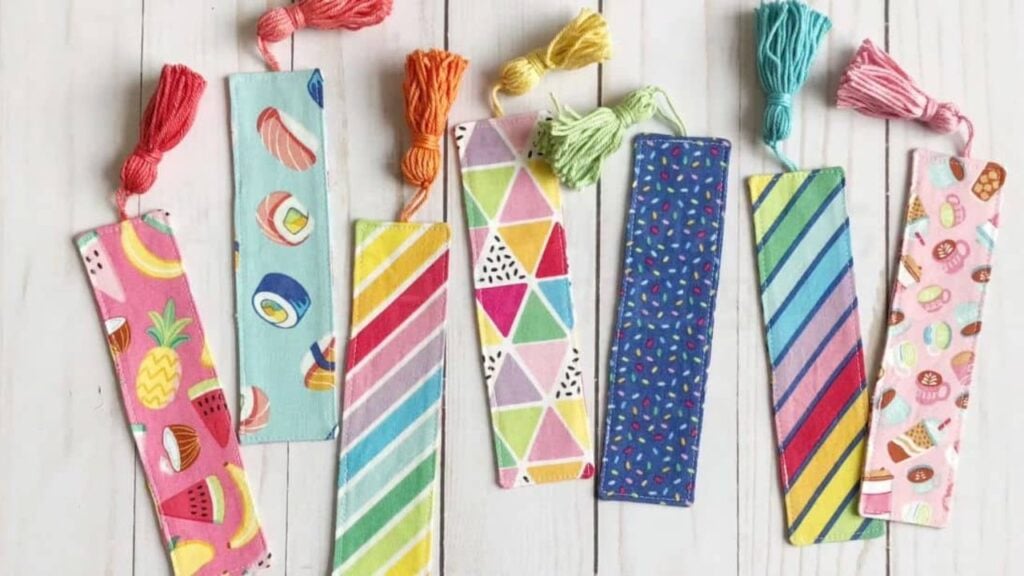
Have a collection of fabric scraps at home? I have found the perfect project to reuse them. Make them into a DIY fabric bookmark with tassel. Thanks to Ameroonie Designs‘ idea and tutorial. Aren’t these gorgeous? They are so easy and fun to make. You can finish one in just a few minutes! It’s just one of the projects that you can make with your leftover fabric.
RELATED: Fabric Scraps Christmas Cards
These are great to give as gifts to your friends, family, or loved ones, especially to those who love to read books. You can also sell these at art fairs and earn a little money. You can even offer customization and design it however they want it to be. Or you can use old clothing that they own and turn them into bookmarks. I am sure they will love it! You can definitely get creative as you want with this simple project.
Easy Fabric Bookmark Materials
- fabric scraps
- medium weight fusible interfacing
- embellishments
- ribbon or thin yarn
[social_warfare buttons=”facebook,pinterest,twitter,whatsapp”]
How to Make a Fabric Bookmark With Tassel
Step 1:
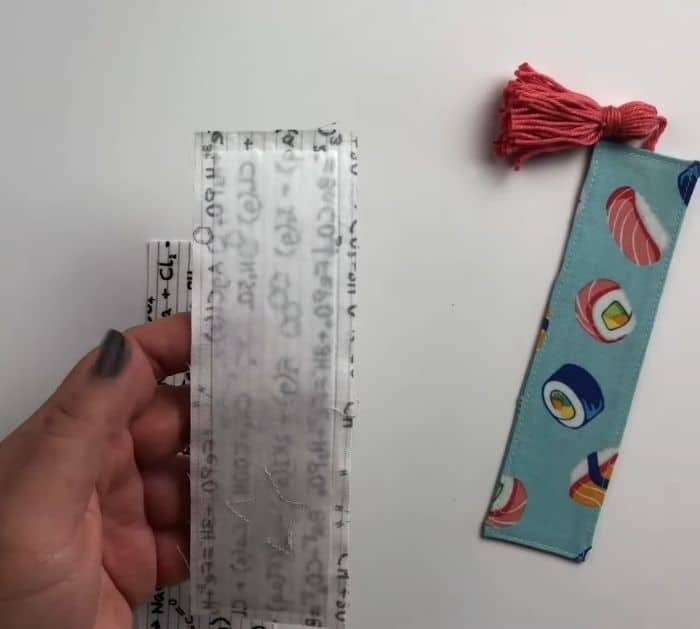
Cut 2 pieces of 2″ by 6 1/2″ rectangles from your fabric scraps. Next, cut s 1/2″ by 6″ rectangle from your interfacing.
Step 2:
Get the front fabric of your bookmark and fuse the interfacing onto the back. Place it in the center with a 1/4″ space on all sides. Make sure you follow the manufacturer’s instructions.
Step 3:
Decide if you want embellishments like hearts, stars, or whatever shape you like. You can add raw edge applique.
Step 4:
If you are going to use ribbon instead of tassel, you can get a piece of ribbon, fold it in half, and place it on the top right of your front fabric. Make sure that it’s pointing towards the inside.
For the tassel, cut a three-inch yarn, fold it in half, and place it on the top center of the front fabric of the bookmark. The loop should face toward the inside. The ends should be hanging on top.
Take the back piece of the bookmark and place them right sides together. Sew all around the edges with a 1/4″ seam allowance, leaving a couple of inches of opening for turning. Make sure to backstitch on the start and end. Once done, turn it right side out, push the corners, and press with an iron. Sew around using an edge stitch.
Step 5:
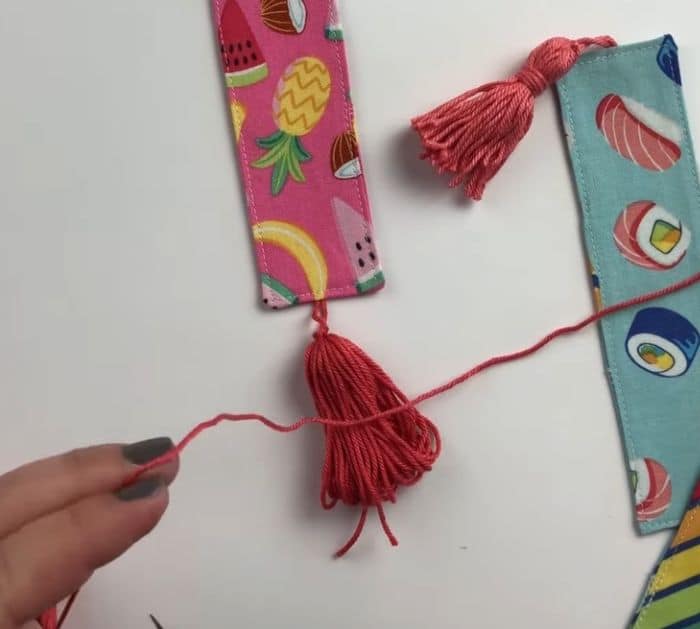
Make the tassel. Get the yarn and loop it around two of your fingers 30 times. Next, cut a piece that is one and a half long of your two fingers. Tie it through the loops. Insert one end to the loop of your bookmark and tie it a couple of times. Incorporate the two ties into your loop thread.
Step 6:
Get another piece of the yarn and create the neck of the tassel by wrapping it tightly around for about 5 to 6 times. Do a double knot. Cut all the loops and cut the excess.
DIY Fabric Bookmark With Tassel