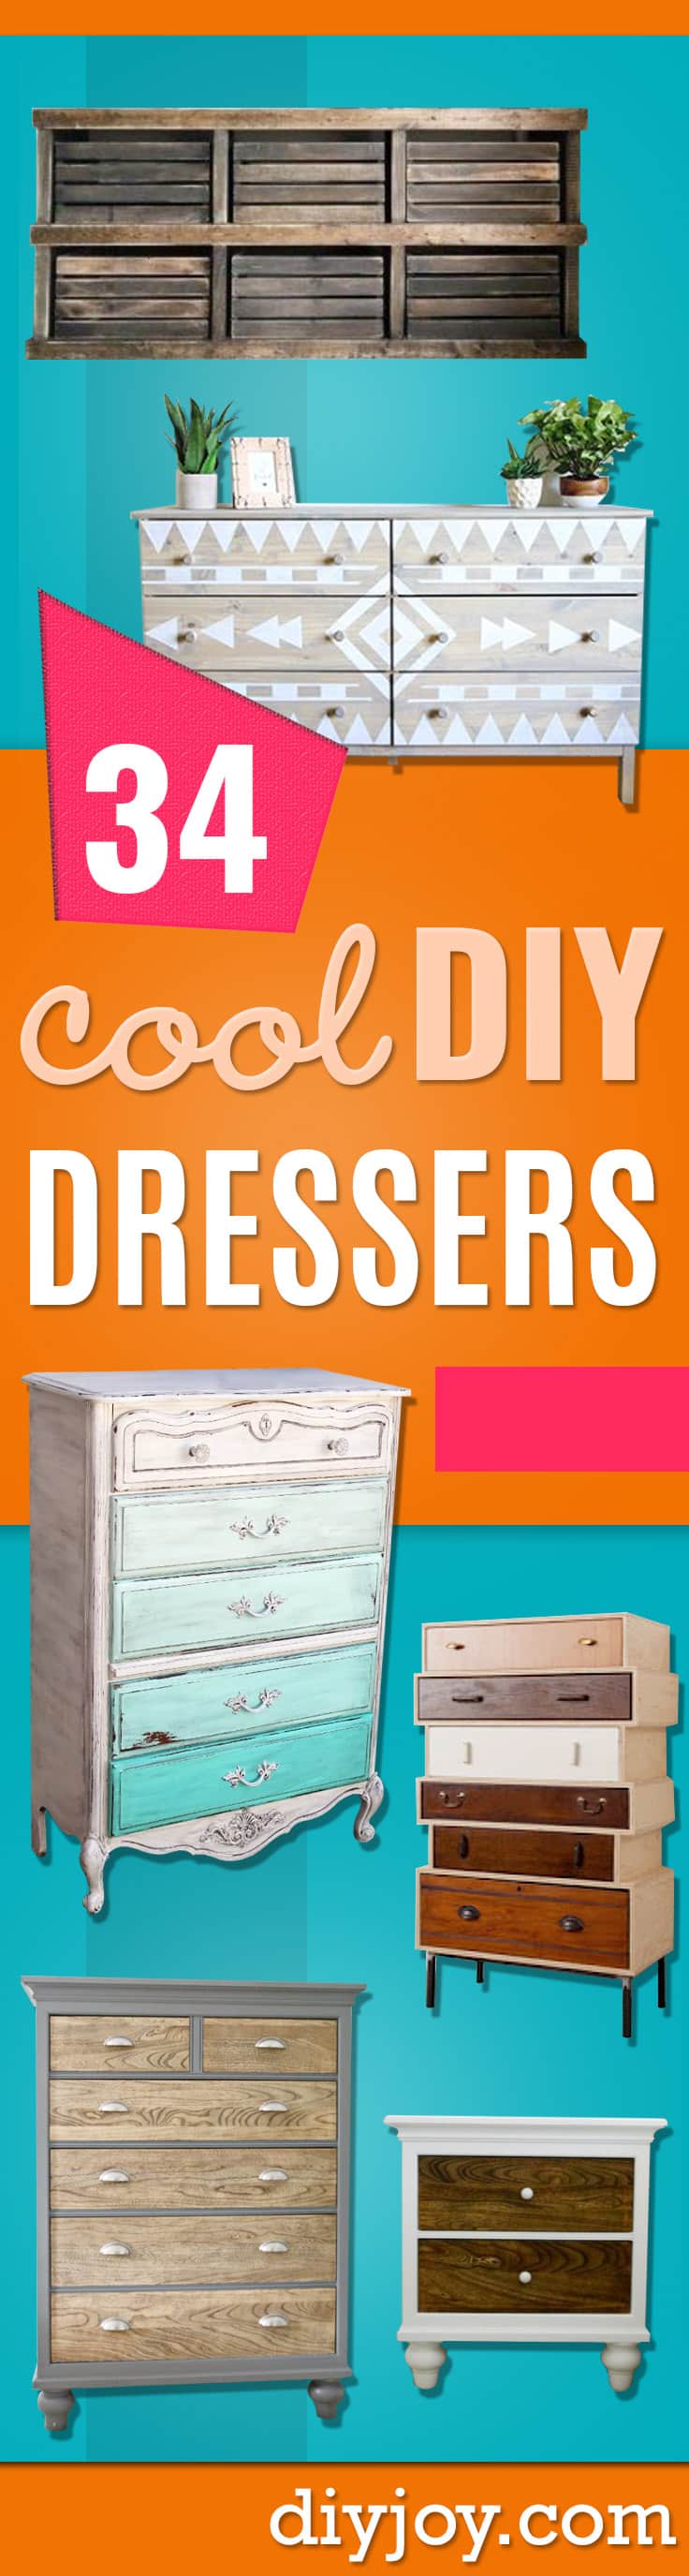
A good dresser costs a small fortune new, but a tired thrift store find or a few sheets of plywood can give you something even better. These 21 DIY dresser ideas cover both sides: free building plans for crate, pallet and 16 drawer dressers, plus makeovers with paint, stain, stencils and even spray painted lace. You’ll find IKEA hacks, a reverse dipped mid century piece, a Lego themed dresser for a kid’s room and a dresser turned dress up closet. Whether you’re a beginner with a paintbrush or you love your pocket hole jig, there’s a project here for you! One tip before you start: pull every drawer and check the slides and joints first, since a wobbly box is easier to fix before the paint goes on.
1. Build an Extra Wide Simple Dresser

This extra wide simple dresser copies a pricey kids catalog dresser, and the free plans make it a great first furniture build. Build the sides from hardwood plywood and 2 by 2 legs with pocket holes and wood glue, then add the back supports and front trim. A scrap wood spacer keeps every drawer opening even. Build three small and four large drawers to fit the openings, prime everything and spray on a satin white. Tip: number the backs of the drawer faces so they go back in the right spot!
Get the full tutorial at Sew Woodsy.
2. Pottery Barn Inspired Crate Dresser
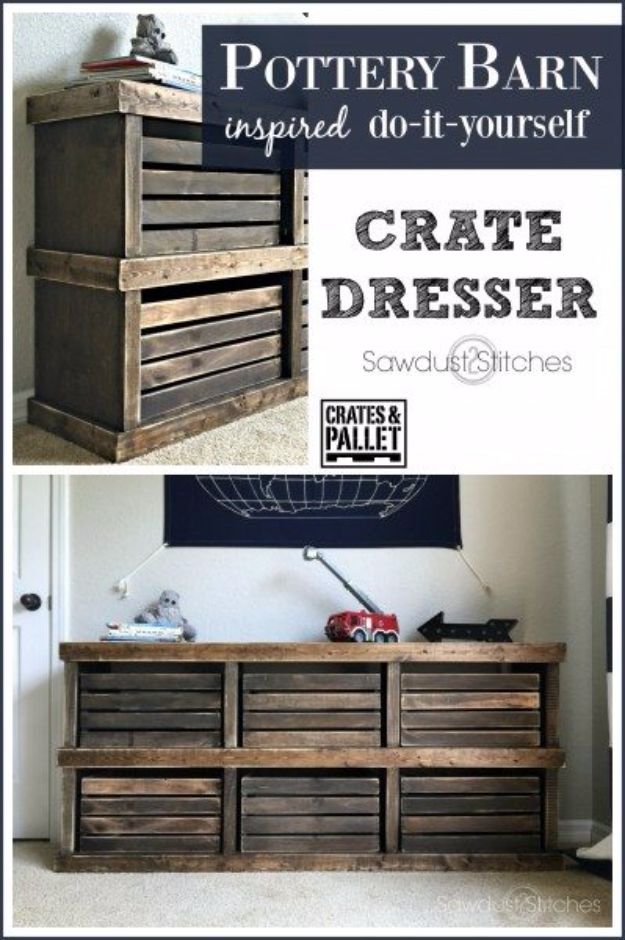
This Pottery Barn inspired crate dresser trades drawers for six big wooden crates that slide in and out. Build a plywood carcass from one 4 by 8 sheet, joining every seam with wood glue, pocket holes and pocket screws, then add dividers for two rows of three cubbies. Wrap the front and sides in 1 by 3 trim with mitered corners, then add thin half inch trim. Fill the nail holes, sand, stain to match the crates and slide them in. It’s perfect for a playroom.
Get the full tutorial at Sawdust 2 Stitches.
3. Ombre Dresser

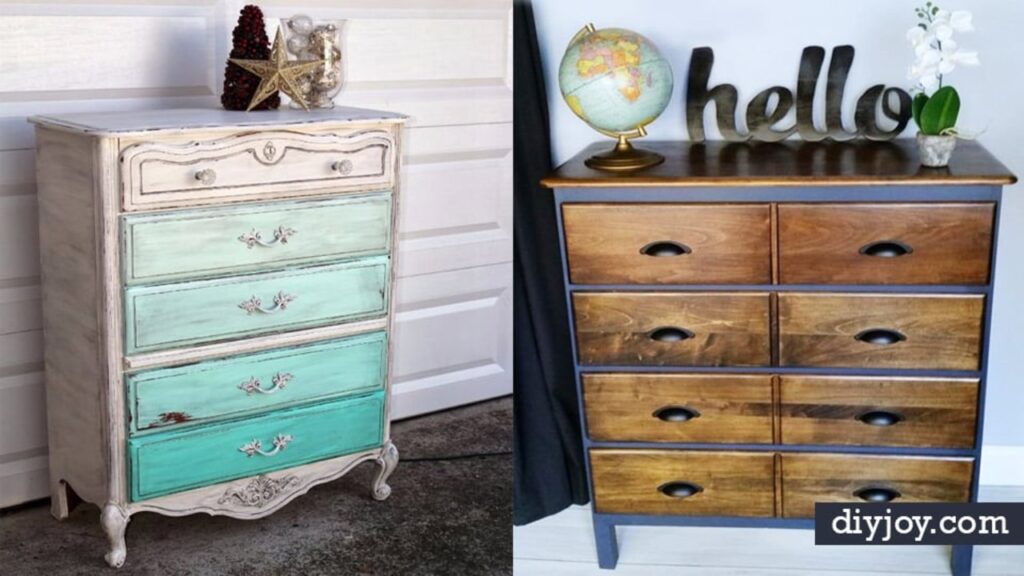
An ombre dresser fades from deep aqua at the bottom to nearly white at the top, and you only need one sample pot to pull it off. Paint the body and top drawer in homemade chalk paint mixed with a soft white. Paint the bottom drawer in aqua, then keep adding white to the aqua for each drawer above it. Swap a few pulls for glass knobs, paint the rest of the hardware white and glaze it. Perfect for a pink and aqua bedroom!
Get the full tutorial at Sometimes Twice.
4. Reverse Dipped Mid Century Dresser with Angled Sides

A reverse dipped finish gives a worn mid century dresser a crisp, modern look. Wet sand the lower drawers and the bottom of the dresser, then refresh the wood with a walnut gel stain and seal it. Measure and tape off the top portion, placing the line off center on a drawer for an asymmetrical look. Brush poly along the tape so nothing bleeds, then prime and paint the top in white. Thin coats give the smoothest finish, so take your time.
Get the full tutorial at The Weathered Door.
5. Ballard Designs-Inspired Dresser

This Ballard Designs inspired dresser is built from scratch with free plans and pretty maple plywood that takes stain beautifully. Cut the top and bottom from the same sheet to stretch your plywood. Build the carcass with a pocket hole jig, keeping holes away from the edges where the legs screw in. Attach the top with a 3/4 inch overhang, iron on edge banding to hide the raw plywood, then add cove moulding. Build the drawer boxes, install the slides and finish with decorative trim.
Get the full tutorial at The House of Wood.
6. Lace Painted Dresser

Lace painting is a magic trick for an old dresser. Paint the drawer fronts a solid base color and let them dry completely. Lay a piece of lace fabric flat over each drawer and spray paint over it in a contrasting color, then lift the lace to reveal a delicate pattern. Glass knobs finish it off beautifully. Try metallic paint for a luxe look or soft blue for a cottage feel. The full video walks you through the whole makeover.
Get the full tutorial at DIY JOY.
7. DIY Aztec Inspired Dresser

This Aztec inspired dresser gets its bold pattern from nothing fancier than painter’s tape. Start with an unfinished wood dresser, stain it and let it dry completely. Tape off a mix of triangles, diamonds, stripes and tick marks, trimming the tape with a craft knife for crisp points. Dab a thin coat of white paint over the tape with a sponge brush for a slightly weathered look. Peel the tape once the paint dries and finish with a clear coat if you like. It’s perfect for a nursery!
Get the full tutorial at Classy Clutter.
8. Contrast Color Dresser

Two tones can make a bedroom set feel collected rather than matchy. Sand just the drawer fronts back to bare wood and stain them a warm walnut. Paint the dresser frame a deep charcoal gray, then swap old knobs for brushed nickel cup pulls. The dark gray and warm wood together give the piece a handsome, tailored look that suits a shared bedroom. It’s a smart way to update a store bought set without replacing a thing.
Get the full tutorial at Naptime Decorator.
9. High End Map Dresser Drawer

This IKEA hack turns a basic three drawer RAST dresser into a map cabinet style piece. Build the drawers and frame as usual, then face each drawer with thin lattice strips so one drawer looks like several. Stain it all in a dark espresso, paint the frame and top a deep gray and seal it. Add round tapered legs on leg plates for height, then finish with rows of brass knobs and metal label holders. It looks like a high end antique!
Get the full tutorial at Diva of DIY.
10. DIY 7-Drawer Dresser

Drawers scare a lot of builders off dressers, but this 7 drawer plan breaks them into simple assemblies. Build plywood drawer boxes, frame style sides and back, then drawer fronts with framed panels for a classic shaker look. A removable changing table topper means it grows from nursery to big kid room. Expect about $180 in lumber and six work days, with optional soft close slides as an upgrade. The free plans include a cut list and step by step photos.
Get the full tutorial at Build Basic.
11. DIY Bone Inlay Dresser

Bone inlay furniture costs thousands, but a stencil gets you the look for the price of a yard sale dresser. Sand off the old finish until it’s smooth, prime it and paint the whole piece a deep charcoal. Tape an inlay pattern stencil in place and load a stencil brush with white, offloading it on a paper towel until it’s almost dry. Dab the pattern on, then move the stencil and repeat until every drawer and side is covered.
Get the full tutorial at Cutting Edge Stencils.
12. DIY Chalkboard Painted Dresser

A chalkboard painted dresser turns a roadside find into furniture you can write on. Lightly sand the dresser, then brush on two coats of homemade chalk paint in a deep green, sanding lightly between coats. Take off the drawer pulls and paint the drawer fronts with chalkboard paint, edges first, then vertical strokes, then horizontal strokes once it’s dry. Repeat for even coverage, let it cure for 24 hours and rub chalk over the whole surface to condition it. Label drawers, jot reminders or doodle away!
Get the full tutorial at Sew Woodsy.
13. DIY Star Wars Dresser

A plain IKEA dresser becomes a galaxy far, far away with this easy vinyl resist trick. Give the whole dresser a light coat of gray stain first. Cut a TIE fighter shape from vinyl with a cutting machine, piecing it together if it’s bigger than your mat, and stick it across the drawers. Dry brush chalky finish paint over the vinyl edges, then paint the rest of the dresser. Peel the vinyl right away to reveal the stained wood ship. Once the cutouts are ready, it takes under an hour!
Get the full tutorial at Classy Clutter.
14. Anthropologie Knock-Off Dresser

This Anthropologie knock off turned a garage toolbox dresser into a numbered showpiece. Sand every drawer and the frame down to bare wood, using coarse 60 grit when the paint layers fight back. Freehand a template and jigsaw a matching cut out into each drawer front, then cut the scrolly base into straight lines. Spray a faux metal finish on the sides and top with hammered and metallic paints, then layer copper and turquoise acrylics. Fill old handle holes with sawdust and Mod Podge.
Get the full tutorial at Craftaholics Anonymous.
15. DIY 16-Drawer Dresser

Sixteen little drawers means a home for every bobby pin, nail polish and hair tie. This tall dresser is a simple build: one carcass and a whole lot of small boxes, so it’s great practice for drawer making. Free step by step plans are linked from the post. Add milk bottle knobs in oil rubbed bronze and small antique brass label holders so everyone knows what goes where. It works just as well for craft supplies, office odds and ends or socks.
Get the full tutorial at Jaime Costiglio.
16. 7-Drawer Dresser With Chevron Top

This 7 drawer dresser is built mostly from free pallet wood, which keeps the cost way down. Take the pallets apart, pull every staple and trim the edges straight on a table saw so the boards work like 1 by 4 pine. Build the face frame, back frame and side supports with pocket hole joinery, then add plywood drawer boxes. The showpiece is a chevron top made from short pallet pieces. Plywood makes it faster if you’d rather skip the salvage.
Get the full tutorial at Her Tool Belt.
17. Lego Themed Dresser

A Lego themed dresser is one of the easiest kids’ room makeovers there is. Pull off the old drawer handles, sand away the paint and fill the screw holes with wood filler. Cut 1 1/2 inch dowel rods into one inch thick rounds. Glue the rounds onto each drawer face in rows, then secure them with screws or nails. Paint each drawer a bright brick color like red, blue, green and yellow, and the round studs double as drawer pulls!
Get the full tutorial at Ideas2Live4.
18. Stenciled Wood Dresser

A climbing vine stencil gives plain drawer fronts a romantic, hand painted look. Sand the fronts back to bare wood, then line all the drawers up in the dresser so the pattern runs continuously from top to bottom. Stencil the vine in a soft cream, then stain right over the paint so it darkens and blends into the wood. Paint the body and hardware a warm putty color and seal with light brown wax that settles into the carved details.
Get the full tutorial at Designed Decor.
19. Dresser With Closet

Got an old wardrobe dresser with a cabinet top? It can become the cutest dress up closet. Take out the upper drawers, patch the holes and add a shelf, trim and a shower rod for hanging costumes. Paint it bright white, then line the back and the bottom drawer with cheerful wrapping paper using spray glue. Add rows of hooks for necklaces on one side and a mirror painted a happy color on the other. Anchor it to the wall for safety.
Get the full tutorial at Rambling Renovators.
20. Summer Sunshine Yellow Dresser

Need a little sunshine? This curvy craigslist dresser had broken trim, scratches and missing knobs, and a mustard seed yellow milk paint brought it right back to life. Paint the body in the bright yellow, then pick out the trim, the carved apron and the curved drawer details in a soft linen white so they pop. Swap in new knobs where any are missing. The two tone mix feels cheery but grown up, and it’s a color combo that sells fast!
Get the full tutorial at q is for quandie.
21. Stunning Lace Dresser

Spiders, cobwebs and a rotted leg couldn’t stop this lace dresser makeover. Scrub the dresser clean, fix the leg, sand down peeling paint and paint the body white. Tape off the drawer edges so they stay white, then lay lace fabric over each drawer front and spray paint over it in a matte aluminum. Spray the pulls to match. Use a fresh piece of lace for every drawer so the pattern stays crisp. The result looks like delicate metal filigree.
Get the full tutorial at Uniquely Chic Furniture.