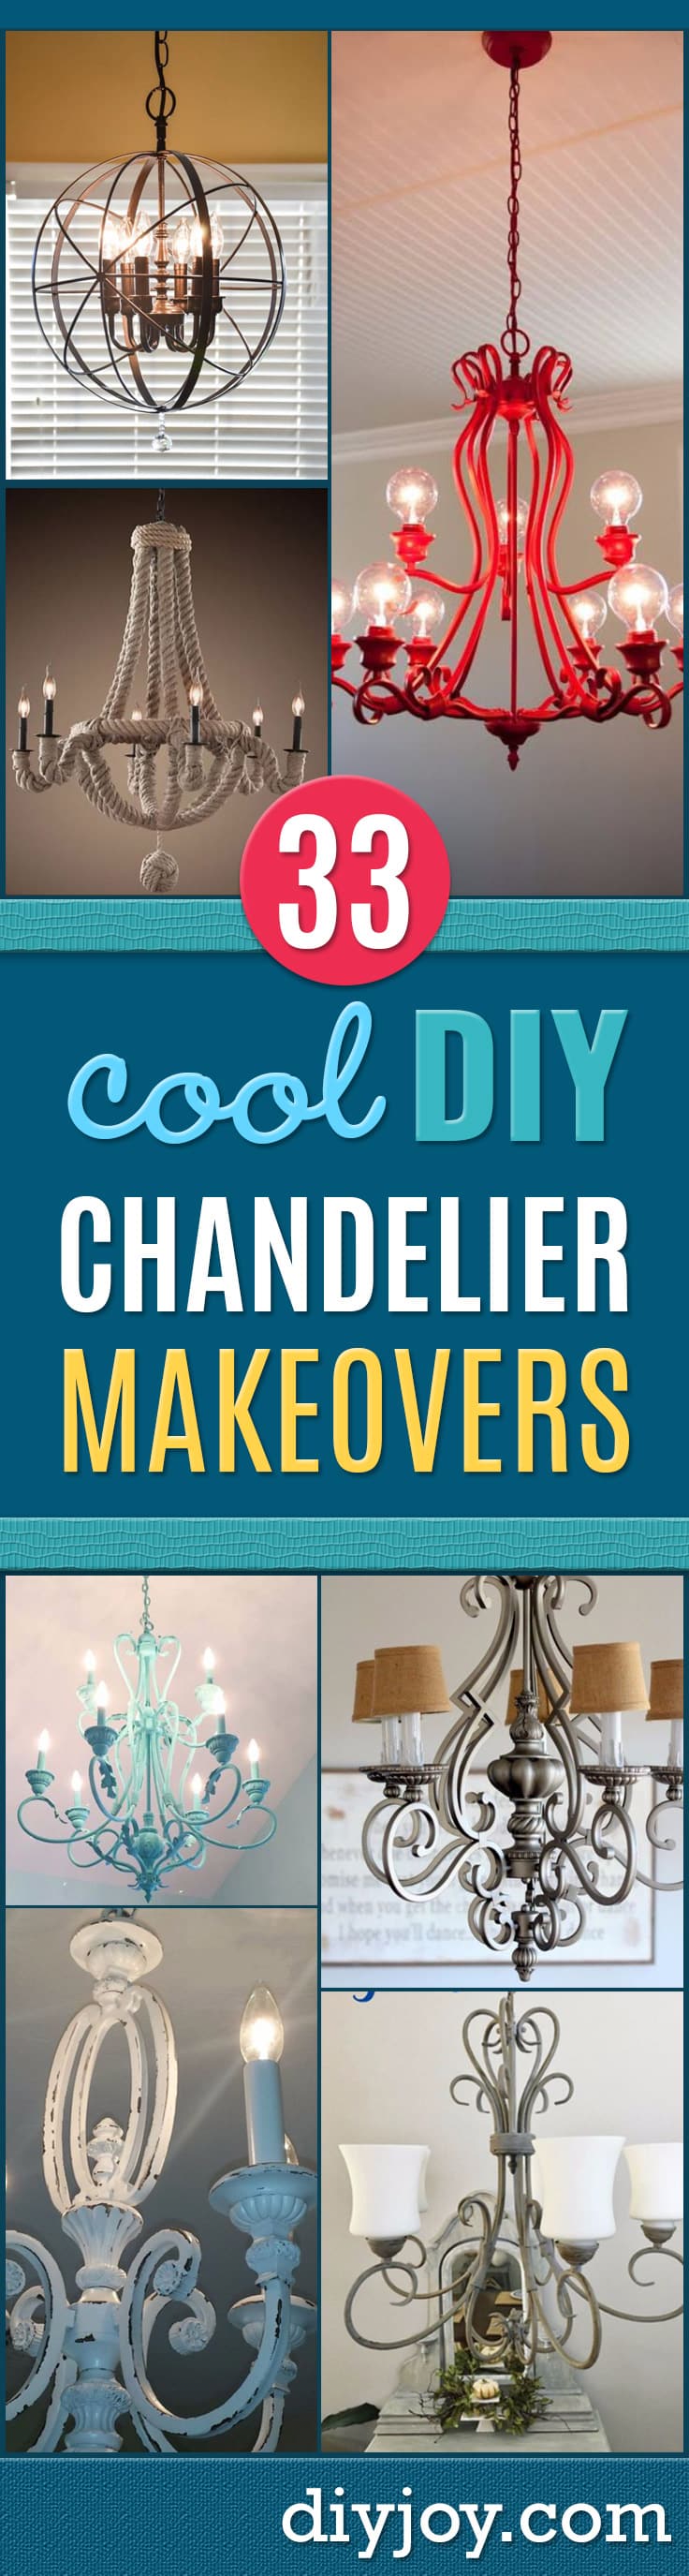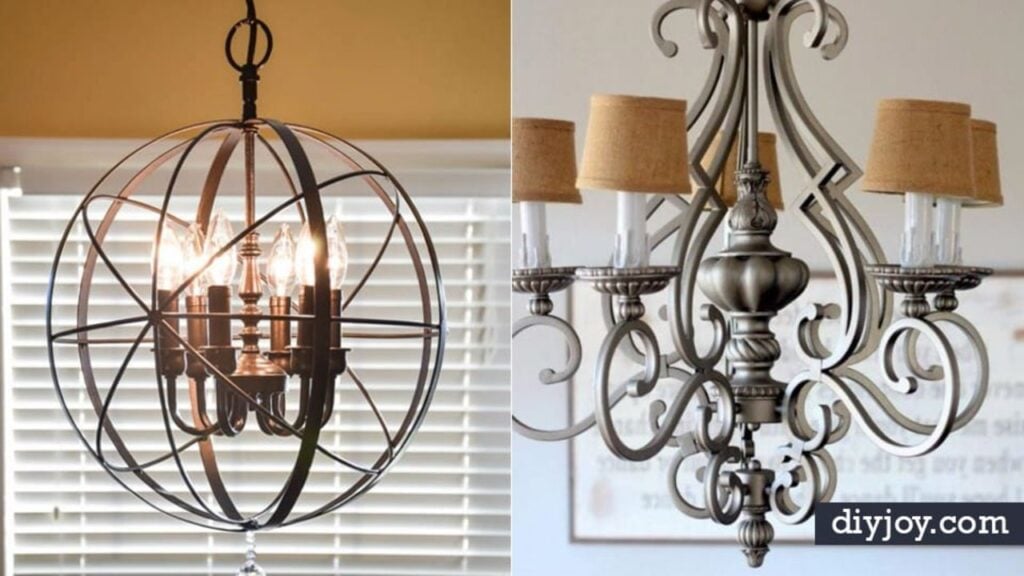
A can of spray paint costs about eight dollars. A new dining room chandelier costs about four hundred. That gap is the whole reason these 21 DIY chandelier makeovers exist, and the gap is where the fun is. The fixture hanging over your table right now is probably solid brass under all that dated shine, and brass takes paint beautifully once the bulbs and the little white sleeves come off. Below you will find navy, royal blue, turquoise, chalky white, oil rubbed bronze and one that went bright red. You will also find an orb cage built around an existing fixture for forty dollars, a set of arms flipped upside down for three fifty, and one chandelier that stopped being a light and became a hanging flower planter. Some take an hour. Some take a weekend. None of them take four hundred dollars.
1. DIY Orb Chandelier
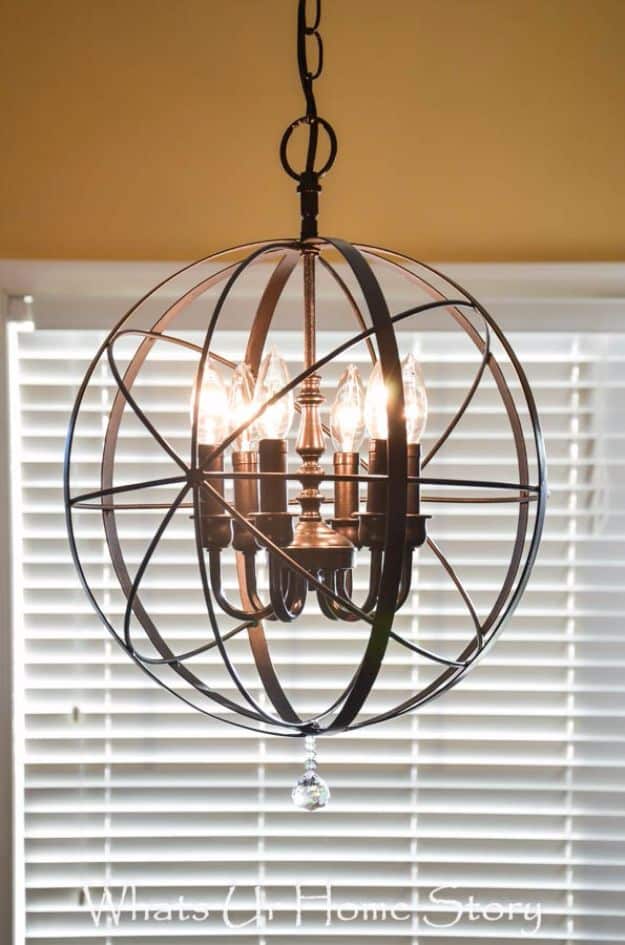
Forty dollars total, and it reads like a lighting showroom piece. The parts list is the trick: a twenty inch decorative orb for fifteen dollars, a carriage light chandelier off Craigslist for ten, a can of oil rubbed bronze for four, zinc plated nipples for six, and a thirty millimeter crystal ball prism for five. Prime everything, then three thin coats of bronze over the orb, the fixture, the chain and the wire so nothing reads as two different metals. Drill the orb slowly with the bit perpendicular, starting small and stepping up. Two nuts lock the rod.
Get the full tutorial at What's Ur Home Story.
2. Red Chandelier Makeover
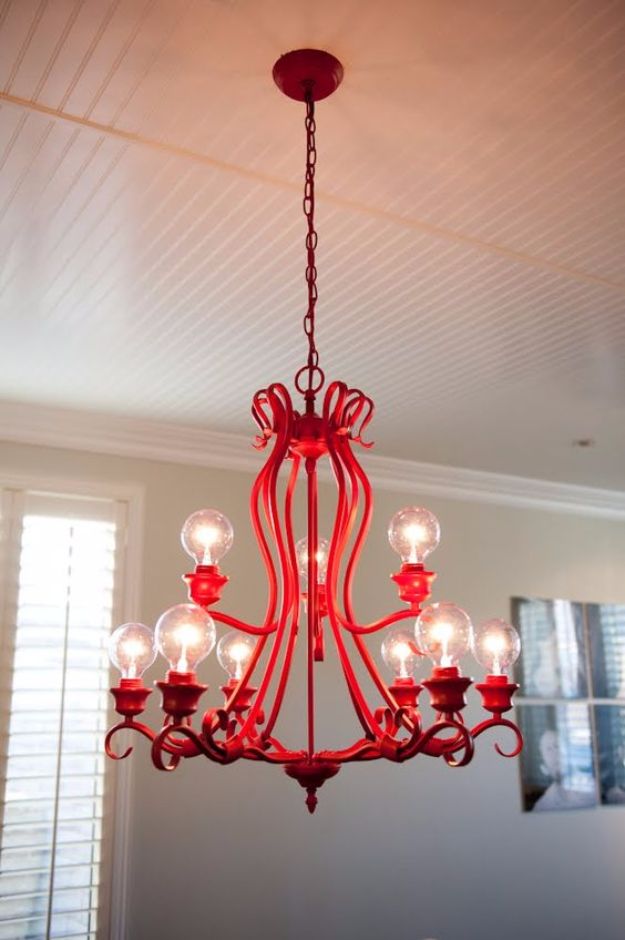
Sometimes the answer really is one can of spray paint and better bulbs. This fixture came with the house and sat over an empty ceiling hole for a year and a half while its owner waited for a chandelier worth buying. Red spray paint and a set of clear decorative bulbs ended that wait. The bulbs matter more than people expect here, because a glossy red frame with frosted candle bulbs looks like a mistake, while the same frame with clear exposed filaments looks deliberate. There is no full step by step on the page, so treat this one as a color idea.
Get the full tutorial at Focus Jennie.
3. Spray Painting A Chandelier Navy
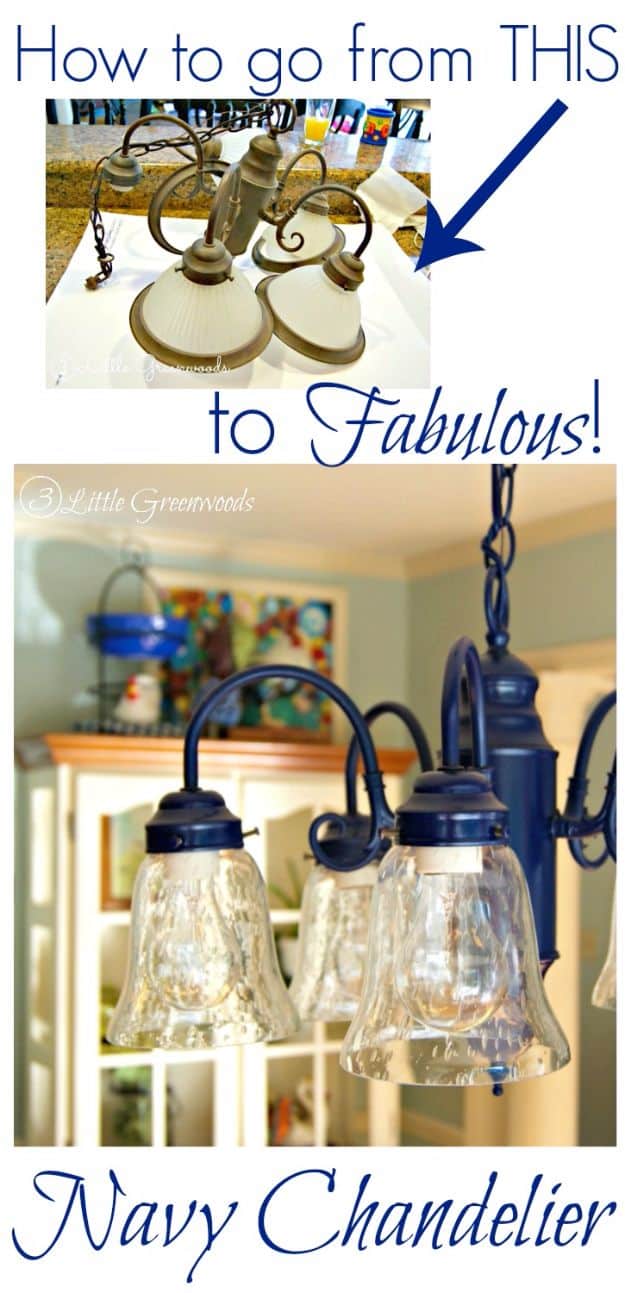
Navy is the color that makes a builder-grade kitchen fixture look like it was chosen rather than inherited. The graphic shows the before, a squat brass five arm with clouded glass shades, and the after, the same frame in deep navy with the original textured glass shades put straight back on. That reuse is the smart part. Glass shades almost never need replacing, and leaving them clear against a dark frame keeps the light output where it was. Mask the sockets, pull the shades before you spray, and let each coat flash off before the next.
Get the full tutorial at 3 Little Greenwoods.
4. DIY Chalk Paint Chandelier Makeover
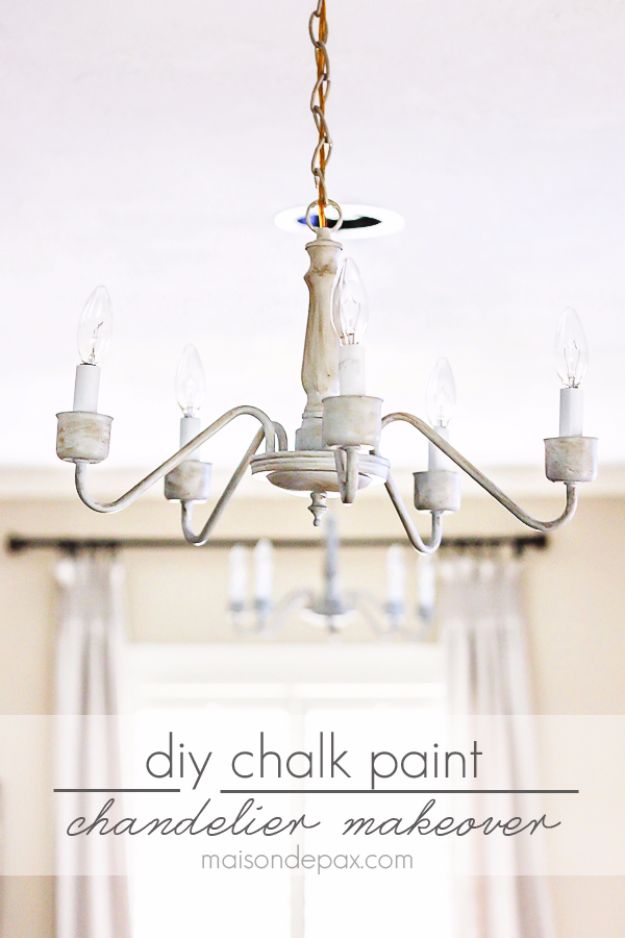
Chalk paint is the reason this one needs no sanding at all, which on a fixture full of curves and sockets is the difference between a project and a chore. Two brushed coats of Annie Sloan in Paris Grey over the base, the chain and the ceiling cover, with a finer brush for the chain so the wire stays clean. Then one solid coat of clear wax, then dark wax rubbed on with an old rag until it looks aged. The clear coat underneath is your undo button, because light wax lifts dark wax back off.
Get the full tutorial at Maison de Pax.
5. Thrift Store Chandelier Makeover
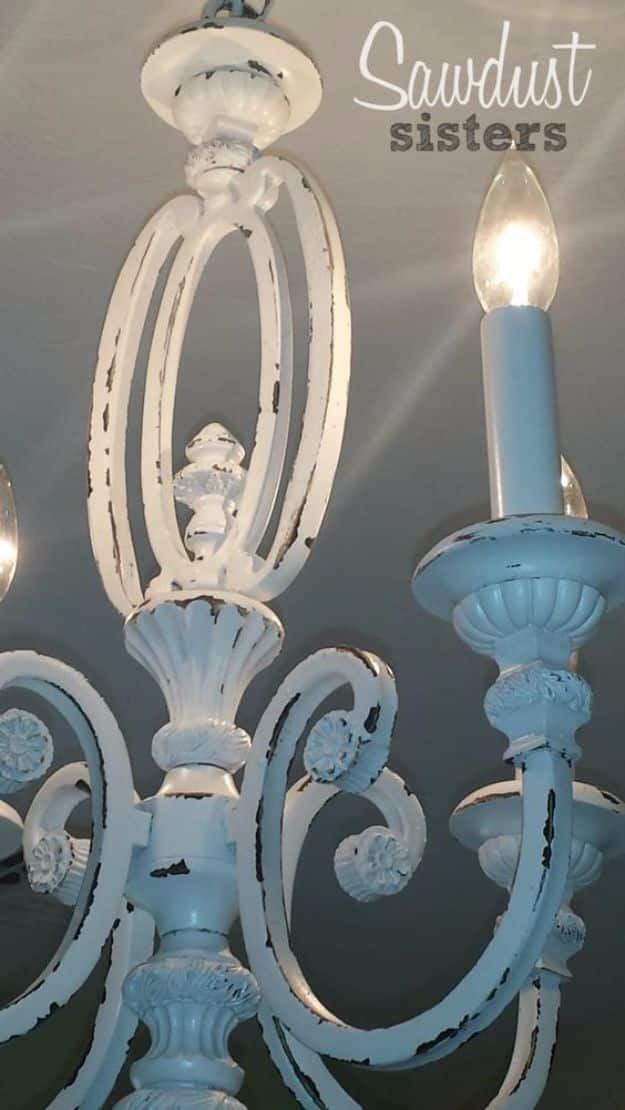
A soft chalky blue with the high points sanded back, which is what turns a painted fixture into something that looks salvaged rather than sprayed. The photograph is a tight crop of the center column and two arms, and the wear is deliberate and uneven: heavier on the rounded bulges and the rim of each bobeche, almost untouched in the recesses. That is where real wear lands, so that is where sandpaper belongs. Work the paint back with a fine grit after it has fully cured, not while it is soft, or it will roll off in strips.
Get the full tutorial at Sawdust Sisters.
6. Bye Bye Brass
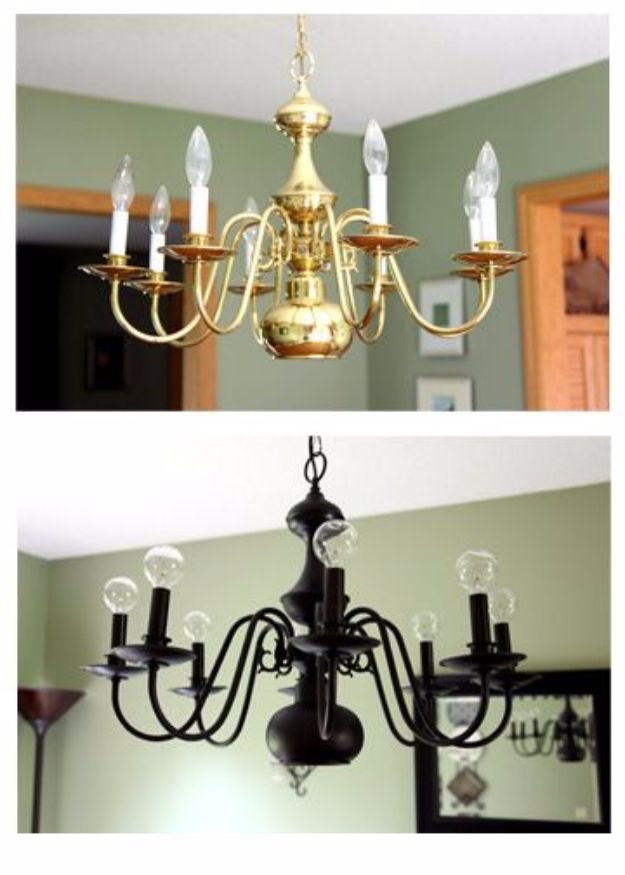
Eighteen dollars, all in, and most of that was paint. Rust-Oleum metallic oil rubbed bronze went over a shiny brass fixture that had been taken down, wires marked so it would go back the same way, white sleeves pulled off and sockets taped. Then the good part: the whole thing was hung from a tree with an old swing and a carabiner so every angle was reachable. The can stayed eight to ten inches out and put down a lot of thin even coats. The sleeves got painted separately on a branch. Four dollars of modern circle bulbs finished it.
Get the full tutorial at Casa de Kemper.
7. Good Chandelier Makeover
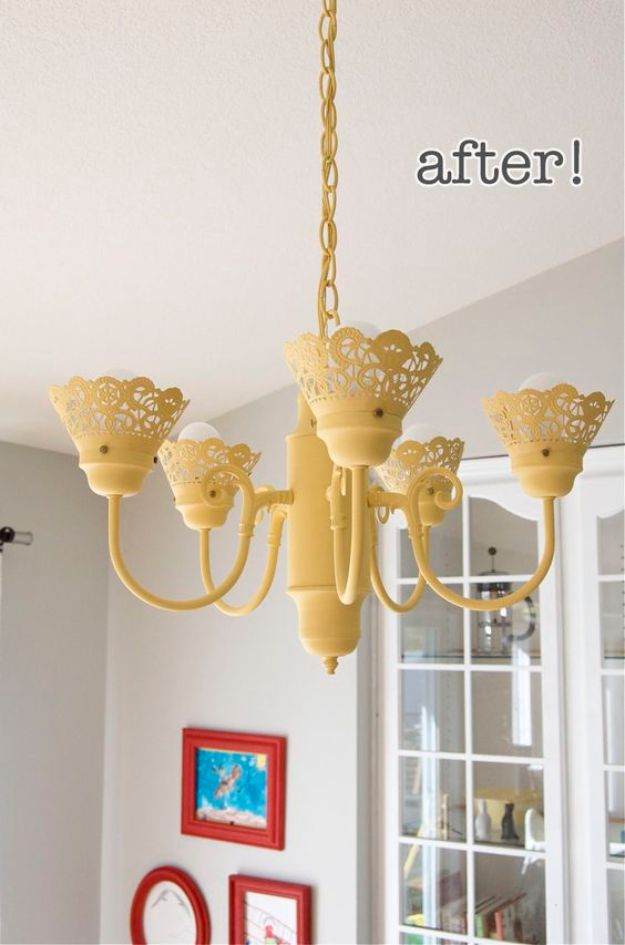
Three dollars and fifty cents, and the best part costs nothing at all: the arms were simply grasped and turned upside down. That one move changes the whole silhouette from Colonial to something closer to a French bistro fixture. After that it is an eighty nine cent bottle of yellow craft paint over the arms and chain in a matte finish, plus a pack of six ten inch foil doilies for two fifty, cut in half with the inner circles removed, painted to match, then rolled and slid onto the socket screws to hide the bulb bases. Forty watt bulbs or lower.
Get the full tutorial at Matsutake.
8. DIY Outdoor Chandelier Planter
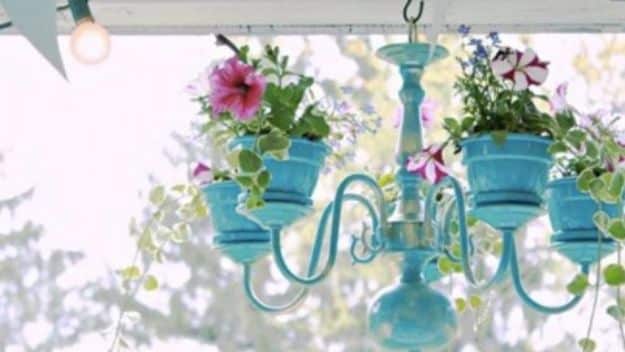
A dead light fixture is a perfect planter frame, and that is the whole idea here. A garage sale chandelier cost four dollars, small pots cost a few more, and the whole thing came together in about an hour. Paint it a color that fights the garden rather than blending into it, then seat a small pot in each candle cup and hang it where it catches light. Because it does not need to work as a light, a fixture with cut wiring or a dead socket is exactly what you want, and those are often free.
Get the full tutorial at DIY Joy.
9. Easy Chandelier Makeover
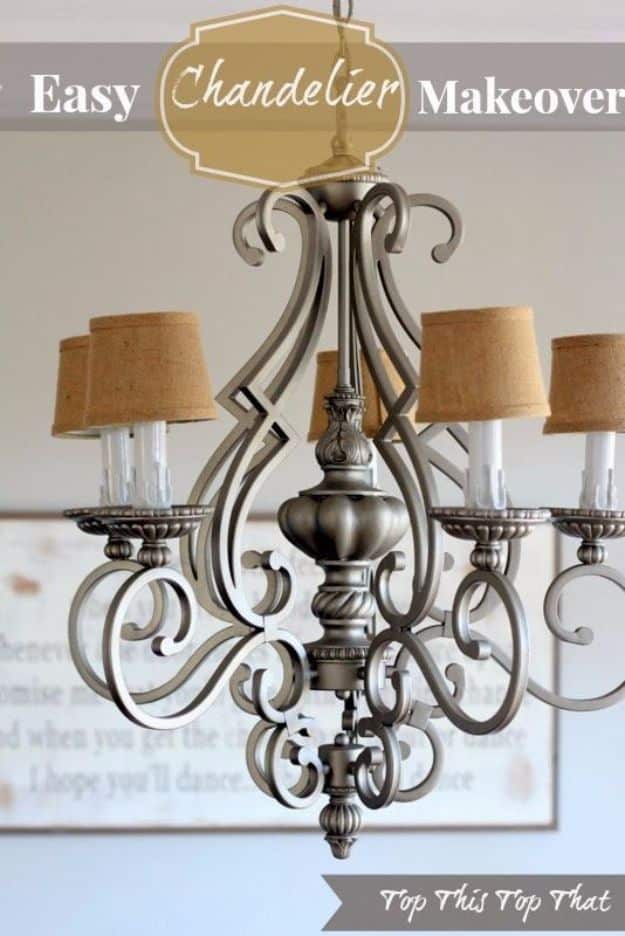
Twenty six dollars and a couple of hours, against a fixture that had been in the house for twelve years. Two cans of satin nickel spray paint went over the bronze frame, one can of glossy white handled the parts that needed to stay bright, and five burlap shades from the craft store replaced the tired off-white ones. Shades are the lever nobody pulls. Swapping them changes the shape and the color temperature of the whole fixture at once, and burlap in particular warms up a cool nickel finish so the two do not fight.
Get the full tutorial at Duke Manor Farm.
10. Hand Painted Chandelier Makeover
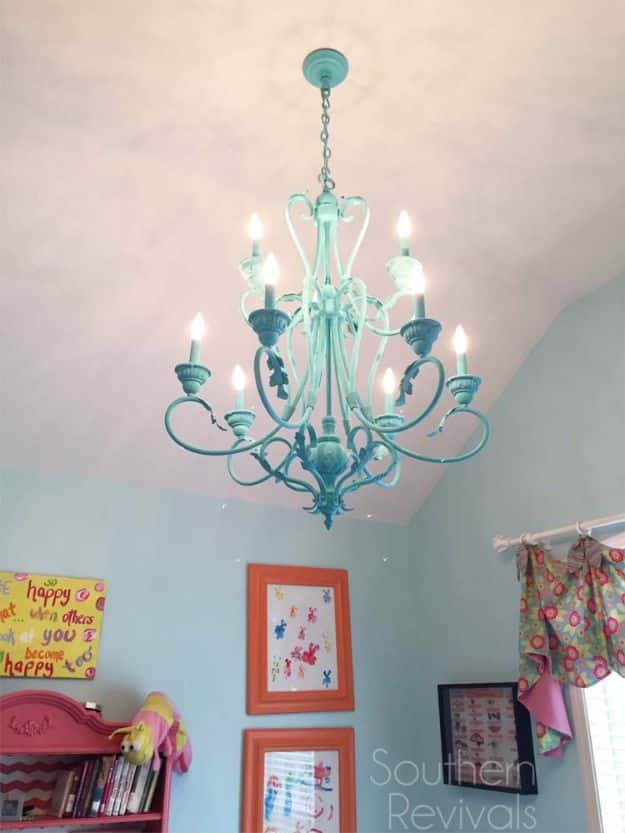
This is the second attempt at the same fixture. The first one was sprayed and it was not right, so the whole thing came back down and got hand painted instead, with Chloe by Maison Blanche. Brushing beats spraying when you want the paint to sit in the details rather than skim over them. The chandelier tip buried in this post is worth the visit on its own: hang the fixture outside to reach every angle, then when it is dry, lay it on its side on a drop cloth and do the chain from both sides. A hanging chain never gets fully covered.
Get the full tutorial at Southern Revivals.
11. $5 Thrift Store Chandelier Makeover
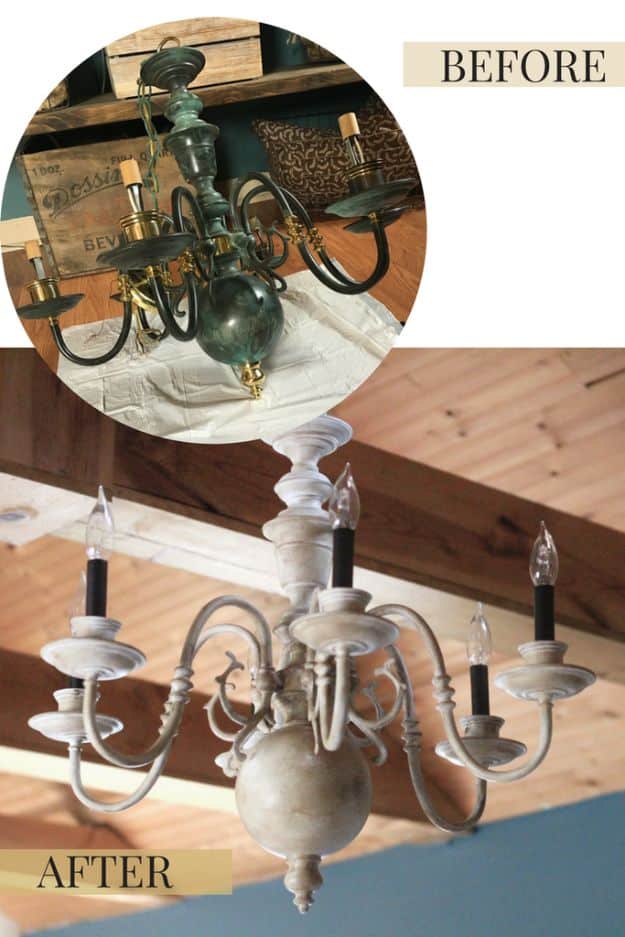
Five dollars is a real price for a real chandelier if you are willing to look past the finish. The before shot is a dark tarnished brass fixture with green tinged arms, photographed on a workbench. The after is the same frame in a soft weathered gray white, hung under exposed timber beams where the paint picks up the color of the wood. That pairing is the point: on a light painted fixture, warm wood overhead stops the white from looking stark. Clean tarnished brass thoroughly before any paint goes on, because old polish residue will reject it.
Get the full tutorial at Hayden Scharrer.
12. Revive An Antique Chandelier
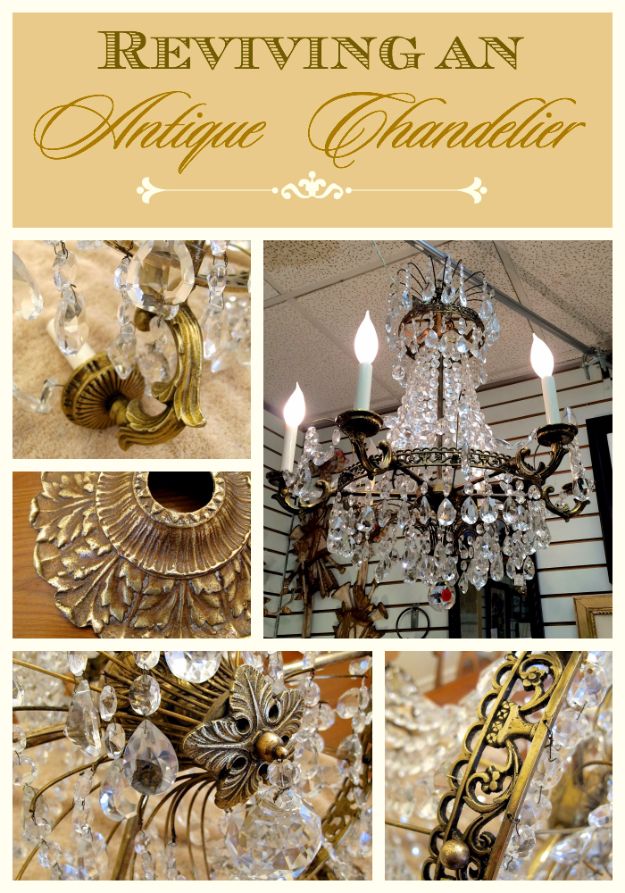
Not every chandelier should be painted. An antique brass frame with original crystals is worth cleaning instead, and the finding here is a good one: a bottle of commercial brass cleaner left significant residue and could not reach the intricate castings, and a toothbrush just flicked cleaner onto the crystals. Plain ordinary steel wool won. It lifted the grime without scratching the metal and left the patina intact, which is exactly what you want on a piece this old. Reattaching the loose crystals afterward with wire jewelry tools was the long, painstaking half of the job.
Get the full tutorial at DesignThusiasm.
13. Big Blue Chandelier Makeover
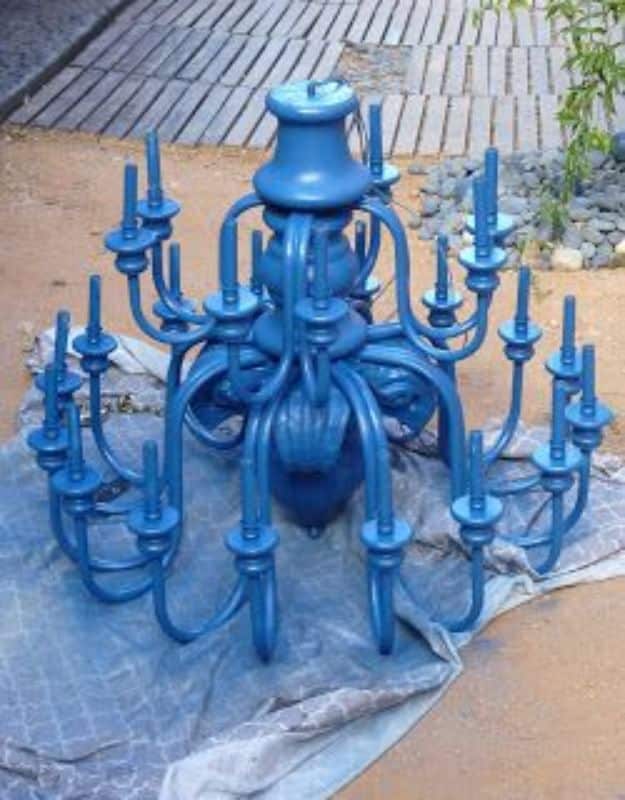
Thirty six inches tall, forty two across, twenty four bulbs, and originally brown and beige. Forty dollars on Craigslist bought it; four cans of royal blue spray paint changed it. The color was tested first with craft paint tubes before anything permanent happened, which is a five minute habit worth copying on any big piece. Hanging it took measuring the ceiling drop, friends to hoist and balance it, wiring through the collar into the ceiling box, and a six hundred watt dimmer to handle twenty four bulbs. Expect blue on your hands and in your hair.
Get the full tutorial at Hayes Tone.
14. Paint A Chandelier Makeover
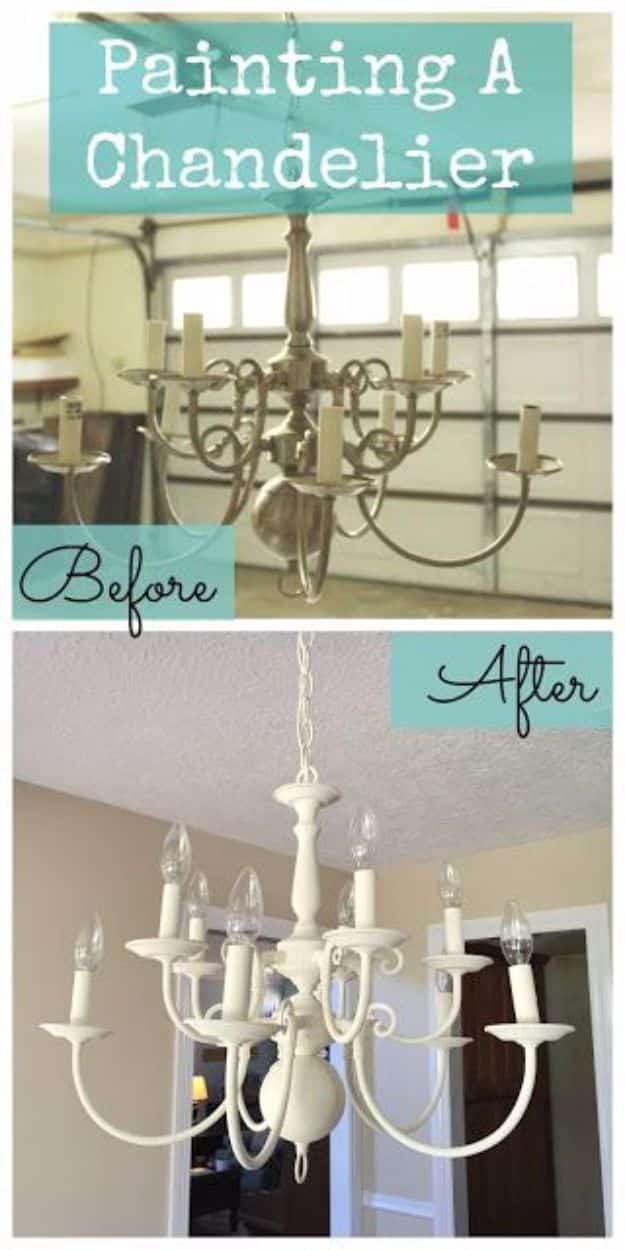
The chandelier was free off Craigslist and the paint was left over, so the only real cost was twelve dollars for a ten pack of candelabra bulbs. Chalk paint in Old White went on over the whole frame, hung from a garage hook with painter’s tape holding the loose wires out of the way. First coat from the top down, dried overnight, second coat the next day. The candle tubes got painted to match rather than replaced, which is the cheap fix for tubes that have yellowed. Total came in under twenty dollars.
Get the full tutorial at Blessed Foundation.
15. $30 Chandelier Refinish
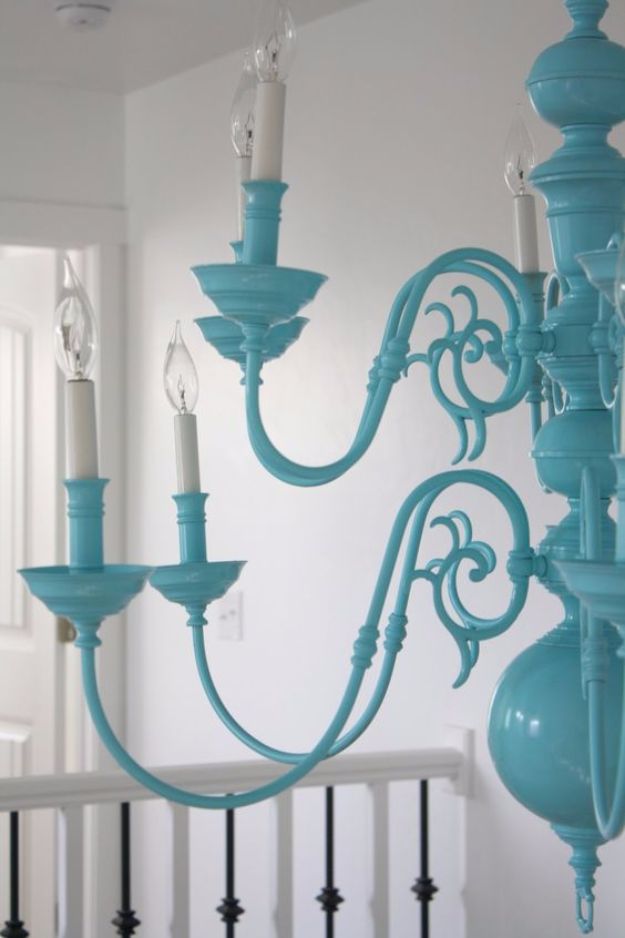
Thirty dollars at a ReStore bought a forty pound fixture, and two cans of spray paint in Blue Ocean Breeze finished it. The tip worth stealing comes first: wipe the whole frame down with vinegar before any paint goes near it, because that is what makes paint grip old metal and stay gripped through all the twisting and handling it takes to hang something this heavy. Wrap the white candle sleeves in tin foil rather than removing them, work from above and below so no angle is missed, and check the frame again from several positions before the can goes down. The sleeves themselves were not repainted. They slide out and flip over, clean end up.
Get the full tutorial at Nifty Thrifty Momma.
16. Super Easy Chandelier Makeover With Spray Paint
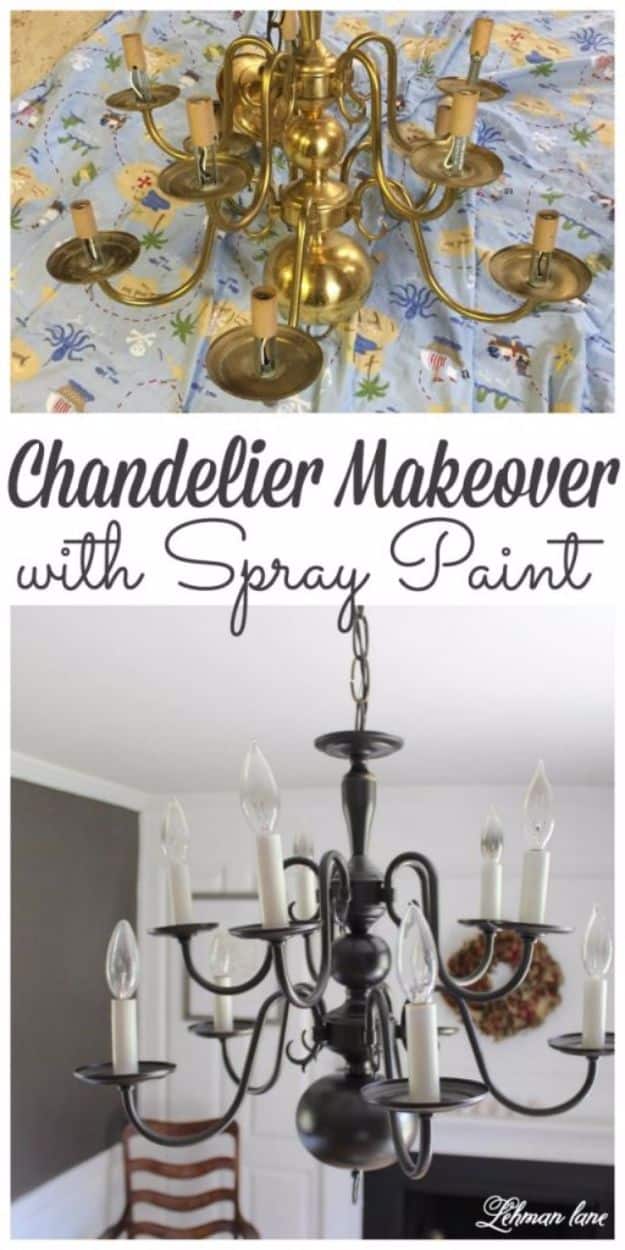
A few dollars and a few hours, using Rust-Oleum’s Universal All Surface metallic in oil rubbed bronze, which carries its own primer so brass needs no separate prep coat. Power off, fixture down, bulbs and white candle sleeves off, drop cloth down, then multiple coats with drying time between. Nearly a full can covers a six arm fixture. A ceiling medallion went up at the same time to hide an oversized junction box hole. The detail worth trusting: four years on, with no topcoat over the paint at all, the finish still looks the same.
Get the full tutorial at Lehman Lane.
17. Easy Outdoor Chandelier Makeover

No paint at all on this one. The frame stayed white and every crystal was swapped instead, clear for aqua, using beads and drops ordered to match. The method is closer to jewelry making than to furniture work: take one original strand off, lay the new beads alongside it, match the length bead for bead, and reuse the wire connectors the fixture came with. Do it strand by strand and you never lose the pattern. It hangs on a covered outdoor table with open sides, which is the only placement a beaded fixture tolerates outdoors.
Get the full tutorial at Purple Chocolat Home.
18. Turquoise Chandelier Redo
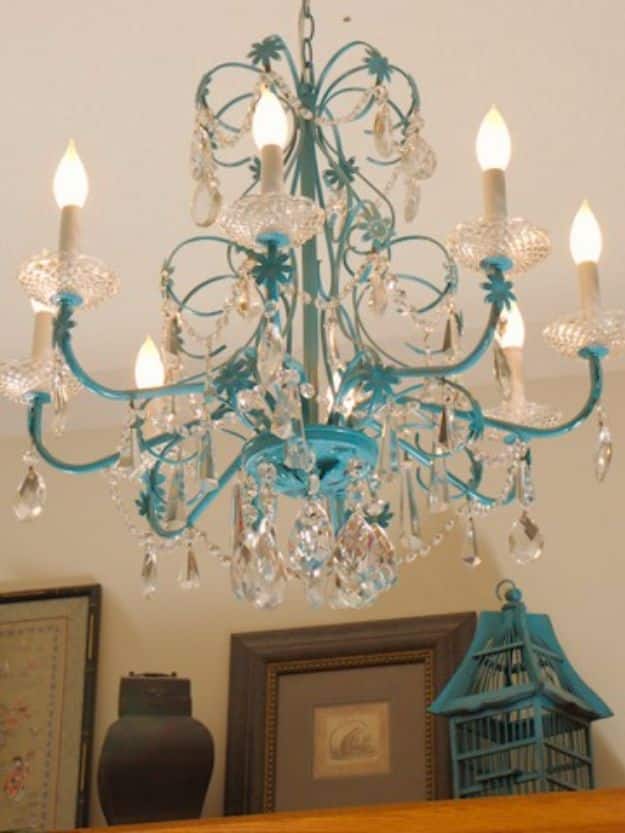
Rust-Oleum Seaside is the color, and the honest warning is in the comments: the crystals came off before painting and nobody photographed them first, so putting seven different sizes back in the right places took two full days. Photograph every strand from two angles before you touch a thing. The fixture was painted to sell and never made it out of the house, which tells you plenty. Teal against clear cut glass is the pairing that keeps a bold color from looking flat, because the crystals throw white light back across the paint.
Get the full tutorial at Daily Dose of Style.
19. $20 Brass Chandelier Makeover
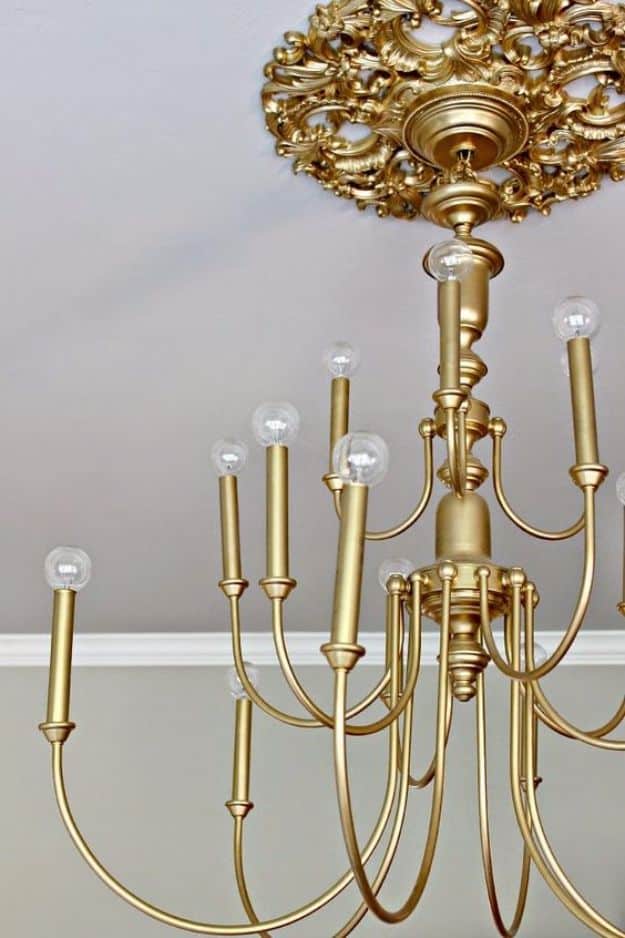
Thirty dollars all in: twenty for the chandelier, ten for a clock that became the ceiling medallion. The decorative fan accents came off with a Dremel and a metal cutting wheel, then the rough edges were filed smooth. The clock lost its face and hands, kept its plastic center, and got an opening cut for the canopy. Everything was sprayed Rust-Oleum Metallic Brass, then the medallion screwed to the ceiling and the canopy glued to it. Clear globe bulbs beat opaque ones here. Sparks fly when you cut metal, so wear glasses.
Get the full tutorial at Dimples and Tangles.
20. DIY Simple Chandelier Makeover
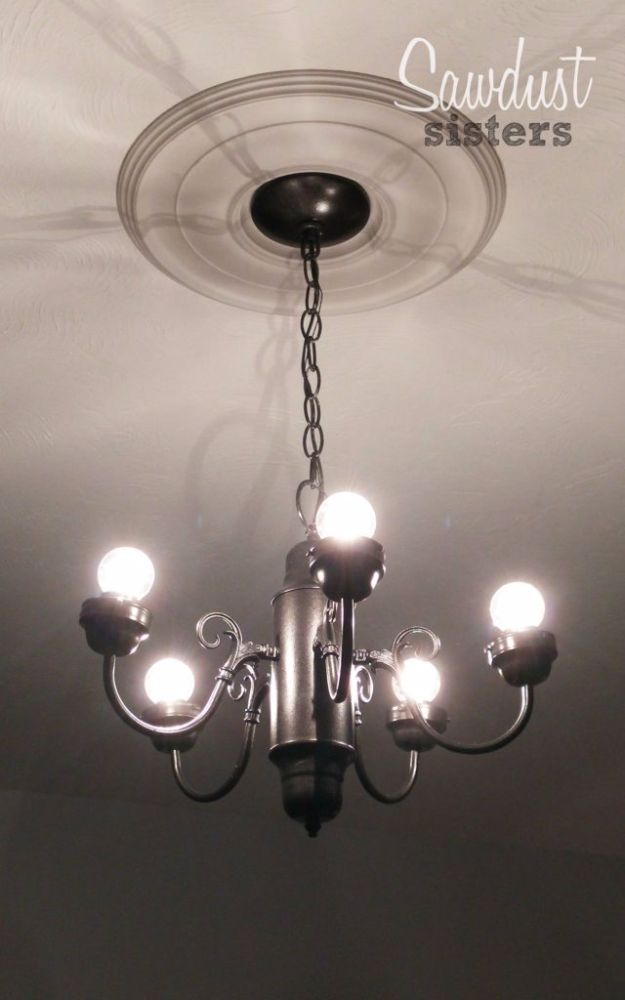
A small silver five arm hung on a short chain from a wide plaster ceiling medallion, photographed lit from below. Two things read from that image. The medallion is doing the heavy lifting, giving a modest fixture presence on a broad ceiling for about ten dollars, and the bulbs are bare rather than sleeved, which suits a simple frame with no crystals to compete. If your fixture looks undersized for the room, add the medallion before you add anything else, and paint it the same color as the ceiling so it reads as plasterwork rather than as a separate ring.
Get the full tutorial at Sawdust Sisters.
21. Little Painted Chandelier
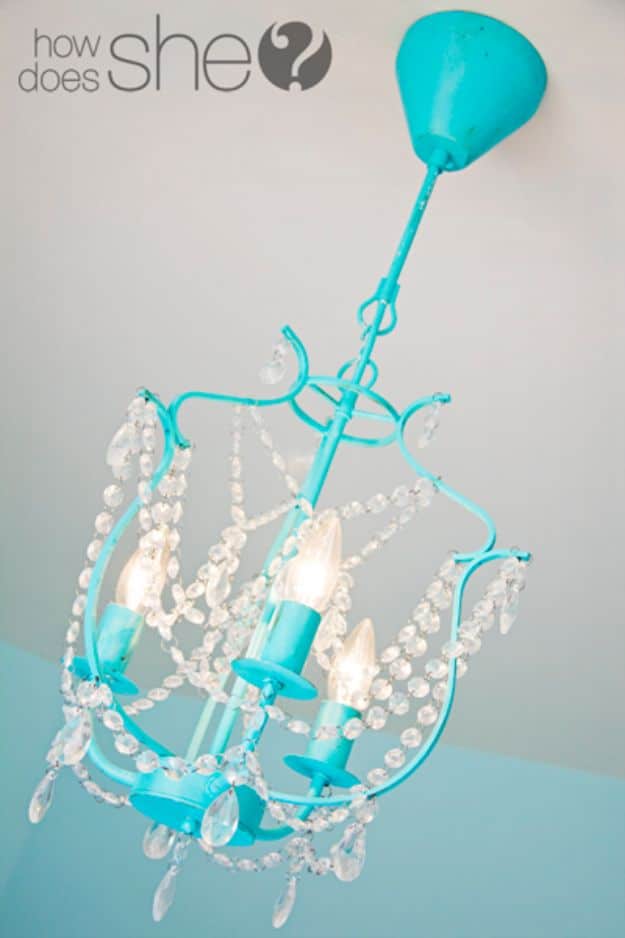
An inexpensive small crystal chandelier in brushed nickel becomes a nursery centerpiece for the cost of a can of primer and a bottle of craft paint. Pliers take out the extra chain links and unwind the wire rings that hold each crystal strand. Indoor outdoor white spray primer goes on first, ten minutes drying per side. Then acrylic paint with a sponge brush, then antiquing medium worked into the edges so the color has some depth, then thirty minutes to dry. Put the strands back in the holes they came from, add bulbs, and hang it.
Get the full tutorial at How Does She.