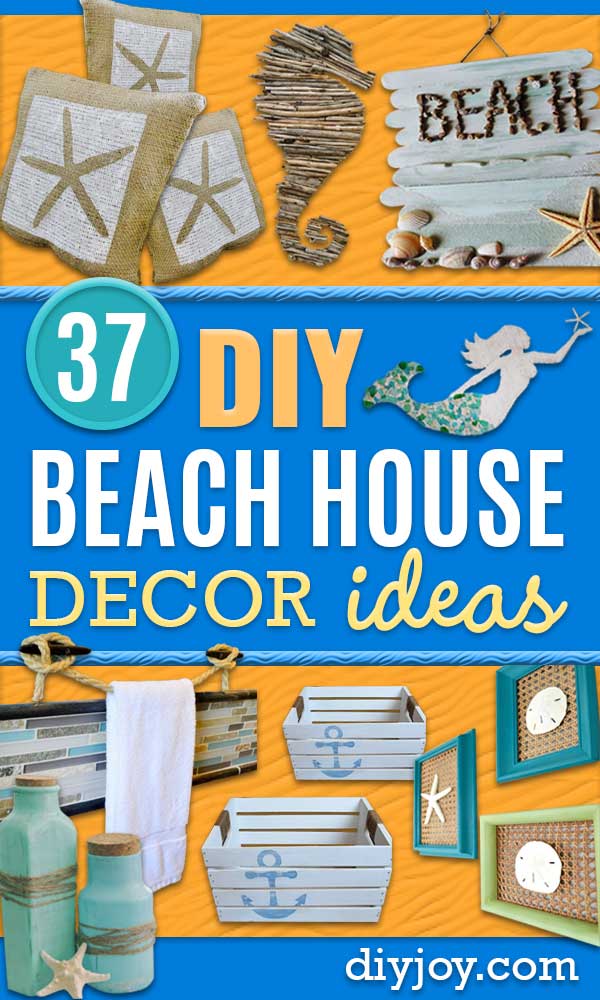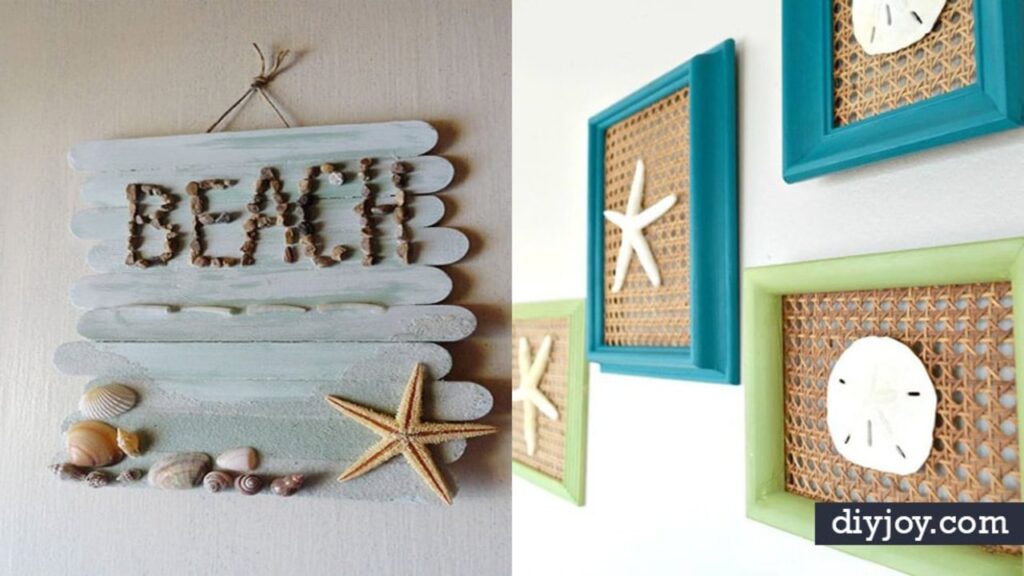
A beach house look does not need a beach house budget, just a bag of shells, some rope and a little driftwood. These 21 DIY beach house decor ideas turn those finds into wall art, lighting and table pieces with real coastal style. For the walls there is a reclaimed wood whale, a driftwood seahorse, a driftwood anchor, map letters that spell BEACH and weathered beach signs in soft sea colors. Glass buoys wrapped in fishnet and a salt dough faux coral bring the texture. For candlelight, try sandy pillar candles or glass lanterns layered with sand and shells. Most of these take an afternoon or less, and plenty use the shells already sitting in a jar from the last trip. Start with the shells and the rest will follow.
DIY Beach House Decor Ideas
1. Seashore Windchimes
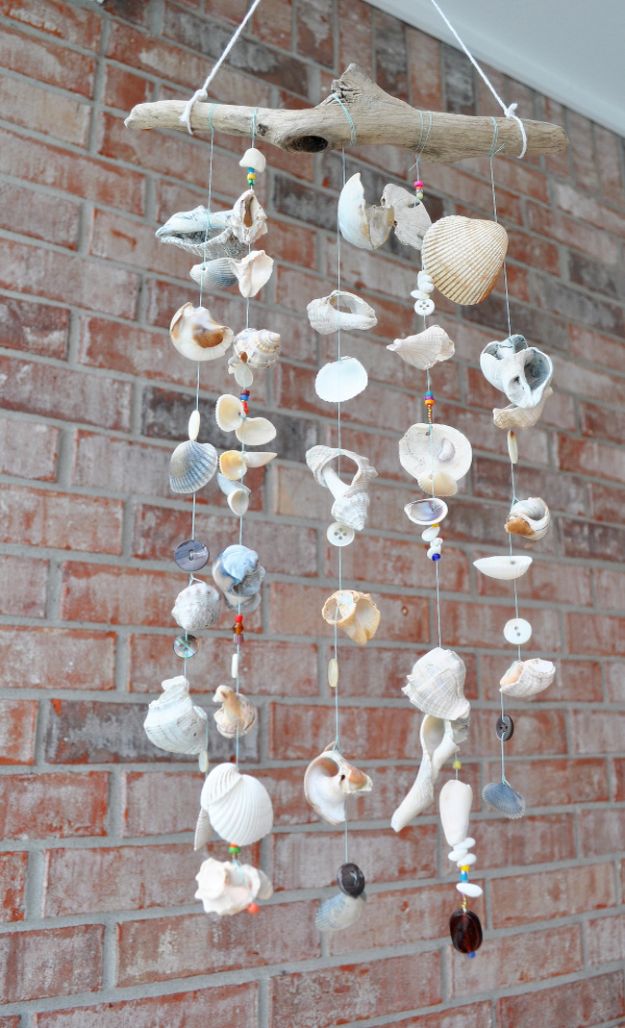
Driftwood, seashells and a few sparkly beads make a seashore wind chime with the softest clink in the breeze. It is the perfect job for shell fragments, the broken pieces nobody wants to display on their own. Strands of shells, buttons and bright beads hang from a weathered piece of driftwood, and a second, smaller version with tiny shell pieces looks just as sweet. Whole shells need a hole first, and the smallest drill bit with a light touch keeps them from cracking. Hang it near a back door or on a porch.
Get the full tutorial at home sweet homemade.
2. DIY Seashell Plank
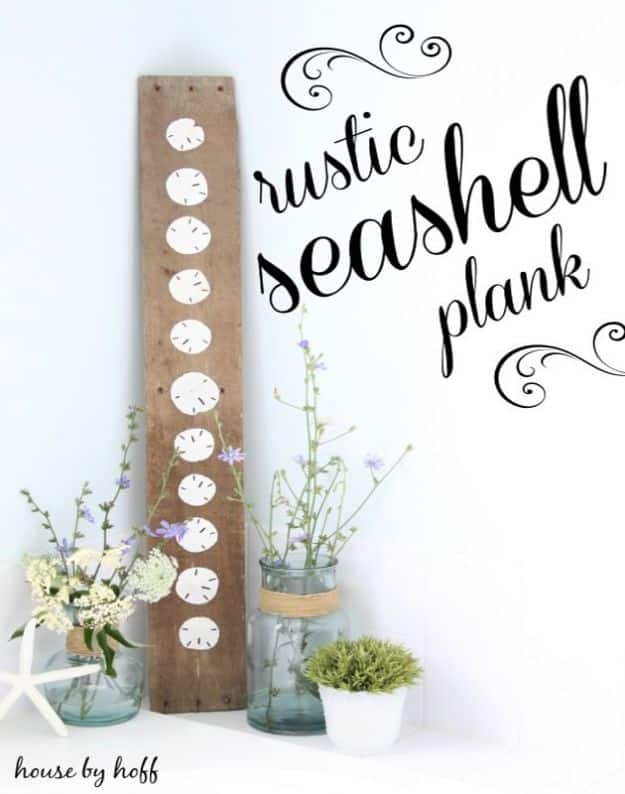
One weathered board and a row of sand dollars might be the simplest piece of beach wall art there is. An old pallet board, even one rescued from the curb, gets a line of sand dollars attached with hot glue, and that is the whole project. It costs next to nothing when the sand dollars came home from a trip. Technically they are not shells at all, as readers were quick to point out, but nobody looking at the wall will mind. It works in a bathroom, a hallway or over a bed.
Get the full tutorial at House by Hoff.
3. DIY Coastal Lobster Art
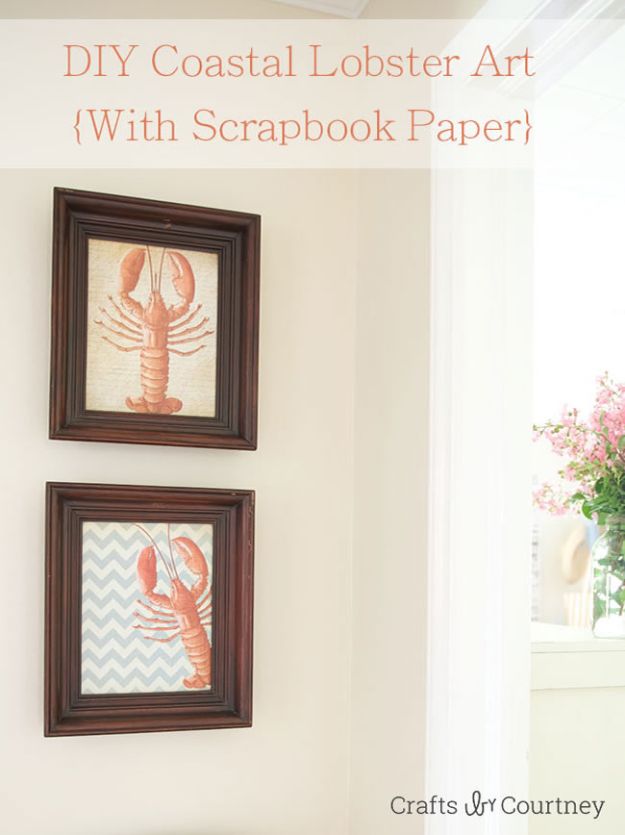
Scrapbook paper is the secret behind this coastal lobster art, and it costs a fraction of a framed print. A pack of papers with quirky lobster illustrations fills a set of thrifted frames, found for about $3.50 each at Goodwill. Take out the old pictures and wipe the frames clean. Lay one of the old pictures on the paper as a template, trace around it with a pencil and trim. Slip the paper in, close the frame and hang. A craft store coupon makes the paper pack cheaper, and the leftover prints are ready for the next wall.
Get the full tutorial at Crafts by Courtney.
4. Coastal Pallet Art
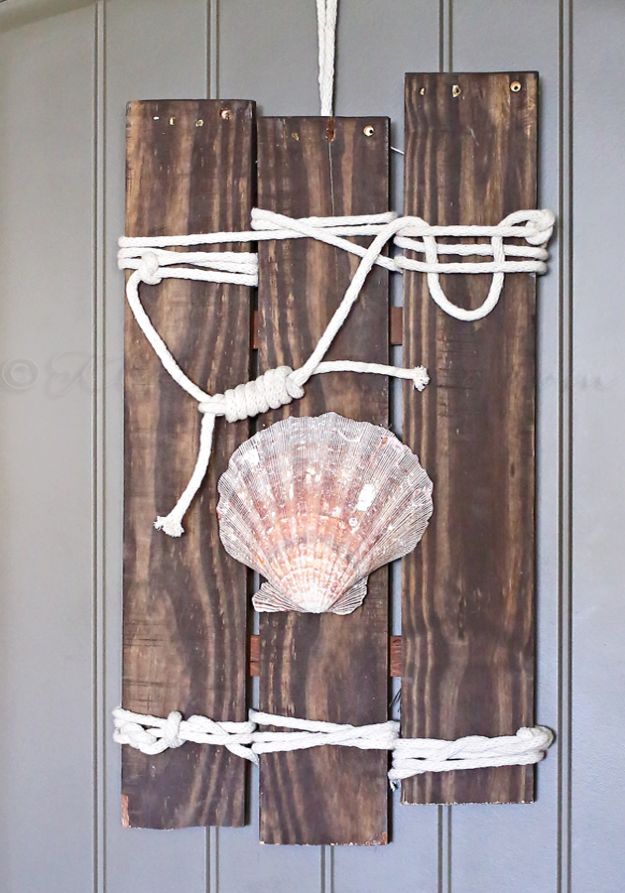
Three short pallet boards, a length of rope and one big seashell make this coastal pallet art in under 30 minutes. Line up the boards and tie them together by wrapping the rope around them and knotting it, which doubles as the decoration. A couple of wood shims fastened across the back keep the boards from shifting, and a string on the back handles the hanging. Flip it over and attach a single shell to the front. It is a quick way to add a little beach to a shelf, a mantel or a bare wall.
Get the full tutorial at Yummi Haus.
5. DIY Coastal Rope Mirror
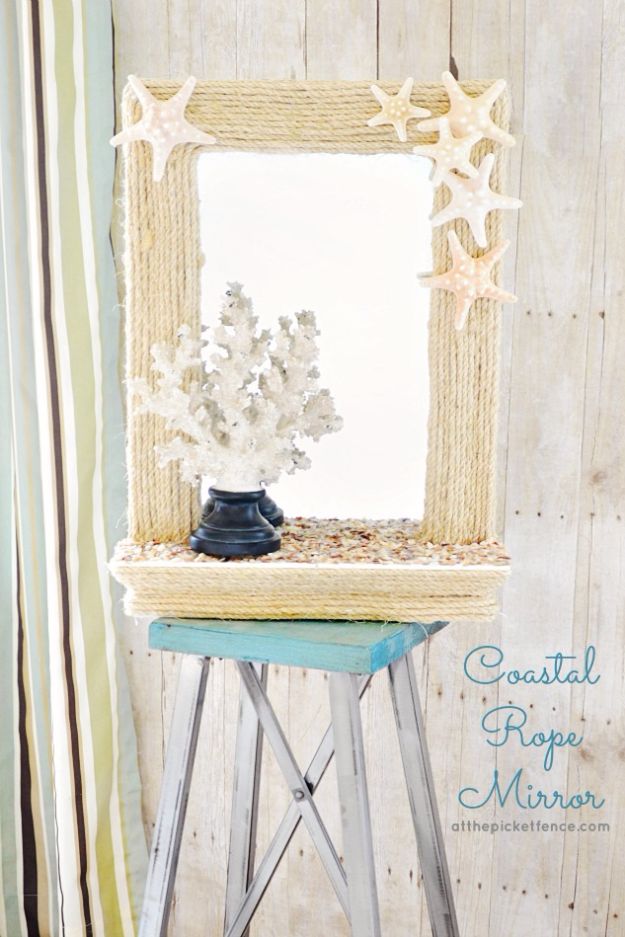
A plain framed mirror becomes a coastal statement piece with 100 feet of twisted sisal rope and a hot glue gun. Glue the rope around the frame in tight, even circles, trim it at the end of each round and loop back with a new row. It takes a few hours of steady gluing, so put on a good playlist. Starfish go on with hot glue once the rope is done. If the mirror has a ledge, coat it heavily with Hard Coat Mod Podge and press on a layer of decorative shell filler, then let it dry.
Get the full tutorial at At The Picket Fence.
6. Reclaimed Wood Whale Art
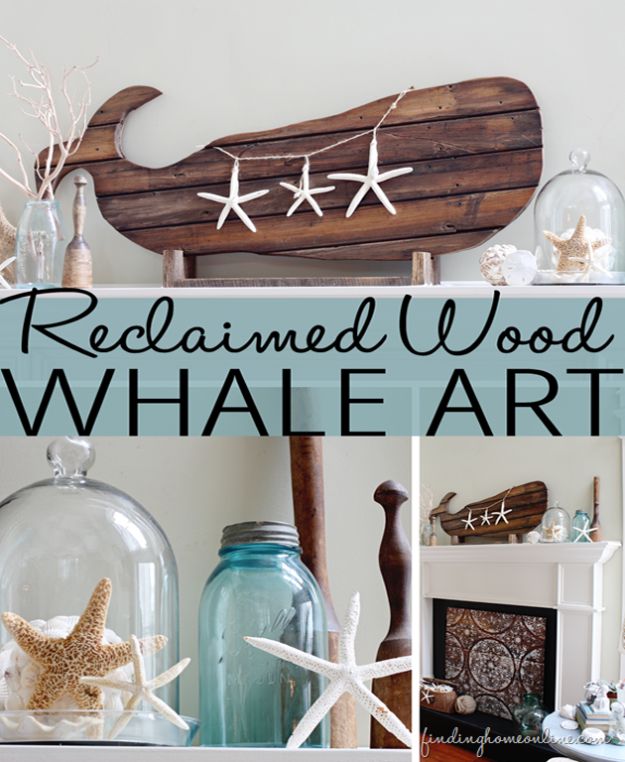
Scrap wood and a jigsaw are all it takes to build reclaimed wood whale art with real history in the grain. Draw a whale freehand on quarter inch plywood and cut it out as a template. Cut scrap boards, even pallet pieces, about an inch wider than the template all around. Glue the template to the back of the boards and secure them with small brad nails. Weigh it down overnight, then cut the whale shape from the boards and sand the edges smooth. A wiped-on dark stain and clear wax finish it.
Get the full tutorial at Finding Home Farms.
7. Driftwood Anchor
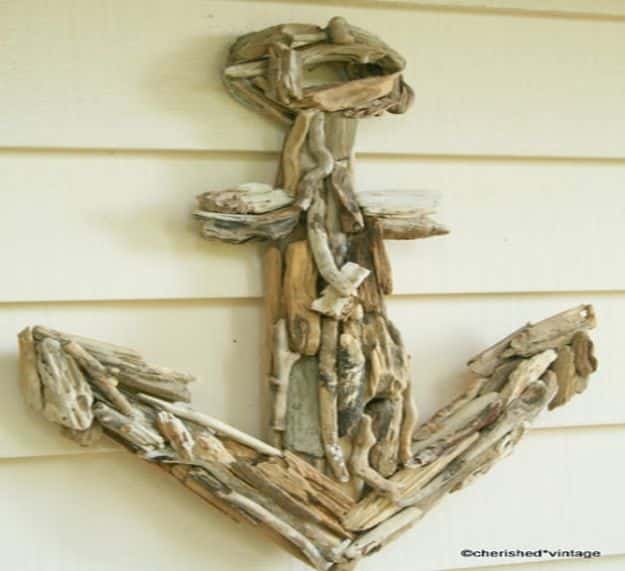
A bag of beach driftwood turns into this driftwood anchor, a twist on the popular driftwood star. Draw an anchor pattern, transfer it to a thin piece of plywood and cut it out with a bandsaw or jigsaw. Paint the plywood a soft gray so any gaps between the pieces disappear into the wood tones. Then lay the driftwood over the shape until the arrangement looks right and glue each piece down. It can wait half finished for months, which makes it a nice project to start on vacation and finish at home.
Get the full tutorial at cherished*vintage.
8. Weathered Beach Signs
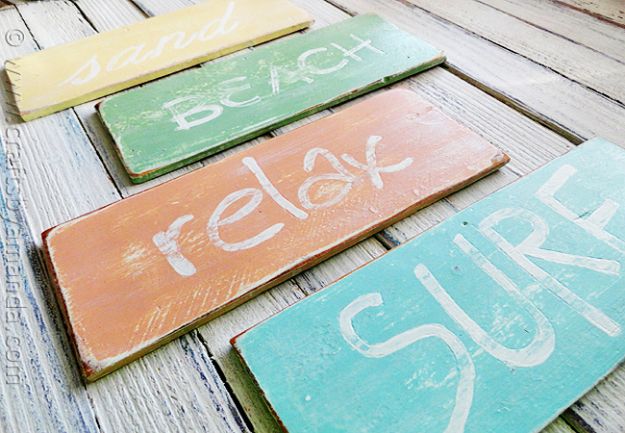
Plain wood slats from the craft store become weathered beach signs that read surf, relax, beach and sand. Paint every slat Cool White, then give each one its own color, like Buttermilk, Warm Beige, Spa Blue or Mint Julep. Print the words, lay them on the wood and trace around them firmly with a ballpoint pen or stylus to press a guide into the surface. Fill in the letters with a liner brush, dry brush a few white streaks and sand harder in some spots than others. A matte acrylic sealer finishes them.
Get the full tutorial at Crafts by Amanda.
9. Build A Beachy Pallet And Starfish Wall Craft
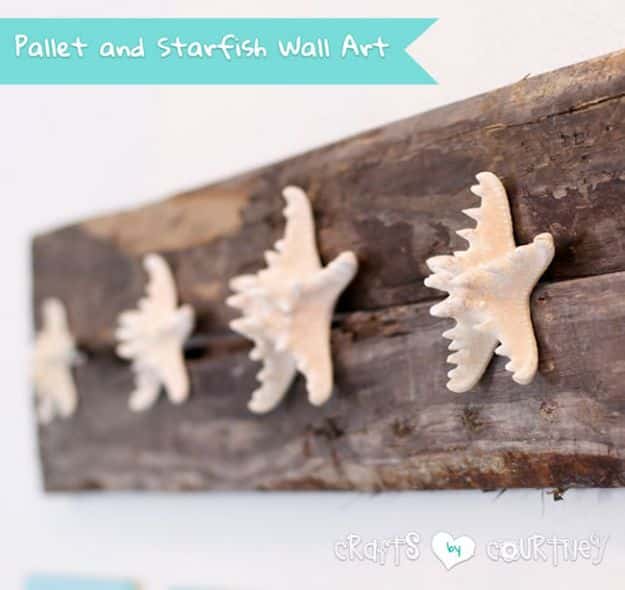
A pallet and a bag of starfish make this beachy wall craft, no ocean nearby required. Pry the pallet apart with a hammer, which is loud, then cut two extra pieces to nail across the back and hold the slats together. Lay out the starfish until the spacing looks right and attach them with a small dab of hot glue, enough to hold but easy to pop off later. Bags of starfish turn up at craft stores and discount home stores. Picture hooks on the back finish it, and the rough pallet wood reads like driftwood.
Get the full tutorial at Crafts by Courtney.
10. Make A Driftwood Seahorse
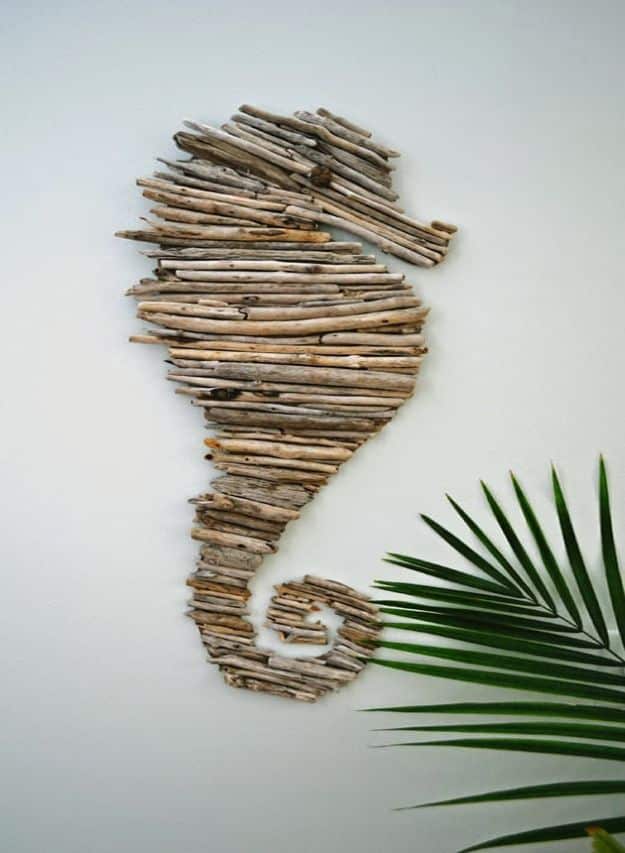
Driftwood laid over a cardboard cutout makes this driftwood seahorse, and it looks like gallery art. Sketch a seahorse about 36 by 16 inches on stiff cardboard, taping two pieces together if needed, and cut it out with a utility knife. Sort through a shopping bag of fairly straight driftwood and lay the pieces over the shape, mostly parallel. Keep them tight over the belly and let them go a little ragged along the back. Hot glue everything down starting at the tail. A small round piece, like a driftwood walnut, makes the eye.
Get the full tutorial at Creative in Chicago.
11. DIY Faux Coral Tutorial
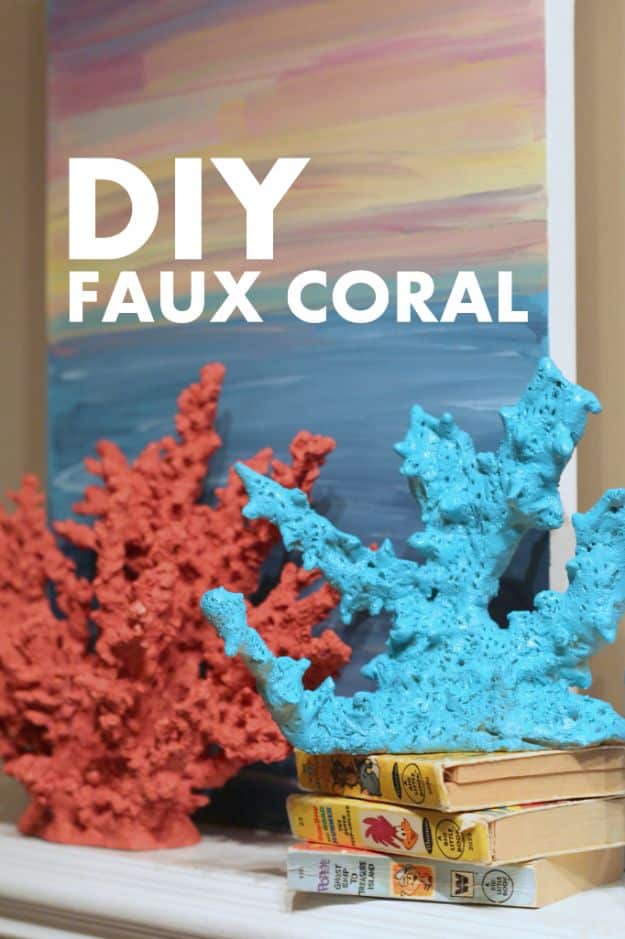
Real coral is expensive and hard on reefs, so this faux coral is made from salt dough and wire instead. Bend thick craft wire into a branching coral shape. Mix 1 cup of flour with 1 cup of salt, adding water slowly until it feels like clay. Cover the wire frame with the dough and poke holes all over to mimic real coral texture. Bake at 350 degrees for about half an hour, let it cool and finish with a coat of spray paint. A classic white or a warm coral shade both work.
Get the full tutorial at All Things with Purpose.
12. Craft Stick Beach Plaque
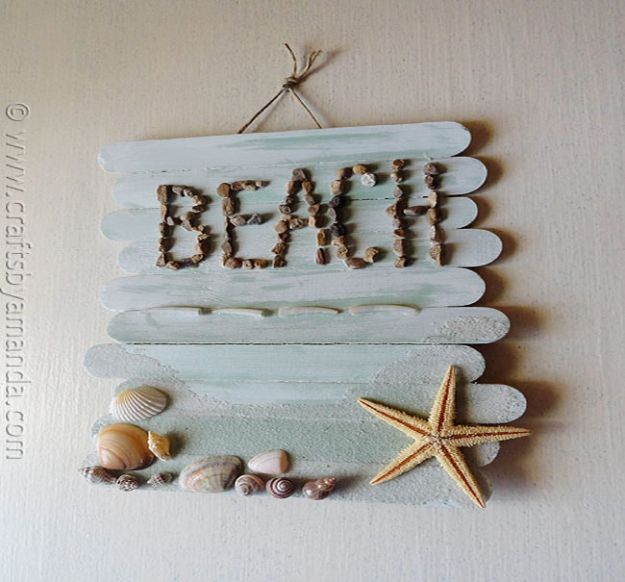
Ten jumbo craft sticks, a little sand and a few shells make a craft stick beach plaque that kids and grownups can make together. Paint the sticks sea green, then glue them side by side with the ends staggered for a jagged edge. Dry brush white over the top for a washed-out look. Write BEACH in white craft glue and press small pebbles into it. Spread glue along the bottom, cover it with sand, wait five minutes and tap off the extra. Glue on shells and a starfish, then add a twine hanger.
Get the full tutorial at Crafts by Amanda.
13. Easy DIY Beachy Candles
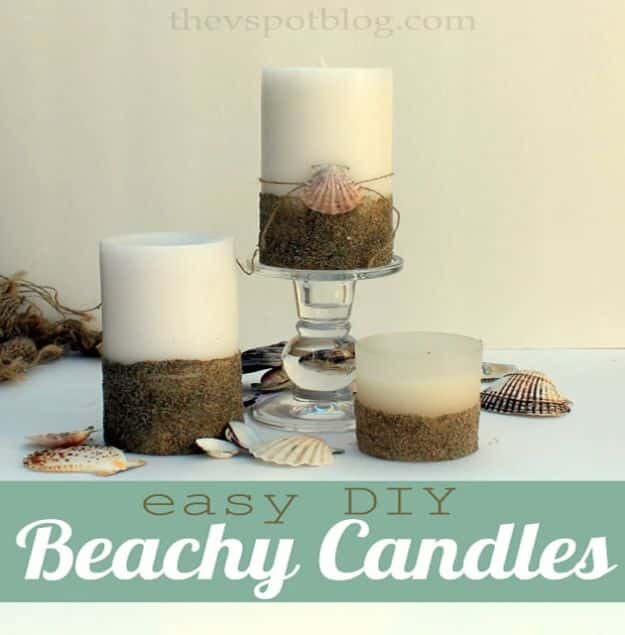
Plain pillar candles get a beachy makeover in about five minutes with glue and sand. Brush Mod Podge or plain white glue around the bottom third of each candle, then roll it through a pile of sand. Tap off the extra and let the glue dry. Bagged sand from a hardware or garden store works fine if the beach is far away. The same trick dresses up small jar candles once the labels are peeled off. Finish with a twine bow and a single shell held on with a dab of glue.
Get the full tutorial at The V Spot.
14. DIY Oyster Shell Candle Holder
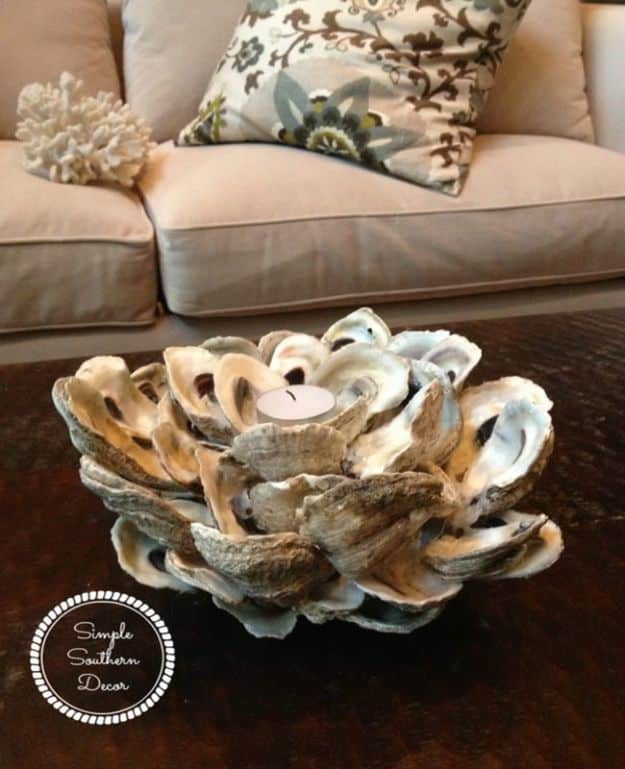
A pile of oyster shells and a strong glue stick add up to a sculptural oyster shell candle holder for the table. Start by standing three oysters in a small cup with the ends down and gluing them together to form the base. Keep adding shells around them until the holder reaches the size you like. A large one takes 45 to 50 shells and about an hour. Let it dry for a full day before setting a thick pillar candle in the center. A few in a row make a striking coastal centerpiece.
Get the full tutorial at Simple Nature Decor.
15. Summer Mantel
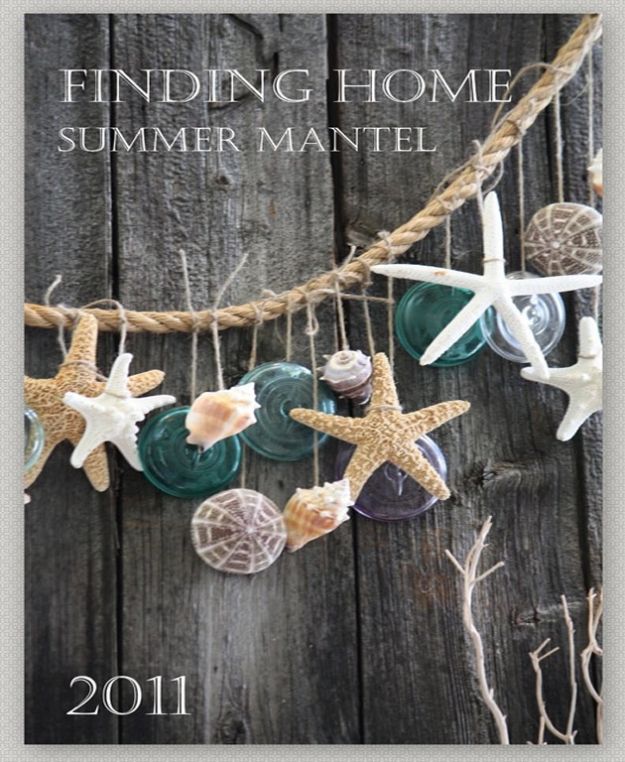
This summer mantel is a styling idea more than a single craft, and most of it comes from things already in the house. An old barn door turned to its weathered gray side stands in for a boardwalk backdrop. Instead of a wreath, a heavy rope drapes across the top with shells and blue mason jar lids tied on with twine. Blue mason jars hold candles, and a blue bottle, a few extra shells and a ladder propped in front of the fireplace pull the beachy look together.
Get the full tutorial at Finding Home Farms.
16. Sea Shell Mosaics
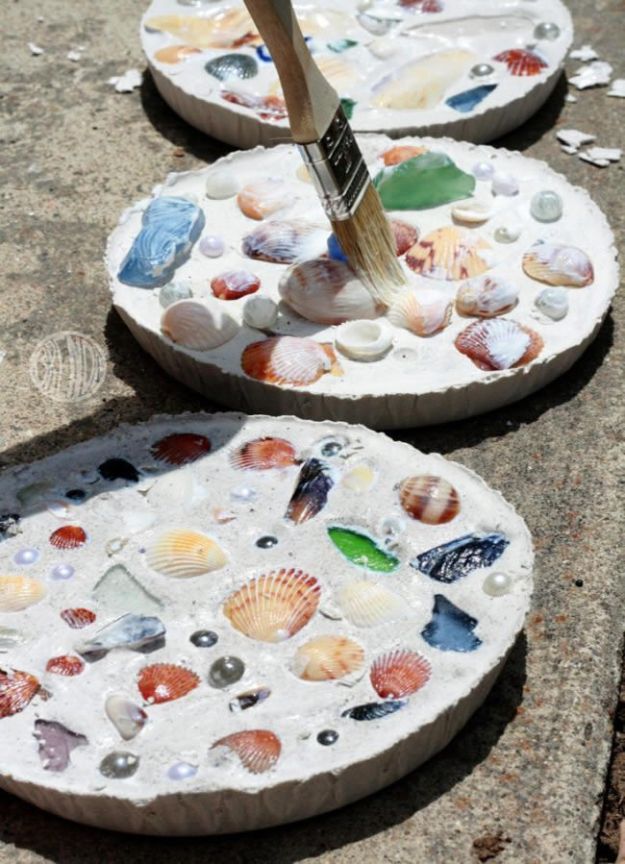
Sea shell mosaics made in aluminum pie pans are a great project for a group of kids. Mix plaster of Paris at two parts powder to one part water, stir well and pour it into the pans. Once it starts to set, press in shells, sea glass, tiny clear marbles and faux pearls, which look like bubbles in a wave. When the plaster hardens, the pan peels right off and leaves a neat round plaque. Seal it with Mod Podge. A grownup should mix the plaster, and egg cartons keep sorted shells tidy.
Get the full tutorial at Alpha Mom.
17. DIY Maritime Map Letters
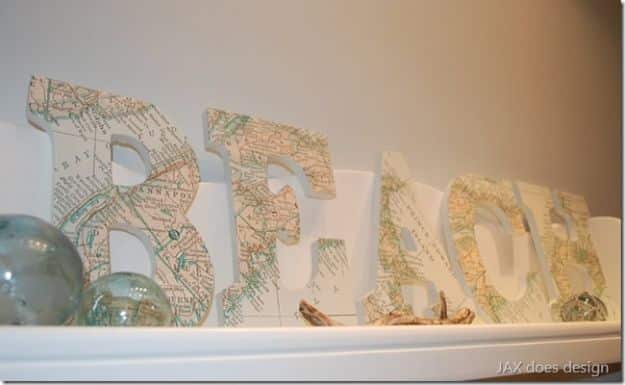
Wooden letters covered in a vintage-style map spell out BEACH for a fraction of what store-bought versions cost. Five white wood letters from the craft store, about $3.50 each on sale, are the base. Print a large map of favorite beaches across several sheets of paper, then place each letter over a spot with meaning, like a favorite shore. Trace each letter onto its map section, cut it out and paint the edges of the letters a light blue-green. Mod Podge holds the map on and seals it.
Get the full tutorial at JAX does design.
18. DIY Distressed Nautical Crate
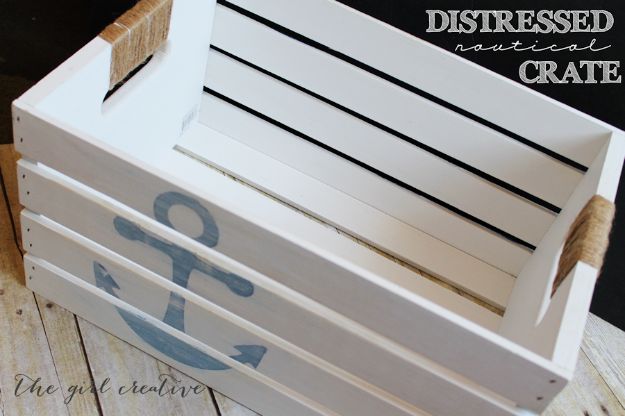
A white wooden crate, an anchor stencil and some twine make a distressed nautical crate in about an hour. Paint a blue anchor on the side with craft paint and a foam brush. If the paint bleeds under the stencil, brush white over the whole thing, since the anchor still shows through softly. Sand it to distress the finish, then rub a brewed tea bag over the bare wood to age it. Hot glue twine around the handles, wrapping until they are covered. It holds toys, blankets or pool towels.
Get the full tutorial at The Girl Creative.
19. Large Glass Buoys DIY
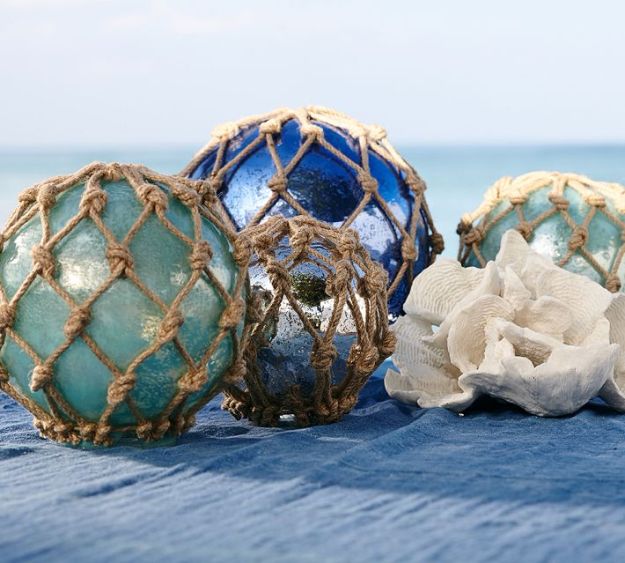
Inexpensive round glass bowls, the kind once used as fish bowls, become large glass buoys for about $3 each. The glass gets a soft sea glass tint from a brushed-on mix of white glue or Mod Podge, water and a few drops of food coloring. Then each bowl gets wrapped in a hand-knotted jute fishnet. The source links its own tutorials for both the tint and the net. Grouped in a basket, they bring the classic blue, white and fishnet beach house look. Water lifts the tint, so dust them rather than wash them.
Get the full tutorial at Craftberry Bush.
20. Beach Lanterns DIY
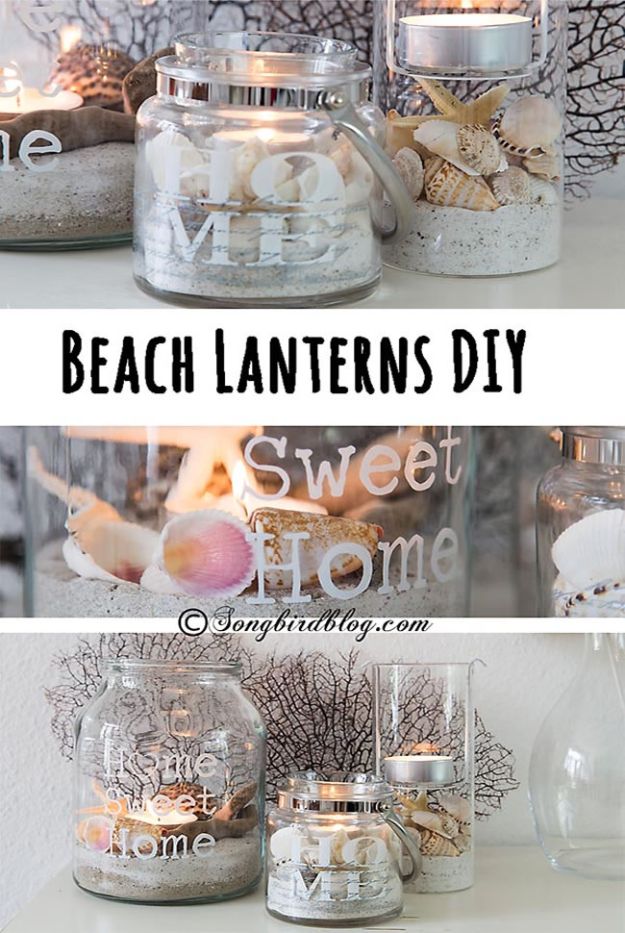
Glass cylinders, sand and a handful of beach finds make these beach lanterns in about 15 minutes. Pour a layer of sand into each vase or jar, filling it about a quarter to a third of the way. Add a layer of small shells, sea stars, sand dollars or bits of driftwood. Set a pillar candle or tea light on top and tuck more shells around it, leaving plenty of room for the flame. Kitchen jars work if there are no vases on hand, and jute rope tied around the outside dresses them up.
Get the full tutorial at Songbird.
21. Displaying Vacation Shells
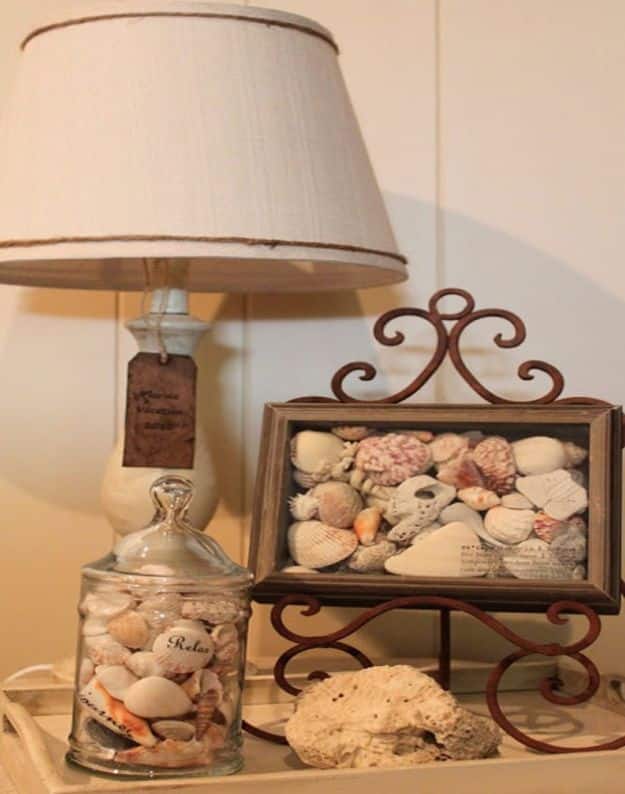
Shells from a vacation deserve better than a basket, and this display idea gives them several creative homes. Tie jute rope around a lampshade for contrast and add a little tag labeling the vacation shells. Put vacation-themed rub-on transfers on some of the shells themselves. Favorites, like a spiny shell or a shark’s tooth, go into a shadow box with a weathered wood frame. A plain black frame holder looks rusty after a dry stencil brush dabs on Autumn Brown paint, darkened with touches of burnt umber.
Get the full tutorial at Tracy's Trinkets and Treasures.