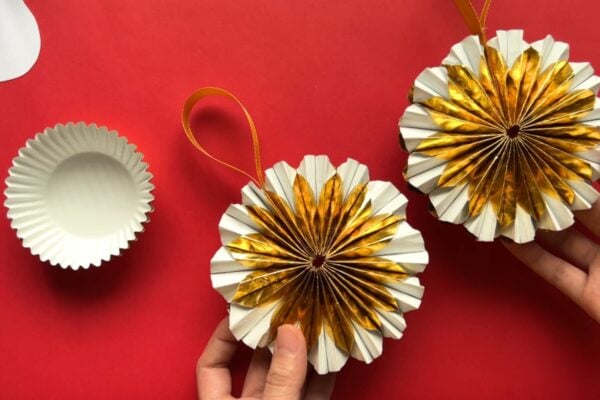
The first warm evening of the year always sends everyone outside, and these 25 DIY backyard ideas make sure the yard is ready for it. They cover the big three of summer living: somewhere comfy to sit, something fun to do and a little light for after dark. Weekend builders will find a pergola, a pea gravel fire pit, a simple side table and a swinging bed, while quicker projects like a neon ring toss game, tin can drink holders and wine bottle tiki torches come together in an hour or two. Plenty of them reuse what’s already lying around, from soup cans and old windows to thrift store chandeliers. Two DIY JOY originals with step by step videos are mixed in, a rainbow beaded wind chime and glowing fairy jar lanterns. Pick one easy win and one bigger build, and the yard will feel brand new by the Fourth of July.
1. DIY Poolside Bar with Wood Slats
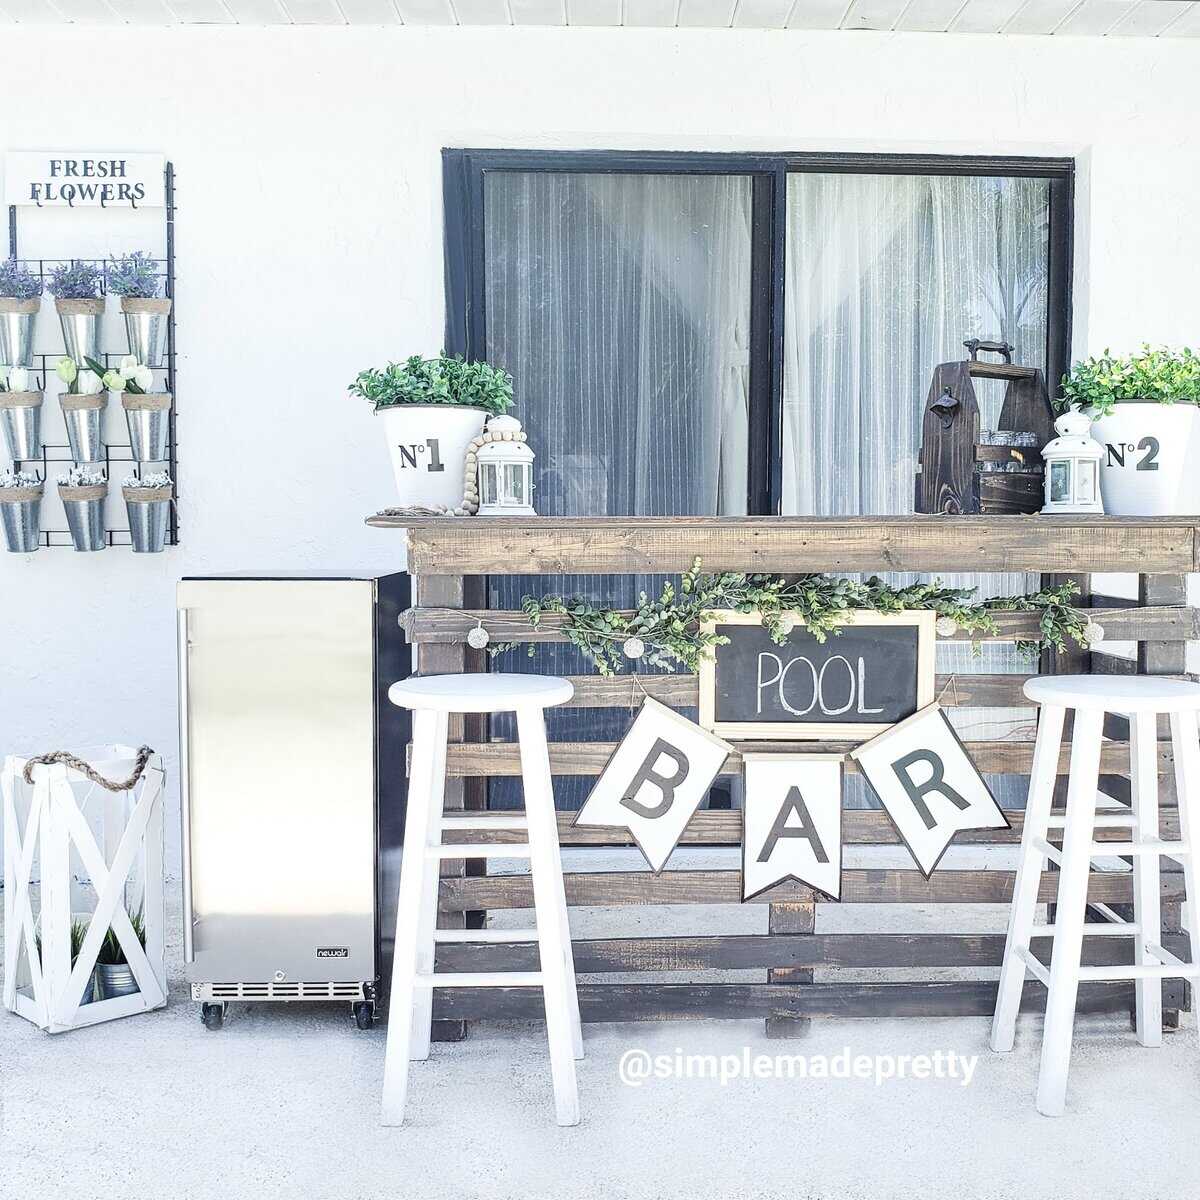
This DIY poolside bar is built from 2x4s and 1×3 slats, and it went together in about three hours plus two more for stain and paint. The legs come first: five 40 inch pieces and four 20 inch pieces framed into a sturdy base, then the slats wrap the front and a plywood or pine top finishes it. Deck screws hold everything, and a couple of coats of polyurethane protect it from sun and rain. It seats six to eight people on stools and stays light enough to move for a party.
Get the full tutorial at Simple Made Pretty.
2. DIY Neon Ring Toss Game
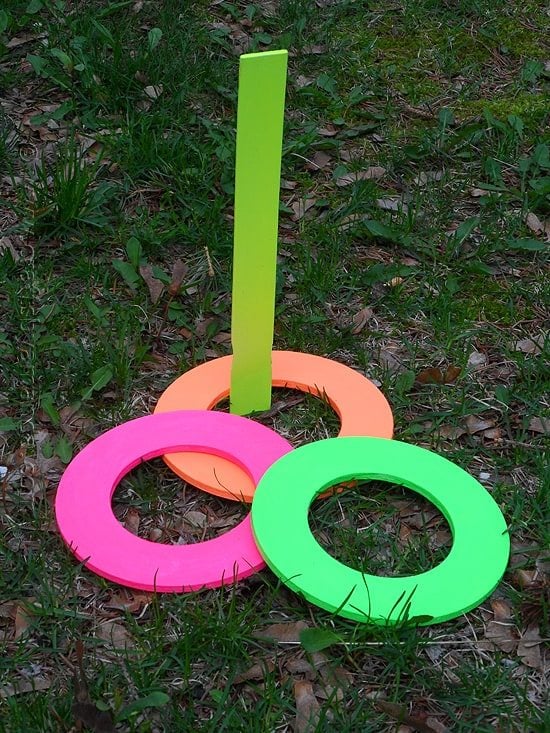
A neon ring toss game takes one paint stir stick and three 6 inch floral craft rings from the craft store. Base coat everything in white first, because neon paint barely covers raw wood. Paint the stick neon yellow, then give each ring its own color, like neon pink, green and orange. A coat of matte varnish helps it stand up to grass and sprinklers. The rings have enough weight to fly straight outdoors, unlike paper plates. Push the stick into the lawn and the game is ready.
Get the full tutorial at Crafts by Amanda.
3. Hello Summer Banner Board

This Hello Summer banner board starts with a slatted wood board painted white and lightly sanded for a distressed edge. Small poplar banner pieces stay raw, with bright scrapbook paper traced, cut and stuck on with wood glue spread thin with a brush. Smooth each one with a squeegee or credit card. SUMMER letters cut on a Cricut, or simple letter stickers, go on each flag, then baker’s twine threads through the holes and tapes to the back. A vinyl hello finishes the board for a mantel or porch.
Get the full tutorial at The Happy Scraps.
4. Green Roof Birdhouse

A green roof birdhouse gets a removable plant tray, so the hinged roof still lifts for cleaning at the end of the season. Screw a ledge of 2 1/2 inch cedar to the front roof edge, cut a plastic container down to 1 1/2 inches and frame it with thinner cedar strips. Drill drainage holes in the front corners so water runs off and keeps the nest dry. Fill it with potting mix and drought tolerant, shallow rooted plants like Sedum album, then slide the tray onto the roof.
Get the full tutorial at Garden Therapy.
5. Backyard Getaway DIY Hammock

This DIY hammock uses 3 yards of sturdy home decor fabric, 15 feet of 1 inch webbing and two climbing carabiners. Hem all the edges, then fold each short end over 5 inches and sew about seven parallel lines across it for strength. The webbing becomes tree straps: two long ones, about 10 feet, wrap around the trunks, and two short ones thread through the ends so the fabric gathers. Clip everything to the carabiners. Use real climbing carabiners rated for a person’s weight, never the decorative kind.
Get the full tutorial at Miss Lovie.
6. DIY Wine Bottle Tiki Torch

A wine bottle tiki torch needs a clear bottle, crafting pebbles, tiki fuel, a tiki refill wick and a brass coupling, where a 3/8 by 1/4 inch size fits most bottles. Fill the bottle about a third full with pebbles, then thread the wick through the coupling. Pour in the fuel, set the wick in place, and it’s ready to light. Some pebbles are too big for the bottle neck, so sort them first. Local wine bars will often save empty bottles if asked.
Get the full tutorial at Armchair Sommelier.
7. DIY Beaded Wind Chime

A DIY beaded wind chime strings glass, wood and metal beads on fishing line or strong jewelry wire, then hangs each strand from a driftwood stick. Lay out the bead order before stringing so the colors balance, and add tiny bells at the ends for a soft tinkle in the breeze. Expect a few runaway beads, so work over a tray. Every chime comes out different, and it’s a relaxing, beginner friendly project. Hang it on the porch, in the garden or by a sunny window.
Get the full tutorial at DIY JOY.
8. Outdoor Swinging Bed

This outdoor swinging bed replaced a rickety old deck with a twin mattress sized platform. Part one covers demo and framing: rip up the old boards, then set four posts spaced for the bed, checking that length and width match and the corners are square. Dig the holes 30 inches deep, which is easier when the ground is wet, set each post, pour in a bag of quick set concrete and fill with water and dirt. Check every post with a level while it sets, then wait several days.
Get the full tutorial at Run To Radiance.
9. Easy DIY Fairy Jar Lanterns
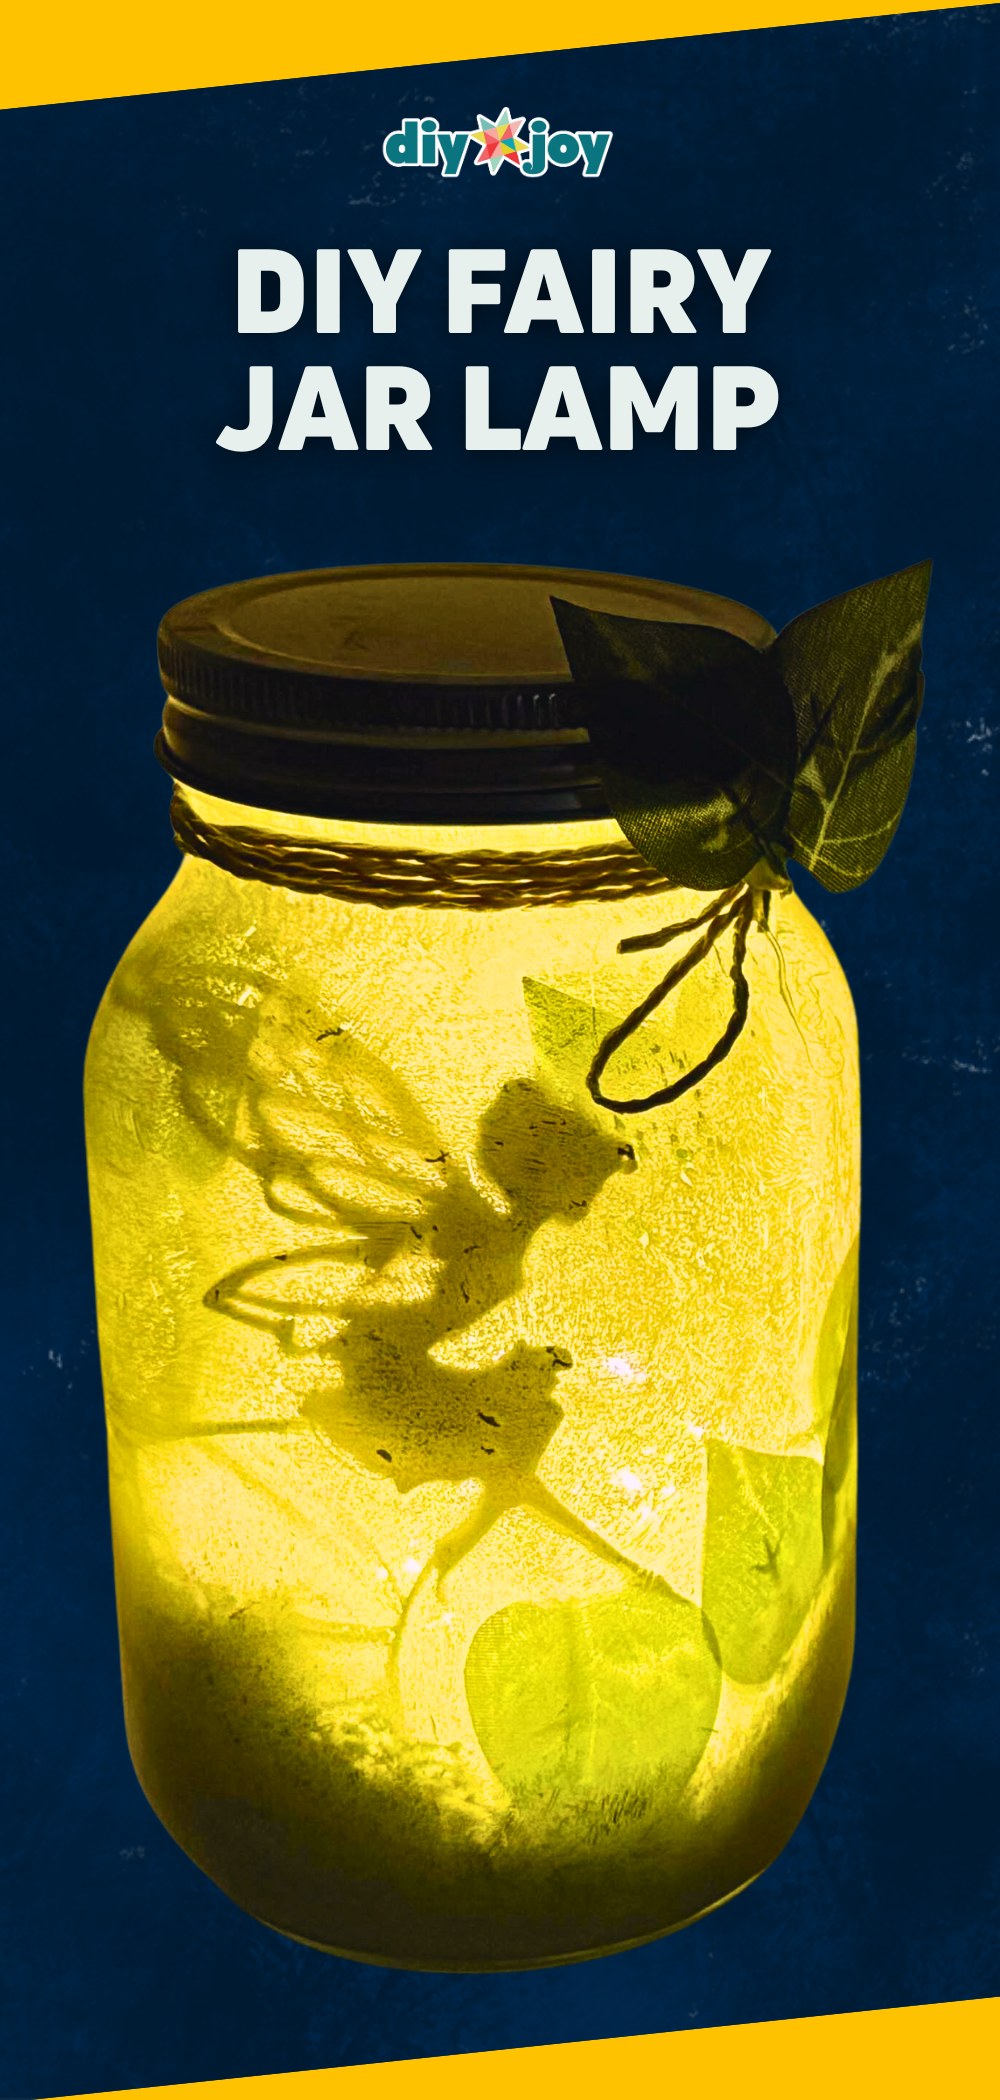
Easy DIY fairy jar lanterns start with an old mason jar or even a pickle jar. Print a fairy silhouette, or trees and mushrooms, on cardstock and cut out every white part. Paint the inside of the jar with white acrylic or primer, keeping it thin enough for light to glow through. Add faux moss or crumpled tissue to the bottom, hot glue the cutout inside, then tuck in a few leaves. Drop in a tea light or fairy lights and tie twine and leaves around the neck.
Get the full tutorial at DIY JOY.
10. Mini Charcoal Grill Trio Centerpiece

This mini charcoal grill trio centerpiece is built from three melamine bowls in 5 and 6 inch sizes, charcoal briquettes without lighter fluid and orange sprinkles for embers. Spray paint upside down shot glasses or small candle holders silver to make stands in three heights. Fill the bowls with partially crushed charcoal, then lay about five black painted bamboo skewers across each one as a grate. Hot glue each bowl to its stand. Strong scissors or wire cutters trim the skewers, and the whole set suits a grilling party table.
Get the full tutorial at Hostess with the Mostess.
11. Budget Patio Makeover

This budget patio makeover took a small townhouse patio from bare to cozy in one day, with no power tools and nothing permanent, so every idea works for renters. Start by deciding what the space is for, like dining, relaxing or play, and choose seating to match. A potting bench doubles as an outdoor bar with a galvanized ice bucket, a drink dispenser and potted plants. Thrift store finds such as a bottle rack, citrus bowl and rattan basket cost about $3 to $5 each.
Get the full tutorial at Bless'er House.
12. Hanging Beach Lanterns

These hanging beach lanterns came from a beach themed tablescape made on a budget. Blue mason jars get shells tied around the outside, a scoop of crushed shells inside and a candle on top. Craft store starfish are painted to match and strung up between the jars, and the whole garland hangs from a gnarled garden branch standing in for driftwood. Shells drilled with small holes and strung with pearls double as napkin rings. Light the candles at sunset for a coastal glow.
Get the full tutorial at Creating Wonderful Spaces.
13. Terra Cotta Pot Table

A terra cotta pot table needs a large clay pot, ideally more than a foot across, a matching large tray and outdoor paint. Check that the tray sits on the rim without sinking in and that the height works as a side table. Tape just below the pot’s rim for a crisp line, then paint the whole rim. Freehand the edge of the tray and fill it in. Two coats and a full dry time come before stacking. The pot inside doubles as hidden storage.
Get the full tutorial at Dukes and Duchesses.
14. Outdoor Lighting with a Solar Chandelier

An outdoor solar chandelier starts with an old chandelier from a garage sale or thrift store and a set of solar landscape lights. Unscrew the bulbs, remove the plastic sleeves and snip out the wiring. Take off the light mechanisms to make room, then reattach each plate and cup with its nut. Spray paint the frame if needed. Pull the stakes off the solar lights and glue each light into a cup with heavy duty adhesive, then let it dry overnight. Hang it where the tops get sun.
Get the full tutorial at Diva of DIY.
15. Beach Towel and Bathing Suit Rack

This beach towel and bathing suit rack is a pallet board sign with hooks made from real branches. Sand two 40 inch pallet boards, line them up and nail two short back supports across them. Paint the boards black, then lay on a stencil cut on a Silhouette or Cricut from vinyl with transfer tape. Spray paint white over it, peel and seal with a matte top coat. Screw on branches about an inch thick and 5 or 6 inches long as pegs for wet towels and suits.
Get the full tutorial at The Summery Umbrella.
16. Backyard Mirror Duo

This backyard mirror duo came from a pair of vintage barn windows with broken panes and missing muntins. Remove the remaining glass and cut the windows down, opening space at the top for strips of vintage beadboard. Taking out the broken muntins leaves openings sized perfectly for new mirror glass. Several thick coats of cottage white paint seal in the old chippy layers underneath. Hung on a barn wall or fence, the mirrors reflect the trees and make a small garden feel bigger.
Get the full tutorial at The Brambleberry Cottage.
17. DIY Beaded Wind Chime
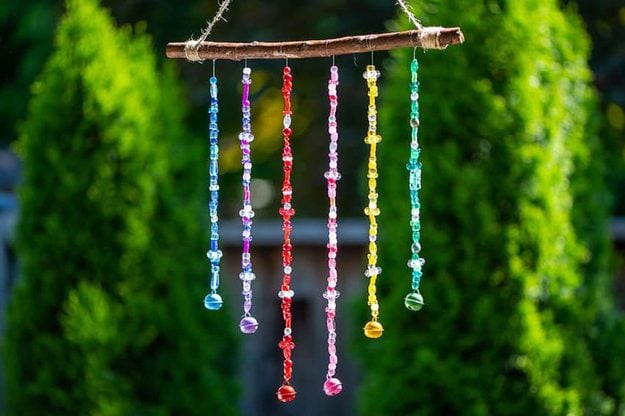
These beaded DIY wind chimes need glass or clear pony beads, a driftwood stick, fishing line, jingle bells and twine. Single strand nylon fishing line works best, since it’s strong, clear, holds knots and is stiff enough to thread without a needle. Sort the beads into rainbow order or string them at random, then tie a bell at the bottom of each strand and knot the tops to the stick. Kids can string the beads, though younger ones may need help with the knots. Twine hangs it.
Get the full tutorial at One Little Project.
18. DIY Fire Pit Area with Pea Gravel
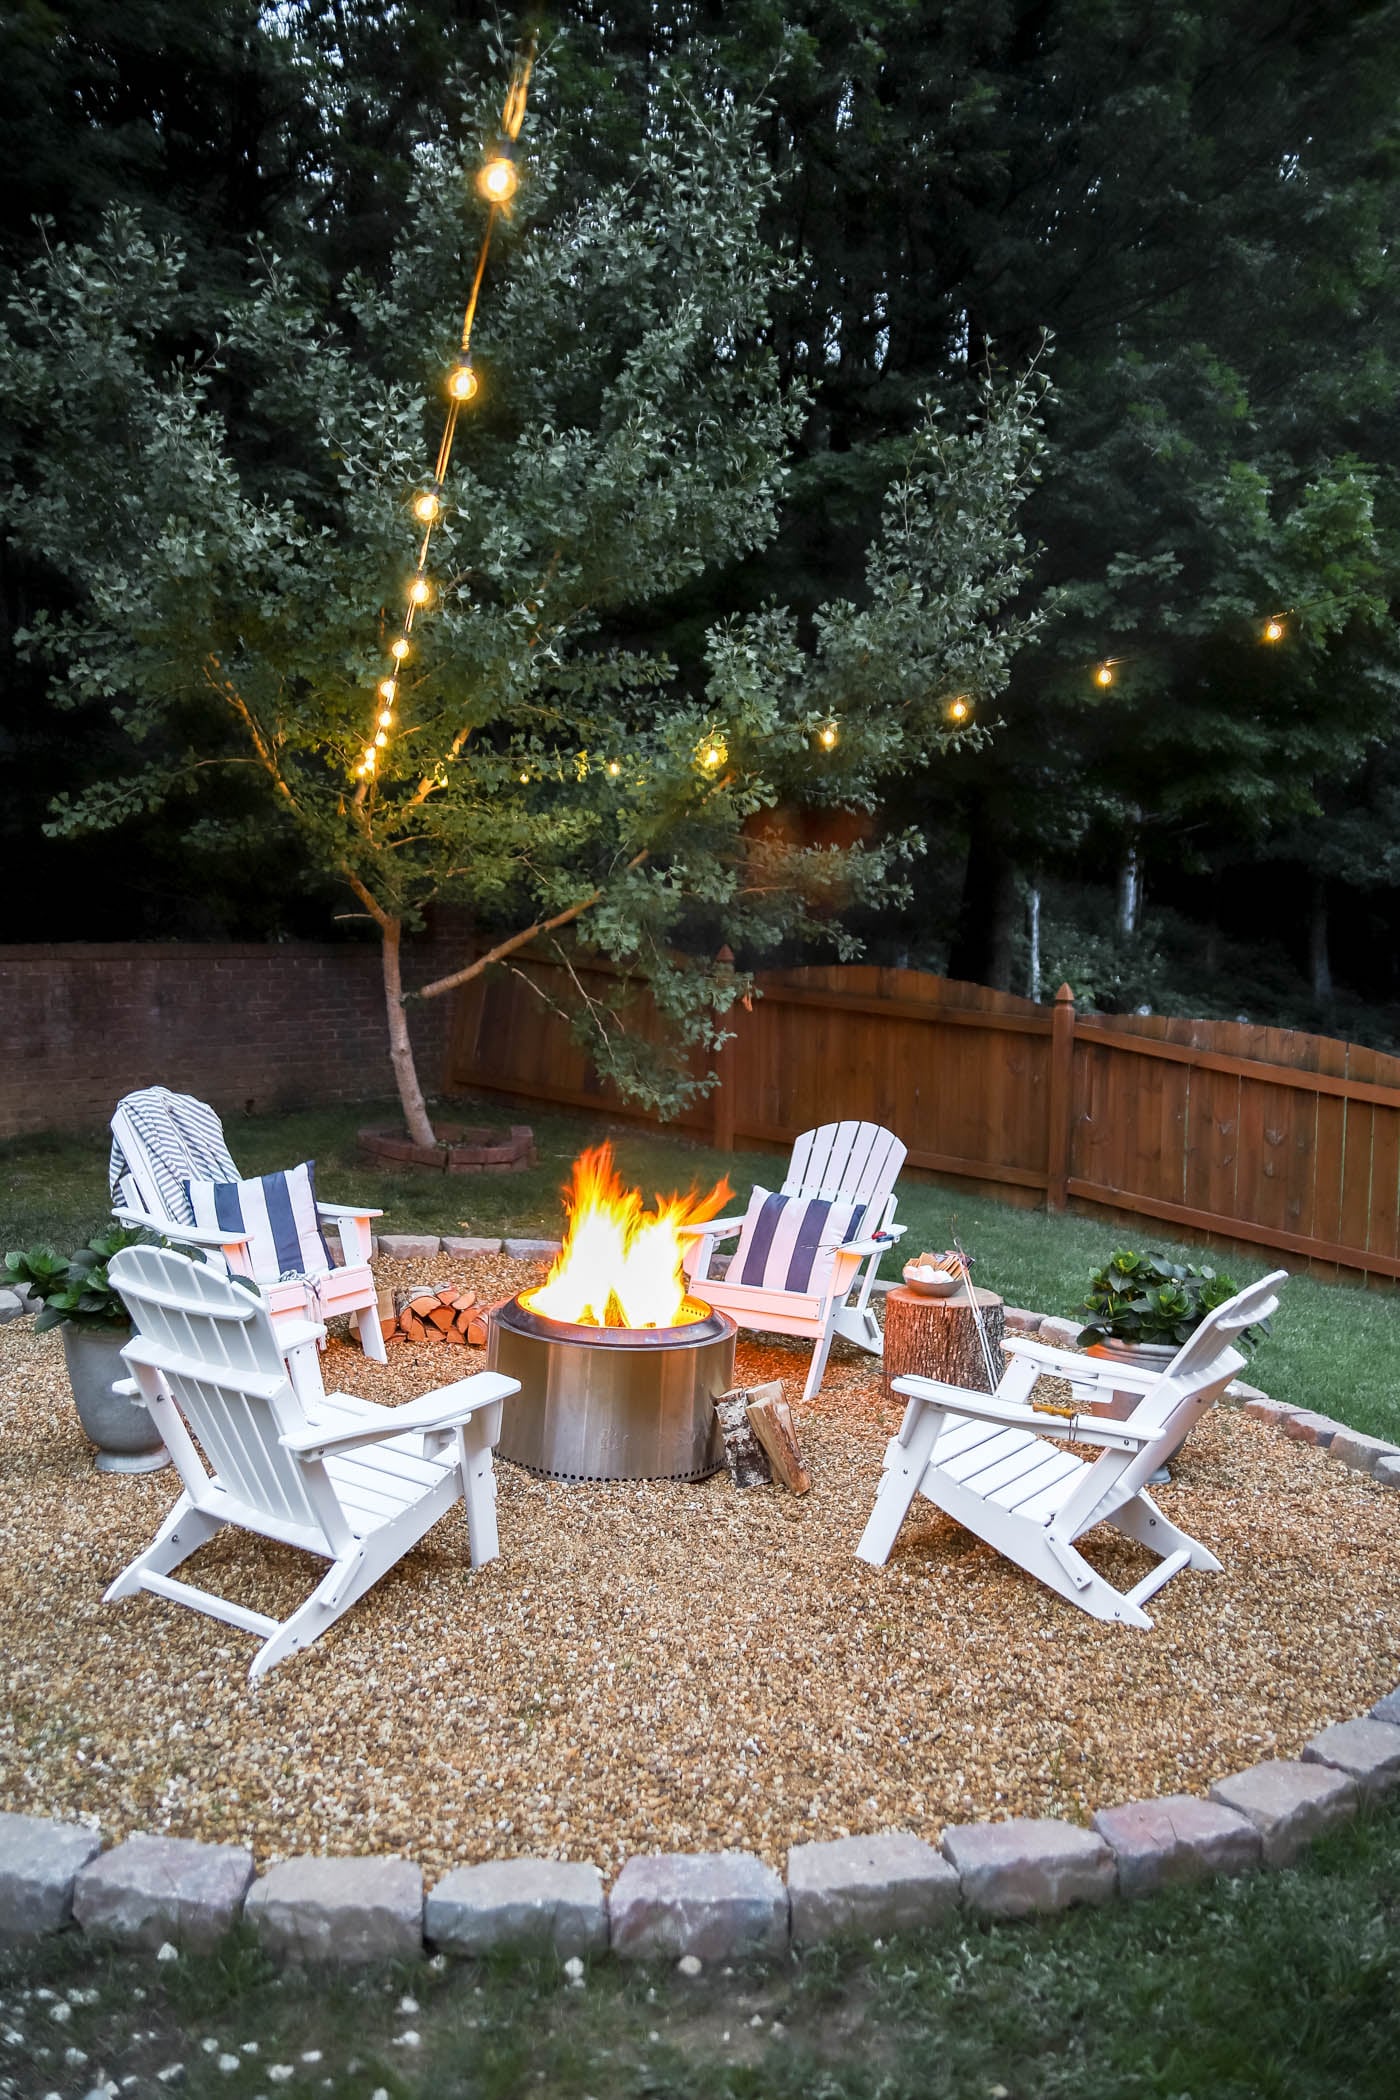
A DIY fire pit area with pea gravel took over a bare patch left by an old trampoline. Mark a circle with a stake, string and spray paint, here about 16 feet across for six to eight chairs, at least 10 feet from the house. Clear grass, weeds and rocks, level the ground and pin down landscaping fabric. Set the fire pit in the center, glue flagstone blocks around the edge with construction adhesive, then rake in pea gravel. Adirondack chairs and string lights finish it.
Get the full tutorial at The Turquoise Home.
19. Build a Pergola Right in Your Backyard

A simple pergola has four parts: posts, crossbeams, rafters and lattice, and a small one can go up in a weekend. Screw one crossbeam to two posts as a temporary unit, raise it into 18 inch deep holes and brace it plumb with 1x3s and stakes. Repeat on the other side, then level each crossbeam using a 2×8 rafter and a 4 foot level before screwing it tight. Trim the posts flush with a reciprocating saw, attach the rafters with angled screws and add 2×4 slats.
Get the full tutorial at Popular Mechanics.
20. Five-Minute Butterfly Feeder

A five-minute butterfly feeder starts with an inexpensive plate from the thrift or dollar store. A hibiscus shaped plate has notches between the petals that hold the hanging lines; a round plate needs a wall mount plate holder instead. Cut five lengths of mason line about 3 feet long, one per notch, since synthetic line outlasts natural twine outdoors. Tie them to a metal washer at the top, thread on a few beads for color and set out sliced oranges and melon to draw butterflies in.
Get the full tutorial at Garden Therapy.
21. Chalk Painted Patio Table

This chalk painted patio table was rescued from the curb when it was wobbly, weathered and falling apart. The repair came first: clamps, screws and wood glue, and the table had to come fully apart to fix it well. One armchair lost its arms so the set would fit a screened porch. After a light sanding to smooth the top, the tabletop got Duck Egg Blue chalk paint and the legs and chairs got Graphite. Light distressing on the top and chairs gives a softly weathered finish.
Get the full tutorial at Artsy Chicks Rule.
22. DIY Waterfall and Pond
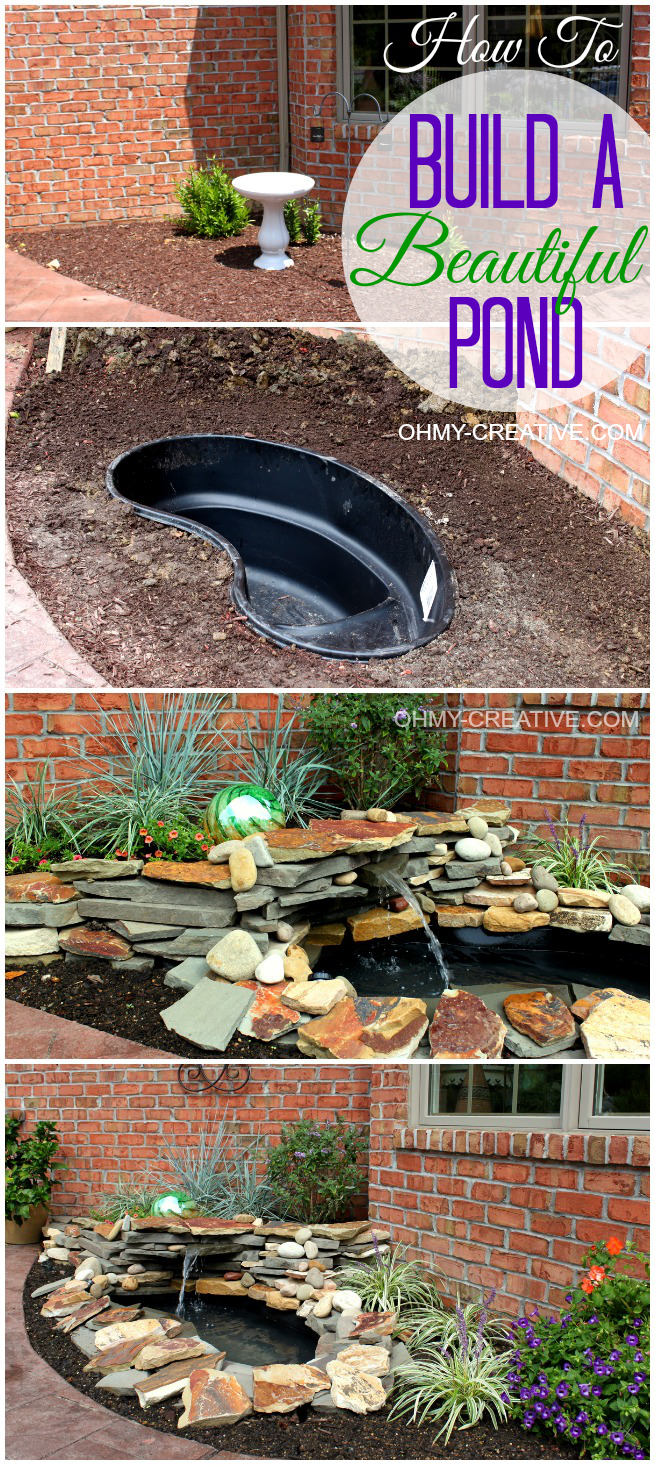
This DIY waterfall and pond cost a fraction of the $4,000 to $5,000 landscaper quotes. It uses a 50 gallon preformed pond basin, 3/4 inch vinyl tubing and a water garden pump. Mark the pond shape and the wall area with spray paint, dig, test the fit several times, then add sand to level the basin and fill any gaps. The pump and tubing go in before the stone wall, so the tubing can run up behind it to the waterfall. Buy extra stone.
Get the full tutorial at Oh My Creative.
23. DIY Mailbox Planters

DIY mailbox planters give old wall mounted mailboxes from Goodwill and garage sales, about $1 each, a cheerful new job. Spray paint each one with a couple of coats in a bright color like lime green or turquoise. Many of these mailboxes already have gaps in the bottom for drainage; if not, drill a few holes. Add a layer of gravel, then black dirt, and plant shade loving flowers if they’ll hang on a covered porch. Mount them on the house wall at eye level.
Get the full tutorial at Second Chance to Dream.
24. DIY Outdoor Side Table
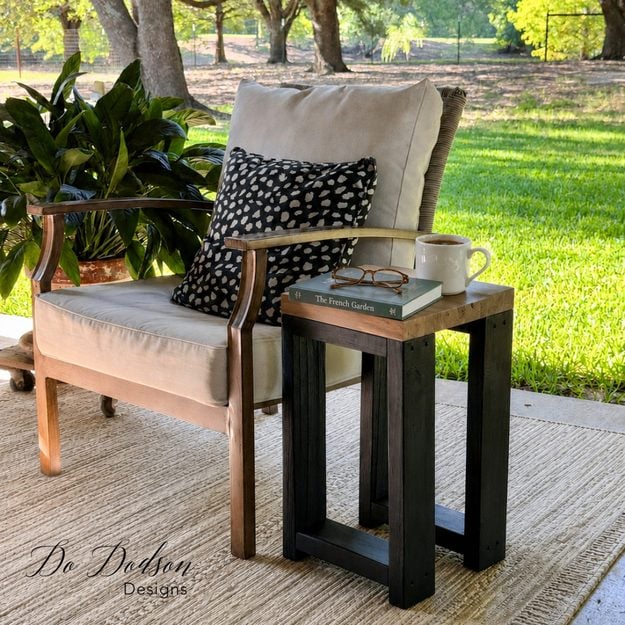
This DIY outdoor side table is a beginner friendly build made entirely of straight cuts. Use weathered pressure treated 2x4s for the base and a 12 by 12 inch acacia or other hardwood panel for the top. Cut eight 20 inch boards and eight 9 inch boards, lay them out and assemble the base with exterior wood screws. Sand everything, paint the base with all-in-one paint and finish with a weather proof clear coat. It fits beside a patio chair for coffee or a potted plant.
Get the full tutorial at Do Dodson Designs.
25. Outdoor Drink Holders

Outdoor drink holders start with an empty soup can. Cut the label off in one clean line and save it, since it becomes the pattern for the fabric. Wash the can carefully, because the inner rim is sharp. Cut two fabric strips the same length, one wider and one thinner, using the label as a guide so a print can be centered. The fabric wraps and covers the can and its edge, then a metal stake mounts it so it pushes into the lawn beside a chair.
Get the full tutorial at Positively Splendid.