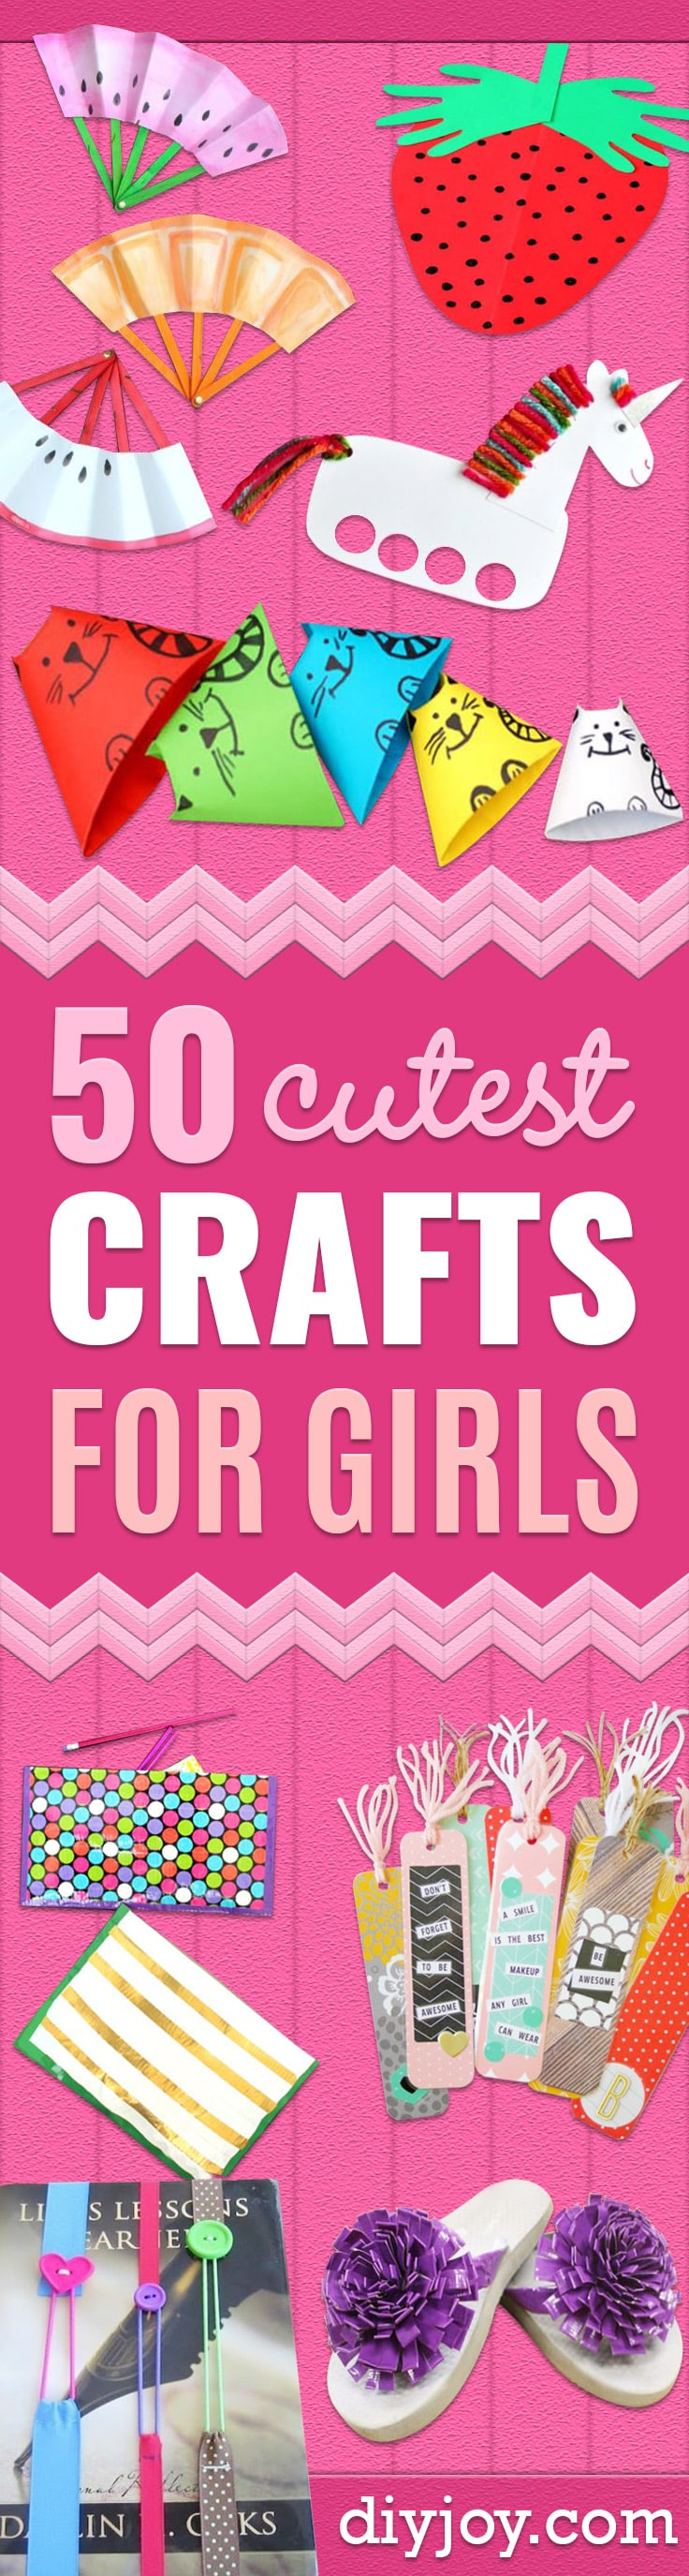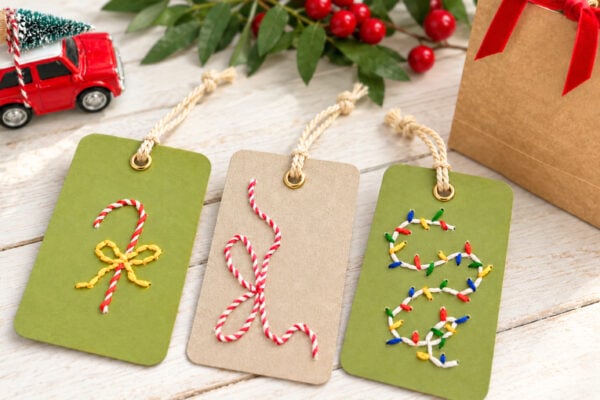
Somewhere along the way “crafts for girls” came to mean a kit in a pink box with everything pre-cut, and there is not much joy in gluing a sticker onto the spot marked for the sticker. These are the other sort. Plastic pony beads melted in a cake pan into a suncatcher that lasts outside for years, a shower loofah stamped into a snowy owl, wooden spoons from the dollar store painted into garden markers, a pom pom given a haircut until it turns into a rabbit. If you have ever set up a craft table for a group of kids, you know the projects that work best are the ones where the outcome is not decided before anyone sits down. Flowers, rainbows, mermaids and glitter are all here. So is a fair amount of cutting, sorting and figuring it out.
1. Braided Yarn Dolls
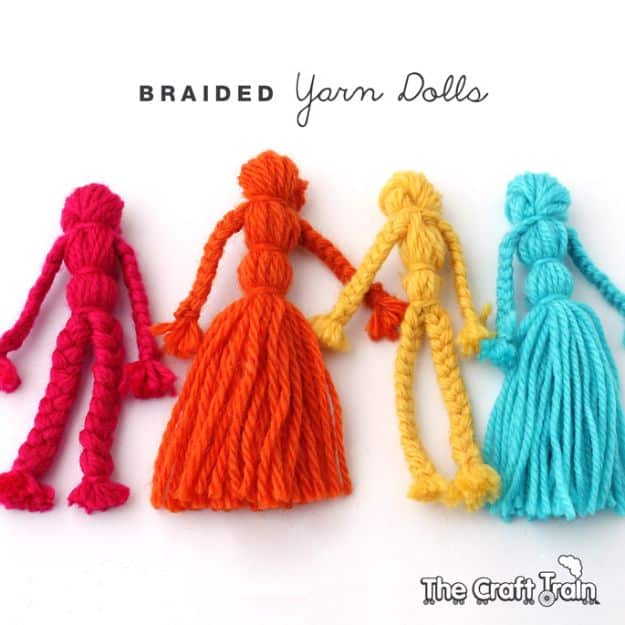
Wrap yarn round and round a scrap of cardboard cut to the height you want the doll, slide the bundle off, and from there it is all knots and braids: a tie at the neck, arms braided out from the sides, a waist, then legs or a skirt left loose. No glue, no needle, nothing but yarn and scissors. Use heavy cardboard rather than a cereal box, which is too floppy to wrap against. This one suits about eight and up, because the braiding takes patience, and a bag of oddments makes a dozen of them.
Get the full tutorial at The Craft Train.
2. Ice Cream Cone Garland

Kraft paper cut into six inch circles, rolled into cones and lined with a brown marker so they read as waffle cones, each one topped with a yarn pom pom scoop and a small red pom pom cherry. Making the pom poms is the real work and it is oddly satisfying: wrap yarn around your palm about a hundred and fifty times, tie the middle with a length cut beforehand, snip the loops and trim it round. Cut that tie length first, because both hands will be busy. Strung across a mantel it makes a summer birthday look planned.
Get the full tutorial at Camille at Growing Up Gabel.
3. 3D Rainbow Paper Craft
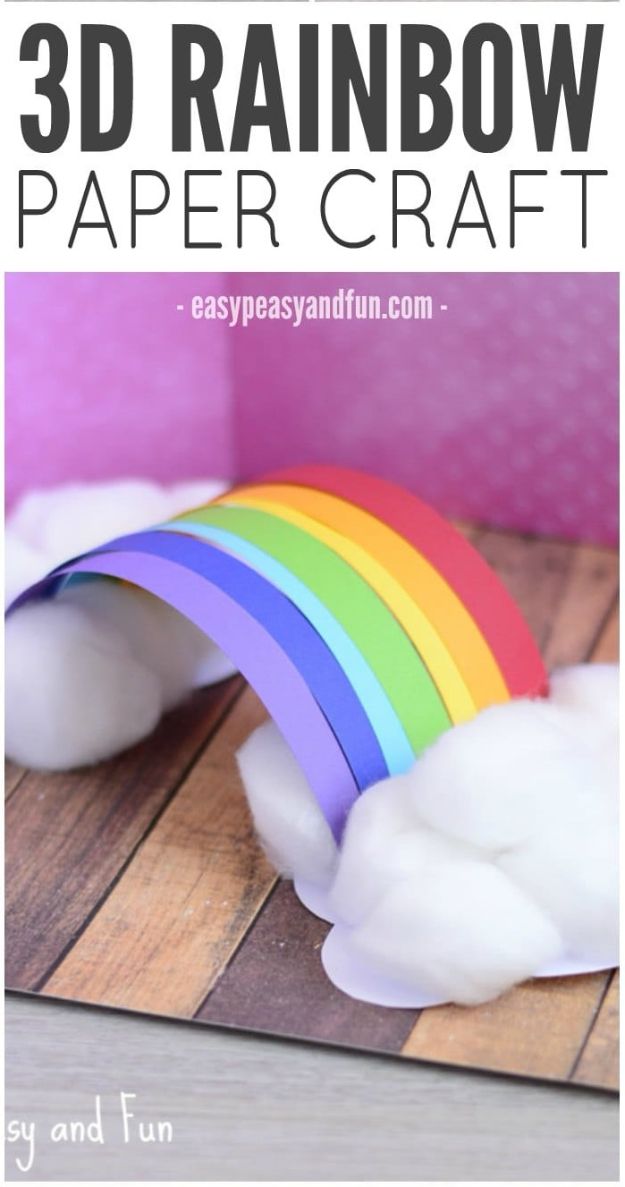
Seven strips of construction paper in rainbow order, sandwiched between two paper clouds at each end, and cotton balls glued generously on top. The engineering detail is the one worth copying: tape across the joint where the strips meet the cloud, fold along the tape, and the rainbow arches properly instead of flopping. Cotton balls go on the underside of each cloud, which is what weighs the ends down and holds the curve. Purple, indigo, blue, green, yellow, orange and red, in that order, or the other way round if somebody feels strongly.
Get the full tutorial at Andreja at Easy Peasy and Fun.
4. The BFG Dream Catchers Craft

Cut the centre out of a paper plate, punch holes around the ring, and let the yarn go across the middle in whatever pattern the child invents, because there is no wrong web. Feathers, beads and sequins hang from the bottom. Buy the cheap uncoated plates rather than the shiny coated ones, since paint and glue slide straight off a coated plate and everyone gets cross. It works beautifully as a group activity for a scout troop or a party, and every single one comes out different, which is rather the point of a dream catcher.
Get the full tutorial at The Suburban Mom.
5. Homemade Postcards
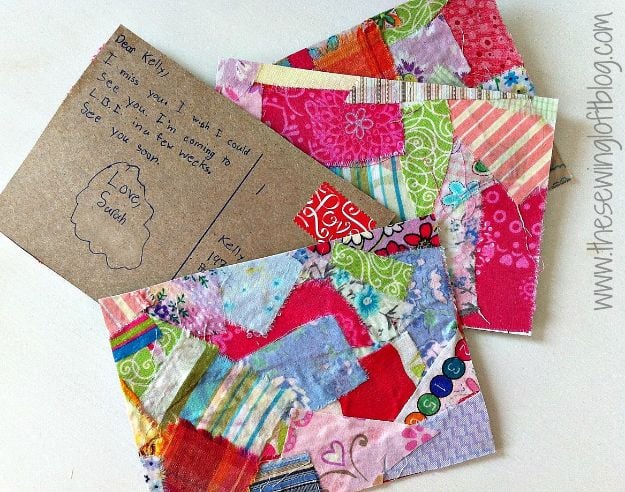
The small fabric scraps that are too little for anything become postcards. Mod Podge over a piece of cardboard, lay the scraps down overlapping like a tiny quilt, another coat of glue on top, let it dry and trim the overhang. Then address it and put it in the post, because it will genuinely go. This is the best possible use for the bottom of a scrap basket, and for anyone with a child who writes to a grandparent, the card and the note arrive together as one thing.
Get the full tutorial at Heather of The Sewing Loft for Skip To My Lou.
6. Clothespin Paper Puppets
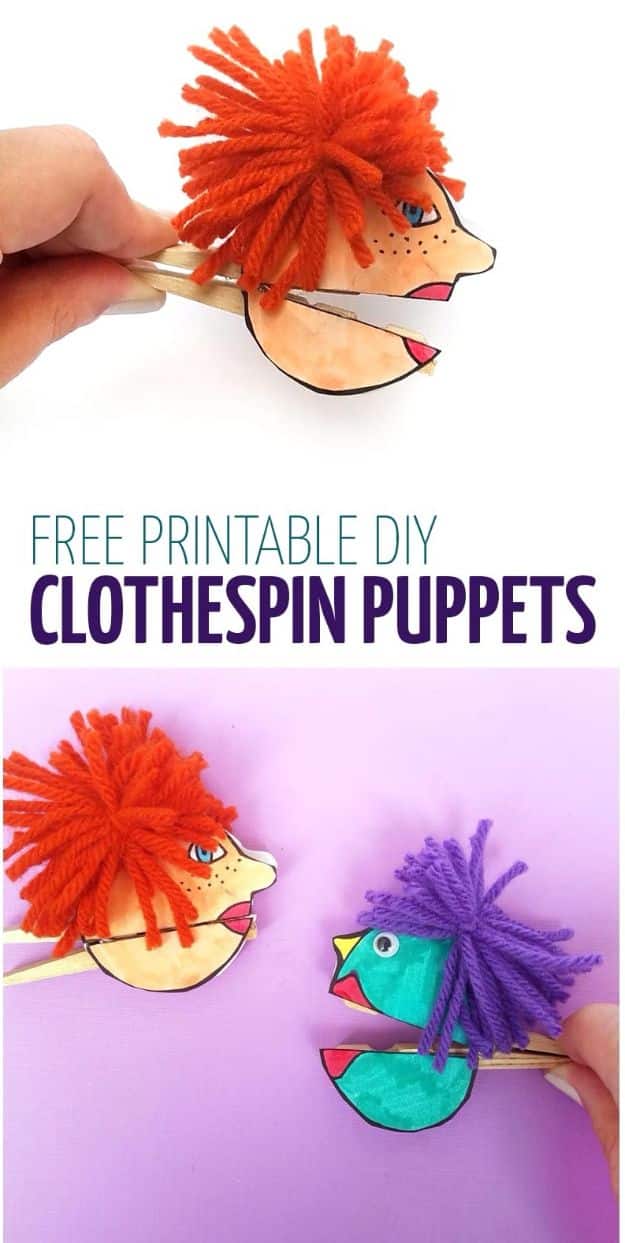
Print the free template, color the characters in, glue the two halves to a clothespin and the mouth opens and closes when you pinch it. The template is drawn in profile rather than face on, which sounds like a small thing and is the entire reason the mouth works. Hair is yarn wrapped fewer times than you would for a pom pom, so it flops rather than puffs, and long hair just means tying the bundle a third of the way along instead of in the middle. Unrealistic colors are strongly encouraged.
Get the full tutorial at Moms and Crafters.
7. Ladybug Painted Rocks

Smooth rocks, red or pink or purple, black heads, black spots, and two white eyes. What separates these from a rock that fades in a fortnight is the finish: outdoor paint, then a sealer, and they survive a season in a flower bed looking exactly as good as the day they went in. Scale the spots to the stone rather than counting them, and the mismatched sizes are what make a group of them look like a family. They also work in a house plant or as a paperweight, and they do tend to walk off.
Get the full tutorial at Crafts by Amanda.
8. Felt Embroidered Hearts

Two felt hearts, a running stitch around the edge in a contrasting floss, a little stuffing, and a word embroidered across the front. Conversation heart phrasing is the obvious route and it is obvious because it works. Felt is the right fabric for a beginner at hand sewing: it does not fray, so the edges need no finishing and a crooked stitch looks charming rather than wrong. Make them in an evening, hang them on a door knob or give a pile of them away, and use a simple backstitch for the letters so the word stays readable.
Get the full tutorial at DIY JOY.
9. Paper Heart Butterfly Craft

Four paper hearts, folded from strips rather than cut, make a butterfly with a body and two proper wings. Sizes matter here: two strips seven inches by three quarters for the body, two at eleven by three quarters for the wings, and two thin black strips about two and a half inches for the antennae. If you are working in cardstock, use glue dots rather than a glue stick, because a heart bent out of stiff card will spring open and a glue stick will not hold it. Hang a few on thread and they turn in the air.
Get the full tutorial at Buggy and Buddy.
10. Pipe Cleaner Flowers

Each flower is two pipe cleaners: bend one into an oval, twist the middle so it makes a figure eight, do the same with the second, then glue them crossed at the centre so you get four petals. A button in the middle, a painted popsicle stick for the stem, and it stands in a little pot filled with newspaper and paper shred. Almost everything comes from the dollar store, so a class set costs very little. It is a Mother’s Day gift that survives being carried home in a backpack, which most of them do not.
Get the full tutorial at The Resourceful Mama.
11. Caterpillar Pom Pom Craft

Pom poms glued in a line along a paper leaf, googly eyes on the front one, and a caterpillar appears in about four minutes. That speed is the point, because it means you can make the whole butterfly life cycle in one sitting: eggs are a scatter of tiny pom poms, the caterpillar is this, the chrysalis is a pom pom wrapped in tissue paper and the butterfly is paper wings with a pom pom body. Cut the leaves from green paper first so the little ones can start gluing immediately.
Get the full tutorial at Andreja at Easy Peasy and Fun.
12. Cotton Ball Heart Painting Crafts

Tape a pre-cut foam heart to the middle of a white canvas, then dab paint all around it with cotton balls until the whole surface is covered, and peel the heart off at the end to leave a clean white shape. Clip each cotton ball into a clothespin and it becomes a dabber, which keeps small fingers out of the paint and makes this far less messy than it sounds. Eight by ten canvases go on sale constantly. It is a wall-worthy piece from a child too young to hold a brush properly.
Get the full tutorial at Sara Reimers at Sunshine Whispers.
13. Snowy Owl Craft

The owl’s body is stamped, not painted: dip a shower loofah in white tempera and press it onto black construction paper, and the texture comes out exactly like feathers. Nothing else gives you that, and a loofah costs almost nothing, so it is worth keeping one in the craft box permanently. Yellow paper circles with black centres for the eyes, a black triangle beak, and a branch cut freehand from brown paper. Read something about snowy owls first and the whole thing turns into an arctic animal lesson that nobody notices happening.
Get the full tutorial at Fantastic Fun and Learning.
14. Q Tip Daisy Craft

Roll a ball of yellow play dough, flatten it slightly between your palms, then press cotton swab halves in around the edge as petals. A green pipe cleaner pushed into the side is the stem. That is the entire build, and it is genuinely excellent for small fingers learning to place things precisely. Cut the swabs in half first, because a whole one is too long and the daisy looks like a sun. They can stand loose in a vase or be pressed flat onto blue paper and glued down as a picture.
Get the full tutorial at The Pinterested Parent.
15. How To Make Melted Bead Suncatchers

Fill an old metal muffin tin or cake pan with plastic pony beads, heat it until they fuse into a solid disc, cool it and pop the disc out. What comes out is tough: unlike every paper or contact paper suncatcher, these live outdoors through weather and stay bright for years. That durability is the reason to do it. The critical part is not optional, and the source says it in capitals for good reason: melting plastic gives off toxic fumes, so this happens outside, with an adult doing the heat, every single time.
Get the full tutorial at The Artful Age, formerly The Artful Parent.
16. Handprint Strawberry Craft

A red paper strawberry with two green handprints for the leafy top, and the trick for drawing the berry is worth stealing: tell them to draw a heart, then round off the point at the bottom. Children who cannot draw a strawberry can all draw a heart. Black marker dots make the seeds, and you can be as haphazard as you like with those. Made after a day of strawberry picking it becomes the record of the day out, and it takes about fifteen minutes from start to finish.
Get the full tutorial at 123 Homeschool 4 Me.
17. No Sew Duck Tape Zipper Pouch

The zip is a Ziploc freezer bag, and once you know that, the whole thing is obvious. Trim the bag to the size you want with the zip closed, cover both sides completely in strips of Duck Tape, square up the edges, then seal the two short sides and the bottom with inch wide tape folded over the seam. About five minutes each, which means a group of children will make a dozen and want more tape. Pencil case, makeup bag, tablet sleeve, all from the same method at whatever size you cut.
Get the full tutorial at Heidi Kundin at Happiness is Homemade.
18. Thumbprint Dandelion

Download the free template, which supplies the stem and the fine spokes of a dandelion head, and let a child press painted thumbprints onto the end of every spoke. The result looks like a dandelion caught mid wish and it takes about ten minutes. Two and up can do this one, because a thumb needs no skill at all, and the seeds drifting off to one side are what makes it look intentional. Frame it. It is one of the very few toddler crafts that looks like art rather than evidence.
Get the full tutorial at Glued To My Crafts.
19. How To Make Duck Tape Flowers

Three strips of tape about fourteen inches long, each folded almost in half so an eighth of an inch of sticky edge shows along the bottom, then gathered and wrapped around a tape circle to make a ruffled bloom. The eighth of an inch is the whole thing: too little and it will not hold, too much and the flower looks clumsy. Stick them on a pair of tired flip flops and they look new, or use them on a hair clip, a pencil, a gift. Non-stick scissors make this far less infuriating than ordinary ones.
Get the full tutorial at Skip To My Lou.
20. Wooden Spoon Garden Stakes

Dollar store wooden spoons, three for a dollar, painted and labelled and pushed into the soil at the end of each row. Kale, carrots, garlic, whatever is in the ground. Children can paint the handle in any pattern they like and write the name on the bowl of the spoon, which is a much better writing surface than a lolly stick. They weather to a soft faded look over a season, which honestly suits a vegetable patch better than anything plastic ever will, and they are easy to redo in spring.
Get the full tutorial at Twig and Toadstool.
21. How To Make Pom Pom Bunnies

Two yarn pom poms, one big and one small, trimmed hard until the shapes read as a body and a head, with felt ears and a tiny pink nose. Be warned before you start: this is not a quick craft. The trimming is where it lives, and getting a pom pom from a fuzzy ball to a proper rounded shape takes a while and a lot of small snips. Children love doing the haircut part, which helps. Gray yarn reads most convincingly as a rabbit, and the whole thing is properly soft at the end.
Get the full tutorial at Megan of Homemade Ginger for One Little Project.
22. Dixie Cup Windmill Craft

Paint paper cups, draw the windows and a door on the side with a Sharpie, and glue a cross of construction paper blades together for the sails. A split pin pushed through the blades and the cup holds them on, and the whole thing turns on how loosely you set that pin, because a windmill that will not spin is just a decorated cup. Line them up in a row of different colors and you have a village. The maker’s daughter layered her colours over each other instead of one cup per color, which looks better than a tidy set.
Get the full tutorial at The Pinterested Parent.
23. Egg Carton Mermaid Dolls

Egg carton cups cut into curved fish scale shapes and threaded down a small cardboard tube make a mermaid tail that actually bends. The assembly detail is the one to follow properly: trim each cup so the centre seam runs down the middle, and line those seams up as you stack them, or the tail sits crooked. Pick shades of one color rather than a rainbow, which is what makes these look designed instead of made from rubbish. There is a printable pack with the shape templates, and it works right across primary school.
Get the full tutorial at Art Camp LA.
24. Super Fun Craft Stick Love Bugs

A craft stick is the body, one foam heart turned upside down and glued behind it is the wings, and the antennae are two short lengths of pipe cleaner with a pom pom glued on each tip. After that it is a free for all with adhesive jewels, googly eyes and whatever else is in the box. Six sticks painted gave the maker four bugs, so paint a few spare. An adult runs the glue gun for the antennae. Stick a magnet strip on the back and it lives on the fridge.
Get the full tutorial at Sara Reimers at Sunshine Whispers.
25. DIY Paper Spinner

Two decorated paper circles glued either side of a cardboard circle, two holes punched near the centre, and about twenty eight inches of string threaded through and knotted into a loop. Wind it up by swinging it in circles, then pull and relax, pull and relax, and it spins fast enough to hum. Burn the cut ends of the string with a match so it cannot unravel, which is the difference between a toy that lasts a week and one that lasts an afternoon. The more color on the circles, the better it looks spinning.
Get the full tutorial at Kimbo of A Girl and a Glue Gun for Make and Takes.
26. Paper Strip Fish Craft

One strip three quarters of an inch by nine for the body and one at three quarters by seven for the tail, looped and glued, and you have a fish with real volume in it. Print the free template if measuring is not going to happen. Red cardstock with gold marker patterns makes these into a Lunar New Year craft, and any other color makes them an ocean unit. Hang a whole shoal on threads at different heights and the classroom looks like somebody spent a week on it rather than twenty minutes.
Get the full tutorial at Buggy and Buddy.
27. No Sew Burlap Owl Craft

Burlap cut into a simple owl shape, with wooden buttons for eyes and a small wooden heart button turned point down for the beak, all glued rather than sewn. The fraying edges are the charm, so do not fight them. What makes this one worth a place is how far it stretches: the same owl becomes bunting, a fridge magnet, a lavender sachet for a wardrobe or a puppet, so a batch made in one sitting covers half a list of small gifts. Kids can absolutely help, and burlap hides every crooked glue line.
Get the full tutorial at Kids Craft Room.
28. A Plastic Spoon Spring Flower Craft

Three plastic spoons, bowls facing inward so the handles form a triangle, bound together with floral tape wound down the handles and back up again, and the spoon bowls really do look like a closed crocus. Green pipe cleaner cut into thirds tucks into the tape as leaves and a yellow one cut in half goes down the centre of the spoons as the stamen. A clear nine ounce cup filled with crinkle cut brown paper shavings is the pot. Dollar store throughout, and because it is plastic it never wilts.
Get the full tutorial at Kid Friendly Things To Do.
29. Toilet Paper Roll Flowers Craft

Cut a paper roll into a tulip shape with three points and it holds its own stem, then a second roll flattened and cut becomes leaves and grass around the base. A free printable template keeps the petal shapes even, which matters more here than usual because a lopsided tulip reads as a lopsided tulip. Paint them in flat bright colors rather than blending anything. A row of them along a shelf is a spring display that costs nothing but the paint and takes one afternoon.
Get the full tutorial at Kimberly McLeod at The Best Ideas for Kids.
30. Feline Matrixes

Squares of bright paper folded into little pillow boxes, then a cat face drawn on each with a black marker: whiskers, ears at the folded corners, a stripe or two. The fold is the same one used for a paper gift box, so it opens, which means each cat can hide a sweet or a tiny note inside. Line six of them up in different colors and they look like a set of nesting dolls, which is where the name comes from. Party favors, advent pockets, or a note in a lunch box.
Get the full tutorial at Krokotak.
31. Jellyfish Salt Painting Activity
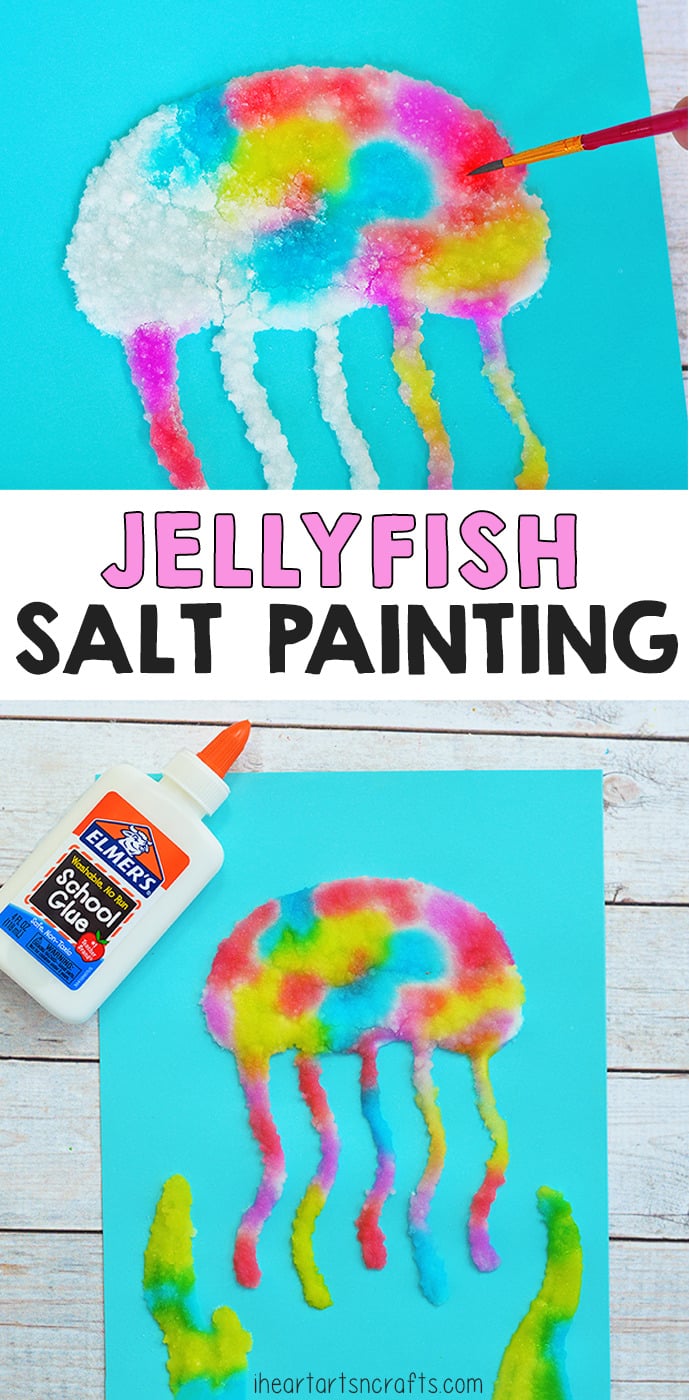
Squeeze lines of white school glue onto cardstock, pour table salt over them, tip the excess off, and you have raised ridges that behave like tiny channels. Touch a loaded brush of liquid watercolor to one point and the color travels along the whole salt line by itself, which is a genuinely mesmerising thing to watch happen. A jellyfish is the ideal shape for it because the trailing tentacles are one long line each. Stars, sharks and turtles work too. Do not press the brush, just touch it and let it go.
Get the full tutorial at I Heart Arts n Crafts.
32. Tissue Paper Butterflies

Cut a butterfly outline from black construction paper, leaving a border about half an inch wide so it holds together, then sandwich torn tissue paper squares between two sheets of clear contact paper inside it. Stuck on a window, the light through the tissue does all the work and it genuinely looks like stained glass. What surprised the teacher who wrote it up was the silence: choosing and placing each square is absorbing enough that a whole class goes quiet. Worth remembering on a gray day with one small window.
Get the full tutorial at Differentiated Kindergarten.
33. Citrus Perler Bead Coasters
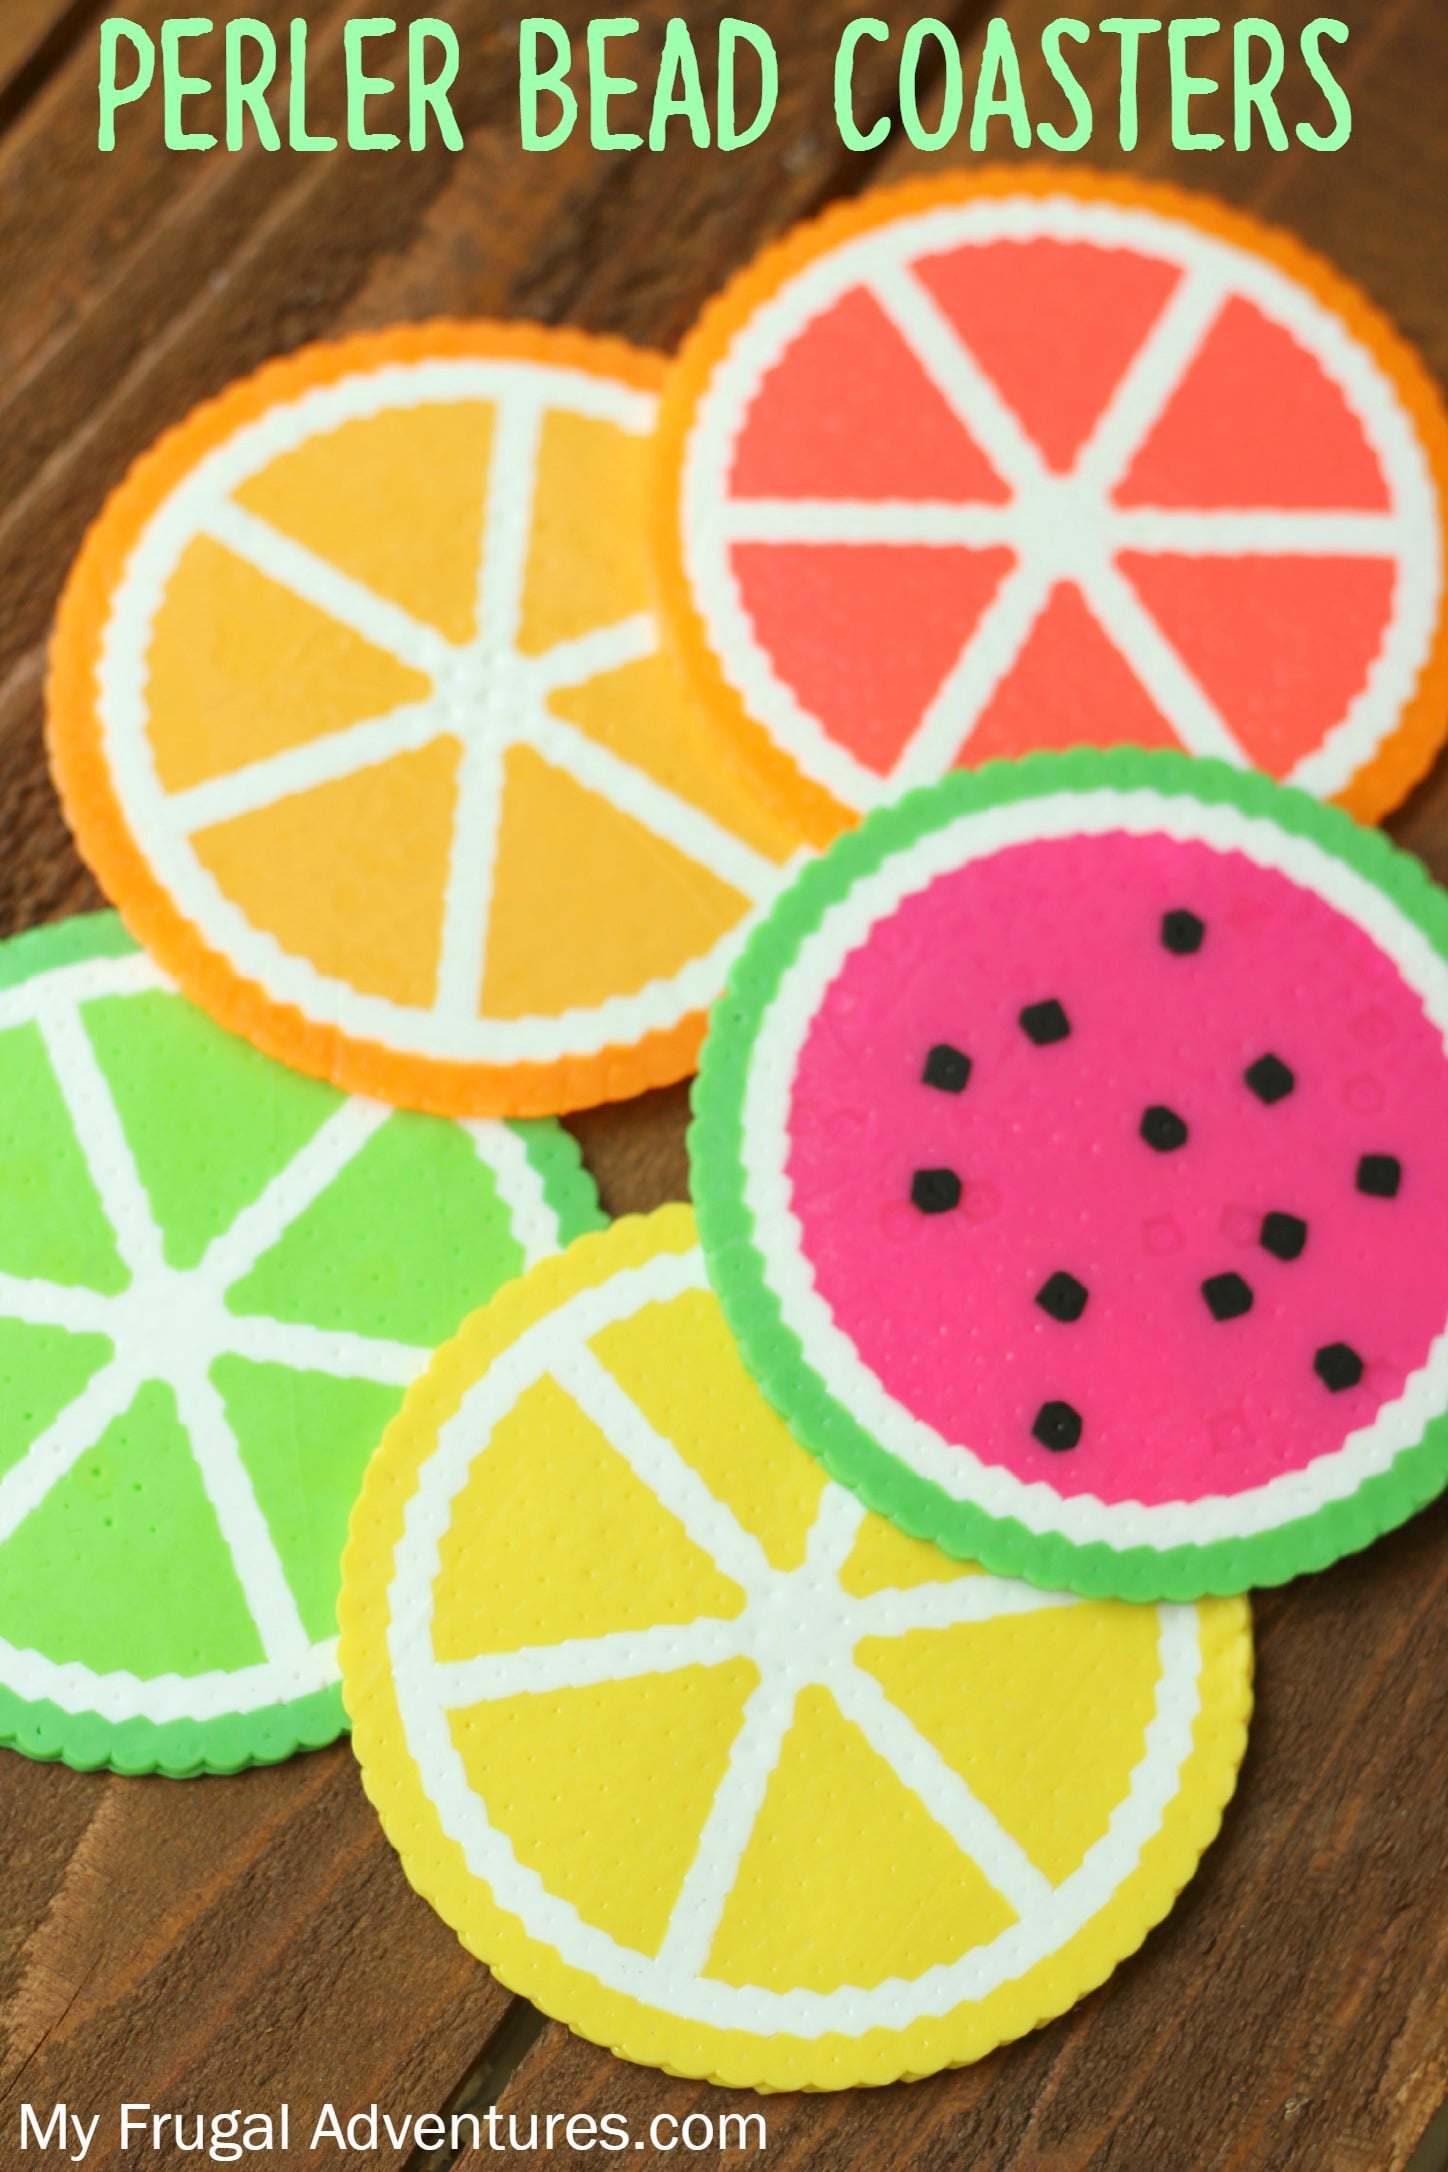
Perler beads laid out on a circular pegboard in wedges, ironed through the paper that comes in the box until they fuse into a solid disc. Lemon, lime, orange and watermelon slices are the obvious designs and they look properly good on a table, not craft-like at all. Two things: an adult does the iron, and press evenly rather than hard, because leaning on one side gives you a melted patch. Older children can lay out an entire set in an afternoon, and it is one of the few kids’ crafts that adults actually use afterward.
Get the full tutorial at My Frugal Adventures.
34. Felt Pinecone Bears

The body is a pine cone, and a head, two ears, two feet and a muzzle cut from felt turn it into a bear in about ten minutes. That speed is deliberate: this was designed for short attention spans, so a child who has lost interest in everything else that afternoon will still finish this one. Cutting the small felt pieces from the printable template is proper scissor practice. Tacky glue is the safe option, or a low temperature glue gun if you are ready to introduce one. Raccoons and foxes work the same way.
Get the full tutorial at Lia Griffith.
35. Uber Cute Origami Mermaid

Three separate folds that come together at the end: the face, the body and the tail. It is a proper origami project, which is to say it demands attention and neat creases, and the payoff is a mermaid that looks nothing like the square of paper it started as. This is one for older children, or for an adult and a child folding together, and the tail is the section to slow down on. Once you have made one, the second takes half as long and the third takes a quarter.
Get the full tutorial at Pink Stripey Socks.
36. Lolly Pop Heart Flowers

Trace a heart onto cardstock with a heart shaped cookie cutter from the dollar store, cut it out, and stick a lollipop to the front with double sided tape so the sweet sits in the middle. Cut a leaf with a long tail, tape that tail and roll it around the stick, and it grips on its own. Use cardstock rather than construction paper, because the heart has to carry the weight of the sweet. Write the Valentine message on the back, and a whole tray takes about five minutes.
Get the full tutorial at One Little Project.
37. Constellation String Art

Heavy cardstock cards, each printed with a named constellation and holes punched at every star, then laced with string from point to point. It is a lacing card with a much better reason to exist, and a set of six framed together makes a genuinely lovely thing for a bedroom wall. Use 110lb cardstock or the holes tear through on the second pass. Six year olds manage it happily and older ones will want to know which constellations are actually visible tonight, which is the best possible outcome.
Get the full tutorial at Vintage Revivals.
38. Simple Hot Cocoa Craft

A paper mug cut freehand, a brown circle for the cocoa, and cotton balls pulled apart for the whipped cream on top. That is the whole supply list, which is exactly why it is useful: construction paper, a glue stick and cotton balls are in every house and every classroom cupboard. Let them draw their own mug shape rather than tracing one, because the wonky ones are better, and add a red glitter snowflake or a name on the side. It fills the flat weeks of January when Christmas is over and winter is not.
Get the full tutorial at 123 Homeschool 4 Me.
39. Easy Insect Craft

Two bugs from one pile of supplies. For the dragonfly, fold both ends of a four to six inch ribbon into the middle, tape the bundle, and fix it across a large craft stick as wings. For the caterpillar, run a line of glue down the stick and press pom poms along it. Gems, googly eyes and buttons finish either one. A seven year old can do the ribbon fold alone and a younger one will need a hand holding it while the tape goes on, which is the only tricky moment in the whole thing.
Get the full tutorial at Juggling Act Mama.
40. Paper Plate Mouse Craft

Trim a paper plate to shape with the free template, paint it gray, add scrapbook paper circles for ears and a nose, and finish with a curled tail. The best bit is the paint: do not hand over gray, hand over black and white and let them work out that mixing the two makes it. The answers you get before they try it are worth the mess on their own. These take minutes, they dry fast, and they are the obvious follow up to reading If You Give a Mouse a Cookie.
Get the full tutorial at Housing a Forest.
41. Easy Turkey Craft

A brown paper turkey body, then thin strips of yellow, orange and red folded accordion style and taped behind it so the feathers stand out in a fan. The accordion folding is the whole point of this one, and it was designed by occupational therapists precisely because that pinch and fold is excellent practice for the hand. Cut the body for anyone new to scissors and let them do the strips. Glue it onto a blank card and it becomes a Thanksgiving greeting that somebody will actually keep.
Get the full tutorial at The Inspired Treehouse.
42. Handmade Bookmarks

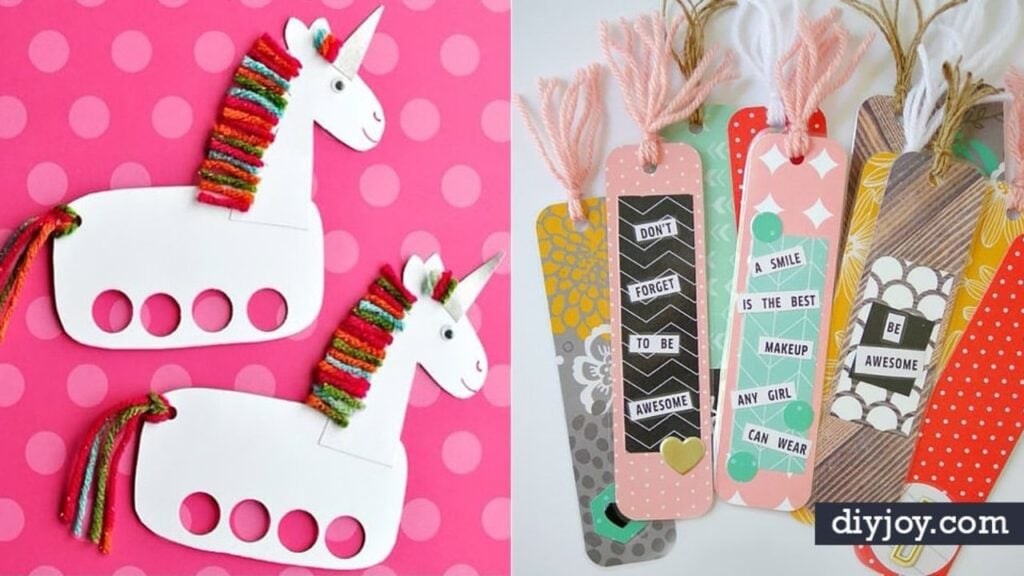
Patterned paper cut into long rectangles, backed so they are stiff enough to survive a school bag, with a punched hole at the top and a little tassel of yarn threaded through. Mix the patterns rather than matching them, because a set where nothing goes together looks far better fanned out than a tidy one does. Add a printed phrase or a monogram sticker. They take about ten minutes for a batch, and they are the right size to tuck into a book you are giving as a present.
Get the full tutorial at Kim of Everything Etsy for Tatertots and Jello.