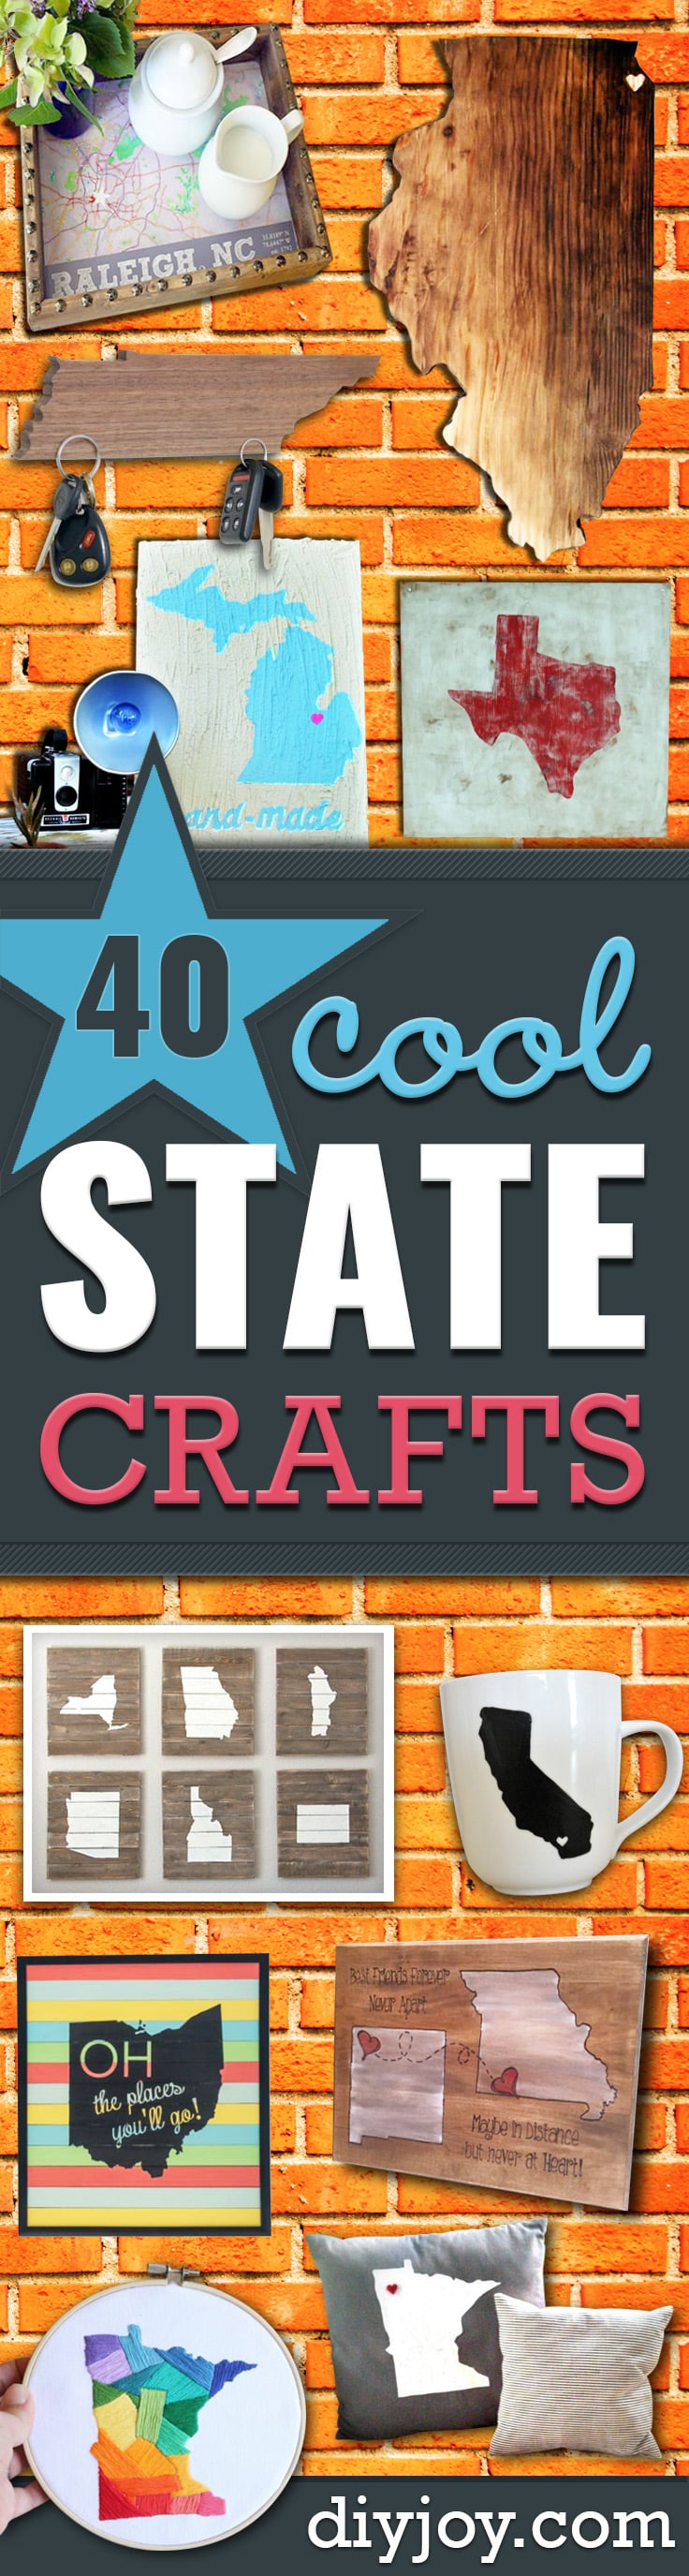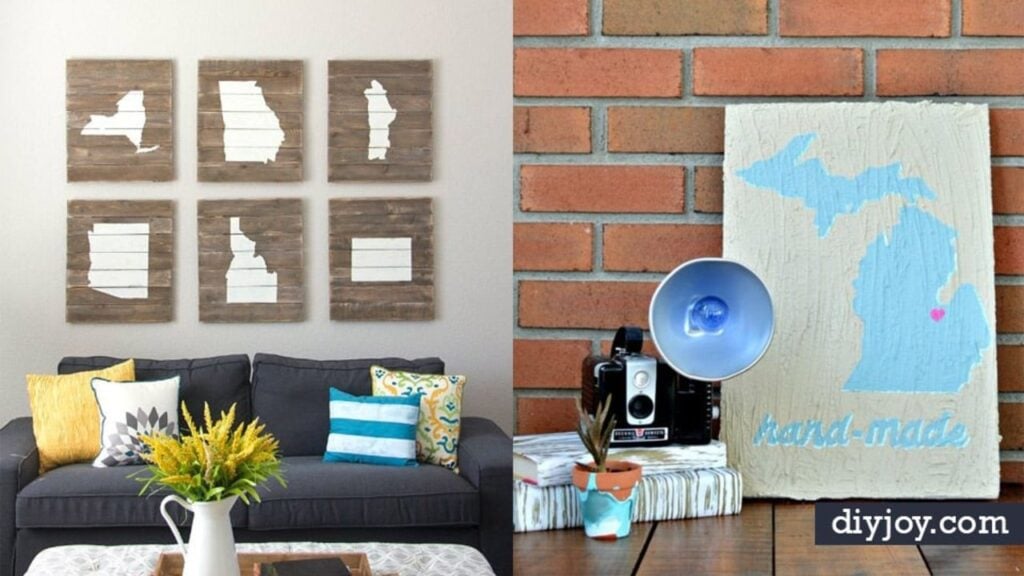
Some people collect magnets from every road trip. Others want the whole outline of home hanging over the couch. These 22 cool state crafts cover both kinds of people, and everyone in between. A state craft is any project built on the shape of a place you love, whether that is where you grew up, where you met or where you landed last spring. Cut the outline from walnut for a key holder, wind twine around it on weathered planks, fuse it onto a tee or bend it from wire into a necklace. Old road atlases become coasters and fridge magnets, and a plain pumpkin gets a porch ready silhouette. Most need a printed outline, some paint and an afternoon. Find more DIY wall art ideas when the walls still look bare.
1. DIY State Art
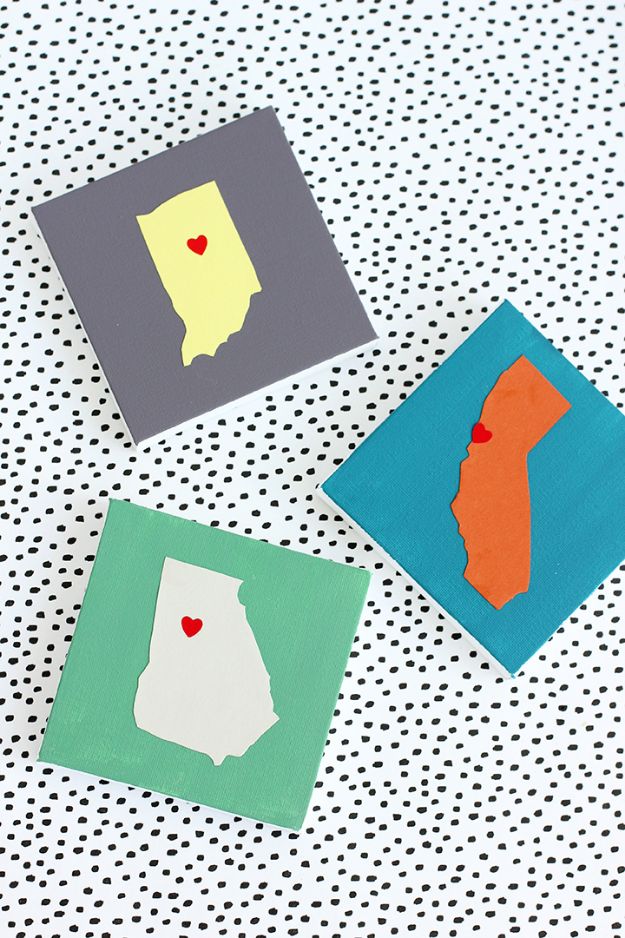
DIY state art on mini canvases is a sweet way to map a life story. Each small canvas gets a solid background color, then a state silhouette in a contrasting shade and a tiny red heart over the hometown. Make one for the state you were born in, one for where you grew up and one for where you live now, then line them up on a shelf or desk. The project started as a supply challenge with mini white canvases, and the full step by step lives on the Oriental Trading blog.
Get the full tutorial at Alice and Lois.
2. How To Make A State Shaped Magnetic Key Holder

This state shaped magnetic key holder solves the hunt for lost keys and shows some hometown pride at the door. Start with a piece of hardwood (walnut looks rich) planed to about half an inch thick. Print a simplified state outline, scale it as large as the board allows and trace it on. Cut the shape with a bandsaw or jigsaw and smooth the curves on a spindle sander. Drill shallow holes with a Forstner bit on the back and seat three rare earth magnets inside. Boiled linseed oil brings out the grain, and keyhole hangers make mounting easy.
Get the full tutorial at Fix This Build That.
3. State Inspired String Art

State inspired string art starts with a planked board instead of a plain plank. Line up nine thin poplar boards, glue two support strips across the back and clamp them (heavy books work) until dry. Wipe on a gray driftwood stain and give it a day. Pin a printed state outline on top with paneling nails, trace through the paper, then nail around the outline about an inch apart. Wind hemp twine back and forth across the nails, add a heart of brass tacks over a special spot, and letter a favorite saying in gold paint pen.
Get the full tutorial at My Blessed Life.
4. DIY Home State Tee

A DIY home state tee takes about 15 to 20 minutes and only basic sewing skills. Fuse Heat n Bond to the wrong side of a pretty floral fabric. Trace the state template backwards on the paper backing so it faces the right way once flipped, then cut it out with sharp scissors. Iron the shirt first, center the shape with a ruler (hold the tee up to check the height), peel the backing and press. A straight stitch around the edge keeps it on through every wash. Pull the threads to the inside and knot them.
Get the full tutorial at Busy Being Jennifer.
5. State Capital Rustic Tray
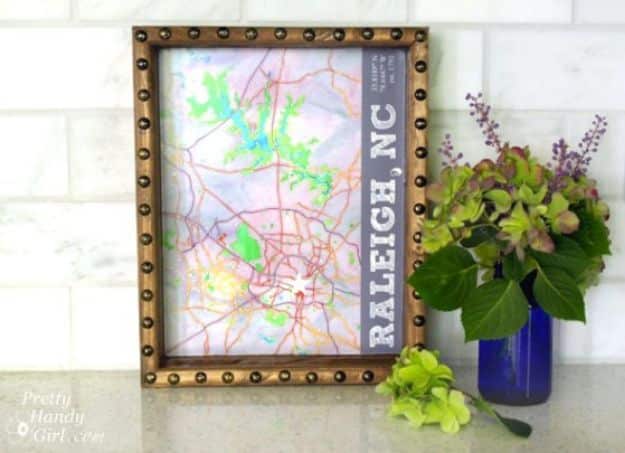
A state capital rustic tray puts a watercolor style map of a hometown under glass. Pull up any city on a map tool that renders streets as watercolor art, download the view and add the city name, its coordinates and the year it was founded. Print it, trim it with a craft knife and metal ruler, and cut a plywood base to match. Frame the base with 1×3 boards mitered at 45 degrees, glued and nailed, then stain. Set the map in, lay glass or plexiglass on top, seal with clear caulk and add nailhead trim and handles.
Get the full tutorial at Pretty Handy Girl.
6. State Pumpkin Project

The state pumpkin project dresses a fall pumpkin in hometown pride, and it works on a real or a craft store pumpkin. Paint the pumpkin white (or any base color) and give it a full 24 hours so the vinyl will stick cleanly. Cut the state outline from vinyl, or run contact paper through a cutting machine, and press it onto the flattest side of the pumpkin, scoring the edges so paint can’t creep under. Paint inside the outline in black, peel and let dry. No cutter? Trace the state with carbon paper and paint it freehand. A red star marks home.
Get the full tutorial at Thistlewood Farm.
7. State Pillow DIY

This state pillow DIY needs no sewing at all, just fabric glue. Find a state outline online or cut one from an old map book, trace it onto fabric with a pencil and cut it out. A thicker fabric such as felt keeps the glue from showing through. Run fabric glue around the edge of the shape and across the middle, then press it firmly onto a ready made pillow. Finish with a little heart glued over the hometown. Once one is done, try chevron, stripes or a whole USA version.
Get the full tutorial at The White House Girls.
8. Hand Painted State Styrofoam Sign

This hand painted state sign skips wood and uses a sheet of craft foam board, which is light and easy to hang. Brush on a smoothing coat so the foam takes paint, wait a full day, then base coat in a chalky finish paint. Project the state and lettering onto the board from a tablet, adjust the distance until it fits and trace with a pencil. Paint the shape with an angle brush, add a slightly metallic drop shadow for contrast and finish with a heart over the hometown. Small crackles in the paint read as charming texture.
Get the full tutorial at Mad in Crafts.
9. DIY Wall Art Home State Love

Home state love wall art is one of those projects people always ask about. Start with a blank canvas and acrylic paint, and if the state should be a color other than white, paint the whole canvas that color first. Tape a cut paper outline to the canvas and paint around it with outward strokes, away from the paper edge, for crisp lines. Peel the paper, fill any gaps left by the tape and finish the background. A small heart or star marks a special city. A long state may need a rectangular canvas.
Get the full tutorial at ink + adventure.
10. Reclaimed Wood State Shadowbox

A reclaimed wood state shadowbox makes a keepsake out of a trip home. Take apart a shadowbox frame, cut strips of reclaimed wood to fit the spacer and glue them to the cardboard back. Glue a scrap block behind a metal state shape so it stands off the wood, then fix it in place. Tie two feathers (or any small treasure from the trip) with twine and glue them beside the state. Small wood hearts with magnets glued on can move across the metal to mark where loved ones live. Vinyl lettering goes on the glass last.
Get the full tutorial at CraftCuts Community.
11. DIY Fabric Map Art

DIY fabric map art pairs two state shapes on burlap for a personal story piece. Print the outlines on regular paper, cut them out, trace them onto canvas fabric and cut again. Then carefully singe the fabric edges over a tall candle, with a glass of water close by since fabric burns fast. The scorched edge hides any wobbly cuts around islands and coastlines and makes the whole thing look intentional. Lay the shapes on burlap and set them into a thrifted frame painted and distressed in soft blue.
Get the full tutorial at Simply Albany.
12. Recycled State Map Magnets

Recycled state map magnets give an outdated road atlas a second life on the fridge. Lay a wooden state puzzle piece over the matching spot on the map, trace it and cut about 1/8 inch inside the line so a colored wood border shows. Brush a thin layer of decoupage on the back of the map, press it onto the wood and let it dry about 40 minutes, then seal the top. Glue a half inch button magnet to the back. Plain wooden circles, squares or hearts work just as well. A fun geography helper too.
Get the full tutorial at FaveCrafts.
13. Vintage State Map Puzzle Magnets

Vintage state map puzzle magnets are about the quickest handmade gift there is. Old wooden map puzzles turn up on Etsy and at flea markets, and one puzzle makes a lot of magnets, so buy plenty of magnets before starting. Glue a magnet to the back of each state with a tiny dot of E6000, since it spreads. If using thin magnet strips, set something heavy on top until the glue sets. Pick out the states someone has visited, or make a whole set and fill a little jar for display.
Get the full tutorial at EverythingEtsy.com.
14. How To Make A State Necklace

A state necklace made from wire costs a fraction of the shop versions. Scale a state outline to about 2 by 2 inches and print it on card stock. Make a loop at the top of a length of 22 gauge wire with round nose pliers, then bend the wire along the printed outline, taping it down as you go. Ease the wire around curves gently, because too much stress will snap it. Once the shape closes, remove the tape, wrap a couple of times around the first loop and trim. Turn the loop to face sideways for the chain.
Get the full tutorial at Two Twenty One.
15. Distressed Map State Coasters

Distressed map coasters are a flea market rescue project. Lightly sand a set of old wooden coasters to knock off the shine and cover the cork centers with painter’s tape. Make a circle template the size of the cork, trimmed about 1/8 inch smaller. Paint the wood black. Trace each coaster onto a road atlas page around the home region, center the circle template and cut that circle out. Mod Podge the wood and the back of the map, press the map on so the hole lines up with the cork, then sand the edges for the distressed look.
Get the full tutorial at Crafts by Amanda.
16. How To Make A Rustic Wood Painted State Sign
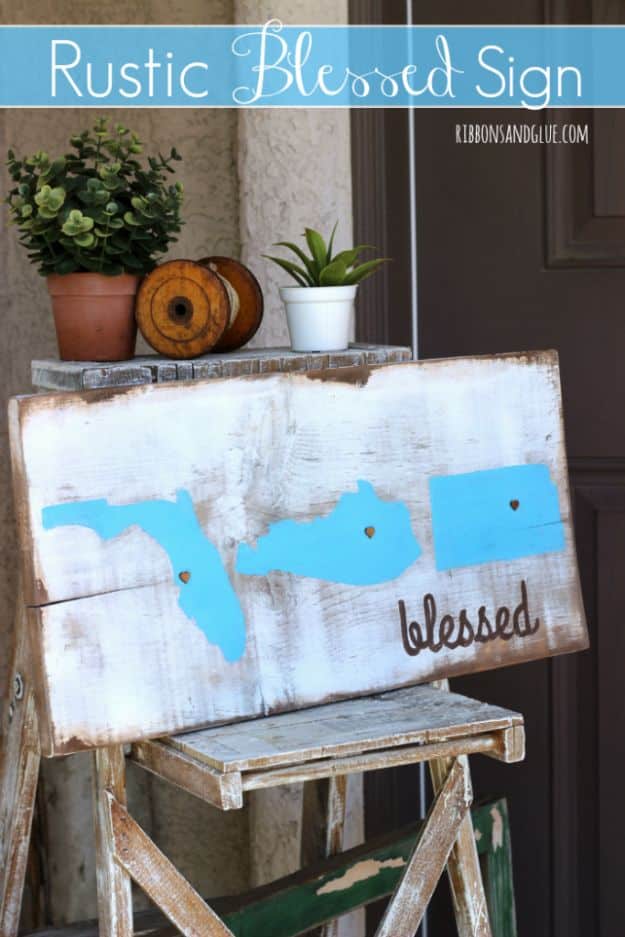
A rustic wood painted state sign is a sweet way to chart every place a family has called home. Start with a chippy, distressed board. Cut each state from a cutting machine (or print the shapes and cut them by hand), trace them onto the wood in pencil and fill them in with chalky finish paint. Sand around the edges once dry for a worn look. Glue small wood veneer hearts where the family lived, then cut a word like blessed, trace it onto the board and hand paint it in brown.
Get the full tutorial at Ribbons & Glue.
17. DIY Black & White Striped State Sign with Colorful Paper Flowers
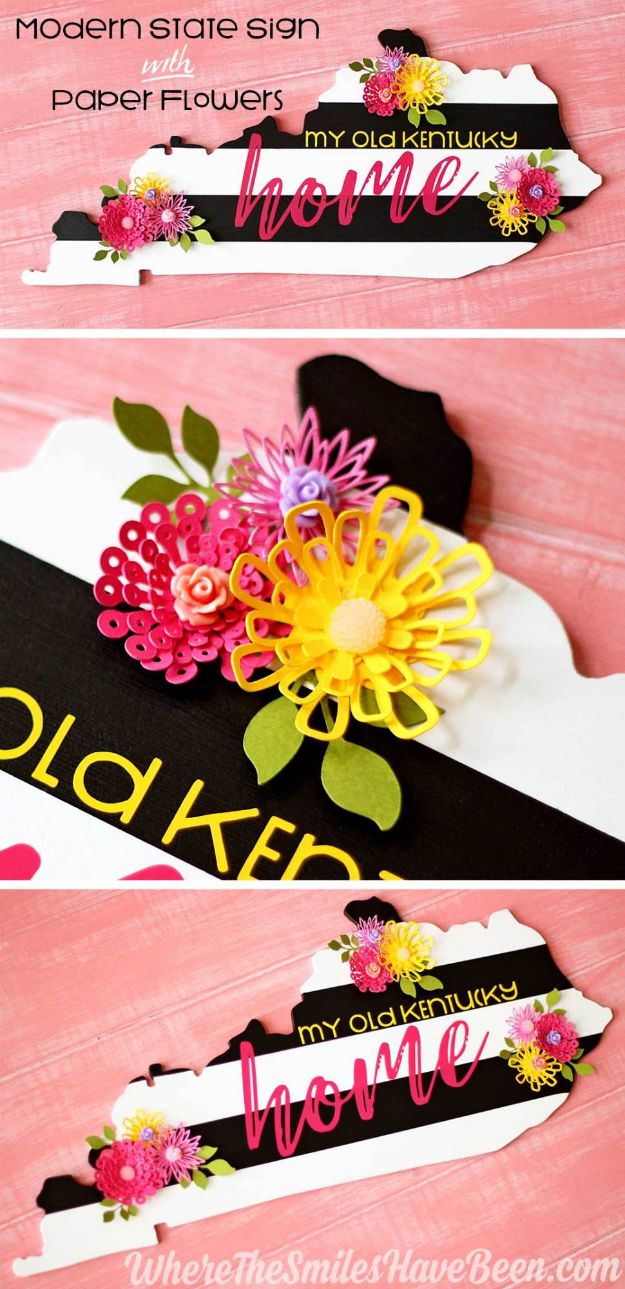
This black and white striped state sign gets its pop from tiny three dimensional paper flowers. Start with an MDF state cutout and give it a couple of coats of white spray paint, sanding lightly between coats for a smooth finish. Tape off stripes and fill the alternating ones with black craft paint and a foam brush. Cut the words from pink and yellow vinyl, weed away the extra and apply them with transfer tape using the hinge method. Finish with layered cardstock flowers in pinks, yellow and green, hot glued on with small flower cabochons in the centers.
Get the full tutorial at Where The Smiles Have Been.
18. DIY Wooden Minnesota Home Sign
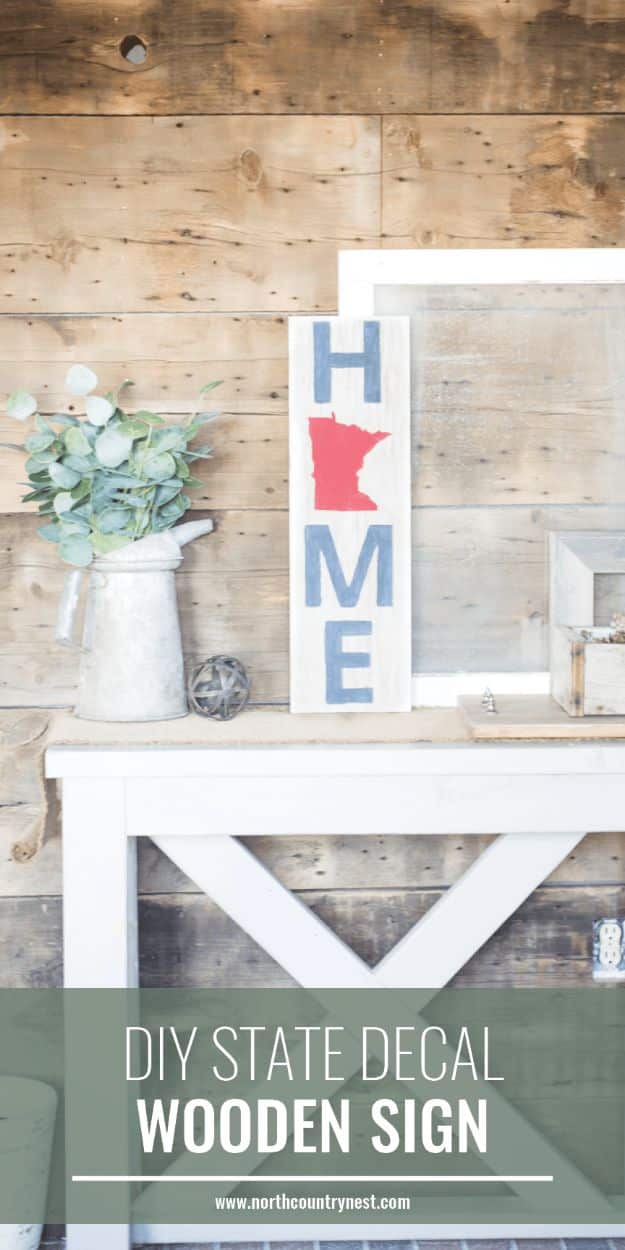
This wooden Minnesota home sign swaps the O in HOME for a state decal, and any state works. Start with a plank stained dark brown and brush on three coats of white satin multi surface acrylic. Print the letters and the state, then transfer them to the board with carbon paper. Paint the H, M and E in navy and fill the state in dark scarlet. Once dry, one coat of a one step crackle medium cracks the paint for an instant antique look. Rub antique wax over the whole sign, wipe it back with a cotton cloth and finish with ultra matte varnish.
Get the full tutorial at North Country Nest.
19. DIY Wood Burned State Sign
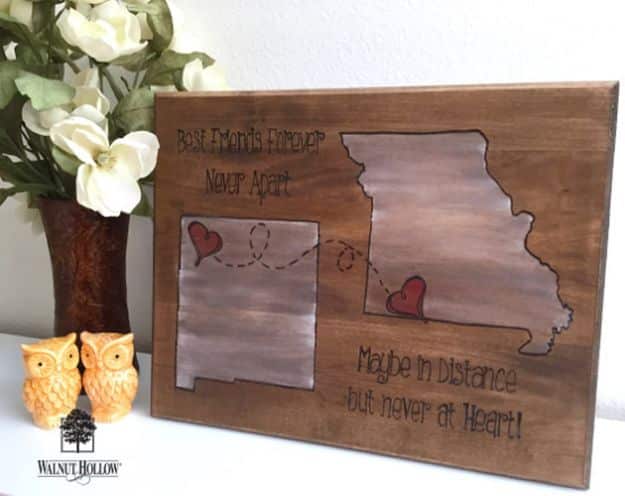
A wood burned state sign is a perfect first wood burning project and a heartfelt gift for a friend far away. Sand a basswood plaque lightly. Print a favorite quote plus two states, draw a heart on each state where each friend lives, then tape graphite transfer paper and the printout onto the plaque and trace. Burn over the lines slowly with a flow point on the highest setting. Rub a dark oak stain over the whole board with a soft cloth, let it dry, then fill the states and hearts with watered down red and white paint. Seal with satin varnish.
Get the full tutorial at walnuthollowcrafts.
20. State Wood Marquee
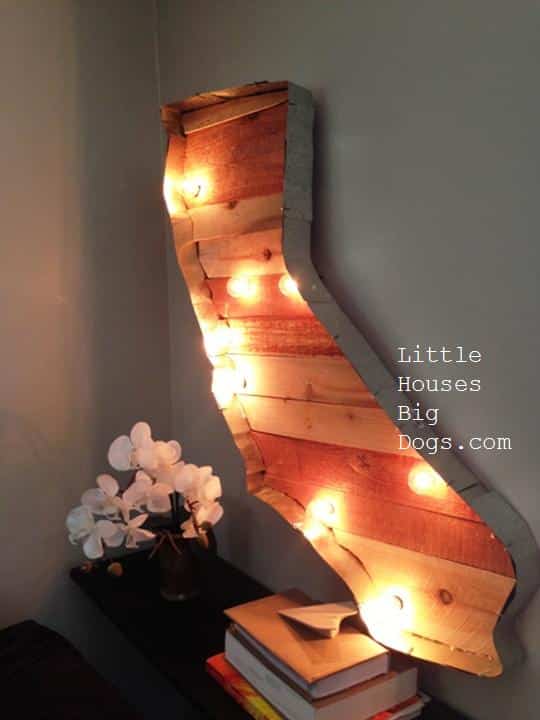
A state wood marquee lights up a blank wall with scrap lumber and leftover roof flashing. Trace a large state picture onto cardboard, cut it out and trace that onto old fence boards, numbering each piece on the back. Cut the shape with a coping saw (a scroll saw makes it much faster), reassemble it and fasten boards across the back. Metal brackets would hold the pieces flatter. Cut flashing into strips for a 2 1/2 inch border, nail it on, wearing thin leather gloves, and tap it to follow the coastline. Drill holes for a string of globe lights.
Get the full tutorial at littlehousesbigdogs.
21. DIY State Cutting Boards
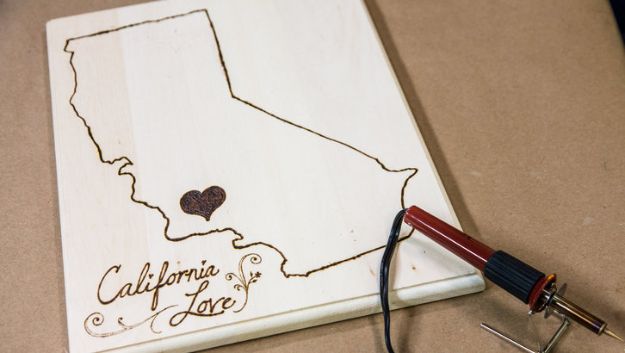
DIY state cutting boards turn a craft store plank into a personal kitchen gift. Print a state outline, cut it out and trace it onto a 3/4 inch board (basswood is soft and easy to cut, and bamboo works too). Clamp the wood securely and cut the shape with a jigsaw, moving the clamps as needed. Round the edges with a router or just sand them smooth. Add a water based stain if you like, then seal with polyurethane. A wood burning tool adds a name, a heart or a little script.
Get the full tutorial at Hallmark Channel.
22. Indiana Love Sign
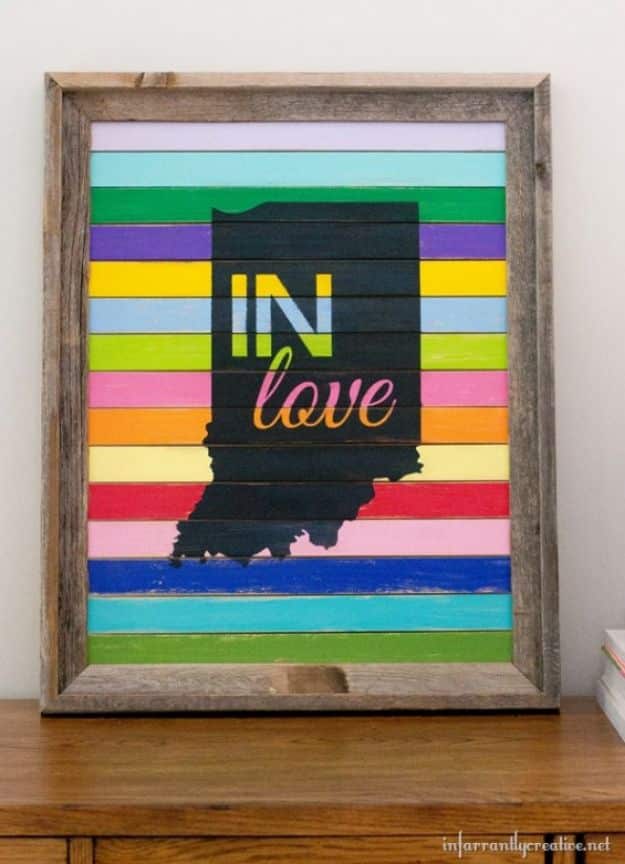
The Indiana love sign turns fifteen 5 gallon paint sticks into a rainbow of stripes. Cut the handles off the sticks (that leaves about 17 inches of width, which sets the frame size) and paint each one a different color of soy based craft paint, which covers in one coat with no primer and distresses like chalk paint. Sand the edges lightly, then glue the sticks into a cut down barn wood frame using a nickel as a spacer between each one. Apply a vinyl stencil of the state and words, paint it black and distress any bleed.
Get the full tutorial at Infarrantly Creative.