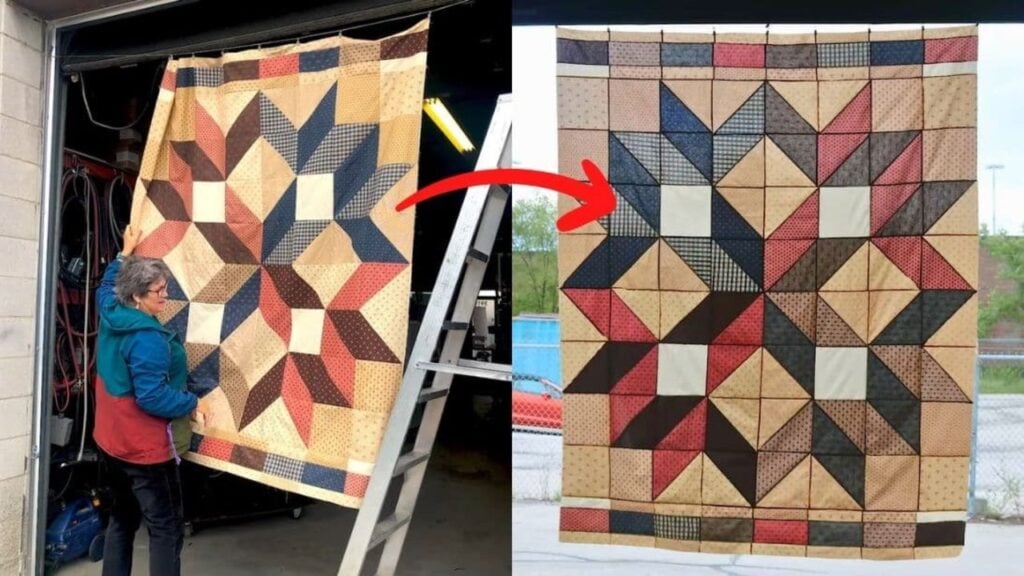
Searching for an easy and beautiful pattern? Try this beginner carpenter star quilt. You’ll surely master making half-square triangles after this project. The steps are simple – follow this tutorial by Just Get it Done Quilts and it will turn out perfect. Read on or watch the video below for full instructions. Happy quilting!
Materials:
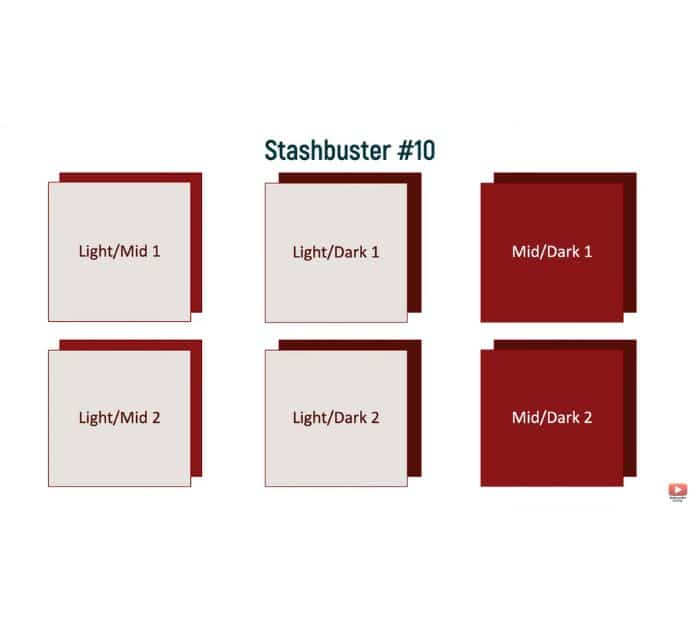
- 8 fat quarters or 2 yards (light color)
- 4 fat quarters or 1 yard (dark color)
- 4 fat quarters or 1 yard (mid-tone color)
Instructions:
Step 1:
Make 4 sets of light, mid-tone, and dark fabric sets, then 4 extra light.
Step 2:
Take 1 set of dark, medium, and light fat quarters then lie them flat on your cutting board. Align the selvages in the bottom. Trim the bottom to make it square. Measure 18 inches from the bottom then trim the top. Trim off the selvages, measure 18 inches, and cut. Cut the stack in the middle horizontally and vertically, to get 12 pieces of 9″ squares.
Step 3:
Pair up the cut squares into the following: 2 light/dark, 2 light/mid, and 2 mid/dark.
[social_warfare buttons=”facebook,pinterest,twitter,whatsapp”]
Step 4:
Repeat steps 2 and 3 for the other 3 sets of light/mid/dark.
Step 5:
For the remaining 4 light fabrics, stack them right side up, then align the selvages and bottom. Cut into a 17″ square, disregarding the selvages. Once done, cut it into half horizontally and vertically to make 16 pieces of 8 1/2″ squares.
Step 6:
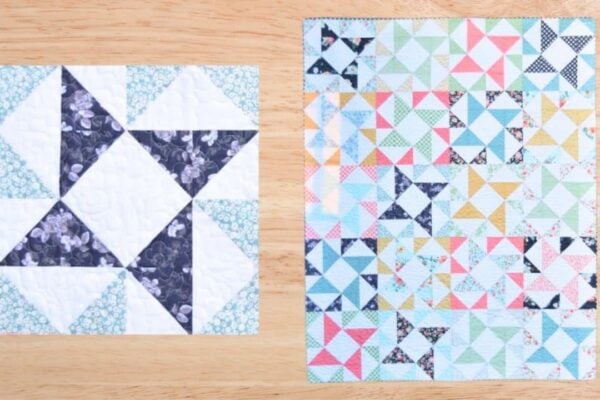
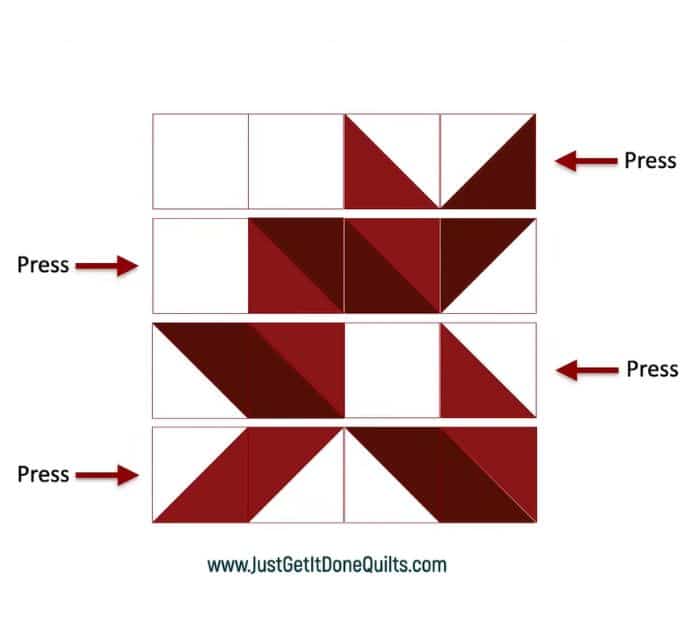
Get the pairs of 9″ squares and draw a diagonal line. Sew on both sides of the line with a quarter of an inch seam allowance. Cut along the diagonal to make two half-square triangles. You will have 4 blocks of each color combination: 16 light/darks, 16 light/mids, and 16 mid/darks in total.
Step 7:
Assemble the blocks as shown below. Use the 8.5″ squares for the background. Press the seams of rows 1 and 3 to the left, then press the seams of rows 2 and 4 to the right. Sew them together. Make four more of this block to create the carpenter star design.
Beginner Carpenter Star Quilt