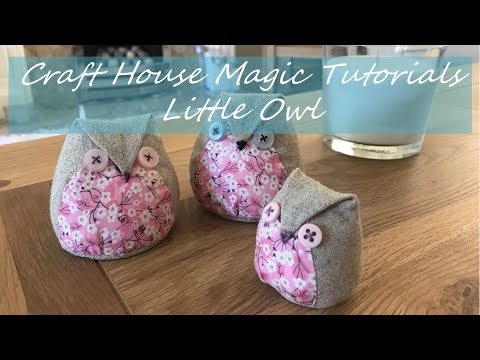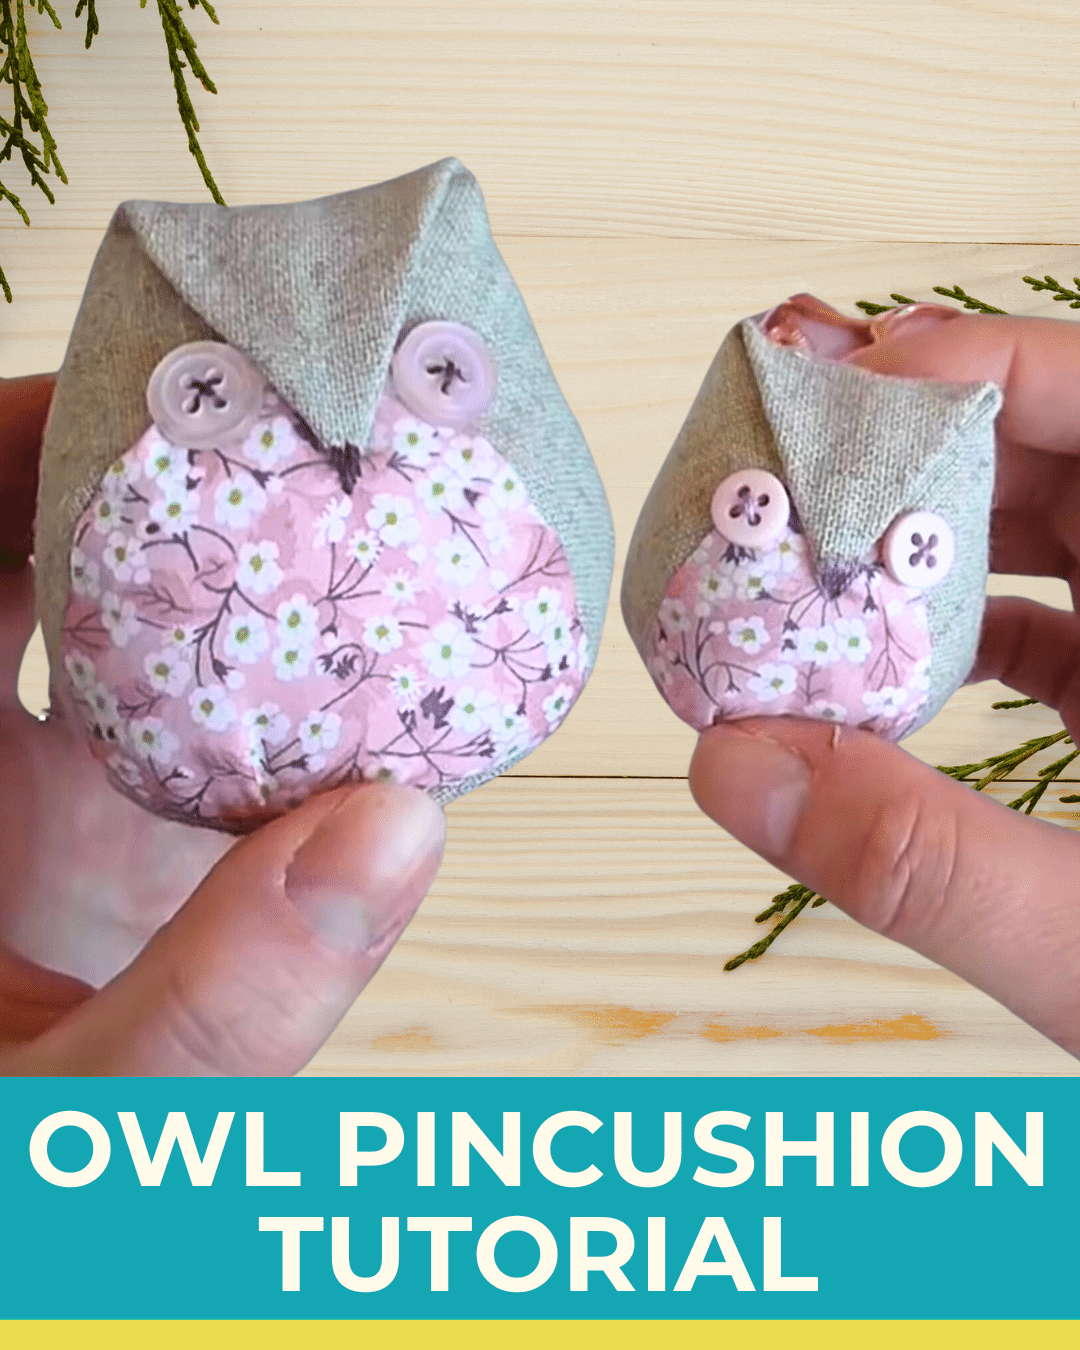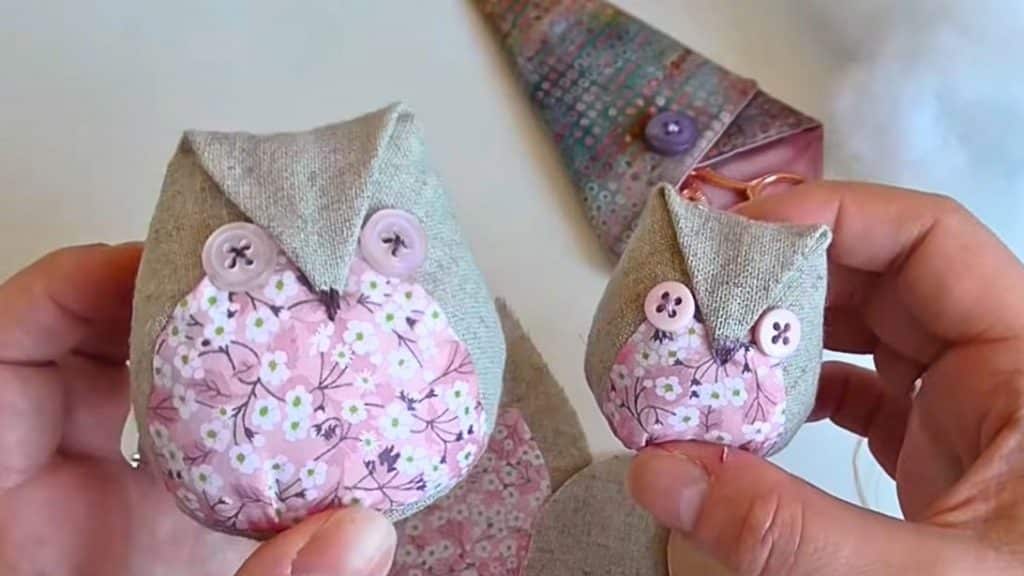
I was looking for new pincushion patterns I could share with you and found this awesome owl pincushion tutorial by Craft House Magic on YouTube. Aren’t they cute? These owls are not just pincushions; they can also be used as decorations, toys for kids, and accessories. You can also fill them with heavy fillers like uncooked rice instead of polyester fillers so you can use them as fabric weights.
RELATED: Easy DIY Owl Pillow Sewing Tutorial
The pattern below comes in two different sizes, so you have the option to make the bigger one, the smaller one, or both. If you have friends who love to sew or who love owls, this would be the perfect gift. It’s a quick and easy sewing project you can make at home. If you have some fabric scraps from past projects, take them out and use them for this small DIY project.
Here’s another pincushion tutorial: How To Sew A Chicken Pincushion Using Fabric Scraps
Easy Owl Pincushion Materials
- owl pattern (download here)
- solid fabric for the body and base
- colored fabric for the tummy
- two buttons for the eyes
- thread and needle
- piece of cardboard
- scissors
- polyester stuffing
How to Make Owl Pincushion
Step 1:
Use the pattern to cut out the pieces.
Step 2:
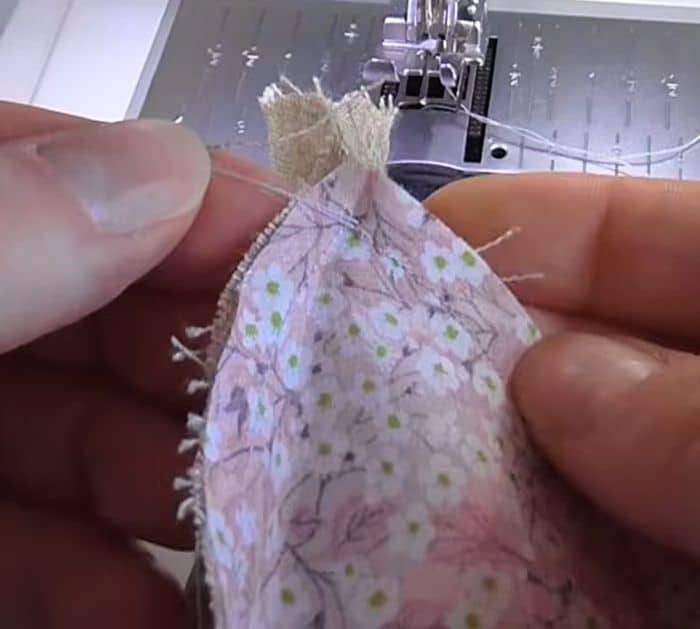
Take the body and find the longest edge. That is the bottom of the owl. Take the tummy piece, and place it on top, lining up the bottom corner. Make sure to place it right sides together. Sew on the curved edge together with a 1/4″ seam allowance. Next, take the tummy piece to the opposite side of the fabric and sew it just like on the other side. See the photo below for reference.
Sew from the edge to the corner to close the gap on the top of the owl. Trim a little bit of the seam allowance.
Step 3:
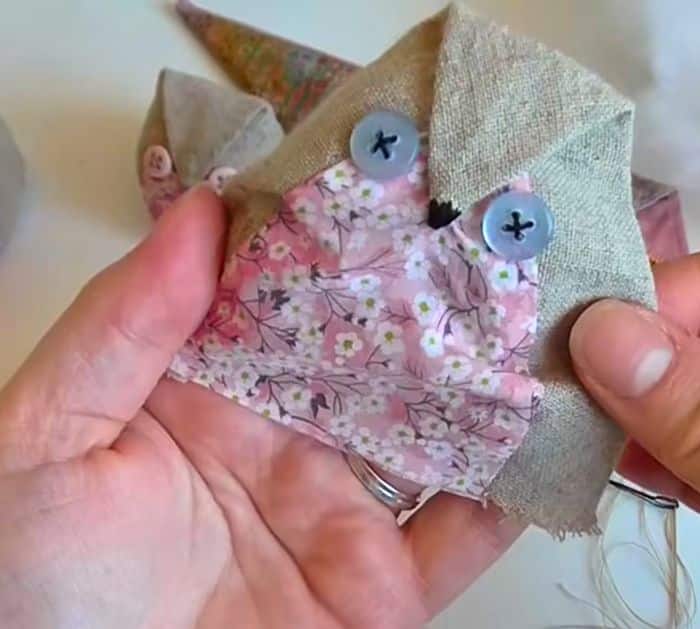
Flip it right side out. Finger press the seams. Fold the top edge toward the tummy to form a little beak. Sew with a dark thread forming a beak.
Step 4:
Sew the two buttons beside the beak for the eyes.
Step 5:
Stuff the owl with the polyester filling.
Step 6:
Cut the cardboard using the pattern as a guide. Get the fabric base then do a running stitch all around the edges. Insert the circle cardboard then tighten the stitch and make a knot.
Step 7:
Do a tacking stitch around the base of the owl. Pull the stitch to tighten and close a little bit. Knot it in place.
Step 8:
Stitch the base on the body.
Owl Pincushion Tutorial